Merry Christmas Jam Recipe: Festive Homemade Gift and Holiday Treat

Christmas jam, holiday fruit spread, cranberry strawberry jam, festive jam recipe, homemade Christmas jam, Christmas breakfast jam, holiday jam

Merry Christmas Jam Recipe: A Festive Homemade Delight

Nothing says holiday cheer quite like a jar of Merry Christmas Jam. This festive jam, often made with seasonal fruits like cranberries and strawberries and infused with holiday spices, is the perfect addition to holiday breakfast tables or a thoughtful homemade gift for friends and family. If you’re interested in more seasonal spreads, check out this Easy Blackberry Jam Recipe for another fruity treat.


What is Merry Christmas Jam?

Christmas jam is a seasonal spread made from a blend of fruits, typically including cranberries and strawberries, along with holiday spices like cinnamon and cloves. This jam is sweet, slightly tart, and packed with festive flavors, making it a perfect spread for holiday mornings or an ideal topping for various desserts. For a similar fruity creation, try this Spicy Pineapple Jalapeno Chutney, which brings a unique twist to classic preserves.


Ingredients for Merry Christmas Jam

Creating this Christmas jam requires a few simple ingredients:

  • Strawberries: Fresh or frozen strawberries bring a sweet base flavor.
  • Cranberries: Their natural tartness complements the strawberries.
  • Orange Zest: Adds a citrusy note that enhances the holiday feel.
  • Spices: Use cinnamon, cloves, and allspice for warm, festive undertones.
  • Sugar: Provides sweetness and helps achieve the jam consistency.

This jam pairs perfectly with festive breakfast treats like the Ultimate Christmas Morning Cinnamon Rolls, adding a fruity contrast to rich baked goods.


How to Make Merry Christmas Jam

1. Prepare the Fruit

  • Wash and chop strawberries and cranberries. Place them in a large pot over medium heat with a bit of water.

2. Cook the Fruit

  • Add orange zest, sugar, and spices. Bring to a boil and cook until the fruit begins to break down, stirring frequently.

3. Achieve the Right Consistency

  • Simmer until the mixture thickens. To test, place a small spoonful on a cold plate—if it sets, your jam is ready. For additional help with consistency, refer to Freezer Test Tips for Jams to perfect your jam texture.

4. Store or Can the Jam

  • Pour the hot jam into sterilized jars and seal tightly. Let the jars cool completely before storing in the refrigerator or canning for long-term storage.

Cooking Tips for the Best Merry Christmas Jam

To make sure your jam turns out perfectly, keep these tips in mind:

  • Cook Slowly: Cooking at a steady, medium heat helps prevent burning.
  • Use a Candy Thermometer: Aim for a temperature of around 220°F for ideal consistency.
  • Experiment with Spices: Adjust the amount of cinnamon or cloves to taste.

For a smoother process, try using frozen strawberries and cranberries, which work well and are easy to find in the winter.


Variations of Merry Christmas Jam

This jam recipe is highly adaptable, allowing for several creative variations:

  • Low-Sugar Version: Use less sugar or a sugar substitute.
  • Citrus Blend: Add lemon zest for a brighter flavor.
  • Alcohol-Infused: Add a splash of brandy or rum for a sophisticated twist.

For another unique holiday jam, consider making a spiced fruit spread, similar to this Apple Cranberry Walnut Salad, which combines fruit with seasonal flavors.


Serving Suggestions

Merry Christmas Jam is a versatile spread, perfect for:

  • Breakfast Toast: Spread on toast or bagels for a festive start to the day.
  • Holiday Pastries: Use as a filling for thumbprint cookies or croissants.
  • Dessert Topping: Add a spoonful over ice cream, cheesecake, or pancakes.

For an ideal holiday brunch, pair this jam with classic breakfast recipes like Fluffy Mini Pancakes, which complement the jam’s festive flavors.


Gifting Merry Christmas Jam

Homemade jams are a wonderful gift option, especially when they’re presented in a festive way. Here are some tips for gifting:

  • Choose Holiday-Themed Jars: Use small mason jars with red and green ribbons.
  • Add Personal Labels: Include a handwritten label with the jam’s name and date.
  • Combine with Other Treats: Create a gift basket with jam, scones, or homemade biscuits.

This jam makes a thoughtful gift that showcases the effort and love behind homemade food. If you’re inspired by the art of gifting food, explore our Homemade Holiday Biscuit Mix to create more edible gifts.


Storage and Preservation

Merry Christmas Jam can be stored for future enjoyment with these tips:

  • Refrigerate: Store in the fridge for up to 1 month in an airtight jar.
  • Freeze: For longer storage, freeze jam in plastic containers.
  • Canning: Follow proper canning techniques to make the jam shelf-stable. For more information on canning, consult this Canning Guide.

Frequently Asked Questions (FAQs)

Can I use frozen strawberries and cranberries?
Yes, frozen fruits work perfectly and can save you time.

How long does Merry Christmas Jam last?
In the refrigerator, it lasts up to one month, or longer if canned.

Is there a sugar-free option for this jam?
Yes, you can substitute with sugar-free pectin or a natural sweetener like honey.

What’s the best way to test the jam’s consistency?
Use the freezer test: place a small amount on a cold plate to check if it sets.

Can I make this jam without spices?
Yes, but spices add a holiday touch. Adjust to your taste preference.


Nutritional Benefits and Health Tips

This jam is both a tasty and health-conscious choice. Here’s a look at some of its benefits:

  • Antioxidants: Cranberries and strawberries are rich in antioxidants that support immune health.
  • Vitamin C: Citrus zest adds an extra boost of Vitamin C.
  • Fiber: The berries contribute dietary fiber, helping with digestion.

For those looking to make healthier choices, consider using honey as a natural sweetener instead of sugar.


Conclusion: Spread the Joy with Merry Christmas Jam

Merry Christmas Jam is a seasonal delight that combines the warmth of holiday spices with the sweetness of strawberries and the tartness of cranberries. It’s easy to make, perfect for gifting, and brings a touch of holiday magic to any breakfast or dessert. Whether you enjoy it with pancakes, spread over toast, or given as a homemade gift, this festive jam is bound to become a holiday favorite.

KFC Style Gravy Recipe: How to Make Delicious Homemade Gravy

homemade KFC gravy, KFC inspired gravy, copycat KFC gravy, rich brown gravy, savory gravy recipe, KFC gravy recipe, quick gravy

KFC Style Gravy Recipe: A Delicious Homemade Guide

When you crave the savory, smooth, and rich taste of KFC style gravy, making it at home is surprisingly simple. This homemade version captures the essence of the classic KFC flavor, with easy-to-find ingredients and a few straightforward steps. Whether you’re serving it over mashed potatoes or as a dip for fried chicken, this gravy recipe is sure to satisfy. For those who enjoy hearty sauces and gravies, the Slow Cooker Chicken and Gravy over Noodles is another excellent comfort meal idea.


Why Make KFC Style Gravy at Home?

Homemade KFC style gravy allows you to control the ingredients while achieving the same rich, restaurant-quality flavor. Plus, it’s budget-friendly and adaptable! From pairing it with mashed potatoes to using it as a sauce for baked chicken, this gravy is versatile and incredibly easy to make. If you’re looking to expand your comfort food collection, check out the recipe for Creamy Garlic Parmesan Chicken, which pairs well with a side of KFC-style gravy.


Ingredients You’ll Need for KFC Style Gravy

To make this comforting and flavorful gravy, gather the following ingredients:

  • Butter or Shortening: For a rich, smooth base.
  • Flour: Essential for thickening, creating the desired gravy consistency.
  • Chicken or Beef Stock Cubes: Adds depth and replicates the classic KFC flavor.
  • Water: Helps achieve the right consistency.
  • Seasoning: Salt, pepper, and optional spices like garlic powder or onion powder for additional flavor.

If you enjoy using savory ingredients, you might also enjoy our No-Peek Beef Tips, which is a perfect match for gravy-based dishes.


Step-by-Step Guide to Making KFC Style Gravy

1. Start with a Roux

  • Melt the butter or shortening in a saucepan over medium heat.
  • Gradually add the flour, whisking continuously to avoid lumps and create a smooth base.

2. Build the Gravy Base

  • Slowly add water and dissolve the chicken or beef stock cube, stirring constantly. Continue to cook and stir until the mixture begins to thicken.

3. Simmer and Season

  • Let the mixture simmer for a few minutes to allow the flavors to develop. Adjust the seasoning with salt, pepper, and any optional spices.

4. Achieve Desired Consistency

  • If the gravy becomes too thick, add a bit more water. For a thicker consistency, let it simmer a little longer.

Variations and Customization Options

Making KFC style gravy at home allows you to tailor it to your preferences. Here are some ideas:

  • Vegetarian Version: Substitute chicken or beef stock cubes with vegetable stock cubes.
  • Spicy Kick: Add a pinch of cayenne pepper or paprika for an extra layer of flavor.
  • Creamier Gravy: Stir in a splash of cream or milk for a richer texture.

For another unique twist, try pairing this gravy with Dorito Chicken Casserole for a flavorful and crunchy side.


Serving Suggestions for KFC Style Gravy

KFC style gravy pairs well with a variety of dishes. Here are a few ideas:

  • Mashed Potatoes: Classic and comforting, gravy is the perfect topping for a fluffy bowl of mashed potatoes.
  • Fried Chicken: Use the gravy as a dipping sauce or pour it over the chicken.
  • Biscuits: A Southern classic, biscuits and gravy make for a hearty meal.

For those who enjoy breakfast-inspired meals, consider using this gravy over a biscuit-based dish like Breakfast Sausage Biscuits Gravy Casserole for an indulgent, savory treat.


Tips for Storing and Reheating KFC Style Gravy

One of the great things about KFC style gravy is that it stores and reheats well. Follow these tips for the best results:

  • Refrigeration: Store in an airtight container for up to 3 days in the refrigerator.
  • Freezing: Freeze for up to 3 months. Reheat slowly, adding a splash of water if the gravy is too thick.
  • Reheating: Heat over low heat on the stove or in the microwave, stirring frequently.

Frequently Asked Questions (FAQs)

What makes KFC style gravy unique?
KFC gravy is known for its rich, savory flavor and smooth texture, which is achieved by a perfect blend of seasonings and a roux-based thickener.

Can I make it without stock cubes?
Yes, you can use homemade chicken or beef broth for a similar flavor. Just adjust the salt content accordingly.

How do I make gluten-free gravy?
Substitute the flour with a gluten-free thickener like cornstarch. Start with a small amount and gradually add to reach the desired thickness.

Can I make a vegan version?
Absolutely! Use plant-based butter and vegetable broth for a vegan-friendly gravy.

How can I make it thicker or thinner?
To thicken, let it simmer longer or add more flour. To thin, add a splash of water or broth until you reach the right consistency.

For more gravy inspiration, see our Biscuits and Gravy Casserole, which uses a similar technique to create a creamy, flavorful sauce.


Nutritional Information

While KFC style gravy is a delicious treat, it’s worth noting the nutritional profile:

  • Calories: Approximately 70 calories per serving (based on a small serving size).
  • Sodium: Stock cubes add sodium, so if you’re watching salt intake, adjust accordingly.
  • Fat Content: Using butter or shortening contributes to a creamy texture but also increases the fat content.

For those looking to enjoy healthier, homemade alternatives, check out our tips on adjusting ingredients for lighter recipes in the Creamy Potato Soup guide.


Conclusion: Enjoy Your Homemade KFC Style Gravy

There’s nothing quite like the comfort of KFC style gravy, especially when made fresh in your kitchen. With just a few ingredients and a simple cooking process, you can enjoy this classic flavor in a variety of dishes. Whether poured over mashed potatoes or used as a dip for fried chicken, this gravy is sure to bring warmth and flavor to any meal.

Busy Day Soup Recipe: Quick, Hearty Comfort for Busy Schedules

quick soup recipe, easy soup recipe, one-pot soup, family-friendly soup, fast soup dinner, easy weeknight meal, busy day dinner

Busy Day Soup Recipe: Quick, Hearty, and Perfect for Any Schedule

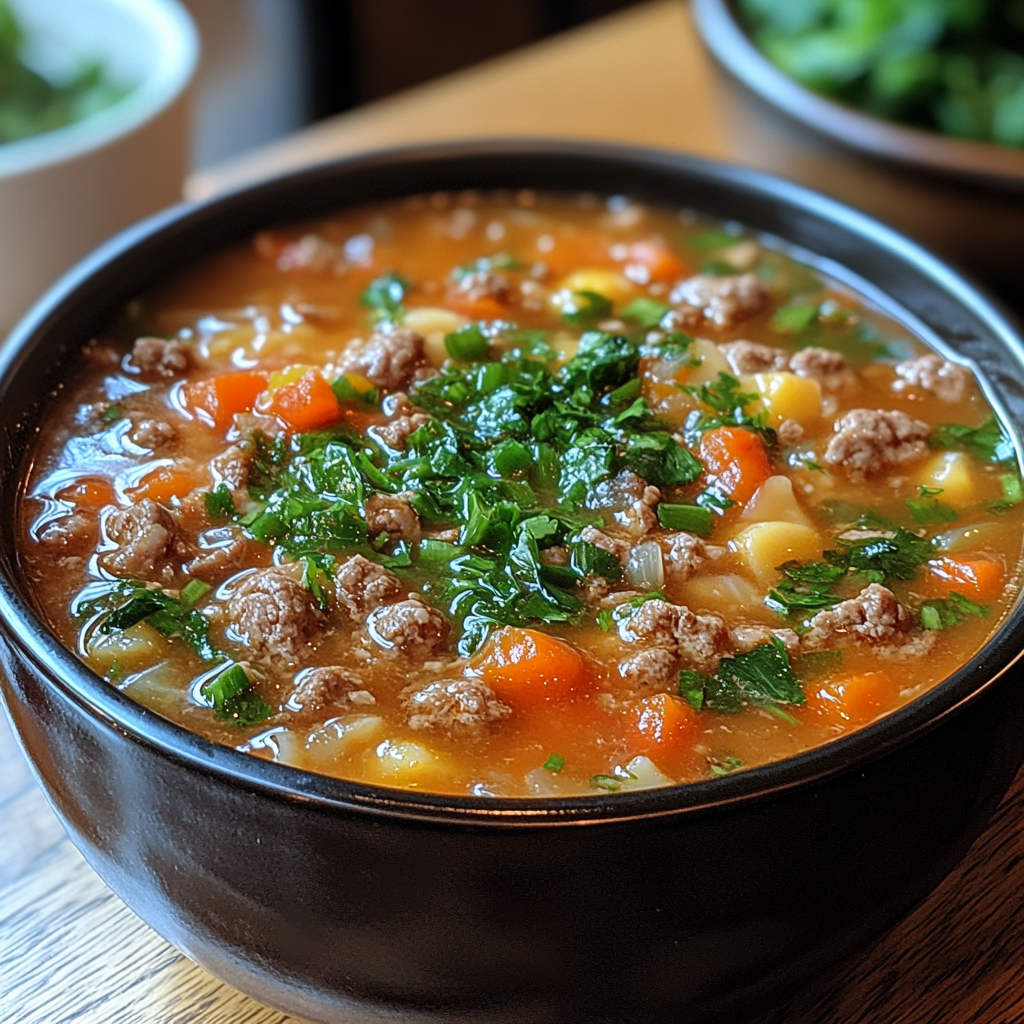
On hectic days when you need a meal that’s easy, filling, and satisfying, Busy Day Soup is the go-to solution. Combining simple ingredients like ground beef, vegetables, and a flavorful broth, this soup is designed for minimal preparation without sacrificing flavor. If you’re looking for more one-pot dinner ideas, try the Slow Cooker Baked Ziti, another quick and easy option.


Why Busy Day Soup is the Ideal Quick Meal

Busy Day Soup isn’t just fast; it’s packed with essential nutrients from vegetables, proteins, and carbohydrates, making it a balanced meal. With versatile ingredients and the ability to adapt to different dietary needs, this soup is perfect for busy families. For a similar hearty, family-friendly soup, check out this Crockpot Potato Soup with Hashbrowns.


Ingredients for Busy Day Soup

The beauty of Busy Day Soup lies in its simplicity. Here’s what you’ll need:

  • Ground Meat: Ground beef, turkey, or even a plant-based alternative.
  • Mixed Vegetables: Frozen vegetables, canned tomatoes, and other veggies.
  • Broth: Use beef, chicken, or vegetable broth depending on your preference.
  • Seasonings: Onion soup mix, garlic powder, and a dash of Worcestershire sauce.
  • Pasta or Rice: Elbow macaroni, small pasta shapes, or rice add a hearty texture.

For more quick, nutritious meals, explore this recipe for No-Peek Beef Tips, which also makes for a satisfying, protein-rich dinner.


Step-by-Step Instructions to Make Busy Day Soup

1. Prepare the Meat

  • In a large pot, brown the ground beef or turkey over medium-high heat. Once cooked, drain the excess fat.

2. Sauté the Vegetables

  • Add onions, garlic, and any other fresh or frozen vegetables. Sauté until softened, which enhances the soup’s flavor.

3. Build the Broth Base

  • Pour in your choice of broth along with canned tomatoes. Stir well to blend flavors and bring to a gentle boil.

4. Add Pasta or Rice

  • Add your pasta or rice and simmer until it reaches the desired texture. This step is key to making the soup filling and comforting.

5. Season and Serve

  • Stir in seasonings and adjust to taste. Garnish with fresh herbs, cheese, or croutons if desired.

Alternative Cooking Methods

Stovetop

  • This traditional method works well if you’re making soup quickly.

Slow Cooker

  • Place all ingredients in a slow cooker, set to low for 6-8 hours. The flavors meld beautifully, making it ideal for busy days.

Instant Pot

  • Brown the meat on the sauté setting, then add the remaining ingredients and cook on high pressure for 5 minutes.

Creative Variations for Busy Day Soup

Busy Day Soup can be tailored to suit different tastes:

  • Vegetarian Version: Substitute meat with plant-based crumbles and use vegetable broth.
  • Spicy Twist: Add chili flakes or diced jalapeños for extra heat.
  • Dairy-Free Option: Omit any dairy toppings and focus on plant-based ingredients.

For more comforting, hearty dishes, try this Momma’s Creamy Baked Macaroni and Cheese, another family-friendly classic.


Storage and Reheating Tips

One of the best parts about Busy Day Soup is that it’s meal-prep friendly. Here’s how to store it:

  • Refrigeration: Store in an airtight container for up to 3 days.
  • Freezing: If you plan to freeze it, leave out the pasta to prevent it from becoming mushy. Add fresh pasta when reheating.
  • Reheating: Reheat on the stove or microwave, adding a splash of broth if it has thickened.

Ideal Pairings for Busy Day Soup

For a complete meal, consider these pairings:

  • Crusty Bread or Rolls: Perfect for dipping.
  • Light Side Salad: A crisp green salad balances the hearty soup.
  • Garlic Bread: Adds a flavorful, crunchy element.

Frequently Asked Questions

Can I use fresh vegetables instead of frozen?
Absolutely! Fresh vegetables will work well, though they may require a slightly longer cooking time.

Can I make Busy Day Soup vegan?
Yes, substitute ground meat with plant-based crumbles and use vegetable broth.

What are the best toppings for Busy Day Soup?
Top with shredded cheese, fresh herbs, or croutons to enhance flavor and texture.

Can I cook Busy Day Soup in a slow cooker?
Yes, simply add all ingredients and cook on low for 6-8 hours for a hands-off approach.

For more meal prep ideas, you might enjoy this Buffalo Chicken Mac and Cheese, another rich, flavorful recipe.


Nutritional Benefits of Busy Day Soup

Packed with protein, fiber, and vitamins, Busy Day Soup is a balanced meal that’s both nourishing and satisfying. Here’s a nutritional overview:

  • Protein: From the ground meat, providing essential nutrients for energy and muscle health.
  • Fiber: Vegetables and pasta or rice contribute to daily fiber needs.
  • Vitamins A & C: Found in the mixed vegetables, supporting immune health.

For a high-protein, comforting meal, consider trying this Ultimate Taco Casserole.


Conclusion

Busy Day Soup is a versatile, quick, and satisfying dish that fits seamlessly into any schedule. With customizable ingredients and the ability to adapt to various dietary preferences, this soup makes for an ideal go-to recipe for busy families. Whether you’re cooking up a pot for tonight’s dinner or preparing ahead for the week, this easy recipe promises warmth and flavor with every bite.

Macaroni Cheeseburger Soup: The Ultimate Comfort Food Recipe

macaroni and cheeseburger soup, cheeseburger macaroni soup, comfort food soup recipe, cheesy beef soup

Macaroni Cheeseburger Soup Recipe: Ultimate Comfort Food

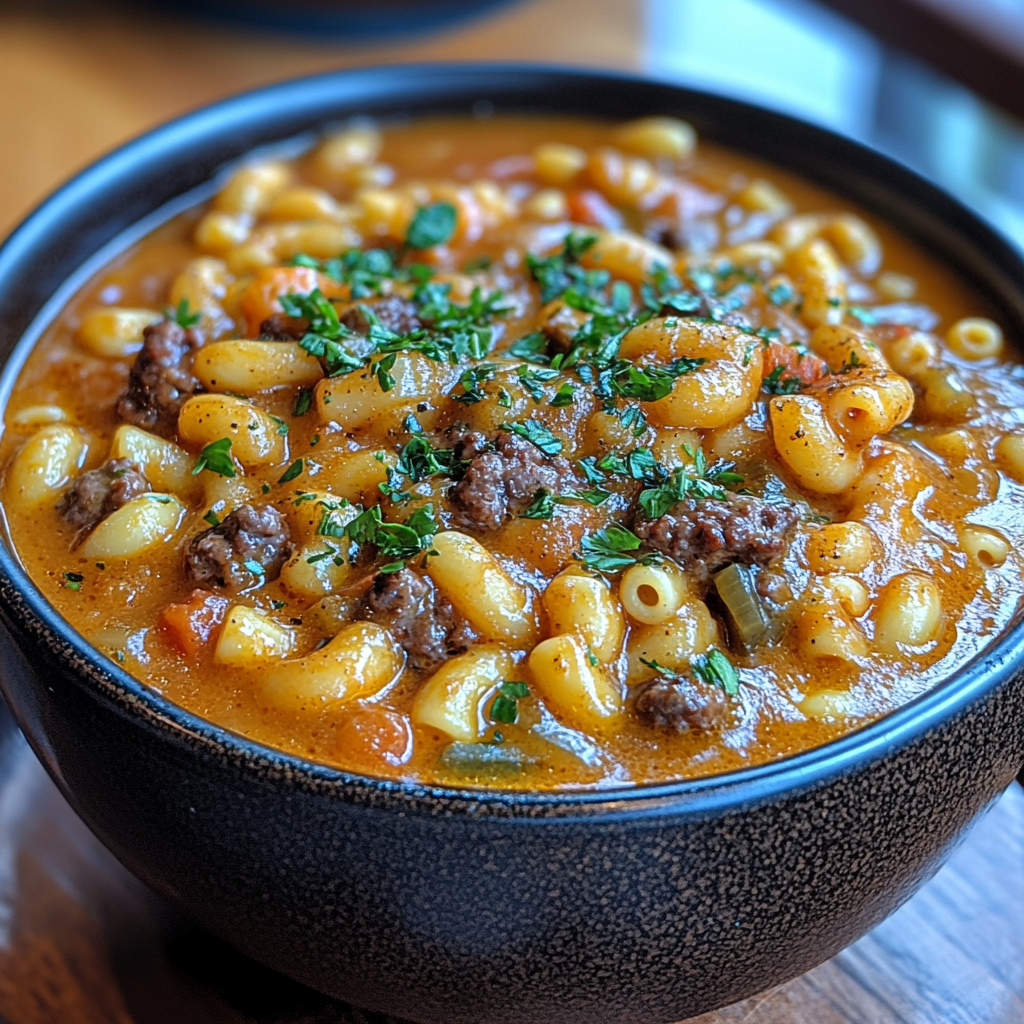
When you’re craving a hearty, flavorful, and comforting meal, Macaroni Cheeseburger Soup is the answer. This unique soup brings the best of two classic American favorites – the cheeseburger and creamy macaroni. Perfect for chilly evenings, family dinners, or even meal prep, this soup is sure to become a staple. For those looking for more comforting soup ideas, consider trying this Crockpot Potato Soup with Hashbrowns as a delicious alternative.


Why You’ll Love Macaroni Cheeseburger Soup

Combining the savory flavors of ground beef, melted cheddar cheese, and perfectly cooked macaroni, this soup brings the comforting essence of a cheeseburger right into a warm bowl. Plus, it’s easily adaptable for different dietary preferences. Pair it with a salad or some garlic bread, and you have a complete meal.

Macaroni Cheeseburger Soup is also incredibly versatile. You can prepare it in a slow cooker, stovetop, or even an Instant Pot. If you’re searching for more one-pot meal ideas, check out this Slow Cooker Baked Ziti for another satisfying and easy-to-make dish.


Ingredients for Macaroni Cheeseburger Soup

Here’s what you’ll need to whip up this comforting soup:

  • Ground Beef: Lean ground beef works well for a rich, beefy flavor without too much grease.
  • Macaroni Pasta: Elbow macaroni is the classic choice, but other pasta shapes can work.
  • Cheddar Cheese: Sharp cheddar brings that cheesy goodness, although a mix of cheddar and mozzarella can be used for extra creaminess.
  • Vegetables: Include onions, carrots, celery, and garlic for a base flavor that enhances the soup’s richness.
  • Broth: Beef broth adds depth, but chicken or vegetable broth can work as a substitute.
  • Milk or Cream: This adds a creamy texture. For a lighter option, use half-and-half or a dairy-free milk alternative.

If you’re looking for more ideas for creamy, cheese-laden recipes, Momma’s Creamy Baked Macaroni and Cheese is another excellent choice for fans of comfort food.


How to Make Macaroni Cheeseburger Soup

1. Brown the Ground Beef

  • In a large pot, cook the ground beef over medium-high heat until it’s browned. Drain any excess fat and set aside.

2. Sauté the Vegetables

  • In the same pot, add a bit of oil and sauté chopped onions, garlic, carrots, and celery until soft and fragrant. This combination brings out the savory base for the soup.

3. Build the Soup Base

  • Return the beef to the pot, then add beef broth and bring it to a simmer. Season with salt, pepper, and a dash of Worcestershire sauce for added depth.

4. Add Pasta and Cheese

  • Stir in the macaroni and let it cook until al dente. Gradually add shredded cheddar, stirring until it’s melted and fully incorporated.

5. Stir in Milk or Cream

  • To achieve a creamy consistency, add milk or cream and allow the soup to simmer for a few more minutes. Adjust seasoning as needed.

Customization and Variation Ideas

Macaroni Cheeseburger Soup is adaptable for different diets and preferences. Here are a few ways to make it your own:

  • Healthier Version: Substitute ground beef with lean ground turkey and use low-fat cheese.
  • Vegetarian Option: Use plant-based ground meat and vegetable broth.
  • Spicy Kick: Add diced jalapeños, chili powder, or hot sauce for a spicier flavor profile.

For another hearty beef-based dish, consider trying No-Peek Beef Tips for a tender, flavorful meal.


Serving Suggestions and Side Pairings

Serve Macaroni Cheeseburger Soup with any of the following for a complete meal:

  • Bread: Crusty bread or soft dinner rolls are perfect for dipping into the creamy broth.
  • Salad: A side salad with a light vinaigrette balances the richness of the soup.
  • Toppings: For extra flavor, garnish with bacon bits, green onions, or a sprinkle of extra cheese.

If you’re looking for a unique way to add a twist to this comfort food classic, consider pairing it with Garlic Bread Bagel Dogs for a playful, snack-style side.


Storage and Reheating Tips

This soup is ideal for meal prep, as it stores well. Follow these tips:

  • Refrigeration: Store in an airtight container in the fridge for up to 3 days.
  • Freezing: Freeze the soup without the macaroni; add freshly cooked pasta upon reheating to prevent a mushy texture.
  • Reheating: Warm the soup on the stove or in the microwave, adding a splash of milk if it’s too thick.

FAQs

Can I make Macaroni Cheeseburger Soup in a slow cooker?
Yes, brown the beef first, then transfer it with the rest of the ingredients to a slow cooker. Cook on low for 6-7 hours or high for 3-4 hours, adding the cheese and cream during the last 30 minutes.

Can I use different types of cheese?
Absolutely. You can use American cheese for a classic cheeseburger taste or mix cheddar with mozzarella for a creamier texture.

How can I make it gluten-free?
Simply substitute the macaroni with gluten-free pasta, and use gluten-free broth.

What toppings work best for this soup?
Bacon bits, scallions, sour cream, or even a sprinkle of Parmesan cheese add excellent flavor and texture to each bowl.

If you enjoy cheesy, creamy dishes, you might also like this recipe for Buffalo Chicken Mac and Cheese, which adds a spicy kick to traditional mac and cheese.


Nutritional Information and Health Benefits

This soup is packed with protein and essential nutrients, making it both comforting and satisfying. With lean ground beef, added vegetables, and cheese, it provides a balanced meal with the following nutritional highlights:

  • Protein: Essential for muscle health, from beef and cheese.
  • Calcium: From the cheese, aiding bone strength.
  • Vitamins A & C: Provided by carrots and celery.

For those looking for another protein-packed meal, consider the Ultimate Taco Casserole for a delicious, filling option.


Conclusion

Macaroni Cheeseburger Soup is a delicious fusion of two comfort food classics. With its creamy texture, savory beef, and rich cheese, it’s bound to be a favorite in any household. Whether you’re cooking it up for a family dinner, meal prepping for the week, or sharing it with friends, this soup offers a hearty, satisfying experience with every bite.

Egg Roll Soup: A Healthy, Flavorful Twist on a Takeout Favorite

Asian-inspired soup, healthy egg roll soup, low-carb soup, cabbage soup with pork, keto egg roll soup, soup with ground pork, Asian cabbage soup

Egg Roll Soup: A Healthy Twist on a Takeout Classic

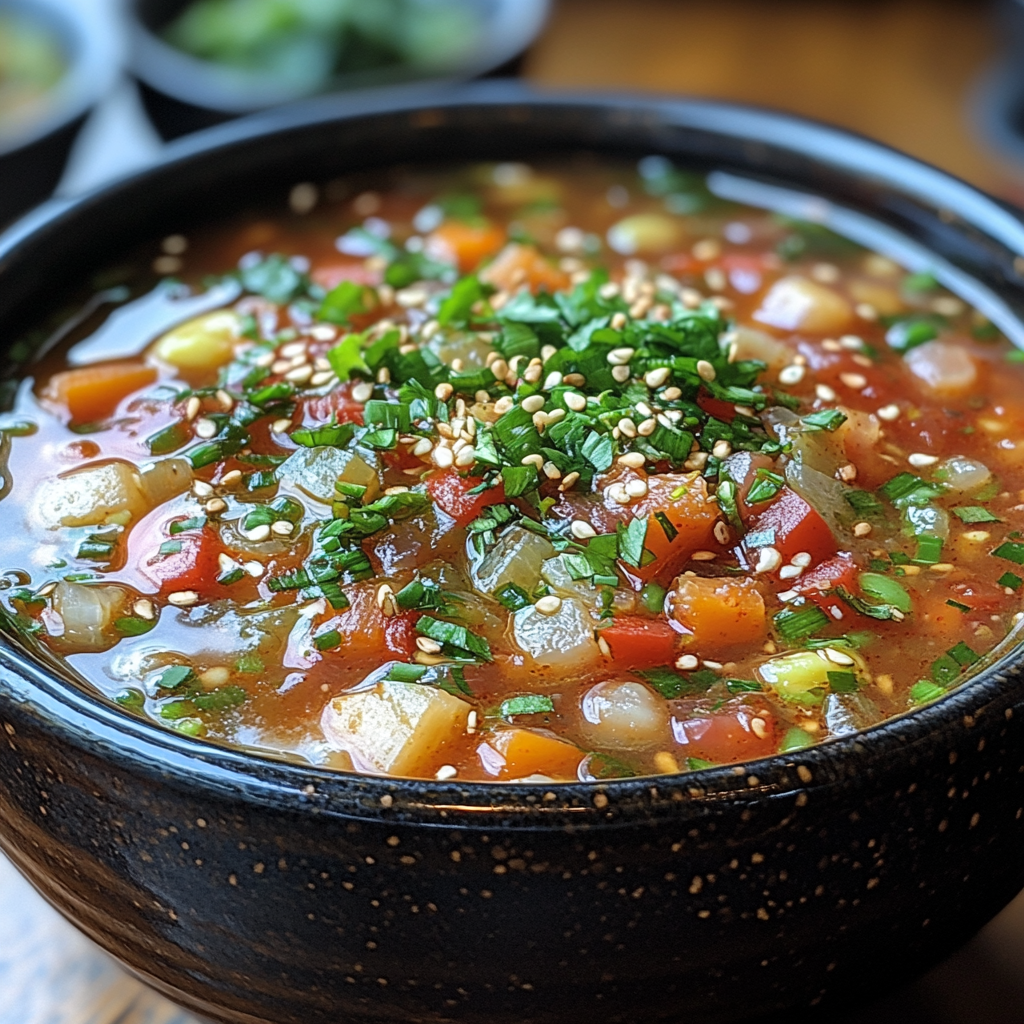
Imagine enjoying the savory flavors of an egg roll without the calories or deep frying. Egg Roll Soup captures the essence of this popular appetizer, transforming it into a comforting, nutrient-packed meal that’s perfect for any season. This soup combines ground pork, cabbage, and classic Asian seasonings in a delicious broth. It’s low in carbs, gluten-free, and can easily be adapted to suit a variety of dietary needs.

For those who enjoy hearty soups, check out Crockpot Potato Soup with Hashbrowns for another easy, warming option.


Ingredients for the Perfect Egg Roll Soup

Gather these core ingredients to make Egg Roll Soup. Each item plays a crucial role in creating the authentic flavor of an egg roll in soup form:

  • Ground Pork or Ground Turkey: Provides a rich base and protein.
  • Cabbage: Adds crunch and body, a staple in traditional egg rolls.
  • Carrots: Adds color, sweetness, and nutrients.
  • Ginger and Garlic: Essential aromatics for a well-rounded flavor.
  • Soy Sauce and Sesame Oil: Bring the umami depth of Asian flavors.
  • Chicken Broth: Forms the soup base, tying all flavors together.
  • Green Onions: For garnish, adding fresh flavor and color.
  • Optional Toppings: Crispy wonton strips or sesame seeds for extra texture.

For more recipes with bold, warming flavors, consider Slow Cooker Baked Ziti as another convenient, flavorful option.

How to Make Egg Roll Soup

1. Prepare the Aromatics and Meat

  • In a large pot, heat a drizzle of sesame oil and sauté garlic and ginger until fragrant.
  • Add ground pork or turkey, breaking it up with a spatula until fully cooked.

2. Add Vegetables

  • Stir in chopped cabbage and shredded carrots. Cook until the vegetables soften, about 5 minutes.

3. Flavor the Broth

  • Pour in chicken broth and soy sauce. Let it simmer, allowing flavors to meld for about 10-15 minutes.

4. Final Touches and Garnishes

  • Adjust seasoning with salt, pepper, or additional soy sauce if desired.
  • Serve hot, garnished with green onions and optional toppings.

Tips for Making the Best Egg Roll Soup

  • Balance the Saltiness: Soy sauce can vary in saltiness, so adjust to taste.
  • Customize the Heat: Add red pepper flakes or sriracha for a spicy version.
  • Use Fresh Ingredients: Ginger and garlic bring the most flavor when fresh, enhancing the authenticity of the dish.

For more Asian-inspired soups, try the Hearty Chicken Chili, which also brings warmth and depth to your table.


Variations of Egg Roll Soup

This recipe is adaptable, allowing you to make it vegetarian or even keto-friendly:

  1. Vegetarian Egg Roll Soup: Replace meat with diced tofu or extra mushrooms.
  2. Shrimp Egg Roll Soup: Swap ground pork for shrimp for a lighter twist.
  3. Spicy Egg Roll Soup: Add chili oil or a dash of sriracha to elevate the spice level.

Nutritional Benefits of Egg Roll Soup

This soup provides a healthy alternative to traditional egg rolls. Here’s a breakdown of its nutritional profile:

  • Low in Carbs: Suitable for keto or low-carb diets.
  • High in Fiber: Cabbage and carrots add fiber, beneficial for digestion.
  • Rich in Protein: Ground pork or turkey provides a substantial protein boost.
  • Vitamins: High in vitamins C and K from the cabbage and carrots.

For a similar low-carb, comforting option, explore our recipe for Chicken Bacon Ranch Potatoes, which provides both flavor and protein.

Storing and Reheating Egg Roll Soup

Egg Roll Soup is easy to make in large batches and stores well:

  • Refrigerate: Store in an airtight container for up to 3 days.
  • Freeze: Place in freezer-safe containers and freeze for up to 3 months.
  • Reheat: Warm on low heat, adding a splash of broth to refresh the flavor if needed.

FAQs about Egg Roll Soup

Is Egg Roll Soup Low-Carb or Keto-Friendly?

Yes, Egg Roll Soup is low in carbs, especially if you skip any starchy toppings. It’s a perfect option for keto and low-carb diets.

Can I Make Egg Roll Soup Vegetarian?

Absolutely! Substitute tofu or mushrooms for the meat and use vegetable broth instead of chicken broth.

How Can I Make Egg Roll Soup Spicier?

To add heat, include red pepper flakes, chili oil, or a touch of sriracha. Customize the spice level to your taste.

How Long Does Egg Roll Soup Last in the Fridge?

Egg Roll Soup can last up to 3 days in the fridge. Make sure to store it in an airtight container for maximum freshness.

Can I Freeze Egg Roll Soup?

Yes, this soup freezes well. For best results, freeze without toppings and reheat on low heat to preserve texture and flavor.

Serving Suggestions

Serve Egg Roll Soup as a standalone dish or pair it with these options for a complete meal:

  • Toppings: Garnish with green onions, sesame seeds, or crispy wonton strips for extra flavor and texture.
  • Side Pairings: Serve with egg rolls, dumplings, or a side of steamed vegetables.

For more side dish ideas, consider our Easy French Bread Pizza, which is customizable and complements the flavors of Egg Roll Soup.


Final Thoughts on Egg Roll Soup

Egg Roll Soup is a delicious, comforting, and healthy alternative to traditional fried egg rolls. Its unique combination of flavors and easy preparation make it a perfect addition to any meal plan, whether for a weeknight dinner or meal prep for the week ahead. This soup brings the bold flavors of takeout to your kitchen in a healthier, homemade format.

If you’re looking for more cozy dishes, try Crockpot Potato Soup or Slow Cooker Baked Ziti. These recipes are equally satisfying and easy to make.

Enjoy exploring the flavors of this easy Egg Roll Soup recipe, and don’t hesitate to customize it to make it your own!