Chinese Chicken and Broccoli: Easy Takeout-Style Recipe at Home

chicken broccoli stir-fry, homemade chicken and broccoli Chinese style, Chinese broccoli chicken recipe, brown sauce stir-fry

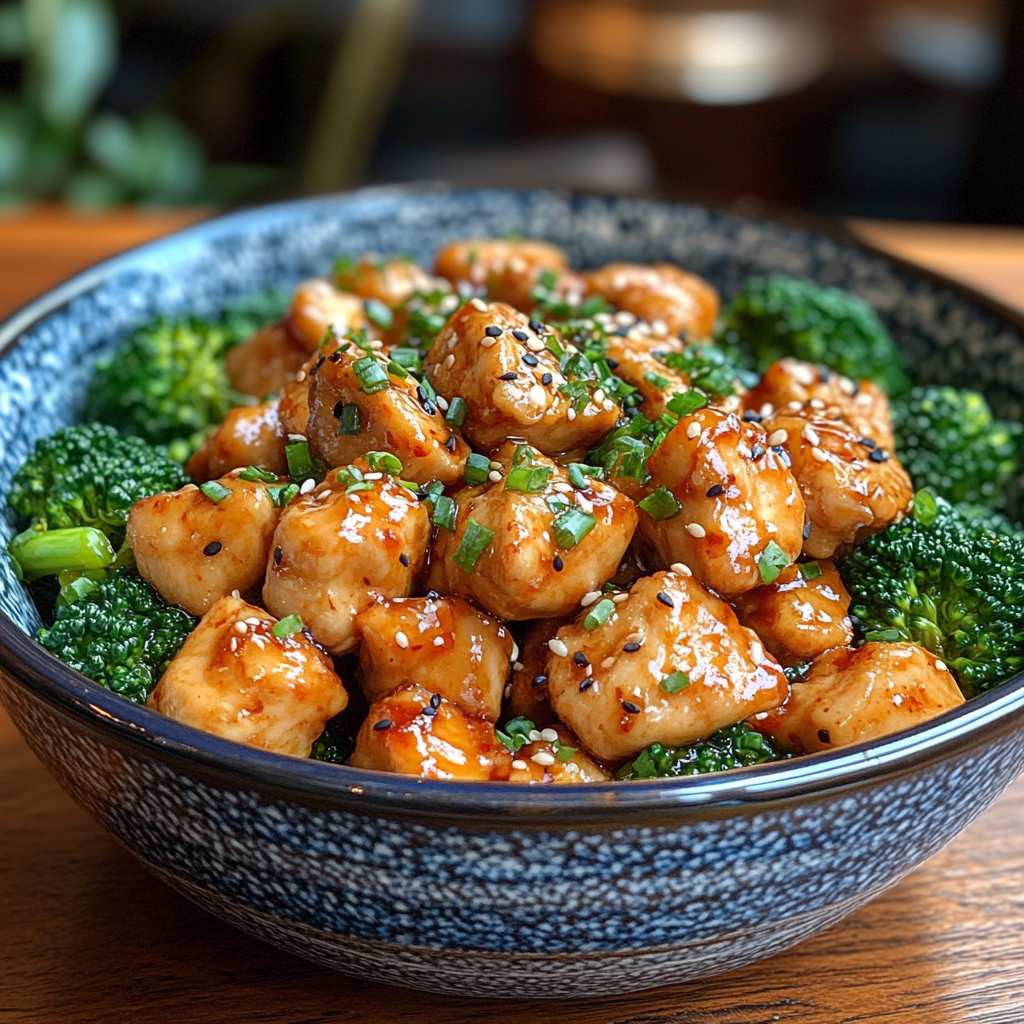
Chinese Chicken and Broccoli: A Flavorful and Healthy Stir-Fry

Chinese Chicken and Broccoli is a classic stir-fry dish that’s popular in restaurants and even more satisfying when made at home. Featuring tender chicken, crisp broccoli, and a rich brown sauce, this dish combines simplicity with bold flavors. Perfect as a quick weeknight meal, it’s an excellent way to enjoy a healthy balance of protein and vegetables.

For more easy comfort food ideas, explore other recipes like Slow Cooker Magic: Unveiling the Ease of Crock-Pot Baked Ziti, which, like this stir-fry, makes for a delicious and comforting family meal.


Why Make Chinese Chicken and Broccoli at Home?

Chinese Chicken and Broccoli is ideal for those who crave the flavors of Chinese takeout without the excess sodium and oil. Making this dish at home allows you to control the ingredients, ensuring a healthier meal with restaurant-quality taste. Additionally, it’s versatile enough to adapt to dietary needs and tastes.

If you love recreating takeout favorites, check out the Ultimate Comfort Food Crockpot Potato Soup with Hashbrowns for another comforting homemade option that’s easy to prepare.


Ingredients for Chinese Chicken and Broccoli

  • Chicken: Boneless, skinless chicken breast or thigh works best for stir-frying.
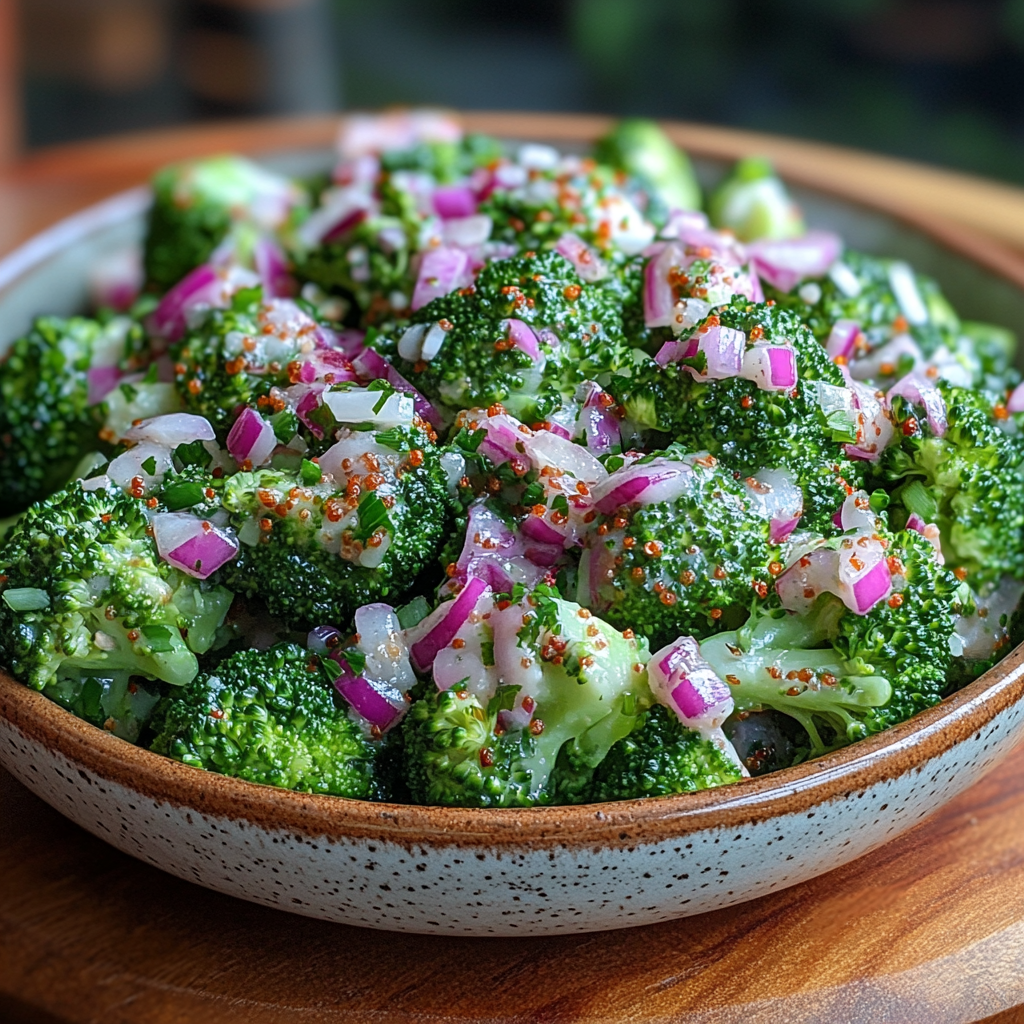
  • Broccoli: Fresh or frozen florets for a balance of texture and nutrition.
  • Garlic and Ginger: Essential for authentic flavor and aroma.
  • Soy Sauce: Adds umami depth to the brown sauce.
  • Oyster Sauce (optional): Enhances the sauce with a subtle, savory richness.
  • Cornstarch: Helps thicken the sauce and creates a silky texture.
  • Sesame Oil: Adds a nutty finish and boosts flavor.

Step-by-Step Cooking Instructions

1. Preparing the Ingredients

  • Chicken: Slice the chicken into thin strips for quick cooking.
  • Broccoli: Blanch or steam lightly for crisp texture.
  • Sauce Mix: Combine soy sauce, oyster sauce, garlic, ginger, and cornstarch in a small bowl.

2. Stir-Frying the Chicken

  • Heat a wok or large pan with oil and stir-fry the chicken until it begins to brown. This adds a golden color and seals in flavor.

3. Adding Broccoli and Sauce

  • Add broccoli to the pan, then pour in the sauce mixture. Stir to coat everything evenly. Allow the sauce to thicken and the flavors to meld together.

4. Final Touches and Serving

  • Drizzle a small amount of sesame oil for added aroma.
  • Serve over steamed rice or noodles, garnished with sesame seeds or green onions.

Tips for Perfect Chinese Chicken and Broccoli

  • Use High Heat: Cooking on high heat helps sear the chicken and broccoli for a wok-fried texture.
  • Blanch Broccoli First: This ensures it stays bright green and tender-crisp.
  • Thicken Sauce with Cornstarch: Adding cornstarch to the sauce ensures it clings to the chicken and broccoli, creating that restaurant-quality finish.

If you’re new to stir-frying, explore One-Pan Pork Chops and New Potatoes for another one-pan wonder that brings out flavors with minimal effort.


Recipe Variations

  1. Spicy Chicken and Broccoli: Add chili paste or red pepper flakes for heat.
  2. Vegetarian Version: Substitute tofu for chicken.
  3. Extra Saucy: Double the sauce ingredients for those who love extra flavor.
  4. Gluten-Free Option: Use gluten-free soy sauce and omit oyster sauce.

Suggested Sides for Chinese Chicken and Broccoli

  • Steamed Rice: Perfect for soaking up the savory sauce.
  • Fried Rice: Adds texture and pairs well with the flavors of chicken and broccoli.
  • Lo Mein Noodles: Great for turning this dish into a more substantial meal.

Frequently Asked Questions (FAQs)

Can I use frozen broccoli for this recipe?

Yes, frozen broccoli works well and saves time on preparation. Just thaw it slightly before adding to the stir-fry.

What type of chicken is best for stir-frying?

Boneless, skinless chicken breast or thigh is ideal for this dish due to its lean texture and quick cooking time.

How do I prevent the chicken from drying out?

Slicing the chicken thinly and cooking quickly over high heat helps prevent it from becoming dry. Adding cornstarch to the marinade can also help maintain moisture.

What can I use instead of oyster sauce?

If you don’t have oyster sauce, you can substitute with extra soy sauce or a splash of hoisin sauce for a similar depth.


Storing and Reheating

  • Storing: Place leftovers in an airtight container and refrigerate for up to 3 days.
  • Reheating: Reheat in a pan over medium heat or in the microwave, adding a splash of water to refresh the sauce if needed.

Final Thoughts

Chinese Chicken and Broccoli is a classic, flavorful dish that’s easy to make at home and adaptable to different tastes. With the right ingredients and techniques, you can recreate this takeout favorite while keeping it healthy and customizable.

For more comforting and easy meals, consider trying the No Peek Beef Tips: The Ultimate Comfort Food You’ve Been Missing for another delicious option that’s just as satisfying.

Crock-Pot Smothered Pork Chops: Easy Comfort Food Recipe

slow cooker pork chops, creamy pork chops recipe, easy smothered pork chops, pork chops in creamy sauce, tender Crock-Pot pork chops

Crock-Pot Smothered Pork Chops: A Flavorful, Comforting Meal

If you’re craving a meal that’s both comforting and simple to make, Crock-Pot Smothered Pork Chops is an ideal choice. This dish features tender pork chops, slow-cooked to perfection, and smothered in a rich, creamy sauce that’s packed with flavor. Perfect for busy weeknights or cozy weekends, this recipe will make your kitchen smell amazing as it simmers away in the Crock-Pot.

For more comfort food ideas, check out The Ultimate Comfort Food Crockpot Potato Soup with Hashbrowns. Pairing this smothered pork with a side like this can turn an everyday dinner into a complete, satisfying meal.


Why Choose Crock-Pot Smothered Pork Chops?

  • Tender Texture: Cooking pork chops in a slow cooker ensures they’re tender and flavorful.
  • Rich Flavor: The slow cooking process deepens flavors, especially when using ingredients like garlic, onion, and a creamy sauce.
  • Easy Preparation: It’s a hands-off recipe, perfect for busy days.

For another effortless Crock-Pot meal, explore Slow Cooker Magic Unveiling the Ease of Crock-Pot Baked Ziti, which, like this dish, allows you to enjoy great food with minimal effort.


Ingredients for Crock-Pot Smothered Pork Chops

  • Pork Chops: Bone-in or boneless, depending on your preference.
  • Onions & Garlic: Key to building the flavor base for the sauce.
  • Cream of Mushroom Soup: A classic addition for a creamy, rich sauce.
  • Broth or Stock: Enhances the flavor and keeps the meat moist.
  • Seasoning: Salt, pepper, and thyme to add seasoning and aroma.

Step-by-Step Recipe Instructions

1. Seasoning and Preparing the Pork Chops

  • Season the pork chops on both sides with salt, pepper, and thyme.
  • Searing the chops before adding them to the Crock-Pot can enhance their flavor.

2. Layering Ingredients in the Crock-Pot

  • Place onions and garlic at the base, followed by the pork chops.
  • Pour in cream of mushroom soup and broth to create a creamy sauce that thickens as it cooks.

3. Cooking Time and Temperature

  • Low Setting: Cook on low for 6-8 hours for tender chops.
  • High Setting: Cook on high for 3-4 hours if you’re short on time.

Tips for Perfect Crock-Pot Smothered Pork Chops

  • Layer Ingredients for Even Cooking: Start with onions and garlic at the bottom, and layer the pork chops on top.
  • Use Bone-In Chops for More Flavor: Bone-in chops retain more moisture and flavor, making the dish richer.
  • Experiment with the Sauce: Add a splash of Worcestershire sauce or Dijon mustard for extra depth.

For a twist on flavors, try using a variation such as One-Pan Pork Chops and New Potatoes: A Flavorful Symphony in Every Bite, which uses a different preparation technique but complements similar ingredients.


Recipe Variations

  1. Southern-Style Smothered Pork Chops: Add bell peppers and Cajun seasoning for a Southern-inspired dish.
  2. Mushroom & Onion Pork Chops: Increase the amount of mushrooms for an earthier flavor.
  3. Spicy Smothered Pork Chops: Add red pepper flakes or sliced jalapeños to the sauce for a kick of heat.

Suggested Sides to Pair with Smothered Pork Chops

  • Mashed Potatoes: The creamy gravy on these pork chops is perfect over fluffy mashed potatoes.
  • Green Beans: A light vegetable side balances the richness of the dish.
  • Rice: Perfect for soaking up the delicious gravy.

For more inspiration, try Ultimate Comfort Food Crockpot Potato Soup with Hashbrowns as a side or starter.


Frequently Asked Questions (FAQs)

Can I use boneless pork chops?

Yes, boneless pork chops work well but may require less cooking time to avoid drying out.

Should I sear the pork chops before placing them in the Crock-Pot?

Searing adds extra flavor and locks in moisture, but it’s optional for this recipe.

Can I substitute cream of mushroom soup?

Yes, cream of chicken or cream of celery can work as alternatives if you don’t have cream of mushroom.


Storage and Reheating Tips

  • Storage: Place leftovers in an airtight container and refrigerate for up to 3 days.
  • Reheating: Reheat in the oven at 300°F until warmed through or use a microwave for quick reheating.

For more comfort food recipes, check out Rediscovering Comfort: Sour Cream and French Fried Onion Pork Chops, another hearty pork chop dish that’s easy to make.


Conclusion

Crock-Pot Smothered Pork Chops are the ultimate comfort dish, offering tender meat and a flavorful sauce perfect for soaking up with sides. This recipe is ideal for anyone seeking a hearty meal with minimal prep. Enjoy these pork chops with loved ones, and experiment with the recipe to suit your tastes.

Easy Cheesy Breadsticks Recipe: Perfect Side for Any Meal

garlic cheese breadsticks, homemade cheesy breadsticks, mozzarella breadsticks, easy cheese breadsticks, breadsticks recipe

Cheesy Breadsticks Recipe: A Delicious Side or Snack

Nothing complements a meal quite like cheesy breadsticks. Whether served alongside a hearty bowl of soup or as a standalone snack, these breadsticks are a crowd-pleaser. With a crisp exterior, gooey cheese, and a hint of garlic, they’re sure to satisfy every carb craving. This recipe will guide you through creating irresistible cheesy breadsticks with a few simple ingredients.

For those who love the convenience of homemade comfort foods, these breadsticks make an excellent side to dishes like The Ultimate Comfort Food Crockpot Potato Soup with Hashbrowns or Slow Cooker Magic Unveiling the Ease of Crock-Pot Baked Ziti.

Why Make Cheesy Breadsticks?

Cheesy breadsticks are incredibly versatile, making them perfect for nearly any meal. From being a delightful appetizer to a complement to Italian dishes, they’re always welcome at the table. The homemade version also allows you to control the ingredients, making them as cheesy, garlicky, or buttery as you prefer.

If you’re in the mood to explore similar flavors, check out One-Pan Pork Chops and New Potatoes for another easy and tasty dish.


Ingredients for Cheesy Breadsticks

  • Pizza Dough: You can use store-bought or homemade dough.
  • Cheese Blend: Mozzarella for meltiness and Parmesan for a sharper flavor.
  • Garlic Butter: Combines minced garlic and melted butter.
  • Herbs: Italian seasoning or fresh parsley for garnish.

Step-by-Step Recipe Instructions

1. Prepare the Dough

Start by preparing or rolling out the pizza dough on a lightly floured surface. Aim for a rectangular shape that fits well on a standard baking sheet. This dough serves as the base for your cheesy breadsticks.

2. Make the Garlic Butter Spread

In a small bowl, combine melted butter with minced garlic. This mixture will coat the breadsticks, enhancing their flavor and ensuring a golden finish.

3. Add the Cheese and Herbs

  • Brush the garlic butter generously over the dough.
  • Sprinkle the mozzarella and Parmesan cheese evenly, ensuring every inch is covered. Add herbs for extra flavor.

4. Bake the Breadsticks

  • Preheat your oven to 425°F (220°C).
  • Bake the breadsticks for 12-15 minutes or until the cheese is bubbly and golden brown.
  • Let them cool slightly, then cut into strips for easy serving.

Tips for Perfect Cheesy Breadsticks

  • Avoid Over-Baking: To prevent them from becoming dry, bake until just golden.
  • Experiment with Cheese Blends: Try adding cheddar or Gouda for a twist.
  • Use Fresh Herbs: Fresh parsley or basil can elevate the flavor.

Variations of Cheesy Breadsticks

  1. Spicy Cheesy Breadsticks: Add a sprinkle of red pepper flakes to the cheese layer for a spicy kick.
  2. Herb & Garlic Breadsticks: Increase the garlic and add rosemary for a stronger flavor profile.
  3. Loaded Cheesy Breadsticks: Add bacon bits or chopped olives for added texture and taste.

Storing and Reheating

Cheesy breadsticks can be stored in an airtight container in the refrigerator for up to three days. To reheat, use an oven or air fryer for a few minutes to regain their crispy texture. Avoid microwaving as it may make them soggy.


Frequently Asked Questions

Can I use store-bought dough?

Yes! Store-bought pizza dough works great and saves time. Just make sure it’s thawed and at room temperature before you start.

What type of cheese works best?

Mozzarella and Parmesan are ideal, but you can experiment with other types like cheddar or Gruyere for a different flavor.

How can I make the breadsticks crispy?

Baking them at a high temperature, like 425°F, will help achieve a crispy crust. You can also bake them on a pizza stone for an even crisper result.

Can I freeze cheesy breadsticks?

Yes, after baking, allow them to cool completely, then freeze in a single layer. Reheat in the oven directly from frozen.


Conclusion

Cheesy breadsticks are a versatile, tasty addition to any meal or gathering. With just a few ingredients and steps, you can create a restaurant-quality side that pairs well with dishes like Ultimate Comfort Food Crockpot Potato Soup with Hashbrowns. Experiment with different cheeses, herbs, and toppings to make the recipe your own!

Cheesy Garlic Butter Mushroom Stuffed Chicken Recipe: Perfect Comfort Food

stuffed chicken with garlic and cheese, mushroom stuffed chicken breast, cheesy mushroom stuffed chicken, garlic butter stuffed chicken, easy stuffed chicken recipe

Cheesy Garlic Butter Mushroom Stuffed Chicken: The Perfect Comfort Food

If you’re a fan of rich, savory flavors and dishes that pack a punch, then cheesy garlic butter mushroom stuffed chicken is the recipe you’ve been waiting for. This recipe is an indulgent combination of succulent chicken breast, earthy mushrooms, creamy cheese, and buttery garlic, creating an explosion of flavor in every bite. Not only is it an impressive dish to serve for gatherings, but it’s also easy enough to make on a cozy weeknight at home.

In this article, we’ll walk you through each step, from choosing the best ingredients to serving suggestions, cooking tips, and answers to some frequently asked questions. Whether you’re a seasoned chef or a beginner, you’ll find everything you need to make this recipe a hit.

For those who enjoy experimenting with flavors, this dish pairs perfectly with a creamy garlic Parmesan sauce. You may also want to explore other comforting meal ideas like Slow Cooker Magic Unveiling the Ease of Crock-Pot Baked Ziti for similar hearty inspiration.

Why Choose Cheesy Garlic Butter Mushroom Stuffed Chicken?

Stuffed chicken recipes offer an ideal way to keep your chicken breast moist and flavorful. By using a blend of garlic butter and mushroom filling, this dish stands out as a unique, gourmet-style recipe that doesn’t require a lot of preparation. The cheesy garlic butter mushroom stuffed chicken provides an indulgent taste experience that will satisfy even the most discerning palates.

Looking for other comfort food staples? Check out the Ultimate Comfort Food Crockpot Potato Soup with Hashbrowns on Exorecipes.


Ingredients You’ll Need

  • Chicken Breasts: Boneless, skinless chicken breasts are ideal as they hold the filling well.
  • Mushrooms: Choose cremini or button mushrooms for a rich, earthy flavor.
  • Garlic: Freshly minced garlic enhances the butter’s aroma and adds depth.
  • Butter: High-quality butter helps create a creamy, flavorful sauce.
  • Cheese: Mozzarella and Parmesan are the go-to cheeses for their meltiness and sharp flavor.
  • Optional Creamy Garlic Parmesan Sauce: Adds an extra layer of decadence.

Health Benefits of Mushrooms, Garlic, and Cheese

Beyond taste, this dish also offers nutritional benefits. Mushrooms are rich in antioxidants and B vitamins, while garlic is known for its anti-inflammatory properties. Cheese, in moderation, provides calcium and protein, making this dish not only delicious but also nourishing.


Step-By-Step Recipe Instructions

Step 1: Prepare the Ingredients

  1. Slice the Mushrooms: Thinly slice your mushrooms to ensure they cook evenly within the chicken.
  2. Mince the Garlic: Minced garlic will mix seamlessly into the butter, maximizing its flavor.
  3. Shred the Cheese: Grate mozzarella and Parmesan to prepare them for stuffing.

Step 2: Create the Garlic Butter Mixture

In a small bowl, combine melted butter with minced garlic. This butter will coat the mushrooms as well as add a layer of flavor to the stuffed chicken.

Step 3: Make the Mushroom Mixture

  1. Sauté the Mushrooms: Cook the mushrooms in a skillet with garlic butter until tender. Season with a pinch of salt and pepper.
  2. Add Cheese: Mix in half of the grated cheese with the mushroom mixture, creating a creamy filling for the chicken.

Step 4: Prepare the Chicken Breasts

  1. Slice Pockets into the Chicken: Use a sharp knife to cut a pocket in each chicken breast, careful not to cut through the meat.
  2. Stuff the Chicken: Fill each pocket with the mushroom and cheese mixture, pressing it in gently.

Cooking Instructions: Oven vs. Stovetop

You can cook this stuffed chicken in the oven or start on the stovetop and finish in the oven for a crisp exterior.

Oven-Baking Method

  1. Preheat the Oven to 375°F (190°C).
  2. Bake the chicken for 20-25 minutes or until the internal temperature reaches 165°F (74°C).

Stovetop and Oven Combination

  1. Sear the Chicken on both sides in a hot skillet for 3-4 minutes per side.
  2. Finish in the Oven at 375°F (190°C) for about 15 minutes.

Tips for Perfect Stuffed Chicken

  • Secure the Filling: Use toothpicks to keep the stuffing inside the chicken breast while cooking.
  • Avoid Overstuffing: Keep the stuffing minimal to prevent spillage.
  • Check Internal Temperature: Always use a meat thermometer to ensure the chicken is fully cooked.

Optional Creamy Garlic Parmesan Sauce

For an extra touch of decadence, serve with a creamy garlic Parmesan sauce. To make the sauce, combine cream, garlic, and Parmesan in a saucepan and simmer until it reaches your desired consistency.


Serving Suggestions

This dish pairs well with sides like:

  • Mashed Potatoes
  • Roasted Vegetables
  • Simple Salad with a Vinaigrette

Looking for a complete family meal? Pair with One-Pan Pork Chops and New Potatoes for a hearty combination.


Recipe Variations

  1. Spinach and Feta: Substitute mushrooms with spinach and use feta cheese for a Mediterranean twist.
  2. Sun-Dried Tomatoes and Basil: Add Italian-inspired flavors by mixing sun-dried tomatoes with fresh basil and mozzarella.

Storing and Reheating

Storing Leftovers

Place leftover chicken in an airtight container and store it in the refrigerator for up to three days.

Reheating Tips

Reheat in the oven at 350°F (175°C) for about 10 minutes. For a quick option, microwave on medium heat for 2-3 minutes, checking frequently.


Frequently Asked Questions (FAQs)

  • Can I make this recipe without mushrooms? Yes, you can substitute mushrooms with spinach or other veggies.
  • What type of cheese is best for stuffed chicken? Mozzarella and Parmesan are ideal for their melting quality and flavor. You can also experiment with Gouda or Swiss.
  • Is it better to bake or pan-fry stuffed chicken? Both methods work well, but baking helps the chicken cook evenly, while pan-frying adds a crispy exterior.
  • How can I prevent the filling from leaking? Use toothpicks to secure the edges, and avoid overfilling.

Final Thoughts

Cheesy garlic butter mushroom stuffed chicken is a dish that delivers both in taste and presentation. It’s the perfect way to enjoy a comforting meal that feels gourmet. From the juicy chicken to the savory mushroom filling and the optional creamy sauce, every element is designed to bring out the best in this recipe.

For more comfort food ideas, check out The Ultimate Comfort Food Bacon Ranch Chicken Quesadillas to keep your recipe list filled with delicious and comforting meals.

Best Broccoli Salad Ever: A Crunchy, Flavorful Side Dish

broccoli salad recipe, broccoli crunch salad, creamy broccoli salad, easy broccoli salad, healthy broccoli salad, broccoli side dish

Best Broccoli Salad Ever: A Delicious, Easy Recipe for Any Gathering

If you’re in search of the perfect side dish that’s as flavorful as it is easy to prepare, look no further than this Best Broccoli Salad Ever. Packed with fresh, crunchy broccoli, crispy bacon, and a tangy-sweet dressing, this salad is sure to become a favorite at potlucks, barbecues, and family dinners.

For a comforting side dish, pair this salad with Crockpot Potato Soup with Hashbrowns for a well-rounded meal that’s perfect for cooler days.


What Makes This the Best Broccoli Salad?

This recipe stands out thanks to its combination of textures and flavors. From the crunchy broccoli to the creamy dressing and bits of savory bacon, every bite offers a balance of taste and satisfaction. Plus, it’s incredibly versatile—you can easily customize it with your favorite mix-ins.

If you’re looking for a hearty main course to complete your meal, try Slow Cooker Baked Ziti, which pairs wonderfully with this fresh salad.


Ingredients for the Best Broccoli Salad

Core Ingredients

Here’s what you need for this tasty broccoli salad:

  • Fresh Broccoli: Adds crunch and nutritional value.
  • Bacon: Provides a savory, crispy contrast to the fresh vegetables.
  • Red Onion: Adds sharpness and color.
  • Dried Cranberries: Balances savory flavors with a touch of sweetness.
  • Sunflower Seeds: Adds a nutty flavor and extra crunch.
  • Cheddar Cheese (optional): Gives the salad a creamy, rich element.

Dressing Ingredients

The dressing brings the salad together with a perfect balance of tangy and sweet:

  • Mayonnaise or Greek Yogurt: Creamy base for the dressing.
  • Apple Cider Vinegar: Adds tanginess to contrast the creamy base.
  • Honey or Sugar: A hint of sweetness to balance flavors.

Ingredient Variations

  1. Vegetarian Option: Replace bacon with smoked almonds or chickpeas.
  2. Dairy-Free Option: Use vegan mayo or coconut yogurt.
  3. Additions: Experiment with extras like apples, grapes, or even shredded carrots.

Step-by-Step Instructions for Making Broccoli Salad

1. Prepare the Vegetables

  • Wash and chop broccoli into bite-sized florets. Dice the red onion finely to add sharpness without overpowering.

2. Make the Dressing

  • In a bowl, whisk together mayonnaise (or Greek yogurt), apple cider vinegar, and honey. Adjust the seasoning to taste.

3. Combine Ingredients

  • In a large bowl, add the broccoli, bacon, red onion, dried cranberries, and sunflower seeds. Pour the dressing over the salad and toss to ensure everything is evenly coated.

4. Chill and Serve

  • For the best flavor, refrigerate the salad for at least one hour before serving. This allows the flavors to meld together.

Tips for Perfecting Broccoli Salad

Follow these tips for the ultimate broccoli salad:

  1. Blanch the Broccoli for a Softer Texture
    • Briefly blanching the broccoli in boiling water gives it a tender-crisp texture, then quickly chill in ice water.
  2. Customize the Sweetness and Tang
    • Taste the dressing before mixing it with the salad to ensure the balance of flavors meets your preference.
  3. Make it Ahead of Time
    • This salad is ideal for making a few hours in advance, as the flavors intensify over time.

Variations and Creative Additions

  1. Healthy Broccoli Salad
    • Substitute Greek yogurt for mayo to reduce calories and increase protein.
  2. Add Fruits for Extra Flavor
    • Sliced apples, grapes, or strawberries make delicious additions for added sweetness.
  3. Add a Hint of Spice
    • For a spicy kick, add a pinch of red pepper flakes or a dash of hot sauce to the dressing.

Storage and Leftover Tips

Broccoli salad stores well, which makes it perfect for meal prep or leftovers.

  1. Refrigeration
    • Store in an airtight container in the fridge for up to three days.
  2. Separate Storage of Dressing
    • To maintain crunch, store the dressing separately and toss it with the salad just before serving.

Frequently Asked Questions (FAQs)

Can I Make Broccoli Salad Ahead of Time?

Absolutely! Prepare the salad a day ahead and keep it refrigerated. Add the dressing just before serving if you prefer a fresher crunch.

How Do I Prevent Broccoli Salad from Becoming Soggy?

Storing the dressing separately until just before serving helps keep ingredients crisp.

Is Broccoli Salad a Healthy Option?

Broccoli is packed with fiber and nutrients. For a lighter dressing, use Greek yogurt instead of mayonnaise.

What Can I Substitute for Mayonnaise?

Greek yogurt, sour cream, or vegan mayo all work as great alternatives.

Do I Need to Blanch the Broccoli?

Blanching is optional. It slightly softens the broccoli but can be skipped if you prefer a crunchier texture.


Creative Serving Suggestions and Pairings

Broccoli salad is an ideal side for summer BBQs, winter potlucks, or casual family meals. Here’s how to serve it:

  • As a BBQ Side Dish
    • Complements grilled meats, burgers, and sandwiches.
  • Seasonal Fruit Add-Ons
    • Add seasonal fruits like pomegranate seeds or fresh blueberries for a holiday twist.

For a savory pairing, try serving it with Ultimate BBQ Pulled Pork Grilled Cheese to create a complete meal with a mix of textures.


Making Broccoli Salad a Family Favorite

This Broccoli Salad can easily become a household favorite. It’s a fantastic way to get kids involved in the kitchen by allowing them to mix ingredients, sprinkle in toppings, or help with tasting the dressing. Make it a family tradition by preparing it together for special occasions or weekly dinners.

Looking for a family-friendly breakfast to serve alongside? Sheet Pan Pancakes are a perfect addition that the whole family can enjoy.


Internal Links to Explore More Recipes

Discover other recipes on ExoRecipes to enhance your menu: