Christmas Sugar Cookie Recipe: Festive Treats for the Holidays

holiday sugar cookies, festive cookie recipe, decorated Christmas cookies, easy sugar cookies, Christmas cookie ideas, best sugar cookies for Christmas

Christmas Sugar Cookie Recipe: A Festive Baking Tradition

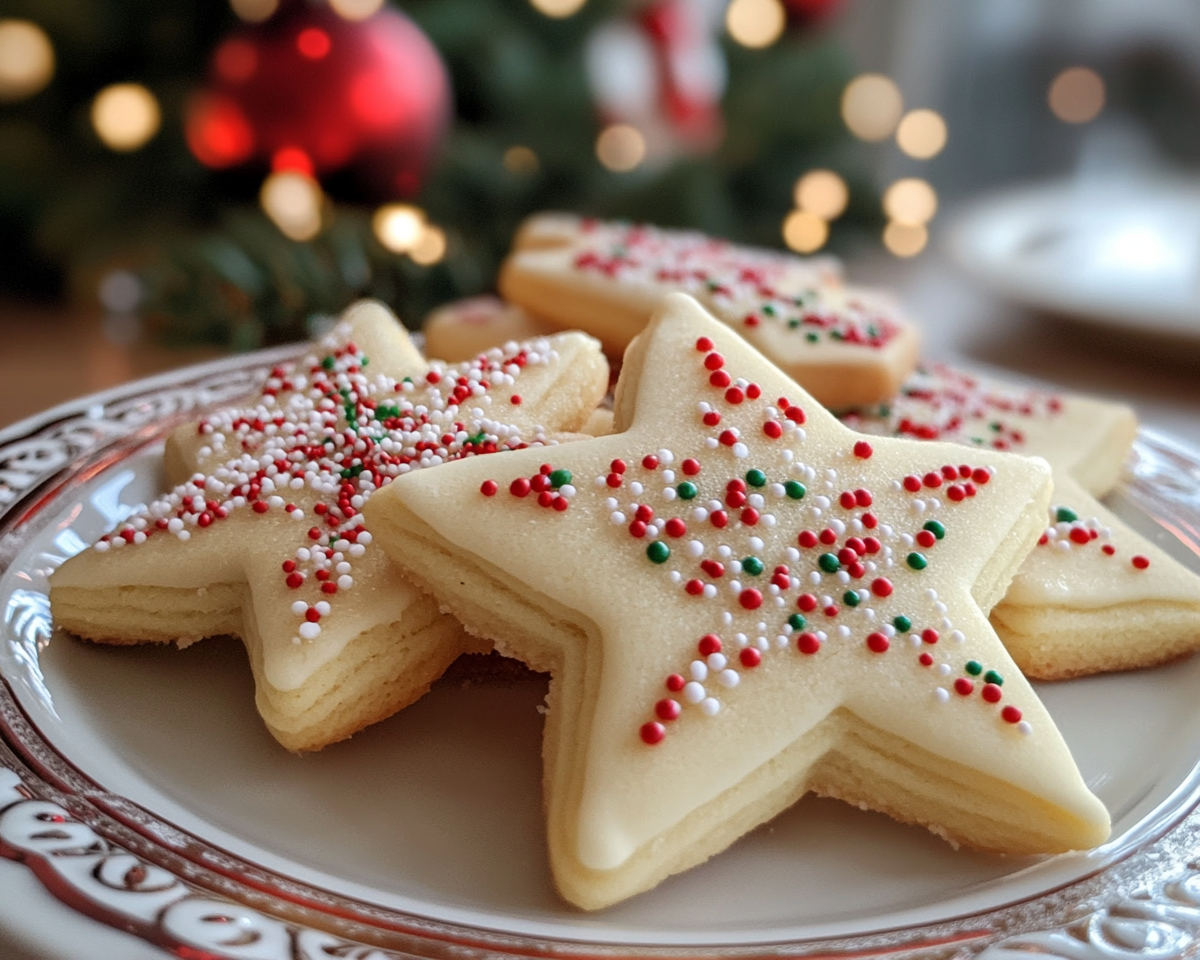
Christmas sugar cookies are the quintessential holiday treat, offering the perfect balance of sweetness and festive fun. With their soft texture, delightful decorations, and customizable flavors, they make every holiday gathering special. Whether you’re baking with family or preparing edible gifts, this classic recipe delivers in taste and creativity.

For more holiday dessert inspiration, try Delightful Mini Pineapple Upside-Down Cakes for another festive favorite.


Why Christmas Sugar Cookies Are a Must-Have

A Timeless Holiday Treat

  • Loved for their simplicity and versatility.
  • Perfect for family baking sessions with kids.
  • Customizable shapes and decorations for a festive touch.

Pair your cookies with No-Bake Pumpkin Cheesecake for a complete holiday dessert spread.


Ingredients for Christmas Sugar Cookies

Key Ingredients:

  • For the Dough:
    • All-purpose flour, sugar, butter, eggs, vanilla extract, and baking powder.
  • Flavor Additions:
    • Almond extract for a nutty aroma.
    • Lemon zest for a refreshing twist.
  • Decorations:
    • Royal icing, sprinkles, edible glitter, and powdered sugar.

Substitutions:

  • Gluten-free flour for dietary needs.
  • Plant-based butter for vegan cookies.
  • Coconut sugar for a natural sweetener option.

Step-by-Step Instructions

Preparing the Dough:

  1. Cream butter and sugar until light and fluffy.
  2. Add eggs and vanilla extract, mixing well.
  3. Gradually incorporate dry ingredients until a smooth dough forms.

Rolling and Cutting:

  1. Chill the dough for 1-2 hours to make rolling easier.
  2. Roll out the dough on a floured surface and cut into festive shapes.

Baking:

  1. Preheat oven to 350°F (175°C).
  2. Bake cookies on a lined baking sheet for 8-10 minutes or until edges are slightly golden.

Explore Cinnamon Roll Cookies with Cream Cheese Drizzle for more holiday baking ideas.


Decorating Tips

Creative Decorating Ideas:

  • Use piping bags for intricate royal icing designs.
  • Sprinkle with colored sugar for a classic touch.
  • Add edible glitter for a magical, wintery effect.

Tips for Success

  • Chill the Dough: Prevents spreading during baking.
  • Use Fresh Ingredients: Ensures the best flavor and texture.
  • Keep Shapes Simple: Helps cookies maintain their form.

Pair these tips with Kentucky Butter Cake for another foolproof dessert.


Flavor Variations

Unique Twists:

  • Add peppermint extract for a holiday-inspired flavor.
  • Incorporate cocoa powder for chocolate sugar cookies.
  • Mix crushed candy canes into the dough for a festive crunch.

Frequently Asked Questions

1. How long can sugar cookies be stored?

Store in an airtight container for up to 1 week. For longer storage, freeze undecorated cookies.

2. Can I freeze the dough?

Yes, freeze it for up to 3 months. Thaw in the refrigerator before rolling.

3. What icing works best for decorating?

Royal icing is the best choice for detailed decorations.


Internal Linking Opportunities


External Links for Further Learning

  1. Anchor Text: “Mastering Royal Icing Techniques”
    URL: https://www.kingarthurbaking.com/
  2. Anchor Text: “Creative Sugar Cookie Decorating Ideas”
    URL: https://www.tasteofhome.com/
  3. Anchor Text: “The Science of Baking Perfect Sugar Cookies”
    URL: https://www.seriouseats.com/

Conclusion

Christmas sugar cookies are more than just a dessert—they’re a tradition that brings families together and spreads holiday cheer. With their simple ingredients, endless customization options, and delightful decorations, they are sure to be the star of your holiday baking lineup.
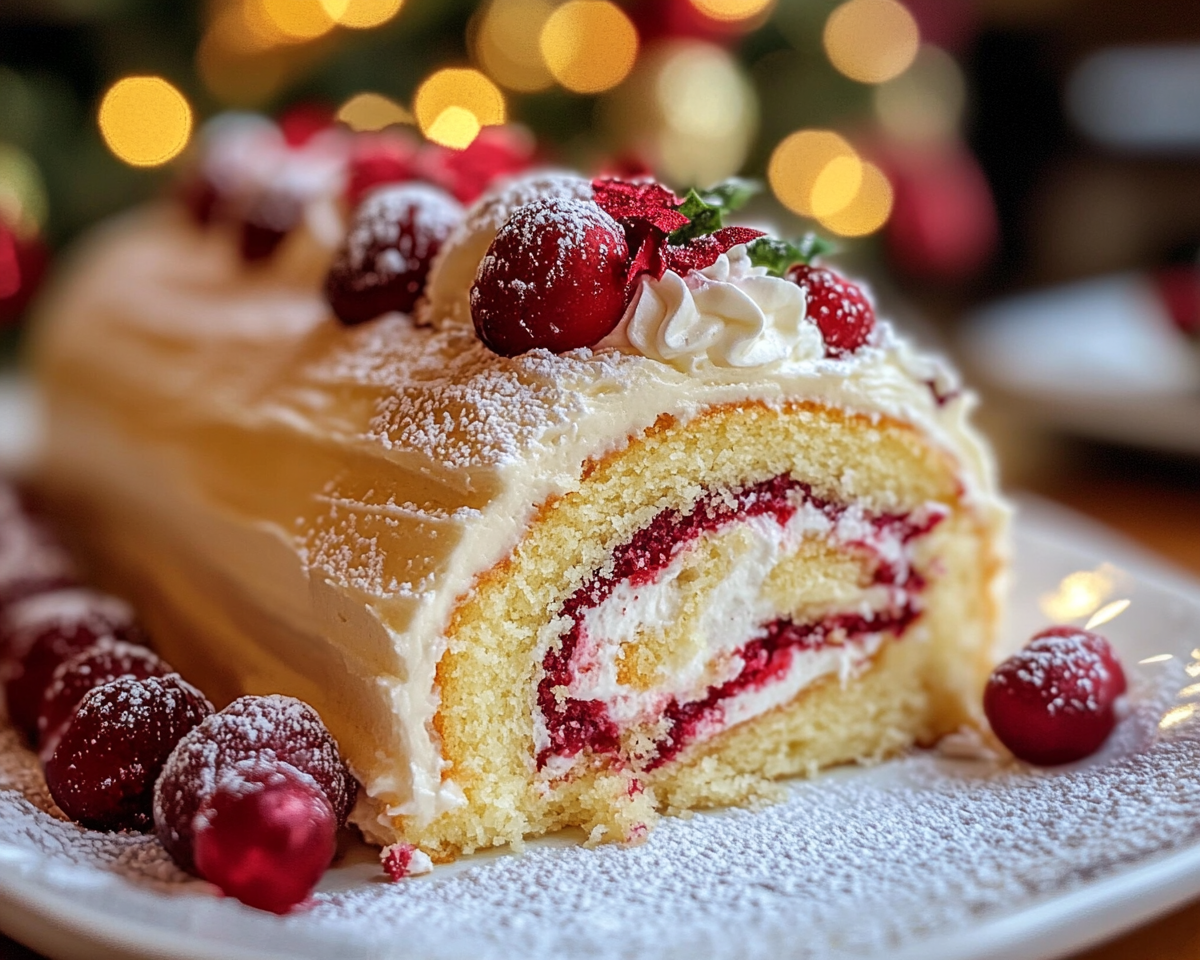
Vanilla Christmas Cake Roll: A Festive Holiday Dessert

Christmas vanilla roll, festive cake roll, holiday dessert roll, vanilla sponge cake, Christmas cake recipe, holiday cake roll recipe, vanilla roll cake

Vanilla Christmas Cake Roll: A Festive Holiday Delight

Vanilla Christmas Cake Roll combines the light, airy texture of sponge cake with a rich, creamy filling, making it a show-stopping dessert for the holidays. Whether you’re a seasoned baker or a beginner, this recipe offers an easy yet impressive way to add sweetness to your festive celebrations. With its versatility in decoration and flavor, it’s sure to be a favorite at your table.

For more festive dessert ideas, explore Delightful Mini Pineapple Upside-Down Cakes for a creative twist on classic flavors.


Why You’ll Love Vanilla Christmas Cake Roll

The Perfect Holiday Dessert

  • Combines a soft vanilla sponge with a luscious filling.
  • Beautifully decorated to match the festive season.
  • Easy to prepare, making it ideal for busy holiday schedules.

For another crowd-pleaser, try Kentucky Butter Cake for a rich and buttery treat.


Ingredients for the Cake Roll

Essential Ingredients:

  • For the Sponge Cake:
    • All-purpose flour, sugar, eggs, vanilla extract, and baking powder.
  • For the Filling:
    • Whipped cream or mascarpone cheese, powdered sugar, and vanilla.
  • For Decoration:
    • Powdered sugar, edible glitter, and holiday-themed sprinkles.

Substitutions and Variations:

  • Gluten-free flour for a gluten-free version.
  • Dairy-free whipped cream for lactose intolerance.
  • Add a touch of almond extract for a nutty flavor.

Step-by-Step Instructions

Preparing the Sponge Cake:

  1. Preheat the oven and line a jelly roll pan with parchment paper.
  2. Whip eggs and sugar until light and fluffy.
  3. Sift and fold in the dry ingredients gently.
  4. Spread the batter evenly in the pan and bake at 350°F for 10-12 minutes.

Rolling the Cake:

  1. Dust a clean kitchen towel with powdered sugar.
  2. Turn the baked cake onto the towel and peel off the parchment paper.
  3. Roll the cake tightly with the towel and let it cool completely.

Filling and Decorating:

  1. Unroll the cooled cake and spread the filling evenly.
  2. Re-roll the cake and refrigerate for at least 2 hours.
  3. Decorate with powdered sugar, sprinkles, or edible glitter.

For more tips on mastering cake rolls, explore The Ultimate Guide to Perfect French Bread Pizza to enhance your baking skills.


Decorating Ideas for Christmas

Creative Decorating Tips:

  • Use red and green sprinkles for a festive touch.
  • Drizzle with melted white chocolate for an elegant look.
  • Garnish with fresh cranberries and rosemary sprigs for a natural finish.

Tips for Success

  • Work Quickly: Roll the cake while it’s warm to prevent cracks.
  • Use Room Temperature Ingredients: Ensures a smooth and creamy filling.
  • Don’t Overbake: A dry sponge will crack when rolled.

For another dessert tip, explore No-Bake Pumpkin Cheesecake for a simple, holiday-friendly option.


Variations for Vanilla Christmas Cake Roll

Flavor Enhancements:

  • Add cinnamon or nutmeg to the batter for a spiced version.
  • Incorporate fruit preserves into the filling for added sweetness.
  • Use peppermint extract for a classic holiday twist.

Frequently Asked Questions

1. Can I make this cake roll in advance?

Yes, prepare and refrigerate it up to two days in advance.

2. What’s the best way to prevent cracks in the roll?

Roll the cake while it’s still warm and pliable.

3. Can I freeze the cake roll?

Absolutely! Wrap it tightly and freeze for up to one month.


Internal Linking Opportunities


External Links for Further Learning

  1. Anchor Text: “How to Perfect a Cake Roll”
    URL: https://www.kingarthurbaking.com/
  2. Anchor Text: “Tips for Holiday Dessert Decorating”
    URL: https://www.tasteofhome.com/
  3. Anchor Text: “The History of Vanilla as a Dessert Ingredient”
    URL: https://www.vanillaqueen.com/

Conclusion

Vanilla Christmas Cake Roll is the ultimate holiday dessert, combining a light, fluffy sponge with a creamy, indulgent filling. Whether you’re serving it at a festive gathering or gifting it to loved ones, this cake roll is a versatile, show-stopping addition to your holiday table.

Apple Pie Cupcakes: A Perfect Blend of Two Classic Desserts

mini apple pies, apple cupcake recipe, spiced apple cupcakes, individual apple pie desserts, apple cinnamon cupcakes, fall dessert cupcakes

Apple Pie Cupcakes: A Perfect Fusion of Two Classic Desserts

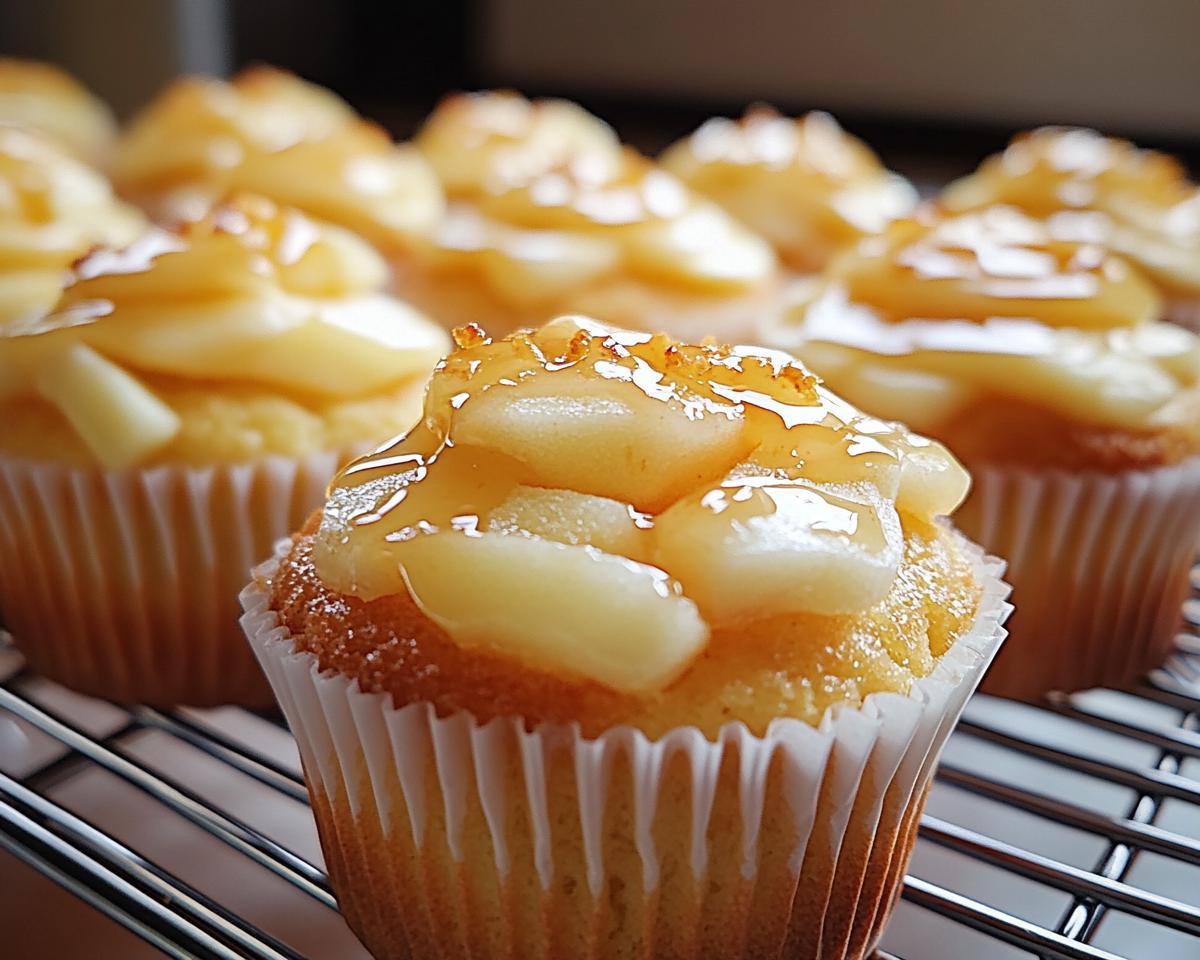
Apple Pie Cupcakes combine the warm, comforting flavors of classic apple pie with the convenience and charm of cupcakes. These individually-sized treats are ideal for sharing and make an excellent choice for parties, family gatherings, or just a simple indulgence at home. With their spiced apple filling, tender cake base, and optional toppings like streusel or caramel drizzle, they bring together the best of both worlds.

For a hearty dinner before dessert, explore No Peek Beef Tips for a comforting main course idea.


Why Apple Pie Cupcakes Are a Must-Try Recipe

The Best of Both Desserts

  • Combines the classic flavors of apple pie with the softness of cupcakes.
  • Perfectly portioned for individual servings, making them easy to serve and share.
  • Great for seasonal occasions like fall celebrations or Thanksgiving.

For another festive dessert option, try Delightful Mini Pineapple Upside-Down Cakes.


Ingredients for Apple Pie Cupcakes

Core Ingredients:

  • Cupcake Batter: Made with flour, sugar, eggs, butter, and vanilla extract for a fluffy cake base.
  • Apple Pie Filling: Includes fresh apples (Granny Smith or Honeycrisp recommended), sugar, cinnamon, nutmeg, and cornstarch.
  • Optional Toppings: Streusel crumble, caramel drizzle, or whipped cream.

Substitutions and Alternatives:

  • Gluten-free flour for a gluten-free version.
  • Coconut or almond flour for added flavor and dietary adaptations.
  • Store-bought apple pie filling for a quick preparation shortcut.

Step-by-Step Instructions

Preparing the Filling:

  1. Peel and dice fresh apples into small, even pieces.
  2. Cook with sugar, cinnamon, nutmeg, and cornstarch until softened and thickened.
  3. Let the filling cool before assembling the cupcakes.

Making the Cupcake Batter:

  1. Mix the dry ingredients (flour, baking powder, and salt) in a bowl.
  2. Cream together butter and sugar, then add eggs and vanilla.
  3. Gradually add the dry ingredients to the wet, alternating with milk, until smooth.

Assembling and Baking:

  1. Line a muffin tin with cupcake liners and fill halfway with batter.
  2. Add a dollop of apple filling to the center, then cover with more batter.
  3. Bake at 350°F (175°C) for 18-22 minutes or until a toothpick inserted comes out clean.

For additional baking inspiration, check out The Ultimate Comfort Food: Crockpot Potato Soup with Hashbrowns.


Topping and Serving Ideas

Popular Topping Options:

  • Streusel Crumble: A mix of butter, sugar, and flour baked to a crispy finish.
  • Caramel Drizzle: Adds a rich, sweet contrast to the spiced apples.
  • Whipped Cream: A light and creamy topping that pairs well with the warm cupcake base.

Serving Suggestions:

  • Pair with a scoop of vanilla ice cream for a classic dessert combination.
  • Garnish with a thin apple slice or sprinkle of cinnamon sugar for presentation.
  • Arrange on a dessert platter for a stunning party display.

Tips for Success

  • Choose the Right Apples: Opt for tart varieties like Granny Smith to balance the sweetness of the filling.
  • Don’t Overfill: Be cautious not to overfill the liners with batter to avoid spillage.
  • Cool Before Adding Toppings: Ensure cupcakes are fully cooled before adding whipped cream or frosting to prevent melting.

Variations and Creative Twists

Flavor Variations:

  • Add pecans or walnuts to the batter for a nutty crunch.
  • Mix a dash of ginger or cloves into the filling for extra spice.
  • Use a chocolate cupcake base for a unique flavor contrast.

Dietary Modifications:

  • Vegan apple pie cupcakes with plant-based butter and milk.
  • Low-sugar options by using natural sweeteners like maple syrup or stevia.

Frequently Asked Questions

1. Can I use store-bought apple pie filling?

Yes, it’s a great time-saver, though homemade filling offers fresher flavors.

2. How long can I store apple pie cupcakes?

Store in an airtight container for up to 3 days at room temperature or up to a week in the refrigerator.

3. Can I freeze apple pie cupcakes?

Yes, freeze them without the toppings for up to 2 months. Thaw and add fresh toppings before serving.

4. What’s the best way to prevent soggy cupcakes?

Let the apple filling cool completely before assembling, and avoid overloading the cupcakes with filling.


Internal Linking Opportunities


External Resources

  1. Anchor Text: “The Health Benefits of Apples”
    URL: https://www.healthline.com/
  2. Anchor Text: “Perfecting Cupcake Techniques”
    URL: https://www.kingarthurbaking.com/
  3. Anchor Text: “Creative Apple Dessert Ideas”
    URL: https://www.tasteofhome.com/

Conclusion

Apple Pie Cupcakes are a delightful fusion of two beloved desserts, bringing the cozy flavors of apple pie into a convenient, shareable form. Whether you’re baking for a special occasion or simply treating yourself, this recipe is sure to impress with its balance of warm spices, tender apples, and soft cupcake base.

Mini Strawberry Cheesecakes: Perfect Bite-Sized Desserts

strawberry cheesecake bites, individual cheesecakes, mini desserts, easy strawberry cheesecake recipe, no-bake mini cheesecakes, bite-sized cheesecakes

Mini Strawberry Cheesecakes: A Delightful Dessert for Every Occasion

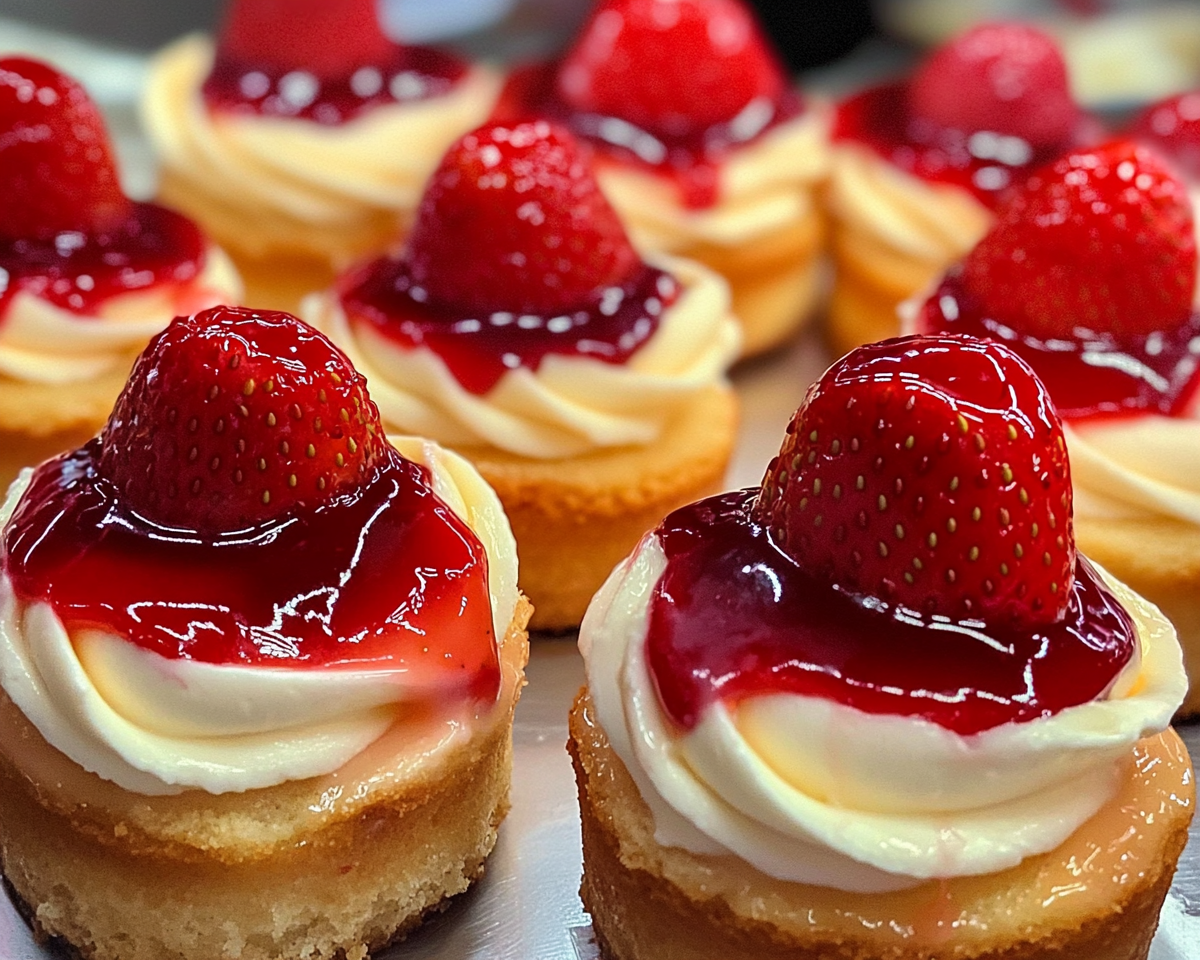
Mini Strawberry Cheesecakes are the perfect blend of elegance and convenience, making them ideal for family gatherings, parties, or even a personal treat. These individual-sized desserts not only offer a creamy, indulgent cheesecake experience but also feature the tangy sweetness of fresh strawberries. Whether you’re an expert baker or a novice in the kitchen, this simple recipe guarantees success every time.

For another easy and refreshing dessert, check out Homemade Pineapple Soft Serve Ice Cream, which pairs beautifully with fruity cheesecakes.


Why Mini Strawberry Cheesecakes Are Perfect for Any Occasion

Convenience and Elegance Combined

  • Individually portioned, making them easy to serve and enjoy.
  • Visually stunning with their vibrant strawberry topping.
  • A perfect blend of creamy filling, crumbly crust, and sweet fruit topping.

For more individual dessert ideas, explore Delightful Mini Pineapple Upside-Down Cakes.


Ingredients and Substitutions

Core Ingredients:

  • Graham Cracker Crust: Provides a buttery, crumbly base.
  • Cream Cheese Filling: Smooth and tangy, made with cream cheese, sugar, eggs, and vanilla.
  • Strawberry Topping: Fresh strawberries, enhanced with a glaze for shine and sweetness.

Substitutions and Variations:

  • Use almond or oat-based crust for a gluten-free option.
  • Substitute regular cream cheese with vegan cream cheese for a dairy-free version.
  • Top with strawberry preserves if fresh strawberries are unavailable.

Step-by-Step Instructions

Preparation:

  1. Make the Crust: Combine crushed graham crackers with melted butter and press into a muffin tin lined with paper liners.
  2. Prepare the Filling: Beat cream cheese, sugar, eggs, and vanilla extract until smooth.

Baking:

  1. Divide the filling evenly over the crusts in the muffin tin.
  2. Bake at 325°F for 18-22 minutes, or until the filling is set.

Adding the Topping:

  1. Cool the cheesecakes completely before adding the topping.
  2. Arrange sliced strawberries on top and brush with a light strawberry glaze.

For another indulgent treat, try Raspberry Cheesecake Brownie Bites for a chocolatey twist.


Tips for Perfect Mini Cheesecakes

  • Room Temperature Ingredients: Ensures a smooth and creamy filling.
  • Avoid Overbaking: Remove from the oven as soon as the center is set.
  • Use a Water Bath: To prevent cracks, place a water pan on the rack below the cheesecakes while baking.

Creative Variations and Pairings

Unique Twists:

  • Add lemon zest to the filling for a citrusy flavor.
  • Replace strawberries with mixed berries or a combination of raspberries and blueberries.
  • Swirl strawberry puree into the filling for a marbled effect.

Pairing Ideas:

  • Serve with whipped cream or a drizzle of chocolate sauce.
  • Pair with Kentucky Butter Cake for a rich dessert buffet.

Frequently Asked Questions

1. Can I make these ahead of time?

Yes, you can make them up to two days in advance. Store in the refrigerator and add the topping before serving.

2. Can I freeze mini strawberry cheesecakes?

Absolutely! Freeze them without the topping in an airtight container for up to three months.

3. Do I need a water bath for mini cheesecakes?

While not necessary, a water bath helps prevent cracks and keeps the filling moist.


Internal Linking Opportunities


External Resources

  1. Anchor Text: “Mastering Cheesecake Techniques”
    URL: https://www.kingarthurbaking.com/
  2. Anchor Text: “Health Benefits of Strawberries”
    URL: https://www.healthline.com/
  3. Anchor Text: “Perfecting Graham Cracker Crusts”
    URL: https://www.seriouseats.com/

Conclusion

Mini Strawberry Cheesecakes are an elegant and easy-to-make dessert that’s perfect for any occasion. Whether you’re hosting a party or looking for a simple treat, these cheesecakes deliver in both flavor and presentation. With their creamy filling, buttery crust, and fresh strawberry topping, they’re sure to be a hit with everyone.

Slow Cooker 3-Ingredient BBQ Pulled Pork: Easy and Delicious Comfort Food

BBQ pulled pork recipe, easy pulled pork, slow cooker pulled pork, 3-ingredient BBQ pork, crockpot BBQ pulled pork, shredded pork recipe

Slow Cooker 3-Ingredient BBQ Pulled Pork: A Simple and Delicious Recipe

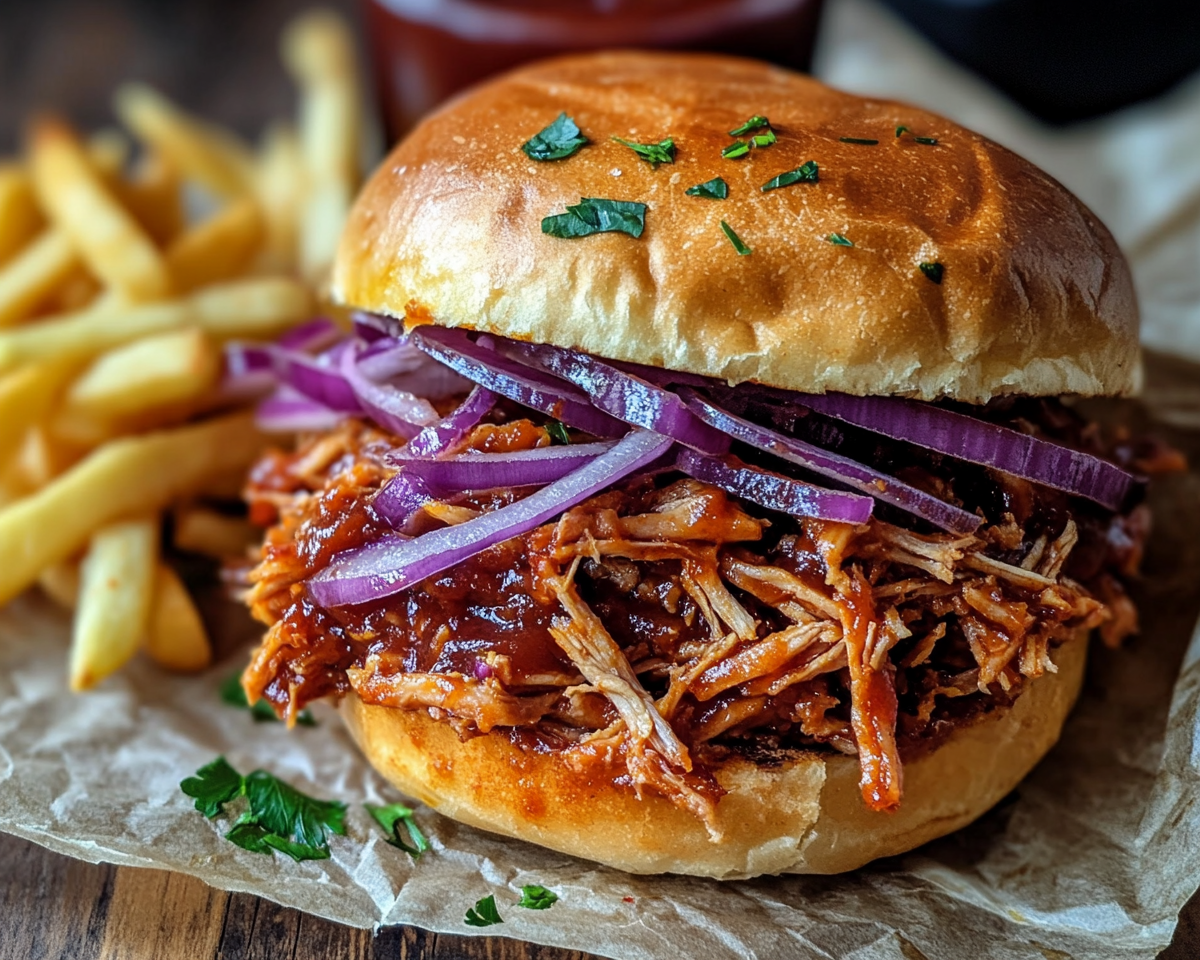
Slow Cooker 3-Ingredient BBQ Pulled Pork is the perfect combination of simplicity and flavor. With just three ingredients and minimal preparation, this dish offers tender, flavorful pork that is ideal for sandwiches, tacos, or even as a main course for family dinners. Whether you’re a beginner or an experienced cook, this recipe is sure to impress with its ease and versatility.

For another slow-cooked delight, explore Slow Cooker Chicken and Gravy Over Noodles, which pairs well with BBQ flavors for a complete comfort food meal.


Why This Recipe Stands Out

Minimal Ingredients, Maximum Flavor

  • Just three simple ingredients: pork shoulder, BBQ sauce, and soda (or an alternative).
  • The slow cooker does all the work, ensuring tender, juicy meat every time.
  • Perfect for meal prep, gatherings, or a lazy weekend dinner.

Pair this with The Ultimate Cheesy Bacon Jalapeño Corn Dip for a bold appetizer.


Ingredients and Substitutions

Core Ingredients:

  • Pork Shoulder: Ideal for its marbling, which ensures tenderness.
  • BBQ Sauce: Choose your favorite—sweet, smoky, or spicy.
  • Soda (Optional): Root beer, cola, or Dr Pepper for a sweet depth, or broth for a savory twist.

Substitution Ideas:

  • Apple juice or cider vinegar for a tangy flavor.
  • Low-sugar BBQ sauce for a healthier option.
  • Smoked paprika and garlic powder for additional spice.

For another creative slow-cooker recipe, try No Peek Beef Tips, which delivers hearty, comforting flavors.


Step-by-Step Recipe Instructions

Preparation:

  1. Trim the Pork: Remove excess fat for a leaner dish.
  2. Layer Ingredients: Place the pork in the slow cooker, pour BBQ sauce on top, and add your third ingredient.

Cooking:

  1. Low and Slow: Cook on low for 8 hours or high for 4–5 hours.
  2. Shred the Pork: Use forks to pull the meat apart easily.
  3. Combine: Mix the shredded pork with the cooking juices and additional BBQ sauce.

Pro Tips:

  • Avoid lifting the lid during cooking to maintain heat and moisture.
  • Let the pork rest for 10 minutes before shredding for optimal texture.

Serving Suggestions

Classic Pairings:

  • Serve on hamburger buns with a side of coleslaw.
  • Layer onto baked potatoes or nachos for a hearty twist.

Creative Ideas:

  • Use as a taco filling with fresh salsa and avocado.
  • Create BBQ pulled pork sliders with Hawaiian rolls.

For a sweet dessert pairing, check out Kentucky Butter Cake.


Tips for Success

  • Monitor Cooking Time: Overcooking can dry out the pork; check for doneness at the minimum cooking time.
  • Add Smoky Flavor: Use liquid smoke or smoked paprika for an authentic BBQ taste.
  • Balance Sweetness: If the sauce and soda are too sweet, mix in a splash of cider vinegar.

Variations to Explore

Healthier Options:

  • Substitute soda with broth or apple cider vinegar.
  • Use leaner cuts of pork, like tenderloin.

Regional Twists:

  • Carolina BBQ Style: Use a vinegar-based BBQ sauce.
  • Tex-Mex Fusion: Add chipotle peppers for a smoky, spicy flavor.

FAQs About Slow Cooker BBQ Pulled Pork

1. Can I use frozen pork?

Yes, but thaw the pork first to ensure even cooking.

2. What’s the best cut of pork for this recipe?

Pork shoulder or butt is recommended for its fat content and tenderness.

3. Can I make this in an Instant Pot?

Absolutely! Use the pressure cook setting for 60 minutes, then natural release.

4. How long does it last in the fridge?

Store in an airtight container for up to 4 days or freeze for up to 3 months.


Internal Linking Opportunities


External Resources

  1. Anchor Text: “Understanding BBQ Sauce Varieties”
    URL: https://www.bbq-brethren.com/
  2. Anchor Text: “Slow Cooker Tips for Beginners”
    URL: https://www.seriouseats.com/
  3. Anchor Text: “Health Benefits of Pork”
    URL: https://www.healthline.com/

Conclusion

Slow Cooker 3-Ingredient BBQ Pulled Pork is a simple, flavorful dish that delivers maximum satisfaction with minimal effort. Whether served at a family dinner or a casual gathering, this recipe is sure to impress. With endless variations and serving possibilities, it’s a must-try for any home cook.