Strawberry Shortbread Cookies: Buttery and Fruity Delight
Strawberry Shortbread Cookies: A Delightful Fusion of Butter and Berry
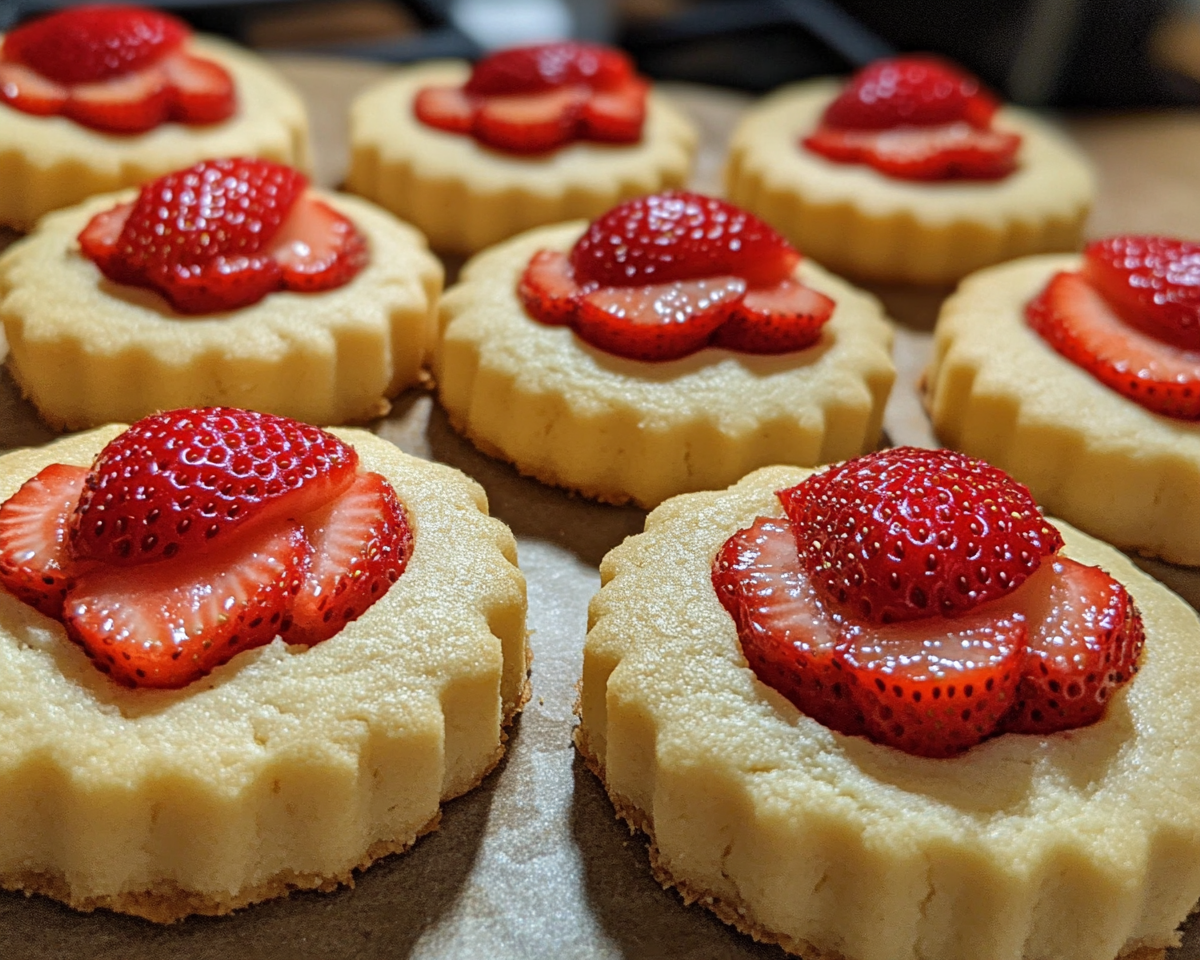
Transform your tea-time snacks or holiday desserts with these Strawberry Shortbread Cookies. Combining the buttery texture of classic shortbread with the sweetness of strawberries, these cookies are a treat for all occasions. For complementary recipes, consider Mini Pineapple Upside-Down Cakes or No-Bake Pumpkin Cheesecake.
Why Strawberry Shortbread Cookies Stand Out
Strawberry shortbread cookies are perfect for gifting, entertaining, or enjoying with your favorite hot beverage. The blend of tart strawberries with the richness of shortbread ensures a balance of flavors that will leave everyone asking for more. Discover other creative cookie recipes like Cinnamon Roll Cookies with Cream Cheese Drizzle.
Ingredients for Strawberry Shortbread Cookies
For the Cookie Base:
Unsalted butter (room temperature)
Powdered sugar
Vanilla extract
All-purpose flour
Salt (a pinch)
For the Strawberry Flavor:
Freeze-dried strawberries (finely ground)
Strawberry extract or jam for added flavor
Optional Add-Ins:
White chocolate chips
Lemon zest
Strawberry glaze for drizzling
Step-by-Step Recipe Guide
1. Prepare the Dough
Cream butter and powdered sugar until light and fluffy.
Add vanilla extract and slowly incorporate the ground strawberries and flour.
2. Chill the Dough
Roll the dough into logs or press into molds and refrigerate for at least 30 minutes.
3. Shape and Bake
Preheat the oven to 325°F (160°C).
Slice or cut the dough into shapes and bake for 10-12 minutes until the edges are slightly golden.
Tips for Perfect Strawberry Shortbread Cookies
Use freeze-dried strawberries for an intense flavor without extra moisture.
Chill the dough to ensure clean cuts and prevent spreading.
Add a drizzle of white chocolate or strawberry glaze for a touch of elegance.
Variations to Try
Chocolate-Dipped Cookies: Dip half the cookie in dark chocolate and sprinkle with freeze-dried strawberries.
Lemon-Strawberry Cookies: Add lemon zest to the dough for a tangy twist.
Vegan Option: Use vegan butter and plant-based milk for a dairy-free version.
Frequently Asked Questions
1. Can I use fresh strawberries instead of freeze-dried?
Freeze-dried strawberries are recommended for their intense flavor and lack of moisture, which can alter the cookie texture.
2. How should I store the cookies?
Store in an airtight container for up to a week or freeze the dough for later use.
3. What’s the best way to achieve an even strawberry flavor?
Grind freeze-dried strawberries into a fine powder and mix thoroughly with the dry ingredients.
These Strawberry Shortbread Cookies are a versatile and delicious addition to any baking repertoire. Whether you’re hosting a party, looking for unique holiday gifts, or simply satisfying a sweet craving, these cookies are sure to impress. Pair them with recipes like No-Bake Pumpkin Cheesecake or Cinnamon Roll Cookies with Cream Cheese Drizzle for a complete dessert table.
Deliciously Simple Pizza Burgers: A Fusion Favorite for Dinner
Pizza Burgers: A Flavorful Fusion of Comfort Foods
⚖️
Difficulty
Easy
⏲️
Prep Time
15 mins
🕒
Cook Time
10 mins
⏱️
Total Time
25 mins
🍽️
Servings
4
Pizza Burgers combine the best of two worlds, offering the familiar comforts of a classic burger with the delicious toppings of pizza. Whether you’re craving a juicy beef patty or the savory flavors of pepperoni and cheese, this recipe brings a unique twist to your meal. Imagine biting into a mouthwatering burger, then tasting the rich and tangy pizza sauce mingling with melted mozzarella, all nestled between a warm, toasted bun. These Pizza Burgers are perfect for a quick dinner or a fun gathering with friends.
Quick Recipe Highlights
Flavor Profile: Savory and rich combination of beef, tomato sauce, and melted cheese with classic pizza spices.
Texture: Juicy beef patties with oozy melted cheese and a crisp, toasted bun.
Aroma: Mouthwatering blend of grilled beef, spices, and fresh baked bread.
Visual Appeal: Vibrant layers of melted cheese, rich red sauce, and green herbs on a golden bun.
Skill Level Needed: Basic cooking skills required for assembling and grilling.
Special Equipment: Grill or stovetop pan, and a spatula.
Recipe Overview
Difficulty Level: This easy recipe requires straightforward steps suitable for beginners with minimal cooking skills.
Category: Perfect for casual meals, game days, or backyard barbecues.
Cuisine: A creative fusion that marries American burger culture with Italian pizza tradition.
Cost: Affordable ingredients, combining basic beef and common pizza toppings into a budget-friendly meal.
Season: Ideal year-round but particularly appealing in warmer months when grilling is in full swing.
Occasion: Suited for family dinners, casual get-togethers, and outdoor celebrations.
Why You’ll Love This Recipe
The taste of Pizza Burgers is truly unforgettable, thanks to the luscious combination of a seasoned beef patty and flavorful pizza toppings. The tenderness of the burger pairs perfectly with the gooey cheese and tangy sauce, offering a sensory delight with every bite. Convenience is key with this recipe, as it allows you to prep and cook a satisfying dish in under 30 minutes, ideal for those busy weeknights. Nutritionally, these burgers provide a balanced blend of protein and carbohydrates, ensuring you have the energy you need for the day.
Historical Background and Cultural Significance
The concept of merging foods, such as burgers and pizza, has roots in the innovation that defines American cuisine. Originally, the burger itself is believed to have evolved in the United States, becoming a staple of casual dining and fast food. Adding the elements of pizza into this traditional meal reflects an evolving culinary landscape that embraces fusion and experimentation.
Ingredient Deep Dive
For the main ingredient, ground beef forms the heart of the Pizza Burger. This ingredient’s history stretches back to the butchery and meat processing techniques that have been refined over centuries. Offering various cuts, ground beef can be selected based on fat content to match your taste preferences. Opt for leaner beef for a healthier option with less fat, or choose a blend for richer flavor and juiciness. Store beef well-wrapped in the refrigerator and cook it thoroughly to ensure safety.
Common Mistakes to Avoid
Overcooking the beef can lead to a dry burger, so monitor the cooking time carefully.
Using too much sauce might cause the buns to become soggy, diminishing the texture.
Skipping the bun toasting step can result in a lackluster presentation and taste.
Inefficiently melting the cheese might leave it insufficiently gooey and rich, so ensure proper heat levels.
Not allowing the cooked burgers to rest could release too much juice onto the plate. Resting allows flavors to set.
Adding toppings unevenly might lead to an imbalanced bite, so distribute them with care.
Choosing inappropriate bread can overpower or ruin the dish; opt for softer buns that complement rather than compete.
Avoid using too much spice which could overshadow the ideal pizza burger flavors.
Essential Techniques
Grilling the perfect burger is an art that involves monitoring temperature and time. Ensuring a hot grill helps create a flavorful sear on the patties, which locks in the juices and enhances the taste of the Pizza Burger. Flipping just once ensures the meat maintains its integrity and moisture. Grate cheese directly onto the burger while it’s still on the grill, allowing for natural melting through radiant heat.
Pro Tips for Perfect Pizza Burgers
Add a sprinkle of herbs, like oregano or basil, to the beef mixture for enhanced flavor. Toast the buns lightly on the grill to add texture and prevent sogginess. Use a mix of mozzarella and cheddar for a unique flare if desired. Incorporating sun-dried tomatoes can add an extra punch to the toppings. Try caramelizing onions for a sweet contrast. Ensure the grill pan is well-oiled to avoid sticking. Experiment with different sauces, like a spicy marinara, for a gourmet take.
Variations and Adaptations
Regional variations can include using spicy Italian sausage for a more authentic pizza flavor. For seasonal adaptations, add fresh tomato slices or basil leaves in the summer for a refreshing pop. Dietary modifications cater to gluten-free diets with the use of gluten-free buns, while vegetarian versions can be made using veggie patties and various cheese types.
Serving and Presentation Guide
Serve your Pizza Burgers on a wooden platter for a rustic feel, garnished with fresh basil leaves and grated Parmesan. Accompany them with crispy oven-baked fries. For a modern twist, cut the burgers into halves and secure them with a skewer for easy handling. Maintain the ideal serving temperature by wrapping in foil before serving.
Wine and Beverage Pairing
Pairing a Pizza Burger with a nice red wine, like Chianti, will highlight the rich, tannic flavors of the beef. Alternatively, a cold pilsner or lager complements the savory ingredients without overpowering them. For non-alcoholic options, consider a robust iced tea with lemon or a flavorful ginger ale for a touch of spice.
Storage and Shelf Life
Store any leftovers in an airtight container in the refrigerator for up to two days. When reheating, aim for low heat to preserve moisture, using either the oven or stovetop. Wrapped tightly, partially cooked patties can be frozen for up to three months, allowing for an easy make-ahead meal whenever you need.
Make Ahead Strategies
Plan to prepare the beef patties up to a day in advance, storing them in the refrigerator to enhance flavor marination. Keep toppings freshly prepared and separate until assembly to maintain optimal texture. For gatherings, consider setting up a toppings station where guests can customize their Pizza Burgers.
Scaling Instructions
Halve the recipe for a smaller group, keeping cooking times consistent but adjusting seasoning amounts accordingly. For a larger party, double or triple the ingredients, ensuring you have extra grilling space. Store additional patties between wax paper to prevent sticking and adjust pan size to accommodate more burgers.
Nutritional Deep Dive
Pizza Burgers offer a satisfying mix of macronutrients, providing protein, carbs, and fats essential for a well-balanced diet. Consider using whole-grain buns for added fiber and opting for low-fat cheese variants to reduce calorie content. Monitor portion sizes and serve with a side salad for a complete meal.
Dietary Adaptations
For gluten-free variations, substitute regular buns with gluten-free alternatives. Dairy-free options can use vegan cheese replacements, while vegetarian adaptations involve meat-free burger patties. Keto-friendly versions emphasize increased fats, using lettuce wraps instead of buns and adding avocado for healthy fats.
Troubleshooting Guide
If the burgers turn out too dry, consider using higher-fat beef or reducing cooking time. Achieving the perfect flavor balance might require tweaking the sauce quantity to complement the cheese and seasonings. Underheating the cheese could mean extended time on the grill with a lid to create an oven effect.
Recipe Success Stories
Many of our readers have successfully switched up the toppings, adding ingredients like jalapeños or bell peppers for an additional kick. Photos shared on our community page showcase the stunning presentation of perfectly executed Pizza Burgers, inspiring others to try their hand with positive outcomes.
Frequently Asked Questions
How can I prevent my burgers from drying out? Make sure not to overwork the meat and keep an eye on cooking time to avoid drying out the patties.
What’s the best way to melt the cheese? Placing the cheese on burgers in the last minute of grilling allows it to melt evenly.
Can I use other meats? Absolutely, ground turkey or chicken can offer lighter alternatives. Adjust seasonings to match the flavor profile.
What if my sauce is runny? Thicken it by simmering longer or incorporating a small amount of tomato paste.
Should I season the beef in advance? Yes, ideally give the spices time to blend with the meat, enhancing flavor penetrate.
How do I make sure the bun doesn’t get soggy? Lightly toast it ahead of time, which keeps firm structure even with juicy toppings.
What’s a good side dish? Classic choices like coleslaw or corn on the cob complement Pizza Burgers excellently.
Additional Resources
Explore our collection of burger recipes and guides on baking homemade buns for further culinary inspiration. Dive into our sauce-making articles to craft the perfect accompaniment and browse our seasonal ingredient lists to keep your meals fresh year-round.
Join the Conversation
We encourage you to share your own Pizza Burger creations by tagging us on social media. Check out reader reviews to see how others personalized their cooking adventures and gain valuable insights from like-minded cooking enthusiasts in our community.
The Recipe
Pizza Burgers
Serves: 4
Prep Time: 15 mins
Cook Time: 10 mins
Total Time: 25 mins
Kitchen Equipment Needed
Grill or stovetop pan
Spatula
Mixing bowl
Knife
Cutting board
Ingredients
1 lb ground beef
1 cup pizza sauce
4 slices mozzarella cheese
4 burger buns
1/2 cup sliced pepperoni
Salt and pepper to taste
1 tsp Italian seasoning
2 tbsp olive oil
Directions
Preheat the grill or stovetop pan over medium heat. Lightly oil the cooking surface.
In a mixing bowl, combine ground beef, Italian seasoning, salt, and pepper.
Shape the mixture into 4 equal-sized patties.
Place patties on the grill, cooking each side for about 4 minutes until fully cooked.
During the last minute, place a slice of mozzarella on each patty to melt.
While cooking, warm pizza sauce in a small saucepan.
Toast burger buns lightly on the grill to a golden brown.
Assemble the burgers by spreading pizza sauce on the buns, topping with burger patties, pepperoni slices, additional sauce, and then top buns.
Serve immediately, garnished with fresh basil if desired.
Recipe Notes
For a smokier flavor, consider using a grill over a stovetop pan.
Feel free to add additional toppings like olives or mushrooms to suit personal tastes.
Substitute mozzarella with provolone or cheddar for an alternative cheese experience.
Slow Cooker Grinch Hot Chocolate: A Festive Holiday Drink
Slow Cooker Grinch Hot Chocolate: A Festive Treat for the Holidays
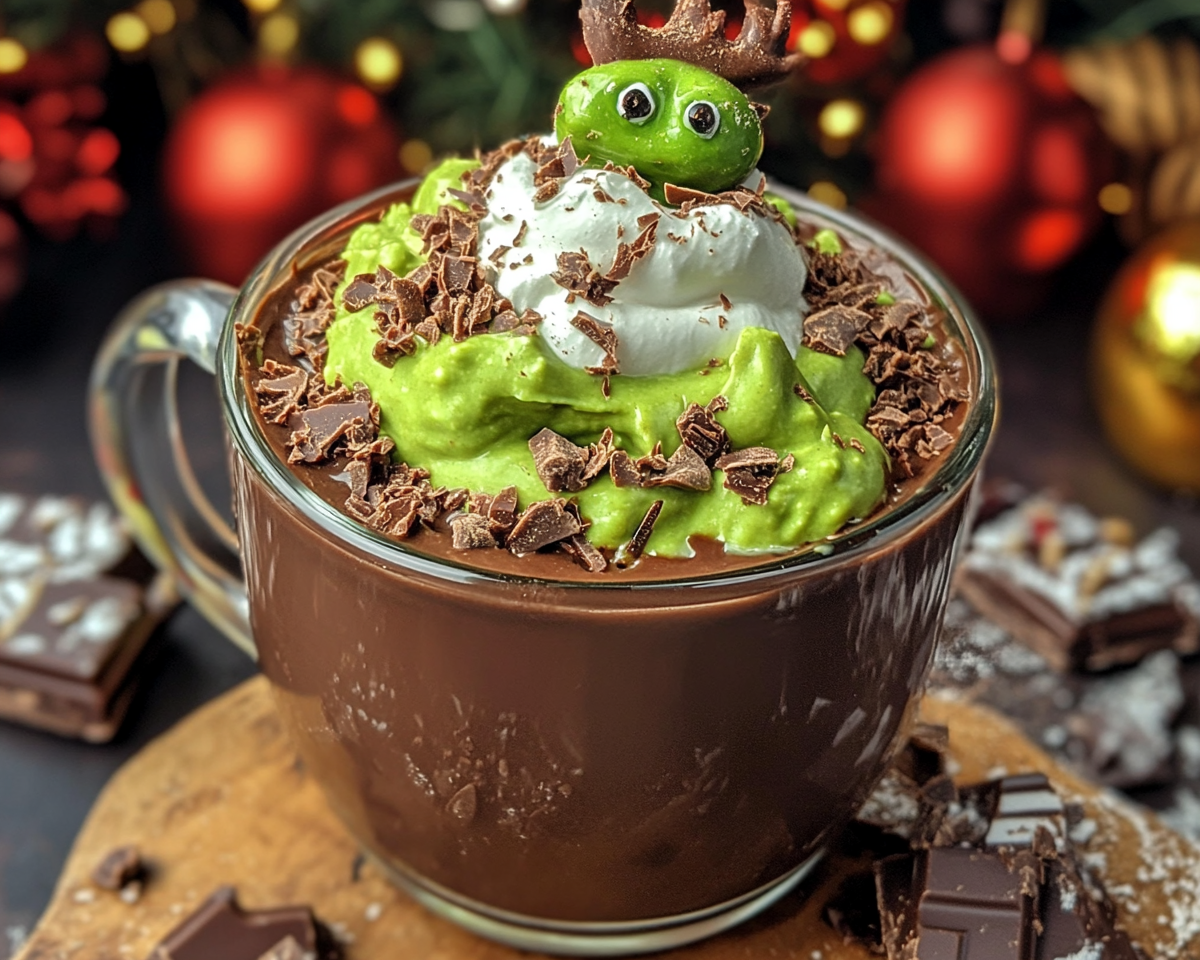
Creating a warm and whimsical Slow Cooker Grinch Hot Chocolate is a delightful way to spread holiday cheer. This festive green drink, inspired by the classic Grinch tale, is easy to prepare, kid-friendly, and perfect for holiday gatherings.
Why You’ll Love Grinch Hot Chocolate
This creamy and festive drink is a crowd-pleaser that requires minimal effort, thanks to the slow cooker. The cheerful green hue and fun toppings make it a great addition to any holiday spread.
Slow Cooker Grinch Hot Chocolate is the ultimate holiday drink, combining festive visuals with creamy, delicious flavor. Whether you’re hosting a party or enjoying a quiet family evening, this drink is sure to warm hearts and bring smiles. Pair it with Ultimate Buffalo Chicken Dip for a savory snack or Crispy Popcorn Shrimp for a light appetizer.
Irresistible White Chocolate Cranberry Pecan Clusters Perfect for Indulgence
White Chocolate Cranberry Pecan Clusters: A Sweet and Nutty Delight
⚖️
Difficulty
Easy
⏲️
Prep Time
10 mins
🕒
Cook Time
5 mins
⏱️
Total Time
15 mins
🍽️
Servings
12 clusters
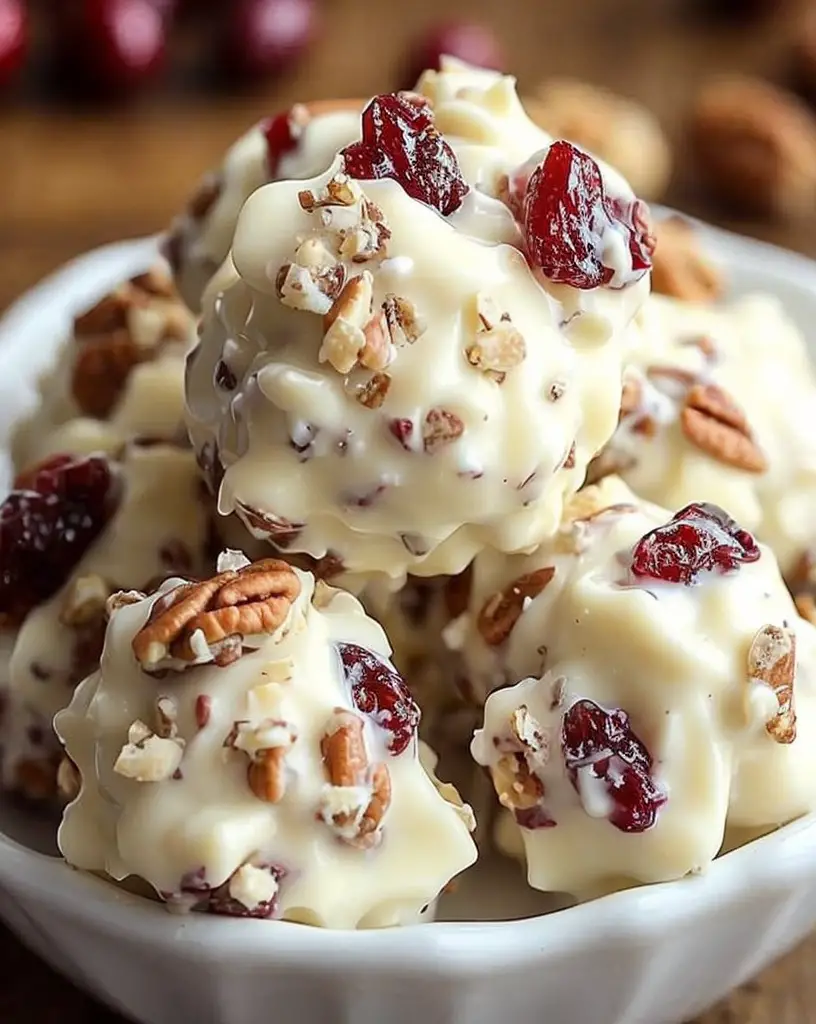
Imagine diving into a luscious blend of creamy white chocolate, tart cranberries, and crunchy pecans with every bite. Our White Chocolate Cranberry Pecan Clusters deliver a harmonious combination of flavors and textures that make them the perfect sweet indulgence. Whether you’re looking for a quick holiday treat or a simple way to satisfy your sweet tooth, these clusters are a must-try. Their delightful aroma and beautiful presentation make them an irresistible option for anyone seeking a flavorful and easy-to-make dessert.
Quick Recipe Highlights
Flavor Profile: A delightful balance of sweet white chocolate, tart cranberries, and rich, nutty pecans.
Texture: A satisfying crunch from the pecans combined with the creamy melt of white chocolate.
Aroma: The sweet fragrance of white chocolate paired with the subtle nuttiness of toasted pecans.
Visual Appeal: Charming clusters with a contrast of white chocolate and vibrant red cranberries, accented by golden pecans.
Skill Level Needed: Requires basic melting and mixing skills, perfect for beginners.
Special Equipment: A double boiler or microwave-safe bowl and a baking sheet for easy preparation.
Recipe Overview
Difficulty Level: This recipe is categorized as easy due to the simple techniques involved, ideal for novice bakers.
Category: Sweet treat, ideal for snacking or as a dessert course.
Cuisine: An American-inspired treat with a universal appeal, perfect for any cultural setting.
Cost: Affordable, with the main ingredients being accessible and economical.
Season: Best enjoyed during the fall and winter months when cranberries are at their peak, but delightful year-round.
Occasion: Perfect for holiday gatherings, parties, or as an indulgent afternoon snack.
Why You’ll Love This Recipe
Indulge in the delectable taste and texture of these White Chocolate Cranberry Pecan Clusters. The blend of creamy white chocolate with the sweet-tartness of dried cranberries and the rich crunch of pecans creates a mouthwatering symphony of flavors. The recipe’s simplicity makes preparation a breeze, allowing you to enjoy delicious clusters in just a matter of minutes. Packed with wholesome nuts and antioxidant-rich cranberries, these treats offer nutritional benefits alongside their indulgent taste. Easily impress guests with this sweet snack, perfect for entertaining at parties or bringing a touch of homemade charm to holiday festivities. The cost-effective ingredients make it accessible for all, ensuring that you can whip up a batch whenever the craving strikes.
Historical Background and Cultural Significance
White chocolate and nut-based treats have been cherished for centuries, with early versions emerging from confectionery traditions. These clusters marry the creamy sweetness of white chocolate, introduced in the 1930s, with cranberries and pecans, two ingredients native to North America that hold historical significance in traditional recipes. Over time, variations emerged across different regions, incorporating local nuts and dried fruits. Cranberries, often associated with festive American celebrations, add a cultural touch to these sweet treats. Today, the classic combination of white chocolate and cranberries remains a beloved choice for creating charming, shareable dessert clusters.
Ingredient Deep Dive
White Chocolate: A sweet confection developed in the 1930s, cherished for its creamy texture and mild flavor. Opt for high-quality white chocolate to ensure a smooth melt and rich taste. Store in a cool, dry place to prevent blooming.
Cranberries: A classic American fruit with holiday ties, known for their vibrant color and tangy taste. Packed with antioxidants, they offer health benefits while adding zest. Choose plump, premium dried cranberries for best results.
Pecans: A staple in Southern cuisine, providing a buttery crunch and healthy fats. Fresh pecans enhance the flavor and texture of the clusters. Store in an airtight container in the refrigerator to preserve freshness.
Common Mistakes to Avoid
Overheating white chocolate can cause it to seize. Melt gently over low heat or in short microwave bursts.
Using low-quality chocolate will impact flavor and texture. Choose a reputable brand.
Not mixing ingredients thoroughly can lead to uneven distribution. Stir until well combined.
Skipping parchment paper will cause clusters to stick. Always line your baking sheet.
Not toasting pecans can lead to a lackluster flavor. Give them a light toast for added depth.
Using unsweetened cranberries can result in overly tart clusters. Sweetened cranberries are ideal.
Chilling clusters for too long can make them difficult to remove. Check texture periodically.
Ignoring humidity will lead to chocolate bloom. Keep dry during preparation and storage.
Essential Techniques
Melting Chocolate: Ensure a smooth consistency by melting chocolate over a double boiler or in a microwave, stirring consistently to prevent burning or seizing.
Mixing Ingredients: Thoroughly mix cranberries and pecans into melted chocolate for an even and balanced distribution.
Cluster Formation: Use a spoon to scoop uniform-sized clusters onto parchment-lined baking sheets, ensuring they don’t merge during setting.
Pro Tips for Perfect White Chocolate Cranberry Pecan Clusters
To ensure your chocolate melts smoothly, use finely chopped pieces allowing for even heating. Enhance pecan flavor by toasting them lightly before folding them into the chocolate mix. Chill your mixing bowl and utensils beforehand to slow the chocolate’s solidification process. Add a pinch of sea salt to the clusters before setting for a delightful sweet-salty contrast. For a flavor twist, consider adding orange zest to the mix. Utilize an ice cream scoop for even cluster sizes, ensuring uniformity.
Variations and Adaptations
To cater to different dietary needs, substitute white chocolate with vegan alternatives for a dairy-free option. Incorporate regional nuts, like almonds, for a Mediterranean variation. Add a hint of spice with ground cinnamon or nutmeg for a festive twist. Introduce seeds like chia for added nutrition and a unique texture. Modify the level of sweetness with the addition of honey or maple syrup.
Serving and Presentation Guide
For an elegant presentation, arrange clusters in neat rows on a decorative platter. Garnish with shaved white chocolate for added finesse. Consider pairing with a creamy dessert wine or sparkling non-alcoholic drink for a sophisticated touch. Serve at room temperature for optimal texture and flavor release.
Wine and Beverage Pairing
Complement these clusters with a light, creamy dessert wine like a Moscato to enhance the sweetness. For non-alcoholic options, a sparkling apple cider or rich hot chocolate pairs beautifully. Adjust the drink temperature to match the room’s atmosphere, enhancing the overall dining experience.
Storage and Shelf Life
Store clusters in an airtight container at room temperature for up to two weeks. Avoid exposure to heat to prevent melting. If refrigerating, use wax paper between layers to maintain quality. Be on the lookout for chocolate bloom, which indicates moisture exposure.
Make Ahead Strategies
Prepare clusters in advance by completing the mixing and forming steps, storing them on a lined tray until needed. Right before serving, briefly chill in the refrigerator for a quick set. Refresh just-made look by drizzling extra melted white chocolate on top.
Scaling Instructions
For small gatherings, halve the recipe while maintaining the full flavor profile. Multiply ingredient quantities for larger events, using multiple trays. Adjust preparation time accordingly to accommodate increased quantities.
Nutritional Deep Dive
Each cluster provides a balanced intake of fats from nuts and antioxidants from cranberries. White chocolate’s sweet creaminess is balanced by pecans’ healthy fats, delivering an enjoyable yet nourishing treat. These clusters offer energy-boosting properties without overloading on refined sugars.
Dietary Adaptations
For gluten-free needs, ensure chocolate used is certified gluten-free. Adapt to a vegan lifestyle by opting for plant-based chocolate brands. For low-carb diets, consider reducing cranberries for less natural sugar.
Troubleshooting Guide
If clusters are overly runny, consider chilling the mix slightly before forming. Imbalanced flavors can be adjusted by varying cranberry and pecan ratios. Should chocolate seize, reheat slowly with a small amount of coconut oil to recover consistency.
Recipe Success Stories
Readers rave about their success with this straightforward recipe, experiencing varying outcomes by diversifying nut choices. Many share creative uses, from holiday gifts to birthday party treats. Engage with others through shared photos or personal twists on our community platform.
Frequently Asked Questions
Can I use milk or dark chocolate instead? Yes, feel free to substitute with your favorite chocolate variety for a different flavor profile.
How long should I chill the clusters? About 30 minutes in the refrigerator is ideal for setting.
What can I substitute for pecans? Walnuts or almonds are excellent alternatives, offering similar textures.
Is it possible to add more flavor? Add vanilla extract for a subtle enhancement.
Can these be frozen? Yes, store in an airtight container in the freezer for up to three months.
Are there any nut-free alternatives? Use sunflower seeds for a nut-free version.
Additional Resources
Explore related recipes featuring chocolate and nut combinations for more inspiration. Dive into technique guides focused on chocolate melting and mixing for perfect results. Discover equipment recommendations to streamline your recipe preparation.
Join the Conversation
Share your cluster creations on social media using #WhiteChocolateClusters, and be sure to tag us for a feature. Exchange tips and variations with our growing community, or leave a detailed review of your experience. Your feedback enriches our recipe library and inspires fellow enthusiasts.
The Recipe
White Chocolate Cranberry Pecan Clusters
Serves: 12 clusters
Prep Time: 10 mins
Cook Time: 5 mins
Total Time: 15 mins
Kitchen Equipment Needed
Microwave-safe bowl or double boiler
Baking sheet
Parchment paper
Mixing spoon
Ingredients
1 cup white chocolate chips
1/2 cup dried cranberries
1/2 cup pecan halves, toasted
Directions
Line a baking sheet with parchment paper.
Melt the white chocolate chips using a microwave or double boiler, stirring until smooth.
Fold in the cranberries and toasted pecans until evenly coated.
Drop spoonfuls of the mixture onto the prepared baking sheet, forming clusters.
Allow clusters to sit at room temperature or refrigerate until set.
Once set, store in an airtight container.
Recipe Notes
Toasting pecans enhances flavor but is optional.
Experiment with other dried fruits and nuts for variety.
Add a sprinkle of sea salt for a savory twist.
Chocolate Chip Cheesecake Cookies: A Sweet Fusion of Flavors
Chocolate Chip Cheesecake Cookies: A Perfect Fusion of Flavors
Chocolate Chip Cheesecake Cookies combine the rich creaminess of cheesecake with the comforting sweetness of classic chocolate chip cookies. This delightful hybrid is perfect for every occasion, from casual treats to festive gatherings.
Why Chocolate Chip Cheesecake Cookies Are a Must-Try
These cookies are a delicious twist on two beloved desserts. The creamy cheesecake layer enhances the chewy cookie texture, creating a one-of-a-kind treat that appeals to all ages.
Chocolate Chip Cheesecake Cookies are the ultimate dessert fusion, combining the best of two worlds. They’re perfect for parties, gifting, or just indulging in something special. For more sweet recipes, check out Mini Pineapple Coconut Cheesecakes or Ultimate Fudgy Brownies.