Embarking on the journey to create the perfect homemade treat often leads us down a path of culinary discovery, where the joy of baking melds with the nostalgia of beloved flavors. Among the myriad of sweet confections that have captured our hearts and palates, the humble donut and the iconic Oreo cookie stand out as quintessential comfort foods. Imagine, then, the delightful fusion of these two—resulting in Homemade Oreo Donuts, a confection that promises to enchant with its blend of soft, fluffy texture and the unmistakable allure of Oreos.
The Allure of Homemade Oreo Donuts
Homemade Oreo Donuts are not just a treat; they are a celebration of flavors and textures that resonate deeply with our collective love for something uniquely comforting yet excitingly innovative. This recipe brings together the classic, tender crumb of a baked donut with the crunchy, chocolatey goodness of Oreo cookies, culminating in a dessert that is both familiar and novel.
Crafting the Perfect Oreo Donut
The journey to crafting the perfect Oreo Donut begins with understanding the components that make up this delightful treat. The base of our creation is a soft, cocoa-enriched donut, light and airy, providing the perfect canvas for the rich flavors that follow. Into this batter, we introduce finely crushed Oreos, their cookies lending depth and texture, their cream filling melting into the mix, imparting a creamy sweetness that is subtly sophisticated.
The Donut Batter: A Balancing Act
Creating the donut batter is a study in balance. Starting with all-purpose flour, we add cocoa powder to introduce a chocolatey base that complements the Oreo pieces. The inclusion of both baking powder and baking soda ensures a rise that is both quick and sustained, giving the donuts their characteristic lightness. Buttermilk is the secret to a tender crumb, reacting with the leavening agents to produce a donut that is soft and moist. The addition of melted butter, eggs, and vanilla extract rounds out the flavors, creating a batter that is rich yet not overpowering, allowing the Oreo pieces to shine through.
The Art of Baking
Baking these donuts, as opposed to frying, is a choice that reflects a modern preference for lighter, less greasy treats. The process is simple, requiring a donut pan and an oven preheated to the perfect temperature. The batter is piped into the pan, a method that ensures uniformity and ease. As they bake, the donuts rise and set into soft, cake-like rings, their aroma filling the kitchen with promises of chocolatey goodness.
The Oreo Glaze: Crowning Glory
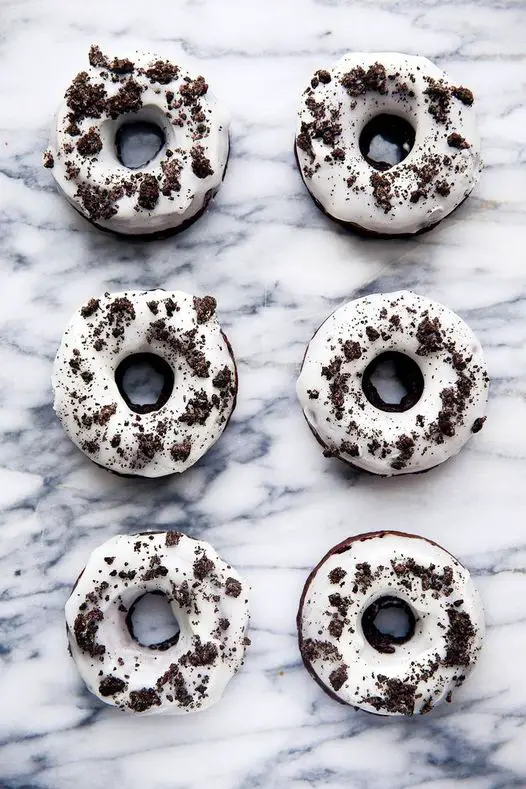
No Oreo Donut would be complete without its crowning glory—the Oreo glaze. This glaze is a confectioner’s dream, smooth and luscious, with finely crushed Oreos mixed in for texture and taste. Dipping the cooled donuts into this glaze is a moment of pure satisfaction, as each piece emerges coated in a layer of creamy frosting, speckled with bits of Oreo cookie.
Toppings and Variations
While the Oreo glaze is a marvel in its own right, the addition of whole or crushed Oreos as a topping adds an element of visual appeal and textural contrast. This final touch not only enhances the flavor profile but also elevates the presentation, making each donut a miniature masterpiece.
Serving and Enjoyment
Serving these Homemade Oreo Donuts is an occasion in itself. Whether arranged on a platter for a brunch gathering, set out as a treat for a special breakfast, or simply enjoyed as a snack, these donuts are sure to bring smiles and satisfaction. Paired with a cup of coffee, a glass of milk, or even a scoop of ice cream, they offer a versatile and delightful experience.
The Joy of Sharing
Perhaps the greatest joy of these Homemade Oreo Donuts lies in the act of sharing them. Food, after all, is not just about nourishment but about the moments we create around it—the conversations started, the memories made, the connections strengthened. In sharing these donuts, we share a part of ourselves, our time, our creativity, and our love for the simple pleasures that make life sweet.
FAQS
Can I use store-bought donut batter as a base for these Oreo donuts?
Yes, you can use store-bought donut batter as a convenient base for making Oreo donuts. Just follow the instructions on the package and incorporate crushed Oreos into the batter to achieve the desired flavor. Keep in mind that homemade batter might offer more flexibility in adjusting the sweetness and chocolate intensity to complement the Oreos.
How do I ensure my donuts are fluffy and not dense?
To ensure your donuts are fluffy, avoid overmixing the batter. Overmixing can develop the gluten in the flour, leading to dense donuts. Mix the wet and dry ingredients until just combined. Also, make sure your baking powder and baking soda are fresh, as they are responsible for the rise.
Can I make these donuts without a donut pan?
If you don’t have a donut pan, you can still make these Oreo donuts using a muffin tin. To create a donut shape, place a small ball of aluminum foil or a small, oven-safe object in the center of each muffin cup and drape the batter around it. Alternatively, you can simply make Oreo muffins with the same batter, adjusting the baking time as needed.
How long do these donuts last, and how should I store them?
Homemade Oreo Donuts are best enjoyed fresh, ideally within 24 hours of baking. If you have leftovers, store them in an airtight container at room temperature for up to 2 days. For longer storage, refrigerate them for up to 5 days, though the texture might change slightly. Avoid storing them in direct sunlight or near heat sources to prevent the glaze from melting.
Can I freeze Oreo donuts?
Yes, you can freeze Oreo donuts without the glaze for up to 2 months. Wrap each donut individually in plastic wrap and place them in a freezer-safe bag or container. Thaw overnight at room temperature and add the glaze before serving to enjoy them as if they were fresh.
Is there a gluten-free version of this recipe?
To make gluten-free Oreo donuts, substitute the all-purpose flour with a gluten-free flour blend designed for baking. Ensure that the blend includes xanthan gum if your flour blend doesn’t already contain it. Also, use gluten-free Oreos or a similar gluten-free chocolate sandwich cookie to ensure the entire recipe is safe for those with gluten sensitivities.
Can I make the batter ahead of time?
While it’s best to bake the donuts soon after mixing the batter for the best texture and rise, you can prepare the batter up to an hour in advance. Keep it covered in the refrigerator to prevent it from drying out. Let it come to room temperature for about 15 minutes before piping it into the donut pan and baking.
Conclusion
In the end, the creation of Homemade Oreo Donuts transcends the mere act of baking. It is a journey through flavors and memories, a celebration of the joy of eating, and an homage to the ingredients that have shaped our culinary landscape. These donuts are not just a treat; they are a testament to the power of food to bring us together, to inspire joy, and to create moments of sweetness in our lives. So, the next time you’re in the kitchen, consider making these Oreo Donuts—not just for the delicious results but for the experiences and connections they foster.
Print
Homemade Oreo Donuts
Description
Homemade Oreo Donuts are a delightful treat that combines the classic flavors of everyone’s favorite chocolate sandwich cookie with the soft, fluffy texture of donuts. These donuts are perfect for anyone looking to bring a twist to the traditional donut by incorporating the unmistakable taste of Oreos into both the batter and the frosting. Here’s how you can make them at home:
Ingredients
For the Donuts:
-
1 ¼ cups all-purpose flour
½ cup sugar
-
¼ cup cocoa powder
-
1 teaspoon baking powder
½ teaspoon baking soda
-
¼ teaspoon salt
-
½ cup buttermilk
1 large egg
-
2 tablespoons unsalted butter, melted
-
1 teaspoon vanilla extract
6 Oreo cookies, finely crushed
For the Oreo Glaze:
-
1 ½ cups powdered sugar
-
3-4 tablespoons milk
½ teaspoon vanilla extract
-
4 Oreo cookies, finely crushed (for the glaze)
-
Whole or crushed Oreos, for topping
Instructions
Making the Donuts:
Preheat your oven to 350°F (175°C). Grease a donut pan well to ensure the donuts do not stick.
Combine Dry Ingredients: In a large mixing bowl, sift together the all-purpose flour, sugar, cocoa powder, baking powder, baking soda, and salt. Add the finely crushed Oreo cookies into the dry mixture and stir to combine.
Mix Wet Ingredients: In a separate bowl, whisk together the buttermilk, egg, melted butter, and vanilla extract until well combined.
Combine Wet and Dry Ingredients: Pour the wet ingredients into the dry ingredients, stirring just until combined. Be careful not to overmix, as this can make the donuts tough.
Fill the Donut Pan: Spoon the batter into a piping bag or a ziplock bag with the corner snipped off. Pipe the batter into the prepared donut pan, filling each donut well about ¾ full.
Bake: Place the donut pan in the preheated oven and bake for 10-12 minutes, or until a toothpick inserted into a donut comes out clean. Remove the donuts from the oven and allow them to cool in the pan for a few minutes before transferring them to a wire rack to cool completely.
Preparing the Oreo Glaze:
Mix Ingredients: In a medium bowl, combine the powdered sugar, milk, and vanilla extract. Whisk until smooth. Adjust the consistency by adding more milk or powdered sugar as needed. The glaze should be thick but pourable.
Add Crushed Oreos: Stir in the finely crushed Oreo cookies into the glaze.
Glazing the Donuts:
Dip the Donuts: Once the donuts are completely cooled, dip the top of each donut into the Oreo glaze. Twist the donut slightly as you pull it out to ensure an even coating.
Add Toppings: After dipping, place the glazed donuts on a wire rack and sprinkle with additional crushed Oreos or top with whole Oreos, depending on your preference.
Let Set: Allow the glaze to set for a few minutes before serving.
Notes
Serving and Storage:
Serve these Homemade Oreo Donuts fresh for the best taste and texture. They’re perfect for breakfast, brunch, or as a sweet snack any time of the day. If you have leftovers, store them in an airtight container at room temperature for up to 2 days. For longer storage, you can refrigerate them for up to a week, though the texture is best when fresh.
Enjoy the delicious combination of soft, fluffy donuts with the rich, chocolatey flavor of Oreos in every bite. These donuts are sure to be a hit with both kids and adults alike, perfect for special occasions or as a treat to brighten any day.
