Crock Pot Beef Stew Recipe: The Ultimate Comfort Food Made Easy
Crock Pot Beef Stew Recipe: The Ultimate Comfort Food
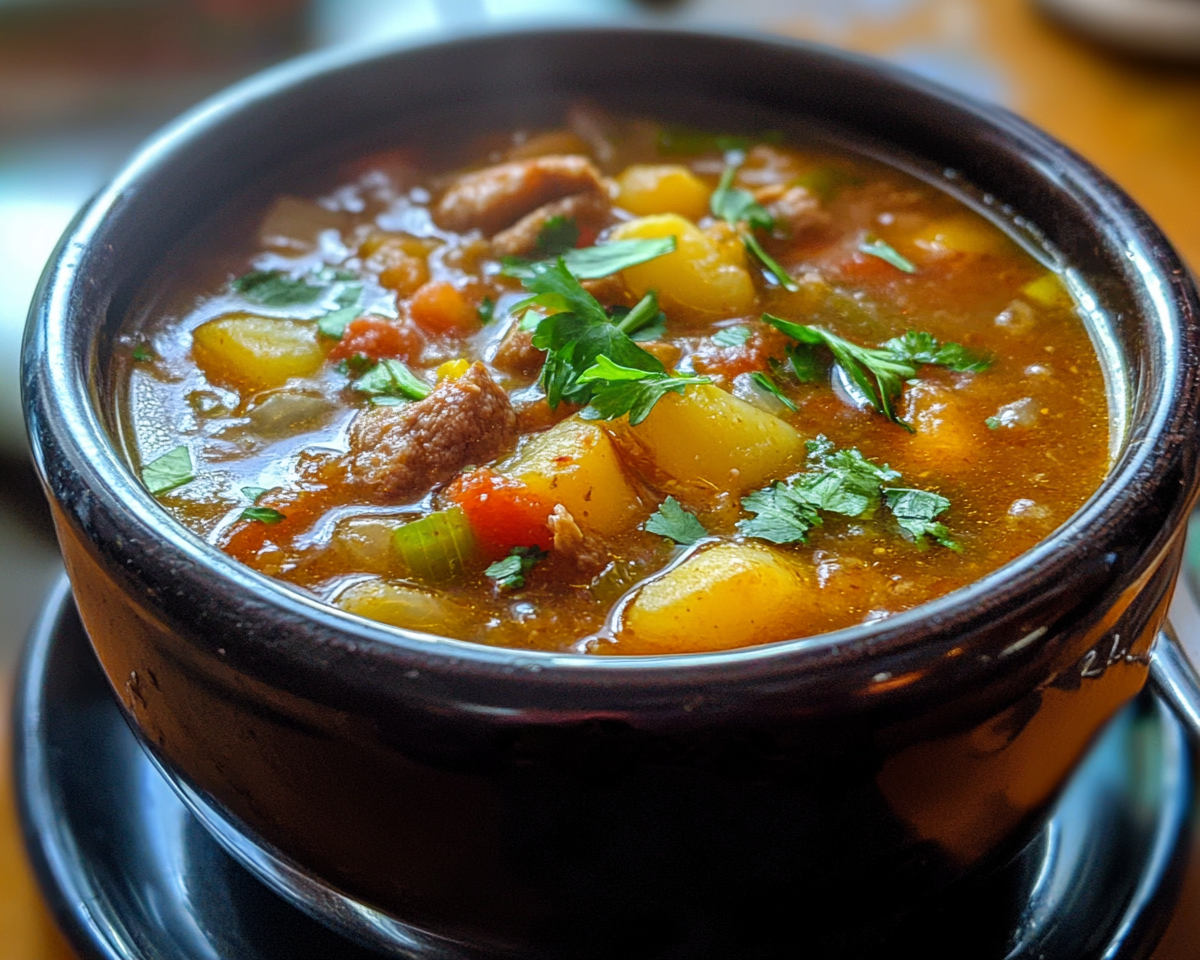
When it comes to hearty meals that warm both the heart and soul, Crock Pot Beef Stew is at the top of the list. This timeless dish combines tender chunks of beef, flavorful vegetables, and a rich broth, all slow-cooked to perfection. Whether you’re preparing a family dinner or looking for a dish to serve at a cozy gathering, beef stew never fails to impress. In this comprehensive guide, you’ll learn how to make a delicious crock pot beef stew, explore variations, and discover essential tips to elevate this classic comfort food.
What is Crock Pot Beef Stew?
Crock Pot Beef Stew is a slow-cooked meal that typically features tender beef, carrots, potatoes, and onions simmered in a savory broth. The magic of the crock pot lies in its ability to meld flavors together over several hours, creating a dish that’s both easy to prepare and irresistibly flavorful.
Why You’ll Love This Recipe
Convenient Preparation: Assemble the ingredients and let the crock pot work its magic.
Budget-Friendly: Uses affordable cuts of beef and everyday vegetables.
Family-Approved: A favorite among kids and adults alike.
Key Ingredients and Their Role
Beef
Choose a well-marbled cut like chuck roast or brisket for tender, juicy results.
Vegetables
Potatoes: Russets or Yukon Golds add heartiness.
Carrots: Bring sweetness and balance.
Onions and Celery: Provide depth of flavor.
Broth and Seasonings
Beef broth forms the base of the stew, while seasonings like garlic, thyme, and bay leaves enhance its aroma and taste.
Step-by-Step Instructions
1. Prep Ingredients
Cut beef into bite-sized chunks and season generously with salt and pepper.
Dice vegetables into even pieces for uniform cooking.
2. Brown the Beef
Sear the beef in a hot skillet to develop a rich, caramelized flavor. This step, though optional, elevates the stew’s taste.
3. Assemble in the Crock Pot
Layer the vegetables at the bottom, followed by the seared beef. Pour in broth and add seasonings.
4. Slow Cook
Cook on low for 7-8 hours or on high for 4-5 hours. The long, slow process tenderizes the beef and melds the flavors together.
5. Thicken the Broth (Optional)
To achieve a thicker stew, mix a slurry of cornstarch and water, then stir it into the stew during the last 30 minutes of cooking.
Pro Tips for the Best Crock Pot Beef Stew
Choose the Right Cut: Opt for tougher cuts like chuck roast that become tender when slow-cooked.
Avoid Mushy Vegetables: Add softer vegetables like peas in the last hour of cooking.
Layer Strategically: Place denser vegetables like potatoes and carrots at the bottom for even cooking.
Creative Variations
1. Low-Carb Option
Replace potatoes with turnips or cauliflower for a keto-friendly version.
2. Vegan Stew
Swap beef with hearty vegetables like mushrooms and lentils, and use vegetable broth.
3. Italian-Style Stew
Add crushed tomatoes, rosemary, and a splash of red wine for a Mediterranean twist.
Serving Suggestions
Pair with crusty bread or buttery rolls.
Serve over mashed potatoes or rice for a heartier meal.
Garnish with fresh parsley for a pop of color.
Storing and Reheating
Refrigeration: Store in an airtight container for up to 4 days.
Freezing: Freeze in individual portions for up to 3 months.
Reheating: Warm on the stove or in the microwave, adding a splash of broth if needed.
FAQs About Crock Pot Beef Stew
Why Does My Stew Taste Bland?
Ensure you season each layer and use a quality beef broth for depth of flavor.
Can I Make It Ahead?
Yes! Crock Pot Beef Stew tastes even better the next day as the flavors meld together.
How Do I Fix an Overly Salty Stew?
Add a peeled potato to absorb excess salt or dilute with additional broth.
Crock Pot Beef Stew is more than just a recipe—it’s a meal that brings warmth and comfort to the table. With its rich flavors, customizable options, and ease of preparation, this dish is perfect for any occasion. Follow this guide to master the art of beef stew and create a dish that will be loved by all.
Delicious Cornbread Casserole Recipe: A Perfect Comfort Food Delight
Delicious Cornbread Casserole Recipe: A Southern Staple
⚖️
Difficulty
Easy
⏲️
Prep Time
15 mins
🕒
Cook Time
45 mins
⏱️
Total Time
60 mins
🍽️
Servings
8
Whatever the occasion, this cornbread casserole recipe is the perfect comfort food that will leave everyone asking for seconds. This traditional Southern dish combines the delightful sweetness of corn with the savory richness of butter and cheese, creating a lip-smacking harmony of flavors. Whether served as a side dish during family gatherings or as the star at your potluck party, this casserole brings a cozy and nostalgic touch to any meal.
The cornbread casserole ticks all the right boxes when it comes to texture and taste. Its golden-brown crust gives way to a moist and tender interior packed with juicy kernels of corn. The balanced combination of sweet and savory notes makes it a versatile dish that pairs beautifully with a variety of main courses. So, gather your ingredients and discover the magic of homemade cornbread casserole—a real crowd-pleaser!
Quick Recipe Highlights
Flavor Profile: This dish offers a delightful blend of sweet corn and savory cheese melded perfectly with a hint of buttery richness.
Texture: Expect a moist and soft interior contrasted with a slightly crispy, golden crust.
Aroma: The enticing aroma of freshly baked cornbread mingling with melted cheese will fill your kitchen with warmth.
Visual Appeal: Its golden exterior tantalizes the eyes, while the colorful flecks of corn kernels provide a pleasing visual contrast.
Skill Level Needed: Suitable for beginners due to the straightforward mixing and baking steps.
Special Equipment: Requires a baking dish for perfect results.
Recipe Overview
Difficulty Level: This recipe falls in the easy category, as it involves simple steps and readily available ingredients. Ideal for novice cooks and those short on time, its success hinges on proper mixing and oven management.
Category: A versatile side dish that complements both casual and formal meals, ideal for lunch and dinner settings.
Cuisine: Rooted in Southern cuisine, this dish showcases the region’s love for corn-based recipes and comfort food dining.
Cost: With economical ingredients like cornmeal and cheese, the overall cost remains reasonable, perfect for budget-friendly meal planning.
Season: Best enjoyed in cooler months, its comforting warmth is also ideal during festive seasons.
Occasion: A staple for Thanksgiving and potlucks, yet simple enough for everyday family meals.
Why You’ll Love This Recipe
This cornbread casserole offers a sensory delight with its rich flavor profile and luscious texture, making every bite a pleasure. Its marriage of sweet corn and savory elements is perfect for those seeking a comforting dish that satisfies all taste buds.
Beyond its incredible taste, this casserole is remarkably convenient to prepare. With no elaborate steps or techniques, even kitchen novices will find success. Its ingredients are likely staples in your pantry, streamlining the process further.
A feast for the eyes as well as the stomach, the casserole incorporates nutrient-rich corn, offering vitamins and fiber while maintaining a balance of flavors that won’t overwhelm your nutritional goals.
The dish’s social versatility is unmatched—whether you’re hosting a dinner party or enjoying a family dinner on a busy weeknight, it fits effortlessly into any menu plan, enhancing the meal’s overall enjoyment.
The cost-effectiveness of cornbread casserole ensures it is accessible for everyone. Using staple ingredients and requiring minimal special tools, it’s a practical choice for home cooks looking to create a satisfying meal without breaking the bank.
Historical Background and Cultural Significance
Cornbread, a staple of Southern American cuisine, has roots that trace back to Indigenous peoples who utilized maize as a fundamental part of their diet. The fusion of corn in bread form became popularized by the settlers who adapted local culinary techniques into their recipes.
Over the years, cornbread evolved into a beloved side dish across America, gaining prominence in Southern households where it was often paired with rich stews and meats. This cultural exchange laid the groundwork for modern cornbread casserole recipes that harness the key ingredients of that era.
Cornbread casserole, as we know it today, serves as a testament to years of culinary evolution, incorporating modern ingredients like cheese and sour cream for added richness and flavor complexity. This evolution highlights the adaptability and enduring appeal of the dish.
Regional variations exist, showcasing the flexibility of cornbread casserole to embrace local flavors and preferences. From incorporating jalapeños in the Southwest to sweet renditions with honey and maple syrup in the North, cornbread casserole reflects a wide culinary tapestry.
Ingredient Deep Dive
Cornmeal, a fundamental ingredient, bears historical significance as a staple grain among Native American tribes. Its fine texture and subtle sweetness form the foundation of various baked goods, notably cornbread. Nutritionally, cornmeal offers dietary fiber, vitamins, and essential minerals, contributing to daily nutrient intake.
In terms of selection, opt for yellow cornmeal when seeking that classic cornbread hue. Store cornmeal in an airtight container in a cool, dry place to prevent moisture and bugs. If needed, polenta can be substituted, although its coarser texture may alter the final product’s consistency.
Cheese, particularly cheddar, lends savory depth and richness to the casserole. Originating from English cheese-making traditions, cheddar is now globally cherished for its robust flavor profile. Besides its flavor appeal, cheese adds calcium and protein, beneficial for bone health.
Select mature cheddar for a more pronounced taste, ensuring freshness by storing it in airtight wrapping within the fridge. Should you desire a different flavor profile, consider substituting with gouda or mozzarella, which melt well and bring their unique flavors to the dish.
Common Mistakes to Avoid
Over-mixing the batter: This can lead to tough, dense cornbread. Mix just until combined to preserve lightness.
Baking at the wrong temperature: Ensuring your oven is preheated accurately is key to achieving the correct texture.
Using outdated cornmeal: Rancid cornmeal can alter flavor, so always check expiration dates before use.
Neglecting to grease the baking dish: This step prevents sticking and maintains the casserole’s aesthetic appeal.
Ignoring ingredient temperatures: Ensure dairy products are room temperature for easier blending and results.
Substituting ingredients haphazardly: Each component contributes to the final taste and texture—adjust with caution.
Skipping rest time: Allow the casserole to cool slightly post-baking for easier slicing and serving.
Underseasoning: Season effectively, especially when using cheese, to enhance the overall flavor profile.
Essential Techniques
Mastering the art of creating a tender cornbread mixture is crucial for success. Combine dry and wet ingredients separately before gently folding them together. This prevents overworking the batter, ensuring the baked result is light and fluffy.
When baking, place the dish in the center rack for even cooking. This position allows consistent heat distribution, crucial for achieving both a golden-brown crust and moist interior. Keep a watchful eye towards the end of the baking time to prevent overbaking.
Thoroughly greasing your baking dish is a simple yet essential step. It facilitates easy removal of servings and maintains the casserole’s structural integrity. Use butter or a non-stick spray generously along the sides and base of the dish.
Employing the right cheese melting technique can elevate the dish. Shred cheese finely to encourage even distribution throughout the casserole, maximizing its creamy flavor. Avoid pre-shredded variations with anti-caking agents that hinder melting.
Pro Tips for Perfect Cornbread Casserole
Add a touch of sweetness by incorporating a tablespoon of honey or maple syrup. This enhances the sweet corn flavor without overpowering the savory elements, creating a well-rounded taste.
For a spicier kick, dice a jalapeño or add a pinch of cayenne to the batter. This culinary twist complements the casserole’s flavors while adding a southwestern flair.
Achieve fluffier results by ensuring all ingredients are at room temperature before mixing. This promotes a more even batter consistency and aids in cooking evenly throughout.
Add crunch by sprinkling a layer of crushed crackers or breadcrumbs on top before baking. This creates a delightful textural contrast to the soft interior of the casserole.
For an even cheese distribution, mix some cheese into the batter rather than layering it all on top. This ensures every bite is packed with creamy flavor, not just the top crust.
Enhance flavor depth by using an oven-to-table baking dish. The retained heat keeps the casserole warmer longer, allowing flavors to meld more harmoniously over time.
Variations and Adaptations
Incorporate regional flair by adding a handful of diced bell peppers and onions for a Creole-inspired twist. This lends vibrant color and additional sweetness to the dish.
With seasonal produce in mind, substitute fresh corn kernels during summer months for canned or frozen options in winter. This offers a taste of summer’s bounty while maintaining casserole consistency.
For dietary modifications, replace regular cheese with a dairy-free alternative to accommodate lactose-intolerant guests. Choose a flavor-rich vegan cheese to maintain the savory essence without compromising on dietary needs.
Infuse Mexican influences by adding a layer of refried beans and salsa for a layered casserole bursting with flavors. The added layers introduce a spicy and tangy edge to the traditional dish.
For texture transformation, blend half of the corn into the batter for a smoother consistency. This creates a uniform cornbread texture while retaining corn’s inherent sweetness.
Enhance presentation by baking the casserole in individual ramekins. Personal portions elevate the dining experience and embody modern presentation standards.
Serving and Presentation Guide
Carefully slice the casserole into squares, ensuring each piece maintains its integrity. Use a spatula for easier transfer from dish to plate, avoiding breaks in the delicate structure.
Top with freshly chopped parsley or cilantro for a burst of color. These herbs introduce both visual beauty and a fresh contrast to the casserole’s warm, rich flavors.
Traditional accompaniments include barbecued meats or smoky grilled vegetables, balancing the cornbread’s sweetness with robust savory elements.
Consider a modern twist by serving alongside a crisp green salad with a tangy vinaigrette dressing. This offers a refreshing counterpart to the dish’s rich texture and buttery flavor.
Ensure serving at a mildly warm temperature. Allow a cooling period post-bake to settle flavors and firmness, then reheat briefly if served later to restore warmth without drying out.
Employ portion control by cutting evenly distributed squares for a clean, professional look. This aids in planning section distribution and enhances visual appeal on the serving platter.
Wine and Beverage Pairing
Pair with a crisp Chardonnay or a light Pinot Grigio to complement the cornbread’s buttery notes. These wines’ acidity balances the casserole’s richness while highlighting its sweet corn elements.
For non-alcoholic options, serve with a refreshing iced herbal tea. Its subtle flavors wash over the palate, creating a clean contrast to the casserole’s hearty nature.
In cooler months, a spiced apple cider offers a cozy complement, aligning with the casserole’s autumn aromas. Serve warm to enhance the interplay of temperatures.
Coffee, particularly a well-rounded medium roast, can heighten the dining experience when pairing breakfast or brunch iterations of this casserole.
Ensure beverages are served at appropriate temperatures to enhance flavors. Chilled white wines emphasize freshness, while warm drinks echo the casserole’s comfort.
Offer beverages in clear glass or ceramic to elevate the presentation. Visual clarity can enhance the overall appeal when perfectly paired with the colorful casserole serving.
Storage and Shelf Life
After cooling, store leftovers in an airtight container to prevent dryness. This method preserves freshness for up to three days when refrigerated. Reheat in a preheated oven or microwave to restore warmth, adding a splash of milk if needed to maintain moisture.
Freezing is possible for portions, although flavor and texture may alter upon thawing. Use freezer-safe containers, ensuring maximum air exclusion to prevent ice crystal formation.
When handling leftovers, inspect for signs of spoilage such as discoloration or sour odor. Err on the side of caution by discarding if quality doubts arise.
Defrost frozen portions overnight in the fridge beforehand to ensure even reheating. Oven warming is preferred for a more consistent result.
Reserve fresh elements for post-storage addition. Address a deflated topping by adding cheese or herb sprinkles post-reheating to refresh the dish’s look and taste.
Make Ahead Strategies
Prepare the batter up to a day in advance, storing it covered in the fridge. This saves time and allows flavors to meld, enhancing the baked result.
If assembling the casserole ahead, combine ingredients and store them unbaked. Cover securely to prevent fridge aromas from imparting off-flavors.
Consider baking in stages, splitting efforts into mixing and baking phases. This minimizes day-of prep and optimizes oven availability for concurrent dishes.
Evaluate quality impacts when making in advance. Longer baking duration can age flavors positively but adhere to set guidelines to prevent overcooking.
Incorporate fresh elements such as parsley or freshening cheese topping just before serving to invigorate day-old dishes.
Advance reheating guidelines offer a better finish. Use foil to cover the casserole during warming, preventing moisture loss while ensuring deep, thorough heating.
Scaling Instructions
To halve the cornbread casserole recipe, simply reduce each ingredient by fifty percent. Use a smaller baking dish to accommodate reduced quantities, ensuring even cooking.
For larger gatherings, double or triple the recipe. Adjust baking dishes accordingly to retain thickness proportion—consider multiple dishes for increased quantity.
Equipment may require scaling adjustments—ensure all items used can accommodate increased load or smaller batch for equalized heating dynamics.
Adjust cooking time based on thermal mass—larger batches may need extended periods, while smaller portions often bake quicker. Monitor closely during cooking.
Account for increased ingredient amounts in storage and preparation areas when scaling, checking for space and feasible operation within intended kitchen setup.
Reflect on serving needs by adjusting portion sizes to maintain consistently served sections across varied guest numbers, employing plates or chafing dishes as needed.
Nutritional Deep Dive
Each serving of cornbread casserole offers an excellent source of carbohydrates, providing sustenance and energy throughout the day. With addition of cheese, the recipe has a notable calcium and protein supply, essential for bone health and cellular functions.
Micronutrient analysis reveals generous portions of vitamin A and E from cornmeal, contributing positively to visual health and overall well-being. The dish remains sufficiently balanced within portion size to avoid excess caloric intake.
Health benefits are rooted in its whole grain content, offering a rich supply of beneficial fiber crucial for digestive health. As with any recipe, exercise portion awareness to prevent overturning dietary goals.
Consider dietary restrictions with component analysis—such as the importance of cheese varieties concerning lactose intolerance or specific nutritional targets.
Mindful portion control allied with balanced meal planning accommodates a range of dietary preferences, aligning taste with nutritional prudence.
Dietary Adaptations
For gluten-free considerations, use gluten-free cornmeal and double-check all processed ingredients for cross-contamination. Ensuring the integrity of each component can address sensitivities effectively.
To create a dairy-free version, substitute regular cheese with lactose-free or plant-based alternatives. Maintain texture and flavor richness by selecting a cheese substitute that melts properly.
Plant-based eaters can enjoy a vegan rendition by using soy milk and flaxseed as an egg replacement. Opt for vegan cheese options to retain the casserole’s savory appeal.
To adapt to keto preferences, reduce cornmeal use and incorporate almond flour for a low-carb variation. This maintains a familiar texture while minimizing carbohydrates.
Paleo fans should explore a grain-alternate recipe utilizing almond or coconut flour while integrating coconut milk to enhance flavor depth.
Consider low-FODMAP dinner arrangements by closely reviewing cheese choices, opting for lactose-free styles. Portion control remains instrumental to allergic sensitivities.
Troubleshooting Guide
For texture issues, avoid additional flour in the batter. Instead, introduce moisture elements like milk or egg whites cautiously to enhance fluffiness instead of density.
To balance flavors, ensure harmony by adjusting seasoning gradually. Taste between ingredient additions to achieve a consistent, wonderful taste profile.
Keep an eye on temperature throughout baking to combat challenges, utilizing an oven thermometer to promote accuracy without surprises.
Stay attentive to ingredient substitution tactics, limiting replacement to one item at a time to gauge impact. Embrace adjustments mindfully to maintain quality.
Timing concerns are alleviated through regular oven checking—use visual cues such as crust coloration or fragmented separations for insight on completion.
When equipment poses challenges, customize dish arrangements or pursue cookware substitutions mindful of size and heat conductivity.
Recipe Success Stories
Every household has its iteration of a classic cornbread casserole success, with stories of gatherings and heartfelt sharing of beloved recipes through generations passed.
Adaptation tales emerge frequently—one reader credits the addition of bacon for elevating flavor, while another introduces chive toppings for a fresh twist.
Community feedback often lauds the dish’s versatility—images show enthusiastic reader variations, speaking to the casserole’s integrative flexibility across cuisines globally.
Photography enthusiasts play with serving angles and lighting arrangements to capture the casserole’s appetizing visual impact, eliciting sensory intrigue.
Reader suggestions from across varied regions provide ingenious enhancement strategies, continually evolving a traditional dish into exciting experiences uniquely representative of regional preferences.
Frequently Asked Questions
Can I use pre-cooked corn instead of canned corn?
Yes, pre-cooked corn works well as a substitute for canned variants. Simply drain thoroughly and incorporate naturally into your batter for desired moisture retention.
Is it possible to prepare the whole dish the night before?
Preparation of the uncooked casserole a day in advance is permissible. Store securely in the fridge, excluding any time-sensitive toppings to retain freshness when baking.
What type of cornmeal should I use for a lighter texture?
Fine-ground cornmeal facilitates smoother batter consistency and results in a lighter casserole texture post-baking. Opt for fresh cornmeal to promote uniformity.
How does baking dish material affect outcomes?
Material impacts heat distribution—a ceramic dish retains heat evenly, promoting thorough baking while metal variants sharpen crust effects. Consider usage based on your preferences.
Should liquids be adjusted in high-altitude baking?
At higher altitudes, slight liquid additions and reduced leavening aid in maintaining baking stability. Experiment gradually to tailor textures to altitude requirements.
Why add eggs at room temperature?
Room-temperature eggs aid in seamless ingredient incorporation, avoiding graininess. This improves batter elasticity and culminates in uniform baking flavors and textures.
Can I freeze before or after cooking?
Freezing after cooking is recommended due to the components’ transformative qualities. Ensure portions are well-contained to minimize freezer burn or textural degradation.
What if cheese forms greasy patches?
Occasional cheese grease requires balancing—distribute mixed cheese evenly to mitigate pooling and moderate overall fat content for equilibrium refinement.
How can I add sweetness without affecting structure?
Strategic use of subtle sweeteners like honey or agave gracefully conduces the natural corn flavor without structural compromise. Monitor optional sugar ratios accordingly.
Can lactose-free cheese perform identically?
Diverse lactose-free types are now commercially available, boasting credible melting properties. Selecting the right variant ensures flawless textural complementarity to standard cheese.
Is non-dairy milk a good substitution?
Non-dairy alternatives are advantageous—select full-fat, potentially creamier types like coconut or macadamia, which emulate dairy richness within moist, flexible textures.
Are any vegan eggs suitable?
Facilities now include flaxseed ‘eggs’ or aquafaba across modern vegan adaptations. Each provides binding aptitude while leaving intact conventional preparation forms and techniques.
Additional Resources
Discover related recipes such as spicy jalapeño cornbread cupcakes or a traditional Southern cornbread stuffing recipe to complement and expand your dish repertoire effectively.
Surround cherished times with technique guides on even greasing strategies and folding methods critical for mastering signature cornbread casserole precision.
Enhance ingredient familiarity by referencing nutrient-specific guides, where detailed discussion over cornmeal selection or cheese types aligns with personal aims or allergy conditions.
Explore quality cookware options—understand vital bakeware’s role influencing outcomes, guiding budget with insights spanning from residential mileage to professional-grade needs.
Opt for seasonal casseroles or time-specific servings—unearthed insight into optimal seasons promotes climatic harmony through aligned sides and interconnected plans.
Join the Conversation
Engage with fellow culinary explorers through social media platforms, sharing creative photos and personalizing each casserole shaping in an embrace of communal enthusiasm.
Develop photography skills inspired by readers, capturing contrasts and angles highlighting the casserole’s distinctive design. Lighting insights clear visual winners enhance aesthetic quality.
Participate in recipe reviews and feedback facilitations—your distinct tastes and experiential foundations enhance core recipe outlook, merging collectivism across flavor timelines.
Deepen community bonds by discussing variation desires or offering educational tips. Unite through seasonal exchanges, upholding a collaborative spirit reflective of hidden secrets.
Try new interpretations or adapt established ones—experimentation with visual stimuli not only hones skill but nurtures a collaborative constituency of food-sharing excitement.
The Recipe
Cornbread Casserole
Serves: 8
Prep Time: 15 mins
Cook Time: 45 mins
Total Time: 60 mins
Kitchen Equipment Needed
Baking dish
Mixing bowls
Whisk
Spatula
Grater
Ingredients
1 cup cornmeal
1 cup all-purpose flour
2/3 cup sugar
1 tablespoon baking powder
1/2 teaspoon salt
2 large eggs
1 cup milk
1/2 cup melted butter
1 cup canned corn, drained
1 cup cheddar cheese, shredded
Directions
Preheat oven to 375°F (190°C). Lightly grease the baking dish.
In a large mixing bowl, whisk together cornmeal, flour, sugar, baking powder, and salt.
In another bowl, beat eggs and mix in milk and melted butter.
Combine wet and dry ingredients, mixing gently until just combined. Do not over-mix.
Stir in canned corn and half of the shredded cheese.
Pour batter into the prepared baking dish, spreading evenly.
Sprinkle the remaining cheese over the top.
Bake for 45 minutes, or until a toothpick inserted into the center comes out clean.
Allow to cool slightly before serving.
Recipe Notes
Substitute canned corn with fresh kernels for a fresher taste.
Add a pinch of cayenne pepper for a spicy variation.
Store leftovers in the refrigerator for up to three days.
Slow Cooker Beef Noodle Soup: A Comforting Classic Made Easy
Slow Cooker Beef Noodle Soup: A Hearty Comfort Food
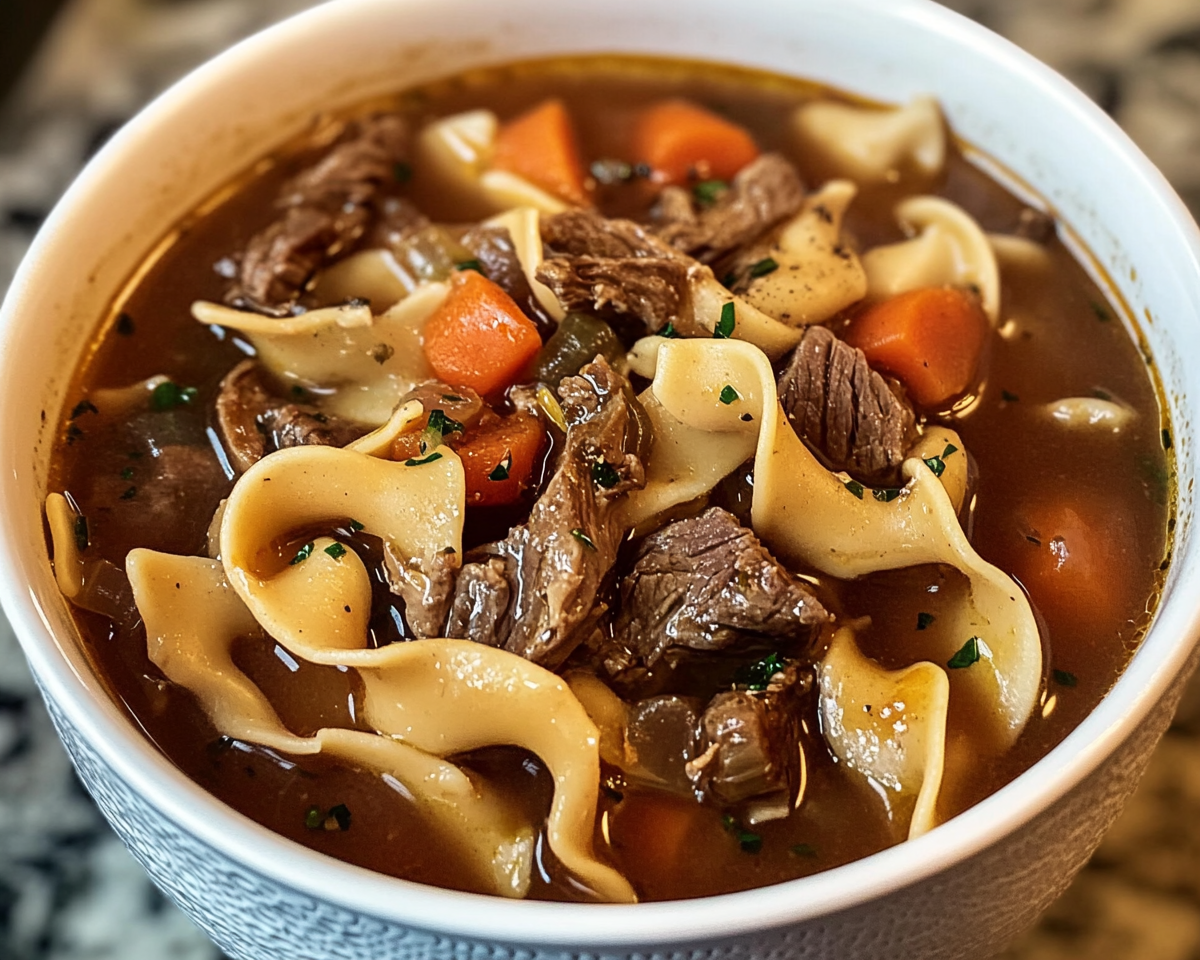
In this article, we will dive into the rich flavors and benefits of Slow Cooker Beef Noodle Soup, a classic comfort food that’s both satisfying and easy to prepare. With its tender beef, hearty noodles, and soul-warming broth, this dish is perfect for any season. Read on to uncover tips, variations, and the history behind this beloved recipe.
The Beauty of Slow Cooking
Slow cooking is ideal for busy lifestyles, allowing flavors to deepen while requiring minimal attention. Learn more about the benefits of this cooking method in our Slow Cooker Magic: Baked Ziti.
Ingredients You’ll Need
Beef Options
Chuck roast, short ribs, or stew meat are excellent choices for rich flavor and tender texture.
Slow Cooker Beef Noodle Soup combines the convenience of modern cooking with the rich flavors of tradition. Try it for a satisfying meal that brings comfort and nourishment. Explore more comforting recipes like Crockpot Ham and Green Beans.
Deliciously Healthy: Crispy Salmon Bowls with Bang Bang Sauce
Crispy Salmon Bowls: A Flavorful Delight with Bang Bang Sauce
⚖️
Difficulty
Medium
⏲️
Prep Time
15 mins
🕒
Cook Time
20 mins
⏱️
Total Time
35 mins
🍽️
Servings
4
Experience the perfect combination of crispy salmon paired with a zesty Bang Bang sauce in our Crispy Salmon Bowls. These bowls are a fantastic blend of flavors and textures, providing a satisfying meal that’s both nutritious and indulgent. The salmon’s crispy skin, juicy interior, and the spicy-sweet bang bang sauce create a compelling taste that will leave your taste buds longing for more. Whether you’re serving family or impressing guests, this dish is sure to be a hit.
Quick Recipe Highlights
Flavor Profile: The blend of spicy, tangy, and slightly sweet Bang Bang sauce elevates the rich flavor of the salmon.
Texture: Enjoy crunchy yet tender salmon with a creamy sauce over a bed of soft rice and crisp vegetables.
Aroma: The salmon releases appetizing aromas that are complemented by the tangy scent of the sauce.
Visual Appeal: Vibrant orange salmon paired with green vegetables and a creamy sauce makes for a stunning presentation.
Skill Level Needed: Some culinary skills are required to achieve perfect salmon crispiness, but it’s simple enough for home cooks.
Special Equipment: A sharp knife for slicing the salmon, a non-stick skillet for cooking, and a whisk for the sauce.
Recipe Overview
Difficulty Level: This medium-level recipe requires some attention to detail when cooking the salmon to achieve a perfect sear without overcooking.
Category: Ideal as a main course for lunch or dinner.
Cuisine: Drawing inspiration from Asian flavors, this dish is a fusion of traditional and modern culinary styles.
Cost: Using fresh salmon can be slightly luxurious but is balanced by affordable ingredients like rice and vegetables.
Season: Best enjoyed in spring and summer when fresh ingredients are in abundance, but can be made year-round.
Occasion: Perfect for family dinners, casual entertaining, or a stress-free weeknight meal.
Why You’ll Love This Recipe
The taste and texture appeal to anyone who enjoys a well-cooked piece of fish. The salmon’s crispy edges and the creamy, spicy-sweet Bang Bang sauce marry wonderfully to create a dish that’s satisfying and full of flavor. Convenience is another strong point. With a prep time of only 15 minutes and a total cooking time of 35 minutes, these crispy salmon bowls are perfect for a quick yet rewarding culinary endeavor. Nutritionally, the dish is well-balanced, offering a great source of protein from the salmon and essential vitamins and minerals from fresh veggies. Socially, these bowls are impressive, showing off your cooking skills without requiring extensive culinary expertise. The cost-effectiveness makes it a viable option for many budgets, especially if ingredients are sourced seasonally.
Historical Background and Cultural Significance
The use of Bang Bang sauce, a creation with origins in Asian cuisine known for its sweet and spicy kick, pairs beautifully with salmon, providing a contemporary twist to traditional flavors. Its cultural significance is rooted in the modern adaptation of Asian sauces in Western cooking. This recipe showcases the evolution of mixing culinary traditions to develop new and exciting dishes. Regional variations of this dish can be found, often featuring different ways to prepare the salmon or altering the accompanying sauce to reflect local tastes.
Ingredient Deep Dive
Salmon is the star ingredient, known for its rich, buttery flavor and high omega-3 fatty acid content. Selecting fresh, wild-caught salmon yields the best flavor and texture. Proper storage is key—keep it refrigerated and use it within one to two days of purchase. The Bang Bang sauce, made with mayo, sriracha, and a hint of honey, provides both cultural significance as it bridges Asian and Western cuisines and nutritional benefits by incorporating healthy fats.
Common Mistakes to Avoid
Overcooking the salmon: Keep a close eye on the salmon for perfect doneness.
Being heavy-handed with the sauce: Balance is key, start with a small amount and add more to taste.
Using canned salmon: Opt for fresh salmon for the best texture and flavor.
Skipping the crisping process: The crispy skin adds a necessary texture contrast.
Neglecting seasoning: A little salt and pepper on the salmon can make a big difference.
Preparing ingredients in advance: Cut veggies just before assembling to maintain freshness.
Incorrect sauce consistency: Ensure the sauce is smooth and well combined.
Not patting the salmon dry: This step is crucial for achieving perfectly crispy skin.
Using low-quality oil: Use high-smoke-point oils like avocado or coconut for salmon frying.
Overloading the skillet: Cook in batches if necessary to ensure even cooking.
Essential Techniques
Master the technique of achieving crispy salmon skin by patting the skin thoroughly dry before cooking, using a hot skillet, and avoiding overcrowding to ensure even crisping. A common pitfall is impatiently flipping the fish too early, which can tear the skin—wait for visual cues, like the edges pulling away from the pan, indicating it’s time to flip. The relevance of mixing the Bang Bang sauce thoroughly cannot be overstated; this ensures homogenous flavors and a creamy texture.
Pro Tips for Perfect Crispy Salmon Bowls
For perfect crispy skin, start with a hot pan and place the salmon skin-side down first. Use a fish spatula to gently press down on the salmon to ensure the skin makes full contact with the pan, resulting in optimal crispness. Another tip is to let the salmon rest for a few minutes after cooking; this helps the juices redistribute, enhancing tenderness. When preparing the Bang Bang sauce, feel free to adjust the heat level of the sriracha to suit your personal taste. Always taste the sauce before serving to ensure the flavors are balanced. Using a non-stick skillet can be beneficial, especially if you’re nervous about the fish sticking. Lastly, serve over a bed of rice or quinoa for a nutritious and filling meal, adding fresh herbs like cilantro for an aromatic finish.
Variations and Adaptations
Regional variations might incorporate locally available fish or adjust the spiciness of the sauce to suit regional heat preferences. For seasonal adaptations, try swapping out the vegetables based on what’s fresh, like adding asparagus in the spring or zucchini in the summer. Dietary modifications are easily made by using a gluten-free soy sauce and omitting sugar from the sauce for a sugar-free option. To change the flavor profile, try using a teriyaki glaze instead of Bang Bang sauce for a Japanese twist. If you prefer a different texture, consider panko-breading the salmon before frying. Finally, to enhance presentation, use a ring mold when forming the rice base in the bowl for a polished, restaurant-quality look.
Serving and Presentation Guide
To elevate your Crispy Salmon Bowls, focus on layering the ingredients for a harmonious presentation. Start with a base layer of rice or quinoa, followed by neatly arranged vegetables like thinly sliced cucumbers, carrots, or avocado. Place the salmon filet on top, slightly off-center, to create a dynamic look. A sprinkle of sesame seeds and fresh herbs adds an elegant touch. When garnishing, consider using microgreens or finely chopped chives. For traditional accompaniments, serve with a side of pickled ginger or a wedge of lime for added zest. Ensure the dish is served hot, as this enhances both the flavors and overall dining experience.
Wine and Beverage Pairing
Pair this dish with a crisp, chilled white wine like a Sauvignon Blanc or a Viognier, as these wines will complement the rich flavors of the salmon and the spicy elements of the Bang Bang sauce. Non-alcoholic alternatives could include a ginger lemonade, which echoes the dish’s spicy notes while providing refreshing contrast. If you prefer tea or coffee, consider a lightly brewed green tea to cleanse the palate. When choosing beverages, remember to serve them well-chilled to contrast with the warm elements of the dish.
Storage and Shelf Life
Store any leftover salmon in an airtight container in the refrigerator, and consume it within two days to ensure freshness. If storing the Bang Bang sauce separately, it will last up to a week when kept in a sealed jar. Be mindful of signs of spoilage, such as a sour smell or slimy texture on the salmon. It’s best to reheat the salmon gently, either in a pan or a low oven, to maintain its original texture without drying it out. Although not recommended due to texture changes, if necessary, freeze the cooked salmon for up to two months.
Make Ahead Strategies
To streamline your meal preparation, marinate the salmon and prepare the Bang Bang sauce up to two days in advance, storing them in the fridge until needed. This not only enhances the flavors but saves valuable time. Consider chopping the vegetables the morning of serving so they remain fresh and crisp. When assembling the dish, start with reheating the rice to ensure that all components are served warm. Add fresh elements, like herbs or greens, just before serving to preserve their vibrant color and flavor.
Scaling Instructions
Halving the recipe is straightforward; simply adjust the quantity of each ingredient proportionally. For doubling or tripling, ensure you have the necessary cooking space and tools to maintain quality. Consider cooking in batches to ensure even cooking and crispiness when scaling up. Adjust timing, especially when cooking additional salmon fillets, to prevent overcrowding. Keep in mind that the Bang Bang sauce proportions can be easily multiplied without affecting cooking dynamics, allowing you to easily scale the flavor profile.
Nutritional Deep Dive
This dish is rich in protein and healthy fats, thanks to the salmon, which supports heart health and satiety. It also provides a well-rounded macro breakdown, with balanced carbohydrate content from rice and abundant micronutrients from fresh veggies. Each serving is rich in vitamin D and B, which are essential for maintaining healthy body functions, as well as potassium and antioxidants. If monitoring caloric intake, adjusting portion sizes and using whole grain alternatives can tailor the dish to fit specific dietary needs.
Dietary Adaptations
Make this recipe gluten-free by ensuring all ingredients, including condiments like soy sauce, are certified gluten-free. For a dairy-free option, the recipe already uses mayonnaise, which is generally dairy-free, but verify your brand’s ingredients to confirm. To adapt for a ketogenic diet, swap rice for cauliflower rice to reduce carbs while maintaining volume and texture. For a vegan alternative, substitute tofu for salmon and proceed with cooking as outlined—ensure to use a plant-based mayo for the Bang Bang sauce.
Troubleshooting Guide
If finding the sauce too sweet, add a splash of rice vinegar to amp up the acidity. To address overly crispy salmon, lower the cooking temperature slightly to allow more even heat distribution. For common temperature problems, always bring the salmon to room temperature before cooking to ensure even cooking throughout. If encountering equipment challenges, non-stick pans are essential for preventing sticking and achieving perfect skin crispiness. Ingredient substitutions such as different fish types should account for varying cooking times to maintain quality.
Recipe Success Stories
Many readers have shared their success stories, noting how easy it was to impress guests with these flavorful bowls. Variations incorporating seasonal vegetables have been particularly popular, showcasing the adaptability of this dish. Community feedback highlights how fantastic the Bang Bang sauce is, with many doubling it to enjoy extra on the side. Reader suggestions include using lime zest before serving for an extra citrus punch, proving that these Cripsy Salmon Bowls offer a canvas for personal culinary creativity.
Frequently Asked Questions
Can I use frozen salmon?
Yes, but ensure it is fully thawed before cooking for optimal crispiness and even cooking.
What can I substitute for sriracha?
Feel free to use another favorite hot sauce, or adjust the spice level by mixing chili paste with honey.
How can I make them ahead of time?
Prepare each component separately, then assemble just prior to serving to maintain freshness and texture.
What is the best substitute for mayonnaise?
Greek yogurt can be an effective substitute, though it will alter the traditional Bang Bang sauce flavor.
How do I prevent the salmon from sticking to the pan?
Ensure your pan is properly preheated and lightly coated with oil before adding the salmon.
Can this be made in an air fryer?
Yes, an air fryer can be used for the salmon, offering a quick and less messy alternative while still achieving crispiness.
What sides pair well with this dish?
A crisp cucumber salad, steamed green beans, or roasted sweet potatoes complement the meal nicely.
Is this dish suitable for meal prepping?
Absolutely, particularly if stored properly to maintain the individual components effectively.
How long does the sauce last in the fridge?
The sauce can be kept refrigerated for up to one week in a tightly sealed container.
Can I grill the salmon instead?
Grilling is a fantastic alternative for adding a smoky flavor, but mind the cooking time to avoid overcooking.
Additional Resources
Dive deeper into Asian-inspired recipes, like spicy tuna rolls, to explore how different varieties of seafood pair with similar flavor profiles. Check out our technique guide on achieving the perfect sear on fish, which provides step-by-step insights for various cooking methods. Learn about the nutritional benefits of incorporating omega-rich fish into your diet through our comprehensive ingredient information posts. For equipment, discover our recommendations on the best non-stick pans for consistently impressive results, and explore seasonal variations in our dedicated section to keep your cooking exciting year-round.
Join the Conversation
Share your Crispy Salmon Bowl creations on social media using #CrispySalmonBowls, where you can interact with a community of fellow food enthusiasts. Engage with others by sharing photography tips to best capture the vibrant colors of your dishes. Leave a review or suggest your variation in the comments section; your feedback can help shape future recipes. Explore the vast array of recipe variations shared by our community, and feel welcome to contribute your own twist on this delightful dish. Join the conversation and enrich your culinary repertoire today.
The Recipe
Crispy Salmon Bowls with Bang Bang Sauce
Serves: 4
Prep Time: 15 mins
Cook Time: 20 mins
Total Time: 35 mins
Kitchen Equipment Needed
Non-stick skillet
Sharp knife
Mixing bowl
Whisk
Spatula
Ingredients
4 salmon fillets
2 tablespoons olive oil
Salt and pepper to taste
1 cup mayonnaise
2 tablespoons sriracha
1 tablespoon honey
2 cups cooked white rice
1 cucumber, thinly sliced
1 avocado, sliced
2 tablespoons sesame seeds
Fresh cilantro for garnish
Directions
Pat dry salmon fillets with paper towels and season with salt and pepper.
Heat olive oil in a non-stick skillet over medium-high heat. Add salmon skin-side down.
Cook for 5-7 minutes until skin is crispy, then flip and cook for another 3-4 minutes.
In a bowl, whisk together mayonnaise, sriracha, and honey to create bang bang sauce.
Divide cooked rice into bowls, top with crispy salmon, cucumber, avocado, and drizzle with sauce.
Sprinkle sesame seeds and garnish with cilantro before serving.
Recipe Notes
You can use cauliflower rice for a low-carb version.
Adjust sriracha level based on your heat preference.
Finish with a squeeze of lime for an extra zesty kick.
The Ultimate Guide to Perfecting Scotcheroos: A No-Bake Dessert Favorite
Markdown Article with Suggested Internal Links for “Scotcheroos”
The Ultimate Guide to Perfecting Scotcheroos: A Sweet Treat for All Occasions
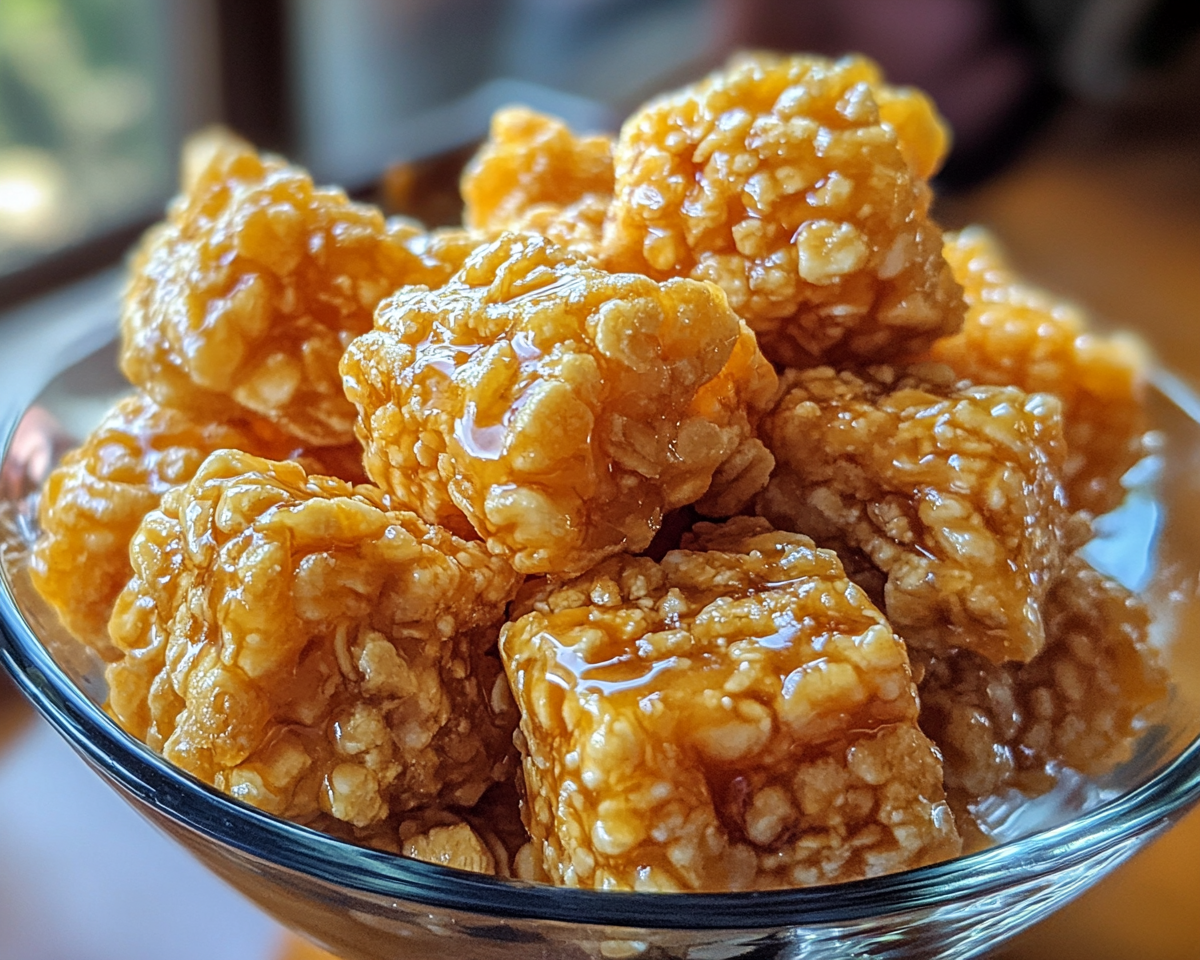
If you’re looking for a dessert that blends the creamy richness of peanut butter with the satisfying crunch of rice cereal, Scotcheroos are the answer. This no-bake dessert is perfect for every occasion, from casual family gatherings to sophisticated holiday spreads. Packed with a chocolate and butterscotch topping, Scotcheroos deliver indulgent flavor with minimal effort. To learn more about similar no-bake treats, check out Dunkaroo Dip for another nostalgic dessert option.
Why Scotcheroos Are Everyone’s Favorite No-Bake Treat
Effortless preparation with pantry staples
Perfect for any gathering
A delightful balance of texture and flavor
For tips on mastering desserts like these, explore the Homemade KFC-Style Famous Bowl recipe, showcasing simplicity at its finest.
What Are Scotcheroos? (300 Words)
Scotcheroos are a no-bake dessert bar combining crispy rice cereal, a peanut butter filling, and a glossy chocolate-butterscotch topping. Originating in the mid-20th century, these bars have stood the test of time for their simple ingredients and irresistible flavor profile.
Ingredients Breakdown and Substitutes (500 Words)
Key Ingredients:
Rice Cereal: Provides the crunchy base.
Corn Syrup: Acts as a binder for the peanut butter mixture.
Peanut Butter: Adds creaminess and flavor.
Chocolate Chips: For a rich topping.
Butterscotch Chips: Complements the chocolate with a caramel-like taste.
Substitution Options:
Use honey instead of corn syrup for a natural sweetener.
Try almond or cashew butter for a nutty twist.
Swap butterscotch chips with white chocolate chips for a different flavor.