Classic Beef Liver with Onions: A Hearty Delight
Delight in the rich and savory flavors of Classic Beef Liver with Onions, a recipe that’s as nutritious as it is delicious. This traditional dish combines tender beef liver with sweet, caramelized onions to create a perfect symphony of taste and texture. It’s a meal that brings comfort and warmth, perfect for any time you crave a hearty home-cooked dinner.
Beef liver is known for its distinct, deep flavor, enhanced by the sweet softness of sautéed onions. As you cook this dish, the aroma fills your kitchen, promising a deliciously satisfying meal. Enjoy each bite of this nutrient-dense food, packed with iron, vitamin A, and various essential nutrients, all while embracing a classic recipe passed down through generations.
Whether you’re a longtime fan of beef liver or trying it for the first time, this recipe for Classic Beef Liver with Onions is sure to impress. Easy to prepare, this dish allows you to enjoy a gourmet experience at home without spending hours in the kitchen. With just a few essential ingredients and simple steps, you can serve a meal that delights both the palate and the senses.
Quick Recipe Highlights
- Flavor Profile: The dish offers a bold and rich flavor from the beef liver, perfectly complemented by the sweet and savory taste of the onions.
- Texture: Experience a delightful combination of tender liver with the soft, caramelized texture of onions, making every bite pleasurable.
- Aroma: Immerse yourself in the enticing scent of liver searing combined with onions slowly caramelizing in the pan.
- Visual Appeal: Present a visually appealing plate with the deep brown of liver juxtaposed against golden onions.
- Skill Level Needed: This recipe is easy, suitable for both beginner and seasoned cooks who appreciate traditional dishes.
- Special Equipment: A good quality frying pan ensures even cooking and enhances caramelization.
Recipe Overview
- Difficulty Level: Categorized as easy, this recipe requires minimal culinary skills and focuses on basic cooking techniques like sautéing.
- Category: Fits well into both main course and quick weekday dinner categories, making it versatile for meal planning.
- Cuisine: A staple in many cultures, this dish showcases a blend of traditional Western culinary practices.
- Cost: Considered a budget-friendly option, using inexpensive ingredients without sacrificing quality or taste.
- Season: Best enjoyed in cooler months, thanks to its hearty and warming characteristics, but enjoyable year-round.
- Occasion: Suitable for casual family dinners, offering a comforting and familiar dining experience.
Why You’ll Love This Recipe
The Classic Beef Liver with Onions is a culinary gem featuring a robust medley of flavors, making it a must-try for liver lovers. Its rich taste comes from perfectly cooked beef liver, enhanced by sweet, sautéed onions that add a pleasant contrast. Together, they create a taste profile that is both nostalgic and satisfying.
Cooking this dish is convenient and straightforward, making it ideal for busy weeknights or when you want a quick but flavorful meal. With just a few steps and ingredients, it’s easy to bring the essence of home-cooked goodness to your table without any fuss.
Nutritionally, beef liver is a powerhouse. Packed with iron, vitamins A and B12, it’s an excellent source of essential nutrients. Adding liver to your regular meal rotation can contribute to a balanced diet, particularly if you are looking to boost your intake of key vitamins and minerals.
Beyond its taste and nutritional advantages, this dish holds social and entertaining value. It’s a dish that evokes fond memories of family dinners and time-honored recipes. Sharing it with family and friends can be a delightful way to revisit those cherished culinary traditions together.
Finally, the cost-effectiveness of this recipe is another reason to love it. Beef liver is affordable and widely available, making this dish accessible to everyone looking to enjoy a hearty and nutritious meal without stressing their budget.
Historical Background and Cultural Significance
Beef liver has long held a place in global culinary traditions, revered for its nutritional benefits and rich taste. Historically, it was consumed by ancient civilizations that recognized its health-boosting properties, and it has since evolved into a staple ingredient across cultures.
In many cultures, liver dishes carry significant cultural importance, symbolizing both simplicity and abundance. Families cherished recipes like Classic Beef Liver with Onions, passing them down through generations as part of their culinary heritage. It embodies a connection to the past and a preservation of cherished culinary traditions.
Over time, the ways to prepare and season beef liver have evolved, with each region putting its unique spin on the dish. From the simplicity of frying to adding aromatic spices and herbs, liver has morphed into a versatile ingredient used in various culinary creations worldwide.
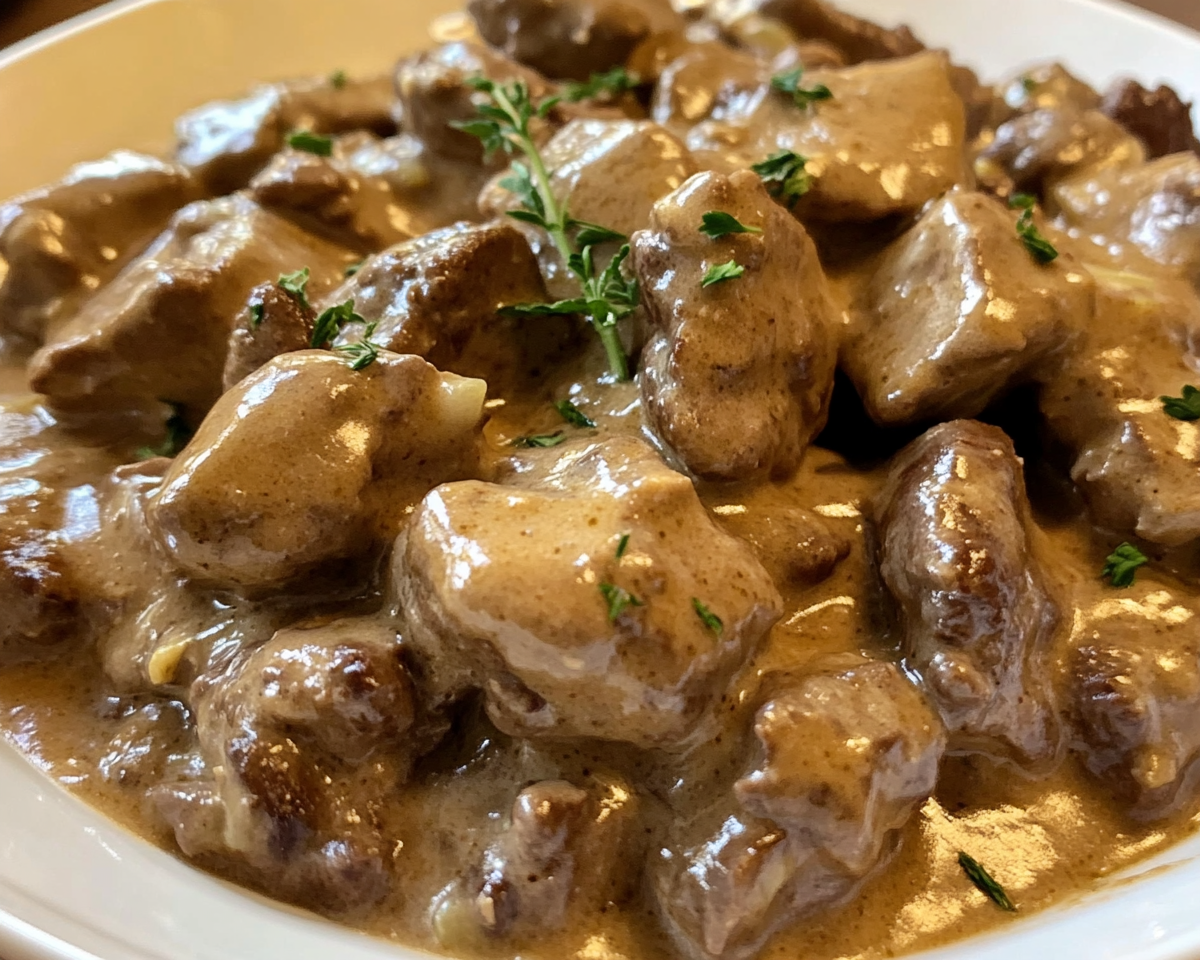
Regional variations abound in the culinary world of liver dishes, influenced by local tastes and preferences. For example, in the Mediterranean, you’ll find liver dishes featuring olive oil and garlic, while in Northern Europe, creamy gravies and onions are popular. These nuances highlight the global appreciation and versatility of this humble ingredient.
Ingredient Deep Dive
Beef liver is the star of this dish, and it enjoys a storied place in culinary history. Known for its deeply nourishing qualities, beef liver has been part of diets since ancient times due to its high nutrient content. Today, it’s recognized for providing essential vitamins and minerals that support overall health.
Nutritionally, beef liver is a powerhouse. It’s an excellent source of iron, crucial for blood health, and vitamin A, beneficial for vision and immune function. Vitamin B12 is also prominent, supporting brain health and energy levels. Consuming liver can complement a balanced diet by delivering these crucial nutrients.
When selecting beef liver, look for firm, cohesive pieces with a deep red-brown color, indicating freshness. It should have a clean scent, reflecting its quality. Proper storage is vital; store liver in the coldest part of your refrigerator and use it within a day or two of purchasing for best results.
For those seeking substitutions, chicken liver offers a milder taste while providing similar nutritional benefits. Alternatively, consider plant-based options, such as lentils or mushrooms, when crafting vegetarian variations without compromising on flavor or texture.
Onions, the dish’s other main component, play a critical role. They’re valued for their natural sweetness, which is accentuated when cooked. Caramelizing onions enhances this sweetness, creating a delightful counterbalance to the liver’s robust flavor.
Nutritionally, onions are low in calories but rich in antioxidants and flavonoids, promoting overall health and reducing inflammation. When selecting onions, opt for those with firm skin and no soft spots. Store them in a cool, dry place to extend their shelf life and preserve freshness.
Common Mistakes to Avoid
- Overcooking liver can result in a tough texture. Aim for medium doneness to retain moisture and tenderness.
- Not soaking the liver in milk beforehand, which can help mellow its strong taste.
- Using high heat can quickly brown the liver’s exterior without cooking it through. Moderate heat is best for even cooking.
- Not allowing onions to caramelize fully. Slow cooking enhances their natural sweetness, improving the overall flavor.
- Skipping the resting time after cooking can lead to a loss of juices. Allow a brief rest to lock in moisture.
- Insufficient seasoning results in a bland dish. Ensure ample seasoning to enhance the liver’s flavor profile.
- Choosing overripe onions can affect flavor and sweetness. Fresh onions deliver the best results.
- Incorrect slicing thickness can affect cooking time and texture. Ensure uniform slices for consistent cooking.
- Not deglazing the pan for added flavor. Utilize wine or stock to capture all the delectable brown bits from cooking.
- Forgetting to taste and adjust seasonings after cooking, ensuring the dish is perfectly balanced for serving.
Essential Techniques
Mastering the art of cooking liver is key to perfecting this dish. Start by soaking liver slices in milk, which helps temper the strong taste and tenderize the meat, a crucial step for achieving a desirable flavor profile.
When it comes to cooking, ensure your pan is preheated and add the liver slices without overcrowding. This technique promotes even browning, necessary for developing those delicious crusty edges while locking in moisture.
Caramelizing onions is an essential technique requiring patience. Cook onions slowly over low to medium heat to draw out their natural sugars. This slow process offers a deep, sweet flavor, perfectly juxtaposed with the savory liver.
Deglaze the pan post-cooking with some broth or dry wine, helping to scrape up all the flavorful bits. This step forms a simple sauce that enhances the dish, integrating hidden flavors back into the meal.
Pro Tips for Perfect Classic Beef Liver with Onions
Pat liver slices dry before cooking to ensure they brown well without steaming. This step guarantees a flavorful crust.
Consider adding a splash of balsamic vinegar to onions towards the end of cooking, enhancing their sweetness and adding a subtle tangy note.
Season the liver generously with salt and pepper just before cooking to enhance its natural flavor without drawing out moisture beforehand.
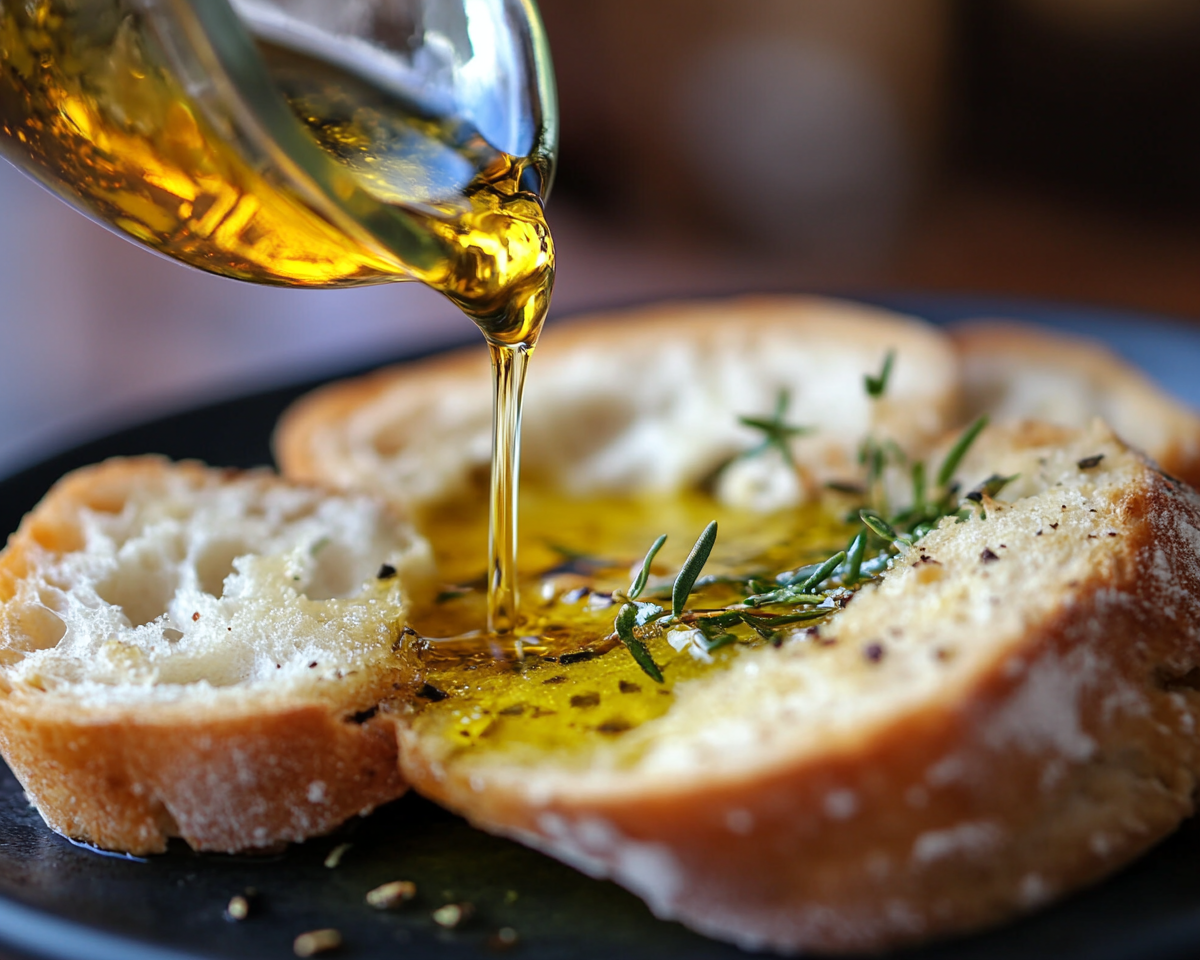
For a richer taste, cook liver slices in a mix of butter and olive oil. The butter adds depth, while the olive oil prevents the butter from burning.
Serve immediately upon finishing, as liver can continue to cook from residual heat. This timing ensures optimal juiciness.
Use a thin bladed knife for slicing liver and onions, aiding in achieving uniform pieces that cook evenly.
Variations and Adaptations
Regional variations can be explored by adding spices native to certain cuisines, like cumin or coriander, enhancing the liver’s ethnic flair. Experiment with flavor variations such as adding a splash of wine to the pan, introducing complexity to the dish’s flavor profile. For texture modifications, try breadcrumb coating the liver slices, adding a satisfying crunch to each bite while maintaining the dish’s original essence.
Adaptation for different dietary needs is also possible. For a lactose-free option, use almond milk for soaking; adapt the recipe by employing gluten-free flours instead of wheat-based ones. Presentation alternatives involve serving liver atop a bed of creamy mashed potatoes or with vibrant, seasonal vegetables, turning it into an eye-catching plate.
Modernize this classic dish by integrating root vegetables or leafy greens, making it even more visually appealing and nutrient-rich. The dish’s inherent versatility allows seasonal adaptations, utilizing the freshest available produce to accompany the liver during various times of the year.
Serving and Presentation Guide
Plating the dish elegantly begins with selecting a warm plate, highlighting colors by placing liver slices atop a golden heap of onions. Based on tradition or creativity, serve alongside common accompaniments like mashed potatoes or steamed greens, adding both nutrition and visual contrast.
Garnishing presents another opportunity for presentation. Fresh herbs like parsley can be sprinkled over, adding a pop of color and a touch of vibrancy to the plate. Engage with modern serving suggestions by creating a liver “tower,” layering onions and liver for an impressive vertical presentation. Remember that portion control ensures the liver’s rich flavor doesn’t overwhelm the palate, allowing the complete meal composition to shine.
Temperature plays a key role; plate everything while it’s warm, preserving the flavors and mouthfeel, maintaining restaurant-like quality in a home-cooked dish.
Wine and Beverage Pairing
Pairing this Classic Beef Liver with Onions with a robust red wine, such as a Shiraz or Cabernet Sauvignon, beautifully complements the liver’s deep flavors and the onions’ sweet undertones.
For non-alcoholic options, a chilled iced tea with a hint of lemon provides a refreshing contrast, cleansing the palate between bites.
If you prefer coffee or tea alongside your meal, consider earthy dark roast coffee or a spiced black tea, each adding depth without overwhelming the dish’s natural complexities.
Temperature considerations matter; choose drinks that aren’t excessively hot or cold to maintain harmony on the palate. Providing glasses at the ideal serving temperature enhances the overall dining experience.
Storage and Shelf Life
Store any leftovers promptly in airtight containers, refrigerating them to maintain freshness. Proper sealing prevents contamination and maintains the integrity of flavors. Ensure storage at consistent refrigerator temperatures, ideally below 40°F (4°C), extending the shelf life to up to two days.
Monitor for signs of spoilage, such as off smells or changes in color, discarding any compromised portions to preserve food safety.
Reheating liver can be delicate; aim for lower temperatures to gently revive the dish without overcooking. Avoid microwave reheating as it can dry out the liver, instead opting for a pan over low heat for better moisture retention.
Freezing guidelines advise against freezing cooked liver due to texture changes, but freezing raw liver can be suitable if needed for future preparations, ensuring it’s well-wrapped and used within three months for optimal quality.
Make Ahead Strategies
Prepare portions of the meal ahead of time, like caramelizing onions, storing them in the fridge to simplify daily preparation. Assembled ingredients can streamline cooking, particularly appreciated for quick weekday meals.
Storage between each step must maintain quality, requiring appropriate sealing and refrigeration. Cold storage does not compromise flavors and ensures the dish remains appetizing upon final cooking.
When reheating, focus on gradually bringing the beef liver back to temperature, avoiding high heat to maintain its moisture. Consider adding fresh herbs or a squeeze of lemon juice before serving, injecting fresh elements into the dish for a vibrant finish.
Scaling Instructions
To half this recipe, adjust ingredient quantities proportionally, ensuring the thickness and size of liver slices remain manageable for your cooking utensils and space.
For doubling or tripling, additional batches might be necessary to maintain quality when cooking, preventing overcrowding that compromises browning and flavor.
Adjust heavyweight equipment accordingly; utilizing larger pans or multiple pans simultaneously maintains efficiency without sacrificing quality.
Recognize that larger volumes may extend cooking times slightly. Monitor closely to prevent overcooking and ensure flavors remain harmoniously balanced.
For storage, prioritize cooling dishes quickly to avoid bacteria incubation when scaling up, ensuring larger portions are promptly chilled for future use.
Nutritional Deep Dive
The macro breakdown of this Classic Beef Liver with Onions makes it a nutritious powerhouse, rich in protein and vital nutrients often lacking in standard diets. Beef liver offers remarkable micronutrient content, especially iron and vitamins B12 and A, integral for maintaining energy, vision, and overall health.
Health benefits include improved energy thanks to vitamin B12, enhanced immune defense from vitamin A, and improved blood health due to its rich iron content.
Each portion aids dietary considerations by delivering nutrient density without unnecessary calories. Balance comes from conscious pairing with fiber-rich sides or vegetables, ensuring overall meal composition supports health goals.
For weight management, moderate portion sizes offer the necessary nutrition without overabundance, focusing on pairing with greens or whole grains for a well-rounded plate.
Dietary Adaptations
For gluten-free options, use cornstarch instead of traditional flour in any optional coating to minimize meat sticking and to cater to specific dietary requirements.
Dairy-free adaptations can be considered by soaking the liver in a milk alternative such as almond milk, providing similar outcomes without lactose content.
While a vegan version of this particular dish may not be feasible, creative exploration of substituting mushrooms or lentils with caramelized onions can offer a taste-alike experience without animal products.
Low-carb diners can focus on serving the liver with leafy vegetables rather than starch-rich sides, preserving the dietary macro balance while adapting the dish to low-carb lifestyles.
Those following specific diets like keto or paleo might appreciate the liver’s nutrient density, serving it with compatible sides like roasted vegetables, contributing to their nutritional requirements and culinary diversity.
Troubleshooting Guide
When liver texture turns tough, focus on precise cooking times, removing the liver from heat once it reaches perfect doneness, keeping it tender and moist.
Balancing flavors may require adjusting seasoning levels, adding additional salt or a touch of acidity to enhance the dish’s overall palette profile.
Temperature challenges, such as uneven stove heat, can be addressed by maintaining medium-low heat, ensuring consistent cooking throughout the process.
Equipment limitations are overcome by using quality non-stick pans or cast iron skillets for even cooking and simple cleaning.
Ingredient substitutions occasionally fall flat, necessitating taste testing and potential seasoning adjustments, addressing the base recipe’s integrity.
Ensure proper timing of additions, like onions and garlic, to avoid bitterness and optimize flavor development throughout the recipe.
Recipe Success Stories
Community feedback consistently praises this recipe’s straightforward instructions and the delightful harmony of flavors it delivers without complexity. Readers often share successful adaptations, such as creating herb-infused variations that add different aromatic profiles to the classic base recipe.
Photographic exchanges showcase beautifully plated liver dishes and community creativity in garnishing and pairing. Reader suggestions highlight on-point improvements, like attempting to add a touch of vinegar or alternative spices for subtle changes, revealing engagement with this beloved traditional dish.
Engaging in shared success experiences drives connection, providing an enhanced appreciation for this classic beef liver recipe as it continues to be adapted and cherished worldwide.
Frequently Asked Questions
What is the best way to tenderize beef liver? Soak the liver in milk for at least an hour before cooking. This process helps to mellow its taste and ensure a tender texture when cooked.
Can I freeze beef liver? While freezing raw liver is possible, it is best used fresh for optimal texture. If freezing, ensure airtight wrapping to prevent freezer burn and use within three months.
How can I reduce the strong taste of liver? Allowing the liver to soak in milk or lemon juice can help reduce its strong taste, resulting in a more subtle flavor profile.
What sides pair well with liver and onions? Mashed potatoes, steamed vegetables, or a side salad with a zingy vinaigrette are excellent pairings providing balance and added nutrition.
Is beef liver healthy to eat regularly? Beef liver is a nutrient-dense food packed with essential vitamins and minerals. Incorporating it occasionally can complement a balanced diet. Moderation is key due to high vitamin A content.
Can I use chicken liver instead of beef liver? Yes, chicken liver offers a milder flavor and can be substituted if desired. It also cooks more quickly, so adjust cooking times accordingly.
Why should liver be soaked in milk? Milk soaking helps to temper the liver’s strong taste and improve its tenderness, enhancing the overall flavor and texture of the dish.
Why are my onions not caramelizing? Cook onions on medium-low heat, allowing time for natural sugars to release and caramelize, resulting in a sweet, golden outcome.
Can I make this dish ahead of time? Portions like caramelized onions can be made ahead and stored in the fridge, streamlining meal preparation when cooking the liver immediately before serving.
What can I use to deglaze the pan? Deglaze the pan using broth or white wine, capturing flavors left in the pan and creating a quick sauce to complement the main dish.
Additional Resources
- Explore our seasoning guides for diversifying flavors in your liver recipes.
- Visit our ingredient information section for detailed knowledge about incorporating beef liver into your meals.
- Check out our technique guides for mastering caramelization and creating perfect sautéed onions.
- Browse related liver recipes to inspire your culinary adventures with variety and new challenges.
- Consider our recommended kitchen equipment for optimal results and enjoyable cooking experiences.
- Seasonal variations section provides ideas for incorporating fresh produce into any liver-based dish you prepare throughout the year.
Join the Conversation
We invite you to share your thoughts and experiences with our Classic Beef Liver with Onions recipe on social media! Tag us in your photos, show off your plating, or inspire others with creative adaptations. Connect with fellow food enthusiasts through recipe reviews or community forums, where you can swap variations or discover new serving ideas.
Your feedback and interaction are what fuels this culinary journey. Whether you’re offering a suggestion or showing your personal twist on the recipe, be part of our food-loving community that appreciates and preserves timeless recipes in today’s kitchens. The conversation is ongoing—and your voice matters!
The Recipe
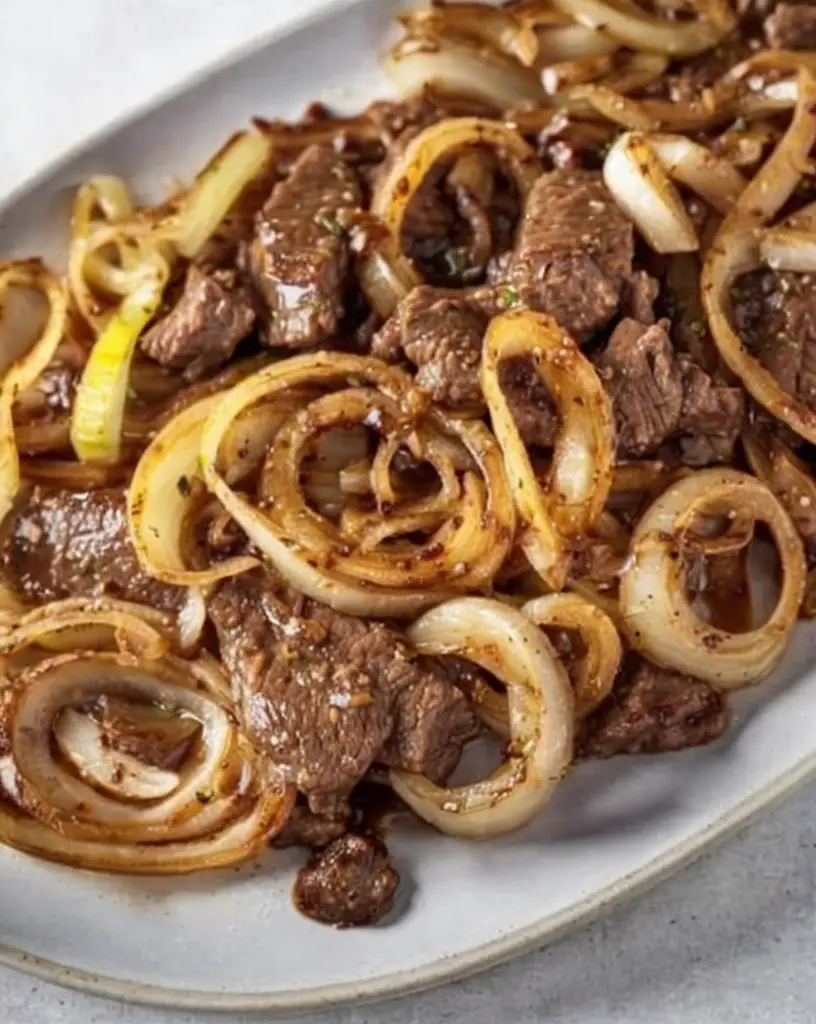
Classic Beef Liver with Onions
Serves: 4
Prep Time: 10 mins
Cook Time: 20 mins
Total Time: 30 mins
Kitchen Equipment Needed
- Non-stick skillet or frying pan
- Sharp knife
- Cutting board
- Tongs or spatula
- Mixing bowl for soaking liver
Ingredients
- 1 lb beef liver, sliced
- 2 cups whole milk (or milk alternative)
- 2 large onions, thinly sliced
- 2 tablespoons olive oil
- 2 tablespoons butter
- Salt and pepper to taste
- Fresh parsley for garnish
Directions
- Soak the beef liver slices in milk for 1 hour. This step helps tenderize the liver and mellow its flavor. Drain and pat dry.
- Heat olive oil and butter in a large skillet over medium heat. Add sliced onions and cook until caramelized, about 10 minutes. Remove and set aside.
- In the same skillet, increase heat to medium-high. Add liver slices in a single layer, cooking for 2-3 minutes per side until brown and cooked through.
- Return onions to the skillet and stir to combine, adding salt and pepper to taste.
- Let the liver rest for a few moments before serving, allowing juices to redistribute.
- Garnish with freshly chopped parsley and serve immediately.
Recipe Notes
- For an added tangy twist, drizzle a tablespoon of balsamic vinegar over the onions during the final minutes of caramelizing.
- Substitute white wine for a portion of the oil for richer flavor layers.
- Consider pairing with mashed potatoes or steamed vegetables for a complete meal.