Cheesy Beef and Pasta Soup: A Comfort Food Classic for Every Occasion

beef macaroni soup, cheesy hamburger soup, ground beef pasta soup, creamy beef and noodle soup, pasta and cheese soup with beef

Cheesy Beef and Pasta Soup: A Hearty and Flavorful Dish

Cheesy Beef and Pasta Soup is the ultimate comfort food—a creamy, cheesy blend of ground beef, tender pasta, and a rich tomato base. This dish is perfect for cozy evenings or when you’re craving something hearty and satisfying.

For a deeper dive into other comforting soups, explore The Ultimate Comfort Food: Crockpot Potato Soup and expand your comfort food repertoire.


What Makes Cheesy Beef and Pasta Soup Special?

This dish stands out for its:

  • Richness and Flavor: A blend of creamy cheese and seasoned beef.
  • Hearty Texture: Tender pasta and a thick, satisfying soup base.
  • Versatility: Easily adaptable for various diets or flavor preferences.

If you’re new to cheesy soups, understanding the basics of rich soups and their origins can elevate your cooking. Check out How Cheese Elevates Comfort Food.


Key Ingredients You’ll Need

For the Soup Base

  • Ground beef: Lean beef for less grease or chuck for flavor.
  • Cheese: Sharp cheddar, cream cheese, or a blend.
  • Pasta: Elbow macaroni or small shells for texture.
  • Tomato sauce: Enhances the tanginess and richness of the broth.
  • Vegetables: Onions, garlic, and optional carrots or celery.
  • Seasonings: Paprika, Italian herbs, salt, and pepper.

Optional Additions

  • Crushed red pepper for spice.
  • Spinach or kale for added greens.
  • Bacon bits for extra smoky flavor.

How to Make Cheesy Beef and Pasta Soup

Step 1: Preparing the Ground Beef

  • Sauté ground beef in a Dutch oven until browned.
  • Add diced onions and minced garlic, cooking until fragrant.

Step 2: Building the Base

  • Stir in tomato sauce, beef broth, and seasonings.
  • Let simmer for 10–15 minutes for flavors to meld.

Step 3: Adding the Pasta

  • Add uncooked pasta to the pot.
  • Let cook until the pasta is al dente, stirring occasionally.

Step 4: Incorporating the Cheese

  • Reduce heat and slowly add shredded cheddar and cream cheese.
  • Stir until fully melted and creamy.

Step 5: Finishing Touches

  • Adjust consistency with additional broth if needed.
  • Garnish with parsley or extra cheese before serving.

For more one-pot recipes, try Slow Cooker Magic: Crockpot Baked Ziti.


Flavor Variations

Spicy Cheesy Soup

  • Add jalapeños or hot sauce for a kick.

Vegetarian Version

  • Substitute beef with plant-based crumbles and use vegetable broth.

Loaded Soup

  • Top with sour cream, bacon bits, and green onions for a “loaded” flavor.

Serving Suggestions

Pair your soup with:

  • Crusty Bread: Perfect for dipping.
  • Side Salad: Lightens the meal.
  • Beverages: Pair with a glass of red wine or iced tea.

For more hearty pairings, explore No-Peek Beef Tips.


FAQs

Can I Make This Soup in Advance?

Yes! It reheats beautifully. Just add a splash of broth to revive the creaminess.

What’s the Best Pasta for This Soup?

Elbow macaroni works best, but small shells or ditalini are excellent substitutes.

Can I Freeze Leftovers?

Yes, but note that the texture of the pasta may change slightly after freezing.

How Do I Store Leftovers?

Store in an airtight container in the fridge for up to 3 days.

Can I Use Pre-Cooked Pasta?

Yes, add it during the last few minutes to prevent overcooking.


Nutritional Information

Each serving (based on 6 servings):

  • Calories: ~400
  • Protein: 25g
  • Carbs: 35g
  • Fat: 20g

Internal Linking Opportunities

Suggested Internal Links


Conclusion

Cheesy Beef and Pasta Soup is a dish that warms both the body and the soul. Its creamy texture, hearty ingredients, and bold flavors make it a go-to recipe for comfort food lovers. Whether you’re serving it for a family dinner or meal prepping for the week, this soup is bound to impress.

For more recipes that bring comfort and flavor, visit ExoRecipes.com.

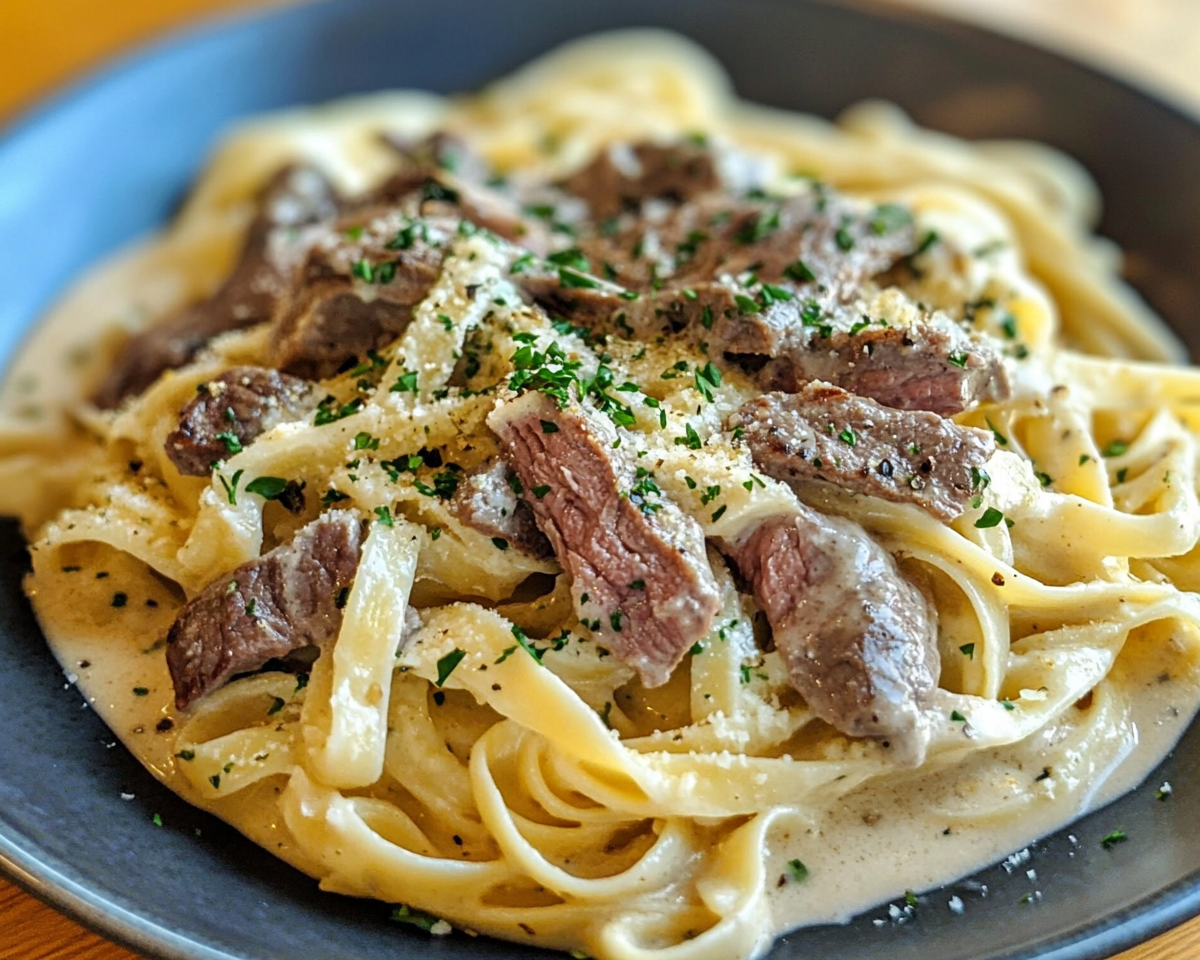
Creamy Philly Steak & Pasta: The Ultimate Comfort Food Recipe

Philly cheesesteak pasta, steak and pasta recipe, creamy pasta with steak, comfort food pasta, cheesy Philly steak pasta, Philly-inspired pasta dish

Creamy Philly Steak & Pasta: A Comfort Food Classic

Creamy Philly Steak & Pasta takes the best of the classic Philly cheesesteak and pairs it with hearty, satisfying pasta. The result? A dish that’s perfect for cozy weeknight dinners or impressing guests at your next gathering.

For those who adore a good steak dish, mastering the art of steak cooking is essential. Visit Serious Eats’ Steak Guide for tips on achieving perfectly cooked steak.

If you’re curious about pasta recipes that blend convenience and taste, check out One-Pot Creamy Broccoli and Parmesan Noodles for inspiration.


Why Creamy Philly Steak & Pasta?

This dish stands out because of its:

  • Comforting Layers: A creamy, cheesy sauce envelops the tender steak strips and pasta.
  • Versatile Ingredients: It can easily be customized with additional vegetables or spices.
  • Ease of Preparation: Perfect for busy evenings or meal prepping.

Philly cheesesteak-inspired dishes have become increasingly popular due to their robust flavors and satisfying textures. For another variation, explore Garlic Rosemary Steak and Potatoes Skillet.


Ingredients for Creamy Philly Steak & Pasta

Main Ingredients

  • Steak: Ribeye or sirloin, thinly sliced
  • Pasta: Penne or fettuccine for a hearty bite
  • Vegetables: Green bell peppers, onions, and mushrooms
  • Cheese: Provolone, cream cheese, or mozzarella
  • Seasoning: Garlic powder, smoked paprika, salt, and black pepper

Optional Additions

  • Red chili flakes for spice
  • Fresh parsley for garnish
  • Heavy cream for extra richness

Step-by-Step Instructions

1. Preparing the Steak

  • Season thinly sliced steak with salt, pepper, and garlic powder.
  • Sear in a hot skillet until browned. Remove and set aside.

2. Making the Sauce

  • Sauté onions, peppers, and mushrooms in butter until softened.
  • Add minced garlic and cook for another minute.
  • Stir in cream cheese, shredded provolone, and heavy cream to create a rich sauce.

3. Cooking the Pasta

  • Boil pasta until al dente. Reserve ½ cup of pasta water for the sauce.

4. Combining Everything

  • Mix the cooked pasta and steak into the sauce.
  • Add reserved pasta water to adjust the consistency.

5. Final Touches

  • Garnish with fresh parsley and serve hot.

For more pasta inspirations, check out Italian Sausage Pasta for a spicy twist.


Variations and Customizations

  • Vegetarian Option: Replace steak with portobello mushrooms.
  • Low-Carb Version: Use zoodles or cauliflower rice.
  • Cheese Swap: Try gouda or cheddar for a different flavor profile.

Serving Suggestions

Pair this dish with:

  • Salads: A light green salad with balsamic dressing.
  • Bread: Warm garlic bread or breadsticks.
  • Drinks: A glass of red wine or iced tea.

FAQs

What type of steak works best?

Ribeye is the most flavorful, but sirloin or flank steak can be used for a leaner option.

Can I prepare this dish ahead of time?

Yes! Cook the steak and sauce in advance, and combine with freshly cooked pasta before serving.

How do I store leftovers?

Store in an airtight container in the refrigerator for up to 3 days.

Can I freeze this dish?

Yes, but the texture of the cheese sauce may change slightly upon reheating.

What vegetables can I add?

Spinach, zucchini, or sun-dried tomatoes pair beautifully with this recipe.


Nutritional Information

Each serving (assuming 4 servings):

  • Calories: ~580
  • Protein: 30g
  • Carbohydrates: 45g
  • Fat: 28g

Internal Linking Opportunities

For related comfort food ideas, check out:


Conclusion

Creamy Philly Steak & Pasta is the ultimate comfort dish, blending the best of Philly cheesesteak flavors with the heartiness of pasta. Whether you’re preparing it for a family dinner or meal prepping for the week, this recipe will leave everyone satisfied. For more indulgent recipes, visit ExoRecipes.com.

Decadent Bananas Foster Cheesecake: A Step-by-Step Recipe for Dessert Lovers

bananas foster dessert, caramelized banana cheesecake, New Orleans cheesecake, banana and rum dessert, bananas foster recipe cheesecake

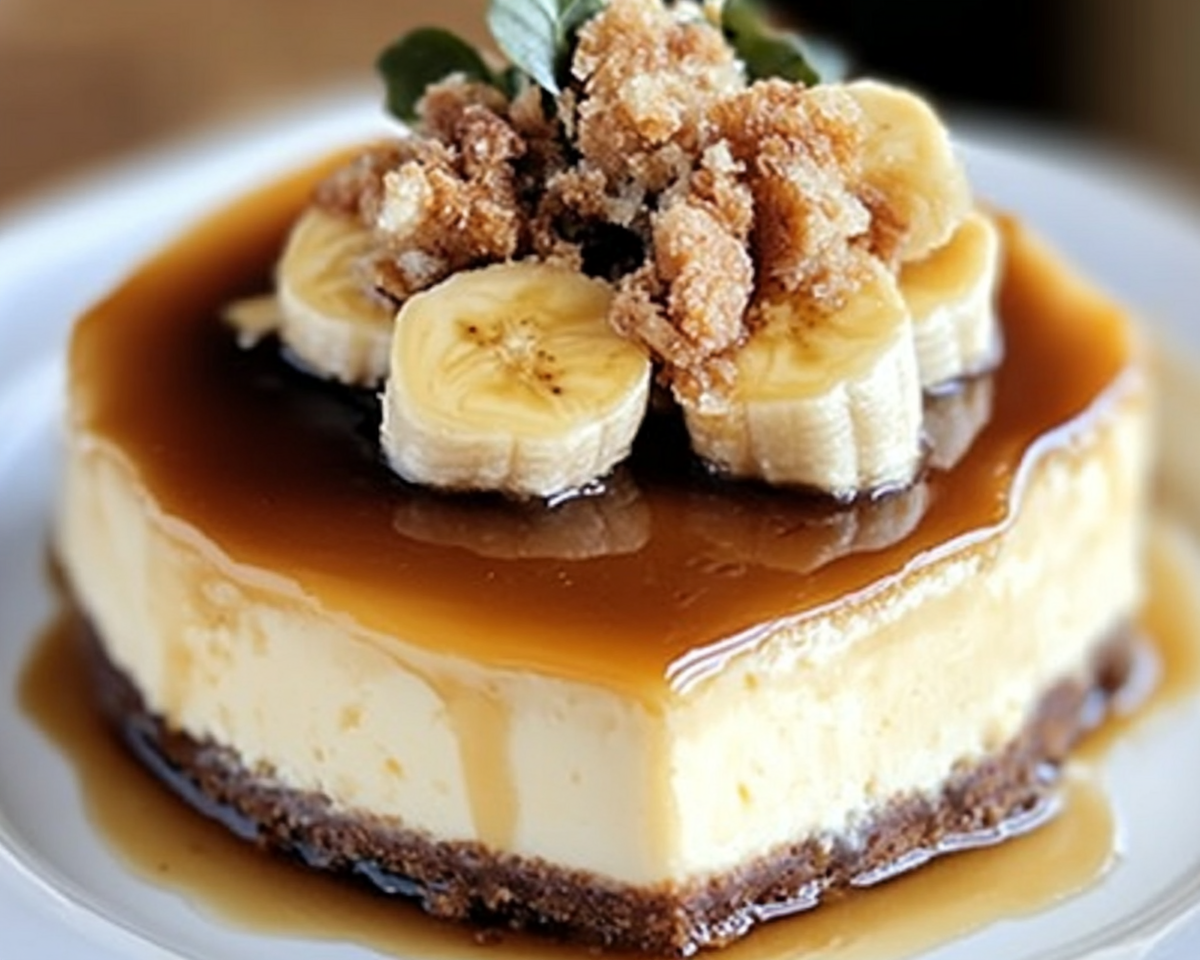
Bananas Foster Cheesecake: The Ultimate Decadent Dessert

Bananas Foster Cheesecake combines the creamy richness of cheesecake with the classic New Orleans dessert, Bananas Foster. This fusion dessert is a celebration of bold flavors—caramelized bananas, buttery rum sauce, and a luscious cheesecake base. It’s the perfect showstopper for special occasions or when you simply want to indulge.

For those new to this dessert, Bananas Foster is a classic dish with caramelized bananas in a buttery brown sugar and rum sauce. Pairing it with cheesecake elevates its decadence, creating a dessert that’s truly irresistible.

If you’re curious about cheesecake baking tips, explore the Ultimate Cheesecake Guide on Serious Eats.


What Makes Bananas Foster Cheesecake Unique?

Bananas Foster Cheesecake stands out because it marries two iconic desserts. The creamy texture of cheesecake beautifully complements the caramelized sweetness of the banana topping. Here’s why it’s a dessert lover’s dream:

  • Rich Layers: A buttery crust, smooth cheesecake, and gooey topping.
  • Flavor Contrast: The tanginess of cream cheese balances the sweetness of caramel and bananas.
  • Visual Appeal: The caramelized banana topping adds elegance and flair.

Curious about other banana-based desserts? Check out Easy No-Bake Banana Split Cheesecake for another creative twist.


Ingredients You’ll Need

For the Crust:

  • 1 ½ cups graham cracker crumbs
  • ½ cup melted butter
  • ¼ cup granulated sugar
  • ½ tsp cinnamon (optional)

For the Cheesecake:

  • 16 oz cream cheese, softened
  • 1 cup granulated sugar
  • 3 large eggs
  • ½ cup sour cream
  • 1 tsp vanilla extract
  • 2 ripe bananas, mashed

For the Bananas Foster Topping:

  • 4 bananas, sliced
  • ½ cup brown sugar
  • 4 tbsp butter
  • ¼ cup dark rum
  • 1 tsp cinnamon

Step-by-Step Recipe

1. Make the Crust

  • Preheat the oven to 350°F (175°C).
  • Combine graham cracker crumbs, sugar, and melted butter.
  • Press the mixture firmly into a springform pan.
  • Bake for 10 minutes, then let it cool.

2. Prepare the Cheesecake Filling

  • Beat cream cheese and sugar until smooth.
  • Add eggs one at a time, mixing thoroughly.
  • Fold in mashed bananas, sour cream, and vanilla.
  • Pour the filling over the prepared crust.

3. Bake the Cheesecake

  • Use a water bath to bake at 325°F (160°C) for about 50–60 minutes.
  • Let the cheesecake cool gradually to room temperature.

4. Make the Bananas Foster Topping

  • In a skillet, melt butter and stir in brown sugar.
  • Add bananas and cinnamon, cooking until caramelized.
  • Carefully pour in rum and flambé (optional).
  • Let the sauce cool slightly before pouring over the chilled cheesecake.

5. Assemble and Serve

  • Spread the bananas Foster topping evenly over the cheesecake.
  • Garnish with whipped cream or a drizzle of caramel if desired.

Pro Tips for Success

  • Use Room-Temperature Ingredients: Ensures a smooth cheesecake batter.
  • Water Bath Is Essential: Prevents cracks and ensures even baking.
  • Choose Ripe Bananas: Enhances the natural sweetness and flavor.

FAQs

Can I Make This Cheesecake Without Alcohol?

Yes! Simply omit the rum or substitute it with rum extract for flavor.

How Long Can I Store This Cheesecake?

Store it in an airtight container in the refrigerator for up to 5 days.

Can I Use a Pre-Made Crust?

Yes, but a homemade crust gives a fresher and more customized flavor.

What’s the Best Way to Flambé Safely?

Ensure the skillet is off the heat before adding rum, then ignite carefully using a long lighter.


Pairing Suggestions

  • Drinks: Serve with a rich coffee, spiced tea, or dessert wine.
  • Sides: Complement the dessert with fresh berries or a scoop of vanilla ice cream.

Looking for another banana treat? Don’t miss Banana Pudding Cheesecake, a no-bake option for busy bakers.


Nutritional Information

Each slice (assuming 12 servings):

  • Calories: ~420
  • Protein: 6g
  • Fat: 24g
  • Carbohydrates: 45g

Internal Linking Opportunities

Incorporate these related recipes for enhanced reader engagement:


Conclusion

Bananas Foster Cheesecake is the perfect combination of luxury and comfort. Whether you’re celebrating a special occasion or indulging in a weekend treat, this dessert will impress your guests and satisfy your cravings.

For more inspiring recipes, visit ExoRecipes.com to discover your next culinary adventure.

How to Make Black Sesame Cheesecake: A Perfect Fusion Dessert Recipe

black sesame cheesecake, sesame dessert recipe, Asian-inspired cheesecake, nutty cheesecake recipe, sesame paste cheesecake

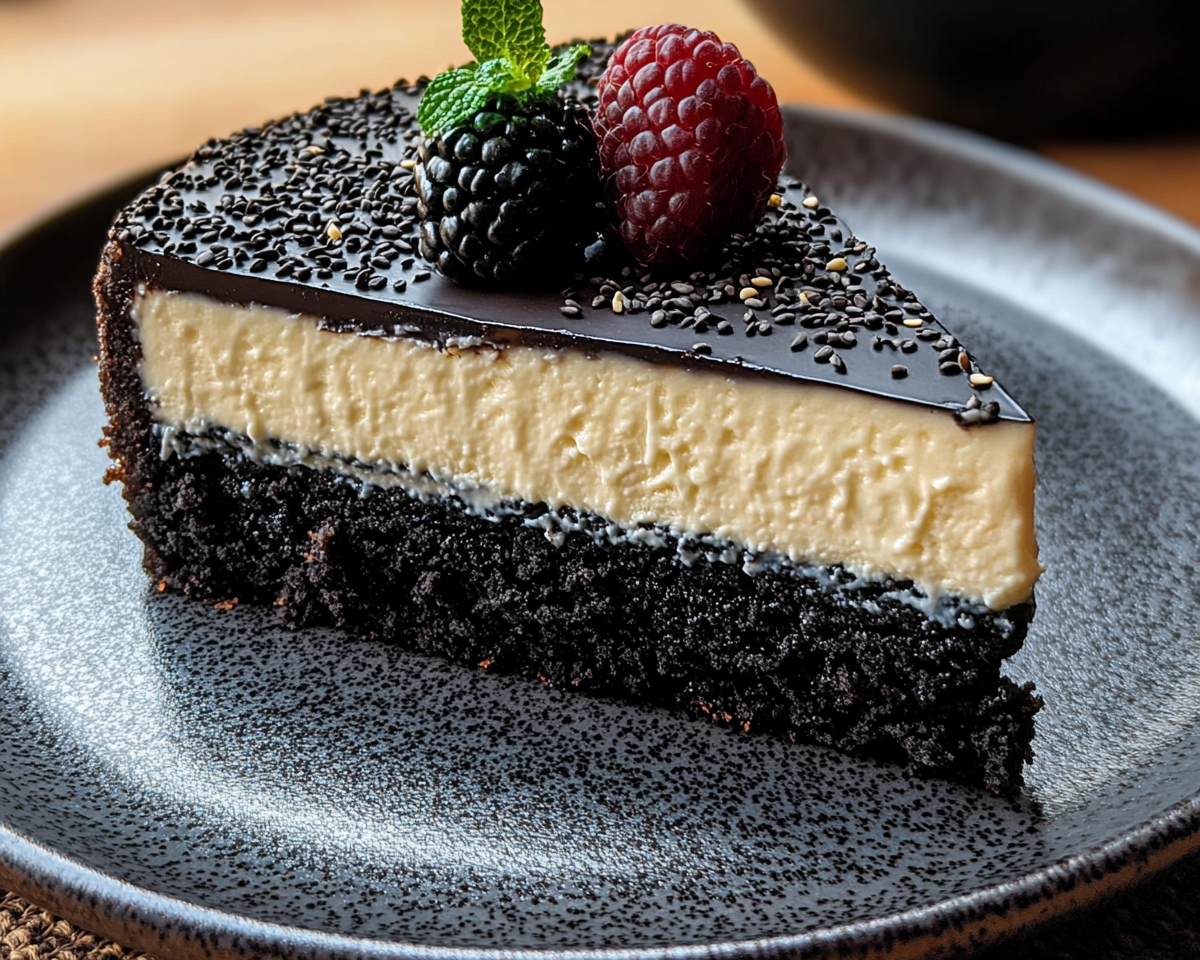
Black Sesame Cheesecake Recipe: A Delectable Fusion Dessert

If you’re a fan of cheesecake and are always on the lookout for unique flavors, then Black Sesame Cheesecake might just be your next favorite dessert. This fusion of creamy cheesecake and the nutty depth of black sesame seeds is not only visually stunning but also delightfully rich in taste. Let’s dive into the details of this remarkable recipe and learn how to create it step-by-step.


Why Black Sesame Cheesecake?

A Flavorful Fusion

The black sesame seed, a staple in Asian desserts, offers a nutty, slightly smoky flavor that complements the creamy texture of cheesecake perfectly. This dessert marries Eastern and Western culinary traditions, offering a treat that’s both comforting and exotic.

Nutritional Benefits

Black sesame seeds are not just about flavor. They are packed with nutrients, including calcium, magnesium, and antioxidants, making this cheesecake not only delicious but also a healthier indulgence compared to many other desserts.

For more on the health benefits of black sesame seeds, check out Healthline’s guide on black sesame seeds.


Ingredients You’ll Need

For the Crust:

  • 1 ½ cups of crushed graham crackers
  • ¼ cup granulated sugar
  • ½ cup melted butter

For the Filling:

  • 16 oz cream cheese, softened
  • 1 cup granulated sugar
  • 3 large eggs
  • ½ cup black sesame paste
  • 1 cup heavy cream
  • 1 tsp vanilla extract

Optional Toppings:

  • Whipped cream
  • Black sesame seeds for garnish

For tips on perfect cheesecake baking techniques, visit Serious Eats’ Cheesecake Guide.


Step-by-Step Instructions

1. Prepare the Crust

  • Combine crushed graham crackers, sugar, and melted butter.
  • Press the mixture firmly into the base of a springform pan.
  • Bake at 350°F (175°C) for 10 minutes and let it cool.

2. Make the Black Sesame Filling

  • Beat cream cheese and sugar until smooth.
  • Add eggs one at a time, mixing thoroughly.
  • Mix in black sesame paste, heavy cream, and vanilla extract until well incorporated.

3. Assemble and Bake

  • Pour the filling onto the cooled crust.
  • Bake in a water bath at 325°F (160°C) for 50–60 minutes or until the center is set.
  • Cool the cheesecake gradually to avoid cracks.

4. Serve

  • Chill the cheesecake in the refrigerator for at least 4 hours before serving.
  • Garnish with whipped cream and a sprinkle of black sesame seeds.

Common Variations

  • No-Bake Black Sesame Cheesecake: Replace the eggs with gelatin for a quicker version.
  • Basque Burnt Style: Increase the oven temperature for a caramelized top.
  • Marble Design: Swirl in additional black sesame paste for a striking visual effect.

Tips for Success

  • Always use room-temperature cream cheese for a smooth filling.
  • Use a water bath to prevent cracks.
  • Grind black sesame seeds freshly for a more intense flavor.

FAQs About Black Sesame Cheesecake

Can I use white sesame seeds instead?

Yes, but white sesame seeds have a milder flavor compared to black sesame.

How should I store this cheesecake?

Store it in an airtight container in the fridge for up to 5 days.

What if I don’t have black sesame paste?

You can make your own by grinding toasted black sesame seeds and mixing them with honey or sugar.


Internal Linking Opportunities

Consider linking to these related recipes on ExoRecipes.com:


Conclusion

Black Sesame Cheesecake is more than just a dessert—it’s a sensory experience. With its striking appearance, nutty flavors, and creamy texture, this cheesecake will impress anyone who tastes it. Whether you’re new to baking or a seasoned pro, this recipe is worth adding to your repertoire.

If you’re inspired by this recipe, why not try making your own version? Share your results, and let us know how you’ve personalized it!

For more dessert inspirations, visit ExoRecipes today!

Mini Peanut Butter Cheesecake Bites: Easy, Creamy, and Perfectly Delicious

peanut butter cheesecake bites, mini cheesecake recipes, bite-sized peanut butter desserts, no-bake mini cheesecakes, creamy peanut butter bites, small cheesecake treats

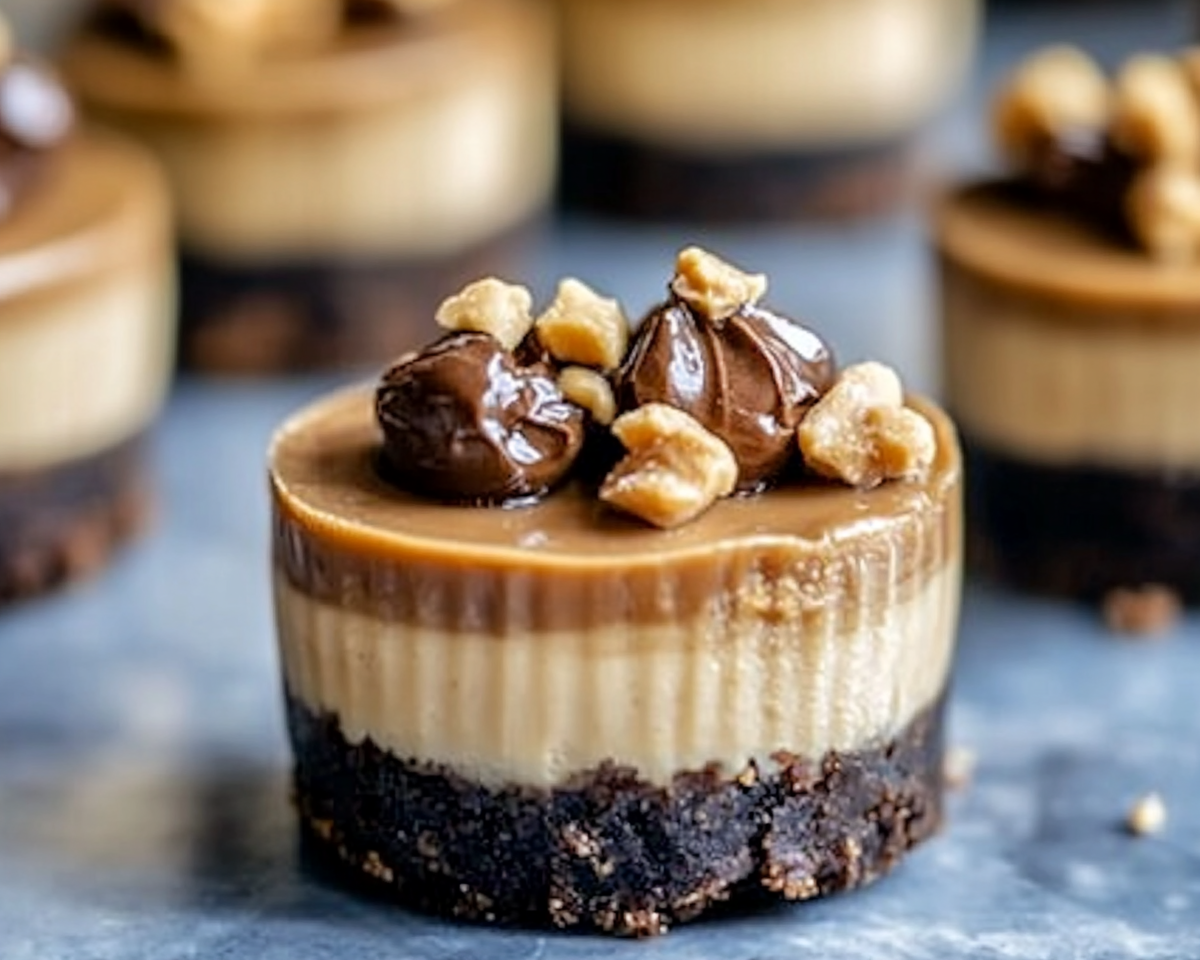
Mini Peanut Butter Cheesecake Bites: The Perfect Dessert in Every Bite

Mini desserts are all the rage, and Mini Peanut Butter Cheesecake Bites bring together the creamy richness of cheesecake and the indulgent nuttiness of peanut butter into bite-sized perfection. Whether you’re hosting a party, craving a quick dessert, or preparing treats for your family, these bites deliver a delightful combination of taste and convenience.

For inspiration on bite-sized desserts, check out Crispy Fried Cheesecake Bites.


Why Choose Mini Peanut Butter Cheesecake Bites?

  • Perfect Portion Control: Each bite is a pre-portioned treat, making it easy to enjoy in moderation.
  • Versatile for Any Occasion: From casual snacks to elegant parties, these bites fit any setting.
  • Quick Preparation Options: Bake or go for no-bake versions to suit your schedule.

For another crowd-pleaser, explore Salted Caramel Apple Cheesecake.


Ingredients You’ll Need

For the Base

  • Crushed graham crackers, Oreos, or peanut butter cookies.
  • Butter for binding.

For the Cheesecake Filling

  • Cream cheese, peanut butter, sugar, and eggs (or egg substitutes for no-bake).
  • Vanilla extract for flavor.

For Decoration

  • Chocolate ganache, crushed nuts, or mini Reese’s cups.

For more ideas, explore Raspberry Cheesecake Brownie Bites.


Step-by-Step Instructions

1. Preparing the Base

  • Crush cookies into fine crumbs and mix with melted butter.
  • Press into mini muffin tins or silicone molds.
  • Bake at 325°F (163°C) for 5-7 minutes or chill for a no-bake option.

2. Making the Filling

  • Beat cream cheese and sugar until smooth.
  • Add peanut butter, vanilla extract, and eggs (if baked). For no-bake, fold in whipped cream instead.

3. Assembling the Bites

  • Spoon or pipe the cheesecake mixture onto the crusts.
  • Chill or bake until set.

4. Topping and Serving

  • Decorate with melted chocolate, nuts, or mini candies.
  • Chill for at least 2 hours before serving.

Creative Variations

  • No-Bake Version: Replace eggs with whipped cream and skip the baking.
  • Vegan Alternative: Use plant-based cream cheese and a flaxseed egg substitute.
  • Keto-Friendly: Use almond flour for the crust and sugar alternatives like erythritol.

For no-bake inspiration, visit No-Bake Banana Split Cheesecake.


Tips for Success

  1. Room Temperature Ingredients: Ensure cream cheese and peanut butter are at room temperature for smoother mixing.
  2. Chill Time: Let the bites chill thoroughly for the best texture.
  3. Use Silicone Molds: Easier to release without breaking the delicate bites.

FAQs About Mini Peanut Butter Cheesecake Bites

1. Can I Freeze These Cheesecake Bites?

Yes, freeze in an airtight container for up to 3 months. Thaw in the refrigerator before serving.

2. How Long Do They Last in the Fridge?

Store in an airtight container for up to 5 days.

3. Can I Use Crunchy Peanut Butter?

Yes, for added texture, crunchy peanut butter works well.

4. What’s the Best Way to Decorate Them?

Drizzle with chocolate or caramel and garnish with chopped nuts or candies.


Internal Linking Opportunities

To enhance engagement, include these internal links:


Conclusion

Mini Peanut Butter Cheesecake Bites are the perfect combination of convenience, flavor, and indulgence. Whether you prefer baked or no-bake versions, this versatile dessert is guaranteed to impress. Their creamy texture, rich peanut butter flavor, and bite-sized appeal make them a must-try for any dessert lover.