“`html
Table of Contents
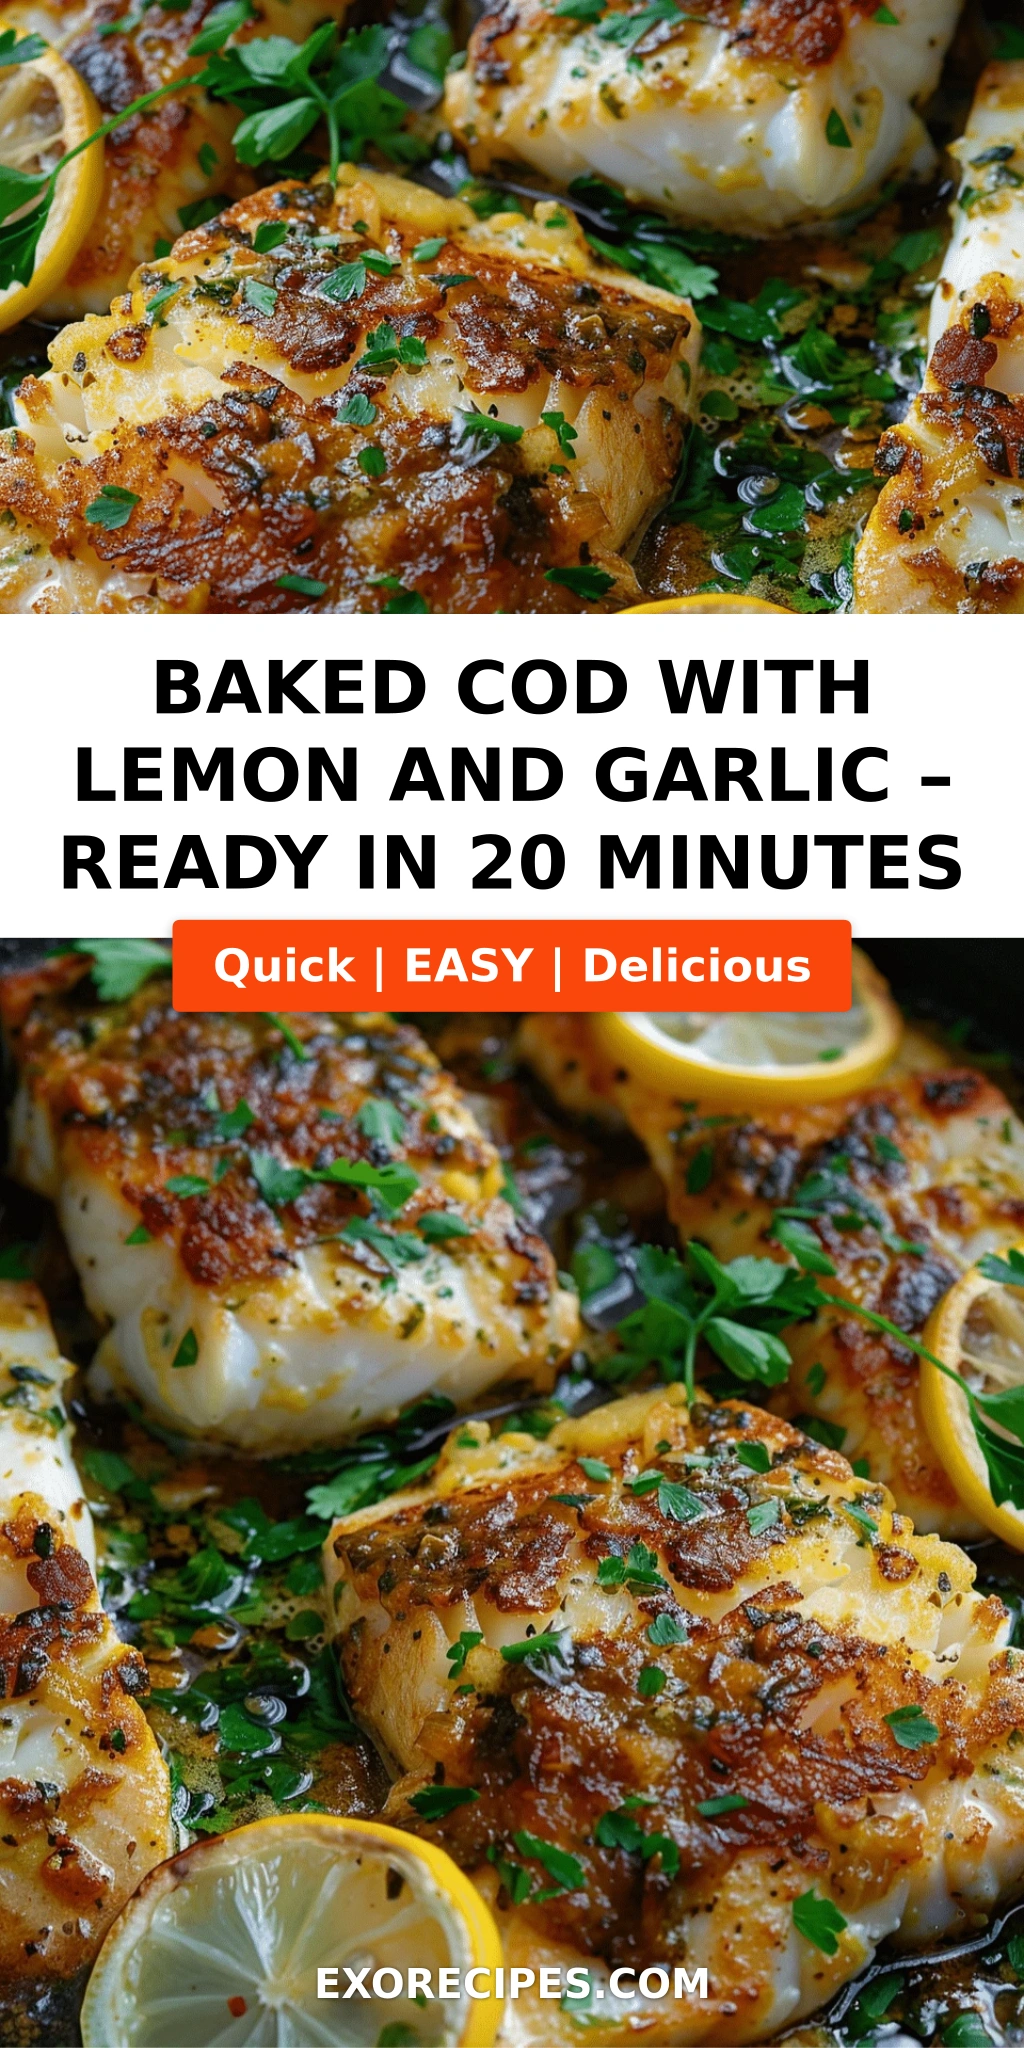
Baked Cod with Lemon and Garlic – Quick, Healthy & Flaky Dinner
I still remember the first time I truly understood how to cook fish properly. It was in Paris, during my training at Le Cordon Bleu. My chef instructor — a stern but brilliant Breton — placed a pristine cod fillet in front of me and said, “The secret is in the respect you show the ingredient.” This baked cod with lemon and garlic is the embodiment of that lesson. It’s the recipe I turn to after a long day of recipe testing in my NYC kitchen, when I need something quick, healthy, and deeply satisfying. The buttery lemon garlic sauce is simple, but when you nail the technique — proper heat, properly dried fish, and fresh aromatics — it becomes something truly special. This lemon garlic baked cod comes together in just 20 minutes from start to finish, making it the perfect weeknight dinner that tastes like you spent hours in the kitchen.
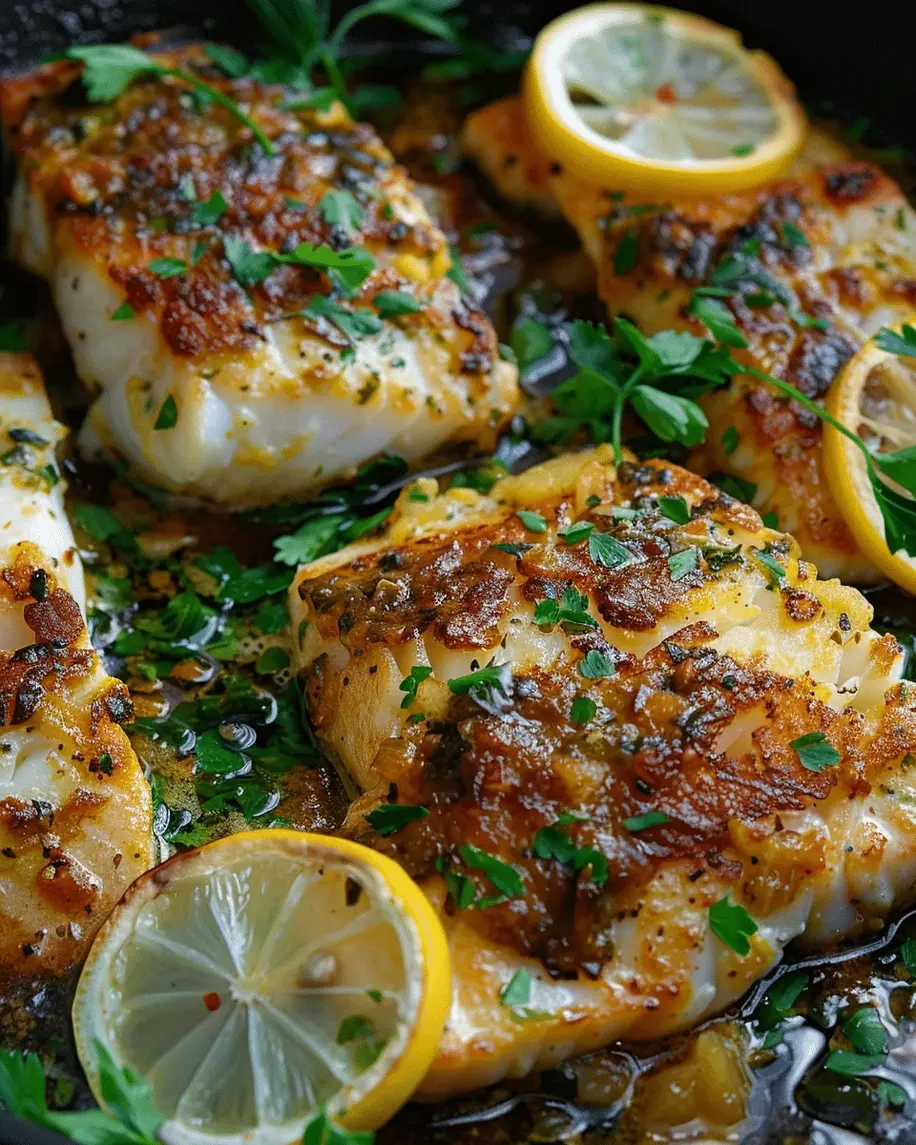
The aroma alone tells you everything is working: the garlic sizzling gently in melted butter, the bright citrus notes of fresh lemon cutting through the richness, and the clean, briny scent of the sea that signals quality cod. When it comes out of the oven, the fillets are pearly white and opaque, with golden edges where the butter has caramelized around the garlic. A fork pressed gently against the thickest part meets no resistance — the fish flakes into tender, juicy chunks that practically melt on your tongue. The sauce pools around the fish, ready to be soaked up by a side of roasted potatoes or crusty bread. Every bite is a balance of richness, brightness, and that clean ocean flavor that makes cod such a beloved fish. It’s the kind of easy baked cod recipe that feels both comforting and elegant at the same time.
My version builds on my French training and my Moroccan love for bold, aromatic flavors. I’ve tested this recipe more times than I can count, tweaking the butter-to-lemon ratio, adjusting the oven temperature, and finding the perfect baking time for that ideal flaky texture. 💡 mia’s Pro Tip: The most important step is patting the cod fillets completely dry with paper towels before adding the butter sauce — excess moisture steams the fish instead of baking it, and you’ll miss that beautiful caramelization. A common mistake home cooks make is overbaking cod because they’re afraid of undercooked fish. At 400°F, 12 to 15 minutes is all you need for standard 6-ounce fillets. The fish will continue cooking from residual heat after you pull it out of the oven, so err on the side of slightly underdone — it’s far better than dry, overcooked cod. This healthy baked cod recipe is proof that simple ingredients, treated with care, create the most memorable meals.
Why This Baked Cod with Lemon and Garlic Recipe Is the Best
The secret to this dish lies in the garlic butter cod sauce that does double duty. After years of testing in my NYC kitchen, I discovered that whisking the melted butter with fresh lemon juice, zest, minced garlic, and a pinch of salt creates a quick compound butter that coats every inch of the fish. My French pastry training taught me the importance of emulsion — and while this isn’t a classic emulsion, the technique of thoroughly combining the fat with the acid ensures the butter clings to the cod rather than pooling separately. The result is a glossy, flavorful coating that bakes into a light, golden crust while keeping the fish impossibly moist. Growing up in Morocco, my mother always said that the best dishes are the ones where the sauce becomes part of the ingredient, not just a topping — and that philosophy is at the heart of this recipe.
The texture of this baked cod is where my professional training really shines. By baking the fillets uncovered at a precise 400°F, the heat circulates evenly around each piece, cooking the fish gently while the butter sauce caramelizes at the edges. The key is starting with room-temperature cod that’s been patted thoroughly dry — this ensures the butter clings to the surface and creates that delicate, flaky texture rather than steaming the fish into rubbery submission. I learned this technique during my Paris training, where we spent an entire week learning to cook fish properly. The difference between a perfectly cooked cod fillet and an overcooked one is literally two minutes, which is why I always recommend checking the fish at the 12-minute mark. This easy baked cod recipe is foolproof if you follow that simple timing rule.
What makes this recipe truly foolproof is the combination of a short ingredient list and a technique that works every time. You don’t need any special equipment — just a baking dish, a small bowl, and a whisk. The entire dish comes together in 20 minutes, which means it’s faster than ordering takeout in most parts of New York City. I’ve taught this recipe to cooking students who were nervous about cooking fish, and every single one of them left feeling confident. The lemon garlic baked cod is forgiving enough for a Tuesday night but elegant enough for company. Plus, with only 220 calories per serving and 30 grams of protein, it fits perfectly into a healthy baked cod meal plan without sacrificing flavor. It’s the kind of recipe that becomes a cornerstone of your weekly rotation — I know it is in my apartment.
Baked Cod with Lemon and Garlic Ingredients
I buy my cod from the fishmonger at the Union Square Greenmarket in NYC — he knows me by name and always sets aside the freshest fillets. The combination of ingredients in this baked cod with lemon and garlic is intentionally simple, letting the quality of each component shine. Here’s everything you’ll need to make this lemon garlic baked cod at home:
Ingredients List
- 4 (6-ounce) cod fillets — look for firm, moist fillets with a mild scent of the sea
- 3 tablespoons unsalted butter, melted — use good-quality butter for the best flavor
- 3 cloves garlic, minced — fresh garlic is essential for this recipe
- 2 tablespoons fresh lemon juice — from about 1 lemon, always fresh, never bottled
- 1 teaspoon lemon zest — adds brightness and depth to the sauce
- 1/2 teaspoon salt — I use kosher salt for better control
- 1/4 teaspoon black pepper — freshly ground, please
- 1 tablespoon chopped fresh parsley (for garnish) — flat-leaf Italian parsley is my preference
Ingredient Spotlight
Cod Fillets: The star of this garlic butter cod recipe. Fresh cod should have a clean, mild scent — never fishy or ammonia-like. Look for fillets that are firm to the touch, moist but not wet, with a pearly white color. If you’re shopping in a US grocery store, ask the fishmonger for center-cut fillets that are evenly thick — this ensures even cooking. For a tested substitution, you can use haddock or pollock, which have a similar flaky texture and mild flavor. Just adjust the baking time slightly if the fillets are thinner or thicker than 1 inch.
Unsalted Butter: I use unsalted butter because it lets me control the salt level precisely. During my pastry training in Paris, I learned that different butters have different water contents, which affects how they behave in the oven. For this easy baked cod recipe, European-style butter (like Plugrà or Kerrygold) has a lower water content and richer flavor, creating a more luxurious sauce. If you only have salted butter on hand, simply reduce the added salt to 1/4 teaspoon. For a dairy-free option, extra-virgin olive oil works beautifully — use a good-quality fruity oil for the best flavor.
Fresh Garlic: This is non-negotiable for the best lemon garlic baked cod. Pre-minced garlic from a jar contains preservatives that affect the flavor and won’t distribute as evenly through the butter sauce. I mince my garlic by hand — a technique I perfected in Paris — because it releases the oils more evenly than a press. If you’re in a pinch, you can substitute 1 teaspoon of garlic powder, but the flavor will be less vibrant and more one-dimensional. For a milder garlic flavor, you can roast whole cloves and mash them into the butter before baking.
Fresh Lemon: The lemon does double duty here — the juice provides acidity that balances the richness of the butter, while the zest adds aromatic oils that brighten the entire dish. I always use fresh lemons for this healthy baked cod recipe because bottled lemon juice has a flat, metallic taste. When selecting lemons at the grocery store, look for ones that feel heavy for their size and have a thin, smooth skin — those are the juiciest. One medium lemon will give you both the zest and the juice you need for this recipe. If you only have lime on hand, it makes a delicious substitute with a slightly different citrus profile.
| Original Ingredient | Best Substitution | Flavor / Texture Impact |
|---|---|---|
| Cod Fillets | Haddock or Pollock | Similar flaky texture; slightly sweeter, milder flavor |
| Unsalted Butter | Extra-Virgin Olive Oil | Fruitier flavor; less rich, but still delicious and dairy-free |
| Fresh Garlic (3 cloves) | 1 tsp Garlic Powder | Milder, less aromatic; still works but lacks depth |
| Fresh Lemon Juice | Fresh Lime Juice | Different citrus profile — more tart, less floral |
| Fresh Parsley | Fresh Dill or Chives | Dill adds an herbaceous note; chives provide mild onion flavor |
How to Make Baked Cod with Lemon and Garlic — Step-by-Step
This easy baked cod recipe comes together in just 20 minutes, and I’ve broken it down into simple steps so you feel confident every step of the way. Trust me — if you can preheat an oven and whisk butter in a bowl, you can make this lemon garlic baked cod like a pro.
Step 1: Preheat and Prepare
Preheat your oven to 400°F (200°C). Lightly grease a baking dish with a little butter or cooking spray, or line it with parchment paper for easy cleanup. I prefer parchment paper because it makes cleanup effortless — a small luxury I appreciate after a long day in my NYC kitchen. Choose a baking dish that fits the cod fillets in a single layer without overcrowding; the fish needs room for the heat to circulate evenly. If the fillets are crowded, they’ll steam instead of bake, and you won’t get that beautiful golden edge.
💡 mia’s Pro Tip: For the flakiest cod, let the fillets sit at room temperature for about 10 minutes before baking. Cold fish straight from the fridge will cook unevenly, with the outside drying out before the center is done.
Step 2: Make the Lemon Garlic Butter
In a small bowl, whisk together the melted butter, minced garlic, fresh lemon juice, lemon zest, salt, and black pepper. Whisk vigorously for about 20 seconds until everything is well combined — the mixture should look slightly emulsified, with the garlic and lemon evenly distributed throughout the butter. This is the moment where you can smell the magic happening: the garlic infuses the warm butter, the lemon brightens it, and the salt balances everything. Take a moment to appreciate it — this is the sauce that will transform simple cod into something special.
⚠️ Common Mistake to Avoid: Don’t use cold butter! Melted butter at room temperature (not hot) ensures the garlic infuses gently without cooking it. If the butter is too hot, it will partially cook the garlic, mellowing its flavor too much.
Step 3: Prepare the Cod Fillets
Place the cod fillets in the prepared baking dish, skin-side down if your fillets have skin. Pat them dry one more time with a paper towel if they feel at all moist. Pour the butter mixture evenly over the fish, using a spoon or brush to make sure each fillet is fully coated. The sauce will pool slightly around the fish, which is exactly what we want — it will concentrate as it bakes, creating a flavorful sauce to spoon over the finished dish.
💡 mia’s Pro Tip: Use a pastry brush to paint the butter mixture onto the sides of the fillets that aren’t fully submerged. This ensures every bite is flavored and prevents dry spots.
Step 4: Bake to Perfection
Bake the cod for 12 to 15 minutes, depending on the thickness of your fillets. The fish is done when it turns opaque and flakes easily with a fork. To check, insert a fork into the thickest part of a fillet and twist gently — if the fish separates into clean, moist flakes, it’s ready. I typically check at 12 minutes for standard 6-ounce fillets that are about 1 inch thick. If your fillets are thicker, they may need the full 15 minutes. The internal temperature should reach 145°F for food safety, but I find the visual cue of flaking is even more reliable.
⚠️ Common Mistake to Avoid: Do not open the oven door repeatedly to check on the fish! Every time you open the door, heat escapes and extends the cooking time. Use the oven light to check for flaking, or wait until the 12-minute mark before testing.
Step 5: Garnish and Serve
Remove the baking dish from the oven and let the cod rest for 2 minutes. This brief resting period allows the juices to redistribute through the fish, ensuring every bite is moist and tender. Sprinkle the chopped fresh parsley over the top and spoon the pan sauce over each fillet. The parsley adds a fresh, herbaceous note that cuts through the richness of the butter and brightens the entire dish. Serve immediately while the fish is still hot and flaky.
💡 mia’s Pro Tip: Don’t skip the resting time! I learned this in Paris — even delicate fish benefits from a short rest. It’s the difference between good cod and exceptional cod.
| Step | Action | Duration | Key Visual Cue |
|---|---|---|---|
| 1 | Preheat oven & prepare dish | 10 min (preheat) | Oven reaches 400°F |
| 2 | Whisk lemon garlic butter | 2 min | Smooth, emulsified, aromatic |
| 3 | Coat cod fillets | 3 min | Fillets fully covered in sauce |
| 4 | Bake | 12–15 min | Opaque, flakes easily with fork |
| 5 | Rest, garnish & serve | 2 min rest | Parsley brightens the dish |
Serving & Presentation
When I serve this baked cod with lemon and garlic in my NYC apartment, I like to plate each fillet on a warm plate and spoon the pan sauce generously over the top. The lemon garlic butter sauce is liquid gold — don’t leave a drop behind. I garnish with a sprinkle of fresh parsley and sometimes add a lemon wedge on the side for an extra squeeze at the table. The bright green parsley against the white fish and golden sauce makes for a stunning presentation that looks like it came from a restaurant kitchen. My Moroccan mother always said that we eat first with our eyes, and this dish delivers on that front beautifully.
For sides, I love pairing this lemon garlic baked cod with something that soaks up that gorgeous sauce. In the summer, I serve it with a simple couscous tossed with fresh herbs — a nod to my Moroccan roots — or with roasted asparagus and cherry tomatoes from the Union Square market. In the winter, I reach for creamy mashed potatoes or a warm farro salad with roasted vegetables. The beauty of this healthy baked cod is that it pairs well with almost anything, from light salads to hearty grains. It’s versatile enough to fit any season or craving.
One of my favorite ways to serve this dish is family-style, placing the entire baking dish on the table with the garnished cod and sauce, alongside a big bowl of something green and a basket of crusty bread. There’s something deeply satisfying about everyone reaching in and helping themselves, tearing off pieces of bread to mop up the sauce. It reminds me of Friday dinners in Morocco, where the table was always full of family and shared dishes. This garlic butter cod has that same welcoming energy — it’s comfort food with a touch of elegance.
| Pairing Type | Suggestions | Why It Works |
|---|---|---|
| Side Dish | Herbed couscous, roasted asparagus, crusty bread | Soaks up the lemon garlic butter sauce perfectly |
| Sauce / Dip | Extra lemon wedges, chermoula, tzatziki | Adds brightness or creaminess to complement the fish |
| Beverage | Crisp Sauvignon Blanc, dry rosé, sparkling water with lemon | Acidity cuts through the butter and complements the lemon |
| Garnish | Fresh parsley, lemon zest, flaky sea salt, microgreens | Adds color, freshness, and a pop of flavor |
Make-Ahead, Storage & Reheating
As a busy NYC food blogger and chef, I know the value of meal prepping wisely. This easy baked cod recipe is best enjoyed fresh from the oven, but with a few smart techniques, you can still enjoy leftovers that taste nearly as good as the first serving. Here’s how I handle storage and reheating in my own kitchen:
| Method | Container | Duration | Reheating Tip |
|---|---|---|---|
| Refrigerator | Airtight container with a drizzle of sauce | Up to 3 days | Reheat gently at 300°F for 8–10 min, covered |
| Freezer | Freezer-safe bag with all air removed | Up to 2 months | Thaw overnight in fridge, then reheat gently |
| Make-Ahead | Prepare sauce and store separately | Sauce up to 5 days in advance | Assemble and bake fresh — only 15 min in the oven |
The most important thing to remember when reheating healthy baked cod is to go low and slow. High heat will dry out the fish and make it rubbery. I reheat leftovers in a 300°F oven, covered with foil, for about 8 to 10 minutes. If you’re in a hurry, you can use the microwave on 50% power in 30-second bursts, but the oven method yields far better results. I sometimes flake leftover cod into a salad or mix it with pasta for a quick lunch the next day — the garlic butter cod flavor is still delicious even cold.
For make-ahead prep, I recommend preparing the lemon garlic butter sauce up to 5 days in advance and storing it in the refrigerator. When you’re ready to cook, simply bring the sauce to room temperature, pat the cod dry, pour the sauce over, and bake. This cuts your active prep time down to just 5 minutes on a busy weeknight. I do this all the time when I know I’ll be coming home late from a recipe testing session — it’s my secret weapon for eating well even on the busiest days.
Variations & Easy Swaps
One of the things I love most about this baked cod with lemon and garlic is how adaptable it is. Over the years, I’ve developed several variations that draw from my Moroccan heritage, my French training, and the seasonal ingredients I find at NYC farmers markets. Here are some of my favorite ways to change things up:
| Variation | Key Change | Best For | Difficulty Impact |
|---|---|---|---|
| Mediterranean Herb-Crusted Cod | Add herbes de Provence & breadcrumbs | When you want a crunchy topping | Easy — just one extra step |
| Dairy-Free Lemon Garlic Cod | Substitute olive oil for butter | Dairy-free or lighter meal | No change — same method |
| Spicy Moroccan Chermoula Cod | Add chermoula spices & fresh cilantro | Bold, aromatic flavor lovers | Easy — just add spices |
Mediterranean Herb-Crusted Cod
This variation takes me back to my Paris training days, where we learned the art of the herb crust. To make it, combine 1/4 cup of panko breadcrumbs with 1 teaspoon of herbes de Provence, a tablespoon of grated Parmesan, and a drizzle of olive oil. Sprinkle this mixture over the sauced cod fillets before baking. The breadcrumbs toast to a golden, crunchy crust that contrasts beautifully with the tender, flaky fish. The herbs de Provence — with their blend of thyme, rosemary, oregano, and lavender — add a fragrant, sun-drenched flavor that pairs perfectly with the lemon and garlic. It’s an easy baked cod recipe upgrade that feels extra special without adding much effort.
Dairy-Free Lemon Garlic Cod
For those who follow a dairy-free diet or simply want a lighter version of this garlic butter cod, the substitution is surprisingly simple. Swap the unsalted butter for 3 tablespoons of high-quality extra-virgin olive oil. I use a fruity Sicilian oil that I buy from a small shop in NYC’s Eataly. The olive oil version is brighter and more herbaceous, with the lemon and garlic taking center stage. The cod bakes up just as flaky and tender, though the sauce will be slightly thinner and won’t caramelize quite as much at the edges. If you want to add richness back, swirl in a tablespoon of nutritional yeast or dairy-free butter alternative. This healthy baked cod variation is a staple in my kitchen during the warmer months.
Spicy Moroccan Chermoula Cod
This is the variation closest to my heart — a tribute to my Moroccan mother’s kitchen. Chermoula is a North African marinade made with cilantro, parsley, garlic, cumin, paprika, and preserved lemon. For this quick version, I add 1 teaspoon of ground cumin, 1/2 teaspoon of sweet paprika, a pinch of cayenne pepper, and 2 tablespoons of fresh cilantro to the butter sauce alongside the lemon and garlic. The result is a deeply aromatic, slightly spicy lemon garlic baked cod that fills your kitchen with the scent of a Moroccan souk. I love serving this with a side of couscous and a dollop of yogurt to cool the heat. It’s the variation I make when I’m homesick for my mother’s cooking — and it never fails to transport me back to those Friday dinners in Marrakech.
How long should you bake cod with lemon and garlic at 400°F?
For standard 6-ounce cod fillets that are about 1 inch thick, bake them at 400°F for 12 to 15 minutes. I recommend checking at the 12-minute mark — insert a fork into the thickest part of the fillet and twist gently. If the fish separates into clean, moist flakes, it’s ready. The internal temperature should reach 145°F for food safety, but I find the visual cue of flaking is even more reliable. Thicker fillets may need the full 15 minutes, while thinner ones might be done at 10 to 12 minutes. Always set a timer and resist the urge to open the oven door repeatedly, which lets heat escape and extends the cooking time.
Can you use frozen cod fillets for a baked lemon garlic cod recipe?
Yes, you can absolutely use frozen cod fillets for this baked lemon garlic cod recipe, but the key is proper thawing. Thaw the frozen fillets overnight in the refrigerator — never at room temperature, which can lead to uneven thawing and potential food safety issues. Once thawed, pat the fillets very dry with paper towels. Frozen fish releases more moisture than fresh, so thorough drying is essential to avoid steaming the fish instead of baking it. You may also need to add an extra 2 to 3 minutes to the baking time since thawed fillets can be slightly more waterlogged. For the best results, I recommend using fresh cod if it’s available, but properly thawed frozen cod works beautifully in a pinch.
What can I substitute for fresh garlic in baked cod with lemon?
If you don’t have fresh garlic on hand, the best substitute is 1 teaspoon of garlic powder for the 3 cloves of fresh garlic called for in this recipe. Garlic powder will give you a milder, more subtle garlic flavor that still works well with the lemon and butter. You can also use 1 tablespoon of jarred minced garlic in oil, but the flavor will be less bright and may have a slightly preserved taste. For a different aromatic profile altogether, try using 2 tablespoons of finely minced shallot or 1 teaspoon of roasted garlic paste. Roasted garlic will add a sweeter, more mellow flavor that pairs beautifully with the lemon. Avoid garlic salt as a substitute since it will make the dish too salty — if that’s all you have, skip the added salt in the recipe.
What sides go best with baked lemon garlic cod?
Baked lemon garlic cod pairs wonderfully with sides that can soak up the buttery sauce. My top recommendations include herbed couscous or quinoa, roasted asparagus or green beans, creamy mashed potatoes, crusty bread for mopping up the sauce, and a simple arugula salad with lemon vinaigrette. For a low-carb option, serve it over sautéed spinach or zucchini noodles. In my NYC kitchen, I love pairing this fish with a warm farro salad with roasted cherry tomatoes and a sprinkle of feta cheese. The key is to choose sides that complement the bright, garlicky flavor of the cod without overwhelming it. The sauce is the star, so you want something that can catch every last drop.
How do I know when baked cod is fully cooked?
The most reliable way to know when baked cod is fully cooked is the fork test. Insert a fork into the thickest part of the fillet and twist gently — if the fish separates into clean, moist flakes, it’s done. Visually, fully cooked cod turns from translucent to opaque white or off-white throughout. The internal temperature should reach 145°F when measured with an instant-read thermometer at the thickest point. I recommend checking the fish at the 12-minute mark for standard 6-ounce fillets. Remember that cod will continue to cook from residual heat for a minute or two after you remove it from the oven, so it’s better to pull it out when it’s just barely opaque and flaking rather than waiting until it’s fully cooked through.
Can I use a different type of fish for this recipe?
Absolutely! This lemon garlic butter sauce works beautifully with any mild, flaky white fish. Haddock is the closest substitute to cod and will give you almost identical results. Pollock, tilapia, and halibut are also excellent choices — just adjust the baking time based on the thickness of the fillets. Tilapia fillets are typically thinner and may only need 8 to 10 minutes, while halibut steaks are thicker and may need 15 to 18 minutes. For a more luxurious option, you can use sea bass or branzino. I’ve even made this recipe with salmon, though the richer flavor of salmon changes the character of the dish. The key is to use fillets of similar thickness so they cook evenly, and always pat them dry before adding the sauce.
Should I cover the cod while baking?
No, I do not recommend covering the cod while baking. Baking it uncovered allows the heat to circulate around the fillets, which helps the butter sauce caramelize slightly at the edges and creates that beautiful golden finish. Covering the dish with foil would trap steam and effectively poach the fish, resulting in a softer texture and preventing the sauce from concentrating and developing those flavorful caramelized bits. If you’re concerned about the fish drying out, rest assured that the butter sauce keeps the cod moist and tender. The uncovered method is the technique I learned in Paris for baking delicate fish — it gives you that perfect balance of a tender interior with a lightly golden exterior.
Can I add vegetables to the same baking dish?
Yes, adding vegetables to the same baking dish is a great way to create a complete one-pan meal. I recommend adding vegetables that have a similar cooking time to the cod, such as asparagus spears, cherry tomatoes, thinly sliced zucchini, or green beans. Toss the vegetables with a little olive oil, salt, and pepper, and arrange them around the cod fillets in the baking dish. Keep in mind that the vegetables will absorb some of the lemon garlic butter sauce as they bake, which is actually a wonderful flavor bonus. For best results, cut the vegetables into uniform sizes so they cook evenly, and avoid overcrowding the dish — the cod needs space for the heat to circulate. I love adding thin lemon slices and asparagus for a beautiful, complete meal.
How do I prevent cod from drying out in the oven?
The number one cause of dry cod is overcooking, and the solution is simpler than you might think. First, always pat the fillets dry before adding the sauce — this helps the butter cling to the fish and creates a barrier that locks in moisture. Second, use the correct oven temperature of 400°F; anything higher can dry out the exterior before the interior is cooked. Third, and most importantly, check the fish early. I always set a timer for 12 minutes and check the thickest fillet. If it flakes easily, it’s done — even if it seems slightly underdone in the very center, remember that residual heat will finish cooking it. Finally, let the fish rest for 2 minutes after baking. This allows the juices to redistribute throughout the fillets, ensuring every bite is moist and tender.
Can I make lemon garlic cod in advance for meal prep?
While this baked lemon garlic cod is best enjoyed fresh from the oven, you can definitely prepare components in advance to save time. The lemon garlic butter sauce can be made up to 5 days ahead and stored in an airtight container in the refrigerator. When you’re ready to cook, simply bring the sauce to room temperature, pat the cod fillets dry, pour the sauce over them, and bake. This reduces your active prep time to about 5 minutes. If you want to cook the fish completely in advance, I recommend gently reheating it in a 300°F oven for 8 to 10 minutes, covered with foil to prevent drying. Leftover cod can also be flaked and added to salads, pasta, or rice bowls for a quick lunch the next day — the lemon garlic flavor is delicious even cold.
Share Your Version!
I hope this baked cod with lemon and garlic becomes as beloved in your kitchen as it is in mine. There’s something truly special about a recipe that’s simple enough for a Tuesday night but elegant enough to serve to company — and this one checks all those boxes. If you try it, I’d love to hear how it turned out for you. Did you add any of the variations? Did you serve it with a favorite side dish? Your feedback helps me create better recipes and inspires others in our community to get cooking.
Please leave a star rating and a comment below — I read every single one and respond as often as I can. If you share a photo on Instagram or Pinterest, tag me @exorecipes so I can see your beautiful creation. And here’s a question for you: what’s your favorite way to dress up cod for a special dinner? I’m always looking for new ideas to test in my NYC kitchen. From my NYC kitchen to yours — I hope this recipe brings as much warmth to your table as it does to mine. — mia 🧡
Love This Recipe? Save It to Pinterest!
If you enjoyed this Baked Cod with Lemon and Garlic recipe, don’t let it get lost in your browser tabs! 😄 Pin it now so you can find it again anytime — and explore hundreds more tried-and-tested recipes waiting for you on my Pinterest boards.
👉 Follow mia on Pinterest @exorecipe
📌 Pin this recipe · 🔁 Re-pin your favorites · 💬 Tag me when you make it — I love seeing your creations!
⭐️ Made this recipe? Tell us about it!
Drop a comment below with your rating, share your twist on the dish, or ask a question — I personally read every one and love hearing from you. Your feedback helps me create better recipes for our community!
“`
Print

Baked Cod Recipe with Lemon and Garlic
- Prep Time: 5 minutes
- Cook Time: 15 minutes
- Total Time: 20 minutes
- Yield: 4 1x
- Method: Main Course
- Cuisine: American
Description
This baked cod with lemon and garlic is a quick, healthy, and flavorful dinner. The fish is baked in a buttery lemon garlic sauce until flaky and tender, making it perfect for a weeknight meal.
Ingredients
- 4 (6-ounce) cod fillets
- 3 tablespoons unsalted butter, melted
- 3 cloves garlic, minced
- 2 tablespoons fresh lemon juice
- 1 teaspoon lemon zest
- 1/2 teaspoon salt
- 1/4 teaspoon black pepper
- 1 tablespoon chopped fresh parsley (for garnish)
Instructions
- Preheat oven to 400°F (200°C). Lightly grease a baking dish or line with parchment paper.
- In a small bowl, whisk together melted butter, minced garlic, lemon juice, lemon zest, salt, and pepper.
- Place cod fillets in the prepared baking dish. Pour the butter mixture evenly over the fish.
- Bake for 12-15 minutes, or until the cod is opaque and flakes easily with a fork.
- Garnish with fresh parsley and serve immediately.
Notes
For best results, use fresh cod fillets. If using frozen, thaw completely and pat dry before baking. You can also add a pinch of red pepper flakes for heat.
Nutrition
- Calories: 220 kcal
- Sugar: 0 g
- Fat: 10 g
- Carbohydrates: 2 g
- Protein: 30 g
Tried This Recipe? Leave a Comment!
Did you make this recipe? I’d love to hear how it turned out! Please leave a comment and a rating below. Your feedback helps other home cooks and supports cheerychop.com!