“`html
Table of Contents
Spicy Monterey Jack Chicken & Peppers Bake – Easy & Cheesy Delight! 🧀
Craving a Weeknight Meal That Packs a Punch?
Are you on the hunt for a satisfying, flavor-packed dinner that doesn’t require hours in the kitchen? If you’re nodding along, then you’re in the right place! Today, we’re diving headfirst into the deliciously spicy and wonderfully cheesy world of the Spicy Monterey Jack Chicken and Peppers Bake. This dish is a game-changer for busy weeknights and a guaranteed crowd-pleaser for any gathering. Imagine tender, juicy chicken mingling with vibrant bell peppers, all coated in a smoky, spicy sauce and then baked to gooey perfection under a blanket of melty Monterey Jack cheese. It’s comfort food with a kick, engineered for maximum flavor and minimal fuss. Whether you’re a seasoned home cook or just starting your culinary journey, this bake is designed to be accessible, forgiving, and incredibly rewarding. Get ready to transform simple ingredients into an unforgettable meal that will have everyone asking for seconds!
Gather Your Flavorful Arsenal: Ingredients List
The magic of a great bake lies in the quality and harmony of its ingredients. For our Spicy Monterey Jack Chicken and Peppers Bake, we’ve carefully selected components that create a symphony of textures and tastes. Here’s what you’ll need:
- 1.5 lbs Boneless, Skinless Chicken Breasts or Thighs: Cut into bite-sized pieces. Chicken breasts offer a leaner option, while thighs provide extra tenderness and moisture.
- 2 Bell Peppers (any color): Sliced. Red, yellow, or orange peppers add sweetness and vibrant color, while green peppers contribute a slightly more bitter, earthy note.
- 1 Onion: Sliced. A yellow or white onion provides a savory foundation that sweetens as it cooks.
- 2-3 Cloves Garlic: Minced. The aromatic backbone of countless delicious dishes! Use more if you’re a garlic lover.
- 1 (4 oz) Can Diced Green Chiles: Mild or hot, depending on your spice preference. These add a subtle but distinct chile flavor and a touch of heat.
- 1 Teaspoon Chili Powder: Adds smoky depth and a mild warmth.
- 1 Teaspoon Cumin: For that earthy, slightly peppery, warm flavor.
- 1/2 Teaspoon Smoked Paprika: Enhances the smoky notes and adds a beautiful reddish hue.
- 1/4 Teaspoon Cayenne Pepper (or to taste): For a noticeable but manageable kick. Adjust based on your love for heat!
- Salt and Black Pepper: To enhance all the flavors. Don’t be shy!
- 1 (15 oz) Can Diced Tomatoes: Undrained. These provide moisture and a tangy sweetness. Fire-roasted tomatoes add an extra layer of complexity.
- 1/2 Cup Chicken Broth: To create a luscious sauce. You can also use vegetable broth or even water in a pinch.
- 1 Tablespoon Olive Oil or Avocado Oil: For sautéing.
- 8 oz Monterey Jack Cheese: Shredded. This cheese is key for its incredible meltiness and mild, creamy flavor. A blend with Colby or cheddar also works beautifully.
- Optional Garnish: Chopped fresh cilantro, sour cream, or a dollop of Greek yogurt.
Time Investment: Speed Meets Flavor
20 minutes
30-35 minutes
50-55 minutes
Compared to many casseroles that require extensive prep or long baking times, this Spicy Monterey Jack Chicken and Peppers Bake is wonderfully efficient. The average baked chicken dish can take anywhere from 45 minutes to over an hour of cooking time alone, not to mention prep. Our recipe keeps the active prep under 20 minutes, allowing you to get this delicious meal from your oven to your table in under an hour.

Let’s Get Cooking: Step-by-Step Instructions
Follow these simple steps to create your own Spicy Monterey Jack Chicken and Peppers Bake. Precision isn’t everything here; a little flexibility makes cooking enjoyable!
Step 1: Prep the Chicken
Begin by preheating your oven to 375°F (190°C). If you haven’t already, ensure your chicken is cut into uniform, bite-sized pieces, about 1-inch cubes. This ensures even cooking. Season the chicken generously with salt and black pepper. You can also toss it with half of the chili powder, cumin, smoked paprika, and cayenne pepper at this stage for an extra flavor boost right from the start.
Step 2: Sauté the Veggies
Heat the olive oil in a large oven-safe skillet or Dutch oven over medium-high heat. Add the sliced onions and bell peppers. Sauté for about 5-7 minutes until they begin to soften and develop a slight char. Add the minced garlic and cook for another minute until fragrant. Be careful not to burn the garlic.
Step 3: Combine Ingredients
Add the seasoned chicken pieces to the skillet with the vegetables. Stir in the remaining chili powder, cumin, smoked paprika, cayenne pepper, and the can of diced green chiles. Pour in the undrained diced tomatoes and the chicken broth. Stir everything together until well combined, scraping up any browned bits from the bottom of the skillet. Bring the mixture to a gentle simmer.
Step 4: Bake to Perfection
Once simmering, remove the skillet from the heat (if it’s not oven-safe, transfer the mixture to a greased 9×13 inch baking dish). Sprinkle the shredded Monterey Jack cheese evenly over the top. Place the skillet or baking dish in the preheated oven. Bake for 20-25 minutes, or until the chicken is cooked through and the cheese is melted, bubbly, and lightly golden brown.
Step 5: Rest and Serve
Once out of the oven, let the bake rest for about 5-10 minutes before serving. This allows the juices to redistribute, making the chicken more tender and the sauce slightly thicker. Garnish with fresh cilantro if desired.
Nutritional Snapshot
While exact nutritional values can vary based on ingredient brands and portion sizes, a typical serving of this Spicy Monterey Jack Chicken and Peppers Bake (excluding optional garnishes) is approximately:
- Calories: 350-450 kcal
- Protein: 30-40g
- Fat: 15-25g (depending on cheese and chicken cut)
- Carbohydrates: 10-15g
- Fiber: 2-4g
- Sodium: Varies (consider low-sodium options for tomatoes and broth)
Smarter Swaps: Healthier Alternatives
Looking to lighten up this flavor-packed dish without sacrificing taste? Here are a few ideas:
- Leaner Protein: Opt for boneless, skinless chicken breasts for a lower fat content.
- Reduced-Fat Cheese: Use a reduced-fat Monterey Jack or a blend with part-skim mozzarella. It won’t be quite as gooey, but it’s a good compromise.
- More Veggies: Load up on extra bell peppers, add zucchini, mushrooms, or spinach to increase fiber and nutrients while reducing the overall calorie density.
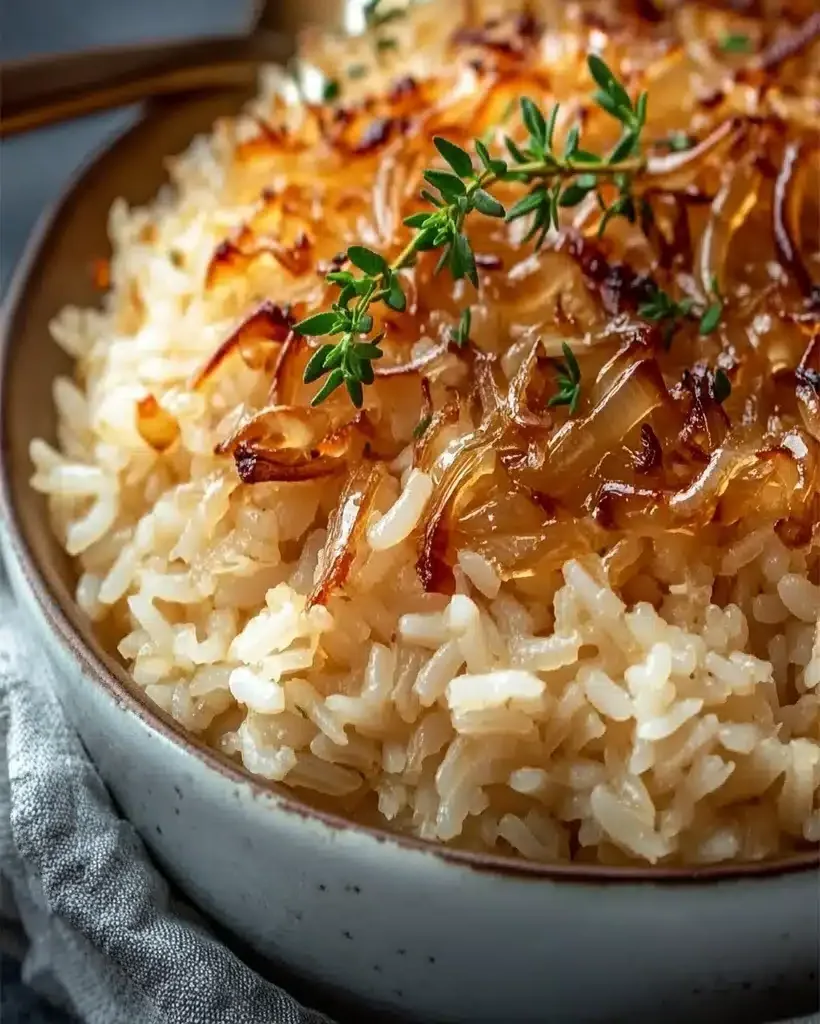
- Whole Grains: Serve over brown rice or quinoa instead of white rice or pasta.
- Lighter Toppings: Use plain Greek yogurt instead of sour cream for a creamy, protein-rich topping with less fat.
Perfect Pairings: Serving Suggestions
This bake is incredibly versatile! Serve it:
- Over fluffy white or brown rice for a complete meal.
- With a side of corn on the cob or a fresh green salad.
- Tucked into warm tortillas for delicious chicken tacos or burritos.
- With a dollop of sour cream or plain Greek yogurt and a sprinkle of fresh cilantro.
- Alongside crusty bread to soak up any delicious sauce.
Common Pitfalls: Mistakes to Avoid
Even simple recipes can have a few tricky spots. Here’s how to ensure your bake is a home run:
- Overcooking the Chicken: Cut chicken into uniform pieces and don’t overcook it during the initial sauté. The oven bake is just to finish it and melt the cheese.
- Crowding the Pan: Ensure your skillet or baking dish isn’t too full for the sautéing step, allowing vegetables to soften rather than steam.
- Skipping the Spice Adjustment: Taste and adjust seasonings before baking, especially if you’re sensitive to heat.
- Not Letting it Rest: A short rest allows flavors to meld and prevents a watery dish.
Savvy Storing: Keeping it Fresh
To Store: Let the bake cool completely. Store any leftovers in an airtight container in the refrigerator for up to 3-4 days. The flavors often meld even further, making leftovers delicious!
To Reheat: Reheat gently in the oven (around 300°F or 150°C) until warmed through, or microwave individual portions. You might need to add a splash of broth or water if it seems a bit dry after refrigeration.
Your New Go-To Dinner, Simplified!
There you have it – a Spicy Monterey Jack Chicken and Peppers Bake that’s as easy to make as it is delightful to eat. It’s the perfect blend of comfort, spice, and cheesy goodness, designed to bring smiles to your dinner table with minimal effort. So, gather your ingredients, sprinkle some spice, and get ready to enjoy a truly satisfying meal. We’d love to hear how your bake turns out! Share your photos and thoughts in the comments below. Happy cooking!
Frequently Asked Questions
1. Can I use pre-cooked chicken?
Yes, you can! If using pre-cooked chicken (like rotisserie chicken), add it in the last 10 minutes of baking, just long enough to heat through and allow the cheese to melt. You might want to shorten the sauté time for the vegetables.
2. What if I don’t have Monterey Jack cheese?
Monterey Jack is chosen for its mild flavor and excellent meltability. However, a good substitute would be a mild cheddar, Colby, Pepper Jack (for extra spice!), or a Mexican blend cheese. Mozzarella can also work but has a stringier texture.
3. How can I make this dish spicier?
Increase the cayenne pepper, add a pinch of red pepper flakes along with the other spices, or use a hotter variety of diced green chiles. You could also add a chopped jalapeño or serrano pepper when sautéing the onions and bell peppers.
4. Can I make this in a slow cooker or Instant Pot?
Yes! For a slow cooker, sauté the onions, peppers, and garlic first, then combine all ingredients (except cheese) in the slow cooker and cook on low for 4-6 hours or high for 2-3 hours. Stir in the cheese and let it melt on top before serving. For an Instant Pot, sauté veggies, then add chicken and other ingredients (except cheese). Cook on high pressure for 8 minutes, natural release for 5 minutes, then quick release. Stir in cheese and let stand with the lid off to melt.

Spicy Monterey Jack Chicken and Peppers Bake – Easy Recipe
Description
Welcome, food enthusiasts! Today, we are diving into the flavorful world ofSpicy Monterey Jack Chicken and Peppers Bake. Whether you’re a fan of bold flavors or looking for an easy-to-make, satisfying meal, this dish will surely hit the spot. Packed with juicy chicken, smoky spices, and gooey Monterey Jack cheese, this recipe brings comfort and spice to your dinner table. Let’s get started with thisdelicious chicken bake!
Ingredients
- Substitution suggestions:
Instructions
- Start by preheating your oven to 375°F (190°C). Grease a 9×13 inch baking dish with olive oil. In a small bowl, mix together the salt, black pepper, chili powder, garlic powder, onion powder, and smoked paprika. Rub this spice mixture all over the chicken breasts, ensuring they are well-coated.
- In a large skillet, heat the remaining olive oil over medium-high heat. Sear the chicken on each side for 3-4 minutes, until golden brown. This helps lock in the moisture and adds a nice crust to the chicken. Transfer the seared chicken to the greased baking dish.
- Surround the chicken breasts with the sliced red and yellow bell peppers. If you want extra heat, add the sliced jalapeño on top. Sprinkle the shredded Monterey Jack cheese evenly over the chicken and peppers.
- Place the baking dish in the preheated oven and bake for about 25 minutes or until the chicken is fully cooked and the cheese is bubbly and golden. You’ll know it’s ready when the internal temperature of the chicken reaches 165°F (74°C).
- Once out of the oven, drizzle lime juice over the top and garnish with freshly chopped cilantro. Serve hot and enjoy the cheesy, spicy goodness!
- For more easy and hearty meal ideas, check this out.
Notes
Make it less spicy: Simply omit the jalapeños and reduce the amount of chili powder for a milder version.
Prep ahead: You can season and sear the chicken ahead of time. When you’re ready to bake, just add the peppers and cheese.
Add more vegetables: Feel free to add zucchini, mushrooms, or onions for more texture and flavor.
“`