Table of Contents
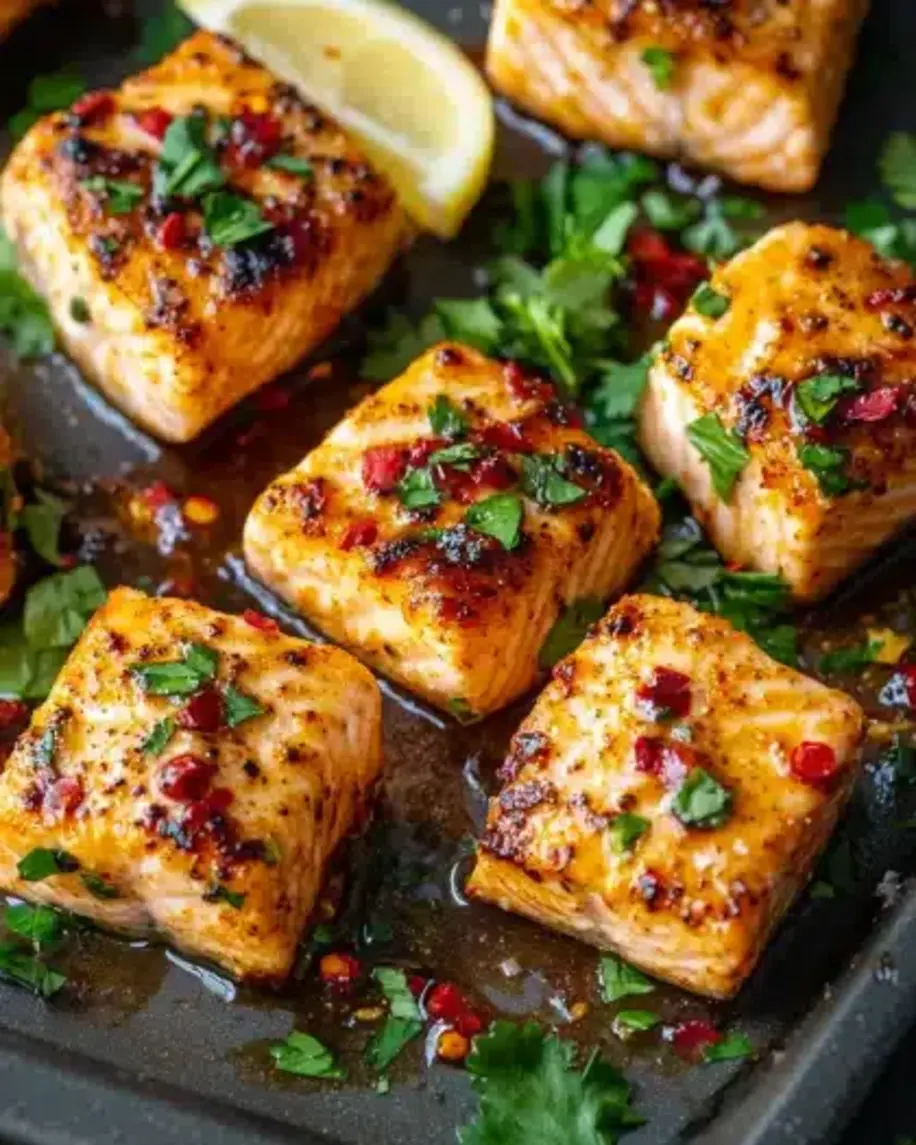
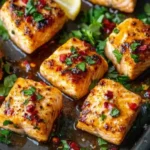
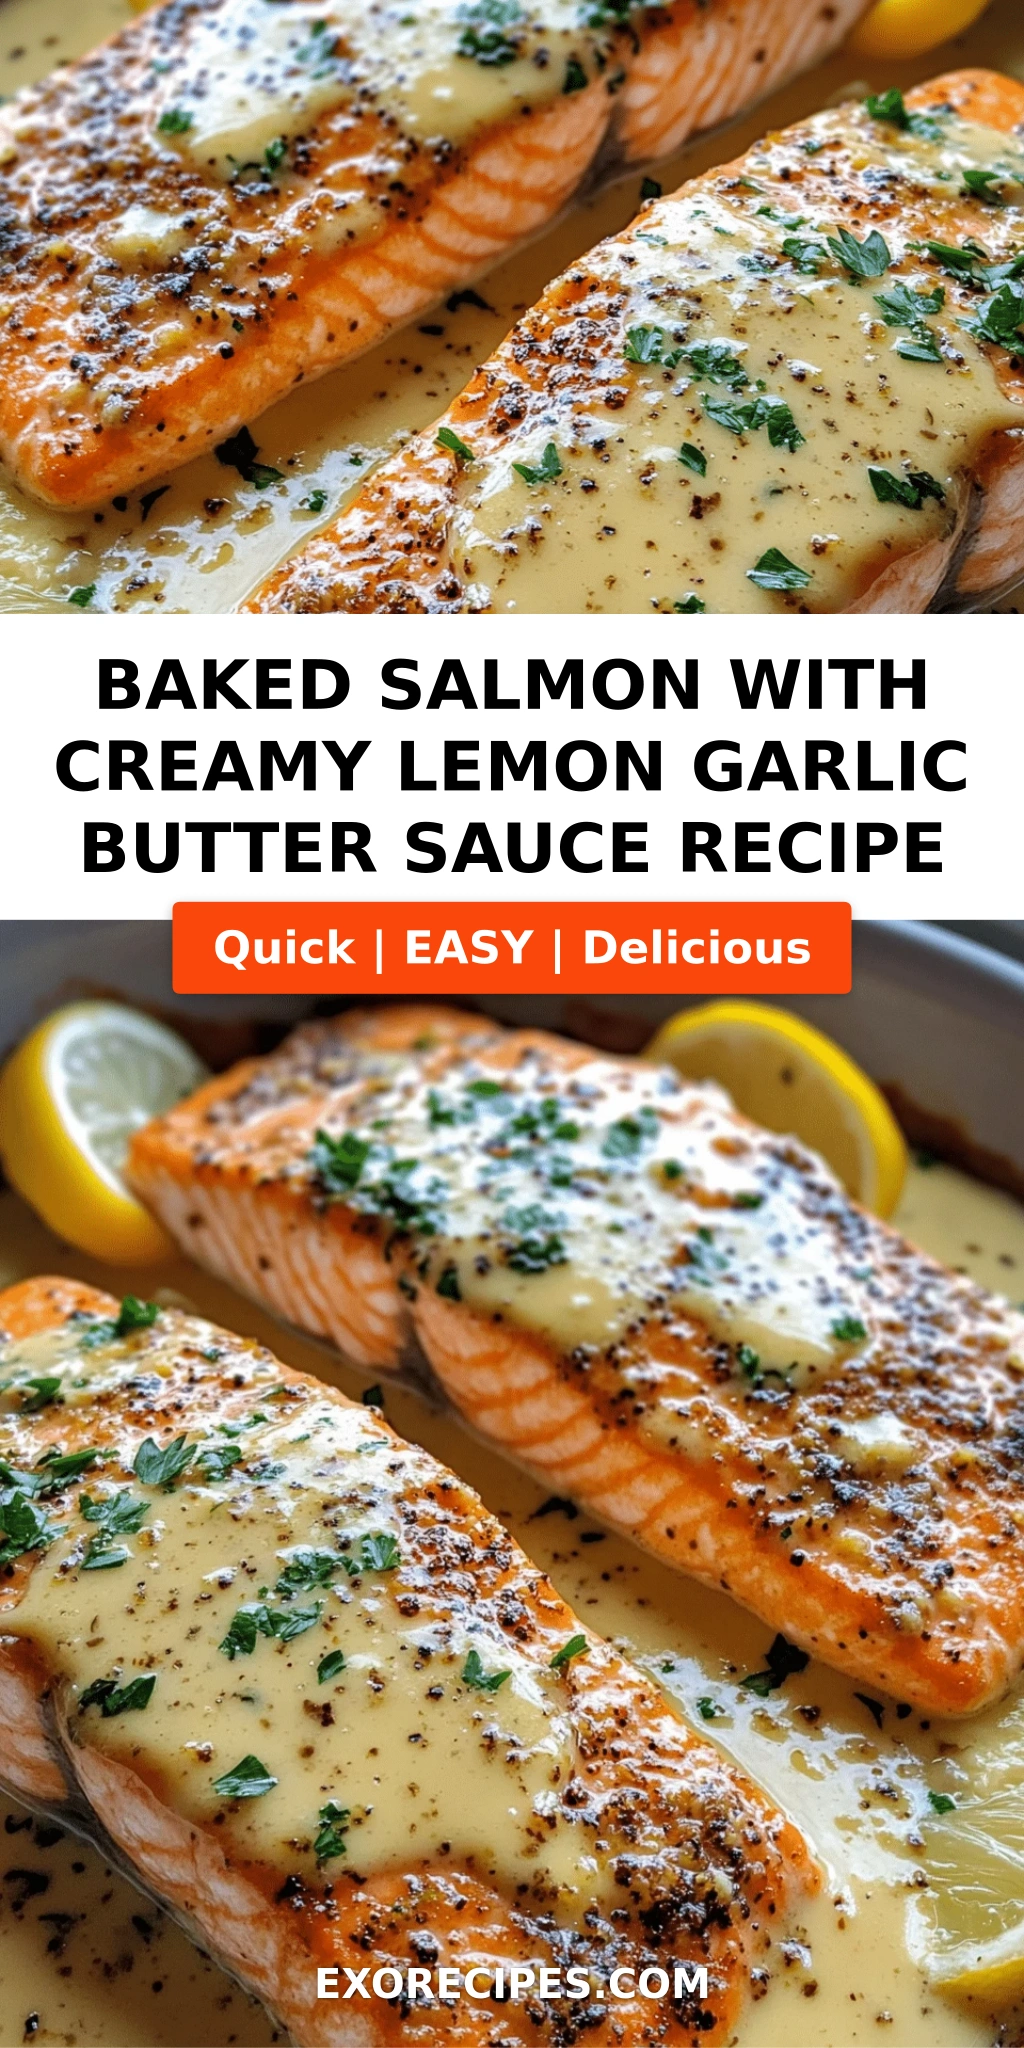
Baked Salmon with Creamy Lemon Garlic Butter Sauce – A Restaurant-Quality Dinner at Home
I still remember the first time I made this baked salmon recipe for a dinner party in my tiny Paris apartment. I was fresh out of culinary school, nervous, and wanted something that felt impressive but wouldn’t let me down. This creamy lemon garlic salmon saved me that night — and it’s been a cornerstone of my cooking ever since. The combination of velvety lemon butter sauce with perfectly baked salmon is pure magic, and it’s far easier than most people think. This easy baked salmon recipe is built around a simple French technique that yields extraordinary results every single time.
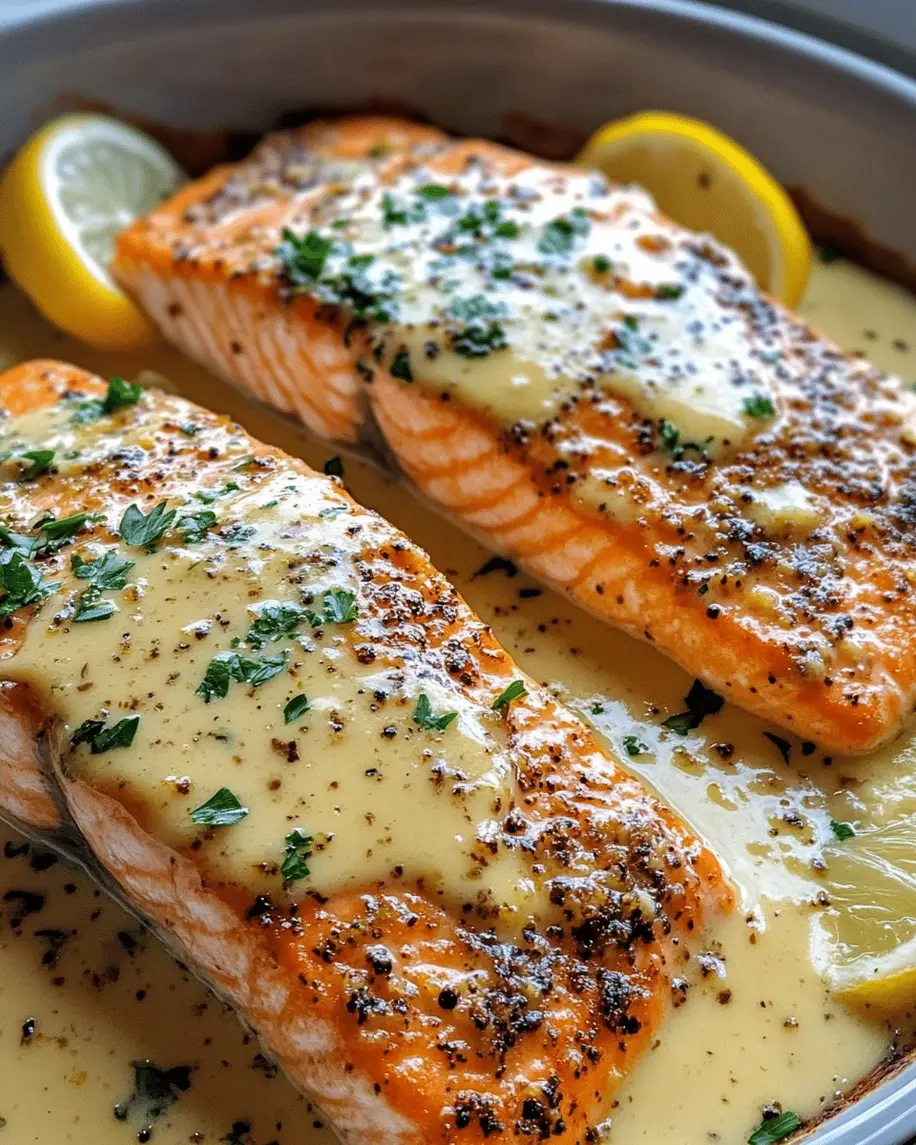
Imagine this: a salmon fillet so tender it flakes at the slightest touch of a fork, bathed in a sauce that’s simultaneously bright, rich, and buttery. The lemon zest cuts through the cream like a beam of sunlight, while the garlic infuses every bite with savory depth. The Parmesan melts into the sauce, adding a subtle nuttiness that ties everything together. Fresh parsley and lemon slices on top add a pop of color and freshness. It’s the kind of dish that makes you close your eyes on the first bite — and that’s exactly what I want you to experience in your own kitchen.
What sets my version apart is a trick I learned from my mother’s kitchen in Morocco, where she taught me to always balance richness with acidity. In this salmon with garlic butter sauce, the lemon zest is non-negotiable — it brightens the entire dish. I also use a quick, single-pan method that keeps cleanup minimal and flavor maximal. 💡 mia’s Pro Tip: Pat your salmon fillets completely dry before seasoning — this is the single most important step for getting that gorgeous golden crust. And don’t forget to check the internal temperature: 125°F for medium, 130°F for medium-well. Let me show you exactly how it’s done.
Why This Baked Salmon Recipe Is the Best
The secret to this baked salmon recipe lies in the sauce, and the secret to the sauce is layering. I start by sautéing garlic in butter until it’s fragrant but not browned — that’s the French technique taking center stage. Then I add heavy cream and chicken broth, which creates a luxuriously smooth base. The lemon juice and zest go in last, preserving their bright, fresh flavor. It’s the same principle my mother used when making tagine: add the acid at the end so it stays vibrant, not muted. This creamy lemon garlic salmon has a depth that will surprise you.
Texture is everything with fish. I bake these fillets at 400°F (200°C) for just 12–15 minutes, depending on thickness. This oven temperature is the sweet spot — hot enough to cook the salmon through quickly without drying it out, and gentle enough that the fat renders evenly. The result is a fillet that’s moist, tender, and flakes beautifully. The sauce coats each bite without overpowering the salmon’s natural richness. It’s a harmony of textures that I perfected over years of testing in my NYC kitchen, using the best wild-caught salmon from the Union Square Greenmarket.
What I love most about this dish is how foolproof it is. Even if you’re new to cooking fish, you can nail this recipe on your first try. The sauce comes together in the time it takes the salmon to bake, so everything is ready at once. No complicated techniques, no obscure ingredients — just honest, delicious food. I’ve taught this recipe in cooking classes across New York, and students consistently tell me it’s the easiest restaurant-quality meal they’ve ever made. This easy baked salmon is my gift to busy home cooks who refuse to compromise on flavor.
Baked Salmon Recipe Ingredients
I source my salmon from the Union Square market on Saturday mornings, where the fishmonger knows me by name. But this recipe works beautifully with any fresh salmon fillets you find at your local market. The beauty of this creamy lemon garlic salmon is that the ingredients are simple and accessible — you probably already have most of them in your pantry. Let me walk you through every ingredient so you know exactly what to look for.
Ingredients List
- 4 (6-ounce) salmon fillets
- 1 tablespoon olive oil
- Salt and freshly ground black pepper, to taste
- 2 tablespoons unsalted butter
- 3 cloves garlic, minced
- 1/2 cup heavy cream
- 1/4 cup chicken broth
- 2 tablespoons fresh lemon juice
- 1 teaspoon lemon zest
- 1/4 cup grated Parmesan cheese
- 2 tablespoons chopped fresh parsley (for garnish)
- Lemon slices (for garnish)
Ingredient Spotlight
Salmon is the heart of this dish. Look for fillets that are bright orange-pink, firm to the touch, and smell like the ocean — not fishy. I prefer center-cut fillets about 1 inch thick for the most even cooking. Wild-caught salmon from Alaska or the Pacific Northwest has a cleaner flavor, but farm-raised Atlantic salmon works beautifully too and is often more forgiving for beginners. The key is to buy fillets of similar thickness so they finish cooking at the same time.
Heavy cream creates the luxurious body of this lemon butter salmon sauce. When you simmer it gently, it thickens naturally without needing a roux or cornstarch. For a lighter version, you can substitute half-and-half, but the sauce will be thinner. If you’re dairy-free, full-fat canned coconut milk is a surprisingly excellent substitute — it adds a subtle sweetness that pairs wonderfully with lemon. Just be sure to use the unsweetened variety.
Parmesan cheese is my secret weapon for umami. The nutty, salty notes of Parmigiano-Reggiano deepen the sauce without making it taste cheesy. Always grate your own from a wedge — pre-shredded cheese contains anti-caking agents that prevent smooth melting. If you don’t have Parmesan, Pecorino Romano works well but is saltier, so adjust your seasoning accordingly. This small detail elevates the entire dish.
Fresh lemon juice and zest are absolutely non-negotiable. Bottled lemon juice has a flat, one-dimensional acidity that can’t compare. The zest contains aromatic oils that bring a floral brightness to the sauce — it’s a lesson I learned in Paris, where even the simplest sauces are finished with fresh citrus. Choose lemons that feel heavy for their size, as they’re juicier. Always zest before juicing.
| Original Ingredient | Best Substitution | Flavor / Texture Impact |
|---|---|---|
| Heavy cream | Canned full-fat coconut milk | Slightly thinner, subtly sweet, dairy-free |
| Parmesan cheese | Pecorino Romano or nutritional yeast (for DF) | Saltier with Romano; nutty-cheesy with nutritional yeast |
| Chicken broth | Vegetable broth or dry white wine | Broth keeps it mild; wine adds acidity and depth |
| Unsalted butter | Ghee or olive oil | Ghee is dairy-free with nutty richness; olive oil is lighter |
How to Make Baked Salmon with Creamy Lemon Garlic Butter Sauce — Step-by-Step
You’re just 28 minutes away from an incredible meal. I’ve broken this down into simple, foolproof steps. Trust the process, and don’t skip the little details — they’re what make this lemmon butter salmon truly exceptional.
Step 1: Preheat & Prep
Preheat your oven to 400°F (200°C). Lightly grease a 9×13-inch baking dish or line it with parchment paper for easy cleanup. Pat your salmon fillets completely dry with paper towels — this is crucial for good searing. Rub each fillet with olive oil, then season both sides generously with salt and freshly ground black pepper.
💡 mia’s Pro Tip: Season the salmon 5 minutes before baking, not earlier. Salt draws out moisture, and you want the surface as dry as possible for the best texture.
Step 2: Bake the Salmon
Place the salmon fillets skin-side down in the prepared baking dish. Bake for 12–15 minutes, depending on thickness. The salmon is done when it flakes easily with a fork and the internal temperature reaches 125°F for medium or 130°F for medium-well. Remember that the salmon will continue cooking for another minute or two after you remove it from the oven.
⚠️ Common Mistake to Avoid: Overcrowding the pan. Leave at least 1 inch between fillets so the heat circulates evenly. Crowded fillets steam instead of bake, giving you a less appealing texture.
Step 3: Make the Sauce
While the salmon bakes, make the sauce. In a small saucepan over medium heat, melt the butter. Add the minced garlic and sauté for about 30 seconds until fragrant but not browned — browned garlic turns bitter. Stir in the heavy cream, chicken broth, lemon juice, and lemon zest. Bring the mixture to a gentle simmer, stirring frequently to prevent scorching.
💡 mia’s Pro Tip: Use a whisk for the smoothest sauce. A whisk incorporates the cream and broth more evenly than a spoon, giving you a silky, lump-free result every time.
Step 4: Finish the Sauce
Reduce the heat to low and whisk in the grated Parmesan cheese until it’s completely melted and smooth. Season with salt and pepper to taste. Let the sauce simmer gently for 2–3 minutes, whisking occasionally, until it thickens slightly and coats the back of a spoon. Don’t let it boil — high heat can cause the cream to separate.
⚠️ Common Mistake to Avoid: Adding the cheese all at once. Add it gradually while whisking constantly. This ensures a silky emulsion rather than a clumpy sauce.
Step 5: Assemble & Serve
Remove the salmon from the oven. Spoon the creamy lemon garlic butter sauce generously over each fillet, making sure every piece is well coated. Garnish with fresh chopped parsley and lemon slices for a bright, beautiful finish. Serve immediately while the salmon is warm and the sauce is velvety.
💡 mia’s Pro Tip: For an extra touch, broil the sauced salmon for 1–2 minutes before serving. The top will get lightly golden and bubbly — it’s how I serve this at dinner parties, and guests always rave.
| Step | Action | Duration | Key Visual Cue |
|---|---|---|---|
| 1 | Preheat oven, pat salmon dry, season | 5 min | Salmon surface is dry to the touch |
| 2 | Bake salmon skin-side down | 12–15 min | Fish flakes easily with a fork |
| 3 | Sauté garlic, add cream, broth, lemon | 5 min | Garlic fragrant, sauce gently simmering |
| 4 | Whisk in Parmesan, simmer until thick | 2–3 min | Sauce coats the back of a spoon |
| 5 | Spoon sauce over salmon, garnish | 2 min | Golden sauce coating each fillet |
Serving & Presentation
The way you present this dish can elevate it from a simple weeknight dinner to something truly special. In my home, I serve this salmon on a warm white platter with the sauce pooled around each fillet, garnished with lemon slices and a generous sprinkle of fresh parsley. The bright yellow lemon and deep green parsley against the soft pink salmon and cream sauce is pure artistry. A light dusting of flaky sea salt just before serving adds a final pop of texture.
For side dishes, I love pairing this with something that can soak up the extra sauce. Garlic mashed potatoes, steamed asparagus, or a simple arugula salad with lemon vinaigrette are my go-to choices. In the summer, I serve it alongside grilled zucchini and a chilled glass of Sauvignon Blanc — the herbaceous notes in the wine mirror the parsley and lemon beautifully. In winter, roasted root vegetables and a nutty brown rice pilaf make this feel like a cozy hug on a plate.
This creamy lemon garlic salmon also works beautifully for entertaining. You can arrange the fillets on a large platter, drizzle the sauce in a ribbon pattern, and garnish with microgreens for a modern, restaurant-style presentation. It’s the dish I turn to when I want to impress without spending hours in the kitchen — a lesson in elegance from my Paris training that I’m happy to pass on to you.
| Pairing Type | Suggestions | Why It Works |
|---|---|---|
| Side Dish | Garlic mashed potatoes, roasted asparagus, lemon-herb couscous | Neutral bases that absorb the sauce beautifully |
| Sauce / Dip | Extra lemon butter sauce, tzatziki, chermoula | Adds brightness and a Moroccan-inspired twist |
| Beverage | Sauvignon Blanc, dry Riesling, sparkling water with lemon | Crisp acidity cuts through the creamy richness |
| Garnish | Fresh parsley, lemon slices, flaky sea salt, microgreens | Adds color, freshness, and a pop of texture |
Make-Ahead, Storage & Reheating
Living in New York City means my schedule is always packed, so I’ve perfected the art of making this recipe work for busy weeks. You can prepare the sauce up to 2 days in advance and store it in the fridge. When you’re ready to eat, simply bake the salmon fresh and reheat the sauce gently on the stovetop. I often double the sauce batch on Sunday so I have it ready for a quick weeknight dinner.
| Method | Container | Duration | Reheating Tip |
|---|---|---|---|
| Refrigerator | Airtight container | Up to 3 days | Reheat in a 300°F oven for 8–10 min; add a splash of broth to refresh the sauce |
| Freezer | Freezer-safe bag or container | Up to 2 months | Thaw overnight in the fridge; reheat gently over low heat, whisk in a splash of cream |
| Make-Ahead | Sauce in sealed jar | Up to 2 days in advance | Reheat sauce gently, then pour over freshly baked salmon |
When reheating leftover lemon butter salmon, the microwave is not your friend — it tends to dry out the fish and break the sauce. Instead, place the salmon and sauce in a covered baking dish with a tablespoon of chicken broth or water, and warm it in a 300°F oven for about 8–10 minutes. The gentle heat revitalizes the salmon without overcooking it, and the added liquid brings the sauce back to its silky consistency. This method has never let me down.
Variations & Easy Swaps
| Variation | Key Change | Best For | Difficulty Impact |
|---|---|---|---|
| Moroccan Spiced Salmon | Add 1 tsp cumin, 1/2 tsp paprika, and a pinch of cinnamon | Adventurous palates, North African flavors | Easy — same method |
| Dairy-Free / Paleo | Replace cream with coconut milk, omit Parmesan, use ghee | Dairy-sensitive, paleo diet | Easy — slight flavor change |
| Lemon Caper Salmon | Add 2 tbsp capers and 1 tbsp caper brine to the sauce | Briny, tangy flavor lovers | Easy — no extra steps |
Moroccan Spiced Salmon
This variation is a nod to my mother’s kitchen in Morocco, where warm spices transform simple dishes into something extraordinary. Before baking, rub the salmon fillets with a mixture of cumin, paprika, cinnamon, and a pinch of cayenne. The spices create a fragrant crust that pairs beautifully with the creamy lemon sauce. It’s a subtle twist that adds layers of warmth without overwhelming the fish. Serve it with couscous and harissa for a complete North African-inspired meal that always gets rave reviews.
Dairy-Free / Paleo Version
I developed this version for my friends who follow a paleo or dairy-free lifestyle, and honestly, it’s so good I make it on repeat. Substitute the heavy cream with full-fat canned coconut milk and use ghee or olive oil instead of butter. Omit the Parmesan or use a dairy-free nutritional yeast for a cheesy flavor. The coconut milk adds a subtle sweetness that complements the lemon beautifully, and the sauce stays wonderfully creamy. This version is proof that dietary restrictions don’t mean sacrificing flavor.
Lemon Caper Salmon
When I’m craving something bright and briny, this is my go-to. Simply add two tablespoons of capers and a tablespoon of caper brine to the sauce along with the lemon juice. The capers burst with salty, tangy flavor that cuts through the richness of the cream and butter. It’s a classic French combination that I learned in Paris — sauce grenobloise meets salmon. This variation is perfect for spring and summer evenings when you want something light but still satisfying. I love serving it with a simple green bean almondine on the side.
What is the best temperature and cooking time for baked salmon with lemon garlic butter sauce?
The best oven temperature for this baked salmon recipe is 400°F (200°C). At this temperature, the salmon cooks through evenly without drying out. For standard 6-ounce fillets that are about 1 inch thick, the cooking time is 12–15 minutes. You’ll know it’s done when the fish flakes easily with a fork and the internal temperature reaches 125°F for medium or 130°F for medium-well. Thicker fillets may need 2–3 minutes more, so use an instant-read thermometer for the most reliable results.
Can I use frozen salmon for this baked salmon recipe, and how should I adjust the cooking time?
Yes, you can absolutely use frozen salmon for this creamy lemon garlic salmon. The key is to thaw it completely first for the best texture. Thaw the fillets overnight in the refrigerator, or place them in a sealed bag and submerge in cold water for about 30 minutes. Once thawed, pat them very dry with paper towels — frozen salmon releases more water, so this step is extra important. The same oven temperature of 400°F works perfectly, but you may need to add 2–4 minutes to the baking time depending on thickness. Always check for flakiness and internal temperature rather than relying solely on the timer.
What can I substitute for heavy cream in the lemon garlic butter sauce to make it lighter or dairy-free?
If you’re looking for a lighter option, half-and-half works well in place of heavy cream — the sauce will be slightly thinner but still delicious. For a dairy-free version, full-fat canned coconut milk is my top recommendation. It has enough fat to create a creamy texture, and its subtle sweetness pairs beautifully with the lemon and garlic. Just be sure to use unsweetened coconut milk. Another option is cashew cream, which you can make by blending soaked cashews with water until smooth. Each substitute will change the flavor profile slightly, but all three deliver a satisfyingly creamy sauce that complements the salmon perfectly.
How do I know when baked salmon is done without overcooking it?
The most reliable method is using an instant-read thermometer. For perfectly cooked salmon, aim for 125°F (52°C) for medium or 130°F (54°C) for medium-well. Insert the thermometer into the thickest part of the fillet. If you don’t have a thermometer, look for visual cues: the salmon will change from translucent to opaque, and it will flake easily when gently pressed with a fork. The flesh should separate into clean flakes but still look moist. Another test: gently press the top of the fillet — if it springs back slightly, it’s done. Remember that salmon continues cooking for a minute or two after you remove it from the oven, so take it out just before it reaches your desired doneness.
Can I make the lemon garlic butter sauce ahead of time?
Absolutely! This sauce is perfect for meal prep. You can make it up to 2 days in advance and store it in an airtight container in the refrigerator. When you’re ready to serve, gently reheat the sauce on the stovetop over low heat, whisking frequently. You may need to add a splash of chicken broth or water to thin it back to its original consistency, as the sauce thickens as it sits. I often make a double batch on Sunday so I have it ready for busy weeknights. Just bake the salmon fresh and warm the sauce — dinner comes together in under 20 minutes.
What sides go best with this baked salmon with creamy lemon garlic butter sauce?
This easy baked salmon pairs beautifully with side dishes that can soak up the extra sauce. Garlic mashed potatoes are my top choice — the creamy potatoes and the silky sauce are a match made in heaven. For a lighter option, steamed asparagus or roasted green beans add a fresh, earthy contrast. Lemon-herb couscous or wild rice pilaf also work wonderfully, especially if you want something grain-based. A simple arugula salad with a lemon vinaigrette complements the richness of the salmon without competing with it. And crusty bread is non-negotiable in my house — you’ll want it to mop up every last drop of that incredible sauce.
How do I prevent the creamy lemon garlic sauce from curdling or separating?
Curdling happens when the cream is heated too quickly or at too high a temperature. To keep your sauce silky smooth, always simmer the cream over medium-low heat — never let it boil. When you add the lemon juice, which is acidic, stir it in gradually and keep the heat gentle. Adding the Parmesan cheese slowly while whisking constantly also helps maintain a smooth emulsion. If your sauce does start to look grainy, remove it from the heat immediately and whisk in a tablespoon of cold chicken broth or cream — this often brings it back. Starting with room-temperature cream rather than cold cream straight from the fridge also reduces the risk of separation.
Can I use a different type of fish for this recipe?
Yes, this lemon butter salmon recipe works beautifully with other firm, flaky fish. Arctic char is my top substitute — it has a similar fat content and cooks at the same temperature and time. Trout is also an excellent option, with a slightly milder flavor. For a more affordable choice, try cod or haddock; these white fish are leaner, so reduce the baking time by 2–3 minutes and check for doneness a bit earlier. Halibut works too but requires a slightly longer bake due to its density. For all substitutions, the key is to use fillets of similar thickness (about 1 inch) for even cooking. The creamy lemon garlic sauce complements all of these fish beautifully.
Share Your Version!
I truly believe that the best recipes are the ones we make our own, and I’d love to see how this baked salmon recipe turns out in your kitchen. Did you add a Moroccan spice blend like I sometimes do? Or maybe you tried the dairy-free version with coconut milk and loved it? Drop a comment below and let me know — I read every single one and often feature reader adaptations on my Instagram stories. Your star rating also helps other home cooks find this recipe, so if it brought a smile to your table, please take a moment to leave a review.
Snap a photo of your creamy lemon garlic salmon and tag me on Instagram or Pinterest @exorecipes — I can’t wait to see your beautiful creations. If you have a question about a substitution or a step, ask away in the comments. I answer each one personally, and your question might even inspire my next recipe variation. From my NYC kitchen to yours — I hope this recipe brings as much warmth to your table as it does to mine. — mia 🧡
Love This Recipe? Save It to Pinterest!
If you enjoyed this Baked Salmon with Creamy Lemon Garlic Butter Sauce recipe, don’t let it get lost in your browser tabs! 😄 Pin it now so you can find it again anytime — and explore hundreds more tried-and-tested recipes waiting for you on my Pinterest boards.
👉 Follow mia on Pinterest @exorecipe
📌 Pin this recipe · 🔁 Re-pin your favorites · 💬 Tag me when you make it — I love seeing your creations!
💬 Made this Baked Salmon with Creamy Lemon Garlic Butter Sauce? I’d love to hear how it went!
Drop a ⭐⭐⭐⭐⭐ rating and your feedback in the comments below — your review helps other home cooks discover this recipe. Tag me on Instagram @exorecipes when you share your photo! 🧡

Baked Salmon with Creamy Lemon Garlic Butter Sauce: The Perfect Recipe for Any Occasion
- Prep Time: 10 minutes
- Cook Time: 18 minutes
- Total Time: 28 minutes
- Yield: 4 1x
- Method: Main Course
- Cuisine: American
Description
This baked salmon is perfectly flaky and tender, topped with a rich and creamy lemon garlic butter sauce. It’s an elegant yet easy dinner that’s perfect for weeknights or special occasions.
Ingredients
- 4 (6-ounce) salmon fillets
- 1 tablespoon olive oil
- Salt and freshly ground black pepper, to taste
- 2 tablespoons unsalted butter
- 3 cloves garlic, minced
- 1/2 cup heavy cream
- 1/4 cup chicken broth
- 2 tablespoons fresh lemon juice
- 1 teaspoon lemon zest
- 1/4 cup grated Parmesan cheese
- 2 tablespoons chopped fresh parsley (for garnish)
- Lemon slices (for garnish)
Instructions
- Preheat oven to 400°F (200°C). Lightly grease a 9×13-inch baking dish or line with parchment paper.
- Pat salmon fillets dry with paper towels. Rub with olive oil, then season both sides with salt and black pepper.
- Place salmon skin-side down in the prepared baking dish. Bake for 12-15 minutes, or until fish flakes easily with a fork.
- While salmon bakes, make the sauce: In a small saucepan over medium heat, melt the butter. Add garlic and sauté for 30 seconds until fragrant.
- Stir in heavy cream, chicken broth, lemon juice, and lemon zest. Bring to a gentle simmer, stirring frequently.
- Reduce heat to low and whisk in Parmesan cheese until melted and smooth. Season with salt and pepper to taste. Simmer for 2-3 minutes until thickened slightly.
- Remove salmon from oven. Spoon the creamy lemon garlic butter sauce generously over each fillet.
- Garnish with fresh parsley and lemon slices. Serve immediately.
Notes
For best results, use fresh salmon fillets of similar thickness for even cooking. The sauce can be made ahead and gently reheated.
Nutrition
- Calories: 520
- Sugar: 2 g
- Fat: 35 g
- Carbohydrates: 5 g
- Protein: 45 g
k">
Tried This Recipe? Leave a Comment!
Did you make this recipe? I’d love to hear how it turned out! Please leave a comment and a rating below. Your feedback helps other home cooks and supports cheerychop.com!
For more delicious inspiration, follow me on Pinterest!