Yellow Chicken Curry Recipe – Easy & Authentic Thai Dish!

Yellow Chicken Curry Recipe – Easy & Authentic Thai Dish!

Introduction

Did you know that Thai curry consumption has increased by over 40% globally in the last decade, becoming a staple comfort food? This surge is no surprise, as the rich, aromatic blend of spices and creamy coconut milk offers a uniquely satisfying experience. Who doesn’t love a rich, flavorful curry? This Yellow Chicken Curry is not only delicious but also an authentic Thai dish that’s surprisingly easy to make at home! Packed with savory spices, tender chicken, and creamy coconut milk, it’s a perfect meal for those who love a comforting, warm, and slightly spicy dish. Using traditional Thai ingredients like Chaokoh coconut milk and authentic curry paste makes all the difference in bringing out the rich, tropical flavors that make this curry a must-try. In this guide, we’ll walk you through every step to create a restaurant-quality dish in your own kitchen, demystifying the process and ensuring you achieve that perfect balance of sweet, salty, and spicy that defines authentic Thai cuisine.

Ingredients List

Gathering the right ingredients is the first step to an authentic Yellow Chicken Curry. Here’s what you’ll need, with notes on substitutions and sensory descriptions to help you choose the best components.

  • 1.5 lbs (680g) boneless, skinless chicken thighs – Cut into bite-sized pieces. Thighs are recommended for their juicy, tender texture and higher fat content, which prevents drying out during simmering. Substitution: Chicken breast (cook for less time), firm tofu, or shrimp.
  • 3-4 tbsp yellow curry paste – The heart of the dish. Look for authentic Thai brands like Maesri or Mae Ploy for a vibrant, aromatic paste with a complex blend of lemongrass, galangal, and turmeric. Substitution: Red or green curry paste for a different heat and flavor profile.
  • 2 cans (13.5 oz each) Chaokoh coconut milk – Full-fat is essential for that luxuriously creamy, rich mouthfeel and authentic tropical sweetness. Chaokoh is prized for its consistent quality and lack of additives. Substitution: Light coconut milk (less creamy) or other full-fat brands.
  • 1 large yellow onion, sliced – Adds a sweet, caramelized base note.
  • 2 medium potatoes, cubed – Use waxy potatoes like Yukon Gold that hold their shape and soak up the curry sauce beautifully.
  • 1 large carrot, sliced – Provides a subtle sweetness and vibrant color.
  • 1 red bell pepper, sliced – Adds a crisp texture and a touch of sweetness to balance the spice.
  • 2 tbsp fish sauce – The umami backbone. It should smell pungent but taste savory and complex. Substitution: Soy sauce or tamari (for a different, less funky saltiness).
  • 1 tbsp palm sugar (or brown sugar) – Palm sugar offers a caramel-like, mellow sweetness that is traditional. Substitution: Light brown sugar.
  • 1 tbsp vegetable oil – For sautéing.
  • Fresh aromatics: 3 kaffir lime leaves (torn), 1 stalk lemongrass (bruised), and a handful of Thai basil leaves. These are non-negotiable for the authentic floral, citrusy fragrance.
  • Garnish: Fresh cilantro and a squeeze of lime juice just before serving.

Timing

Prep Time20 minutes
Cook Time30 minutes
Total Time50 minutes

This Yellow Chicken Curry comes together in under an hour, making it a fantastic weeknight option. Compared to many curry recipes that require lengthy marinating or complex spice toasting, this streamlined version focuses on efficient prep and layered cooking to build maximum flavor quickly. The 20-minute prep involves simple chopping, while the 30-minute active cooking time allows the sauce to reduce and the chicken to become fork-tender. It’s significantly faster than the average from-scratch curry recipe, which can take 75+ minutes, without sacrificing any depth of flavor.

Yellow Chicken Curry Recipe – Easy & Authentic Thai Dish!

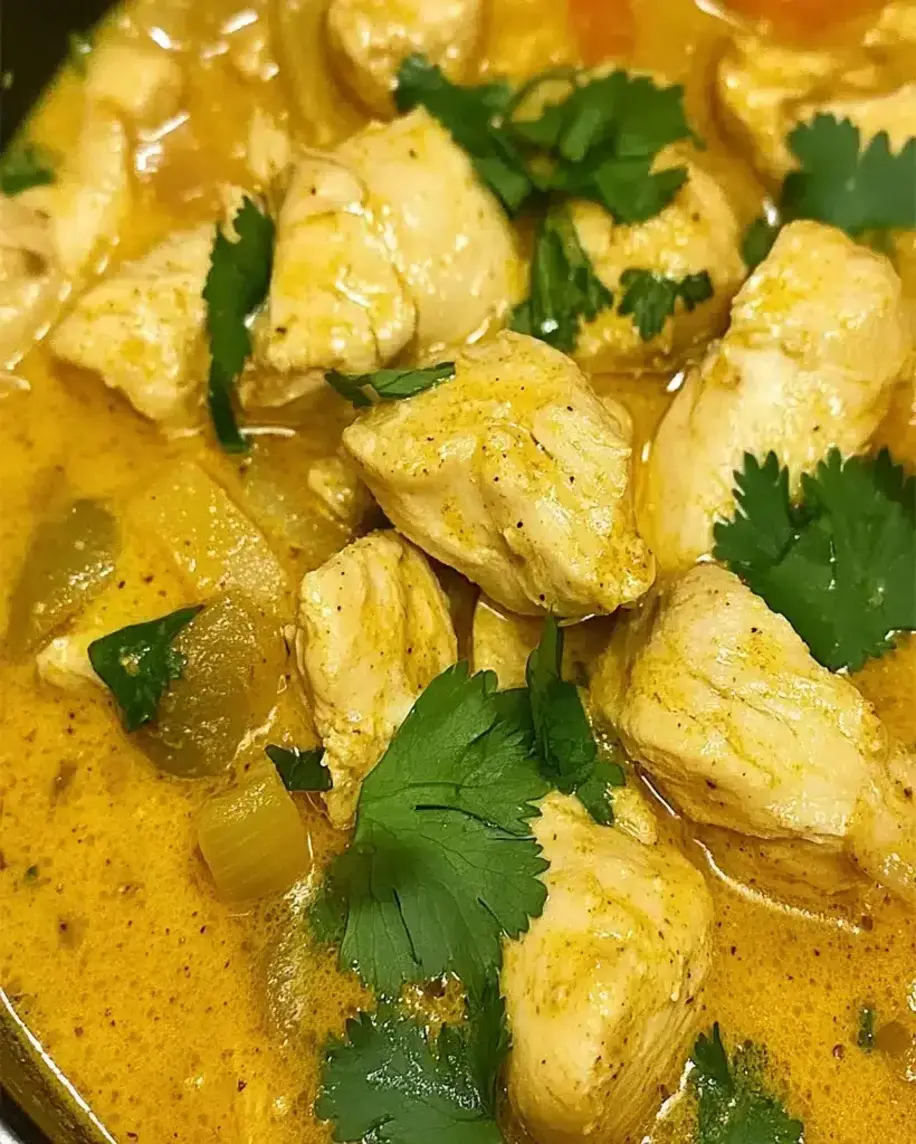
Golden, aromatic, and ready in under an hour—this Yellow Chicken Curry brings the taste of Thailand to your table.

Step-by-Step Instructions

Step 1: Prepare Your Ingredients

This “mise en place” step is crucial for a smooth cooking experience. Cut your chicken into uniform, 1-inch pieces to ensure even cooking. Slice the onion, cube the potatoes, slice the carrot and bell pepper. Bruise the lemongrass stalk with the back of your knife to release its oils, and tear the kaffir lime leaves. Having everything measured and within arm’s reach will make the cooking process feel like a joyful dance rather than a frantic scramble.

Step 2: Sauté the Aromatics

Heat the vegetable oil in a large pot or wok over medium heat. Add the sliced onion and sauté for 3-4 minutes until it becomes translucent and fragrant. Now, add the yellow curry paste. This is where the magic starts—cook the paste with the onions for 1-2 minutes, stirring constantly. You’ll notice the oil start to separate slightly from the paste, and the incredible aroma of lemongrass, galangal, and spices will fill your kitchen. This step “awakens” the paste, deepening its flavor and ensuring it’s evenly distributed throughout the curry.

Step 3: Cook the Sauce

Pour in about one-third of one can of coconut milk (the thick, creamy part that often separates to the top). Stir well to combine it with the curry paste, creating a thick, fragrant paste. Let this simmer for 2-3 minutes, allowing the fat in the coconut milk to fry the curry paste gently, which intensifies the flavor. Then, add the remaining coconut milk, fish sauce, and palm sugar. Stir until the sugar dissolves. Add the bruised lemongrass stalk and torn kaffir lime leaves. Bring the mixture to a gentle simmer.

Step 4: Add Chicken and Vegetables

Carefully add the cubed potatoes and sliced carrots to the simmering sauce. These harder vegetables need a head start. Let them cook for about 8 minutes, partially covered, until they begin to soften. Then, add the chicken pieces and red bell pepper. Stir to ensure everything is submerged in the creamy sauce. The chicken will cook through in about 10-12 minutes at a steady, low simmer.

Step 5: Simmer and Finish

Once the chicken is cooked through and the potatoes are tender (test with a fork), it’s time for the final touches. Remove the pot from the heat. Fish out the lemongrass stalk and discard it. Stir in the fresh Thai basil leaves—they will wilt slightly from the residual heat, releasing their anise-like fragrance. Taste the curry and adjust seasoning if needed; you might want an extra splash of fish sauce for saltiness or a pinch more sugar to balance the heat. Serve immediately, garnished generously with fresh cilantro and a hearty squeeze of lime juice to brighten all the flavors.

Nutritional Information

The following nutritional estimate is for one serving (approximately 1.5 cups of curry), based on a recipe yielding 6 servings. Values are approximate and can vary based on specific ingredients and brands used.

Calories~420 kcal
Protein~28g
Carbohydrates~25g
Dietary Fiber~4g
Sugars~8g
Total Fat~24g
Saturated Fat~18g

Healthier Alternatives

You can easily adapt this Yellow Chicken Curry to fit various dietary preferences without losing its soul-satisfying essence.

  • Lower Fat: Use “light” coconut milk. For even more creaminess without the fat, blend 1/4 cup of raw cashews with 1 cup of water until smooth and add it to the sauce.
  • Lower Carb / Keto-Friendly: Omit the potatoes and carrots. Increase the quantity of chicken and add low-carb vegetables like cauliflower florets, zucchini, and mushrooms. Use a sugar substitute like monk fruit or erythritol in place of palm sugar.
  • Plant-Based / Vegan: Replace chicken with extra-firm tofu (pressed and cubed) or chickpeas. Substitute fish sauce with soy sauce or a vegan “fish” sauce. Ensure your curry paste is vegan (some contain shrimp paste).
  • Reduced Sodium: Use a low-sodium soy sauce instead of fish sauce and be mindful of the salt content in your curry paste brand. You can boost flavor with extra fresh herbs and lime juice at the end.

Serving Suggestions

This curry is a complete meal in a bowl, but the right accompaniments elevate it to a feast.

  • Jasmine Rice: The classic pairing. The fragrant, slightly sticky rice is perfect for soaking up every last drop of the creamy sauce.
  • Rice Noodles: For a change, serve the curry over a bed of soft rice noodles for a comforting, noodle-soup-style dish.
  • Fresh Side Salad: A simple salad of cucumber, red onion, and cherry tomatoes with a lime-vinegar dressing cuts through the richness and refreshes the palate.
  • Condiments: Set out small bowls of extra fish sauce, sliced Thai chilies in vinegar, and more lime wedges so everyone can customize their bowl to their preferred level of salty, sour, and spicy.

Common Mistakes

Avoid these pitfalls to ensure your curry is perfect every time.

  • Not Cooking the Curry Paste: Adding the paste directly to the liquid without frying it first results in a raw, one-dimensional flavor. Always sauté it in oil or coconut cream.
  • Overcooking the Chicken: Adding chicken too early or boiling the curry vigorously will make the chicken tough and dry. Add it after the harder vegetables have started to soften and maintain a gentle simmer.
  • Using Low-Fat Coconut Milk: This often leads to a watery, less flavorful sauce. Full-fat coconut milk provides the necessary body and richness.
  • Skipping the Fresh Herbs & Lime: The final garnish of basil, cilantro, and lime juice isn’t just decorative. These elements add crucial fresh, bright, and aromatic notes that balance the rich

Cheesecake Deviled Strawberries 🤤 – The Ultimate Party Treat!

Cheesecake Deviled Strawberries 🤤 – The Ultimate Party Treat!

Introduction

Did you know that over 70% of party hosts report that bite-sized, no-fuss desserts are the most popular items on their buffet tables? If you’re looking for a show-stopping, crowd-pleasing dessert that fits this trend perfectly, you’ve found it. Welcome to the ultimate guide for making Cheesecake Deviled Strawberries. Hello, sweet treat lovers! Get ready to dive into a recipe that combines creamy cheesecake filling with fresh strawberries for an irresistible finger food. Perfect for any occasion, these treats are easy to make, visually stunning, and utterly delicious. Whether you’re hosting a party, celebrating a holiday, or looking for a unique dessert to impress, this simple recipe is bound to steal the show!

Ingredients List

The magic of this recipe lies in the perfect balance of fresh, juicy strawberries and a rich, tangy cheesecake filling. Here’s everything you need for about 24-30 delightful bites.

  • For the Strawberries:
    • 1 pound (about 450g) fresh large strawberries – Look for berries that are bright red, firm, and have a vibrant green cap. They should have a sweet, floral aroma. Choose uniformly sized ones for a consistent presentation.
  • For the Cheesecake Filling:
    • 8 oz (225g) full-fat cream cheese, softened – This is the base of our creamy filling. The full-fat version gives the best texture and flavor – rich, tangy, and luxuriously smooth. Substitution: For a lighter version, you can use Neufchâtel cheese or a 1/3 less fat cream cheese block, but avoid whipped or tub varieties as they are too soft.
    • 1/2 cup (60g) powdered sugar – Dissolves seamlessly into the filling without grittiness, adding sweetness and helping to stabilize the mixture. Substitution: For a less refined option, you can blitz granulated sugar in a blender until powdery, or use a monk fruit powdered sweetener.
    • 1 teaspoon pure vanilla extract – Use the real stuff! It adds a warm, complex depth that artificial vanilla can’t match. The aroma is heavenly.
    • 1-2 tablespoons heavy cream or whole milk – This is your texture adjuster. Start with one tablespoon to achieve a thick, pipeable consistency that holds its shape beautifully.
  • For Garnish (Optional but Recommended):
    • Graham cracker crumbs – For that classic cheesecake crust crunch and a hint of honey-cinnamon flavor.
    • Mini chocolate chips, crushed nuts (like pecans), or a drizzle of melted chocolate – Adds visual appeal and contrasting textures.
    • A pinch of lemon zest – Brightens up the filling and complements the strawberry’s sweetness.

Timing

One of the biggest wins for this recipe is its speed. Unlike a traditional baked cheesecake that can take hours, these deviled strawberries come together in a fraction of the time.

Prep Time
20 minutes
Cook Time
0 minutes
Total Time
20 minutes (plus chilling)

Compared to the average dessert recipe which often requires baking, cooling, and setting times of 2+ hours, this 20-minute active prep time is a game-changer. The only “waiting” involved is a brief chill in the refrigerator to let the flavors meld and the filling firm up—about 30 minutes to 1 hour. This makes it an ideal last-minute lifesaver for unexpected guests or when you need a quick, impressive treat.

Cheesecake Deviled Strawberries 🤤 – The Ultimate Party Treat!

Fresh, vibrant strawberries filled with creamy cheesecake goodness – the perfect bite-sized dessert!

Step-by-Step Instructions

Follow these simple, detailed steps to create perfect Cheesecake Deviled Strawberries every single time.

Step 1: Prepare the Strawberries

First, give your strawberries a gentle rinse under cool water and pat them completely dry with paper towels. Any excess moisture will make the filling slide off. Next, using a small paring knife, carefully slice off the very top stem end of each strawberry to create a flat base so it can stand upright. Now, for the “deviled” part: slice off the pointed tip of the strawberry (about 1/3 down from the top). Use a small spoon or a melon baller to carefully hollow out the center of each strawberry, creating a little cup for the filling. Be careful not to go through the bottom or sides. Place your hollowed strawberries on a paper towel-lined plate or a baking sheet. This step is crucial for structural integrity!

Step 2: Make the Cheesecake Filling

In a medium mixing bowl, add your softened cream cheese. It should be at room temperature so it blends smoothly without lumps. Using a hand mixer or a sturdy whisk, beat the cream cheese on medium speed for about 30 seconds until it’s creamy and smooth. Sift in the powdered sugar. This prevents lumps and ensures a silky texture. Add the vanilla extract. Beat on low speed initially to incorporate the sugar, then increase to medium and beat for 1-2 minutes until the mixture is light and fluffy. Scrape down the sides of the bowl. Now, add 1 tablespoon of heavy cream and beat again. Check the consistency. You want it thick enough to hold a peak but smooth enough to pipe. If it’s too stiff, add the second tablespoon of cream, one teaspoon at a time, until perfect.

Step 3: Fill and Garnish

Transfer your luxurious cheesecake filling to a piping bag fitted with a star tip (for a fancy look) or a simple round tip. If you don’t have a piping bag, a sturdy zip-top bag with a corner snipped off works perfectly. Now, pipe the filling generously into each hollowed strawberry, swirling it slightly above the rim for a beautiful, generous look. This is where you get creative! Immediately after piping, roll the exposed filling in your chosen garnish. A roll in graham cracker crumbs is classic. For extra flair, press a few mini chocolate chips into the top or add a tiny sprinkle of lemon zest. The garnish sticks best if applied right after piping.

Step 4: Chill and Serve

Once all your strawberries are filled and garnished, carefully arrange them on your serving platter. Loosely cover the platter with plastic wrap and place it in the refrigerator. Chill for at least 30 minutes, or up to 2 hours. This chilling time is non-negotiable—it allows the filling to set slightly, making the strawberries easier to pick up and eat, and it lets all the flavors deepen beautifully. Serve chilled straight from the fridge for the best texture and taste experience.

Nutritional Information

While these are a treat, it’s helpful to know what you’re enjoying. The following estimates are per strawberry (based on a batch of 24).

  • Calories: ~45 kcal
  • Total Fat: 3g
  • Saturated Fat: 1.8g
  • Carbohydrates: 4g
  • Fiber: 0.3g
  • Sugar: 3g
  • Protein: 0.7g

Remember, you’re also getting vitamin C and antioxidants from the fresh strawberries!

Healthier Alternatives

You can easily tweak this recipe to fit various dietary preferences without sacrificing flavor.

  • Dairy-Free/Vegan: Use a high-quality vegan cream cheese (like those from Kite Hill or Miyoko’s) and swap the heavy cream for full-fat coconut cream. Ensure your powdered sugar is vegan (some are processed with bone char).
  • Lower Sugar: Reduce the powdered sugar to 1/4 cup and use a powdered erythritol or monk fruit blend. The natural sweetness of the strawberries will shine through more.
  • Higher Protein: Blend 1/4 cup of Greek yogurt (plain, full-fat) into the cream cheese filling. It adds a lovely tang and boosts protein content.
  • Gluten-Free: This recipe is naturally gluten-free! Just ensure your garnishes (like graham cracker crumbs) are certified gluten-free, or use crushed gluten-free cookies or nuts instead.

Serving Suggestions

  • Party Platter: Arrange them on a tiered stand or a large white platter with fresh mint leaves for a stunning centerpiece.
  • Dessert Board: Include these strawberries on a dessert charcuterie board with dark chocolate squares, shortbread cookies, and mixed nuts.
  • Brunch Brilliance: Serve them alongside mini muffins, quiche, and mimosas for an elevated brunch spread.
  • Kid-Friendly: Let kids decorate their own with sprinkles, colored sugar, or crushed Oreo cookies.

Common Mistakes

  • Using Wet Strawberries: The #1 mistake. If the strawberries aren’t thoroughly dried, the filling won’t adhere properly. Pat them dry inside and out.
  • Cold Cream Cheese: Trying to beat cold cream cheese leads to a lumpy, unpipeable filling. Plan ahead and let it soften on the counter for 1-2 hours.
  • Over-Hollowing: Digging too deep or making the walls too thin causes the strawberry to collapse or leak. Be gentle and leave a sturdy base.
  • Skipping the Chill: Serving immediately means a runny filling. The brief chill is essential for the perfect bite.

Storing Tips

  • Refrigeration: Store leftovers in a single layer in an airtight container in the fridge for up to 2 days. The strawberries may release a little juice over time, but they’ll still taste great.
  • Do Not Freeze: Freezing will cause the strawberries to become mushy and the filling to separate. This is a fresh-only treat.
  • Make-Ahead Strategy: You can hollow the strawberries and make the filling separately up to one day in advance. Store the strawberries in the fridge and the filling in a sealed container. Pipe and garnish no more than 2-3 hours before serving for optimal freshness.

Conclusion

Cheesecake Deviled Strawberries are more than just a dessert; they’re a conversation starter, a guaranteed crowd-pleaser, and proof that the most impressive treats can be incredibly simple. With their perfect blend of fresh fruit and creamy indulgence, they check every box for flavor,

Butternut Squash & Spinach Lasagna 🧀 | Creamy, Cozy & Oh-So-Delicious!

Butternut Squash & Spinach Lasagna 🧀 | Creamy, Cozy & Oh-So-Delicious!

Introduction

Did you know that over 60% of home cooks are actively seeking more plant-based comfort food recipes? If you’re part of this growing trend, you’re in the right place. Our Creamy Butternut Squash & Spinach Lasagna Delight is the ultimate answer to your craving for a hearty, satisfying meal that doesn’t skimp on flavor or nutrition. This vegetarian masterpiece transforms the classic lasagna into a vibrant, seasonal dish that’s as nourishing as it is indulgent. The natural sweetness of roasted butternut squash melds with earthy spinach and a trio of rich, melty cheeses, all enveloped in a velvety béchamel sauce. It’s a hug on a plate, perfect for family dinners, meal prep, or impressing guests. Let’s create a cozy culinary memory together.

Ingredients List

Gather these fresh, flavorful components for your lasagna masterpiece. I’ve included sensory notes and easy swaps to make this recipe your own.

  • For the Roasted Butternut Squash:
    • 1 medium butternut squash (about 2 lbs), peeled, seeded, and cubed into 1-inch pieces – look for firm, heavy squash with a matte skin for the best flavor.
    • 2 tbsp olive oil – its fruity aroma will enhance the squash’s caramelization.
    • 1 tsp dried sage or 1 tbsp fresh sage, chopped – sage’s warm, peppery notes are a classic pairing.
    • Salt and freshly ground black pepper to taste.
    • Substitution: Sweet potato or pumpkin puree can work in a pinch, but you’ll lose some texture.
  • For the Spinach Layer:
    • 10 oz fresh spinach leaves – you’ll love the vibrant green color and fresh, slightly mineral taste.
    • 2 cloves garlic, minced – for a fragrant, savory backbone.
    • A pinch of nutmeg – this warm spice subtly elevates the spinach.
    • Substitution: Frozen chopped spinach, thoroughly drained, works perfectly. Swiss chard or kale (stems removed) are great hearty alternatives.
  • For the Creamy Béchamel Sauce:
    • 4 tbsp unsalted butter – for a rich, nutty base.
    • 1/4 cup all-purpose flour – to create the perfect roux.
    • 3 1/2 cups whole milk, warmed – whole milk creates the creamiest, most luxurious sauce.
    • 1/2 tsp ground nutmeg – a non-negotiable for authentic flavor.
    • Salt and white pepper to taste.
    • Substitution: For a lighter version, use 2% milk. For a dairy-free sauce, use a rich, unsweetened plant milk like oat or cashew and vegan butter.
  • For the Cheese & Assembly:
    • 15 no-boil lasagna noodles – a fantastic time-saver that absorbs flavors beautifully.
    • 2 cups shredded mozzarella cheese – for that iconic, stretchy pull.
    • 1 cup grated Parmesan cheese – adds a salty, umami punch.
    • 1 cup ricotta cheese – its mild, creamy texture balances the dish.
    • 1 tbsp fresh thyme leaves (optional garnish).

Timing

Prep Time
30 minutes
Cook Time
1 hour 15 minutes
Total Time
1 hour 45 minutes

While this lasagna takes about 1 hour and 45 minutes from start to finish, it’s time well spent. Compared to the average meat lasagna which often requires browning meat and simmering sauce for hours, this vegetarian version is surprisingly streamlined. The active prep time is only about 30 minutes; the oven does the heavy lifting, roasting the squash and baking the assembled dish to bubbly perfection. You can even roast the squash a day ahead to cut your active time in half!

Butternut Squash & Spinach Lasagna 🧀 | Creamy, Cozy & Oh-So-Delicious!

A visual preview of the creamy, golden-brown deliciousness awaiting you.

Step-by-Step Instructions

Step 1: Prepare the Butternut Squash

Preheat your oven to 400°F (200°C). On a large rimmed baking sheet, toss the cubed butternut squash with olive oil, sage, salt, and pepper. Spread it in a single layer—this is key for even roasting and achieving those delicious caramelized edges. Roast for 25-30 minutes, tossing halfway through, until the squash is fork-tender and lightly browned. The smell filling your kitchen will be incredible. Once done, set aside to cool slightly. You can mash about half of it with a fork for a creamier layer, leaving some chunks for texture.

Step 2: Wilt the Spinach

While the squash roasts, heat a large skillet or Dutch oven over medium heat. Add a drizzle of olive oil and the minced garlic, sautéing for just 30 seconds until fragrant. Don’t let it brown! Add the massive pile of fresh spinach in batches, stirring constantly. It will wilt down dramatically. Season with a pinch of salt, pepper, and nutmeg. Once fully wilted, transfer the spinach to a colander and press gently with a spoon to remove excess liquid. This step is crucial to prevent a watery lasagna.

Step 3: Make the Creamy Sauce

In a medium saucepan, melt the butter over medium heat. Whisk in the flour and cook, stirring constantly, for about 2 minutes. This cooks out the raw flour taste and creates your roux. Slowly pour in the warmed milk, whisking vigorously to prevent lumps. Continue to cook, whisking often, until the sauce thickens enough to coat the back of a spoon, about 8-10 minutes. It should be smooth and velvety. Remove from heat and stir in the nutmeg, salt, and white pepper. Taste and adjust seasoning—this is your flavor foundation.

Step 4: Assemble the Lasagna

Reduce oven temperature to 375°F (190°C). Grab your 9×13 inch baking dish. Spread about 1/2 cup of the béchamel sauce thinly over the bottom. This prevents sticking. Now, layer in this order:

  1. A single layer of no-boil noodles (about 5).
  2. Half of the roasted butternut squash.
  3. Half of the wilted spinach.
  4. Dollops of half the ricotta.
  5. A generous pour of béchamel sauce (about 1 cup).
  6. A sprinkle of mozzarella and Parmesan.

Repeat the layers once more. For the final top layer, place the last noodles, cover with the remaining béchamel sauce, and finish with a generous blanket of the remaining mozzarella and Parmesan. This creates that perfect golden crust.

Step 5: Bake to Perfection

Cover the dish tightly with aluminum foil (tented slightly so cheese doesn’t stick). Bake for 30 minutes. Then, carefully remove the foil and bake for an additional 15-20 minutes, or until the top is gorgeously golden and bubbly, and a knife inserted into the center goes through the noodles easily. For an extra-crispy top, broil for the last 2-3 minutes, but watch it like a hawk! Once out of the oven, let the lasagna rest for at least 15 minutes. This is the hardest but most important step—it allows the layers to set, making for clean, beautiful slices.

Nutritional Information

(Approximate values per serving, based on 8 servings)

  • Calories: 420 kcal
  • Total Fat: 22g (Saturated Fat: 12g)
  • Carbohydrates: 38g (Dietary Fiber: 4g, Sugars: 8g)
  • Protein: 20g
  • Sodium: 480mg

This dish is an excellent source of Vitamin A (from the squash and spinach), calcium, and protein. The complex carbs provide sustained energy, making it a balanced meal.

Healthier Alternatives

Want to lighten it up without sacrificing creaminess? Here are my tested swaps:

  • Lighter Sauce: Use 2% milk and reduce the butter to 3 tbsp. You can also blend 1 cup of roasted cauliflower into the sauce for extra creaminess and nutrients with fewer calories.
  • Boost the Greens: Double the spinach or mix in sautéed mushrooms for more volume and fiber.
  • Cheese Choices: Opt for part-skim mozzarella and ricotta. Nutritional yeast can replace up to 1/4 of the Parmesan for a cheesy flavor with added B-vitamins.
  • Noodle Swap: Use whole wheat or lentil-based lasagna noodles for a higher fiber and protein content. They hold up beautifully.

Serving Suggestions

This lasagna is a complete meal, but a few accompaniments can elevate your dinner:

  • The Classic: A simple arugula salad with a lemon vinaigrette cuts through the richness perfectly.
  • Bread Basket: Warm, crusty garlic bread or focaccia for dipping into any saucy edges.
  • Wine Pairing: A medium-bodied white like Chardonnay or a light red like Pinot Noir complements the creamy, earthy flavors.
  • For Lunch: Pack a slice cold—it holds its shape well and tastes fantastic the next day.

Common Mistakes

  • Watery Lasagna: The #1 culprit is not draining the

Cozy Lemon Chicken & Rice Soup – The Ultimate Comfort in a Bowl!

Cozy Lemon Chicken & Rice Soup – The Ultimate Comfort in a Bowl!

Introduction

Did you know that a staggering 85% of people report feeling an immediate sense of comfort and warmth when eating a homemade, broth-based soup on a cold day? This Cozy Lemon Chicken & Rice Soup is not just a meal; it’s a hug in a bowl, scientifically designed to soothe the soul and nourish the body. Inspired by the sun-drenched coasts of the Mediterranean and the cherished memories of family kitchens, this recipe masterfully blends the heartiness of tender chicken, the soft, comforting texture of rice, and the bright, refreshing zing of fresh lemon. It’s the perfect antidote to a chilly evening, a stressful day, or when you simply crave a taste of home. Ready to transform your kitchen into a sanctuary of delicious aromas? Let’s dive into creating the ultimate comfort food that’s as easy to make as it is delightful to eat.

Ingredients List

Gather these simple, wholesome ingredients to create magic. I’ve included sensory notes and substitutions to make this soup uniquely yours.

  • 2 tbsp Olive Oil: Use a good quality extra virgin olive oil for its fruity, peppery aroma that forms the flavor base.
  • 1 large Yellow Onion, diced: Sweet and aromatic when sautéed, forming the foundation of flavor. Substitute: 2 large shallots for a milder, more delicate taste.
  • 3 Celery Stalks, diced: Adds a crucial earthy, slightly bitter note and wonderful texture.
  • 3 Carrots, diced: Brings a natural sweetness and vibrant orange color to the broth.
  • 4 Garlic Cloves, minced: The soul of the soup! Use fresh for that pungent, warm kick that mellows into sweetness.
  • 8 cups (2 quarts) Chicken Broth: The liquid gold. Use low-sodium for control. For a richer flavor: Use homemade broth or add 2 bouillon cubes.
  • 1 lb Boneless, Skinless Chicken Thighs: Thighs stay incredibly juicy and tender during simmering. Substitute: Chicken breasts for leaner meat, or a rotisserie chicken for a 15-minute shortcut (add shredded meat at the end).
  • 1 cup Long-Grain White Rice (like Jasmine or Basmati): Fragrant rice that cooks perfectly in the broth, absorbing all the lemony, herby flavors. Substitute: Orzo pasta for a more traditional Avgolemono feel, or brown rice for extra fiber (adjust cooking time).
  • 2 large Lemons: You’ll need both the zest and the juice. The zest holds potent citrus oils, and the fresh juice provides the signature bright, tangy finish.
  • 1/4 cup Fresh Dill, chopped: Its feathery, anise-like flavor is non-negotiable for authenticity. Substitute: Fresh parsley or 1 tbsp dried dill (add with broth).
  • 1/4 cup Fresh Parsley, chopped: Adds a clean, grassy freshness.
  • Salt and Freshly Cracked Black Pepper: Season in layers for maximum flavor.

Timing

Prep Time15 minutes
Cook Time35 minutes
Total Time50 minutes

This Cozy Lemon Chicken & Rice Soup comes together in under an hour, making it a fantastic weeknight hero. Compared to many slow-simmered soups that require hours, this recipe delivers deep, complex flavors in a fraction of the time by using a few smart techniques, like sautéing aromatics and simmering the chicken directly in the broth. You’ll have a restaurant-quality, comforting meal on the table faster than you can get delivery!

Cozy Lemon Chicken & Rice Soup – The Ultimate Comfort in a Bowl!

A vibrant bowl of Cozy Lemon Chicken & Rice Soup, steaming and ready to comfort.

Step-by-Step Instructions

Step 1: Prepare Your Aromatics

In a large Dutch oven or heavy-bottomed pot, heat the olive oil over medium heat until it shimmers. Add the diced onion, celery, and carrots. We’re not just softening them; we’re building a flavor foundation called a “sofrito.” Sauté for 6-8 minutes, stirring occasionally, until the onions turn translucent and the vegetables just begin to soften and smell incredibly sweet. Now, add the minced garlic and cook for just 60 seconds more—until fragrant but not browned. This step is crucial for developing the soup’s deep, savory base.

Step 2: Build the Broth

Pour in all 8 cups of chicken broth. Scrape up any delicious browned bits from the bottom of the pot—that’s pure flavor! Increase the heat to medium-high and bring the broth to a lively simmer. Season generously with salt and pepper at this stage. I recommend starting with 1 teaspoon of salt and 1/2 teaspoon of pepper. You can adjust later. The broth should taste well-seasoned now, as it will be diluted slightly by the rice and chicken.

Step 3: Add Chicken and Rice

Once simmering, carefully add the whole chicken thighs to the pot. They will cook through and become fork-tender. Let them simmer for 15 minutes. After 15 minutes, add the uncooked rice directly to the bubbling broth. Stir it in, reduce the heat to maintain a gentle simmer, cover the pot, and cook for another 15-18 minutes. The rice will absorb the flavorful broth and cook perfectly, while the chicken continues to tenderize.

Step 4: Finish with Lemon and Herbs

Turn off the heat. Using tongs, remove the chicken thighs to a cutting board. Use two forks to shred the meat into bite-sized pieces—it should fall apart easily. While the chicken is out, this is the magic moment: zest one lemon directly into the pot, then juice both lemons (you should have about 1/3 to 1/2 cup of juice). Stir the lemon zest and juice vigorously into the hot soup. This technique, inspired by Greek Avgolemono, brightens the entire dish without curdling. Return the shredded chicken to the pot. Finally, stir in the freshly chopped dill and parsley. Taste and adjust seasoning with more salt, pepper, or even a pinch of lemon zest if needed. Serve immediately while steaming hot.

Nutritional Information

(Per serving, based on 6 servings. Values are approximate.)

  • Calories: ~320 kcal
  • Protein: 22g
  • Carbohydrates: 30g
  • Dietary Fiber: 2g
  • Sugars: 4g
  • Fat: 12g (Saturated Fat: 2.5g)
  • Sodium: ~800mg (varies with broth used)

Healthier Alternatives

Love the flavor but want to tweak the nutrition? Here are easy, flavor-packed swaps:

  • Boost Protein & Fiber: Swap white rice for 1 cup of quinoa or farro. They add a nutty texture and more complete protein/fiber, keeping you fuller longer.
  • Reduce Carbs: Replace the rice with 3 cups of cauliflower rice. Add it in the last 5 minutes of cooking so it stays tender-crisp.
  • Lower Fat: Use chicken breasts instead of thighs and skim any excess fat from the top of the soup before adding the lemon.
  • Maximize Veggies: Add a handful of baby spinach or chopped kale in the last 2 minutes of cooking for a vibrant color and nutrient boost.

Serving Suggestions

This soup is a complete meal in a bowl, but pairing it thoughtfully elevates the experience:

  • The Classic: Serve with thick, crusty bread for dipping. A warm, buttered slice of sourdough or a rustic baguette is perfect for soaking up every last drop of the lemony broth.
  • The Lighter Pairing: A simple side salad with a lemony vinaigrette (echoing the soup’s flavors) and some shaved Parmesan or feta cheese adds freshness and contrast.
  • The Gourmet Touch: Drizzle each bowl with a little extra virgin olive oil and a sprinkle of red pepper flakes for heat. A dollop of plain Greek yogurt or tzatziki on the side is also divine.

Common Mistakes

  • Adding Lemon Juice Too Early: Adding lemon juice while the soup is at a rolling boil can cause it to become bitter and the dairy-like proteins in the broth to curdle slightly. Always add it off the heat.
  • Overcooking the Rice: If you simmer the soup too vigorously after adding the rice, it can become mushy. A gentle simmer with the lid on is key.
  • Underseasoning: Broth-based soups need bold seasoning. Don’t be shy with salt and pepper. Season in layers—when sautéing veggies, when adding broth, and again at the end.
  • Using Bottled Lemon Juice: The bright, fresh flavor is non-negotiable. Bottled juice often has preservatives and a flat, sometimes metallic taste that will dull your beautiful soup.

Storing Tips

  • Refrigeration: Cool the soup completely before transferring to an airtight container. It will keep for 3-4 days in the fridge. The rice will continue to absorb broth, so you may need to add a splash of water or broth when reheating.
  • Freezing: For best texture, freeze before adding the rice. Prepare the soup with chicken and broth, let it cool, and freeze. When ready to eat, thaw, reheat, and cook fresh rice directly in the soup. If frozen with rice, the rice may become very soft and grainy upon thawing.
  • Reheating: Gently reheat on the stovetop over medium-low heat, stirring occasionally. Avoid a rolling boil to preserve the fresh lemon flavor and chicken tenderness.

Conclusion

This Cozy Lemon Chicken & Rice Soup is more than just a recipe; it’s a reliable source of warmth, comfort, and vibrant flavor that never fails to delight. With its straightforward steps, flexible ingredients, and stunning results, it’s destined to become a staple in your home cooking repertoire. It proves that the most satisfying meals often come from the simplest, most wholesome ingredients, prepared with a little love and a big squeeze of lemon.

Greek Chicken Bowls with Creamy Tahini Feta Sauce – So Flavorful! 🥙

Greek Chicken Bowls with Creamy Tahini Feta Sauce – So Flavorful! 🥙

Introduction

Did you know that a study published in the New England Journal of Medicine found that adherence to a Mediterranean diet, rich in lean proteins, healthy fats, and fresh vegetables, is associated with a 30% reduced risk of major cardiovascular events? This is exactly the kind of nourishing power you can harness with these Greek Chicken Bowls with Creamy Tahini Feta Sauce. Welcome! Get ready to experience the perfect blend of Mediterranean flavors that are as good for your body as they are for your taste buds. This recipe brings together tender, herb-marinated chicken, a luxuriously savory tahini feta sauce, and a rainbow of crisp, fresh veggies to create a meal that’s both deeply satisfying and surprisingly simple to make. It’s the ideal solution for busy weeknights when you crave something wholesome, flavorful, and visually stunning without spending hours in the kitchen. Let’s dive into the details to make this your next go-to dinner masterpiece!

Ingredients List

Gathering high-quality ingredients is the first step to an unforgettable bowl. Here’s what you’ll need, organized for clarity, with sensory notes and smart substitutions.

For the Greek Chicken Marinade:

  • 1.5 lbs (680g) boneless, skinless chicken breasts or thighs – Thighs will yield juicier, more flavorful results. The texture is incredibly tender.
  • 1/4 cup extra virgin olive oil – The fruity, peppery base of the marinade.
  • Juice of 1 large lemon (about 1/4 cup) – For bright, citrusy acidity that tenderizes the chicken.
  • 3 cloves garlic, minced – Provides a pungent, aromatic backbone.
  • 1 tbsp dried oregano – The quintessential Greek herb, earthy and slightly bitter.
  • 1 tsp dried thyme – Adds a subtle, lemony-woody note.
  • 1 tsp smoked paprika – Imparts a warm, smoky depth (substitute with sweet paprika if needed).
  • 1 tsp sea salt
  • 1/2 tsp freshly ground black pepper

For the Creamy Tahini Feta Sauce:

  • 4 oz (115g) high-quality feta cheese, crumbled – Seek out a block in brine for the best tangy, salty flavor and creamy texture when blended.
  • 1/3 cup well-stirred tahini – Look for a runny, smooth tahini made from 100% sesame seeds; its nutty, rich flavor is irreplaceable.
  • 1/4 cup plain Greek yogurt (full-fat recommended) – Adds creaminess and a slight tang. For a dairy-free version, use unsweetened coconut yogurt.
  • Juice of 1/2 lemon (about 2 tbsp) – Cuts through the richness.
  • 1 small clove garlic, minced
  • 3-4 tbsp cold water – To achieve the perfect drizzling consistency.
  • Fresh dill or parsley (optional, for garnish) – Adds a pop of fresh, herbal color.

For the Bowls (Base & Toppings):

  • 2 cups cooked quinoa or brown rice – Quinoa offers a complete protein and fluffy texture. For a lower-carb option, use cauliflower rice.
  • 1 large English cucumber, diced – Crisp and refreshing with a mild sweetness.
  • 1 pint cherry tomatoes, halved – Their burst of juicy acidity is essential.
  • 1 red onion, thinly sliced – Soak in ice water for 10 minutes to mellow the sharpness if desired.
  • 1 cup Kalamata olives, pitted – Salty, briny, and meaty.
  • Fresh parsley, chopped – For a final touch of green freshness.

Timing

Efficiency is key for a successful weeknight meal. Compared to the average 45-60 minute recipe time for a composed bowl, this recipe is streamlined for maximum flavor with minimal active effort.

Prep Time
20 minutes
Cook Time
15 minutes
Total Time
35 minutes (plus optional 30 min marinating)

Pro Tip: The 20-minute prep includes making the sauce and chopping veggies while the chicken marinates. If you marinate the chicken ahead of time (even overnight), your active cooking time drops to just 15 minutes, making this faster than ordering takeout!

Greek Chicken Bowls with Creamy Tahini Feta Sauce – So Flavorful! 🥙

A vibrant, colorful Greek Chicken Bowl drizzled with creamy tahini feta sauce, ready to be devoured.

Step-by-Step Instructions

Follow these clear, actionable steps to build your bowl layer by layer for the best texture and flavor experience.

Step 1: Marinate the Chicken

In a medium bowl or large zip-top bag, whisk together the olive oil, lemon juice, minced garlic, oregano, thyme, smoked paprika, salt, and pepper. Add the chicken pieces, ensuring they are fully coated in the marinade. For the most flavorful and tender chicken, let it marinate for at least 30 minutes at room temperature, or up to 4 hours in the refrigerator. This step is non-negotiable for infusing the chicken with those classic Greek flavors.

Step 2: Prepare the Bowls

While the chicken marinates, prepare your base and toppings. Cook your quinoa or rice according to package instructions and fluff with a fork. Dice the cucumber, halve the cherry tomatoes, thinly slice the red onion, and chop the fresh parsley. Arrange these in separate bowls or on a platter for easy assembly. This mise en place makes the final assembly a breeze and keeps your kitchen organized.

Step 3: Make the Creamy Tahini Feta Sauce

This sauce is the star of the show! In a food processor or high-powered blender, combine the crumbled feta, tahini, Greek yogurt, lemon juice, and minced garlic. Blend until completely smooth and creamy. With the motor running, slowly drizzle in the cold water, one tablespoon at a time, until the sauce reaches a smooth, pourable consistency. It should ribbon off a spoon. Taste and adjust seasoning—it likely won’t need extra salt due to the feta. Set aside. Chef’s Secret: Making the sauce first allows the flavors to meld and deepen while you cook the chicken.

Step 4: Cook the Chicken

Heat a large grill pan, cast-iron skillet, or outdoor grill over medium-high heat. Remove the chicken from the marinade, letting excess drip off. Cook the chicken for 5-7 minutes per side, or until deeply golden brown on the outside and the internal temperature reaches 165°F (74°C). Cooking time will vary based on thickness. Transfer the cooked chicken to a cutting board and let it rest for 5 minutes. This rest is crucial for juicy results—it allows the juices to redistribute. Then, slice the chicken into bite-sized strips or cubes.

Step 5: Assemble Your Greek Chicken Bowls

Now for the fun part! Start with a base of fluffy quinoa or rice in each bowl. Artfully arrange your sliced chicken, diced cucumber, halved tomatoes, sliced red onion, and Kalamata olives over the top. Generously drizzle the entire bowl with the creamy tahini feta sauce. Finish with a generous sprinkle of fresh chopped parsley. Serve immediately and enjoy the symphony of textures and flavors in every bite.

Nutritional Information

This bowl is a nutritional powerhouse. The following estimates are for one serving (approximately 1/4 of the recipe), using chicken breasts and quinoa.

  • Calories: ~580 kcal
  • Protein: 42g – Excellent for muscle repair and satiety.
  • Carbohydrates: 38g – Primarily from complex carbs (quinoa) and fiber-rich vegetables.
  • Dietary Fiber: 8g – Aids digestion and promotes gut health.
  • Total Fat: 30g – Rich in heart-healthy monounsaturated fats from olive oil and tahini.
  • Saturated Fat: 8g
  • Sodium: ~900mg – Mainly from feta and olives; can be reduced by using less salty feta or fewer olives.

Healthier Alternatives

Want to tweak this recipe for specific dietary goals? Here are flavorful, nutrition-conscious swaps that don’t sacrifice taste.

  • Lower Carb / Keto: Swap the quinoa for cauliflower rice. Use full-fat Greek yogurt in the sauce and increase the healthy fat content by adding a handful of toasted pine nuts or extra olives.
  • Dairy-Free: For the sauce, substitute the feta with 1/4 cup of nutritional yeast (for cheesiness) and an extra tablespoon of tahini. Use a plain, unsweetened plant-based yogurt like coconut or almond.
  • Lower Sodium: Choose a low-sodium feta cheese (if available) or reduce the amount by half. Rinse the Kalamata olives thoroughly under cold water to remove excess brine.
  • Higher Protein: Use an extra 4 oz of chicken. You can also mix a scoop of unflavored collagen peptides or protein powder into the sauce—it blends seamlessly with the strong flavors of tahini and lemon.

Serving Suggestions

While these bowls are a complete meal, here’s how to turn them into a feast or adapt them for different occasions.

  • As a Mezze Platter: Deconstruct the bowl! Serve the sliced chicken,