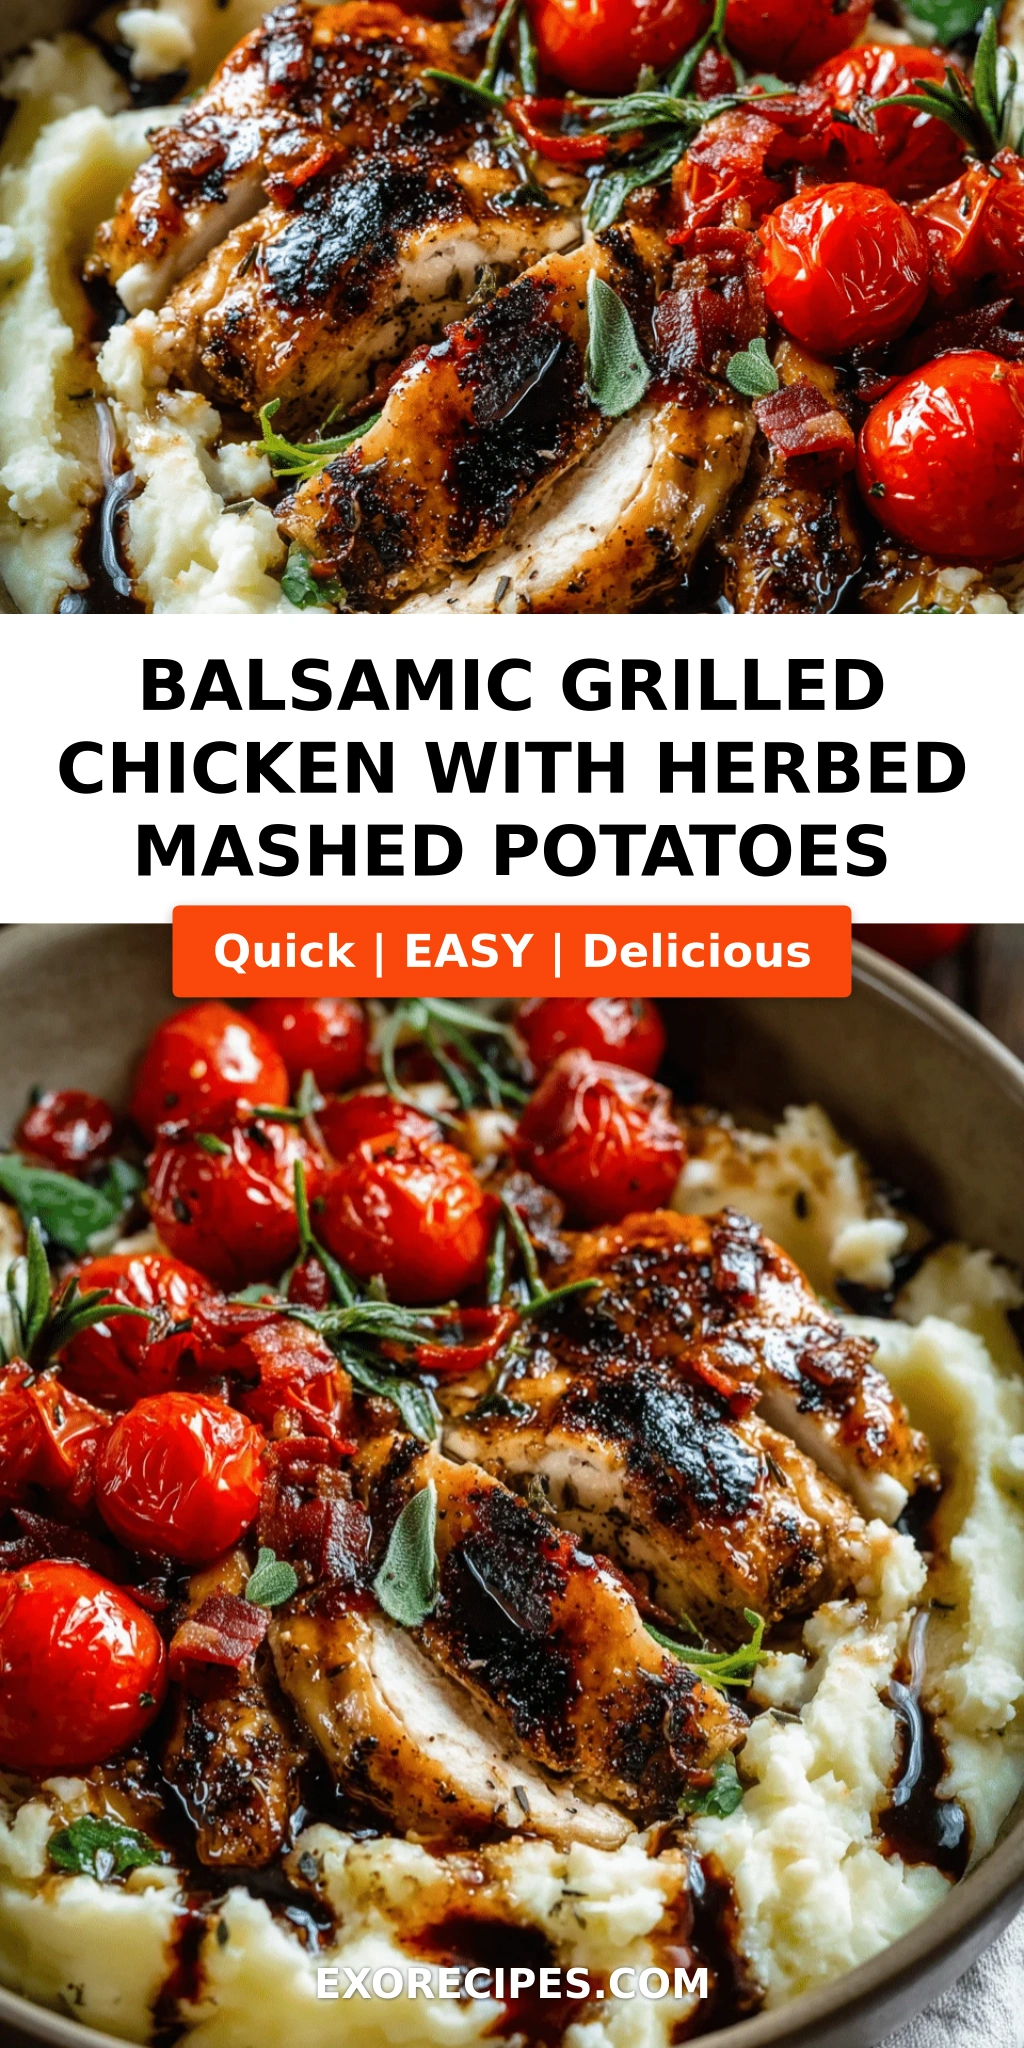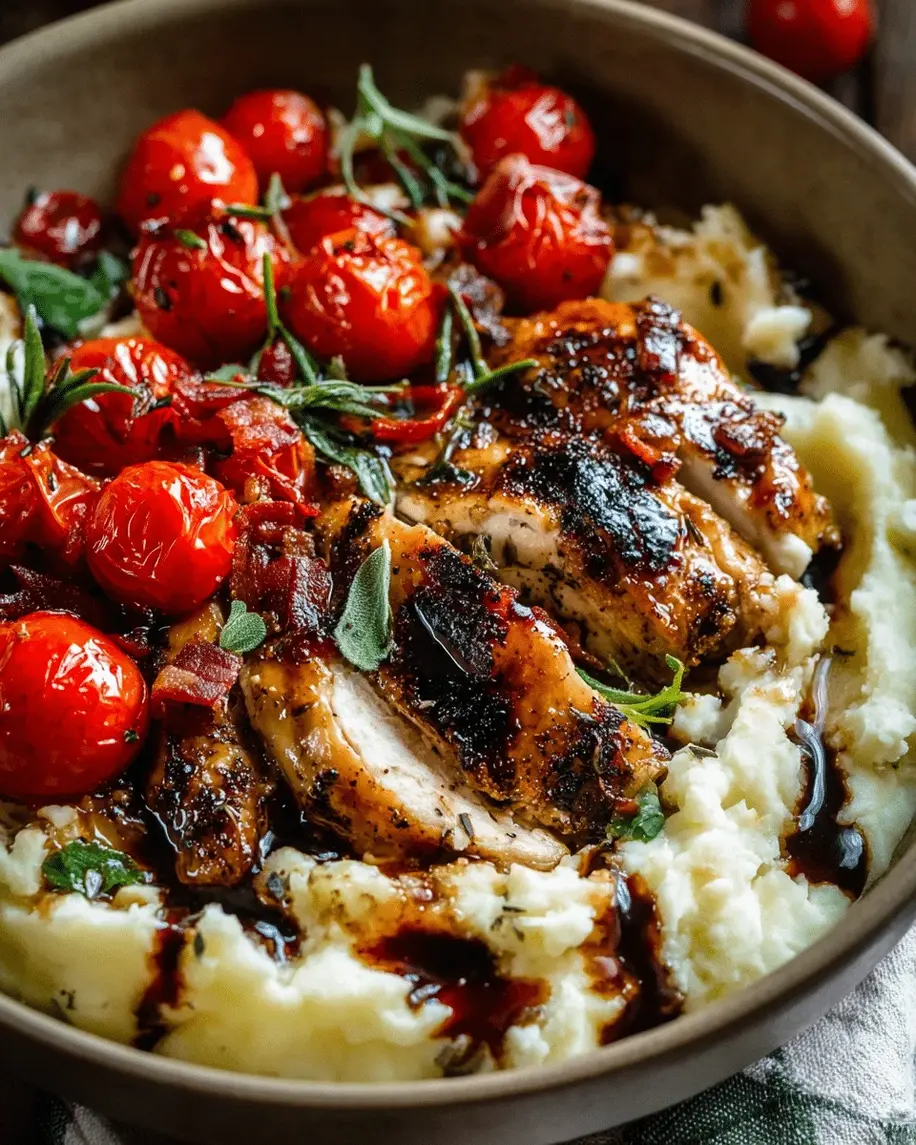
Balsamic Grilled Chicken with Herbed Mashed Potatoes & Roasted Tomatoes – A Complete Restaurant-Quality Meal in Under an Hour

⚖️
Difficulty
Easy
⏲️
Prep Time
20 mins
🕒
Cook Time
30 mins
⏱️
Total Time
50 mins
🍽️
Servings
4

I still remember the first time I made balsamic grilled chicken – I was a young cook in Paris, just out of culinary school, trying to impress my French classmates with something that tasted like home. In my mother’s kitchen in Morocco, we’d slow-cook chicken with vinegar and spices until it fell apart. But here in New York, I wanted that same deep tangy richness on a weeknight. This balsamic grilled chicken recipe is my answer: a quick marinade that delivers incredible flavor, paired with creamy herbed mashed potatoes and burst-roasted tomatoes. The whole meal comes together in under an hour – perfect for busy evenings when you still want something special.

Imagine a perfectly charred chicken breast, its surface glistening with a balsamic glaze that’s both sweet and sharp. Underneath, the mash is velvety smooth, flecked with fresh parsley and chives, while the roasted tomatoes pop like little flavor bombs, their juice mixing with the potatoes and chicken. The aroma of garlic, oregano, and balsamic rising from the grill takes me straight back to the Parisian markets where I’d buy the most fragrant herbs. Every forkful is a balance of tender, creamy, and brightly acidic – a dish that feels elegant yet deeply comforting.

What makes this version stand out is the technique I learned in Paris: a simple but intentional marinade that doesn’t overpower the chicken but enhances it. The secret? Marinating for at least 30 minutes (or overnight if you plan ahead) and grilling over medium-high heat to get those beautiful grill marks without drying out the meat. I’ve also tested these herbed mashed potatoes countless times – the key is using Yukon Golds for their natural buttery texture and folding in fresh herbs at the very end. And those roasted tomatoes? They’re a game-changer, adding a burst of sweetness that ties everything together. Trust me, once you try this, you’ll never go back to plain grilled chicken.

Why This Balsamic Grilled Chicken Recipe Is the Best

The Flavor Secret – The balsamic marinade is the heart of this dish. I whisk together quality balsamic vinegar, olive oil, garlic, and dried oregano and basil – a nod to the Mediterranean flavors I grew up with. The vinegar tenderizes the chicken while adding a caramelized, almost sweet depth when grilled. In my French training, we called this une marinade simple mais efficace – simple but effective. It’s the same principle I use for my Moroccan wedding chicken, just faster.

Perfected Texture – The herbed mashed potatoes are not just an afterthought; they’re a canvas. I use Yukon Gold potatoes because they have a lower starch content and a natural creaminess that doesn’t require heavy cream. The butter and milk are added warm so they absorb beautifully, and the fresh herbs are stirred in last to preserve their color and flavor. The result is a mash that’s fluffy, rich, and studded with green flecks – the perfect bed for the grilled chicken.

Foolproof & Fast – This balsamic grilled chicken recipe is designed for home cooks. The ingredients are all easy to find at any US grocery store – think balsamic vinegar from the oil section, fresh herbs from the produce aisle, and cherry tomatoes that are in season most of the year. Even if you’re a beginner, the step-by-step instructions and my pro tips will help you avoid common mistakes like overcooking the chicken or making lumpy potatoes. Plus, you can prep everything in advance, making it a fantastic choice for meal prep or a stress-free dinner party.

Balsamic Grilled Chicken Recipe Ingredients

I’ve learned to source my ingredients smartly over the years. For this dish, I always grab fresh garlic from the Union Square farmers market (the smell takes me right back to the spice souks in Marrakech), and I pick Yukon Gold potatoes because they mash like a dream. The balsamic vinegar should be aged for depth – I love the one from the Italian deli on Arthur Avenue, but any good supermarket brand works.

Ingredients List

For the chicken:
  • 4 boneless skinless chicken breasts (about 6 oz each)
  • ½ cup balsamic vinegar
  • ¼ cup olive oil
  • 3 cloves garlic, minced
  • 1 teaspoon dried oregano
  • 1 teaspoon dried basil
  • Salt and black pepper to taste
For the herbed mashed potatoes:
  • 2 pounds Yukon Gold potatoes, peeled and cubed (about 1-inch pieces)
  • ½ cup milk (whole or 2% preferred)
  • ¼ cup unsalted butter (2 tbsp or ½ stick)
  • 2 tablespoons chopped fresh parsley
  • 1 tablespoon chopped fresh chives
  • Salt and black pepper to taste
For the roasted tomatoes:
  • 2 cups cherry tomatoes (halved if large)
  • 1 tablespoon olive oil
  • Salt and black pepper to taste

Ingredient Spotlight

Balsamic Vinegar – The star of the show. Good balsamic is thick, dark, and slightly sweet. For this marinade, you don’t need the expensive 12-year-aged stuff – a mid-range bottle works perfectly. Substitute with red wine vinegar plus 1 tsp honey if you’re in a pinch, though the flavor will be brighter and less complex.

Yukon Gold Potatoes – My absolute favorite for mashing. They have a creamy texture and buttery flavor that Russets can’t match. When boiled, they don’t get gluey. Substitute with red potatoes if needed – just expect a slightly denser mash. Sweet potatoes also work (see variations).

Fresh Herbs – I use flat-leaf parsley (Italian parsley) and chives for their clean, mild flavors that don’t compete with the balsamic chicken. Dried herbs won’t give the same vibrant finish, but in winter, you can use 1 tablespoon each of freeze-dried chives and parsley – still good!

Cherry Tomatoes – When roasted, they become sweet and jammy. Look for firm, bright red tomatoes. Grape tomatoes are a fine substitute; just note they’re a bit less juicy. If you can’t roast them (e.g., grilling season), you can grill them in a foil packet for the same effect.

Original IngredientBest SubstitutionFlavor / Texture Impact
Balsamic vinegarRed wine vinegar + 1 tsp honeyLess sweet, more acidic
Yukon Gold potatoesRed potatoesSlightly waxy, less creamy
Fresh parsley + chives1 tbsp each dried parsley + dried chivesMilder herb flavor, less vibrant color
Cherry tomatoesGrape tomatoes or halved Roma tomatoesSimilar but Roma will be less sweet

How to Make Balsamic Grilled Chicken — Step-by-Step

Don’t let the number of steps fool you – this balsamic grilled chicken recipe is incredibly straightforward. With a little planning, you’ll have a restaurant-quality dinner on the table in less than an hour. Let’s get started!

Step 1: Marinate the Chicken

In a large bowl, whisk together the balsamic vinegar, olive oil, minced garlic, dried oregano, dried basil, and a generous pinch of salt and pepper. Add the chicken breasts and turn to coat well. Cover with plastic wrap and refrigerate for at least 30 minutes. For deeper flavor, marinate overnight – that’s what I do when I’m prepping for a Sunday dinner in my NYC apartment.

💡 mia’s Pro Tip: Don’t marinate longer than 24 hours – the acid in the balsamic can start to break down the chicken’s texture, making it mushy.

Step 2: Boil the Potatoes

Place the peeled and cubed potatoes in a large pot and cover with cold water by about an inch. Bring to a boil over high heat, then reduce to a simmer. Cook for 15-20 minutes, until a fork slides in easily but the cubes don’t fall apart. Drain well in a colander and return the potatoes to the hot pot to dry for a minute – this helps them absorb the butter and milk better.

⚠️ Common Mistake to Avoid: Overcooking the potatoes makes them waterlogged. Start checking at 15 minutes – they should be tender but not falling apart.

Step 3: Mash the Potatoes

Add the milk and butter to the drained potatoes (they should still be hot). Mash with a potato masher or ricer until smooth. Fold in the chopped parsley, chives, salt, and pepper. Taste and adjust seasoning. Keep warm by covering the pot with a lid – but don’t leave it on the burner or it’ll turn gluey.

💡 mia’s Pro Tip: Warm the milk and butter before adding – cold dairy will cool the potatoes down and you’ll end up over-mashing trying to reheat them.

Step 4: Roast the Tomatoes

While the potatoes cook, preheat your oven to 425°F (220°C). On a rimmed baking sheet, toss the cherry tomatoes with olive oil, salt, and pepper. Spread them in a single layer and roast for 12-15 minutes, until they’re softened, wrinkled, and just starting to char in spots. They should release their juices but still hold their shape.

⚠️ Common Mistake to Avoid: Overcrowding the pan steams the tomatoes instead of roasting them. Use a large baking sheet or two if needed.

Step 5: Grill the Chicken

Preheat your grill to medium-high heat (about 400-450°F). Remove the chicken from the marinade and let any excess drip off – don’t wipe it completely, you want that balsamic glaze. Grill the chicken breasts for 5-7 minutes per side, depending on thickness. Use a meat thermometer to check: 165°F (74°C) in the thickest part. Let the chicken rest for 5 minutes before slicing – that keeps it juicy.

💡 mia’s Pro Tip: If you don’t have a grill, a cast-iron grill pan works beautifully. You can also bake the chicken at 400°F for 20-25 minutes, but you’ll miss the smoky char.

Step 6: Assemble and Serve

Spoon a generous mound of herbed mashed potatoes onto each plate. Place a grilled chicken breast on top, then spoon the roasted tomatoes and their juices over and around. Garnish with a few extra chives or a sprinkle of flaky sea salt if you like. That’s it – a complete meal that looks like it came from a great bistro.

StepActionDurationKey Visual Cue
1Marinate chicken30 min+Chicken fully coated in dark marinade
2Boil potatoes15-20 minFork-tender cubes
3Mash potatoes5 minSmooth, creamy, no lumps
4Roast tomatoes12-15 minSkin wrinkled, juices released
5Grill chicken10-14 minInternal temp 165°F, grill marks
6Assemble & serve2 minBeautiful, colorful plate

Serving & Presentation

This dish is a complete meal in itself, but I love to bring a little Moroccan flair to the table. When I entertain in my NYC apartment, I spoon the mashed potatoes into a wide, shallow bowl, slice the chicken on the bias and fan it over the top, then scatter the roasted tomatoes and their juices around. A final sprinkle of fresh chives and a drizzle of extra-virgin olive oil (with a pinch of smoked paprika if I’m feeling nostalgic) makes it look like it came from a chic brasserie.

Pair it with a simple arugula salad tossed with lemon and shaved Parmesan for a bright contrast, or serve crusty bread to soak up the tomato juices and balsamic pan drippings. A glass of medium-bodied red wine – like a Merlot or a Côtes du Rhône – is my go‑to. For a non-alcoholic option, try sparkling water with a splash of pomegranate juice.

Pairing TypeSuggestionsWhy It Works
Side DishArugula salad, grilled asparagus, or sautéed green beansAdds freshness and crunch
Sauce / DipTzatziki, garlic yogurt, or a balsamic glaze drizzleCools, complements the balsamic tang
BeverageMerlot (red), Sauvignon Blanc (white), or sparkling water with mintWine’s acidity matches the dish; mint water refreshes
GarnishFresh chives, flaky sea salt, smoked paprika dustingVisual appeal + subtle flavor boost

Make-Ahead, Storage & Reheating

As a busy New York City food blogger, I’m all about meal prep that doesn’t sacrifice taste. This balsamic grilled chicken recipe is perfect for Sunday prep – you can marinate the chicken up to 24 hours in advance, and the mashed potatoes can be made a day ahead and reheated gently. The roasted tomatoes are best fresh, but leftover ones add amazing flavor to sandwiches and salads.

MethodContainerDurationReheating Tip
RefrigeratorAirtight container (separate components)3-4 daysReheat chicken in a skillet with a splash of water – microwave dries it out.
FreezerFreezer-safe bag or container (mashed potatoes only)Up to 3 monthsThaw in fridge overnight, reheat in a saucepan with a splash of milk.
Make-AheadMarinate chicken in the bag; mash potatoes but keep herbs separate1 day (chicken) / 1 day (potatoes)Fresh herbs added just before serving for best flavor.

For reheating the chicken, I prefer the stovetop method: a non-stick skillet over medium-low heat with a tablespoon of water or chicken broth, covered, for about 4-5 minutes. The steam brings back moisture without drying it out. The mashed potatoes reheat beautifully in a saucepan over low heat, stirring often – add a splash of milk if they seem thick. The roasted tomatoes are best at room temperature or quickly warmed in the oven at 300°F for 5 minutes.

Variations & Easy Swaps

One of the things I love most about this balsamic grilled chicken recipe is how adaptable it is. Whether you’re cooking for dietary needs or just want to change it up, these variations have all been tested in my own kitchen.

VariationKey ChangeBest ForDifficulty Impact
Moroccan Spice TwistAdd 1 tsp cumin + ½ tsp cinnamon to marinadeWarm, aromatic flavor loversEasy
Dairy-Free Mashed PotatoesUse unsweetened almond milk + vegan butterLactose-intolerant / veganEasy
Sheet Pan VersionBake everything at 400°F – chicken and tomatoes on one pan, potatoes boiled then roastedNo grill, minimal cleanupMedium (timing coordination)

Moroccan Spice Twist

This is my personal favorite – it reminds me of my mother’s tagine. Just add 1 teaspoon of ground cumin and ½ teaspoon of cinnamon to the balsamic marinade. The warm spices meld beautifully with the vinegar, giving the chicken an exotic depth. I serve it with the same herbed mash and tomatoes, but sometimes I swap the parsley for fresh cilantro. It’s a beautiful fusion of my two worlds: French technique and North African soul.

Dairy-Free Mashed Potatoes

For a vegan or dairy-free option, substitute the milk with unsweetened almond milk (or oat milk for extra creaminess) and use a good quality vegan butter. The texture will be slightly less rich, but still very satisfying. I’ve tested this for friends with lactose intolerance and they couldn’t tell the difference. Just be sure to warm the alternative milk and butter before adding – cold liquid can make the mash turn gummy.

Sheet Pan Version

If you don’t have a grill (or just want an easier clean-up), you can adapt this into a sheet pan meal. Marinate the chicken as directed. On a large rimmed baking sheet, toss the cherry tomatoes with a little olive oil and push them to one side. Place the marinated chicken on the other side. Roast at 400°F for 20-25 minutes, flipping the chicken halfway, until it reaches 165°F. Meanwhile, make the mashed potatoes on the stovetop. The chicken won’t have the same smoky char, but the tomatoes will be extra jammy and the whole dish comes together beautifully.

How do you make balsamic glaze for grilled chicken from scratch?

Making a balsamic glaze from scratch is simple and far better than store-bought. In a small saucepan, combine 1 cup of balsamic vinegar with 2-3 tablespoons of brown sugar (or honey) and a pinch of salt. Bring to a simmer over medium heat, then reduce the heat to low and let it gently bubble for 10-15 minutes, stirring occasionally, until it thickens to a syrupy consistency that coats the back of a spoon. Be careful not to let it boil aggressively – it can burn quickly. Once thickened, let it cool slightly and use it as a finishing glaze over your grilled chicken. The natural sugars in the balsamic concentrate into a sweet-tart sauce that’s incredible drizzled over the chicken and potatoes.

What herbs work best in mashed potatoes to pair with balsamic chicken?

For herbed mashed potatoes that complement balsamic chicken, choose fresh herbs that are mild and slightly sweet or grassy. My top picks are flat-leaf parsley, chives, and fresh dill. Parsley brings a clean, bright note, chives add a delicate onion flavor, and dill introduces a subtle anise-like freshness that pairs beautifully with the balsamic marinade. Avoid strong herbs like rosemary or thyme in the mash – they can overpower the delicate balance. If you only have dried herbs, use half the amount and stir them in early so they can rehydrate. The key is to add fresh herbs just before serving so they stay vibrant. This combination creates a creamy, aromatic base that lets the balsamic chicken and roasted tomatoes shine.

Can you roast tomatoes at the same temperature and time as the chicken on the grill?

Yes, you can absolutely roast tomatoes on the grill at the same time as your chicken, but with a few adjustments. Grilled chicken is typically cooked at medium-high heat (around 400-450°F) for about 10-14 minutes total. Cherry tomatoes can be grilled in a foil packet or a cast-iron pan on the grill grates – they’ll cook in about 8-12 minutes at the same heat. Place the tomatoes on the cooler side of the grill (indirect heat) so they soften and char without burning. You can also thread them onto skewers and turn them alongside the chicken. For best results, toss them with olive oil, salt, and pepper, and keep an eye on them – they’re done when the skins are blistered and they release a little juice. This method adds a lovely smoky flavor that ties the whole meal together.

How long should you marinate chicken in balsamic vinegar before grilling?

For the best flavor and texture, marinate chicken in balsamic vinegar for at least 30 minutes, but no longer than 24 hours. The acid in the vinegar helps tenderize the chicken and infuse it with tangy flavor, but if left too long (over 24 hours), it can break down the proteins too much, resulting in a mushy texture. For this balsamic grilled chicken recipe, I recommend a minimum of 30 minutes – that’s enough time for the marinade to penetrate the surface. If you’re meal-prepping, 4-6 hours is ideal. Overnight (8-12 hours) works well too. Just remember to keep the chicken refrigerated while marinating, and discard any leftover marinade (don’t reuse it for basting unless you boil it first).

Can I use chicken thighs instead of breasts for balsamic grilled chicken?

Absolutely! Chicken thighs are a wonderful substitute for breasts in this balsamic grilled chicken recipe. Thighs have a higher fat content, which means they stay juicier and more flavorful on the grill, even if you cook them a few minutes longer. Boneless, skinless thighs will cook in about 6-8 minutes per side over medium-high heat, reaching an internal temperature of 175-180°F (thighs can handle a bit more heat without drying out). Bone-in thighs need about 10-12 minutes per side. The balsamic marinade works beautifully with dark meat – the extra richness balances the tangy vinegar. Just adjust your cooking time based on thickness. This swap makes the dish even more forgiving for beginners.

What is the best way to reheat balsamic grilled chicken without drying it out?

The best way to reheat balsamic grilled chicken without drying it out is to use the stovetop method with added moisture. Place the chicken in a non-stick skillet over medium-low heat, add about 2 tablespoons of water, chicken broth, or even the leftover pan juices from the tomatoes. Cover the skillet with a lid and let it steam for 4-5 minutes, flipping once halfway through. This gentle steam rehydrates the meat and brings it back to juicy perfection. Alternatively, you can reheat it in a 300°F oven wrapped in foil with a splash of broth for 10-12 minutes. Avoid the microwave unless you’re in a real hurry – it tends to make the chicken rubbery. For the mashed potatoes, reheat them gently in a saucepan with a little extra milk, stirring constantly.

Can I make this balsamic grilled chicken recipe ahead of time for a dinner party?

Yes, this recipe is ideal for making ahead, especially for a dinner party. You can marinate the chicken up to 24 hours in advance and keep it in the fridge. The herbed mashed potatoes can be made a day ahead – just store them in an airtight container in the refrigerator. On party day, grill the chicken fresh for the best texture and those beautiful grill marks. You can also roast the tomatoes up to a few hours ahead and keep them at room temperature; they are delicious at room temperature or can be quickly reheated in a low oven. For a truly stress-free experience, set up your grill and have everything prepped: the chicken ready to grill, the potatoes ready to reheat, and the tomatoes ready to go. Then you can focus on your guests while the magic happens.

What wine pairs well with balsamic grilled chicken and herbed mashed potatoes?

Balsamic grilled chicken with herbed mashed potatoes pairs beautifully with medium-bodied red wines that have enough acidity to cut through the richness of the mash and complement the tangy balsamic. My top picks are a Merlot (soft tannins, dark fruit notes), a Chianti Classico (bright acidity and cherry flavors that echo the tomatoes), or a Côtes du Rhône (slightly earthy and herbal). If you prefer white wine, choose an oaked Chardonnay – its buttery character works well with the creamy potatoes and doesn’t clash with the balsamic. For a non-alcoholic option, try a sparkling water with a splash of cranberry or pomegranate juice – the tartness is a great palate cleanser. In my NYC dinner parties, I always serve a Merlot and it’s always a hit.

Can I substitute sweet potatoes for Yukon Gold in the herbed mashed potatoes?

Yes, you can absolutely substitute sweet potatoes for Yukon Gold in the herbed mashed potatoes. The result will be sweeter and a bit denser, but it’s a delicious twist that pairs surprisingly well with the balsamic chicken. Use 2 pounds of sweet potatoes, peeled and cubed. Boil them until very tender – they take about the same time (15-20 minutes). Mash with the same amount of butter and milk, but consider reducing the salt slightly to let the natural sweetness shine. The fresh herbs (parsley and chives) still work wonderfully, adding a savory counterpoint. I often make this version in the fall when I find beautiful sweet potatoes at the Union Square farmers market. It adds a vibrant orange color to the plate and a gentle earthiness that complements the roasted tomatoes.

How can I add a smoky flavor without a grill to this balsamic chicken recipe?

If you don’t have a grill, you can still achieve a smoky flavor in several ways. First, add ½ teaspoon of smoked paprika to the balsamic marinade – this is my secret when I’m cooking in my NYC apartment without outdoor space. Another method: cook the chicken in a cast-iron skillet over high heat until well-browned, then finish it in a 400°F oven. That high-heat searing creates a crust that mimics grill marks. You can also use a grill pan on the stovetop – the ridges give those classic char lines. For an extra smoky touch, add a drop of liquid smoke to the marinade (use it sparingly – it’s potent). Finally, if you have a stovetop smoker (like the Cameron brand), you can cold-smoke the chicken for 15 minutes before cooking. These tricks will bring that backyard flavor indoors.

Share Your Version!

I truly hope this balsamic grilled chicken recipe becomes a staple in your kitchen the way it has in mine. Whether you make it for a busy weeknight dinner, a weekend cookout, or a cozy meal for two, I’d love to hear how it turns out! Leave a star rating below and share your experience in the comments – did you try the Moroccan spice twist? Or maybe you grilled the tomatoes alongside the chicken? Your stories and tips help other home cooks become braver in the kitchen.

Snap a photo of your beautiful plate and tag me on Instagram or Pinterest @exorecipes – I always love to see your creations. And if you have a question about any step, just ask below. I answer every comment personally, because cooking is about connection, and that starts around the table. From my NYC kitchen to yours – I hope this recipe brings as much warmth to your table as it does to mine. — mia 🧡

📌

Love This Recipe? Save It to Pinterest!

If you enjoyed this Balsamic Grilled Chicken with Herbed Mashed Potatoes & Roasted Tomatoes recipe, don’t let it get lost in your browser tabs! 😄 Pin it now so you can find it again anytime — and explore hundreds more tried-and-tested recipes waiting for you on my Pinterest boards.

👉 Follow mia on Pinterest @exorecipe

📌 Pin this recipe · 🔁 Re-pin your favorites · 💬 Tag me when you make it — I love seeing your creations!

Print

clock clock iconcutlery cutlery iconflag flag iconfolder folder iconinstagram instagram iconpinterest pinterest iconfacebook facebook iconprint print iconsquares squares iconheart heart iconheart solid heart solid icon

Balsamic Grilled Chicken with Herbed Mashed Potatoes & Roasted Tomatoes

  • Author: Chef Mia
  • Prep Time: 20 minutes
  • Cook Time: 30 minutes
  • Total Time: 50 minutes
  • Yield: 4 1x
  • Method: Main Course
  • Cuisine: American

Description

Grilled balsamic-marinated chicken served with creamy herbed mashed potatoes and roasted cherry tomatoes.


Ingredients

Scale
  • For the chicken:
  • 4 boneless skinless chicken breasts
  • 1/2 cup balsamic vinegar
  • 1/4 cup olive oil
  • 3 cloves garlic, minced
  • 1 teaspoon dried oregano
  • 1 teaspoon dried basil
  • Salt and black pepper to taste
  • For the herbed mashed potatoes:
  • 2 pounds Yukon Gold potatoes, peeled and cubed
  • 1/2 cup milk
  • 1/4 cup butter
  • 2 tablespoons chopped fresh parsley
  • 1 tablespoon chopped fresh chives
  • Salt and black pepper to taste
  • For the roasted tomatoes:
  • 2 cups cherry tomatoes
  • 1 tablespoon olive oil
  • Salt and black pepper to taste

Instructions

  1. Marinate the chicken: In a large bowl, whisk together balsamic vinegar, olive oil, garlic, oregano, basil, salt, and pepper. Add chicken breasts, turning to coat. Cover and refrigerate for at least 30 minutes.
  2. Prepare the mashed potatoes: Place potatoes in a large pot and cover with water. Bring to a boil, then reduce heat and simmer until tender, about 15-20 minutes. Drain and return to the pot. Add milk, butter, parsley, chives, salt, and pepper. Mash until smooth. Keep warm.
  3. Roast the tomatoes: Preheat oven to 425°F (220°C). On a baking sheet, toss cherry tomatoes with olive oil, salt, and pepper. Roast for 12-15 minutes, until softened and lightly charred.
  4. Grill the chicken: Preheat grill to medium-high heat. Grill chicken breasts for 5-7 minutes per side, or until internal temperature reaches 165°F (74°C).
  5. Serve: Plate the mashed potatoes, top with grilled chicken, and garnish with roasted tomatoes.

Notes

For extra flavor, marinate the chicken overnight. You can substitute sweet potatoes for Yukon Gold if desired.


Nutrition

  • Calories: 420
  • Sugar: 8g
  • Fat: 15g
  • Carbohydrates: 38g
  • Protein: 35g


Balsamic Grilled Chicken with Herbed Mashed Potatoes & Roasted Tomatoes

ph">For more delicious inspiration, follow me on Pinterest!

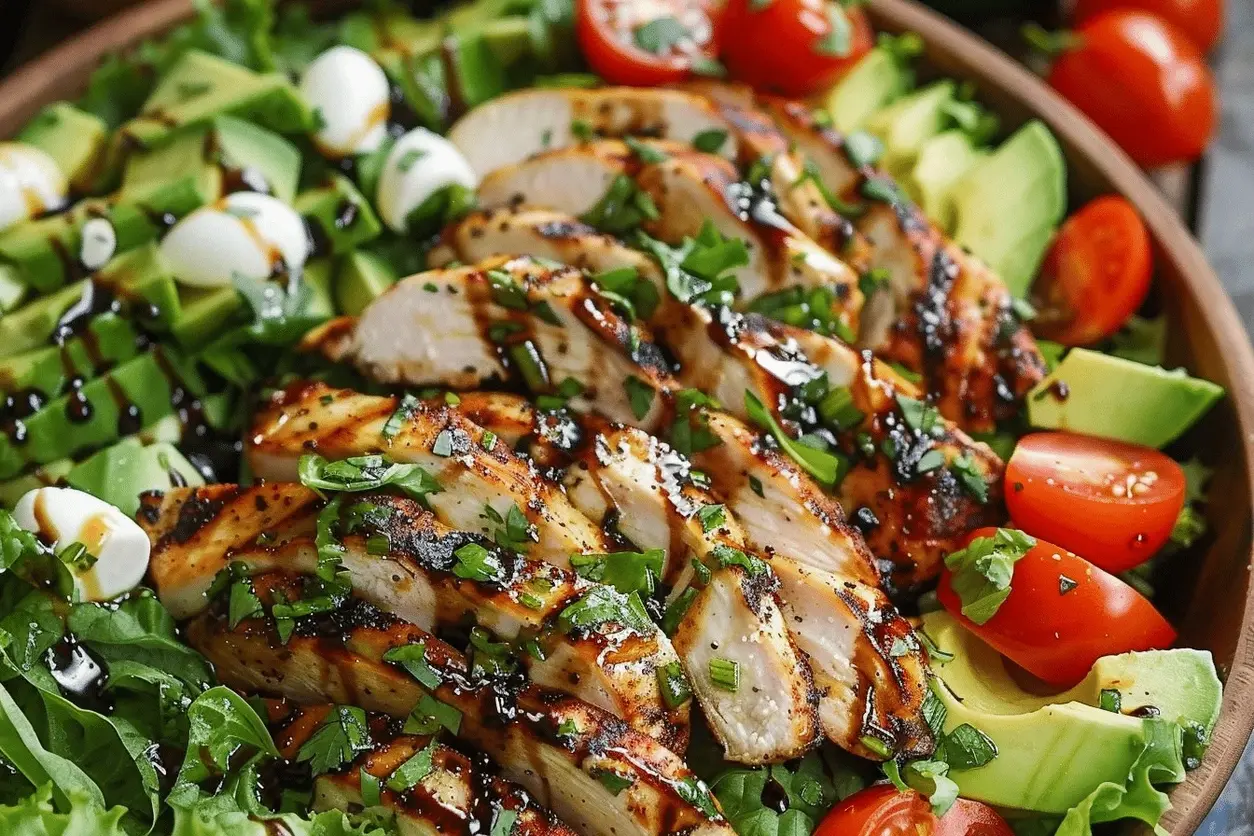
Balsamic Glazed Chicken Salad – A Mediterranean Twist on America’s Favorite Salad

⚖️
Difficulty
Easy
⏲️
Prep Time
15 mins
🕒
Cook Time
15 mins
⏱️
Total Time
30 mins
🍽️
Servings
4

I still remember the first time I made a truly great balsamic glazed chicken salad. It was a hot summer afternoon in my tiny Manhattan kitchen, and I was missing the bright, tangy flavors of my mother’s Moroccan table. She’d always balance sweet and sour so perfectly — a drizzle of honey over roasted vegetables, a splash of vinegar in her tagines. That memory inspired this Balsamic Glazed Chicken Salad. I wanted something fresh, protein-packed, and bursting with personality, something that could hold its own as a main course. This healthy chicken salad has become a total weeknight hero in my house, ready in just 30 minutes and endlessly adaptable.

Imagine tender, juicy chicken breasts lacquered with a glossy balsamic glaze — sweet from honey, sharp from vinegar, and aromatic from garlic. Sliced thin over a bed of crisp mixed greens, blushing cherry tomatoes, paper-thin red onion rings, and tangy crumbles of feta cheese. Then a handful of toasted almonds adds that nutty crunch. And the dressing? A classic balsamic vinaigrette with Dijon mustard and just a hint of honey, whisked together until creamy and emulsified. The first forkful hits every note: sweet, salty, tangy, and fresh. It’s all the best parts of a bistro salad, made right in your own kitchen.

What makes my version special is that I treat the chicken like a star, not an afterthought. I learned to build flavor in layers during my time at Le Cordon Bleu in Paris — a good marinade is your best friend. I also dial in the glaze so it caramelizes beautifully without burning. Many home cooks either under-cook chicken (making it rubbery) or overcook it (drying it out). My tested technique gives you a perfectly cooked, glistening piece of chicken every time. And if you’re short on time, I’ll share a shortcut that still delivers incredible flavor. 💡 mia’s Pro Tip: Always pat the chicken dry before marinating — it helps the glaze cling better.

Why This Balsamic Glazed Chicken Salad Recipe Is the Best

The Flavor Secret — The magic begins with a balsamic marinade that doubles as a glaze. Instead of just brushing on sauce at the end, I marinate the chicken for at least 30 minutes (longer if you have time) so the flavors penetrate deep. The honey catches in the hot pan, creating a sticky, caramelized crust that’s pure gold. Growing up in Morocco, I learned that a balance of acid and sweet is the foundation of so many great dishes — this recipe honors that tradition with French precision.

Perfected Texture — I cook the chicken over medium-high heat in a cast-iron skillet, exactly 6–7 minutes per side, until the internal temperature hits 165°F. Then — don’t skip this — I let it rest for 5 minutes before slicing. That resting time allows the juices to redistribute, making each bite moist and tender. The almonds are toasted just until golden, which adds a satisfying crunch that contrasts with the soft greens and juicy tomatoes.

Foolproof & Fast — Even if you’re a beginner, this recipe won’t let you down. The ingredient list is short (just pantry staples), the dressing comes together in under 2 minutes, and the assembly is as simple as tossing and topping. I’ve made this for busy weeknights, meal-prep Sundays, and even for company — it always impresses. And because it’s a one-dish meal with protein, healthy fats, and veggies, it fits perfectly into a balanced lifestyle.

Balsamic Glazed Chicken Salad Ingredients

I love shopping for these ingredients at the Union Square Greenmarket in NYC — the heirloom tomatoes in summer are unforgettable, and the local honey is always a revelation. But every ingredient here is easy to find at your regular grocery store. Let me walk you through what you need and why it matters.

Ingredients List

  • For the chicken:
  • 4 boneless skinless chicken breasts (about 1½ pounds)
  • ½ cup balsamic vinegar
  • 2 tablespoons honey
  • 2 cloves garlic, minced
  • 1 tablespoon olive oil
  • Salt and pepper to taste
  • For the salad:
  • 6 cups mixed salad greens (I use a spring mix)
  • 1 pint cherry tomatoes, halved
  • ½ red onion, thinly sliced
  • ½ cup crumbled feta cheese
  • ¼ cup sliced almonds, toasted
  • For the dressing:
  • ¼ cup balsamic vinegar
  • 2 tablespoons extra-virgin olive oil
  • 1 tablespoon Dijon mustard
  • 1 teaspoon honey
  • Salt and pepper to taste

Ingredient Spotlight

Balsamic Vinegar — This is the star of the show. Use a good-quality balsamic (not the cheapest bottle) for a rich, slightly sweet flavor without being too acidic. I buy one from Modena when I can. If you only have standard balsamic, you can reduce it by simmering for a few minutes to concentrate the flavor.

Honey — I use wildflower honey from the farmers market, but any runny honey works. Honey not only sweetens the glaze but also helps it caramelize on the chicken. For a vegan option, substitute with maple syrup or agave, but note the flavor will be different (maple adds a woodsy note).

Feta Cheese — I prefer block feta packed in brine for its creamy, tangy taste. Pre-crumbled feta often has additatives and less moisture. Crumble it yourself for the best texture. If you’re dairy-free, try a vegan feta (the almond-based ones are great) or just skip it and add extra avocado for creaminess.

Mixed Salad Greens — I use a mix of baby spinach, arugula, and romaine for variety. Spinach holds up well to dressing, arugula adds peppery kick, and romaine gives crunch. Avoid delicate greens like butter lettuce that will wilt.

Original IngredientBest SubstitutionFlavor / Texture Impact
Balsamic vinegar (marinade)Red wine vinegar + 1 tsp sugarLess sweet, more acidic; add sugar to balance
HoneyMaple syrup or agave nectarMaple adds a subtle woody flavor; agave is neutral but thinner
Feta cheeseGoat cheese or dairy-free fetaGoat cheese is creamier and tangier; vegan feta is softer
Sliced almondsPecans or walnutsPecans are sweeter; walnuts are more bitter — toast both

How to Make Balsamic Glazed Chicken Salad — Step-by-Step

Making this salad is easier than you think — you’ll feel like a pro after the first try. Follow these five steps and you’ll have a stunning dinner in 30 minutes.

Step 1: Marinate the Chicken

In a medium bowl, whisk together ½ cup balsamic vinegar, 2 tablespoons honey, 2 minced garlic cloves, 1 tablespoon olive oil, and a generous pinch of salt and pepper. Add the chicken breasts and turn to coat thoroughly. Cover and refrigerate for at least 30 minutes — or up to 4 hours for deeper flavor. The acid in the vinegar helps tenderize the meat, while the honey caramelizes beautifully during cooking.

💡 mia’s Pro Tip: If you’re in a rush, use a resealable bag instead of a bowl — it coats the chicken more evenly and takes up less space in the fridge.

Step 2: Cook the Chicken

Heat a large skillet (I love cast iron for this) over medium-high heat. Remove chicken from the marinade, letting excess drip off. Cook for 6–7 minutes per side, until the internal temperature reaches 165°F. The glaze will darken and caramelize — that’s what you want. Transfer chicken to a cutting board and let rest for 5 minutes. Resting is non-negotiable; it keeps the juices locked in. Then slice against the grain into thin strips.

⚠️ Common Mistake to Avoid: Don’t crowd the pan — cook chicken in batches if needed. Overcrowding steams the chicken instead of searing it, and you’ll lose that beautiful glaze.

Step 3: Make the Dressing

While the chicken rests, whisk together ¼ cup balsamic vinegar, 2 tablespoons extra-virgin olive oil, 1 tablespoon Dijon mustard, 1 teaspoon honey, and a pinch of salt and pepper. Whisk vigorously until the dressing is emulsified and looks creamy. Dijon acts as a natural emulsifier, so you don’t even need a blender. Taste and adjust — a little extra honey or vinegar depending on your preference.

💡 mia’s Pro Tip: If you want a thicker, more salad-bar-style dressing, add 1 teaspoon of mayonnaise — it stabilizes the emulsion beautifully and adds a touch of richness.

Step 4: Assemble the Salad

In a large mixing bowl, combine 6 cups mixed greens, halved cherry tomatoes, thinly sliced red onion, crumbled feta cheese, and toasted sliced almonds. Drizzle the dressing over the top and toss gently until everything is evenly coated. Toss with your hands for the most delicate handling — you don’t want to bruise the greens.

⚠️ Common Mistake to Avoid: Don’t add all the dressing at once — start with about three-quarters, toss, then add more if needed. Salad isn’t a soup; you want the greens lightly glistening, not sitting in a pool.

Step 5: Top and Serve

Divide the dressed salad among 4 plates or bowls. Fan the sliced balsamic-glazed chicken on top of each serving. If you want extra visual appeal, drizzle a little of the leftover pan juices (or extra balsamic glaze) over the chicken. Serve immediately — this salad is at its peak right after assembly.

StepActionDurationKey Visual Cue
1Marinate chicken30+ minChicken fully coated, no dry spots
2Cook chicken12–14 minGolden brown crust, internal temp 165°F
3Make dressing2 minEmulsified, creamy, no separation
4Assemble salad5 minGreens evenly dressed, not drenched
5Top & serve1 minChicken fanned neatly, everything fresh

Serving & Presentation

This balsamic glazed chicken salad is a meal in itself, but you can make it extra special with a few finishing touches. I like to serve it in wide, shallow bowls to show off the colors — the deep red of the tomatoes, the bright green of the arugula, the white crumbles of feta, and the mahogany stripes on the chicken. A final crack of black pepper and a sprinkle of flaky sea salt elevates everything.

For a heartier version, serve alongside a slice of crusty sourdough or a warm baguette — that tangy bread pairs perfectly with the balsamic dressing. Sometimes I add a handful of avocado cubes for extra creaminess (hello, healthy fats!). If you’re serving this for a dinner party, consider adding grilled peaches or figs when in season — a nod to both my Moroccan and French culinary influences.

And don’t forget the wine! A crisp Sauvignon Blanc or a light Pinot Noir complement the tangy vinaigrette without overpowering the chicken. For a non-alcoholic option, try sparkling water with a splash of pomegranate juice and a sprig of mint.

Pairing TypeSuggestionsWhy It Works
Side DishCrusty sourdough, roasted potatoes, quinoaBread soaks up dressing; potatoes add heartiness; quinoa adds protein
Sauce / DipExtra balsamic glaze, tzatziki, lemon aioliGlaze intensifies flavor; tzatziki cools; aioli adds richness
BeverageSauvignon Blanc, Pinot Noir, mint pomegranate spritzWine cuts acid; spritz is refreshing and festive
GarnishFresh basil, mint, flaky sea salt, edible flowersHerbs brighten; salt finishes; flowers impress

Make-Ahead, Storage & Reheating

I know how busy life gets — that’s why I often prep components of this balsamic glazed chicken salad ahead of time. The chicken can be cooked and sliced up to 2 days in advance. The dressing keeps for a week in the fridge. But the greens? Dress them only at the last minute to keep them crisp. Here’s my full guide to storing and reheating everything perfectly.

MethodContainerDurationReheating Tip
RefrigeratorAirtight container (separate – chicken, greens, dressing)Up to 2 daysReheat chicken in a dry skillet over medium heat 2–3 min per side; do not microwave greens.
FreezerFreezer-safe bag for cooked chicken only; greens and dressing not recommendedUp to 3 monthsThaw overnight in fridge; reheat in skillet with a splash of water to steam back moisture.
Make-AheadStore each component separatelyChicken & dressing: up to 2 days; greens: wash/dry day ofAssemble just before serving — toss greens with dressing last.

My favorite trick: I prep the chicken and dressing on Sunday, then during the week I wash and dry my greens, toss them with the dressing, and reheat the chicken in a dry skillet while I slice tomatoes. Dinner is on the table in under 10 minutes. If you’re meal-prepping, portion the dressed salad into individual containers, but keep the chicken separate and warm it up before adding — cold chicken on a cold salad is fine, but I find the contrast of warm chicken on cool greens much more satisfying.

Variations & Easy Swaps

VariationKey ChangeBest ForDifficulty Impact
Mediterranean DelightAdd olives, cucumber, and pepperoncini; swap feta for goat cheeseMediterranean flavor lovers, summer mealsEasy – just extra chopping
Gluten-Free & Dairy-FreeOmit feta; use dairy-free feta or avocado; ensure dressing ingredients are GFGluten-free, dairy-free, paleoEasy – simple swaps
Summer Berry BoostAdd fresh strawberries or blueberries; use poppy seeds in dressingSweet-savory fans, berry seasonEasy – no cook change

Mediterranean Delight

This variation brings a taste of the Mediterranean coast to your bowl. Add sliced cucumber, Kalamata olives, and a few pepperoncini for heat. Swap the feta for a creamy goat cheese and use a handful of fresh oregano instead of basil. The briny olives and tangy goat cheese pairs beautifully with the balsamic glaze — it reminds me of a salad I had at a tiny place in Nice. Everything stays quick; you just need to chop a few extra veggies.

Gluten-Free & Dairy-Free

This version is naturally gluten-free if you check the mustard and vinegar labels (cheap balsamic can have caramel color, but pure balsamic is GF). Omit the feta and replace it with a generous scoop of diced avocado for creaminess. Alternatively, try a dairy-free feta made from almonds — it crumbles just like the real thing. The dressing is already dairy-free. I’ve made this for many friends with dietary restrictions and it never feels like a compromise.

Summer Berry Boost

When sweet local berries hit the NYC farmers market, I add them to this salad without hesitation. Halved strawberries or whole blueberries introduce bursts of juicy sweetness that play off the balsamic glaze. Add a teaspoon of poppy seeds to the dressing for a classic summer touch. This version is so beautiful that it doubles as a centerpiece for brunch. Just be gentle when tossing so the berries don’t break apart.

What is the best way to cook chicken for a balsamic glazed chicken salad?

The best method is to cook the marinated chicken in a hot skillet (cast iron is ideal) over medium-high heat. This gives you a beautiful caramelized crust while keeping the inside juicy. Grill also works wonderfully — the high heat creates those appealing grill marks and adds a smoky dimension. Cook 6–7 minutes per side until the internal temperature reaches 165°F. Always let the chicken rest for 5 minutes before slicing; this redistributes the juices so every bite is moist. Avoid boiling or poaching, as those methods wash away the glaze and lead to bland, waterlogged meat.

Can I use a different vinegar to make the glaze for balsamic glazed chicken salad?

Yes, you can substitute the balsamic vinegar in the glaze with other vinegars, but the flavor profile will change. Red wine vinegar is the closest alternative — it’s less sweet and more acidic, so you’ll need to add extra honey (or a pinch of sugar) to balance. Apple cider vinegar adds a fruity tang that pairs nicely with the feta and almonds. White balsamic (or white wine vinegar) will give a milder, less complex flavor. I’ve tried all of these, and my top recommendation is to use a balsamic reduction if you want that rich, syrupy consistency without the full acidity.

How many calories are in a balsamic glazed chicken salad?

A typical serving of this balsamic glazed chicken salad (about one-quarter of the recipe) contains approximately 380 calories. The breakdown includes 38 grams of protein, 16 grams of fat, 18 grams of carbohydrates, and 12 grams of sugar (mostly from the honey and natural sugars in tomatoes). If you’re watching your calorie intake, you can reduce the fat by using less oil in the dressing (swap 1 tablespoon for water or vinegar) and omitting the almonds. The chicken remains high in protein and very filling, making this a satisfying meal for around 300–350 calories if you adjust the toppings.

What type of greens go best with balsamic glazed chicken salad?

I recommend a mix of baby spinach, arugula, and romaine hearts. Spinach is sturdy and holds up well to the dressing without wilting too quickly. Arugula adds a peppery kick that complements the sweet balsamic glaze. Romaine provides crunch and structure. Avoid delicate greens like butter lettuce or mesclun that will become soggy within minutes. If you want a more nutrient-dense base, use kale (massaged with a little olive oil to soften) — it’s fantastic for meal prep because it stays crisp for days. Always wash and thoroughly dry your greens before dressing; wet greens dilute the vinaigrette.

Can I make balsamic glazed chicken salad ahead of time?

Absolutely, but you need to store components separately for the best results. Cook the chicken and let it cool completely, then refrigerate in an airtight container for up to 2 days. Make the dressing and store it in a jar in the fridge for up to a week. Wash and dry the greens thoroughly (use a salad spinner) and keep them in a sealed bag with a paper towel to absorb moisture. When you’re ready to eat, slice the chicken, reheat it briefly in a skillet, toss the greens with the dressing, and assemble. This method keeps the greens crisp and the chicken juicy — never dress the salad ahead of time or it will become soggy.

What can I use instead of feta cheese in balsamic glazed chicken salad?

If you’re out of feta or want a different flavor, here are three excellent substitutions. Goat cheese (chèvre) is the closest in tanginess and creaminess — just crumble it similarly. Fresh mozzarella pearls add a mild, milky richness that’s lovely with the balsamic. For a dairy-free option, use diced avocado (which adds creaminess and healthy fats) or a dairy-free feta made from almonds or tofu. I’ve tested all of these, and each brings its own character. Goat cheese makes the salad more luxurious, while avocado keeps it light and fresh. Avoid pre-shredded cheese blends — they contain anti-caking agents and won’t melt or crumble well.

Is balsamic glazed chicken salad healthy?

Yes, this salad is a nutrient-packed, balanced meal. It provides lean protein from the chicken, healthy fats from olive oil and almonds, vitamins and fiber from the greens and vegetables, and calcium from feta cheese. One serving contains 38 grams of protein, which supports muscle health and keeps you full for hours. The balsamic vinegar has antioxidants and may help with blood sugar regulation. To make it even healthier, you can reduce the honey in the marinade and dressing, use a low-sugar balsamic glaze, or swap the almonds for sunflower seeds for fewer calories. Overall, this is a whole-food, low-carb, high-protein meal that fits many dietary patterns.

How do I prevent the balsamic glaze from burning on the chicken?

The sugar in honey (and the vinegar) can burn if the heat is too high or if you cook the chicken too long. Here’s my technique: First, pat the chicken dry after marinating — excess liquid will cause steaming, not searing. Second, use a clean, hot skillet with a little oil, but not smoking hot. Cook at medium-high heat, not high. Watch the chicken closely: when the bottom is deeply browned after about 6 minutes, flip it. If you see black spots forming, reduce the heat. The glaze should be dark amber, not black. If you’re using a grill, oil the grates well and keep the lid closed to avoid flare-ups. Always let the chicken rest on a clean plate — the residual heat finishes cooking without burning.

Can I use chicken thighs instead of breasts?

Absolutely! Chicken thighs are actually more forgiving because they have more fat, so they stay juicy even if you overcook them slightly. Boneless, skinless thighs work best. Follow the same marinade and cooking instructions, but thighs may cook a little faster (about 5–6 minutes per side). The internal temperature should still reach 165°F. Thighs are often more affordable and have richer flavor, which pairs beautifully with the balsamic glaze. If using skin-on thighs, cook skin-side down first until crispy, then flip and cook through. The skin adds extra crunch, but it will make the salad a bit less light — your call!

What can I serve with balsamic glazed chicken salad to make it a full meal?

This salad is already a complete meal with protein, vegetables, and healthy fats. But if you want to round it out further, consider a simple side of crusty bread (sourdough or baguette) to soak up any extra dressing, or a cup of roasted butternut squash soup for a cozy fall pairing. For extra carbs, serve with a side of quinoa or farro tossed with olive oil and lemon. If you’re hosting, start with an antipasto platter (olives, prosciutto, roasted peppers) and end with a light dessert like berries with whipped cream. The key is to keep sides simple so the balsamic glazed chicken salad stays the star of the plate.

📌

Love This Recipe? Save It to Pinterest!

If you enjoyed this Balsamic Glazed Chicken Salad recipe, don’t let it get lost in your browser tabs! 😄 Pin it now so you can find it again anytime — and explore hundreds more tried-and-tested recipes waiting for you on my Pinterest boards.

👉 Follow mia on Pinterest @exorecipes

📌 Pin this recipe · 🔁 Re-pin your favorites · 💬 Tag me when you make it — I love seeing your creations!

Print

clock clock iconcutlery cutlery iconflag flag iconfolder folder iconinstagram instagram iconpinterest pinterest iconfacebook facebook iconprint print iconsquares squares iconheart heart iconheart solid heart solid icon

Balsamic Glazed Chicken Salad

  • Author: Chef Mia
  • Prep Time: 15 minutes
  • Cook Time: 15 minutes
  • Total Time: 30 minutes
  • Yield: 4 1x
  • Method: Main Course
  • Cuisine: American

Description

A fresh and flavorful salad topped with tender balsamic glazed chicken, ripe tomatoes, and crumbled feta cheese, drizzled with a tangy balsamic vinaigrette.


Ingredients

Scale
  • For the chicken:
  • 4 boneless skinless chicken breasts
  • 1/2 cup balsamic vinegar
  • 2 tablespoons honey
  • 2 cloves garlic, minced
  • 1 tablespoon olive oil
  • Salt and pepper to taste
  • For the salad:
  • 6 cups mixed salad greens
  • 1 pint cherry tomatoes, halved
  • 1/2 red onion, thinly sliced
  • 1/2 cup crumbled feta cheese
  • 1/4 cup sliced almonds, toasted
  • For the dressing:
  • 1/4 cup balsamic vinegar
  • 2 tablespoons extra-virgin olive oil
  • 1 tablespoon Dijon mustard
  • 1 teaspoon honey
  • Salt and pepper to taste

Instructions

  1. Marinate the chicken: In a bowl, whisk together 1/2 cup balsamic vinegar, honey, garlic, olive oil, salt, and pepper. Add chicken, coat well, and refrigerate for at least 30 minutes.
  2. Cook the chicken: Heat a grill or skillet over medium-high heat. Cook chicken 6-7 minutes per side until internal temperature reaches 165°F. Let rest 5 minutes, then slice.
  3. Make the dressing: In a small bowl, whisk together 1/4 cup balsamic vinegar, olive oil, Dijon mustard, honey, salt, and pepper until emulsified.
  4. Assemble the salad: In a large bowl, combine salad greens, tomatoes, red onion, feta cheese, and almonds. Toss with dressing.
  5. Top with sliced chicken and serve immediately.

Notes

For a lighter version, use a sugar-free balsamic glaze and reduce honey in the marinade. This salad is best served fresh, but leftovers can be stored separately for up to 1 day.


Nutrition

  • Calories: 380
  • Sugar: 12 g
  • Fat: 16 g
  • Carbohydrates: 18 g
  • Protein: 38 g


Balsamic Glazed Chicken Salad

Balsamic Glazed Blackberry and Basil Brie with Candied Pecans – A Decadent Holiday Appetizer

⚖️
Difficulty
Easy
⏲️
Prep Time
5 mins
🕒
Cook Time
15 mins
⏱️
Total Time
20 mins
🍽️
Servings
6

I still remember the first time I made this balsamic glazed brie recipe for a holiday party in my tiny NYC kitchen. It was one of those snowy December evenings when the whole city feels like it’s wrapped in a warm blanket, and I wanted something that felt special but didn’t keep me away from my guests. I pulled out a wheel of brie, a basket of blackberries from the Union Square Greenmarket, and a bottle of aged balsamic I’d brought back from a trip to Modena. Within twenty minutes, that balsamic blackberry appetizer became the star of the night — gooey, tangy, sweet, and utterly irresistible. Every time I make it now, I think of my mother’s kitchen in Morocco, where she would simmer fruit with honey and spices, and I smile at how that same instinct to balance sweet and savory shows up here in this very American, very delicious appetizer.

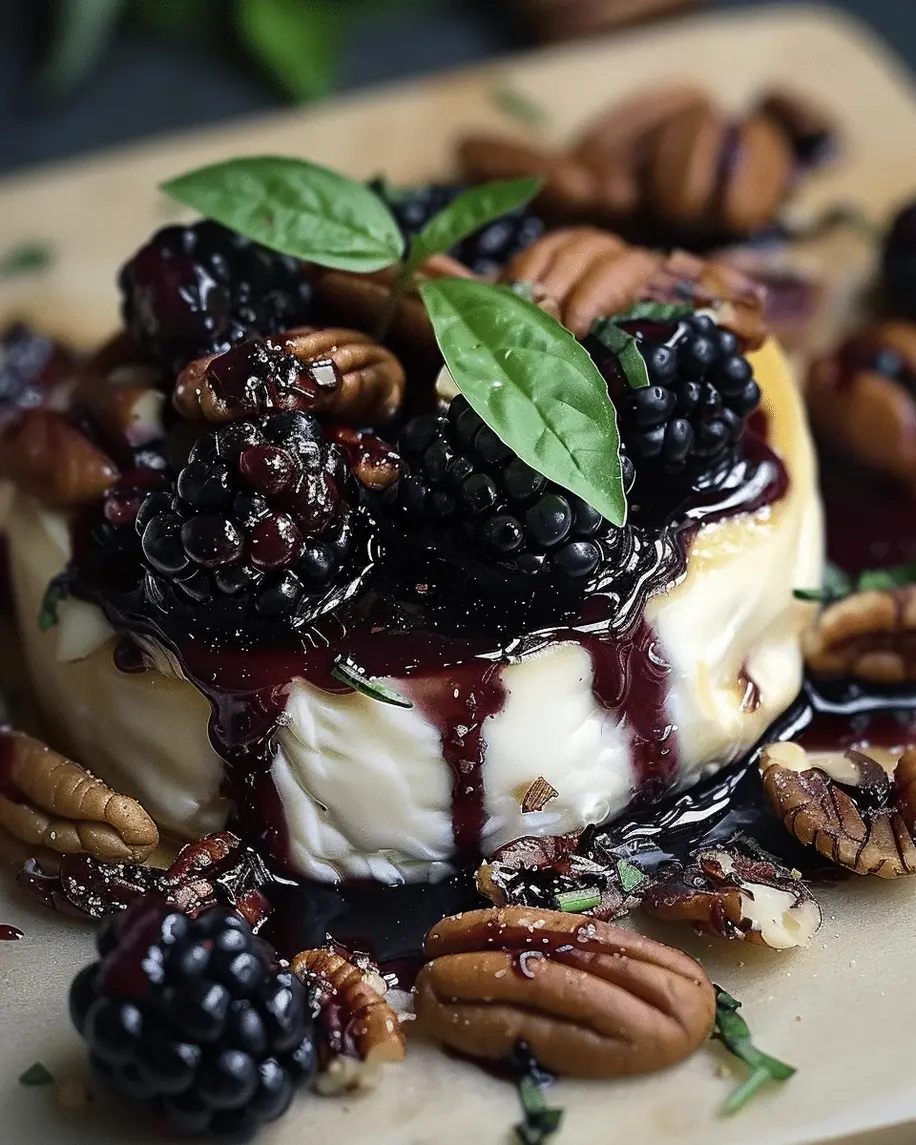
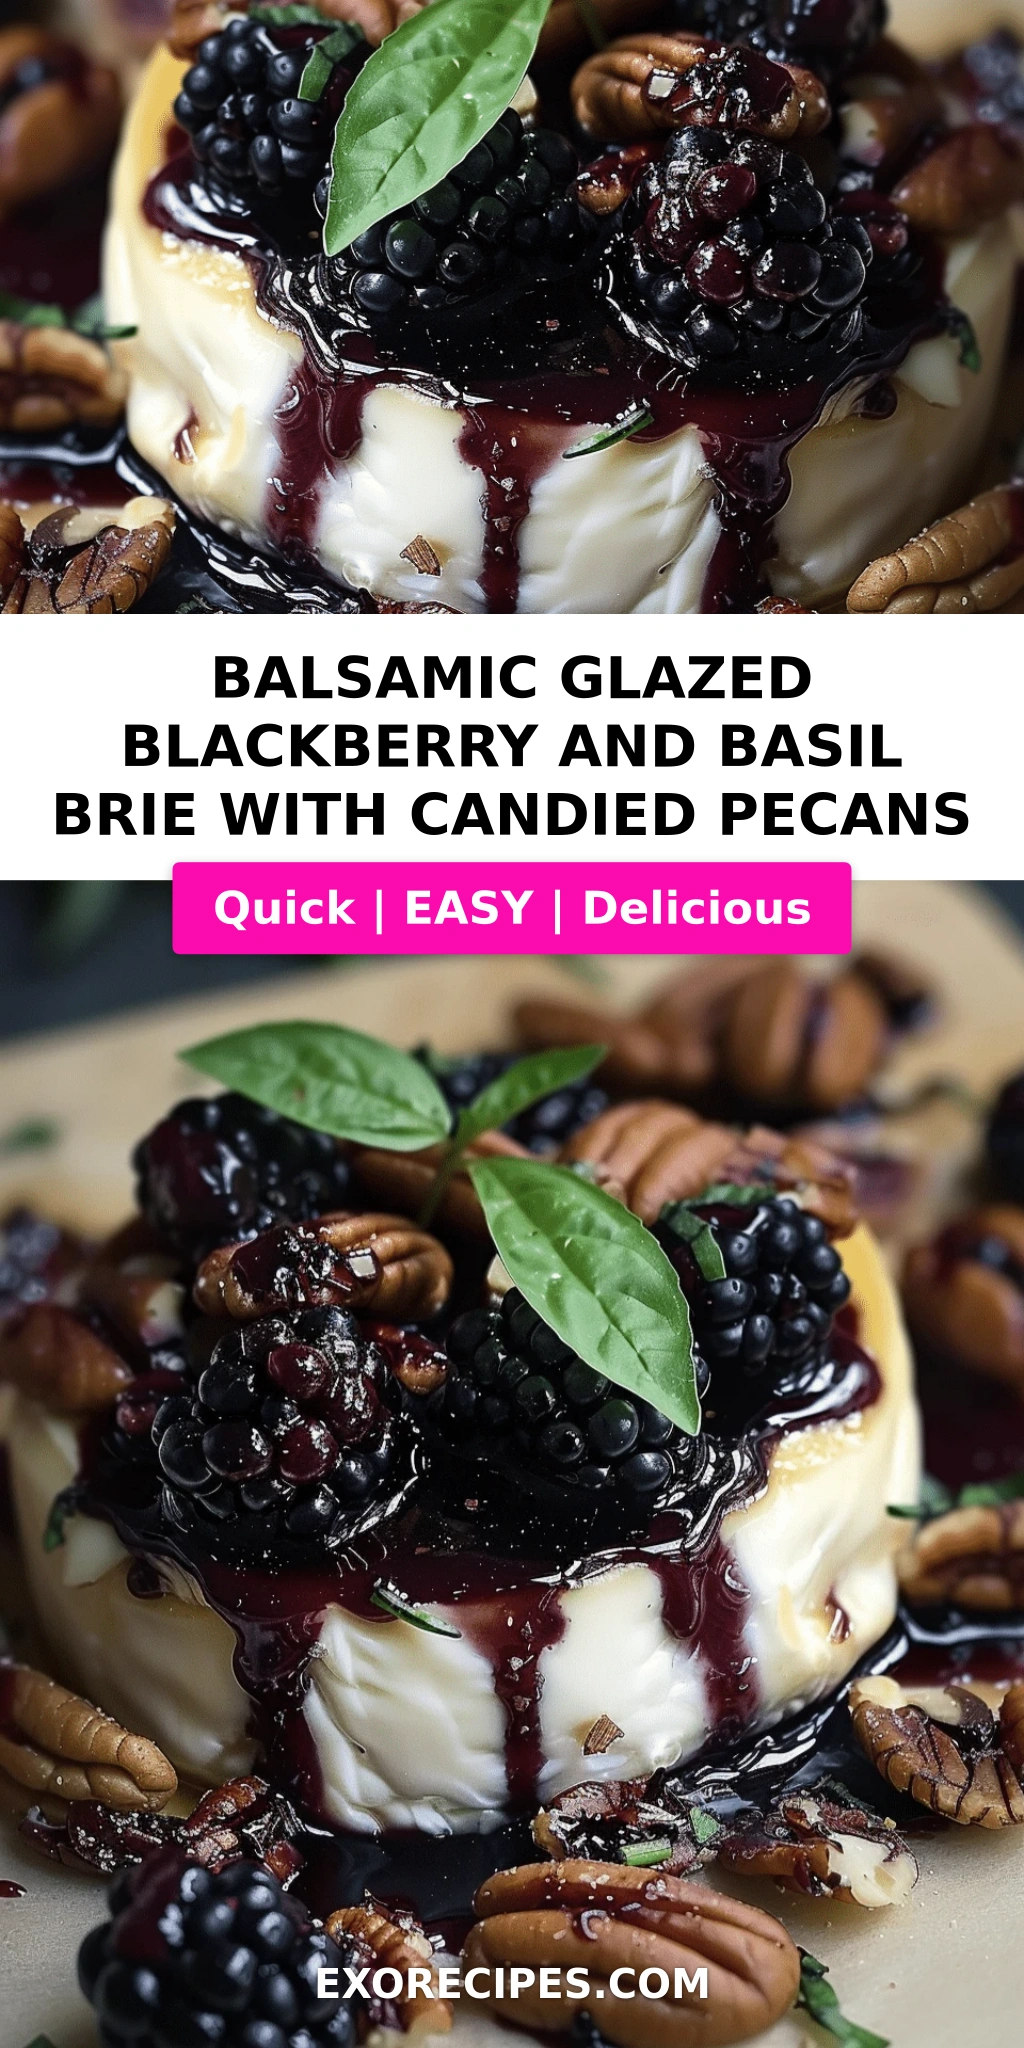
Imagine cutting into a warm, creamy wheel of brie and watching the center gently spill out beneath a jewel-toned blanket of balsamic blackberry glaze. The aroma hits you first — rich balsamic vinegar that’s been reduced to a syrupy sweetness, punctuated by the bright pop of fresh blackberries. Then comes the crunch of candied pecans, their caramelized edges breaking through the creamy cheese, and finally the whisper of fresh basil — cool, peppery, and completely unexpected. Each bite is a study in contrast: velvety and crisp, tart and sweet, simple and elegant. The balsamic doesn’t overwhelm the blackberries; it deepens them, turning a humble berry into something sophisticated and deeply satisfying.

What sets this baked brie with candied pecans apart from every other version I’ve tried is the balance. So many baked brie recipes end up either too runny or too sweet, with toppings that slide off or flavors that fight each other. My version — honed through years as a professional cook in Paris and now tested on countless New York dinner parties — gets it exactly right. The brie is baked just until it’s soft and pillow-like but still holds its shape. The balsamic blackberry sauce is reduced to a thick, jammy consistency that clings to the cheese instead of pooling around it. And the candied pecans and basil add texture and freshness that cut through the richness. 💡 mia’s Pro Tip: Take the brie out of the refrigerator 20 minutes before baking — room-temperature cheese bakes more evenly and won’t separate into a greasy mess.

Why This Balsamic Glazed Brie Recipe Is the Best

The Flavor Secret – This isn’t just a baked brie with fruit; it’s a layered composition where every component earns its place. The balsamic vinegar I use is aged — not the thick, syrupy cream kind, but a good-quality Modena balsamic that has a natural sweetness and acidity. When simmered with fresh blackberries and a touch of honey, it creates a glaze that’s both tangy and deeply fruity. The fresh basil is my Moroccan-French twist — in Paris, I learned to use fresh herbs in unexpected places, and here basil brightens the whole dish the way mint does in Moroccan tea. It’s unexpected, and it works brilliantly.

Perfected Texture – The biggest challenge with any baked brie is avoiding the dreaded cheese puddle. I’ve seen it happen too many times — a beautiful wheel that melts into a flat, oily mess. The trick, which I learned in a French pastry kitchen, is about temperature and timing. Baking the brie at 350°F for just 10–12 minutes on parchment paper ensures the interior gets warm and creamy while the rind stays intact enough to hold everything together. The candied pecans add a necessary crunch that contrasts with the soft cheese, so every bite has texture and interest.

Foolproof & Fast – This easy holiday brie recipe comes together in under 20 minutes with just five main ingredients. There’s no complicated technique, no special equipment, and no stress. Whether you’re hosting a Thanksgiving cocktail hour, a Christmas Eve gathering, or a casual New Year’s Eve party, this blackberry basil brie looks and tastes like you spent hours on it. But between us? It’s almost embarrassingly simple. The hardest part is waiting for the brie to come to room temperature before baking.

Balsamic Glazed Brie Recipe Ingredients

When I shop for this recipe, I head straight to the cheese counter at my local market in the West Village, then over to the fruit display for the blackberries. In the summer, I grab basil from the window box on my fire escape — but store-bought is just fine, of course. The key is using fresh, high-quality ingredients because this recipe has so few elements; each one really matters. Here’s everything you’ll need.

Ingredients List

  • 1 (8 ounce) wheel of brie cheese (double or triple cream works beautifully)
  • 1 cup fresh blackberries (see notes on frozen below)
  • 2 tablespoons balsamic vinegar (aged if possible)
  • 1 tablespoon honey (wildflower or orange blossom)
  • 1 tablespoon brown sugar (light or dark — both work)
  • 1/4 cup candied pecans, chopped (homemade or store-bought)
  • 2–3 fresh basil leaves, chiffonade (rolled and thinly sliced)
  • Crackers or baguette slices for serving (I love water crackers or a seeded baguette)

Ingredient Spotlight

Brie Cheese – The foundation of the whole dish. Look for a wheel that feels firm but gives slightly when pressed near the center — that means it’s ripe and ready. The rind should be white with faint pinkish or ivory tones, without any ammonia smell. A double- or triple-cream brie (usually labeled as such) will be extra luscious when baked. If you’re at a standard US grocery store, Brie de Meaux or a good-quality domestic brand like Marin French Cheese Company works wonderfully.

Fresh Blackberries – These are the heart of the glaze. Choose berries that are deep purple-black, plump, and dry — moisture on the berries in the container can lead to mold. They don’t need to be perfect; slightly soft berries break down faster in the glaze, which is actually ideal. In the winter when fresh blackberries aren’t at their peak, frozen berries (thawed and drained) can work in a pinch, though the glaze will be slightly more liquid and need a minute or two longer to reduce.

Balsamic Vinegar – This is not the place for the cheap stuff. A good-quality balsamic vinegar — aged at least 12 years if you can find it — has a natural sweetness and syrupy body that regular vinegar lacks. You don’t need the $50 bottle, but look for one labeled “Aceto Balsamico Tradizionale” or at least “aged balsamic vinegar of Modena.” The flavor concentration matters here because the vinegar is the backbone of the glaze.

Candied Pecans – These add the crucial crunch. You can buy them at the store (check the baking aisle or the bulk section at Whole Foods), but homemade are incredibly easy and taste better. To make them quickly, toast 1/4 cup pecan halves in a dry skillet over medium heat for 2 minutes, then add 1 tablespoon maple syrup or honey and a pinch of salt, stirring until coated and glossy. Spread on parchment to cool, then chop. They stay crunchy for days.

Original IngredientBest SubstitutionFlavor / Texture Impact
Brie CheeseCamembert or vegan brie-style cheeseCamembert is slightly firmer when baked; vegan brie will be softer and less creamy
Fresh BlackberriesFrozen blackberries (thawed and drained) or raspberriesFrozen berries yield more liquid; raspberries are tarter and break down faster
Candied PecansToasted walnuts, almonds, or pepitas (for nut-free)Walnuts are slightly bitter; almonds are crunchier; pepitas add a nut-free seed crunch
Balsamic VinegarBalsamic glaze (store-bought) or pomegranate molassesBalsamic glaze is thicker and sweeter; pomegranate molasses adds tart fruitiness

How to Make Balsamic Glazed Blackberry and Basil Brie — Step-by-Step

Trust me when I tell you this is one of the easiest impressive appetizers you’ll ever make. In just four simple steps and about 20 minutes, you’ll have a warm, gooey, stunning dish that looks like it came straight from a caterer’s kitchen.

Step 1: Preheat and Prepare the Brie

Preheat your oven to 350°F (175°C). While it heats, take the brie out of the refrigerator and let it sit at room temperature for about 20 minutes. This is important — cold brie bakes unevenly and can separate into a greasy, oily mess. Line a small baking sheet with parchment paper or place the brie in a small oven-safe dish (a 6-inch ceramic baker or mini cast-iron skillet is perfect). Leave the rind on the brie — it’s edible and helps the cheese hold its shape during baking.

💡 mia’s Pro Tip: If you want a more dramatic “pour” when you cut into the brie, score the top rind lightly in a crosshatch pattern with a sharp knife. This helps the interior peek through as it bakes.

Step 2: Bake the Brie

Place the prepared brie in the oven and bake for 10–12 minutes. You’re looking for the cheese to be soft and pillowy to the touch — it should jiggle slightly when you gently shake the pan — but still holding its overall round shape. The rind will puff up a little and may develop faint golden spots. Do not overbake! If the brie starts to leak white liquid or collapse flat, it’s gone too far. Remove it from the oven and let it rest for 1 minute before transferring to a serving plate.

⚠️ Common Mistake to Avoid: Overbaking the brie. Every oven runs slightly different, so start checking at 10 minutes. You want it warm and soft but not molten. If the cheese is actively bubbling at the edges, it’s overdone.

Step 3: Make the Balsamic Blackberry Glaze

While the brie bakes, combine the fresh blackberries, balsamic vinegar, honey, and brown sugar in a small saucepan. Cook over medium heat, stirring occasionally, for 5–7 minutes. At first, the berries will release their juices and the mixture will look thin. As it simmers, the liquid will reduce and thicken into a glossy, jammy sauce. You want the blackberries to have broken down but still have some texture — a few whole or half berries are lovely for visual appeal. The sauce should coat the back of a spoon. Remove from heat and let cool slightly.

💡 mia’s Pro Tip: For a smoother glaze, use the back of a wooden spoon to gently smash some of the blackberries against the side of the pan as they cook. If you prefer a completely smooth sauce, you can strain it through a fine-mesh sieve, but I love the rustic texture.

Step 4: Assemble and Serve

Carefully transfer the warm baked brie to a serving platter or wooden board. Spoon the balsamic blackberry glaze generously over the top, letting some cascade down the sides. Sprinkle the chopped candied pecans evenly over the glaze, then finish with the fresh basil chiffonade. Serve immediately while the cheese is still warm and gooey, with crackers or toasted baguette slices on the side. The contrast between the warm cheese, the tangy-sweet glaze, the crunchy nuts, and the fresh basil is absolutely magical.

⚠️ Common Mistake to Avoid: Adding the basil too early. Basil wilts quickly when it touches warm food, so always add it at the very last second — right before you carry the dish to the table. This way it stays bright green and perky.

StepActionDurationKey Visual Cue
1Preheat oven, let brie come to room temp20 mins (passive)Brie feels soft at the center when pressed
2Bake brie on parchment-lined sheet10–12 minsPillowy center, rind puffed but intact
3Simmer blackberries with balsamic, honey, sugar5–7 minsGlaze coats the back of a spoon
4Top brie with glaze, pecans, basil1 minuteGlaze drips over edges, basil is bright green

Serving & Presentation

This balsamic blackberry appetizer is all about that wow factor when you bring it to the table. I like to serve it on a wide wooden board or a slate platter — the deep crimson glaze against the pale brie and dark board is stunning. Arrange crackers or baguette slices in a fan around the cheese, leaving one side open for dipping. A small pile of extra candied pecans on the side never hurts, and if I’m feeling extra fancy, I’ll scatter a few fresh blackberries and tiny basil leaves around the board for color.

In my NYC apartment, this appetizer has made appearances at everything from Thanksgiving dinner to book club meetings to a quiet night in with a glass of red wine. It pairs beautifully with a crisp Sauvignon Blanc or a dry Rosé — the acidity cuts through the rich cheese. For a non-alcoholic option, sparkling water with a splash of pomegranate juice is lovely. And if you’re serving this at a holiday party, set it out alongside a charcuterie board with prosciutto, dried figs, and Marcona almonds for a truly memorable spread.

Pairing TypeSuggestionsWhy It Works
Side DishRoasted grapes, honey-drizzled figs, marinated olivesFruity and briny flavors complement the sweet-tangy brie
Sauce / DipExtra balsamic glaze, fig jam, honeycombAdds another layer of sweetness or tang for dipping crackers
BeverageSauvignon Blanc, dry Rosé, sparkling water with pomegranateAcidity cuts through the creamy cheese; bubbles refresh the palate
GarnishExtra basil leaves, edible flowers, flaky sea saltAdds visual contrast and a final pop of flavor

Make-Ahead, Storage & Reheating

One of the questions I get most often from friends and readers is how far in advance they can prep this dish — especially during the busy holiday season. The good news is that this balsamic glazed brie recipe is forgiving, and a little planning makes party day even easier. Here’s how I handle it in my own kitchen when I’m juggling a full menu.

MethodContainerDurationReheating Tip
RefrigeratorAirtight container, brie and glaze stored separatelyUp to 2 daysReheat brie at 300°F for 5–7 mins; warm glaze on stovetop
FreezerGlaze only in freezer-safe jar; do not freeze baked brieGlaze up to 3 monthsThaw glaze overnight in fridge, reheat gently on stovetop
Make-AheadGlaze in jar; brie on plate covered with plastic wrapGlaze up to 3 days ahead; brie 1 day aheadBake brie fresh, then add pre-warmed glaze, pecans, and basil

My favorite make-ahead strategy for this easy holiday brie recipe is to prepare the balsamic blackberry glaze up to three days in advance and store it in a glass jar in the fridge. On party day, I bake the brie fresh (it only takes 10 minutes!), warm the glaze in a small saucepan while the brie bakes, and then assemble everything. The candied pecans can also be made a week ahead and kept in an airtight container at room temperature. The only thing I never prep ahead is the basil — it wilts and discolors, so I always chiffonade it at the very last second.

If you happen to have leftovers (rare in my house, but it happens!), store the baked brie and glaze separately in the fridge. The brie will firm up again, but you can gently reheat it in a 300°F oven for about 5 minutes — just enough to soften it without melting it into a puddle. The glaze can be microwaved for 20 seconds or reheated on the stovetop. Leftover assembled brie doesn’t reheat perfectly, so if you’re planning for leftovers, store the components separately.

Variations & Easy Swaps

Over the years, I’ve played with this blackberry basil brie in so many ways — sometimes on purpose, sometimes because I opened the fridge and realized I was out of something. Here are my favorite variations, each tested and approved in my NYC kitchen.

VariationKey ChangeBest ForDifficulty Impact
Summer Berry & HerbUse mixed berries + mint instead of basilPeak summer produce; lighter flavorSame — Easy
Nut-Free & Dairy-FreeUse pepitas + vegan brieAllergy-friendly entertainingSame — Easy
Spiced Honey & FigReplace blackberries with figs, add cinnamon and cardamomFall and winter holidaysSame — Easy

Summer Berry & Herb Variation

When summer hits and the farmers markets in NYC overflow with berries, I swap out the blackberries for a mix of raspberries, blueberries, and sliced strawberries. The combination creates a more complex, layered berry flavor. I also swap the basil for fresh mint — a nod to my Moroccan roots, where mint is used in everything from tea to tagines. The mint adds a cool, bright note that pairs beautifully with the warm balsamic berries. If you use strawberries, add them in the last 2 minutes of cooking so they don’t break down completely.

Nut-Free & Dairy-Free Version

For guests with dietary restrictions, this balsamic glazed brie recipe adapts beautifully. Use a vegan brie-style cheese — the ones made from cashews or coconut oil work best because they melt similarly to dairy brie. For the crunch, replace candied pecans with roasted pepitas (pumpkin seeds) tossed in maple syrup and a pinch of salt. They crisp up nicely and provide that same satisfying texture. Everything else stays exactly the same. I’ve served this version at parties where half the guests were dairy-free, and no one could tell the difference until I mentioned it.

Spiced Honey & Fig Variation

This is my go-to for Thanksgiving and Christmas. Replace the blackberries with fresh figs (quartered or halved depending on size) and add 1/4 teaspoon of cinnamon and a pinch of cardamom to the glaze. The warm spices echo the holiday flavors we all love, and the figs become jammy and luscious as they cook. Use a good-quality honey — orange blossom or wildflower — and finish with a sprinkle of flaky sea salt just before serving. It’s a beautiful, sophisticated twist that feels special without any extra effort.

Can I use frozen blackberries instead of fresh for the balsamic glaze?

Yes, you can absolutely use frozen blackberries in this balsamic glazed brie recipe. The key is to thaw them first and drain off any excess liquid, otherwise the glaze will be too watery and take longer to reduce. Frozen berries tend to break down more quickly than fresh, so you’ll end up with a slightly smoother, more uniform glaze — which is lovely, just different. If you’re using frozen, add an extra minute or two of simmering time to ensure the sauce thickens properly. I’ve done this many times during winter when fresh blackberries aren’t at their best, and the flavor is still fantastic.

How do you keep the brie from melting too much when baking with toppings?

The secret to perfectly baked brie that holds its shape is all about temperature and timing. First, always let the brie come to room temperature for 20 minutes before baking — this ensures even cooking. Second, bake at 350°F for only 10–12 minutes, not longer. The brie should feel soft and jiggle slightly when you gently shake the pan, but it should still hold its round shape. If the cheese starts to leak white liquid or collapse at the edges, it’s overbaked. Baking on parchment paper also helps prevent sticking and makes transfer easy. And here’s the thing — add the toppings after baking, not before. The hot brie will warm the glaze and pecans perfectly without risking the cheese breaking down under the weight of heavy toppings during baking.

What can I substitute for candied pecans to make this dish nut-free?

For a nut-free version of this blackberry basil brie, my favorite substitution is roasted pepitas (pumpkin seeds) that have been tossed in a little maple syrup and salt, then toasted until crunchy. They provide the same satisfying texture and salty-sweet contrast that candied pecans bring. Another great option is sunflower seeds — toast them in a dry skillet for 2 minutes, then toss with honey and a pinch of flaky sea salt. If you want to keep the crunch but skip the candy coating, plain roasted pumpkin seeds or even crushed pretzels (check for nut-free facilities if allergies are a concern) work beautifully. I often make the pepita version for holiday parties, and guests love them just as much as the original.

How far in advance can I prepare the balsamic blackberry and basil topping?

You can prepare the balsamic blackberry glaze up to 3 days in advance — this is actually my preferred way to handle it when I’m entertaining. Simply make the glaze as directed, let it cool completely, then transfer it to an airtight jar and refrigerate. When you’re ready to serve, warm it gently in a small saucepan over low heat or in the microwave for 20–30 seconds. The candied pecans can be made up to a week ahead and stored at room temperature in an airtight container. The fresh basil, however, should be chiffonaded at the very last minute — it wilts quickly and loses its bright color and flavor once cut. So my make-ahead strategy is: glaze and pecans prepped ahead, brie baked fresh, basil added right before serving.

What type of brie is best for baking in this recipe?

For this baked brie with candied pecans, I recommend a double- or triple-cream brie — the extra cream content makes the cheese extra luscious and smooth when melted. Look for a wheel that’s about 8 ounces, firm but with a little give when pressed near the center. The rind should be white with no ammonia smell. Good-quality domestic brie works beautifully and is often more affordable than imported French brie. Avoid brie that’s labeled “soft-ripened” without specifying double or triple cream — it can sometimes be too thin and watery when baked. If you’re using a very large wheel (12 ounces or more), increase the baking time by 2–3 minutes and check for doneness by gently pressing the center.

Can I make this balsamic glazed brie recipe in an air fryer?

Yes, you can make this easy holiday brie recipe in an air fryer, and it works wonderfully. Preheat your air fryer to 320°F (160°C) — air fryers run hotter than ovens so a lower temperature prevents over-baking. Place the brie in a small oven-safe dish that fits your air fryer basket, or on a piece of parchment paper. Cook for 6–8 minutes, checking at the 6-minute mark. The brie should be soft and puffy but still holding its shape. While the brie cooks, prepare the balsamic blackberry glaze on the stovetop as directed. Assemble exactly the same way — glaze, pecans, basil — and serve immediately. The air fryer method is slightly faster and gives a beautifully even melt.

What should I serve with this balsamic blackberry appetizer?

This balsamic blackberry appetizer pairs beautifully with a range of dippers and sides. For crackers, I love water crackers, seeded whole-wheat crackers, or buttery Ritz-style rounds. Toasted baguette slices are always a hit — brush them with olive oil and toast at 350°F for 8 minutes for extra crunch. For a low-carb option, endive leaves or thick-cut cucumber rounds make excellent vessels. As part of a larger spread, serve this brie alongside cured meats like prosciutto or soppressata, a bowl of marinated olives, dried figs, and maybe a small dish of honeycomb. A glass of dry sparkling wine or Sauvignon Blanc completes the experience beautifully.

Can I use a different cheese instead of brie for this recipe?

Absolutely, though the texture and flavor will change in delicious ways. Camembert is the most natural substitute — it’s very similar to brie but typically has a slightly firmer texture and a more earthy, mushroom-like flavor when baked. It holds its shape even better than brie, so it’s a great option if you’re nervous about over-baking. A soft, mild goat cheese log (like a chèvre) also works surprisingly well — the tangy flavor plays beautifully with the sweet balsamic blackberry glaze, though it won’t get as gooey. For a more indulgent spin, try a small wheel of Époisses or a soft-ripened triple-cream cheese. Just keep the baking time similar and watch for visual cues rather than relying strictly on the clock.

📌

Love This Recipe? Save It to Pinterest!

If you enjoyed this Balsamic Glazed Blackberry and Basil Brie with Candied Pecans recipe, don’t let it get lost in your browser tabs! 😄 Pin it now so you can find it again anytime — and explore hundreds more tried-and-tested recipes waiting for you on my Pinterest boards.

👉 Follow mia on Pinterest @exorecipe

📌 Pin this recipe · 🔁 Re-pin your favorites · 💬 Tag me when you make it — I love seeing your creations!

Print

clock clock iconcutlery cutlery iconflag flag iconfolder folder iconinstagram instagram iconpinterest pinterest iconfacebook facebook iconprint print iconsquares squares iconheart heart iconheart solid heart solid icon

Balsamic Glazed Blackberry and Basil Brie with Candied Pecans

  • Author: Chef Mia
  • Prep Time: 5 minutes
  • Cook Time: 15 minutes
  • Total Time: 20 minutes
  • Yield: 6 1x
  • Method: Appetizer
  • Cuisine: American

Description

A decadent baked brie topped with a tangy balsamic blackberry sauce, fresh basil, and crunchy candied pecans. Perfect for an appetizer or holiday gathering.


Ingredients

Scale
  • 1 (8 ounce) wheel of brie cheese
  • 1 cup fresh blackberries
  • 2 tablespoons balsamic vinegar
  • 1 tablespoon honey
  • 1 tablespoon brown sugar
  • 1/4 cup candied pecans, chopped
  • 23 fresh basil leaves, chiffonade
  • Crackers or baguette slices for serving

Instructions

  1. Preheat oven to 350°F (175°C). Place the brie on a small baking sheet lined with parchment paper or in a small oven-safe dish.
  2. Bake the brie for 10-12 minutes, until soft and slightly melted but still holding its shape.
  3. While brie bakes, combine blackberries, balsamic vinegar, honey, and brown sugar in a small saucepan. Cook over medium heat, stirring occasionally, for 5-7 minutes until blackberries break down and sauce thickens slightly.
  4. Remove brie from oven and transfer to a serving plate. Spoon the balsamic blackberry mixture over the top.
  5. Sprinkle with candied pecans and fresh basil. Serve immediately with crackers or baguette slices.

Notes

For a dairy-free version, use a vegan brie-style cheese. Candied pecans can be substituted with walnuts or almonds. Adjust sweetness to taste.


Nutrition

  • Calories: 215
  • Sugar: 8g
  • Fat: 15g
  • Carbohydrates: 12g
  • Protein: 8g


Balsamic Glazed Blackberry and Basil Brie with Candied Pecans

k">

Tried This Recipe? Leave a Comment!

Did you make this recipe? I’d love to hear how it turned out! Please leave a comment and a rating below. Your feedback helps other home cooks and supports cheerychop.com!
For more delicious inspiration, follow me on Pinterest!

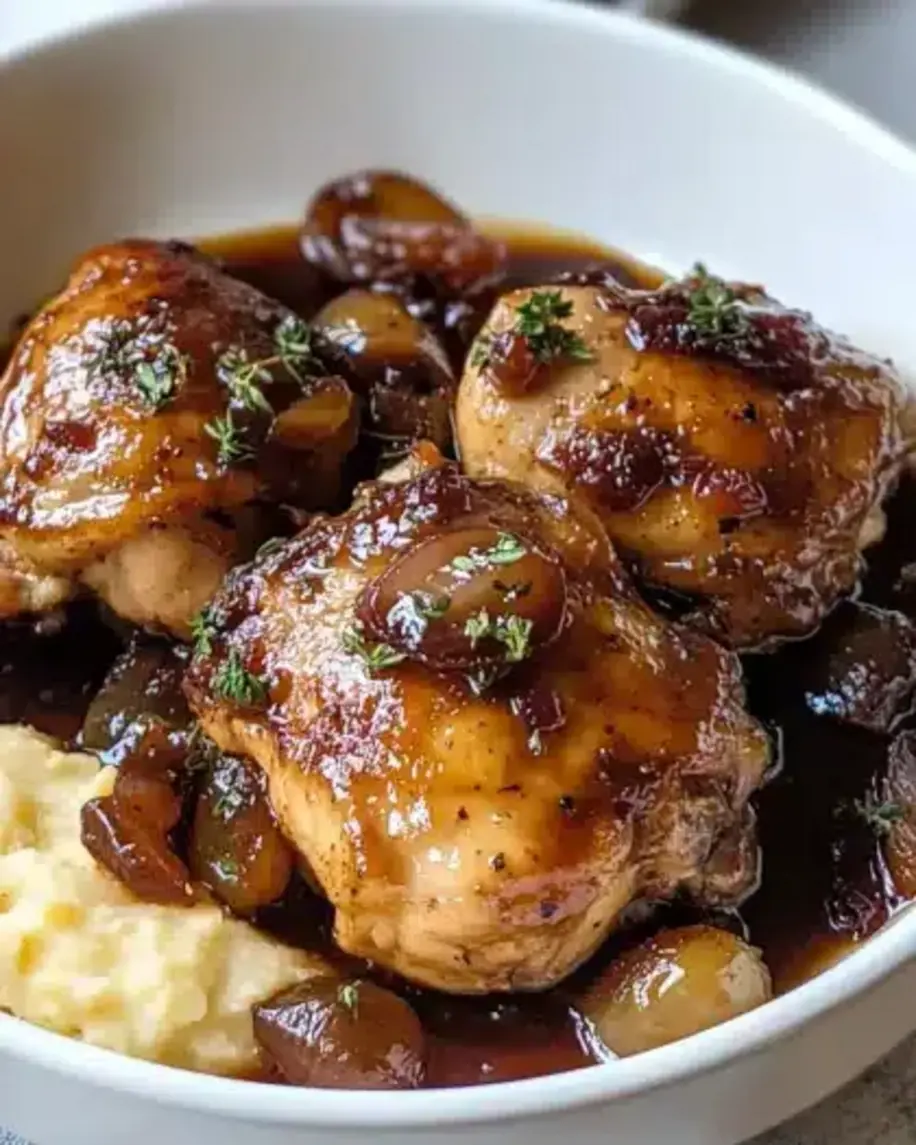
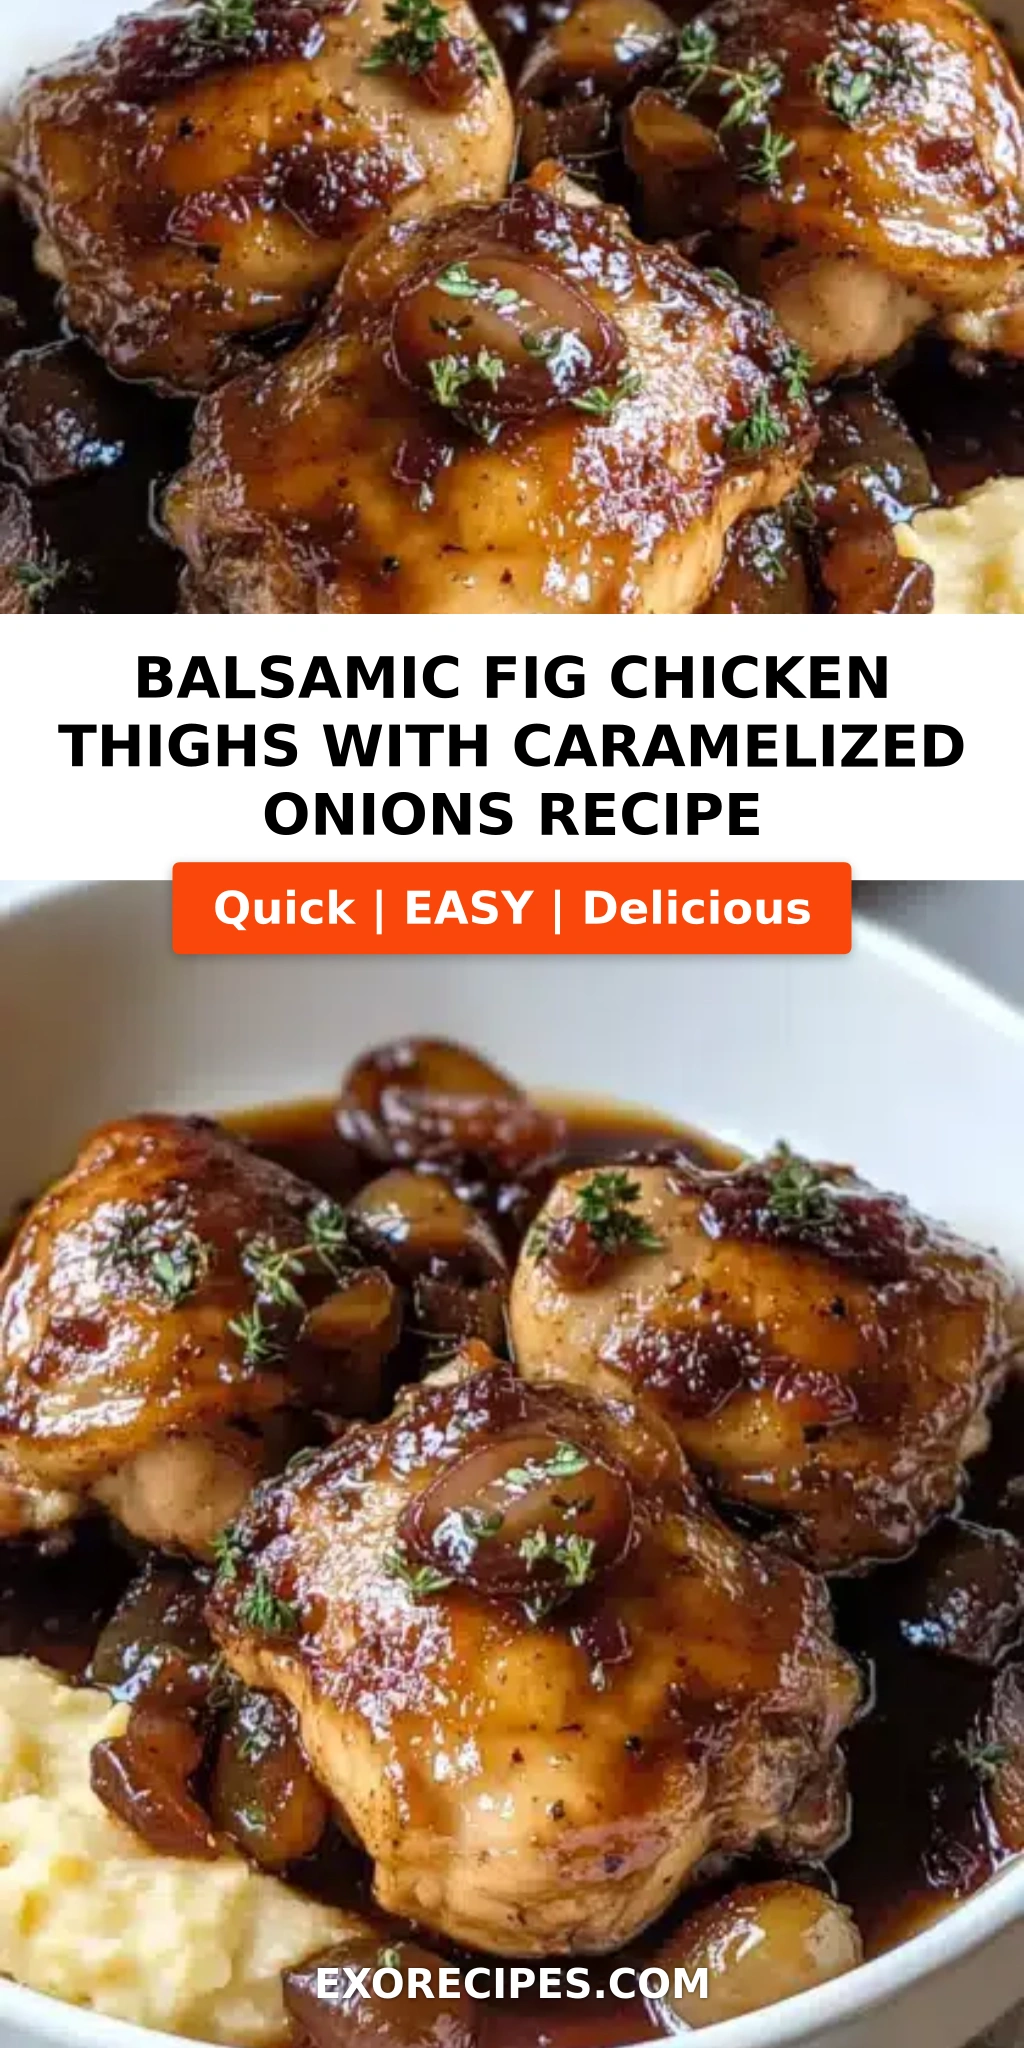
Balsamic Fig Chicken Thighs with Onions and Thyme – A One-Pan Wonder

⚖️
Difficulty
Easy
⏲️
Prep Time
10 mins
🕒
Cook Time
35 mins
⏱️
Total Time
45 mins
🍽️
Servings
4

Every time I make these balsamic fig chicken thighs, I’m transported back to my mother’s kitchen in Rabat. She would slow-cook chicken with dried fruits and a touch of honey, the aromas of cinnamon and saffron filling our little home. But it was during my culinary training in Paris that I discovered how a simple balsamic reduction could echo those sweet-savory North African flavors. This recipe is my love letter to both worlds: the warmth of Morocco and the precision of French cooking. The key? A glossy balsamic fig sauce that clings to every bite of tender chicken thighs, with caramelized onions and fresh thyme tying it all together.

Imagine pulling a skillet from the oven: the chicken skin is crackling gold, the onions are jammy and sweet, and the sauce has thickened into a deep mahogany glaze. One forkful reveals juicy, fall-off-the-bone meat underneath, with a tangy-sweet kick that makes you reach for another piece of crusty bread. The thyme adds an earthy, almost floral note that balances the fruitiness of the figs. Every element works in harmony – the richness of the chicken, the acidity of the vinegar, the candy-like sweetness of the fig preserves. It’s the kind of meal that feels both rustic and elegant, perfect for a busy weeknight or a quiet dinner party.

What sets my version apart is a double-cooking technique: searing the chicken to get that golden crust, then finishing it in the oven to ensure the meat stays succulent while the sauce concentrates. I also add a pat of butter at the end – a classic French trick – for a velvety finish. One common mistake? Rushing the onions. They need a good 5–6 minutes to soften and develop sweetness before you add the garlic. Trust me, that patience pays off. From my NYC kitchen to yours, this balsamic fig chicken thighs recipe will become a staple you’ll come back to again and again.

Why This Balsamic Fig Chicken Thighs Recipe Is the Best

The Flavor Secret. The magic lies in the interplay between aged balsamic vinegar and fig preserves. Aged balsamic is naturally sweet and syrupy, while fig preserves add a honeyed, almost floral sweetness with tiny seeds that pop. Growing up, my mom would use fresh figs from our garden, but in New York I rely on good-quality seedless fig jam from the farmers market. Either way, the combination creates a sauce that is complex – tangy, sweet, and savory all at once. My French pastry background taught me to balance acids with sugars, so I add a splash of chicken broth to round out the acidity.

Perfected Texture. Bone-in, skin-on chicken thighs are non-negotiable here. The skin protects the meat from drying out and renders its own fat, which the onions and sauce soak up. Searing at high heat creates that coveted crunch, while the oven finish locks in moisture. I always let the chicken rest a few minutes before serving – it’s a small step that keeps the juices inside. The onions, cooked low and slow in the same pan, become soft and caramelized, almost melting into the sauce.

Foolproof & Fast. This whole dish comes together in 45 minutes, and most of that is hands-off oven time. There’s no marinating, no complicated steps. Even if you’re new to cooking chicken thighs, the visual cues are clear: brown the skin until it releases easily from the pan, let the onions soften until they look translucent, and bake until the sauce is thick and bubbly. The internal temperature is your ultimate safety net – 165°F (75°C) guarantees perfectly cooked meat. I’ve made this for friends who are self-proclaimed “bad cooks,” and they always leave with the recipe.

Balsamic Fig Chicken Thighs Ingredients

I source most of these ingredients from my local market in Chelsea – I love the freshness of the thyme and the variety of fig preserves. But the real star is the balsamic vinegar; I still remember buying my first bottle of aged balsamic in a tiny shop near the Louvre. The man behind the counter let me sample it from a wooden barrel – that depth of flavor changed how I cook. Below is everything you’ll need for this recipe, with US measurements and a few options.

Ingredients List

  • 6 bone-in, skin-on chicken thighs (about 2 lbs)
  • 1 teaspoon salt
  • 1/2 teaspoon black pepper
  • 2 tablespoons olive oil
  • 2 large onions, sliced
  • 4 cloves garlic, minced
  • 1/2 cup balsamic vinegar (preferably aged)
  • 1/2 cup chicken broth (low-sodium)
  • 1/4 cup fig preserves or jam (seedless recommended)
  • 2 sprigs fresh thyme
  • 1 tablespoon butter (optional)

Ingredient Spotlight

Balsamic Vinegar: Use a quality aged balsamic – the sweetness is more concentrated and the acidity is smoother. If you only have standard balsamic, you can reduce it by simmering a few extra minutes. Substitution: balsamic glaze works, but reduce the amount to 1/3 cup and skip the broth adjustment.

Fig Preserves: Seedless fig jam gives a silkier sauce, but chunky preserves add lovely texture. In a pinch, use 1/4 cup honey mixed with 2 tablespoons balsamic reduction. Dried figs also work – rehydrate 1/2 cup chopped dried figs in hot water for 10 minutes, drain, and add to the pan along with the broth.

Chicken Thighs: Bone-in, skin-on is best for flavor and moisture. Boneless thighs will cook faster (20–25 minutes) but may dry out. If using boneless, reduce oven time by 5–7 minutes and check internal temperature. For a leaner option you can use chicken breasts, but adjust cooking time to 20–22 minutes and consider basting with sauce halfway through.

Original IngredientBest SubstitutionFlavor / Texture Impact
Balsamic vinegarBalsamic glaze (use 1/3 cup)Sweeter, thicker sauce; less acidic
Fig preservesHoney + balsamic reduction (1/4 cup honey + 2 tbsp reduction)Less complex, but still sweet and sticky
Bone-in chicken thighsBoneless thighs (reduce oven time by 5 min)Less juicy, skin not as crispy
Fresh thyme1 teaspoon dried thymeLess aromatic; add with the liquid
ButterGhee or 1 tbsp olive oilLess richness; sauce may be thinner

How to Make Balsamic Fig Chicken Thighs – Step-by-Step

This recipe flows like a gentle rhythm: sear, soften, deglaze, and bake. Follow these steps and you’ll have a stunning one-pan meal that tastes like you spent hours in the kitchen. I’ve included my trusted tips and common pitfalls, so you can avoid the mistakes I made in my early days.

Step 1: Preheat and Season

Preheat oven to 375°F (190°C). Pat chicken thighs dry with paper towels – this is crucial for browning. Season generously on both sides with salt and black pepper. Don’t be shy; the salt will help crisp the skin and season the meat all the way through.

⚠️ Common Mistake to Avoid: Seasoning right before searing – salt draws moisture to the surface and can prevent browning if the chicken is wet. Pat dry first, then season.

Step 2: Sear the Chicken

Heat olive oil in a large oven-safe skillet (cast-iron works beautifully) over medium-high heat. Place chicken thighs skin-side down in a single layer. Cook without moving for 5–6 minutes, until the skin is deep golden and releases easily from the pan. Flip and cook 3 minutes more. Transfer chicken to a plate; don’t worry if it’s not fully cooked – the oven will finish it.

💡 mia’s Pro Tip: If the skin sticks, it needs more time. Let it cook undisturbed until it naturally releases. For extra crispy skin, press the thighs gently with a spatula while searing.

Step 3: Caramelize Onions

Reduce heat to medium. Add sliced onions to the same skillet – they should sizzle. Cook for 5–6 minutes, stirring occasionally, until they turn soft, translucent, and lightly caramelized. The fond (browned bits) from the chicken will start to lift into the onions, adding flavor.

⚠️ Common Mistake to Avoid: Overcrowding the pan – the onions need space to brown. If necessary, cook them in two batches. Also, don’t rush the heat; medium allows them to sweat without burning.

Step 4: Add Garlic and Deglaze

Stir in minced garlic and cook for 1 minute until fragrant. Pour in balsamic vinegar, chicken broth, and fig preserves. Immediately scrape the bottom of the pan with a wooden spoon to dissolve all the browned bits – that’s concentrated flavor. Add fresh thyme sprigs. Bring the mixture to a simmer (you’ll see small bubbles).

💡 mia’s Pro Tip: When adding balsamic vinegar, it may smell sharp at first – that’s normal. Let it cook for 30 seconds before adding the broth, so the acidity mellows slightly. This prevents an overly tangy sauce.

Step 5: Return Chicken and Bake

Return the chicken thighs to the skillet, skin-side up. Spoon some of the sauce over each piece. Transfer the skillet to the preheated oven. Bake for 25–30 minutes, until the internal temperature reaches 165°F (75°C) and the sauce is thickened and bubbly around the edges. The skin will be extra crispy and the sauce will have reduced by about half.

⚠️ Common Mistake to Avoid: Opening the oven too often – every time you peek, heat escapes and cooking time increases. Use the oven light to check. If the sauce reduces too quickly before the chicken is done, cover the skillet loosely with foil.

Step 6: Finish and Serve

Remove the skillet from the oven. If using, stir in butter until melted and glossy – this adds a restaurant-quality sheen and richness. Remove thyme sprigs (they have tough stems). Let the chicken rest 5 minutes before serving. Spoon extra sauce and onions over each thigh. Serve with your favorite sides to soak up every drop.

💡 mia’s Pro Tip: For a thicker, more syrupy glaze, transfer the sauce to a small saucepan after removing the chicken and simmer on the stovetop for 2–3 minutes more. Pour over the chicken just before serving.

StepActionDurationKey Visual Cue
1Preheat & season5 minSeasoned, dry chicken
2Sear chicken (skin side)5-6 minGolden-brown skin releases easily
3Sear chicken (flip)3 minLight browning on second side
4Cook onions5-6 minOnions soft, translucent, slightly caramelized
5Add garlic & deglaze2 minGarlic fragrant, liquid bubbly, fond dissolved
6Bake chicken with sauce25-30 minInternal temp 165°F, sauce thick, skin crispy
7Optional rest & stir in butter5 min restButter melts into glossy sauce

Serving & Presentation

I love serving this dish directly from the skillet – it’s rustic and inviting. Arrange the chicken thighs to look like spokes on a wheel, with the caramelized onions mounded in the center and the sauce spooned all around. Sprinkle a few fresh thyme leaves (remove the tough sprigs first) over the top for a bright, herbal note. In Morocco, we’d serve this with crusty bread to soak up every last drop of sauce, but here in New York, I often pair it with roasted baby potatoes or a simple couscous pilaf.

For a more elegant presentation, transfer the chicken to a serving platter and pour the sauce through a fine-mesh sieve (pressing the onions lightly) to get a silky glaze. But honestly, I prefer the onions as part of the dish – they’re too good to leave behind. Garnish with a drizzle of extra balsamic glaze and a twist of black pepper. My French training taught me that garnishes should be edible and meaningful, so a few fresh fig slices when in season make a stunning finish.

When I make this for friends, I put the skillet in the center of the table with a pile of warm flatbreads and a simple green salad dressed with lemon and olive oil. The combination of the rich, sweet-savory chicken and a fresh, tangy salad is pure comfort. For a cold-weather meal, I swap the salad for roasted Brussels sprouts or caramelized carrots – the sweetness lines up beautifully with the fig sauce.

Pairing TypeSuggestionsWhy It Works
Side DishRoasted baby potatoes, herbed couscous, crusty bread, or creamy polentaAbsorb the sauce and provide a neutral base for the bold flavors
Sauce / DipExtra balsamic glaze, fig chutney, or yogurt-tahini sauceAdds creaminess or extra sweetness
BeverageDry red wine (Merlot or Syrah), sparkling water with lemon, or Moroccan mint teaWine’s tannins cut through richness; mint tea complements the North African vibe
GarnishFresh thyme leaves, chopped parsley, pomegranate arils, or toasted walnutsAdds color, freshness, and texture – especially pomegranate for a tart pop

Make-Ahead, Storage & Reheating

As a busy working cook in New York, I rely on meals that can be prepped ahead or freeze beautifully. This balsamic fig chicken is a champion in both categories. I often make a double batch on Sunday, knowing that a quick reheat later in the week will taste just as good – sometimes better, as the flavors meld overnight. Below is my tested storage guide so you can enjoy this recipe with zero stress.

MethodContainerDurationReheating Tip
RefrigeratorAirtight container (glass or plastic)Up to 4 daysReheat in a covered skillet over medium-low heat with a splash of water or broth, 8–10 minutes, or microwave in 30-second bursts.
FreezerFreezer-safe zip-top bag or containerUp to 3 monthsThaw overnight in fridge. Reheat in a 350°F oven for 15–20 minutes, covered with foil to prevent drying.
Make-AheadSkillet (cover and refrigerate)1 day in advanceRemove skillet from fridge 30 minutes before reheating. Bake at 375°F for 20 minutes, adding a little broth if sauce is too thick.

One more trick I learned in Paris: when reheating leftover chicken, I often add a tiny splash of balsamic vinegar and a pinch of sugar to revive the glaze. It brings back that just-made tanginess. Also, if you’re freezing, separate the sauce and chicken in a single layer in the bag – it thaws more evenly. I often freeze individual portions for quick lunches; the sauce makes a wonderful pasta sauce or a topping for ricotta toast the next day.

Make-ahead tip: You can prepare the entire dish up to the point of baking – just sear the chicken, make the sauce, arrange everything in the skillet, and refrigerate (covered). When ready to serve, let it sit at room temperature for 20 minutes while the oven preheats, then bake as directed. It may need an extra 5 minutes since it’s starting cold. This is my go-to for dinner parties: all the heavy lifting done hours before, with minimal last-minute fuss.

Variations & Easy Swaps

This recipe is incredibly adaptable. Over the years, I’ve tested it with different proteins, spice blends, and even a vegan version (with jackfruit – though that’s a story for another post). Below are three of my favorite variations that you can try with confidence. Each one keeps the soul of the dish but takes it in a new direction.

VariationKey ChangeBest ForDifficulty Impact
Moroccan SpicedAdd 1 tsp cumin, 1/2 tsp cinnamon, pinch of saffronExotic flair, company dinnerEasy (just add spices)
Gluten-Free / Dairy-FreeUse tamari instead of balsamic? No – just omit butter, serve with rice or GF breadDietary restrictions, light mealNo change
Apple-Thyme TwistSwap fig preserves for apple butter, add 1 diced appleFall season, sweeter noteEasy

Moroccan Spiced Variation

This version is a direct nod to my roots. While the onions are cooking, I add a teaspoon of ground cumin, half a teaspoon of cinnamon, and a pinch of saffron threads (steeped in a tablespoon of warm water). The warm spices deepen the sweet-savory profile and make the kitchen smell like a souk. I serve this with couscous studded with raisins and almonds – a classic Moroccan combination. The saffron adds a subtle floral fragrance that pairs perfectly with the figs. It’s slightly more complex but still comes together in the same 45 minutes.

Gluten-Free / Dairy-Free Variation

This recipe is naturally gluten-free as written – balsamic vinegar, chicken broth, fig preserves all pass muster. For dairy-free, simply skip the optional butter (the sauce is still rich enough without it). To make it fully paleo, use coconut aminos instead of balsamic? Actually, balsamic is paleo-friendly in moderation, but if you’re strict, reduce the amount to 1/4 cup. Serve with roasted sweet potatoes or cauliflower rice. I’ve tested this for a friend with celiac disease and she raved about it – no modifications needed except ensuring the broth and vinegar are certified gluten-free (most are).

Apple-Thyme Twist Variation

When fall arrives and figs are no longer in season, I make this variation that uses apple butter instead of fig preserves. I add one diced Honeycrisp or Gala apple to the pan along with the onions, cooking until slightly softened. The apple butter provides a similar sweetness with a hint of cinnamon and clove that complement the thyme beautifully. The apples break down partially into the sauce, adding a chunky texture. Pair with roasted Brussels sprouts and a side of apple cider-spiked gravy – it’s my favorite Thanksgiving alternative.

What is the best way to thicken the balsamic glaze for fig chicken thighs?

The best way to thicken the glaze is to let it reduce naturally during baking. The combination of balsamic vinegar, chicken broth, and fig preserves will thicken as it simmers in the oven. If you want a faster fix, you can simmer the sauce on the stovetop for a few more minutes after the chicken is done. Alternatively, mix 1 teaspoon cornstarch with 2 tablespoons cold water and stir it into the sauce at the end, then cook for one minute until thickened. I find that reducing is better because it concentrates the flavor without adding a cloudy appearance.

Can I use dried figs instead of fresh figs in this recipe?

Yes, dried figs work wonderfully. Because the recipe calls for fig preserves (which are cooked and sweetened), dried figs will need a little prep to achieve a similar consistency. Chop 1/2 cup dried figs (stems removed) and soak them in hot water for about 10 minutes to soften. Drain and add them to the pan when you would normally add the fig preserves. The dried figs will rehydrate further during baking and release their natural sweetness. Keep in mind that dried figs are more intensely sweet and have a chewier texture, so you might want to reduce the balsamic slightly to balance the sweetness.

How long should I cook chicken thighs with balsamic vinegar and figs?

For bone-in, skin-on chicken thighs, the total cooking time is about 35 minutes: 8–9 minutes for searing and 25–30 minutes in a 375°F oven. The internal temperature should reach 165°F (75°C) to be safe. If you use boneless thighs, reduce the oven time to 20–25 minutes. The sauce should be thickened and the chicken golden. Always rely on a meat thermometer for accuracy – the time can vary based on the size of the thighs and your oven.

What side dishes pair well with balsamic fig chicken and onions?

I love serving this with sides that can soak up the sweet-savory sauce. Roasted baby potatoes or creamy polenta are classic choices. For a lighter option, try herbed couscous or quinoa. A simple green salad with a lemon vinaigrette cuts through the richness beautifully. In the fall, roasted Brussels sprouts or butternut squash are fantastic. If you want to go all-out, crusty bread is non-negotiable – the bread soaks up every last drop of that glossy sauce, and it’s my favorite part of the meal.

Can I use chicken breasts instead of thighs for this recipe?

Yes, you can substitute boneless, skinless chicken breasts. However, the cooking time will be shorter and the meat can dry out more easily. Sear the breasts for 2–3 minutes per side (just to brown), then bake at 375°F for 20–22 minutes, until they reach 165°F internal temperature. The sauce will still be delicious, but you’ll lose the crispy skin and extra fat that makes this dish so succulent. If you use breasts, I recommend basting them with the sauce halfway through baking to keep them moist.

How can I make this recipe dairy-free?

This recipe is nearly dairy-free as written – the only dairy is the optional butter stirred in at the end. Simply skip the butter and the dish is entirely dairy-free. The sauce will be a bit less glossy and rich, but it still tastes fantastic. If you want to replace the richness, you can stir in a tablespoon of olive oil or a splash of full-fat coconut milk (though the coconut flavor may be noticeable). Serve with a dairy-free side like roasted vegetables or a grain salad.

Should I remove the skin from chicken thighs before cooking?

I strongly recommend keeping the skin on. The skin protects the meat during cooking and becomes wonderfully crispy, which is a highlight of this dish. It also renders fat that flavors the sauce and onions. If you choose to remove it for dietary reasons, the chicken may be less moist, so I suggest reducing the oven time by 5 minutes and covering the skillet with foil to retain steam. The sauce will still be delicious, but you’ll miss that irresistible crackly top.

Can I prepare this dish in advance for a dinner party?

Absolutely. You can complete the recipe up to step 6 (before baking) and refrigerate the skillet, covered, for up to 24 hours. Let it sit at room temperature for 20–30 minutes before baking. Then bake at 375°F for about 30 minutes – it may take a little longer since it starts cold. I often do this when hosting: all the active work is done ahead, and I just pop the skillet in the oven before guests arrive. The aroma of balsamic and thyme will welcome them at the door.

Share Your Version!

I’d love to see how you make these balsamic fig chicken thighs your own. Did you add a Moroccan spice twist, go dairy-free, or use dried figs? Drop a star rating and a comment below – it really helps other cooks find the recipe. Snap a photo of your finished dish and tag me on Instagram or Pinterest @exorecipes. I try to reply to every single one, and your feedback keeps me inspired to keep experimenting.

And here’s a question I’m always curious about: what’s your favorite side dish to serve with sweet-savory chicken? I’m always looking for new pairings, so let me know in the comments! From my NYC kitchen to yours — I hope this recipe brings as much warmth to your table as it does to mine. — mia 🧡

📌

Love This Recipe? Save It to Pinterest!

If you enjoyed this Balsamic Fig Chicken Thighs with Onions and Thyme recipe, don’t let it get lost in your browser tabs! 😄 Pin it now so you can find it again anytime — and explore hundreds more tried-and-tested recipes waiting for you on my Pinterest boards.

👉 Follow mia on Pinterest @exorecipe

📌 Pin this recipe · 🔁 Re-pin your favorites · 💬 Tag me when you make it — I love seeing your creations!

Print

clock clock iconcutlery cutlery iconflag flag iconfolder folder iconinstagram instagram iconpinterest pinterest iconfacebook facebook iconprint print iconsquares squares iconheart heart iconheart solid heart solid icon

Balsamic Fig Chicken Thighs with Onions and Thyme

  • Author: Chef Mia
  • Prep Time: 10 minutes
  • Cook Time: 35 minutes
  • Total Time: 45 minutes
  • Yield: 4 1x
  • Method: Main Course
  • Cuisine: American

Description

These balsamic fig chicken thighs are a sweet and savory one-pan dinner featuring juicy chicken, caramelized onions, and a rich balsamic fig sauce infused with thyme.


Ingredients

Scale
  • 6 bone-in, skin-on chicken thighs (about 2 lbs)
  • 1 teaspoon salt
  • 1/2 teaspoon black pepper
  • 2 tablespoons olive oil
  • 2 large onions, sliced
  • 4 cloves garlic, minced
  • 1/2 cup balsamic vinegar
  • 1/2 cup chicken broth
  • 1/4 cup fig preserves or jam
  • 2 sprigs fresh thyme
  • 1 tablespoon butter (optional)

Instructions

  1. Preheat oven to 375°F (190°C).
  2. Season chicken thighs with salt and pepper on both sides.
  3. Heat olive oil in a large oven-safe skillet over medium-high heat. Sear chicken thighs skin-side down for 5-6 minutes until golden brown. Flip and cook 3 minutes more. Remove chicken and set aside.
  4. Add sliced onions to the skillet and cook for 5-6 minutes, stirring occasionally, until softened and starting to caramelize.
  5. Add minced garlic and cook for 1 minute until fragrant.
  6. Pour in balsamic vinegar, chicken broth, and fig preserves. Stir, scraping up browned bits from the bottom of the pan. Add fresh thyme sprigs.
  7. Return chicken thighs to the skillet, skin-side up. Spoon some of the sauce over the chicken.
  8. Transfer skillet to preheated oven and bake for 25-30 minutes, until chicken is cooked through (internal temp 165°F) and sauce is thickened.
  9. Optional: stir in butter for extra richness. Remove thyme sprigs before serving.

Notes

For best results, use a good quality aged balsamic vinegar and seedless fig preserves. Serve with roasted potatoes or crusty bread to soak up the sauce.


Nutrition

  • Calories: 480 kcal
  • Sugar: 16 g
  • Fat: 28 g
  • Carbohydrates: 22 g
  • Protein: 34 g


Balsamic Fig Chicken Thighs with Onions and Thyme

k">

Tried This Recipe? Leave a Comment!

Did you make this recipe? I’d love to hear how it turned out! Please leave a comment and a rating below. Your feedback helps other home cooks and supports cheerychop.com!
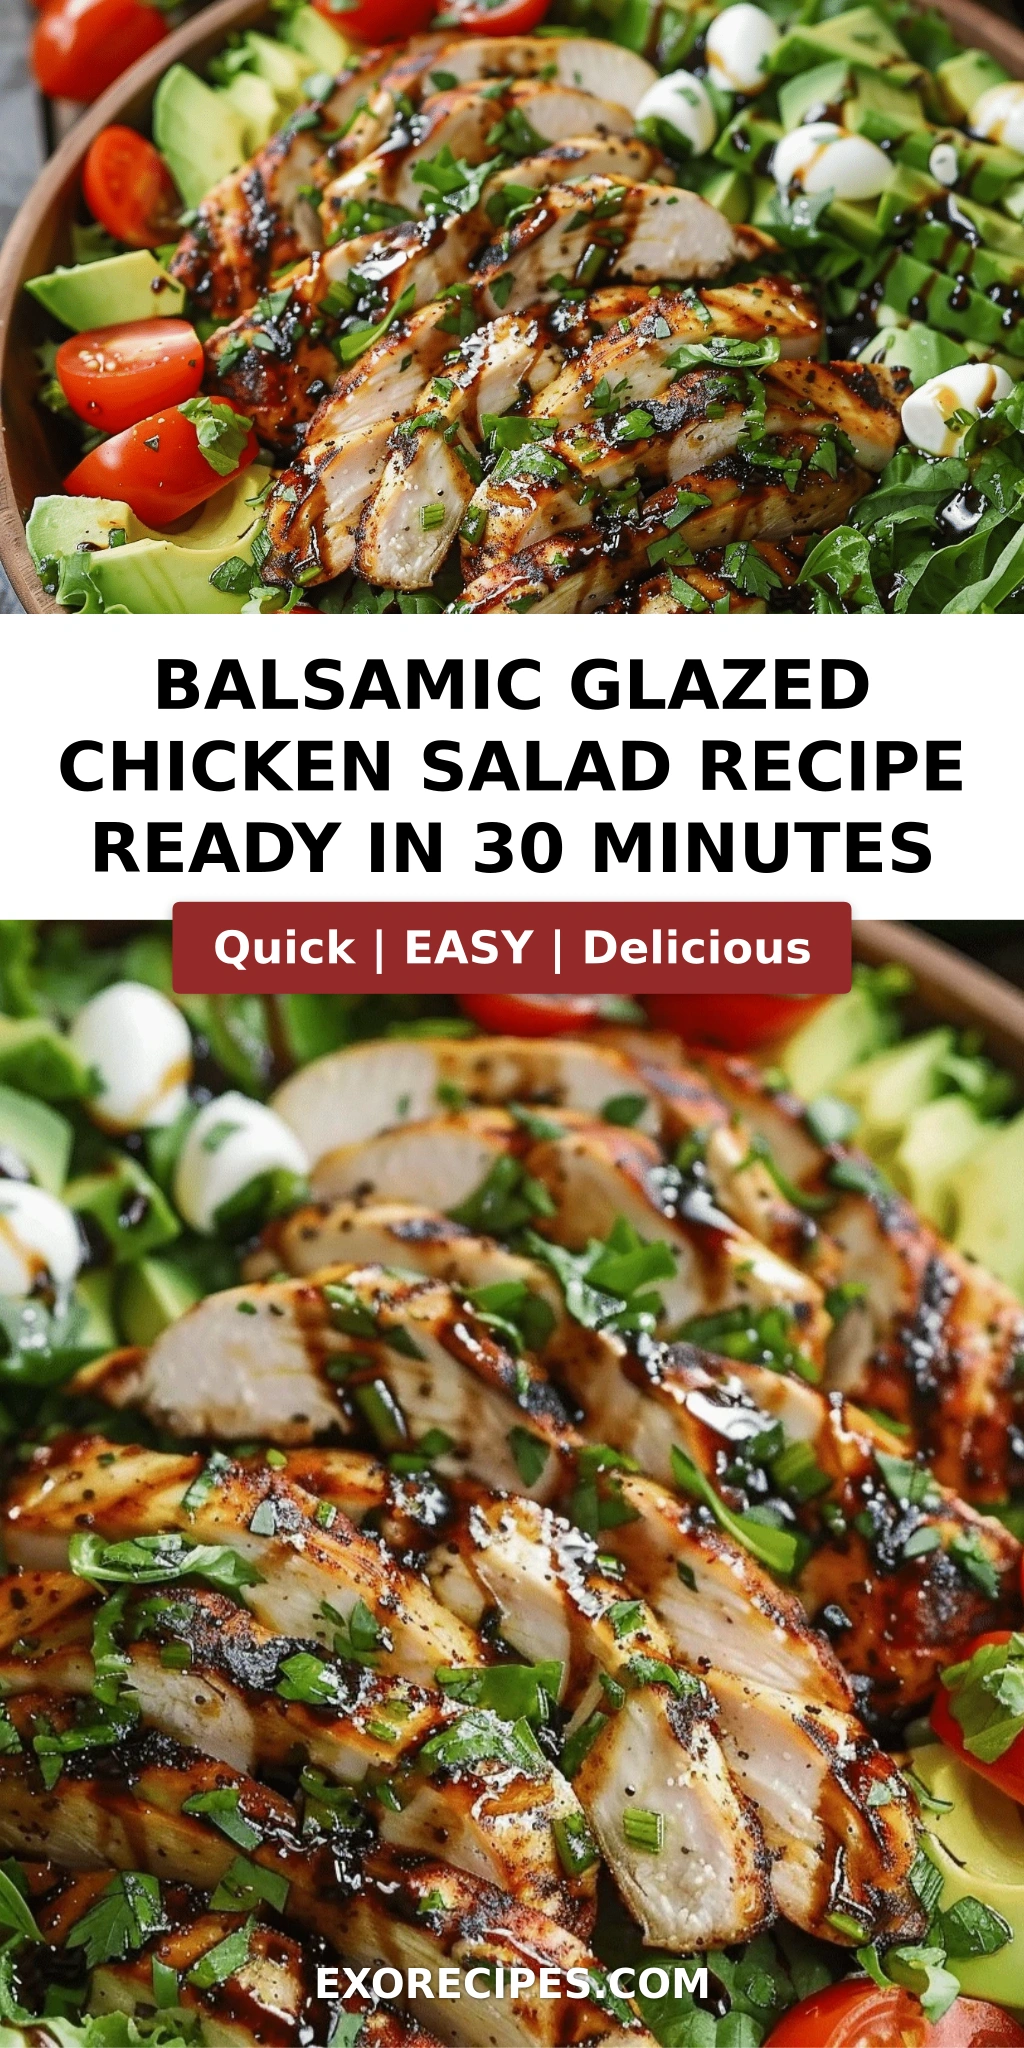
For more delicious inspiration, follow me on Pinterest!

Balsamic Fig Chicken Thighs with Caramelized Onions: Your New Go-To Comfort Meal – A Savory-Sweet One-Pan Wonder

⚖️
Difficulty
Medium
⏲️
Prep Time
15 mins
🕒
Cook Time
45 mins
⏱️
Total Time
60 mins
🍽️
Servings
4

There’s something magical about the way fig and balsamic come together — it’s a pairing that reminds me of late-summer evenings in Morocco, where my mother would slow-cook lamb with dried fruits and a splash of vinegar until the whole house smelled like sweet surrender. These balsamic fig chicken thighs are my New York City interpretation of that memory: deeply caramelized onions, golden seared chicken, and a glossy balsamic fig glaze that clings to every bite. If you’ve been searching for a balsamic chicken dinner that feels both rustic and refined, this is the recipe that will win your heart. I make it on busy weeknights when I want something that tastes like I spent hours in the kitchen — but really, it comes together in under an hour with just one skillet.

The first time I tested this fig chicken recipe, I stood over the stove watching the onions slowly turn from pale white ribbons to jammy, honey-colored strands. That moment — when the natural sugars in the onions begin to release and caramelize — is pure kitchen alchemy. Then comes the fig jam, stirred into the pan with balsamic vinegar and chicken broth, creating a sauce that’s simultaneously sweet, tangy, and savory. The chicken thighs roast right on top, their skin crisping up while the meat stays impossibly tender. Every forkful delivers that perfect contrast: crackling skin, juicy meat, and those luscious, syrup-kissed onions beneath. It’s comfort food that doesn’t weigh you down — it warms you from the inside out.

What sets my version apart is the technique I brought back from my Paris culinary training: I caramelize the onions low and slow before adding any liquid, letting them develop a deep, almost meaty sweetness that balances the fig jam’s bright fruitiness. Then I deglaze the pan with the balsamic-fig mixture, scraping up every browned bit for maximum flavor. It’s a French technique that makes all the difference. And here’s a pro tip: use bone-in, skin-on chicken thighs — they stay juicier and the skin gets beautifully crispy in the oven. One common mistake I see is rushing the onions. Trust me, give them the full 15–20 minutes they deserve. This recipe has become my most-requested comfort chicken meal from friends and readers alike, and I know it will earn a permanent spot in your weekly rotation too.

Why This Balsamic Fig Chicken Thighs Recipe Is the Best

The flavor secret lies in the marriage of North African and French culinary traditions — something I live and breathe every day in my NYC kitchen. Growing up in Morocco, I learned that fruit and meat belong together: my mother simmered chicken with apricots and saffron, and we ate lamb with prunes and sesame. Later, in Paris, my chef instructor taught me the art of deglazing and how to build a pan sauce that feels like velvet. This balsamic fig chicken thighs recipe brings those two worlds together — the bold, sweet-savory soul of Moroccan cooking meets the elegant restraint of French technique. It’s a dish that tells a story with every bite, yet it’s simple enough for a Tuesday night.

The texture here is everything I look for in a skillet dinner. That first sear on the chicken thighs gives you a deeply golden, crackling skin that stays crisp even after roasting. The caramelized onions, cooked slowly until they collapse into jammy strands, provide a soft, silky bed that soaks up all the fig-balsamic sauce. Then there’s the glaze itself — thick enough to coat the back of a spoon but not syrupy, with just enough acidity from the balsamic to cut through the richness. Every component works together: the saltiness of the broth, the sweetness of the fig jam, the tang of the vinegar, and the herbal lift from fresh thyme. It’s a masterclass in balance, and once you taste it, you’ll understand why this has become my signature comfort meal.

What makes this recipe truly foolproof is the all-in-one skillet method. You sear the chicken, cook the onions in the same pan, build the sauce right there, and then finish everything in the oven — no transferring, no extra dishes, no stress. Even if you’re a beginner, the visual cues make it easy: the onions should be a deep amber color when they’re ready, and the chicken is done when a thermometer reads 165°F. I’ve tested this with dozens of home cooks in my virtual cooking classes, and the success rate is nearly 100%. The combination of a well-seasoned skillet, patient caramelizing, and a simple oven finish means you get extraordinary results without extraordinary effort. This is the kind of balsamic chicken dinner that makes you look like a hero — and it genuinely is that easy.

Balsamic Fig Chicken Thighs Ingredients

I love sourcing ingredients for this recipe at the Union Square Greenmarket in Manhattan. The onions from upstate New York are so sweet and firm, and the fresh thyme always smells like a little green garden. When figs are in season, I sometimes buy them fresh and make my own jam — but a good quality fig preserves from the store works perfectly. Every ingredient in this list plays a specific role, and I want you to feel confident choosing the best versions at your local grocery store. Let me walk you through what you’ll need and why each one matters.

Ingredients List

  • 4 bone-in, skin-on chicken thighs
  • 1 teaspoon kosher salt
  • 1/2 teaspoon black pepper
  • 2 tablespoons olive oil
  • 2 large yellow onions, thinly sliced
  • 1/2 cup fig jam or preserves
  • 1/4 cup balsamic vinegar
  • 1/2 cup chicken broth
  • 2 sprigs fresh thyme
  • 1 tablespoon butter
  • Fresh parsley for garnish

Ingredient Spotlight

Chicken thighs are the star here — bone-in, skin-on thighs stay moist during roasting and develop that irresistible crispy skin. Look for thighs with the skin still attached and plump, pinkish flesh. If you can only find boneless, skinless thighs, reduce the roasting time by 5–7 minutes and consider adding a pat of butter under the skin (if any) for moisture. The fig jam provides the sweet backbone of the glaze — choose one without added high-fructose corn syrup if possible, and look for a brand that lists figs as the first ingredient. Apricot jam can work in a pinch, but it will shift the flavor toward a brighter, less complex sweetness. The balsamic vinegar should be a good-quality aged variety — not the most expensive, but one with a slightly syrupy consistency and a balance of sweet and tangy. The cheaper supermarket balsamics can be harsh, so spend a dollar or two more for something that says “Traditional” or “aged.” Yellow onions are non-negotiable here — they have the right sugar content to caramelize into sweet, golden strands. Sweet onions like Vidalia can work but will take longer and may become too soft.

Original IngredientBest SubstitutionFlavor / Texture Impact
Fig Jam / PreservesApricot preserves or honeyBrighter, less complex sweetness; slightly thinner glaze
Balsamic VinegarPomegranate juice + 1 tsp lemon juice (non-alcoholic)Tart and fruity but less syrupy; may need cornstarch to thicken
Bone-in, Skin-on Chicken ThighsBoneless, skinless chicken thighs or chicken breasts*Drier, less crispy; reduce cook time by 5-7 mins; breasts cook faster and may be less juicy
Fresh Thyme1 tsp dried thyme or 2 sprigs fresh rosemaryDried thyme is slightly less aromatic; rosemary adds a piney, bolder note
Yellow OnionsWhite or sweet onionsWhite onions are more pungent; sweet onions take longer to caramelize and are softer

How to Make Balsamic Fig Chicken Thighs with Caramelized Onions — Step-by-Step

I’ve broken this down into simple, forgiving steps. Even if it’s your first time making a fig chicken recipe, you’ll feel like a pro. Let’s get cooking!

Step 1: Season and Sear

Preheat the oven to 375°F (190°C). Season the chicken thighs on both sides with the kosher salt and black pepper. Heat the olive oil in a large oven-safe skillet over medium-high heat. Place the chicken thighs skin-side down in the hot oil — you should hear a satisfying sizzle. Sear without moving them for about 5 minutes, until the skin is deep golden brown and crispy. Flip and sear the other side for 2 minutes. Transfer the chicken to a plate and set aside. This initial browning builds the foundation of flavor for the entire chicken thighs with caramelized onions dish.

💡 mia’s Pro Tip: Don’t crowd the skillet — sear in two batches if needed. Overcrowding lowers the pan temperature and gives you pale, soggy skin instead of that golden crust.

Step 2: Caramelize the Onions

Reduce the heat to medium. Add the sliced yellow onions to the skillet — they will sizzle and shrink immediately. Cook them slowly, stirring occasionally, for 15–20 minutes. You want them to turn a deep amber color, almost like honey. Don’t rush this step; the natural sugars need time to develop that sweet, savory depth that defines the balsamic fig chicken thighs dish. If the onions start to stick, add a tablespoon of water to deglaze the pan naturally.

⚠️ Common Mistake to Avoid: Cooking the onions on high heat to speed things up. High heat burns the sugars and makes them bitter. Patience, my friend — medium heat and a little time give you soft, sweet, golden perfection.

Step 3: Build the Glaze

In a small bowl, whisk together the fig jam, balsamic vinegar, and chicken broth until smooth. Pour this mixture over the caramelized onions in the skillet. Stir to combine, scraping up any browned bits from the bottom — that’s pure flavor. Let it bubble gently for 1–2 minutes so the glaze thickens slightly and coats the onions.

💡 mia’s Pro Tip: Use a wooden spoon to scrape up the fond — those dark, caramelized bits stuck to the pan. That’s where the deepest flavor lives. Don’t leave it behind!

Step 4: Oven Finish

Nestle the seared chicken thighs back into the skillet, skin-side up, on top of the onion mixture. Tuck the fresh thyme sprigs between the pieces. Transfer the skillet to the preheated oven and bake uncovered for 30 minutes, or until the chicken reaches an internal temperature of 165°F. Remove from the oven, stir in the butter until it melts into the sauce, and let the dish rest for 5 minutes. This resting time allows the juices to redistribute and the sauce to settle.

⚠️ Common Mistake to Avoid: Skipping the rest. If you serve the chicken immediately, the juices will run out onto the plate and leave the meat dry. Give it those 5 minutes — I promise it’s worth the wait.

Step 5: Garnish and Serve

Serve the chicken and caramelized onions with the pan sauce drizzled generously on top. Garnish with freshly chopped parsley for a pop of color and freshness. The sauce will be glossy, the onions silky, and the chicken tender and crisp — this is the balsamic chicken dinner of your dreams.

StepActionDurationKey Visual Cue
1Season & sear chicken thighs7 minutesSkin is deep golden brown and crisp
2Caramelize sliced onions15–20 minutesOnions are deep amber and jammy
3Whisk fig jam, balsamic, broth & pour over onions2 minutesSauce bubbles and coats the onions
4Bake chicken in skillet30 minutesInternal temperature reaches 165°F
5Rest, butter, garnish & serve5 minutes restSauce is glossy; chicken juices settle

Serving & Presentation

I love serving these balsamic fig chicken thighs over a bed of creamy polenta or alongside roasted sweet potatoes — the sweetness of the sides plays beautifully with the savory-sweet glaze. For a lighter option, try it with steamed green beans or a crisp arugula salad dressed with lemon vinaigrette. The way the sauce pools around the base of the plate is pure comfort food poetry. When I entertain, I sometimes sprinkle toasted pine nuts and a few fresh fig slices on top for an elegant finish that transports me right back to a Parisian bistro.

In my NYC apartment, I often pair this dish with a medium-bodied red wine like a Grenache or a Côtes du Rhône — the fruity notes echo the fig jam beautifully. For a non-alcoholic option, sparkling water with a splash of pomegranate juice and a sprig of mint is refreshing and festive. The leftovers (if there are any!) make a fantastic lunch the next day — I love shredding the chicken and piling it onto crusty bread with a spoonful of the caramelized onions for the most incredible sandwich. This is comfort chicken meal that keeps on giving.

Pairing TypeSuggestionsWhy It Works
Side DishCreamy polenta, roasted sweet potatoes, steamed green beansNeutral or sweet bases soak up the rich fig-balsamic sauce
Sauce / DipExtra pan sauce drizzled on top, a dollop of crème fraîcheAdds richness and balances the sweetness
BeverageGrenache or Côtes du Rhône (red), sparkling water with pomegranateFruity red complements fig; citrus water cuts richness
GarnishFresh parsley, toasted pine nuts, fresh fig slices (if in season)Adds color, texture, and a fresh pop of flavor

Make-Ahead, Storage & Reheating

Between my recipe development, cooking classes, and the chaos of NYC life, I rely on make-ahead meals more than I care to admit. This chicken thighs with caramelized onions dish is one of the best make-ahead recipes I know — the flavors actually deepen after a day in the fridge, so leftovers taste even better than the first serving. Here’s how I store and reheat mine for the best results.

MethodContainerDurationReheating Tip
RefrigeratorAirtight containerUp to 4 daysReheat in a covered skillet over medium-low with a splash of broth, 8–10 minutes
FreezerFreezer-safe container or zip-top bagUp to 3 monthsThaw overnight in the fridge, then reheat gently in a covered skillet
Make-AheadAssemble in skillet, cover, refrigerateUp to 2 days in advanceAdd 5–7 minutes to oven time if baking from fridge

When reheating, the key is gentleness. I warm the chicken and onions in a covered skillet over medium-low heat with a splash of chicken broth to revive the sauce. The microwave works in a pinch, but the stovetop keeps the chicken moist and the skin crisp. If you’ve frozen the dish, let it thaw overnight in the refrigerator — never at room temperature — and reheat as directed. One of my favorite tricks is to shred the cold leftovers and toss them into a salad with arugula, goat cheese, and toasted walnuts for a next-day lunch that feels completely new.

Variations & Easy Swaps

One of the things I love most about this balsamic fig chicken thighs recipe is how adaptable it is. Whether you’re cooking for dietary restrictions or just want to switch things up based on what’s in your pantry, these variations keep the spirit of the dish alive while letting you make it your own.

VariationKey ChangeBest ForDifficulty Impact
Moroccan SpicedAdd 1 tsp ras el hanout + 1/2 tsp cinnamon to the glazeWarm, aromatic, North African depthEasy (no extra steps)
Dairy-Free / PaleoOmit butter; use ghee or coconut oilDairy-free, paleo-friendlyEasy (simple swap)
Apple-Balsamic (Fall Twist)Swap fig jam for apple butter; add 1 diced apple with the onionsAutumn flavor, slightly less sweetEasy (adds 5 mins of chopping)

Moroccan Spiced Variation

This variation is very close to my heart — it takes me straight back to my mother’s kitchen in Marrakech. Add 1 teaspoon of ras el hanout and 1/2 teaspoon of ground cinnamon to the fig-balsamic glaze before pouring it over the onions. The warm, floral spices elevate the balsamic fig chicken thighs into something truly exotic, with layers of cumin, coriander, and ginger that dance with the sweetness of the figs. Serve with couscous tossed with dried apricots and almonds for a full North African experience. This version has become a favorite among my cooking class students who want to explore bold flavors without leaving their comfort zone.

Dairy-Free / Paleo Variation

For a dairy-free version that’s just as luscious, simply omit the butter at the end or swap it for ghee (which is clarified and lactose-free) or a splash of full-fat coconut milk. The coconut milk adds a subtle tropical note that pairs surprisingly well with the fig and balsamic. If you’re following a paleo diet, this recipe is already nearly perfect — just ensure your fig jam is sweetened with fruit juice or honey rather than refined sugar, and use coconut aminos in place of the chicken broth if you’re avoiding legumes. The chicken thighs with caramelized onions stay beautifully tender, and the sauce is just as glossy and delicious. I’ve tested this version multiple times with my paleo clients, and it gets rave reviews every time.

Apple-Balsamic Fall Twist

When autumn arrives and the farmers markets in New York are bursting with crisp apples, I love swapping the fig jam for apple butter and adding one diced Honeycrisp or Fuji apple to the onions during the caramelization step. The apple butter brings a warm, spiced sweetness that’s slightly less intense than fig, while the diced apple adds little pockets of tender fruit throughout the onions. This variation is a gorgeous way to celebrate the season and uses ingredients you likely already have on hand. The apple-balsamic pairing is a classic for good reason — it’s bright, comforting, and feels like a warm sweater on a cool evening. This is my go-to balsamic chicken dinner from October through December.

What is the best way to caramelize onions for balsamic fig chicken thighs?

The best way to caramelize onions is low and slow — patience is your secret ingredient. After you sear the chicken, reduce the heat to medium and add the sliced onions. Cook them for 15–20 minutes, stirring every 3–4 minutes, until they turn a deep amber color and taste sweet and jammy. If they start to stick, add a tablespoon of water or broth to deglaze the pan — this actually helps build flavor. Avoid the temptation to crank up the heat, as high heat burns the sugars and makes the onions bitter. Yellow onions are ideal because they have the right balance of sugar and water content for caramelization. For extra depth, add a pinch of salt and a sprig of thyme while they cook. This technique transforms simple onions into the silky, flavorful foundation that makes the balsamic fig chicken thighs truly special.

Can I use boneless chicken breasts instead of chicken thighs for this recipe?

Yes, you can use boneless chicken breasts, but there are a few adjustments you’ll want to make for the best results. Boneless breasts cook faster and can dry out more easily, so reduce the oven time by 5–7 minutes and start checking the internal temperature at 20 minutes. I recommend using a meat thermometer — 165°F is your target. To add moisture, consider placing a small pat of butter under the skin if you have skin-on breasts, or basting the breasts with the pan sauce halfway through roasting. The flavor will still be lovely, but you’ll miss some of the richness and crispiness that bone-in, skin-on chicken thighs provide. If you’re looking for a faster weeknight option, boneless skinless thighs are a better substitute than breasts — they stay juicier and are more forgiving. For the most authentic version of this chicken thighs with caramelized onions recipe, stick with bone-in, skin-on thighs if you can.

How long should I cook balsamic fig chicken thighs with caramelized onions?

The total cook time for this balsamic fig chicken thighs recipe is about 45 minutes from stove to oven, plus 5 minutes of resting. Here’s the breakdown: you’ll sear the chicken on the stovetop for about 7 minutes total (5 minutes skin-side down, 2 minutes on the other side), then caramelize the onions for 15–20 minutes over medium heat. After adding the glaze and nesting the chicken back in the skillet, you’ll bake everything uncovered at 375°F for 30 minutes. The chicken is done when an instant-read thermometer inserted into the thickest part of the thigh (without touching the bone) reads 165°F. Always let the dish rest for 5 minutes after removing it from the oven — this allows the juices to redistribute and the sauce to settle into a beautiful, glossy finish. The resting time is part of the cooking process, so don’t skip it!

What can I substitute for figs in balsamic fig chicken thighs?

If you don’t have fig jam or preserves, the best substitutes are apricot preserves, honey, or apple butter — each will create a slightly different but equally delicious version of this dish. Apricot preserves are the closest match in texture and sweetness, though the flavor is brighter and less complex. Honey will give you a thinner, more floral sweetness, so you may want to add a tablespoon of water or broth to balance the consistency. Apple butter works beautifully, especially in the fall, and adds warm spice notes that pair wonderfully with the balsamic. For a low-sugar option, try a sugar-free fruit preserve sweetened with monk fruit or stevia. If you’re using dried figs instead of jam, soak 1/2 cup of chopped dried figs in warm water for 15 minutes, then blend them into a paste with a tablespoon of the soaking liquid. The result is a more rustic, less sweet glaze that’s still packed with fig flavor.

Can I make this balsamic fig chicken thighs recipe in a slow cooker or Instant Pot?

Yes, you can adapt this recipe for both a slow cooker and an Instant Pot, though the texture of the chicken skin will differ. For a slow cooker: sear the chicken and caramelize the onions in a skillet first (this step is essential for flavor), then transfer everything to the slow cooker along with the fig-balsamic mixture and thyme. Cook on low for 4–5 hours or high for 2–3 hours. Stir in the butter at the end, and note that the skin will be soft rather than crispy — you can crisp it under the broiler for 2–3 minutes after cooking. For the Instant Pot: use the sauté function to sear the chicken and caramelize the onions, then add the glaze and cook on high pressure for 10 minutes with a natural release. Thicken the sauce on the sauté setting after cooking. Both methods work beautifully, and the chicken thighs with caramelized onions will be incredibly tender either way.

What side dishes go well with balsamic fig chicken thighs?

This balsamic fig chicken thighs dish pairs wonderfully with a variety of sides that soak up the luscious sauce. My personal favorites include creamy polenta — the soft, buttery cornmeal is the perfect canvas for the fig-balsamic glaze — and roasted sweet potatoes, which echo the sweetness of the figs. For a lighter option, steamed green beans with a squeeze of lemon or a crisp arugula salad with shaved Parmesan and a simple vinaigrette provide a bright, peppery contrast. If you’re in the mood for something more substantial, serve the chicken and caramelized onions over egg noodles, mashed potatoes, or even crusty sourdough bread to sop up every drop of sauce. Quinoa or farro also work beautifully for a hearty, nutritious base. Whatever you choose, the goal is to have something that lets the sauce shine — it’s the star of this comfort chicken meal.

How do I prevent the balsamic glaze from burning in the skillet?

Preventing the balsamic glaze from burning is all about temperature control and liquid balance. When you add the fig-balsamic mixture to the caramelized onions, make sure the heat is at medium or medium-low — high heat will cause the sugars in the jam and vinegar to scorch quickly. The chicken broth in the glaze helps keep everything moist and prevents burning, so don’t skip it or reduce the amount. If you notice the glaze starting to stick or darken too much around the edges of the skillet, stir in an extra tablespoon or two of broth or water to loosen it. Using a heavy-bottomed skillet, like cast iron or stainless steel, also helps distribute heat evenly and reduces hot spots where burning can occur. And remember, the oven does the final cooking at a moderate 375°F, so the glaze has time to concentrate without risk of burning. This technique, which I use in all my balsamic chicken dinner recipes, ensures a glossy, rich sauce every time.

Can I use dried thyme instead of fresh for this fig chicken recipe?

Yes, you can use dried thyme in place of fresh for this fig chicken recipe, but the flavor will be slightly different. Dried thyme is more concentrated and less aromatic than fresh, so use about 1 teaspoon of dried thyme (or 1/2 teaspoon of dried thyme leaves) to replace the 2 fresh sprigs. Add the dried thyme to the fig-balsamic glaze mixture before pouring it over the onions, rather than tucking it into the skillet as you would with fresh sprigs. The dried herb will rehydrate during cooking and infuse the sauce with an earthy, slightly minty flavor. If you have fresh rosemary on hand, that’s a wonderful alternative — use 1–2 small sprigs and remove them before serving. Fresh herbs do add a brighter, more vibrant note, but dried thyme works perfectly well and is a great pantry-friendly option for this chicken thighs with caramelized onions dish.

Is this balsamic chicken dinner recipe gluten-free?

Yes, this balsamic fig chicken thighs recipe is naturally gluten-free! All the ingredients — chicken thighs, olive oil, onions, fig jam, balsamic vinegar, chicken broth, fresh thyme, butter, and parsley — are gluten-free. The only potential concern is the chicken broth, so be sure to check the label on your broth to confirm it’s certified gluten-free, as some commercial broths may contain trace amounts of gluten from additives or flavorings. Most major brands like Swanson, Kitchen Basics, and Pacific Foods offer gluten-free options that work beautifully. If you’re serving this dish with a side like polenta, rice, or quinoa, those are also naturally gluten-free. This makes the recipe a fantastic choice for anyone following a gluten-free diet who doesn’t want to compromise on flavor or comfort. It’s one of the reasons this balsamic chicken dinner has become such a staple in my household.

What wine pairs best with balsamic fig chicken thighs?

A medium-bodied red wine with fruity notes is the ideal match for the sweet-tangy profile of balsamic fig chicken thighs. I highly recommend a Grenache, Côtes du Rhône, or a fruity Zinfandel — these wines have enough body to stand up to the richness of the chicken and caramelized onions, with fruit-forward notes that echo the fig jam without overpowering it. A Pinot Noir also works wonderfully, especially if it’s from a warmer region like California or New Zealand, as it brings bright cherry and raspberry notes that complement the balsamic. For white wine lovers, a full-bodied Chardonnay with subtle oak aging can handle the dish’s richness, or try a Viognier for its stone fruit aromas. If you’re serving this as a comfort chicken meal on a cozy night, a glass of the same wine you’d enjoy alongside elevates the whole experience. For a non-alcoholic option, sparkling water with a splash of pomegranate juice and a twist of orange is festive and pairs beautifully.

Share Your Version!

I absolutely love hearing how this balsamic fig chicken thighs recipe turns out in your kitchen. Did you try the Moroccan spiced variation with ras el hanout? Or did you go the dairy-free route with coconut milk? Every time you make this dish, you put your own spin on it — and that makes me so happy. Drop a star rating and a comment below to let me know how it went, and if you run into any questions, I’m always here to help. This is the kind of balsamic chicken dinner that brings people together, and I can’t wait to hear how it becomes part of your story too.

When you make this, snap a photo and share it on Instagram or Pinterest — tag me @exorecipes so I can see your beautiful creation! Use the hashtag #miaskitchen so our whole community can find and celebrate each other’s versions. Whether you’re serving it for a cozy weeknight meal or a dinner party with friends, this comfort chicken meal is made to be shared. From my NYC kitchen to yours — I hope this recipe brings as much warmth to your table as it does to mine. — mia 🧡

📌

Love This Recipe? Save It to Pinterest!

If you enjoyed this Balsamic Fig Chicken Thighs with Caramelized Onions recipe, don’t let it get lost in your browser tabs! 😄 Pin it now so you can find it again anytime — and explore hundreds more tried-and-tested recipes waiting for you on my Pinterest boards.

👉 Follow mia on Pinterest @exorecipe

📌 Pin this recipe · 🔁 Re-pin your favorites · 💬 Tag me when you make it — I love seeing your creations!

Print

clock clock iconcutlery cutlery iconflag flag iconfolder folder iconinstagram instagram iconpinterest pinterest iconfacebook facebook iconprint print iconsquares squares iconheart heart iconheart solid heart solid icon

Balsamic Fig Chicken Thighs with Caramelized Onions: Your New Go-To Comfort Meal

  • Author: Chef Mia
  • Prep Time: 15 minutes
  • Cook Time: 45 minutes
  • Total Time: 1 hour
  • Yield: 4 1x
  • Method: Main Course
  • Cuisine: American

Description

Juicy chicken thighs meet the sweet tang of balsamic fig glaze and deeply caramelized onions for a savory-sweet comfort dish that’s as easy as it is elegant. Perfect for weeknights or entertaining.


Ingredients

Scale
  • 4 bone-in, skin-on chicken thighs
  • 1 teaspoon kosher salt
  • 1/2 teaspoon black pepper
  • 2 tablespoons olive oil
  • 2 large yellow onions, thinly sliced
  • 1/2 cup fig jam or preserves
  • 1/4 cup balsamic vinegar
  • 1/2 cup chicken broth
  • 2 sprigs fresh thyme
  • 1 tablespoon butter
  • Fresh parsley for garnish

Instructions

  1. Preheat the oven to 375°F (190°C).
  2. Season chicken thighs on both sides with salt and pepper.
  3. Heat olive oil in a large oven-safe skillet over medium-high heat. Add chicken thighs skin-side down and sear until golden, about 5 minutes. Flip and sear the other side for 2 minutes. Transfer chicken to a plate.
  4. Reduce heat to medium. Add sliced onions to the skillet and cook, stirring occasionally, for 15–20 minutes until deeply caramelized and golden brown.
  5. In a small bowl, whisk together fig jam, balsamic vinegar, and chicken broth. Pour over the caramelized onions.
  6. Nestle the chicken thighs back into the skillet, skin-side up. Add fresh thyme sprigs.
  7. Transfer skillet to the preheated oven. Bake uncovered for 30 minutes, or until chicken reaches an internal temperature of 165°F.
  8. Remove from oven. Stir in butter until melted. Let rest 5 minutes.
  9. Serve chicken and onions with the pan sauce drizzled on top. Garnish with fresh parsley.

Notes

For extra depth, add a minced shallot along with the onions. If you don’t have fig jam, substitute with apricot preserves or honey. For a non-alcoholic version, use pomegranate juice instead of balsamic.


Nutrition

  • Calories: 410
  • Sugar: 18g
  • Fat: 22g
  • Carbohydrates: 28g
  • Protein: 24g


Balsamic Fig Chicken Thighs with Caramelized Onions: Your New Go-To Comfort Meal