
Best Chocolate Chip Cookies Recipe – Soft and Chewy

Deliciously Chewy Chocolate Chip Cookies: A Classic Treat for Everyone

⚖️
Difficulty
Easy

⏲️
Prep Time
15 mins

🕒
Cook Time
10 mins

⏱️
Total Time
25 mins

🍽️
Servings
24 cookies

There’s something truly magical about a freshly baked chocolate chip cookie. Once you take a bite, the velvety chocolate melts into your mouth, harmonizing beautifully with the soft yet slightly crisp edges of the warm cookie. Perfectly balanced with just the right amount of sweetness and a hint of vanilla, these cookies are not just a dessert; they are a nostalgic journey into childhood. Whether you’re baking for a special occasion or simply enjoying an afternoon treat, this Chocolate Chip Cookie recipe promises a delightful experience for everyone.

What makes these chocolate chip cookies stand out is their chewy texture and rich flavor. Combining simple ingredients like butter, sugar, and eggs, this recipe incorporates techniques that elevate ordinary cookies into extraordinary ones. Imagine pulling a tray of golden-brown cookies out of the oven, the aroma wafting through your kitchen, filling your home with warmth and happiness. These chocolate chip cookies are destined to become your go-to recipe, turning any moment into a celebration of flavors.

Quick Recipe Highlights

  • Flavor Profile: Rich, buttery goodness combined with luscious chocolate makes for an irresistible treat.
  • Texture: Each cookie offers a perfect balance of crunch on the outside and a soft, gooey center.
  • Aroma: Warm notes of vanilla and buttery sweetness fill the air, making it hard to resist the first bite.
  • Visual Appeal: Golden-brown cookies speckled with melted chocolate chips create a mouthwatering sight.
  • Skill Level Needed: This recipe is beginner-friendly, requiring no advanced skills, just a love for baking.
  • Special Equipment: A mixing bowl, baking sheet, and an oven are all you need to start your baking adventure.

Recipe Overview

  • Difficulty Level: While this recipe is straightforward, attention to timing and mixing is crucial to achieve perfect cookies.
  • Category: This falls under the dessert category, perfect for satisfying sweet cravings any time of the day.
  • Cuisine: Chocolate chip cookies are a staple in American cuisine, beloved by generations across the globe.
  • Cost: The cost is minimal, typically around $5-10 for all ingredients, making it an affordable treat.
  • Season: Cookies can be enjoyed year-round, but they shine during the holiday season for gatherings and gifting.
  • Occasion: Ideal for parties, casual gatherings, or just a cozy night in with a glass of milk.

Why You’ll Love This Recipe

First and foremost, the taste and texture of these cookies offer a delightful experience that few can resist. Each bite provides a burst of chocolaty goodness paired with a satisfying chew that brings joy with every mouthful. The simple ingredients come together effortlessly, creating a familiar yet elevated flavor that feels just right.

Convenience is another reason why this recipe is irresistible. With a prep time of only 15 minutes, anyone can whip up a batch with minimal fuss. Perfect for unexpected guests or a sweet cravings on a weeknight, they are truly a lifesaver. You can easily adapt this recipe to add nuts, oatmeal, or different types of chocolate to cater to various tastes.

In terms of nutrition, while they are a treat, you can incorporate semi-sweet chocolate, which offers antioxidants, making each cookie a little less guilty. They are best enjoyed in moderation, fitting perfectly into a balanced diet while satisfying those dessert cravings.

Socially, these chocolate chip cookies are a great way to connect with others. Imagine serving them at a gathering and watching as friends and family indulge in the comfort of this classic treat. They’re fantastic for fostering conversations, sharing stories, and creating great memories around the dining table.

Finally, cost-effectiveness makes these cookies an all-around winner. You can create a large batch without breaking the bank, making them perfect for parties or bake sales. Plus, the pleasure of homemade cookies often surpasses those store-bought options, affirming that fantastic taste doesn’t always come with a high price tag.

Historical Background and Cultural Significance

The origins of the chocolate chip cookie can be traced back to the 1930s when Ruth Wakefield, the owner of the Toll House Inn in Massachusetts, decided to experiment with a chocolate bar. Instead of melting the chocolate as originally intended, the chocolate chips maintained their shape, creating a new cookie that quickly became popular. This simple yet revolutionary discovery paved the way for a beloved dessert that has lasted through decades.

Culturally, chocolate chip cookies hold a unique place in American traditions, often associated with home, comfort, and childhood memories. They are frequently baked during family gatherings, holidays, and special occasions, becoming an emblem of homemade love and warmth.

Over the years, the basic recipe has evolved, with variations emerging across different regions and cultures. From adding sea salt to experimenting with different types of chocolate, bakers worldwide have tailored the classic recipe to create their own twists while preserving its essence.

Today, chocolate chip cookies are more than just a treat; they are a universal symbol of hospitality and joy, bringing people together regardless of age or background. Their simplicity and adaptability allow them to remain a staple in both everyday homes and gourmet kitchens.

Ingredient Deep Dive

Butter: Butter is essential for moisture and flavor in cookies. It contains milk fats that create a rich taste and tender texture. Opt for unsalted butter for better control of salt in the recipe. Properly softened butter ensures even mixing and prevents greasy cookies.

When selecting butter, aim for higher fat content, as margarine often doesn’t yield the same richness. Store in a cool place, and when not used, refrigerate or freeze to maintain its freshness.

Flour: All-purpose flour is the backbone of any cookie recipe, providing structure. When measuring, spooning flour into the measuring cup and leveling it off helps ensure accuracy. Using too much flour results in dry cookies, while too little can make them spread too much during baking. For optimal storage, keep flour in an airtight container, preferably in a cool, dry place.

For gluten-free adaptations, look for a 1:1 gluten-free flour blend with good results in texture and flavor.

Common Mistakes to Avoid

  • Not measuring ingredients accurately, leading to unbalanced flavors and textures.
  • Using cold butter instead of softened butter, which can affect the cookie’s chewiness.
  • Overmixing the dough, which can make cookies tough instead of tender.
  • Baking cookies at the wrong temperature, causing uneven baking.
  • Not letting the cookies cool properly on the baking sheet, leading to soggy bottoms.
  • Skipping the chilling stage, which can prevent cookies from spreading appropriately.
  • Using old baking soda or powder, which can lead to inadequate rising.
  • Baking cookies with a crowded baking sheet, which can prevent even baking and browning.
  • Not sampling a little of the dough for flavor adjustments, which might affect the final taste.
  • Overlooked toppings, such as sea salt, which can enhance flavor profile significantly.

Essential Techniques

Properly creaming butter and sugar is crucial. This technique incorporates air, giving cookies a light texture. Use an electric mixer until light and fluffy, paying attention to avoid overmixing. Look for a pale, fluffy mixture as a visual cue for success.

Know when to use room temperature eggs. Cold eggs don’t mix well with room temperature ingredients, affecting the cookie’s texture. Crack them into a separate bowl to ensure there are no shell pieces before adding them to your mixture.

Pro Tips for Perfect Chocolate Chip Cookies

Use high-quality chocolate chips for the best flavor, as they greatly enhance the overall cookie experience.

Chill your dough before baking to control spread and improve texture; a rest of at least 30 minutes is ideal.

Rotate the baking sheet halfway through to ensure uniform baking, providing an even texture and color.

Try adding nuts for extra flavor and crunch, complementing the soft chocolate perfectly.

Experiment with brown and white sugar ratios to bring a unique depth of flavor; more brown sugar yields chewier cookies.

Add a touch of espresso powder to elevate the chocolate flavor without making coffee-flavored cookies.

Sprinkle sea salt on top before baking for a sophisticated flavor enhancement.

For chewier cookies, underbake slightly; they will continue to firm up on the baking sheet after removing them from the oven.

Variations and Adaptations

Consider regional variations, like adding caramel or toffee bits for a unique twist on flavor and texture, stimulating the classic cookie experience.

Seasonally, adapt your recipe to include pumpkin spice in the fall or peppermint candies during the winter to cater to festive cravings.

Dietary modifications can include coconut oil or dairy-free chocolate to create a vegan version without sacrificing the beloved taste.

For an extra crunch, try incorporating oats into the mix for a delightful chewy texture that blends seamlessly with chocolate.

Presentation alternatives include dusting cookies with powdered sugar or serving them in a jar for a beautiful gift idea.

Serving and Presentation Guide

When plating, arrange cookies in a stack or in a charming cookie jar to attract attention. Consider garnishing with fresh mint or a drizzle of chocolate for a visual flair.

Accompany with traditional glasses of milk, or explore modern options by serving with a scoop of ice cream on the side for a decadent dessert experience.

Consider portion control to ensure everyone gets a taste, especially if serving at gatherings; cutting larger cookies in half can be ideal.

Wine and Beverage Pairing

Pair with a rich dessert wine, like a port, which complements the sweetness of chocolate while elevating the tasting experience.

For non-alcoholic options, serve with cold brew coffee or a thick hot chocolate to enhance the chocolate experience.

If tea is preferred, a warm chai or spiced tea can offer a comforting contrast to the cookies’ sweetness.

Storage and Shelf Life

To store, place cookies in an airtight container, keeping them fresh for up to a week at room temperature.

For longer shelf life, consider freezing them individually; they can last up to three months. Just thaw on the counter before serving.

Check for signs of spoilage, such as a change in texture or off smell, and discard if necessary.

To reheat, simply pop in the microwave for a few seconds to restore that fresh-baked feel.

Make Ahead Strategies

To prep ahead, roll cookies into balls and chill them; this saves time later while retaining texture and flavor.

For better storage, layer between parchment paper, preventing sticking while cooling. Advertise for maximum freshness.

Quality doesn’t have to be compromised; with some advance planning, you can enjoy warm cookies anytime.

Scaling Instructions

When halving the recipe, pay close attention to baking time, as smaller batches may bake quicker than larger ones.

Doubling or tripling the ingredients can be done, but ensure mixing methods are consistent for even distribution of flavors.

A larger bowl may be needed for scaling, ensuring no discomfort from mixing or measuring in too small spaces.

Nutritional Deep Dive

Each cookie typically contains around 200 calories, making them a sweet treat worth savoring in moderation.

The macro breakdown includes carbohydrates predominantly from flour and sugars, while fats stem from butter and chocolate, enriching flavor.

Micronutrients such as calcium and potassium from butter and chocolate provide minimal health benefits, especially when enjoyed moderately.

Being mindful of serving size can aid in weight management while still enjoying this delightful dessert without guilt.

Dietary Adaptations

For a gluten-free version, choose almond flour or gluten-free alternatives to maintain texture while making cookies suitable for all diets.

A vegan adaptation can be made by replacing butter with coconut oil and using flax eggs in place of chicken eggs.

Low-carb adaptations can incorporate almond flour, sugar substitutes like erythritol, and dark chocolate to maintain flavor with reduced sugars.

Paleo dieters can adjust by substituting maple syrup and using dairy-free chocolate while avoiding all grains.

Troubleshooting Guide

Dry cookies often result from too much flour; ensure accurate measurements to maintain moistness.

If cookies spread too much on the baking sheet, chilling the dough can help control this issue.

Baking at incorrect temperatures can lead to either burnt or undercooked cookies; always preheat the oven before baking.

Substituting ingredients may lead to unnecessary flavor tweaks; stick to recommended ingredients for best results.

Recipe Success Stories

Community feedback reveals many family traditions revolve around this recipe, making it a favorite among various generations.

Readers often share unique variations that turn out incredibly well, enhancing the recipe with personal touches.

Photographing these cookies creates opportunities for showcasing results on social media, garnering praise from followers.

Frequently Asked Questions

Q1: Can I freeze these cookies?
Yes, you can freeze chocolate chip cookies for up to three months. Ensure they are placed in an airtight container.

Q2: How do I measure flour accurately?
Spoon flour into your measuring cup and level it off with a knife for precise measurements.

Q3: Why did my cookies turn out flat?
Flat cookies can result from melted butter or insufficient flour. Ensure butter is softened, not melted, and measure accurately.

Q4: What can I substitute for eggs?
Flax eggs or applesauce are great replacements for eggs in baking when aiming for vegan options.

Q5: Can I use dark chocolate instead of semi-sweet?
Absolutely! Dark chocolate will give cookies a more intense chocolate flavor.

Q6: Why are my cookies hard?
Overbaking is often the culprit. Keep an eye on your cookies as they will continue to cook after being removed from the oven.

Q7: How do I make these cookies chewier?
Substituting brown sugar for some of the white sugar and slightly underbaking can enhance chewiness.

Q8: Can I add nuts?
Yes! Chopped walnuts or pecans make an excellent addition for added crunch and flavor.

Q9: What’s the best way to store cookies?
Store cookies in an airtight container at room temperature for up to a week.

Q10: Can I use margarine instead of butter?
While possible, it may alter the flavor and texture of cookies. Stick to butter for the best results.

Additional Resources

Explore related recipes for different kinds of cookies, such as oatmeal raisin or snickerdoodles, for more baking inspiration.

Technique guides on how to properly bake cookies can be helpful, covering everything from ingredient selection to baking tricks.

Ingredient information on chocolate types can provide insights into achieving the best flavors in your baking.

Equipment recommendations, such as the best baking sheets or mixers, can streamline your baking process.

Consider seasonal variations where you can incorporate pumpkin or peppermint into cookies for festive occasions.

Join the Conversation

Sharing your baking adventures on social media can greatly unite cookie lovers worldwide, encouraging vibrant discussions.

Photography tips can enhance your cookie snapshots and inspire your followers to try the recipe.

Engage with your community by sharing reviews and adaptations or hosting cookie swaps for a fun experience.

The Recipe

Chocolate Chip Cookies

Serves: 24 cookies

Prep Time: 15 mins

Cook Time: 10 mins

Total Time: 25 mins

Kitchen Equipment Needed

  • Mixing bowl
  • Baking sheet
  • Electric mixer
  • Measuring cups and spoons
  • Spatula

Ingredients

  • 1 cup unsalted butter, softened
  • 1 cup brown sugar
  • 1/2 cup granulated sugar
  • 2 large eggs
  • 2 teaspoons vanilla extract
  • 3 cups all-purpose flour
  • 1 teaspoon baking soda
  • 1/2 teaspoon salt
  • 2 cups semi-sweet chocolate chips

Directions

  1. Preheat the oven to 350°F (175°C).
  2. In a large mixing bowl, cream together the softened butter, brown sugar, and granulated sugar until light and fluffy.
  3. Add in the eggs, one at a time, mixing well after each addition, followed by the vanilla extract.
  4. In a separate bowl, whisk together the flour, baking soda, and salt.
  5. Gradually add the dry ingredients to the wet mixture until combined, then fold in the chocolate chips.
  6. Drop tablespoon-sized portions of dough onto a lined baking sheet, spacing them about 2 inches apart.
  7. Bake for 10-12 minutes, or until the edges are golden but the centers are still soft.
  8. Allow the cookies to cool on the baking sheet for a few minutes before transferring them to wire racks to cool completely.

Recipe Notes

  • For chewier cookies, underbake slightly and store them in an airtight container.
  • Customize by adding nuts, dried fruit, or different chocolate varieties.
  • For a fun twist, try adding a pinch of sea salt on top before baking.
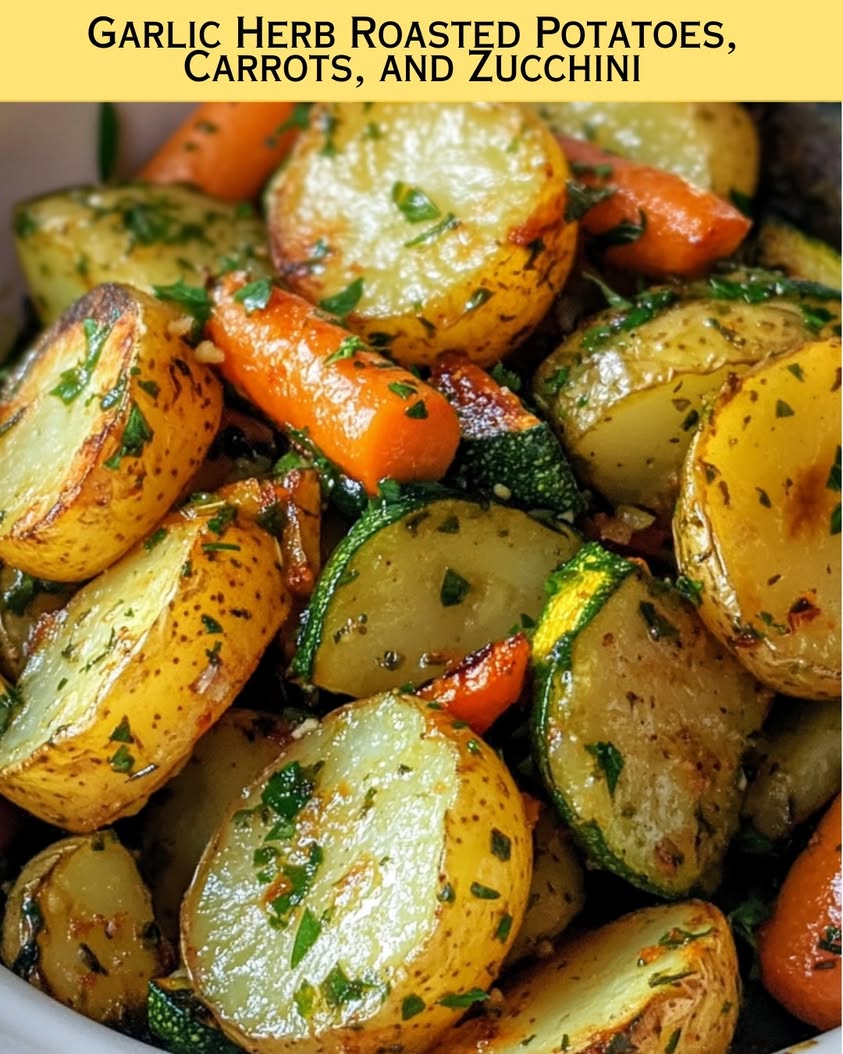
Delicious Garlic Herb Roasted Potatoes, Carrots, and Zucchini Recipe

Garlic Herb Roasted Potatoes, Carrots, and Zucchini: A Flavor-Packed Side Dish

⚖️
Difficulty
Easy

⏲️
Prep Time
15 mins

🕒
Cook Time
30 mins

⏱️
Total Time
45 mins

🍽️
Servings
4 servings

Garlic Herb Roasted Potatoes, Carrots, and Zucchini is a vibrant and flavorful side dish that is perfect for any meal. The combination of tender potatoes, sweet carrots, and fresh zucchini is enhanced by the rich aroma of roasted garlic and an assortment of herbs. Together, these ingredients create a delicious medley that complements everything from roasted meats to grilled fish. This dish not only satisfies the palate but also provides a beautiful burst of color on your dining table.

Easy to prepare and visually stunning, this recipe is designed for both novice and experienced cooks alike. The simplicity of roasting vegetables allows the natural flavors to shine, providing a delightful contrast of textures—from crispy edges to soft insides. Ideal for family dinners or entertaining guests, Garlic Herb Roasted Potatoes, Carrots, and Zucchini can elevate any ordinary meal into something extraordinary.

Quick Recipe Highlights

  • Flavor Profile: Enjoy a mix of savory garlic with a hint of earthiness from the herbs, balanced by the natural sweetness of roasted carrots and zucchini.
  • Texture: This dish features a delightful combination of crispy roasted vegetables and tender bites, offering a satisfying eating experience.
  • Aroma: The aromatic blend of garlic, rosemary, and thyme fills your kitchen, creating an inviting atmosphere as the vegetables roast.
  • Visual Appeal: The vibrant colors of golden potatoes, vibrant orange carrots, and bright green zucchini create an eye-catching presentation.
  • Skill Level Needed: This recipe is simple and requires minimal cooking skills, making it accessible for everyone.
  • Special Equipment: A baking sheet and parchment paper are recommended for easy cleanup and even roasting.

Recipe Overview

  • Difficulty Level: Easy. The steps involved are straightforward, requiring just chopping and tossing ingredients before placing them in the oven.
  • Category: Side Dish. This dish pairs beautifully with a wide range of main courses, from grilled meats to vegetarian options.
  • Cuisine: This dish draws on classic roasted vegetable preparations common in various culinary traditions, particularly Mediterranean.
  • Cost: Affordable. Most ingredients are widely available and low-cost, making this an economical choice for meals.
  • Season: Perfect year-round as it utilizes vegetables that are commonly available in every season.
  • Occasion: Great for family meals, potlucks, or holiday gatherings, adding a festive touch to any occasion.

Why You’ll Love This Recipe

This Garlic Herb Roasted Potatoes, Carrots, and Zucchini recipe is not just about taste; it’s about savoring wholesome flavors that will keep you coming back for more. The garlicky richness combined with the herbal notes elevates the profile of the vegetables, turning a simple side into a star dish. The crunch from the roasted edges adds to the satisfaction with each bite, while the soft, buttery inside provides an enjoyable contrast.

The convenience factor is unbeatable. Prep can be done in just about 15 minutes, making it a quick solution for weeknight dinners. Once they’re in the oven, you can focus on preparing your main dish, allowing you to balance your kitchen duties effortlessly. These roasted vegetables pair with so many options, from classic roast chicken to flavorful vegan grain bowls, making them a staple in your recipe repertoire.

Nutritionally, this dish packs a punch. Packed with vitamins, minerals, and fiber, it contributes to a well-rounded meal that supports your health goals. Potatoes provide energy, carrots are full of beta-carotene, and zucchini adds hydration and nutrients, ensuring every serving is a boost of goodness.

Whether it’s a casual weeknight meal or an extravagant dinner party, roasted vegetables create an ambiance of warmth and hospitality. This dish is a conversation starter and often a highlight at gatherings, prompting compliments and recipe requests. Sharing the dish with loved ones enhances the dining experience, creating lasting memories around the table.

Cost-effectiveness is another benefit, as many of the ingredients can be sourced from your pantry or local farmer’s market at minimal expense. The flavors generated during roasting elevate the simplest vegetables into extraordinary fare, making it easy to enjoy delicious food without breaking the bank.

Historical Background and Cultural Significance

The origins of roasting vegetables date back centuries, rooted deeply in many culinary cultures around the world. Roasting is considered one of the oldest cooking techniques, harnessing heat sources to enhance flavors while making the most of seasonal produce. Traditionally, many cultures have utilized root vegetables, like potatoes and carrots, which store well and provide sustenance during harsher seasons.

In Mediterranean cuisines, roasted vegetables are frequently featured as side dishes or main events in themselves, showcasing the love for fresh, high-quality ingredients, such as olive oil, garlic, and herbs. Roasting elevates these humble items, emphasizing their natural sweetness with minimal intervention. The rise of farm-to-table dining has also seen a resurgence of interest in roasting vegetables, making it a popular choice in modern kitchens.

Over the years, variations of this recipe have emerged, influenced by regional tastes and available produce. From adding spices in North African cuisines to styles rich in herbs from French cooking, the essence of roasted vegetables remains a delicious, versatile option that transcends geography and time.

Traditionally, recipes for roasted vegetables have been passed down through generations, retaining the essence of family cooking while allowing room for creativity. Regional variations often provide a unique twist, ensuring that each culture adds their flair to this classic cooking technique.

Ingredient Deep Dive

Potatoes: Potatoes are a staple ingredient across the globe and hold significant cultural importance. Originating from the Andes mountains of South America, these tubers were brought to Europe in the 16th century and quickly became a dietary staple. Nutritionally, they are rich in carbohydrates, vitamins, and minerals, providing energy and supporting overall health. When selecting potatoes, look for firm skins without any blemishes or sprouts. For storage, keep them in a cool, dark place, and avoid refrigerating them as that can alter their flavor. Substitute sweet potatoes for a different taste and texture.

Carrots: Carrots have a rich history dating back thousands of years, initially cultivated for their medicinal properties. They are now celebrated for their vibrant color, sweetness, and versatility in cooking. Packed with beta-carotene, fiber, and antioxidants, carrots are a fantastic addition to any diet. When choosing carrots, select those that are firm and straight, avoiding ones that feel soft or appear shriveled. Store them in a cool, moist environment, and consider using carrot tops for pestos or salads to reduce waste. If you need a substitute, parsnips can bring a similar texture with a different flavor.

Zucchini: Zucchini, a summer squash, has roots in the Americas and is well-loved in many culinary traditions. It’s low in calories and high in water content, making it a great addition to any meal. Zucchini can be used in numerous ways, from sautéing to grilling, and works beautifully in this roasted recipe. When selecting zucchini, look for small to medium-sized squash that are firm and vibrant. Store them in the refrigerator and use within a week for the best taste. If zucchini isn’t available, yellow squash can be used as a great alternative.

Common Mistakes to Avoid

  • Overcrowding the baking sheet can lead to uneven cooking; ensure the vegetables are in a single layer for optimal roasting.
  • Not drying the vegetables before roasting results in steaming instead of roasting; pat them dry with paper towels.
  • Using cold vegetables straight from the fridge can disrupt cooking time; allow them to come to room temperature first.
  • Skipping the seasoning can lead to bland flavors; be generous with salt, pepper, and herbs.
  • Not preheating the oven can lead to uneven cooking; always ensure your oven is hot before adding the vegetables.
  • Ignoring the chopping size of vegetables can cause uneven cooking; aim for uniform pieces.
  • Using stale herbs will diminish flavor; always opt for fresh herbs or ensure dried ones are not expired.
  • Opening the oven door frequently can affect cooking temperature; try to minimize interruptions for consistent results.
  • Cooking at too low of a temperature can lead to soggy vegetables; roast at a high temperature to achieve crispiness.
  • Not checking on the vegetables can lead to burning; set a timer and check periodically for doneness.

Essential Techniques

Roasting: Roasting is a dry cooking method that uses hot air to elevate the flavors of vegetables while concentrating their natural sugars. To master this technique, it’s crucial to use a high heat, which creates a crispy exterior while maintaining a tender inside. A common pitfall is overcrowding the pan, which can lead to steaming instead of roasting. Look for a golden brown hue and caramelization as visual cues of success.

Chopping: The size and shape of your vegetable cuts greatly affect cooking time and texture. Mastering even chopping ensures consistent cooking. A common mistake is cutting too large, leading to undercooked pieces. Aim for uniform pieces that are about 1 to 2 inches in size to achieve even results. Use a sharp knife for better control, and a cutting board for safety and ease.

Pro Tips for Perfect Garlic Herb Roasted Potatoes, Carrots, and Zucchini

1. Always preheat your oven and get it hot enough—around 425°F (220°C) is ideal for crispy veggies.

2. Experiment with different herbs, such as thyme or oregano, to complement your favorite flavors.

3. Add a splash of balsamic vinegar before serving for an extra layer of flavor.

4. Use a mixture of root vegetables for variety, including beets or turnips if you’re adventurous.

5. For extra crunch, broil the vegetables for the last 2-3 minutes of cooking.

6. Season after roasting with a sprinkle of fresh herbs and squeeze of lemon for brightness.

7. Make sure to cut your vegetables into equal sizes to ensure they cook evenly.

8. Try adding garlic cloves whole and unpeeled for a sweeter, mild flavor.

Variations and Adaptations

Regional variations can provide a refreshing twist on the classic recipe. Consider adding Mediterranean elements like olives and feta for a Greek-inspired dish. Seasonal adaptations such as including butternut squash in the fall or asparagus in spring can keep this recipe relevant year-round. For dietary modifications, swap olive oil for avocado oil in a keto version or replace the vegetables with cauliflower for a low-carb option. Additionally, flavor variations like incorporating a spice blend can add a kick, while presentation alternatives such as serving in a colorful bowl can enhance visual appeal.

Serving and Presentation Guide

Presentation can elevate your Garlic Herb Roasted Potatoes, Carrots, and Zucchini to gourmet status. Arrange them artfully on a large platter, allowing the vibrant colors to contrast. Consider the use of fresh herbs as a garnish, adding not only beauty but also freshness to the presentation. Serve with dips like hummus or tzatziki on the side for added flavor. Temperature-wise, this dish is best enjoyed hot or warm, ensuring that the textures remain intact and delightful, offering an enjoyable experience with every bite.

Wine and Beverage Pairing

For wine pairings, a refreshing Sauvignon Blanc complements the flavors of the roasted vegetables beautifully, enhancing the freshness from the herbs. Alternatively, a light Pinot Grigio can offer a nice contrast to the sweetness of the carrots. If you prefer non-alcoholic options, try a sparkling water infused with lemon; it balances the dish well. Coffee lovers can enjoy a rich dark roast, reminiscent of the depth and earthiness in roasted dishes, rounding out a complete dining experience. Always serve your drinks chilled to maintain their refreshing qualities alongside your hearty dish.

Storage and Shelf Life

To store, allow the roasted vegetables to cool, then place them in an airtight container in the refrigerator, where they can last up to 3 days. If you need to save them for a longer period, consider freezing them; however, note that texture may change. For reheating, use the oven to maintain crispness or microwave for convenience, but be aware that the latter may lead to a softer texture. To identify spoilage, watch for discoloration or smells; if noticed, dispose of the vegetables to ensure food safety.

Make Ahead Strategies

For those busy nights, consider prepping your vegetables in advance. Chop potatoes, carrots, and zucchini up to a day before and store them in water in the fridge to prevent browning. Season and toss with herbs just before roasting for maximum flavor. This strategy allows you to enjoy fresh-roasted vegetables without extensive preparation time. If you have leftovers, they can be added to salads or grain bowls the next day, reducing waste, and maintaining a wholesome diet.

Scaling Instructions

If you’re looking to halve the recipe, simply cut all ingredient amounts in half while keeping the same cooking instructions and time adjustments. If you wish to double or triple, make sure to use larger pans and possibly increase cooking time, so all vegetables have enough space to roast evenly. Keep in mind that vegetables may need additional cooking time in larger batches. Always adjust seasonings according to your taste preferences, as these can change with increased quantities.

Nutritional Deep Dive

A macro breakdown reveals that this dish is primarily composed of carbohydrates from the vegetables, with healthy fats if using olive oil. Each serving provides a variety of vitamins, including Vitamin A from carrots and Vitamin C from zucchini, essential for immune support and skin health. Consider analyzing micronutrients to ensure you’re meeting dietary needs. For those monitoring calorie intake, this side dish provides substantial flavor without excessive calories, ideal for weight management strategies.

Dietary Adaptations

This recipe can be easily modified to suit various dietary needs. For a gluten-free version, no adjustments are necessary as it is naturally gluten-free. Making it dairy-free is as simple as skipping cheese garnishes. To create a vegan adaptation, simply ensure no animal-based stock is used in the preparation. For a low-carb alternative, replace potatoes with cauliflower, and for keto enthusiasts, reduce the potato count significantly to keep net carbs low. Each modification retains the fundamental flavors while accommodating specific dietary requirements.

Troubleshooting Guide

If your roasted vegetables turn out soggy instead of crispy, ensure you’re using a high temperature and that the pan is not overcrowded. If flavors seem off balance, consider adjusting seasoning after roasting and adding a splash of acid to brighten taste. Temperature problems can arise if the oven hasn’t preheated sufficiently. For ingredient substitutions, if you’re lacking zucchini, consider using yellow squash, which provides a similar texture with a unique flavor twist. Timing concerns can be addressed by keeping an eye on the vegetables, checking for tenderness regularly.

Recipe Success Stories

Our community has shared an array of feedback showcasing their delightful experiences with Garlic Herb Roasted Potatoes, Carrots, and Zucchini. From variations that incorporate different root vegetables to festive adaptations for holiday gatherings, the versatility shines in every kitchen. Many readers have reported great success at potlucks, prompting requests for recipe cards to share with friends. Contributing ideas for garnishing and presentation have brought creativity to the basic recipe. The satisfaction of experimenting and sharing culinary outcomes has enriched our cooking community.

Frequently Asked Questions

Can I use frozen vegetables for this recipe?

Using frozen vegetables can lead to mushiness, as they contain more moisture than fresh ones. For best results, opt for fresh, in-season vegetables.

How do I prevent the vegetables from burning?

To prevent burning, monitor your vegetables closely while they roast, and add them to the oven only after it has fully preheated. Stir them halfway through cooking for even browning.

Can I add other vegetables to this mix?

Absolutely! You can enhance the dish with other vegetables such as bell peppers, asparagus, or even Brussels sprouts, adjusting the cooking time as necessary for each type.

What should I serve this dish with?

This side dish pairs wonderfully with grilled chicken, roasted pork, or as part of a vegetarian feast, making it a versatile choice for all types of meals.

Can I make this meal ahead of time?

You can prepare the vegetables in advance, store them in the refrigerator, and roast just before serving. This keeps the flavors fresh and vibrant.

What type of oil is best for roasting?

Olive oil is a great choice for roasting due to its flavor and health benefits. However, feel free to experiment with avocado oil for a higher smoke point.

How do I know when the vegetables are done?

The veggies are done when they are golden brown and fork-tender. A good visual cue is caramelization on the edges.

Can I store leftovers?

Yes, store leftover roasted vegetables in an airtight container in the refrigerator for up to 3 days. They can be reheated or used in salads.

Are there any dairy-free options for this recipe?

This recipe is naturally dairy-free; just avoid adding any cheese or cream when serving. The flavors stand strong on their own.

How can I spice this recipe up?

Add chili flakes, smoked paprika, or your favorite spice blend to give the dish an extra kick. Toss in fresh herbs after roasting for added flavor depth.

Additional Resources

For more delicious recipes, check out our collection of vegetable side dishes that embrace seasonal ingredients. Explore our technique guides that delve into roasting, sautéing, and seasoning, ensuring you’re equipped with the skills to create stunning meals. Ingredient information helps you understand more about the vegetables you’re using, enhancing your culinary knowledge. Lastly, our recommendations for kitchen equipment will ensure you have everything you need for seamless cooking experiences.

Join the Conversation

We’d love to hear your thoughts! Share your photos of Garlic Herb Roasted Potatoes, Carrots, and Zucchini on social media, tagging us with your delightful experiences. Your feedback inspires our community and gives us ideas for future recipes and blog topics. Join the conversation by leaving your reviews and suggestions—what ingredients did you add? What variations did you create? Let’s celebrate the joy of cooking together!

The Recipe

Garlic Herb Roasted Potatoes, Carrots, and Zucchini

Serves: 4 servings

Prep Time: 15 mins

Cook Time: 30 mins

Total Time: 45 mins

Kitchen Equipment Needed

  • Baking sheet
  • Parchment paper (optional)
  • Sharp knife
  • Cutting board
  • Mixing bowl
  • Spatula or tongs

Ingredients

  • 4 medium potatoes, diced
  • 2 large carrots, sliced
  • 2 medium zucchinis, sliced
  • 4 cloves garlic, minced
  • 2 tablespoons olive oil
  • Salt and pepper, to taste
  • 1 teaspoon dried rosemary
  • 1 teaspoon dried thyme
  • Optional: fresh herbs for garnish

Directions

  1. Preheat the oven to 425°F (220°C) and line a baking sheet with parchment paper.
  2. In a large mixing bowl, combine diced potatoes, sliced carrots, and zucchini. Drizzle with olive oil.
  3. Add minced garlic, rosemary, thyme, salt, and pepper. Toss until vegetables are well-coated.
  4. Spread the mixture onto the prepared baking sheet in a single layer.
  5. Roast in the preheated oven for 25-30 minutes, or until the vegetables are golden and fork-tender, stirring halfway through.
  6. Remove from the oven and let cool slightly before garnishing with fresh herbs, if desired.
  7. Serve hot as a delicious side dish!

Recipe Notes

  • This recipe is easily adaptable; feel free to add other vegetables or spices as you like!
  • If using different root vegetables, adjust the cooking time according to their density.
  • Leftovers can be stored in the fridge and make a great addition to salads, or reheated as a side.

Delicious Baked Chicken Ricotta Meatballs: A Flavorful Recipe

Baked Chicken Ricotta Meatballs: A Delicious Twist on a Classic

⚖️
Difficulty
Medium

⏲️
Prep Time
20 mins

🕒
Cook Time
30 mins

⏱️
Total Time
50 mins

🍽️
Servings
4 servings

Experience a delightful twist on a classic with these Baked Chicken Ricotta Meatballs. Infused with a luscious blend of ricotta cheese and seasoned ground chicken, these meatballs are not only flavorful but also moist and tender. This recipe brings together the comforting essence of Italian cuisine, making it perfect for a family dinner or a gathering with friends, leaving everyone craving for seconds.

The combination of ricotta cheese and aromatic herbs creates a harmonious flavor profile that’s both comforting and satisfying. Each bite is tender yet rich, with the ricotta lending a creamy texture that contrasts beautifully with the ground chicken. Ideal for soaking up your favorite marinara sauce, these meatballs are perfect served over pasta or even on their own as a delicious appetizer. You’ll not only love the taste but also appreciate the simplicity of crafting them at home.

Quick Recipe Highlights

  • Flavor Profile: Savory and rich with a hint of Italian spices.
  • Texture: Soft and moist inside with a slight golden crust outside.
  • Aroma: Aromatic notes of basil, oregano, and garlic that waft through your kitchen.
  • Visual Appeal: Beautifully golden-brown meatballs served atop a vibrant marinara sauce.
  • Skill Level Needed: A medium skill level, suitable for home cooks comfortable with meat preparation.
  • Special Equipment: Baking sheet, mixing bowls, and measuring cups.

Recipe Overview

  • Difficulty Level: This recipe is categorized as medium complexity due to the need to mix ingredients and craft meatballs, but it’s accessible for cooks of all skill levels.
  • Category: Perfect for dinner or as a hearty appetizer for gatherings and parties.
  • Cuisine: Heavily influenced by traditional Italian cooking, blending rich flavors and fresh herbs.
  • Cost: Ingredients are affordable, positioning this dish as a cost-effective meal option.
  • Season: Excellent for year-round enjoyment, especially indulge during the cooler months.
  • Occasion: Ideal for family meals, dinner parties, or comforting weeknight dinners.

Why You’ll Love This Recipe

The balance of taste and texture in Baked Chicken Ricotta Meatballs will leave your palate dancing with joy. The savory notes from the chicken perfectly harmonize with the creaminess of the ricotta, delivering an indulgent experience with each bite. They are an excellent choice if you are looking for something both satisfying and easy to prepare.

Moreover, this recipe is incredibly convenient, making it a go-to dish for busy weeknights. You can prepare the meatballs in advance and simply pop them in the oven during dinner time. Their versatile nature also means that they can be served in various ways, from pasta to sliders, allowing you to customize your serving style to match the occasion.

Nutritionally, chicken is a lean protein, and paired with ricotta, it adds a boost of calcium and essential nutrients. This makes Baked Chicken Ricotta Meatballs not only delicious but also a nutritious addition to your family’s meals.

These meatballs are great for social gatherings, offering a crowd-pleasing option that caters to both adults and children. They are easy to share and can be complemented with various sauces and sides, making them perfect for entertaining.

Finally, the affordability and accessibility of the ingredients play a significant role in why this recipe is a must-try. With simple components you likely have on hand, it is easy to whip up a batch when cravings strike or when you need to serve a group without breaking the bank.

Historical Background and Cultural Significance

The concept of blending meats with dairy, particularly in Italian cuisine, stretches back centuries, showcasing the creative use of available ingredients. Originating in humble kitchens, meatballs have since evolved into a beloved dish revered around the world.

Italian culture places high importance on community and family, which is often reflected in shared meals featuring meatballs. They often appear at Sunday dinners and are a staple in many households, symbolizing comfort and togetherness.

As for the evolution of the recipe, meatballs have transformed tremendously over time. Originally made from leftover meats and grains, modern recipes such as Baked Chicken Ricotta Meatballs highlight a significant shift toward fresh, wholesome ingredients and flavors.

Regional variations abound, especially in Italy, where you can find numerous meatball recipes, each unique to the area, reflecting local culinary preferences. This dish exemplifies this adaptability, blending the classic Mediterranean influences with contemporary twists.

Ingredient Deep Dive

Chicken, a crucial ingredient in this recipe, has a long-standing history as a protein staple in numerous cultures. Its versatility makes it ideal for various cuisines and cooking methods, while its lean nature provides countless nutritional benefits. Look for fresh, high-quality ground chicken to enhance your meatball experience.

Ricotta cheese brings a creamy and smooth texture to the meatballs. Originating from Italy, it offers a rich taste while being lower in fat compared to other cheeses. When selecting ricotta, opt for whole-milk varieties to achieve the best flavor and texture.

Herbs, particularly basil and oregano, play an essential role in enhancing the flavor profile. Fresh herbs can elevate the dish, but dried options are just as effective. Properly stored, herbs can maintain their potency for extended periods, providing a burst of flavor when added to your meals.

Breadcrumbs are included for binding and texture, making each meatball cohesive while keeping it tender. Panko breadcrumbs offer a crispier texture, but traditional breadcrumbs will work just as well. Store breadcrumbs in a cool, dry place and use them within a reasonable time.

Finally, garlic adds a punch of flavor and aroma. Known for its multitude of health benefits, fresh garlic cloves are a staple in many cuisines. Look for plump cloves with an unblemished skin for the best quality, and store them in a cool, dark place to extend their shelf life.

Common Mistakes to Avoid

  • Overmixing the Meat: When mixing the ingredients, be cautious not to overwork the meat, as this can lead to tough meatballs. Aim for a gentle incorporation of flavors.
  • Skipping the Browning Step: For enhanced flavor, browning the meatballs in a skillet before baking is key. This caramelizes the exterior and adds depth.
  • Inadequate Baking Time: Ensure the meatballs are cooked through, as undercooked meat can lead to food safety issues. Always check internal temperature with a meat thermometer.
  • Missing Flavor Enhancers: Don’t skimp on seasonings—salt and pepper are essential to highlight the flavors. Taste your mixture before baking to adjust the seasoning.
  • Using Cold Ingredients: For the best results, let ingredients like ricotta and eggs come to room temperature before using them. Cold ingredients hinder proper mixing.
  • Improperly Shaped Meatballs: To ensure even cooking, try to make your meatballs a uniform size. This will help them cook at the same rate.
  • Ignoring Baking Sheet Preparation: Always line your baking sheet with parchment paper or spray it with non-stick cooking spray to prevent sticking.
  • Serving Without Sauce: Meatballs often taste better when served with a dipping sauce or over marinara sauce, enhancing the overall flavor experience.
  • Not Letting Them Rest: Allowing meatballs to rest for a few minutes after baking will help keep them moist when serving.
  • Storing Incorrectly: Store leftover meatballs in an airtight container in the refrigerator to maintain freshness and avoid spoilage.

Essential Techniques

Baking meatballs requires mastering the combination of flavors while ensuring even cooking. Uniform sizing of the meatballs is critical to achieve this; use a cookie scoop for perfectly shaped spheres. Additionally, browning the meatballs in a pan before baking will lead to a richer, caramelized flavor that greatly enhances overall taste.

It’s also essential to monitor the oven temperature to prevent them from drying out. Using a meat thermometer to check for doneness guarantees perfectly cooked meatballs, achieving an internal temperature of 165°F. Visual cues, such as a golden-brown exterior, help indicate when they are ready to come out of the oven.

Pro Tips for Perfect Baked Chicken Ricotta Meatballs

To achieve the best results, use high-quality ground chicken and fresh ingredients for improved flavor. Mixing your ingredients by hand is advisable to avoid overworked meatballs, which can become tough. If you have time, allow the mixture to chill for 30 minutes prior to making meatballs, which helps them hold their shape during baking.

Consider adding grated Parmesan cheese for an additional savory note that’s irresistible, enhancing both flavor and texture. If you want a kick, incorporate red pepper flakes into the mix for gentle heat.

Monitor the temperature of your oven regularly, as hotter ovens can lead to uneven cooking. Lastly, baste with a bit of olive oil or sauce prior to serving for added moisture and shine.

Variations and Adaptations

Regional variations of meatballs are plentiful and can include switching up the protein used, such as turkey or pork, for a different flavor profile. Seasonal adaptations can play a significant role; adding finely chopped spinach or seasonal herbs can introduce fresh flavors. For dietary modifications, consider gluten-free breadcrumbs for those with gluten intolerance and modify the cheese content for a lighter version.

Flavor variations can be achieved by introducing spices such as paprika or adding a flavorful sauce like barbecue before baking. For texture modifications, try adding finely diced vegetables for additional moisture and crunch. Finally, to make a more visually appealing dish, consider serving over vibrant vegetable noodles or with fresh herbs sprinkled on top.

Serving and Presentation Guide

Plating your Baked Chicken Ricotta Meatballs can elevate the dining experience. Start by serving them on a bed of spaghetti or zucchini noodles, creating a beautiful contrast in colors. Garnish with fresh basil or parsley for a burst of green, and drizzle with homemade marinara sauce for added flavor and elegance.

A sprinkle of grated Parmesan cheese can also enhance both appearance and taste. Consider using a larger plate to allow for some elegant spacing. To keep each meatball warm when served, cover them with aluminum foil until ready to plate. Offering toothpicks can make for a more casual and fun serving option.

Lastly, pay attention to temperature when serving; these meatballs are best enjoyed warm, so be sure to reheat if they’ve been sitting out too long.

Wine and Beverage Pairing

When it comes to wine pairings, a medium-bodied red wine like Chianti or Merlot pairs wonderfully with the rich flavors of these meatballs. The acidity in these wines complements the tomato sauce beautifully while enhancing the overall dining experience.

For non-alcoholic alternatives, a light sparkling water infused with lemon or a chilled herbal iced tea can refresh the palate. If coffee or tea is more your style, opt for a robust blend of coffee that can stand up to the richness of the dish. Ensure that all beverages are served at optimal temperatures to enhance your meal’s flavor and enjoyment.

Storage and Shelf Life

Proper storage of Baked Chicken Ricotta Meatballs can prolong their shelf life. Store leftovers in an airtight container in the refrigerator for up to three days. For longer storage, freeze cooked meatballs in single layers on a baking sheet, then transfer them to airtight freezer bags.

When reheating, ensure that they reach a minimum internal temperature of 165°F to safely enjoy them again. If you plan to freeze them, consider storing them with sauce to help maintain moisture and flavor. Always check for signs of spoilage, such as off-smells or abnormal texture before consuming.

Make Ahead Strategies

Baked Chicken Ricotta Meatballs can be prepared ahead of time to save you stress on the day of serving. Mix your meatball ingredients and form the meatballs, then store them in the refrigerator for up to 24 hours before baking.

Alternatively, you can freeze the raw meatballs, separating them on a baking sheet until frozen, then transferring them to a freezer bag. This allows you to bake fresh meatballs anytime by cooking them directly from frozen—just add a few minutes to the cooking time.

Consider making extra batches of meatballs so you always have them on hand for quick meals or snacks. Batch cooking will ensure you have a delicious, wholesome option ready to go when needed.

Scaling Instructions

If you want to modify the recipe for more or fewer servings, consider halving or doubling the ingredients accordingly. When doubling or tripling the recipe, you may need to use larger bowls for mixing and baking sheets to accommodate the larger batch.

Adjust cooking times based on batch size; smaller batches may cook faster, while larger ones might require additional time in the oven. A meat thermometer will be invaluable to ensure meatballs are thoroughly cooked no matter the size of the batch.

Always keep an eye on the baking process; larger batches may also need to be spaced further apart on the baking tray to ensure even cooking, preventing steaming.

Nutritional Deep Dive

Baked Chicken Ricotta Meatballs are a great source of lean protein, which is essential for muscle repair and growth. Each serving provides significant amounts of calcium and phosphorus from ricotta, which support bone health.

When analyzing micronutrients, those found in herbs like basil and oregano contribute antioxidants that bolster immunity and may reduce inflammation. Portion control is key in incorporating these meatballs into a balanced diet, as they can be both satisfying and nutritious.

Consider adjusting the recipe for various dietary preferences to maximize nutritional benefits, such as using low-fat ricotta or adding nutrient-rich vegetables to the mix.

Dietary Adaptations

Incorporate dietary adaptations for this Baked Chicken Ricotta Meatball recipe to cater to specific needs. For a gluten-free version, use gluten-free breadcrumbs and ensure all other ingredients are certified gluten-free.

Dairy-free adaptations are also possible; substitute ricotta with cashew cheese or tofu blended with nutritional yeast for a creamy consistency. For those following vegan diets, utilize plant-based meat alternatives and flax eggs as a binding agent.

Low-carb and keto adaptations can be achieved by replacing breadcrumbs with almond flour or grated zucchini, significantly reducing carbohydrates while maintaining moisture. These alterations ensure that everyone can enjoy the rich flavors of meatballs without compromising their dietary preferences.

Troubleshooting Guide

If you encounter texture issues with your meatballs, it could be due to excessive mixing or using lean meat. Aim for a light touch when combining ingredients, and consider using a blend of meats for better moisture.

In terms of flavor balance, if the meatballs taste bland, re-evaluate the seasoning, and add salt or herbs gradually until you achieve your desired flavor profile. Temperature problems, especially undercooked or dry meatballs, can typically be solved by using a meat thermometer for precise cooking.

Should you face challenges with equipment such as sticking to baking sheets, ensure you grease the pan adequately or use parchment paper for a guaranteed non-stick surface. If time management becomes an issue, prepare the meatballs in advance to reduce stress on cooking day.

Recipe Success Stories

Community feedback highlights the positive reception of Baked Chicken Ricotta Meatballs among both seasoned cooks and culinary novices. Many readers have shared their successful variations, modifying the recipe to suit their family’s tastes, resulting in unique takes that maintain the spirit of the dish.

Adaptation stories abound where busy families have found this recipe to be a lifesaver for quick weeknight dinners, often resulting in children asking for seconds and thirds, a sure sign of success.

Photography tips shared by readers emphasize showcasing the meatballs with vibrant side dishes for eye-catching presentations, inspiring others to try and adapt the recipe in creative ways.

Frequently Asked Questions

1. Can I use turkey instead of chicken?
Yes, ground turkey can be used as a leaner alternative to ground chicken. Make sure to adjust the seasonings accordingly.
2. How do I store leftovers?
Leftover meatballs can be stored in an airtight container in the refrigerator for up to 3 days or frozen for longer storage.
3. What sauce pairs well with this recipe?
Marinara sauce is a traditional pairing, but you can also use pesto or a simple olive oil and garlic dressing.
4. Can I make this recipe in advance?
Yes, you can prepare the meatballs ahead of time and refrigerate them until you’re ready to bake or cook.
5. How can I make this recipe gluten-free?
Substitute regular breadcrumbs with gluten-free breadcrumbs and ensure that all other ingredients are gluten-free as well.
6. Can I bake them instead of frying?
Definitely! Baking is a great method for cooking meatballs, and it allows for easier cleanup with less oil.
7. How do I know if the meatballs are cooked through?
Use a meat thermometer to check that the internal temperature reaches 165°F for safe consumption.
8. Are there alternatives to ricotta cheese?
Yes, you can try cottage cheese or a dairy-free cream cheese for a non-dairy option.
9. Can I freeze uncooked meatballs?
Yes, you can freeze them raw. Lay them flat on a baking sheet until solid, then transfer to a freezer bag for storage.
10. What herbs can I use in this recipe?
Fresh parsley, thyme, or oregano are excellent choices to enhance the flavor of your meatballs.

Additional Resources

If you enjoyed this dish, you may want to explore other related recipes, such as classic spaghetti and meatballs or baked ziti. Additionally, check out technique guides for perfecting your meatball-making skills, including tips on ingredient substitutions.

Explore seasonal variations that highlight what’s fresh and available, or dive into equipment recommendations for kitchen tools that can simplify cooking processes, such as food processors for mixing.

Join the Conversation

Engage with our cooking community by sharing your experiences with Baked Chicken Ricotta Meatballs. Use social media to showcase your photography and variations, and connect with fellow culinary enthusiasts through comments and reviews.

Your feedback is invaluable, and suggestions for adaptations are welcomed, contributing to the rich tapestry of culinary creativity. Let’s inspire each other in our cooking journeys!

The Recipe

Baked Chicken Ricotta Meatballs

Serves: 4 servings

Prep Time: 20 mins

Cook Time: 30 mins

Total Time: 50 mins

Kitchen Equipment Needed

  • Baking sheet
  • Mixing bowls
  • Measuring cups and spoons
  • Meat thermometer
  • Cookie scoop (optional)

Ingredients

  • 1 lb ground chicken
  • 1 cup ricotta cheese
  • 1/2 cup breadcrumbs
  • 1/2 cup grated Parmesan cheese
  • 1 egg
  • 2 cloves garlic, minced
  • 1 tsp dried oregano
  • 1 tsp dried basil
  • Salt and pepper, to taste
  • Olive oil, for drizzling

Directions

  1. Preheat your oven to 375°F (190°C) and line a baking sheet with parchment paper.
  2. In a large mixing bowl, combine ground chicken, ricotta cheese, breadcrumbs, Parmesan cheese, egg, garlic, oregano, basil, salt, and pepper.
  3. Mix until just combined, being careful not to overwork the meat.
  4. Using a cookie scoop, form the mixture into meatballs and place them on the prepared baking sheet.
  5. Drizzle with olive oil and bake in the preheated oven for about 30 minutes, or until golden brown and cooked through.
  6. Serve hot with your choice of marinara sauce or as an appetizer.

Recipe Notes

  • Be sure to adjust the seasoning to suit your tastes.
  • You can prepare these meatballs ahead and freeze them for later use.
  • Consider adding finely chopped vegetables to the mixture for extra nutrition.

Delightful Lemon Lime Cherry Pistachio Cheesecake Recipe to Savor

Luscious Lemon Lime Cherry Pistachio Cheesecake: A Delightful Sweet Treat

⚖️
Difficulty
Moderate

⏲️
Prep Time
30 mins

🕒
Cook Time
60 mins

⏱️
Total Time
90 mins

🍽️
Servings
8-10

Indulging in a slice of Luscious Lemon Lime Cherry Pistachio Cheesecake is like savoring sunshine on a plate. This recipe showcases the zestiness of lemon and lime alongside the rich sweetness of cherries and the crunchy texture of pistachios. Each bite offers a refreshing burst of flavor that dances on your palate, making it an exquisite dessert that’s perfect for any occasion. The combination of creamy cheesecake and fruity notes creates a delightful balance that is both decadent and light.

This cheesecake not only looks stunning but also offers layers of taste and texture that enhance your dessert experience. The bright toppings contrast beautifully against the smoothness of the cheesecake, inviting not just your taste buds but also your eyes. Whether you’re celebrating a special event or simply treat yourself at home, this dessert is sure to impress friends and family alike.

Quick Recipe Highlights

  • Flavor Profile: A harmonious blend of tart lemon and lime with sweet cherries, balanced by the nuttiness of pistachios.
  • Texture: Creamy and smooth cheesecake with a crunchy pistachio crust and toppings that add engaging contrasts.
  • Aroma: Fragrant citrus notes complemented by the sweet scent of cherries and a nutty undertone from the pistachios.
  • Visual Appeal: Vibrantly colored layers of red cherries and green pistachios create a stunning presentation.
  • Skill Level Needed: Requires moderate baking skills, but is accessible for enthusiastic home bakers.
  • Special Equipment: A springform pan and electric mixer will facilitate the preparation of this luscious dessert.

Recipe Overview

  • Difficulty Level: This recipe is classified as moderate due to multiple components that require attention, but the steps are straightforward, making it achievable for motivated bakers.
  • Category: This dish falls under desserts, specifically cheesecakes, which are celebrated for their rich flavors and creamy textures.
  • Cuisine: Combining American and Mediterranean influences, this cheesecake draws from classic dessert traditions while introducing unique flavors.
  • Cost: With an approximate cost of $20-25, the ingredients are relatively affordable, ensuring it remains a budget-friendly indulgence.
  • Season: Ideal for spring and summer gatherings, this cheesecake features fresh fruit that shines during warmer months.
  • Occasion: Perfect for birthdays, holiday celebrations, or dinner parties, this dessert brings a festive touch to any gathering.

Why You’ll Love This Recipe

This Luscious Lemon Lime Cherry Pistachio Cheesecake captivates the senses with its unique taste and appealing texture. The tartness of the citrus elements cuts through the richness of the cheesecake, creating a balanced profile that leaves you craving more. Coupled with the nutty crunch of pistachios, this dessert provides a multi-dimensional experience that plays delightfully with textures.

Additionally, this cheesecake is a breeze to prepare, even for novice bakers. Most of the work can be done ahead of time, allowing you more freedom to enjoy the event or occasion. Simply craft the cheesecake filling, populate the crust, and let it chill—making it a convenient option for those who may not have hours free in the kitchen.

From a nutritional standpoint, pistachios are a surprisingly healthy addition. They are rich in protein, fiber, and healthy fats, making your dessert not only delicious but also a bit more wholesome. The fruits add essential vitamins and a burst of color that makes this cheesecake a way to include some nutrients without compromising taste.

Socially, desserts hold power. This cheesecake invites friends and family to gather around the table, sharing stories and creating memories. It also presents an opportunity for creative presentation, allowing you to engage your guests with a beautifully plated dessert that serves as the centerpiece of your meal.

Moreover, this delightful cheesecake is affordable and accessible, utilizing ingredients that are commonly available year-round. Whether it’s a casual weeknight or a special celebration, you can whip it up without breaking the bank.

Historical Background and Cultural Significance

The origin of cheesecake dates back to ancient Greece, where it was offered to athletes at the first Olympic Games. However, this specific Luscious Lemon Lime Cherry Pistachio Cheesecake draws on various influences, merging traditional American cheesecakes with vibrant Mediterranean flair. The use of citrus in desserts is especially prominent in Mediterranean cuisines, where flavors are fresh and bright.

Cheesecake has remained a beloved dessert across cultures, evolving into numerous variations worldwide. The pairing of cherries with cheesecakes is particularly popular in summer, making it a staple for festive occasions. This dessert reflects the importance of seasonal ingredients, which are crucial for both flavor and presentation.

Over the years, this cheesecake has evolved from basic recipes to incorporate modern flavor profiles. Today, the combination of citrus, cherries, and nuts represents a fusion of traditional techniques with contemporary tastes, ensuring that it remains relevant for new generations.

Various regional variations exist, with many cultures designing their unique takes on cheesecake. This Luscious Lemon Lime Cherry Pistachio Cheesecake embodies a blend of influences that caters to diverse palates while remaining true to its rich historical roots.

Ingredient Deep Dive

Lemon: The zest and juice of lemons invigorate this cheesecake with brightness. Their high vitamin C content provides health benefits, and selecting fresh lemons is key to maximizing flavor. Store them in the refrigerator to prolong fresh flavors, and for substitutions, lime or even grapefruit can work in a pinch.

Pistachios: This nut is steeped in cultural significance, often associated with celebrations and gourmet snacks. Nutritionally, they offer protein and healthy fats, making them a smart addition to desserts. Choose shelled, unsalted pistachios to avoid excess sodium, and for storage, keep them sealed in a cool, dark place. If nuts are a concern, sunflower seeds can serve as a great alternative.

Cherries: A versatile fruit, cherries add luscious sweetness and a pop of color. Rich in antioxidants, they’re fabulous for health while enhancing the visual appeal of your dessert. Choose fresh or frozen cherries, and store in the refrigerator or freezer as needed. Dried cherries could work, but they will alter the texture of the cheesecake.

Common Mistakes to Avoid

  • Overmixing the cheesecake batter can lead to a dense texture—mix just until combined.
  • Using room temperature ingredients is pivotal—cold ingredients can result in lumps.
  • Not greasing the springform pan sufficiently can make it difficult to remove the cheesecake.
  • Overbaking results in cracks—remove the cheesecake when the center is set but slightly jiggly.
  • Forgetting to let the cheesecake cool gradually can affect its texture; let it cool in the pan.
  • Skipping the chilling process means flavors won’t meld—chill for at least four hours, preferably overnight.
  • Not using a water bath causes uneven baking; consider baking in a larger pan with water for consistent heat.
  • Neglecting to taste the batter can lead to an off-balance flavor; adjust sweetness before baking.
  • Not garnishing effectively may result in a visually unappealing dessert; consider toppings for visual impact.
  • Serving at the wrong temperature affects the taste; letting it sit for a while after chilling enhances flavor profiles.

Essential Techniques

Mastering the crust: The crust is the foundation of a great cheesecake. For success, finely chop the nuts and combine them well with the butter and sugar. Ensure the mixture is damp enough to hold together when pressed into the pan. Aim for an even layer and press it firmly using the bottom of a measuring cup for a professional finish.

Blending Cheesecake Batter: When blending your cheesecake batter, it’s essential to combine the ingredients slowly at low speed to avoid excess air and prevent cracks later. Scrape the sides of the bowl regularly and avoid overmixing to keep the mixture light and smooth.

Pro Tips for Perfect Luscious Lemon Lime Cherry Pistachio Cheesecake

– Always preheat your oven to ensure even baking and prevent the cheesecake from cracking.
– Use room temperature ingredients for a smooth batter; set out your cream cheese, eggs, and sour cream beforehand.
– Consider adding lemon zest to the crust for extra flavor that ties the dessert together beautifully.
– Let the cheesecake cool completely in the pan before removing it, to help maintain its shape.
– Use a hot, wet knife to slice your cheesecake; this will create clean, beautiful cuts without crumbling.
– Garnish with fresh cherries and pistachios just before serving for a vibrant presentation.
– Experiment with other fruits like blueberries or raspberries for different flavor profiles.
– Allow the cheesecake to chill overnight to deepen flavors and improve texture for the best results.

Variations and Adaptations

For regional variations, consider adding local fruits or nuts to personalize your cheesecake, such as using macadamia nuts for a tropical twist. Seasonal adaptations could involve substituting in summer berries for a bright, colorful topping. Dietary modifications can include using gluten-free cookies in the crust for those with sensitivities.

Flavor variations are also limitless; try introducing chocolate or caramel swirls into the batter for a rich experience. Texture modifications might involve altering the crust; for a chewier texture, use oats or crushed graham crackers. Finally, significantly changing the presentation can create a new experience—try serving cheesecake slices atop a graham cracker crumble for a rustic touch.

Serving and Presentation Guide

Plating techniques are crucial for an eye-catching presentation. Consider using a cake stand to elevate the cheesecake and garner attention. For garnishing, a drizzle of raspberry coulis and strategically placed cherry halves can enhance the dessert’s look. Traditional accompaniments, such as whipped cream or vanilla ice cream, can elevate the flavor experience.

Modern serving suggestions may include serving mini slices on individual plates for events. Temperature considerations are essential; serve the cheesecake chilled or at room temperature. Lastly, practice portion control to ensure everyone gets a taste without overindulging in one sitting.

Wine and Beverage Pairing

A fruity Riesling or Moscato complements the citrus flavors beautifully, enhancing the dessert experience. For a non-alcoholic alternative, sparkling water with slices of lime or lemon adds refreshing notes that mirror the cheesecake. For coffee lovers, brewing a citrusy light roast can create an elegant pairing; serve it warm alongside your dessert.

Ensure drinks are in line with serving suggestions—chill white wines and serve them in elegant glassware to match the sophistication of your cheesecake.

Storage and Shelf Life

To store your Luscious Lemon Lime Cherry Pistachio Cheesecake, cover it with plastic wrap or place it in an airtight container, preserving its freshness in the refrigerator for up to one week. Ensure it’s stored at a consistent, cool temperature to maintain texture and prevent spoilage.

Signs of spoilage include an off smell, discoloration, or mold growth. For reheating, the cheesecake can be enjoyed cold, but if preferred warm, let it sit out for 30 minutes for the best flavor. While freezing is an option, it’s advisable to consume within 1-2 months for optimal taste—slice the cheesecake before freezing for easier access.

Make Ahead Strategies

For prep timelines, consider making the cheesecake a day in advance; this allows the flavors to meld beautifully, enhancing the final product. While preparing, cool each step properly before storage to preserve freshness.

Quality can be affected if left at room temperature for too long, so aim to assemble and chill your cheesecake as soon as possible. Prioritize freshness by adding any garnishes right before serving for an unbeatable presentation that impresses guests.

Scaling Instructions

When halving the recipe, the cooking time may need to reduce slightly, so keep an eye on it during baking. Doubling or tripling the recipe is entirely manageable; however, be mindful of adjusting your baking times and equipment to accommodate larger quantities.

Timing modifications are crucial—keep the same temperatures, but be prepared for a potential increase in baking time. Make sure to use appropriately sized pans to help with even cooking, and when scaling, always consider how your storage methods will change for larger desserts.

Nutritional Deep Dive

The macro breakdown of this cheesecake includes essential fats and carbohydrates balanced with protein from the cream cheese and nuts. The micros, including vitamins A and C from the cherries and citrus, offer immune support alongside fiber content from the pistachios for digestive benefits.

For portion analysis, a serving of cheesecake can be part of a balanced diet—it’s vital to practice moderation. Weight management tips suggest enjoying satisfying desserts in moderation, ensuring that indulgences are enjoyed without guilt while maintaining an overall healthy lifestyle.

Dietary Adaptations

For a gluten-free option, substituting traditional graham crackers with gluten-free cookies in your crust ensures those with sensitivities can enjoy this dessert. For dairy-free adaptations, consider using cashew cheese or coconut cream as a replacement for cream cheese.

Vegan versions would replace eggs with flaxseed or chia gel for binding, while keeping the rich flavor intact. Low-carb and keto adaptations can utilize almond flour and sugar substitutes, like erythritol, for a guilt-free dessert. Even paleo approaches can integrate naturally sweetened ingredients without sacrificing taste.

Troubleshooting Guide

If you encounter texture issues, it may be due to insufficient mixing or using cold ingredients. Aim for a smooth, creamy batter to achieve that perfect consistency. If your cheesecake lacks flavor balance, taste and adjust the sweetness during preparation, particularly before adding eggs.

Inadequate temperature can lead to improper baking; using an oven thermometer ensures that your cheesecake bakes correctly. Equipment challenges, particularly when using a springform pan, may arise; grease it generously to allow for easy removal. If you find that your cooking time fluctuates, always keep watch and test for doneness to avoid under or overbaking.

Recipe Success Stories

Community feedback surrounding this recipe has been overwhelmingly positive, with numerous readers expressing delight at the fresh flavors. Variations shared include using seasonal fruits, which have been embraced by fellow bakers.

Success stories often highlight personal adaptations—like incorporating different nuts or experimenting with different herbs—creating unique interpretations that celebrate individual tastes. Many readers share their photography of the cheesecake, elevating engagement and fostering community spirit.

Frequently Asked Questions

1. Can I use a different type of fruit? Absolutely! Feel free to experiment with blueberries, strawberries, or even other citrus fruits to create your unique flavor profile.

2. How long can I store the cheesecake? Your cheesecake will stay fresh in the refrigerator for about one week if stored properly in an airtight container.

3. Is it necessary to use a water bath? While it enhances baking consistency and prevents cracks, it’s not mandatory—but highly recommended for achieving a smooth finish.

4. Can I freeze this cheesecake? Yes, you can freeze it! For best results, wrap it tightly and consume it within 1-2 months for maximum freshness.

5. What’s the best way to slice the cheesecake? Run a hot, wet knife through the cheesecake for clean cuts between slices, and wipe it clean after each cut for best results.

6. Can I use a store-bought crust? Yes, a store-bought graham cracker or cookie crust can save time if you prefer.

7. Can I make this cheesecake vegan? Yes, use plant-based alternatives for the cream cheese and substitute eggs with a flaxseed mixture for binding.

8. Will this cheesecake crack during baking? To prevent cracks, avoid overmixing and ensure you don’t bake it too long—remove it when the center is slightly jiggly.

9. Should I let the cheesecake cool before refrigerating? Yes, allow it to cool at room temperature before chilling it to set properly.

10. What can I substitute for pistachios? You can use any finely chopped nuts, such as almonds or hazelnuts, or even seeds to suit dietary preferences.

Additional Resources

Expanding your culinary skills is always rewarding; explore related recipes that highlight fruit and nuts, or try other cheesecake variations. Technique guides can offer insight into mastering essential baking skills, ensuring that your dessert creations are impressive and delicious.

If you enjoy the flavors in this recipe, consider trying other cheesecake fillings or crusts to further enhance your baking repertoire. Seasonal variations also provide an opportunity to experiment with fresh produce, making your desserts unique with every season.

Join the Conversation

We love hearing from you! Share your photography and results from this recipe on social media, inspiring your connections while engaging in our baking community. Your feedback and variations not only nurture recipe development but can also offer fresh perspectives that have the power to enhance future iterations of this beloved dessert.

The Recipe

Luscious Lemon Lime Cherry Pistachio Cheesecake

Serves: 8-10

Prep Time: 30 mins

Cook Time: 60 mins

Total Time: 90 mins

Kitchen Equipment Needed

  • Springform pan
  • Electric mixer
  • Mixing bowls
  • Spatula
  • Measuring cups and spoons

Ingredients

  • 1 ½ cups pistachio cookies, crushed
  • ⅓ cup unsalted butter, melted
  • 2 cups cream cheese, softened
  • 1 cup sugar
  • 3 large eggs
  • ½ cup sour cream
  • Juice and zest of 1 lemon
  • Juice and zest of 1 lime
  • 1 cup cherries, pitted and halved
  • ¼ cup pistachios, chopped for garnish

Directions

  1. Preheat your oven to 325°F (160°C).
  2. In a mixing bowl, combine crushed pistachio cookies and melted butter; stir until fully incorporated.
  3. Press the mixture firmly into the bottom of a springform pan to form the crust.
  4. In a separate bowl, beat together the cream cheese and sugar until smooth.
  5. Add the eggs one at a time, mixing well after each addition.
  6. Mix in the sour cream, lemon juice, lime juice, and zest until combined.
  7. Pour the mixture over the prepared crust, smoothing the top.
  8. Bake for 60 minutes, or until the edges are set, and the center is slightly jiggly.
  9. Allow to cool in the pan for 1 hour before transferring to the refrigerator to chill for at least 4 hours.
  10. Garnish with cherries and chopped pistachios before serving.

Recipe Notes

  • Chill overnight for improved flavor.
  • Experiment with other fruit toppings.
  • This recipe can easily be doubled for a larger gathering—using a larger pan.

Perfect Chocolate Chip Cookies – Soft, Chewy, and Easy to Make

Chocolate Chip Cookies: The Ultimate Comfort Dessert

⚖️
Difficulty
Easy

⏲️
Prep Time
15 mins

🕒
Cook Time
10 mins

⏱️
Total Time
25 mins

🍽️
Servings
24 cookies

Chocolate chip cookies are a classic dessert loved by many, and for good reason! The warm, gooey chocolate chips nestled in a sweet, buttery cookie base create an irresistible treat for cookie lovers everywhere. With each bite, you experience a delightful harmony of sweetness and a hint of vanilla that fills the air and your senses with joy. Whether you enjoy them fresh out of the oven or slightly cooled, these cookies bring comfort and nostalgia, evoking memories of home and togetherness.

The beauty of chocolate chip cookies lies not only in their taste but also in their simplicity. Made with just a handful of basic ingredients, they come together quickly and easily, making them a perfect treat for any occasion. From family gatherings to simple weeknight desserts, these cookies are sure to please everyone at the table with their delightful aroma and perfect texture.

Quick Recipe Highlights

  • Flavor Profile: Buttery, sweet, and rich with dark, melted chocolate.
  • Texture: Soft and chewy with a slightly crisp edge.
  • Aroma: Sweet vanilla and warm chocolate wafting through the kitchen.
  • Visual Appeal: Golden-brown cookies with melted chocolate chips generously studded.
  • Skill Level Needed: Ideal for all skill levels, even beginners.
  • Special Equipment: Standard baking sheets and mixing bowls, with optional parchment paper.

Recipe Overview

  • Difficulty Level: This chocolate chip cookie recipe is easy to follow, making it accessible for novice bakers while allowing experienced cooks to refine their technique.
  • Category: Perfect for desserts, snacks, or treats at any time of day.
  • Cuisine: A staple of American baking traditions, inspired by classic recipes handed down through generations.
  • Cost: With affordable ingredients, these cookies can be baked without a hefty price tag, averaging around $5-$10 for a full batch.
  • Season: Enjoy year-round, but they particularly shine during the holiday season when shared with family and friends.
  • Occasion: Ideal for birthdays, gatherings, or simply an afternoon pick-me-up treat.

Why You’ll Love This Recipe

The taste and texture of chocolate chip cookies are unmatched. The combination of buttery cookie dough and rich chocolate chips creates a heavenly mix that is both satisfying and nostalgic. You’ll savor each bite as the cookies melt in your mouth, providing a satisfying sweetness that hits just the right spot.

Convenience is another reason to love this recipe. It requires minimal prep time and just a few simple steps, making it a fantastic option for quick baking when cravings strike. With ingredients likely already in your pantry, you can whip up a batch without a trip to the store, making it a go-to treat.

Nutritionally, while cookies are a dessert, they can provide some quick energy with their carbohydrate content. Be mindful of portion sizes, and remember that sharing is caring, allowing you to enjoy treats without going overboard.

Socially, chocolate chip cookies are a definite crowd-pleaser. They evoke smiles and memories, offering warmth and joy when shared with loved ones. They’re perfect for gatherings or simply brightening someone’s day.

Lastly, the accessibility of this recipe means that anyone can enjoy the joy of homemade cookies without breaking the bank. With a low cost of ingredients and minimal specialized equipment needed, this classic treat is available to everyone.

Historical Background and Cultural Significance

The history of chocolate chip cookies dates back to the 1930s when Ruth Wakefield invented the recipe at her Toll House Inn. She originally intended to create a chocolate dessert but found that adding chopped chocolate bars yielded a delightful combination that became a hit.

Since then, these cookies have evolved into various forms but remain a symbol of American home baking. They are frequently associated with nostalgia and moments of comfort, representing the warmth of home and family traditions. This cookie is not just a treat; it’s a recipe that often tells a story of care and sharing.

Regional variations abound, with some incorporating nuts, oats, or alternative chocolates, reflecting local taste preferences. Despite these variations, the classic chocolate chip cookie continues to hold a special place in hearts and homes across the country.

As recipes spread and evolved, the chocolate chip cookie has found its way into international cuisines, serving as a beloved dessert in restaurants and homes worldwide. They embody a sense of creativity, inviting bakers to experiment and personalize according to their preferences.

Ingredient Deep Dive

The primary ingredients in chocolate chip cookies include flour, sugar, butter, eggs, baking soda, and chocolate chips.

**Flour** has a rich culinary history, serving as a fundamental building block in a variety of baked goods. Whole wheat flour is an excellent alternative for added nutrition, lending a nutty flavor. Proper storage in a cool, dry place can extend its shelf life.

**Sugar** contributes sweetness and assists in browning, which is crucial for developing that perfect golden color. Brown sugar adds moisture and a deeper flavor, while granulated sugar achieves that crispness. When selecting sugar, opt for freshness, and consider alternatives like coconut sugar for healthier versions.

**Butter** is beloved for its richness and flavor. Unsalted butter is often preferable for baking to better control salt content. It’s essential to store butter properly in the refrigerator and use it at room temperature for the best consistency in dough.

**Chocolate chips** bring indulgence, and the choices are vast. Dark chocolate offers health benefits with antioxidants; semi-sweet is most common, while white chocolate adds a different sweetness. Always choose high-quality chocolate for the richest flavor, and store any leftovers in a cool, dry place.

Common Mistakes to Avoid

  • Overmixing the dough can lead to tough cookies. Mix just until combined.
  • Not chilling the dough can result in flat cookies. Allow at least 30 minutes in the fridge.
  • Using cold butter can prevent proper creaming. Always use room temperature butter for the ideal spread.
  • Baking at incorrect temperatures can alter texture. Always preheat your oven accurately.
  • Not measuring ingredients accurately can lead to imbalanced ratios. Use a scale for precision.
  • Overbaking will dry out the cookies. Remove them when they begin to golden slightly around the edges.
  • Using outdated baking soda or baking powder can affect rising. Always check expiration dates.
  • Neglecting to line baking sheets can result in stuck cookies. Parchment paper helps release easily.
  • Using low-quality chocolate chips can downgrade flavor. Invest in good chocolate for the best results.
  • Skipping the cooling step can result in crumbled cookies. Allow them to set before transferring to wire racks.

Essential Techniques

Creaming butter and sugar is a key technique. This process aerates the butter, incorporating air for lightness. Begin with softened butter, and vigorously mix it with sugar to achieve a pale, fluffy texture. Avoid overbeating, as it can cause the cookies to spread too much.

Properly measuring flour is critical. Spoon flour into the measuring cup, then level it with a knife for an accurate measurement. Packing flour can lead to dense cookies. Aim for a light and fluffy consistency in your dough for the best cookie texture.

Chilling the dough is an invaluable step. It solidifies the fats, preventing excessive spreading during baking. If using a family recipe that skips this step, don’t hesitate to adapt for better results.

Knowing when the cookies are finished baking requires practice. Remove them from the oven when just set, as they will continue to cook on the baking sheet afterward. They should appear slightly pale in the center with golden edges for the perfect balance.

Pro Tips for Perfect Chocolate Chip Cookies

For the best chocolate chip cookies, always use high-quality chocolate chips to enhance flavor. Opting for a mix of dark and semi-sweet chocolates can create delightful variations in taste.

Chilling cookie dough not only improves texture but also deepens flavors as they meld. Aim for at least one hour of chilling time for optimal results.

Test a small baking trial if trying out a new ingredient or substitution. Baking is a science, and gradual adjustments can help refine your results.

Use a cookie scoop for uniform size and even baking. It helps in achieving consistent results across all cookies in the batch.

Experiment with add-ins like nuts, dried fruit, or various chocolates for added texture and flavor. These variations can give a personal touch to the classic recipe.

Consider sprinkling a pinch of sea salt on top before baking. It enhances the sweetness and offers a delightful contrast in flavor.
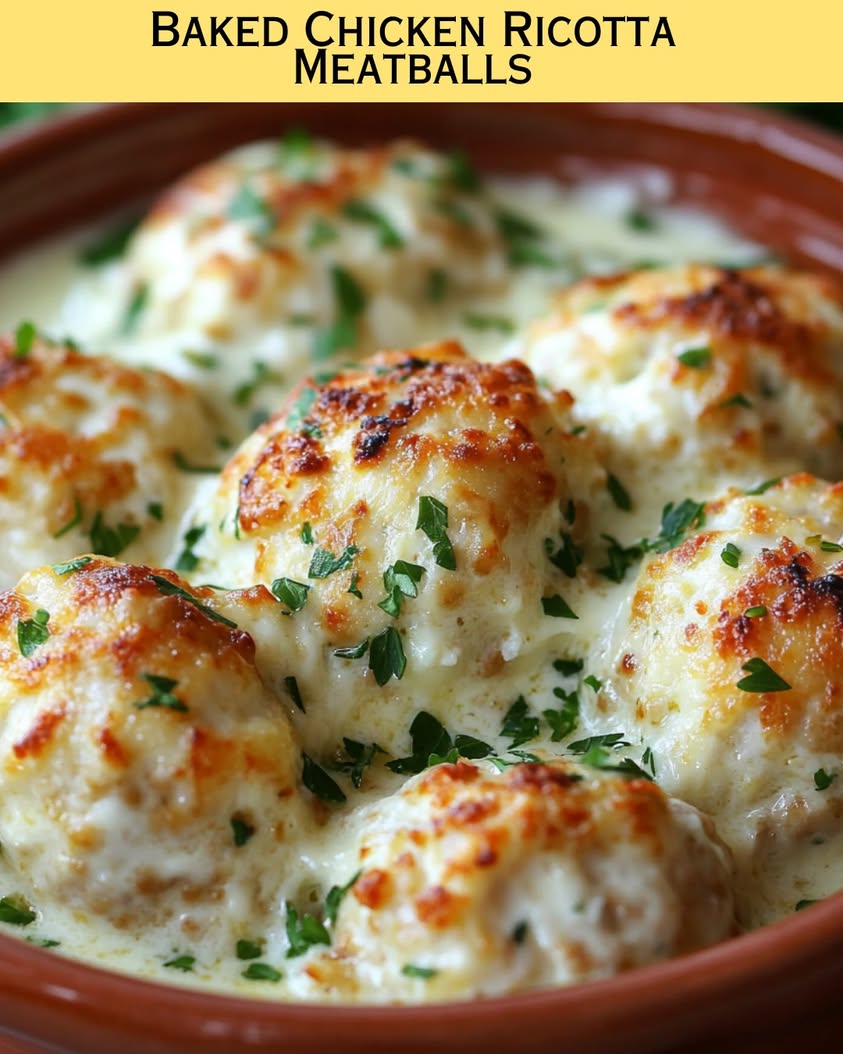
Store leftover cookies in an airtight container at room temperature to maintain their chewiness. If they begin to harden, placing a slice of bread in the container can help retain moisture.

Adjust baking times based on your oven’s personality. Every oven can be slightly different, so note that you may need extra minute adjustments for optimal baking conditions.

Variations and Adaptations

Chocolate chip cookies can be personalized to fit any palate. For a regional variation, try adding nuts like walnuts or pecans to incorporate a crunchy texture and nutty flavor, which also enhances nutritional value.

Seasonal adaptations can include holiday spices such as cinnamon or nutmeg, perfect for festive gatherings. You may also incorporate pumpkin during the fall for a warm, seasonal twist that combines well with chocolate.

Dietary modifications like making cookies gluten-free can be achieved with almond flour or a gluten-free all-purpose blend. These options allow cookie lovers to still indulge without compromising their dietary needs.

For a flavor variation, experiment with different chocolate types, such as white chocolate or even flavored chocolate bars. These imparts unique profiles that can surprise and delight.

Texture modifications may involve tweaking baking times or thickness to create cookies that are either chewier or crunchier based on personal preference.

Presentation alternatives can include drizzling cookies with melted chocolate or dusting them with confectioner’s sugar. These touches elevate their visual appeal, making them perfect for special occasions.

Serving and Presentation Guide

For an impressive presentation, stack cookies high on a decorative plate, garnished with fresh mint or sprinkled chocolate shavings. Adding a side of creamy milk or rich ice cream elevates their appeal.

Consider traditional accompaniments such as a glass of cold milk that pair perfectly, enhancing the cookie experience by balancing sweetness with creaminess.

Modern serving suggestions might include using them as a topping on ice cream sundaes or crumbling them on yogurt for a sweet breakfast option.

Serve cookies warm from the oven or slightly cooled, understanding that they continue to set as they rest. This knowledge will help control the final texture after baking.

Portion control is key when serving; consider offering single cookies or half cookies to allow guests to sample various flavors without overindulging.

Wine and Beverage Pairing

For decadent dessert pairings, consider a rich port or a dessert wine that complements the sweetness of the cookies. The fruity notes in these wines can enhance the chocolate flavors beautifully.

If looking for non-alcoholic alternatives, pair with a smooth vanilla bean milkshake that echoes the creamy aspects of the cookie’s flavor profile.

Coffee lovers should enjoy their cookies alongside a cup of freshly brewed coffee; the bitterness complements the sweetness, creating a balanced experience.

Ensure that all beverages are served at the optimal temperature to enhance the cookie experience: warm cookies should pair with warm beverages, while chilled cookies mix well with cold drinks.

Storage and Shelf Life

To maintain the freshness of your chocolate chip cookies, store them in an airtight container at room temperature. This will keep them soft and chewy for several days.

For longer storage, place cooled cookies in the freezer. They can be kept in a sealed container or a freezer bag for up to three months, making them easy to enjoy any time.

If you’re unsure about spoilage, look for changes in texture, color, or an off-odor. Always ensure that cookies are fully cooled before placing them into storage.

Reheating cookies is simple; pop them in a microwave for a few seconds or put them back in the oven at a low temperature to regain warmth and softness.

Freezing cookie dough is a great way to plan for emergencies. You can portion the dough and freeze it, allowing for ready-to-bake cookies at a moment’s notice!

Make Ahead Strategies

Preparation can start as early as the day before by mixing the dough and chilling it. This allows the flavors to meld perfectly overnight.

Store completed cookies in a container between baking steps, ensuring that each layer remains fresh until you’re ready to serve.

Quality can be maintained by ensuring that the cookies are fully cooled before sealing; this prevents moisture from making them soggy.

For assembly tricks, prepare your baking sheets with parchment paper so that they are ready to go, speeding up the process when the cravings hit.

Consider reintroducing freshness by adding a scoop of ice cream or drizzling warm chocolate over cookies just before serving. This adds an unexpectedly delightful twist to the classic dessert.

Scaling Instructions

To halve the recipe, simply divide all the ingredient measurements by two, ensuring you check bake times regularly as they may adjust.

For larger gatherings, doubling or tripling the recipe is straightforward; just ensure that you have ample mixing space. You might need to bake in batches to avoid overcrowding the oven.

When scaling recipes, always adjust equipment accordingly: larger batches may require multiple baking sheets or an additional oven if cooking a significant quantity at once.

Timing requires attention; always refer to the appearance of cookies rather than the clock, as these can vary dramatically between batches.

Consider storage aspects for the excess; label your containers properly to avoid confusion, and ensure that they are airtight for long-lasting flavor.

Nutritional Deep Dive

In terms of macro breakdown, chocolate chip cookies predominantly contain carbohydrates from flour and sugars, which provide energy. The butter and chocolate add fats, making them more calorie-dense.

Micronutrient analysis shows that while cookies are not a health food, quality chocolate provides iron, and butter includes fat-soluble vitamins. Enjoying in moderation can ensure satisfaction without excessive caloric intake.

Health benefits are minimal, but incorporating whole grains or using dark chocolate can offer some antioxidants and fiber, turning a classic treat into an occasionally healthier option.

Limited portions allow for enjoyment without excess. Consider serving one or two cookies alongside fresh fruit for a balanced and satisfying dessert option.

For weight management, factor in cookies as treats in your overall daily intake, enjoying them without guilt while being mindful of serving sizes.

Dietary Adaptations

Gluten-free chocolate chip cookies can be made using almond flour or a gluten-free baking blend. These variations retain texture and flavor without compromising quality.

Dairy-free alternatives can include coconut oil instead of butter and dairy-free chocolate. These swaps accommodate those with lactose intolerance or dietary restrictions.

For a vegan version, substituting flaxseed eggs for traditional eggs works well, and be sure to choose vegan chocolate chips to maintain the integrity of the recipe.

Low-carb chocolate chip cookies can be crafted using almond flour and sugar substitutes like erythritol to significantly reduce carbohydrate content.

Keto and paleo adaptations focus on natural sweeteners and nut flours, achieving a delicious result that aligns cohesively with those dietary lifestyles.

For low-FODMAP needs, adjustments like choosing dark chocolate in moderation may be appropriate, allowing more flexibility in enjoying treats without significant digestive concerns.

Troubleshooting Guide

If your cookies are too flat, ensure your butter was not too melty before mixing. Properly softened, room-temperature butter gives structure to your cookies.

For dry cookies, double-check your flour measurements and consider adding an additional egg or more fat to promote moisture.

Flavor imbalance can commonly arise from not incorporating enough vanilla or too much salt. Taste your dough and adjust accordingly to achieve a desired balance.

Keeping an eye on the oven temperature is crucial; oven thermometers can quickly resolve discrepancies between the dial and actual temperature.

For equipment challenges, line baking sheets with parchment to prevent sticking and to ensure even baking across all cookies during production.

If timing remains an issue, take a notepad to record adjustments, documenting how you can perfect your method for the next round of baking.

Recipe Success Stories

Community feedback showcases the joy this chocolate chip cookie recipe brings, with many bakers noting how it has become a family favorite across generations.

Variation successes highlight the creativity flourished through experimenting with different ingredients, leading to new adaptations loved by friends and family alike.

Adaptation stories reveal how this simple recipe accommodates numerous dietary needs, helping many find joy in baking without compromising health or preferences.

Readers have also suggested photography tips, sharing stunning images that highlight the cookies’ gooey, chocolatey goodness that incites cravings.

These recipes become shared heirlooms, circulating through social media and gatherings, enhancing connections and camaraderie as they are baked and enjoyed everywhere.

Frequently Asked Questions

Q: Can I freeze chocolate chip cookie dough?

A: Yes! Chocolate chip cookie dough freezes very well. Portion the dough into balls and freeze them on a baking sheet. Once frozen, transfer them to an airtight container or freezer bag for up to three months.

Q: How do I make gluten-free chocolate chip cookies?

A: Substitute all-purpose flour with a gluten-free baking blend or almond flour. Ensure that other ingredients, like chocolate chips, are also gluten-free.

Q: Why are my cookies spreading too much?

A: Overly warm butter or not chilling the dough can cause cookies to spread too thin. Make sure your butter is at room temperature, and chill the dough for at least 30 minutes before baking.

Q: Can I replace brown sugar with white sugar?

A: Yes, but this alters texture and flavor. Brown sugar adds moisture and depth; if you use white sugar, consider incorporating a little molasses for a similar effect.

Q: How can I make softer cookies?

A: To achieve softer cookies, reduce baking time slightly and ensure you are not overmixing the dough, which can lead to tougher cookies.

Q: Do I need to chill the dough?

A: While not strictly necessary, chilling the dough enhances flavor and texture. It also helps prevent the cookies from spreading too much during baking.

Q: What can I use instead of eggs?

A: Common substitutions include flaxseed meal mixed with water or applesauce, perfect for vegan or egg-free varieties.

Q: How do I know when my cookies are done?

A: Look for slightly golden edges while the center appears set but still soft. Cookies continue cooking after being removed from the oven, leading to the perfect texture.

Q: How should I store leftover cookies?

A: Store cookies in an airtight container at room temperature for up to one week. For longer shelf-life, consider freezing them as described above.

Q: Can I add nuts to my cookies?

A: Absolutely! Feel free to add chopped nuts like walnuts or pecans for added texture and flavor in your chocolate chip cookies.

Q: Why are my cookies too dry?

A: Overbaking is the primary reason for dry cookies. Keep an eye on the timer and remove them while they are still slightly soft in the center for perfect moisture.

Additional Resources

Explore related recipes for variations of your favorite cookies, such as oatmeal chocolate chip or peanut butter cookies. Each provides a fun twist on the classic treat.

Consider consulting technique guides for perfecting your baking skills, from mastering dough textures to perfecting frostings that complement your cookies.

Dive into ingredient information, learning about the benefits of selecting high-quality chocolates or how to incorporate superfoods to elevate your sweet treats.

For those looking to up their kitchen game, recommendations for essential equipment can help in creating flawless cookies every time, with items like silicone baking mats and cookie scoops.

With each season, new flavors and ingredients inspire creativity. Seasonal variations, like pumpkin spice cookies or peppermint versions for the holidays, can invigorate your baking routine.

Join the Conversation

Engage with your baking community on social media by sharing your chocolate chip cookie successes. Use dedicated hashtags and tags to showcase your delicious results and inspire others to try the recipe.

Consider sharing photography tips that enhance the visual appeal of your baked goods. Good lighting and composition can make all the difference in showcasing your culinary creations.

Recipe reviews are encouraged, allowing fellow bakers to understand the strengths and joys of this beloved chocolate chip cookie recipe better.

Participate in community engagement by exchanging ideas on variations or adaptations that have worked well for you. Your experiences can offer helpful insights to budding bakers looking to explore.

Recipe variations create a richer baking ecosystem, and sharing your adaptations can inspire others to continue the legacy of chocolate chip cookies across different methods and cultures.

The Recipe

Chocolate Chip Cookies

Serves: 24 cookies

Prep Time: 15 mins

Cook Time: 10 mins

Total Time: 25 mins

Kitchen Equipment Needed

  • Baking sheet
  • Mixing bowls
  • Electric mixer or whisk
  • Cookie scoop or spoons
  • Parchment paper (optional)

Ingredients

  • 2 1/4 cups all-purpose flour
  • 1/2 cup granulated sugar
  • 1 cup brown sugar, packed
  • 1 cup unsalted butter, softened
  • 2 large eggs
  • 1 teaspoon vanilla extract
  • 1 teaspoon baking soda
  • 1/2 teaspoon salt
  • 2 cups semi-sweet chocolate chips

Directions

  1. Preheat your oven to 350°F (175°C).
  2. In a large mixing bowl, beat the softened butter, granulated sugar, and brown sugar until light and fluffy.
  3. Add the eggs and vanilla extract, mixing until well combined.
  4. In another bowl, whisk together the flour, baking soda, and salt. Gradually add this dry mixture to the wet ingredients.
  5. Fold in the chocolate chips until evenly distributed.
  6. Using a cookie scoop, drop rounded balls of dough onto the prepared baking sheets, leaving space between each for spreading.
  7. Bake for 9-11 minutes or until golden brown around the edges but still soft in the center.
  8. Remove from the oven and allow to cool on the baking sheet for a few minutes before transferring to wire racks to cool completely.

Recipe Notes

  • For an extra touch, sprinkle sea salt on top before baking.
  • Store any leftover cookies in an airtight container to maintain softness.
  • It’s great to mix in nuts for added texture.
  • Chocolate chips can be replaced with chunks or different varieties for a unique twist.
  • If you prefer chewier cookies, consider reducing bake time by one minute.