Smoky Jalapeño Popper Meatloaf with Creamy Ranch Drizzle Recipe

Smoky Jalapeño Popper Meatloaf: A Flavorful Twist on a Classic Dish

⚖️
Difficulty
Easy

⏲️
Prep Time
15 mins

🕒
Cook Time
50 mins

⏱️
Total Time
65 mins

🍽️
Servings
4-6

Are you ready to elevate your dinner table with a dish that’s both delicious and exciting? This Smoky Jalapeño Popper Meatloaf is a must-try for anyone looking to spice up their weekly meals. A delightful combination of savory meat, smoky flavors, and a zesty jalapeño kick, every bite is sure to become your new favorite. Whether you’re serving it for a family dinner or a weekend gathering, this comforting dish will win hearts and tummies alike.

Imagine a loaf that brings together the classic meatloaf you know and love with the spicy, cheesy goodness of jalapeño poppers. Each ingredient plays a vital role, from the succulent ground beef to the rich cream cheese that creates a creamy drizzle to top off your meal. Looking for a recipe that packs both flavor and satisfaction? Look no further than this Smoky Jalapeño Popper Meatloaf.

Quick Recipe Highlights

  • Flavor Profile: A smoky, spicy, and cheesy combination that tantalizes the taste buds with every mouthful.
  • Texture: The meatloaf is perfectly tender on the inside, while the crispy bacon adds a satisfying crunch.
  • Aroma: A blend of smoky spices and fresh jalapeños wafts through the kitchen, inviting everyone to the dinner table.
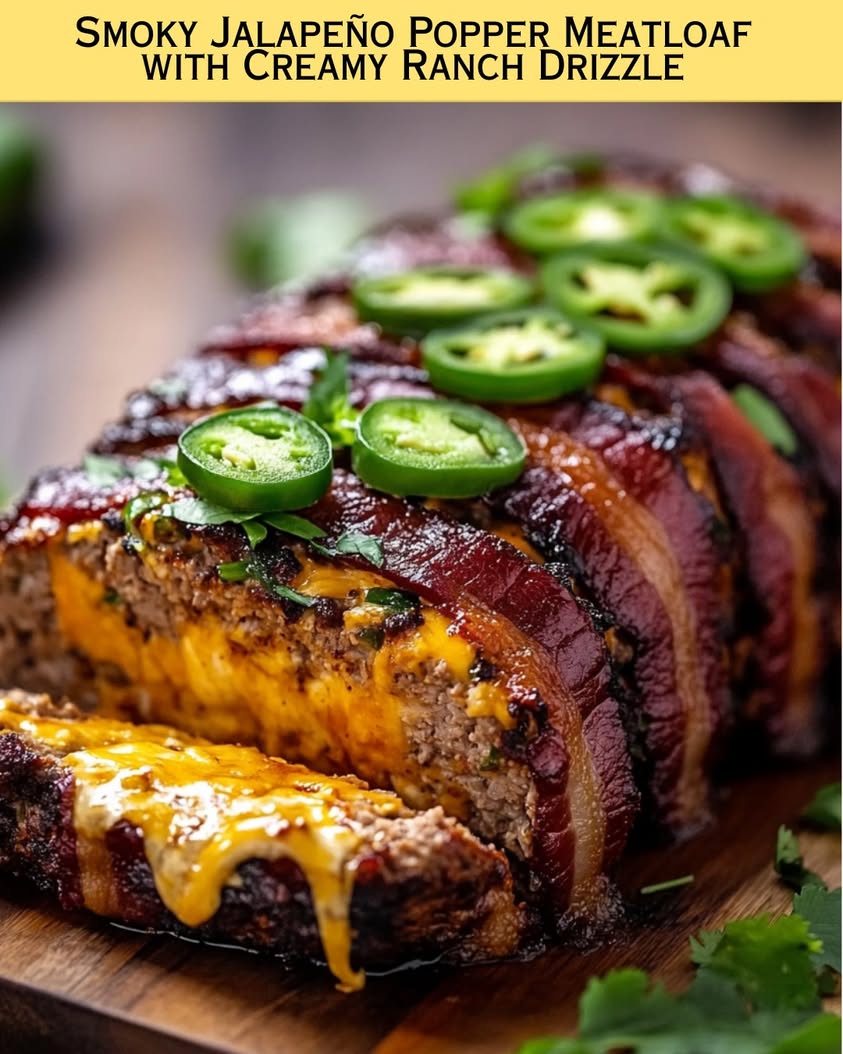
  • Visual Appeal: The vibrant green of jalapeños contrasts beautifully with the golden-brown meatloaf, making it a focal point on any plate.
  • Skill Level Needed: This dish is easy enough for beginners, yet impressive enough for seasoned cooks looking to wow their guests.
  • Special Equipment: You’ll need a loaf pan and an oven to bring this tasty meatloaf to life.

Recipe Overview

  • Difficulty Level: This recipe is straightforward and designed for a range of skill levels, making it perfect for any home cook.
  • Category: This meatloaf fits seamlessly into dinner entrées and is perfect for meal prep throughout the week.
  • Cuisine: Influenced by traditional American comfort food, this recipe offers a nod to Tex-Mex flavors with jalapeños.
  • Cost: The ingredients are relatively inexpensive, making this dish a cost-effective option for a hearty meal.
  • Season: This meatloaf can be enjoyed year-round, but it’s especially comforting during cooler months.
  • Occasion: Whether it’s a casual family dinner or a potluck with friends, this meatloaf is sure to please a crowd.

Why You’ll Love This Recipe

This Smoky Jalapeño Popper Meatloaf is an irresistible blend of taste and texture—juicy meat combined with creamy cheese and a spicy kick creates a harmonious balance that excites the palate. The savory ground beef and crispy bacon work together to provide a satisfying chew, while the melted cream cheese creates a luscious sauce that elevates the entire dish. You’ll find yourself savoring each bite and craving more.

Preparation is a breeze, as the ingredients come together quickly. Mixing your meatloaf, shaping it into a loaf, and letting it bake allows you to spend more time with family and friends. The straightforward process means that anyone can whip this dish together without demanding hours in the kitchen. Plus, it holds up well for leftovers, making it a great meal prep option.

From a nutritional standpoint, this meatloaf offers protein-packed bites thanks to the ground beef and cream cheese. It can easily be made more health-conscious with lean meat or vegetable substitutes without sacrificing flavor. You can feel good about serving a dish that satisfies cravings and keeps everyone energized for the day ahead.

Gathering friends or family around this meatloaf for dinner is an experience. The appealing aroma and vibrant presentation create a warm, inviting atmosphere perfect for sharing stories and laughter. Whether served as the main dish or alongside your favorite sides, this unique twist on meatloaf will surely spark conversation and delight your guests.

Cost-effectiveness is also a significant benefit to this recipe. With simple ingredients you probably already have in your pantry, it’s an affordable option that doesn’t compromise on flavor or satisfaction. This means you can enjoy delicious meals without an extravagant budget.

Historical Background and Cultural Significance

Meatloaf has long been a staple of American cuisine, with roots tracing back to many culinary traditions that include meat combined with grains and spices. While variations of meatloaf can be found in numerous cultures—such as the German “Fleischklops” and Italian “polpettone”—the American version has evolved into a classic comfort food. This rendition incorporates jalapeños to bring a contemporary twist to a beloved dish.

As culinary preferences expanded, incorporating global flavors into traditional recipes became a popular trend. The addition of smoky ingredients mirrors a growing appreciation for deep, robust flavors that excite the palate. These changes demonstrate how traditional dishes adapt over time, reflecting societal preferences and increasing cultural diversity within home cooking.

Each family often has their own spin on the classic meatloaf recipe—some choose to incorporate vegetables, while others might opt for different meat types. This Smoky Jalapeño Popper Meatloaf adds a beloved Tex-Mex element that resonates with many diners, connecting past traditions to modern tastes.

The growth of regional variations makes meatloaf a dish filled with personality. Whether it’s spicy, sweet, or packed with vegetables, every version tells a story of the cook’s background and style. The Smoky Jalapeño Popper Meatloaf is a testament to the creativity that can emerge when various culinary influences combine to create something unique.

Ingredient Deep Dive

Ground Beef: As the main ingredient, ground beef forms the core of the meatloaf. It is rich in protein and provides essential nutrients like iron and vitamin B12. When selecting ground beef, look for a mix of lean and fat for optimal flavor and moistness. Storing ground beef in the freezer can extend its shelf life, and it can be substituted with ground turkey or chicken for a lighter dish.

Jalapeños: These peppers underscore the recipe’s bold flavors. Not only do they contribute spiciness, but they are also packed with vitamin C and antioxidants. When choosing jalapeños, look for firm, shiny peppers without blemishes. Store them in the refrigerator for several days, and consider removing the seeds for a milder flavor if desired.

Common Mistakes to Avoid

  • Skipping the resting time: Allowing the meatloaf to rest after baking is crucial, as it helps maintain moisture and improves texture.
  • Packing the meat too tightly: Overworking the meat can lead to a dense loaf. Instead, mix gently to maintain a tender texture.
  • Not using a thermometer: Ensuring your meatloaf reaches the right internal temperature (160°F) is vital for food safety and optimal flavor.
  • Forgetting to grease the pan: If you skip this step, your meatloaf may stick, making it challenging to remove from the pan.
  • Neglecting to incorporate enough moisture: Adding ingredients like eggs and sauce enhances juiciness. Without these, the meatloaf can turn out dry.
  • Overbaking: Keep an eye on baking time to avoid a dry outer crust; it’s better to err slightly on the side of undercooking.
  • Disregarding ingredient temperature: For uniform cooking, let ground beef and other ingredients reach room temperature before mixing.
  • Not seasoning enough: A well-seasoned meatloaf enhances flavor—don’t hesitate to adjust spices to your taste!
  • Skipping the glaze: A glaze not only adds flavor but also improves the appearance and the overall appeal of your dish.
  • Ignoring the importance of texture balance: Integrating elements like bacon and cheese gives an enjoyable contrast to the meatloaf’s overall texture, enhancing the experience.

Essential Techniques

Mixing the meatloaf: Properly mixing is essential for a tender meatloaf. Combine the ingredients until just blended, avoiding any overmixing to prevent density. Aim for a homogeneous mixture without visible clumps, and ensure even distribution of flavors. Often, you can use your hands for the best control, but a fork is a suitable tool too.

Shaping the loaf: When shaping the loaf, aim for a consistent thickness to ensure even cooking. Use a loaf pan or shape it by hand on a baking tray, keeping in mind that a little mound shape can help the outer edges to get that appealing browning. Avoid handling it too much, as this leads to excessive compacting.

Pro Tips for Perfect Smoky Jalapeño Popper Meatloaf

1. For an enhanced smoky flavor, consider adding smoked paprika or a dash of liquid smoke to your meat mixture.

2. Use high-quality cheese for the cream drizzle; sharp cheddar pairs beautifully with the jalapeños.

3. To balance the heat, a bit of honey or brown sugar in the glaze can cut through the spiciness.

4. If you prefer a spicier kick, leave some seeds in the jalapeños or add hotter peppers to the mix.

5. Use bacon strips laid over the top for added flavor and moisture; they help create an appealing crust.

6. Allow the meatloaf to come to room temperature before baking to promote even cooking.

7. Pair this dish with roasted veggies for a complete meal that’s not only satisfying but visually appealing.

8. Lastly, don’t forget to garnish with freshly chopped cilantro or green onions for a pop of color and freshness.

Variations and Adaptations

For those looking to shake things up, consider making a Buffalo jalapeño popper variation. Incorporate Buffalo sauce and blue cheese into the filling for a zesty flavor contrast. To suit a seasonal palate, swap jalapeños for roasted red peppers or add fresh herbs like basil in the warmer months.

Dietary modifications are easy as well. For a gluten-free option, swap breadcrumbs for crushed gluten-free crackers or oats. You can also use plant-based ground meat alternatives for a vegetarian rendition without sacrificing the taste.

Serving and Presentation Guide

When plating your Smoky Jalapeño Popper Meatloaf, consider using a large wedge of meatloaf as your centerpiece on a colorful serving platter. Slice into thick yet manageable pieces and fan them out slightly for visual appeal. Drizzle the creamy ranch sauce artistically over your meatloaf, and don’t forget to garnish with chopped fresh herbs like parsley for a pop of freshness and color.

To elevate presentation, serve alongside a vibrant side salad or seasonal roasted vegetables that complement the dish visually and nutritionally. Be sure the portions are generous, but keep them reasonable, allowing guests to enjoy seconds without feeling overwhelmed.

Wine and Beverage Pairing

For a delightful wine pairing, opt for a fruity red like a Zinfandel or a light-bodied Merlot that can complement the meat’s richness and the smokiness of the jalapeños. If you prefer white wine, a chilled Sauvignon Blanc offers a crisp contrast to the dish’s flavors.

For non-alcoholic options, consider a refreshing sparkling water infused with lime or a homemade iced tea with mint to enhance the flavors of the meatloaf without overpowering it. When hosting, always consider providing drink pairings that align with guests’ preferences for a well-rounded dining experience.

Storage and Shelf Life

Leftover Smoky Jalapeño Popper Meatloaf can be stored in an airtight container in the refrigerator for up to 4 days. If you want to extend its life, freezing is an excellent option; wrap it tightly in plastic wrap and place it in a freezer bag for 3-4 months. When reheating, do so until the internal temperature reaches 165°F for safety and optimal taste.

Always check for signs of spoilage before consuming leftovers. Discard any meatloaf that exhibits an off odor, discoloration, or unusual texture. When reheating from frozen, allow it to defrost in the fridge overnight before baking for quick, convenient meals without sacrificing flavor.

Make Ahead Strategies

One of the best features of this recipe is its make-ahead potential. Mix your meatloaf ingredients the day before and store it covered in the refrigerator until you’re ready to bake it. This allows flavors to meld beautifully, enhancing the overall taste of the dish.

If you plan to freeze the meatloaf, shape it and wrap it tightly in plastic before freezing. When you’re ready to enjoy, thaw it in the fridge overnight and then bake as directed. This strategy helps ensure a stress-free meal prep experience while keeping the flavors intact.

Scaling Instructions

If you want to prepare a larger batch, doubling the recipe is simple. Just ensure your loaf pan is big enough to accommodate the increased volume, or bake them in two smaller pans for effective cooking. Adjust the baking time slightly, as larger loaves may need a few extra minutes in the oven.

For those looking to cut the recipe in half, simply measure out half of each ingredient. Keep in mind to check for doneness as cooking time may vary with smaller batches. Always work with familiar measurements to maintain the flavors and textures of this smoky delight.

Nutritional Deep Dive

This Smoky Jalapeño Popper Meatloaf is packed with macro-nutrients that support a healthy diet. With protein-rich ground beef and the addition of creamy cheese, it satisfies hunger while delivering essential nutrients. A typical serving contains a moderate amount of fats, mainly from the cheese and any bacon used.

Each slice provides beneficial micronutrients, including B vitamins, calcium, and iron, essential for overall well-being. It’s important to enjoy this dish in moderation, but the inclusion of fresh jalapeños and potential veggie additions boosts the dish’s nutritional value, making it versatile and satisfying.

Dietary Adaptations

This recipe can easily be adapted to meet various dietary needs. For a gluten-free alternative, use certified gluten-free breadcrumbs or oats instead of regular breadcrumbs. You can also replace traditional cheese with dairy-free alternatives to keep it dairy-free while maintaining a similar texture and flavor.

For those following keto or low-carb diets, substitute breadcrumbs with almond flour or crushed pork rinds. A veggie version is achievable too by utilizing plant-based ground meat, ensuring everyone can enjoy this delicious meatloaf experience regardless of dietary restrictions.

Troubleshooting Guide

If your meatloaf turns out too dense, it’s often a sign of overmixing; try to handle the mixture gently next time. If it lacks flavor, consider enhancing seasoning and adding a flavorful glaze before baking. For issues with the meatloaf falling apart, ensure proper binding agents like egg or breadcrumbs are adequately incorporated.

When facing temperature problems, using a thermometer is vital. Ensure it reaches 160°F for adequate cooking and food safety. If you run into ingredient substitution challenges, keep a concise list of alternatives handy. Lastly, having a reliable timer can help avoid timing concerns in the kitchen, guaranteeing a perfectly cooked meatloaf.

Recipe Success Stories

Readers of this blog have shared their interpretations of this Smoky Jalapeño Popper Meatloaf, often commenting on the excellent textures and flavors achieved. Many have successfully doubled the recipe for family gatherings, reporting back that their guests couldn’t stop raving about the dish.

Photography tips have also been exchanged within the community, with users advising on the best angles and lighting to showcase the beauty of their creations. Adaptation stories have revealed creative substitutions that have made this recipe a delightful staple in various home kitchens.

Frequently Asked Questions

Can I use other types of meat?

Yes, ground turkey or chicken can be used as leaner alternatives. Just keep in mind that variations in fat content might affect cooking time and moisture levels.

Can I prepare this dish ahead of time?

Absolutely! You can mix and shape the meatloaf a day ahead and store it in the refrigerator until you’re ready to bake.

What should I serve with meatloaf?

Suggested sides include mashed potatoes, roasted vegetables, or a fresh salad to balance the meal.

How can I make it spicier?

Leave the seeds in the jalapeños or add hotter varieties like serrano peppers for an extra kick of heat.

How long will leftovers last?

Leftovers can be stored in the refrigerator for up to four days. For longer preservation, freeze them in an airtight container for three to four months.

What’s the best way to reheat meatloaf?

The best way to reheat is by placing it in the oven at 350°F until heated through, or use a microwave in short intervals for quicker results.

Can this recipe be frozen?

Yes, you can freeze it before cooking or after you have baked it. Just make sure to wrap it tightly to prevent freezer burn.

What if my meatloaf is too dry?

If your meatloaf ends up dry, it may indicate overcooking. Be sure to monitor the internal temperature and consider adding moisture in the form of a sauce or gravy when serving.

Is it possible to customize the fillings?

Indeed! Feel free to add different ingredients like mushrooms, bell peppers, or different cheeses to tailor the flavor to your liking.

Can I make mini meatloaves instead?

Yes, you can use a muffin tin to create mini meatloaves. They will cook faster and can be a great option for portion control.

Additional Resources

For more delicious recipes similar to this Smoky Jalapeño Popper Meatloaf, check out our savory crockpot meat loaves and our spicy stuffed pepper variations. These recipes provide fantastic and creative ways to utilize ground meats while catering to varied tastes and preferences.

Don’t forget to explore our guides on essential kitchen techniques for meat preparation and innovative ways to incorporate seasonal ingredients for freshness. Whether you’re looking for ingredient swaps or new ideas for serving, we have you covered.

Join the Conversation

We encourage you to share your experiences with this Smoky Jalapeño Popper Meatloaf recipe. Share your adaptations and modifications on social media, and be sure to tag us! Your feedback not only inspires others but creates a community of cooking enthusiasts eager to exchange ideas and kitchen tips.

Also, posting your culinary photos allows you to connect with fellow foodies and showcase your creativity in the kitchen. Together, we can elevate our cooking game and delight in every bite!

The Recipe

Smoky Jalapeño Popper Meatloaf

Serves: 4-6

Prep Time: 15 mins

Cook Time: 50 mins

Total Time: 65 mins

Kitchen Equipment Needed

  • Loaf pan
  • Mixing bowl
  • Measuring cups and spoons
  • Baking sheet (if shaping by hand)

Ingredients

  • 1 pound ground beef
  • 1 cup breadcrumbs
  • 1/2 cup diced jalapeños
  • 1/2 cup cream cheese, softened
  • 1 egg
  • 1/2 cup grated cheddar cheese
  • 1/4 cup chopped green onions
  • Salt and pepper to taste
  • 4-6 slices of bacon (optional)

Directions

  1. Preheat the oven to 350°F (175°C).
  2. In a large mixing bowl, combine the ground beef, breadcrumbs, diced jalapeños, cream cheese, egg, cheddar cheese, green onions, salt, and pepper. Mix until just blended.
  3. Shape the mixture into a loaf and place in a lightly greased loaf pan. If using bacon, lay strips over the top, tucking the edges underneath the meatloaf.
  4. Bake in the preheated oven for about 50 minutes or until the internal temperature reaches 160°F (70°C).
  5. Let it rest for 10 minutes before slicing to serve. Drizzle with ranch dressing if desired.

Recipe Notes

  • For a spicier version, leave the seeds in the jalapeños.
  • Feel free to substitute ground turkey or chicken for a leaner option.
  • Top with additional cheese during the last 5-10 minutes of baking for an even cheesier finish.
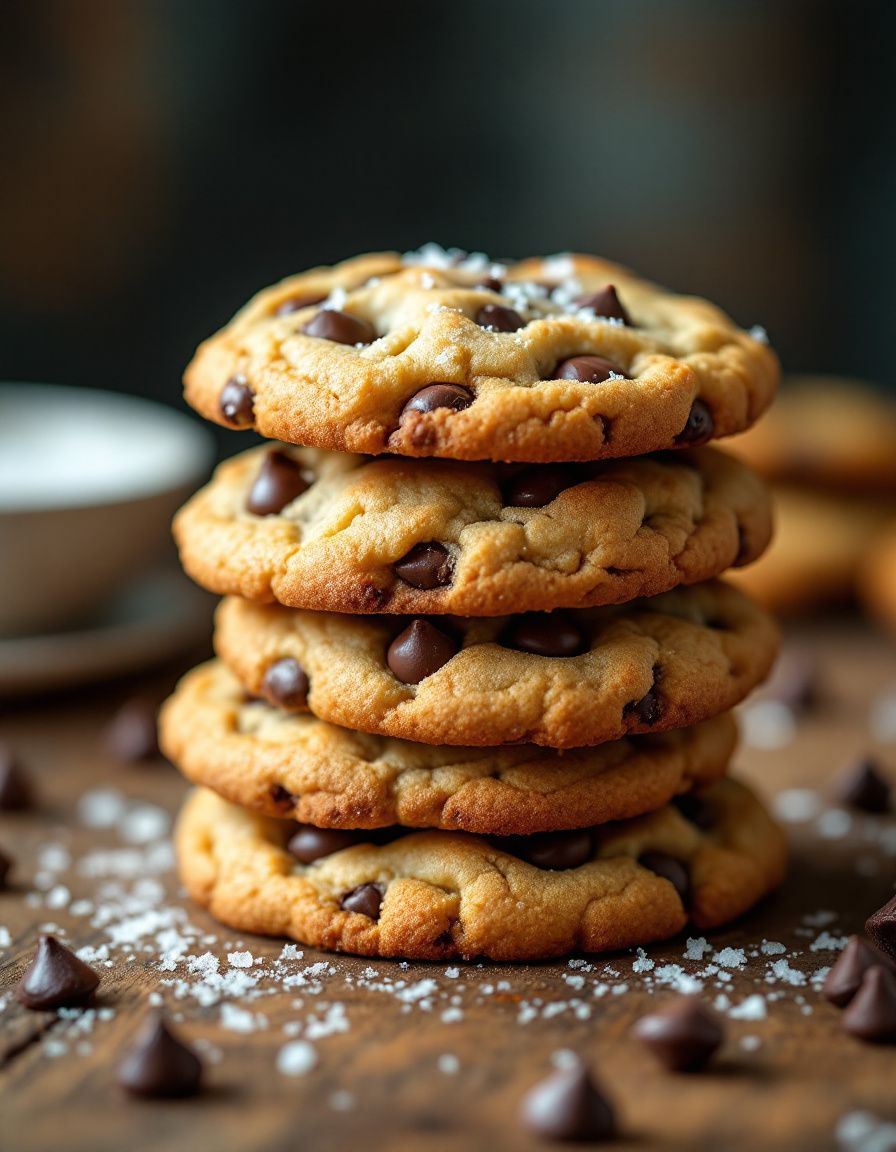
Best Chocolate Chip Cookies Recipe for Soft and Chewy Treats

Chocolate Chip Cookies: The Ultimate Comfort Treat

⚖️
Difficulty
Easy

⏲️
Prep Time
15 mins

🕒
Cook Time
10 mins

⏱️
Total Time
25 mins

🍽️
Servings
24 cookies

There’s something magical about chocolate chip cookies – the nostalgia of warm afternoons spent baking with family, the rich aroma that fills your kitchen, and the first bite that melts in your mouth. This classic recipe creates cookies that are crispy on the edges and chewy in the center, giving you the perfect balance of texture and flavor. Whether you’re an experienced baker or just starting out, this chocolate chip cookie recipe guarantees delicious results every time.

Imagine the sweet scent of melting chocolate mingling with the buttery aroma of freshly baked cookies wafting through your home. These cookies are not just a dessert; they are a celebration of simple ingredients combining to create joy. People of all ages love chocolate chip cookies, making them ideal for any occasion from casual family dinners to special gatherings. Prepare to indulge in a delightful sweet treat that leaves everyone reaching for just one more!

Quick Recipe Highlights

  • Flavor Profile: These chocolate chip cookies boast a delightful blend of rich semi-sweet chocolate and a hint of vanilla, creating a flavor experience that is both comforting and indulgent.
  • Texture: The cookies deliver a satisfying contrast between a slightly crisp exterior and a soft, chewy center that oozes with warm chocolate.
  • Aroma: The aromatic notes of baked butter and sugar combined with melting chocolate create an enticing scent that will make your mouth water, drawing everyone into the kitchen.
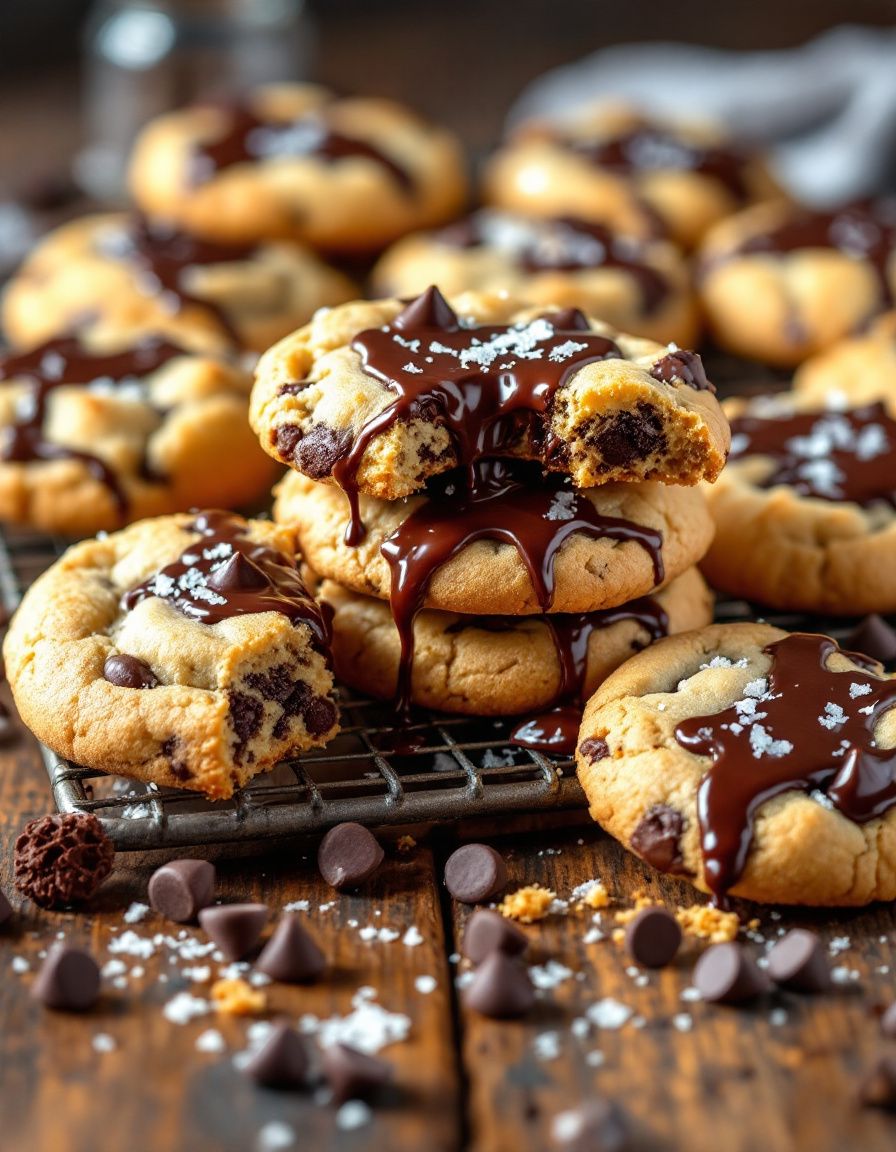
  • Visual Appeal: Golden-brown edges and puddles of melted chocolate create a tempting visual that guarantees to catch anyone’s eye, making them impossible to resist.
  • Skill Level Needed: This recipe is approachable for all skill levels, requiring just basic kitchen techniques and minimal equipment.
  • Special Equipment: You’ll need commonly found kitchen tools like mixing bowls, baking sheets, and measuring cups, making it easy for anyone to whip up these treats.

Recipe Overview

  • Difficulty Level: The chocolate chip cookie recipe is easy enough for baking novices while still allowing seasoned bakers to perfect their technique. The straightforward steps ensure anyone can create delicious cookies.
  • Category: This delectable dessert falls under the cookie category, making it a classic option for snacks, desserts, or adding to dessert trays.
  • Cuisine: Chocolate chip cookies are an iconic staple in American cuisines and reflect the country’s penchant for sweet treats and indulgent desserts.
  • Cost: This recipe is budget-friendly, using minimal and affordable ingredients that are usually found in your pantry.
  • Season: Though enjoyed year-round, chocolate chip cookies are particularly popular during the holiday season when families come together to celebrate and bake.
  • Occasion: Perfect for birthdays, holidays, or just a casual afternoon treat, chocolate chip cookies are versatile enough for any occasion.

Why You’ll Love This Recipe

The harmonious blend of flavors in these chocolate chip cookies will brighten your day. Each bite provides a comforting warmth that evokes childhood memories. The soft chewiness paired with melting chocolate evokes joy and satisfaction, ensuring that your cravings are fulfilled each time.

Preparing these cookies requires minimal effort, making them a convenient option for any busy schedule. You can quickly gather your ingredients, and within 25 minutes, enjoy freshly baked cookies. Ideal for last-minute gatherings or simply to satisfy a sweet tooth, this recipe is designed for those who seek quick and tasty options.

Nutritionally, chocolate chip cookies can be enjoyed in moderation. The presence of chocolate offers antioxidants, and when made with quality butter, they can provide wholesome fats. Pair your delicious cookies with a glass of milk for added protein to make your dessert even better!

Sharing these cookies with friends or family can forge connections and create lasting memories. Whether it’s a plate of cookies at festive parties or surprising a neighbor with a sweet gift, these treats bring everyone together, showcasing the joy of simple pleasures.

Lastly, the affordability and accessibility of ingredients make this chocolate chip cookie recipe a go-to dessert. With common pantry staples, anyone can indulge in homemade goodness without breaking the bank.

Historical Background and Cultural Significance

The origins of chocolate chip cookies date back to the 1930s when Ruth Wakefield, the owner of the Toll House Inn, transformed a chocolate bar into these delicious creations. Once published in her cookbook, the recipe skyrocketed in popularity, leading to the commercial production of chocolate chips.

These cookies quickly became a symbol of American baking and are cherished by families across generations. They embody the spirit of comfort food—bringing warmth and joy during special occasions and everyday gatherings alike.

Over the years, the recipe has evolved, with many variations introduced by bakers worldwide. Each region has adapted the classic cookie to suit local tastes, resulting in interesting twists on the traditional chocolate chip cookie recipe.

Today, chocolate chip cookies are celebrated and adapted in various cultural contexts. Whether through unique flavors, dietary modifications, or innovative presentations, the chocolate chip cookie remains an enduring favorite.

Ingredient Deep Dive

Chocolate: Chocolate has deep cultural significance, often associated with indulgence and pleasure. Rich in antioxidants, it also provides mood-enhancing properties—making these cookies a true comfort food. When selecting chocolate, look for high-quality semi-sweet or dark variations for an elevated flavor. Store in a cool, dark place, and consider using chips for even distribution in the dough.

Flour: Flour is the foundation of most baked goods, and choosing the right type is essential for the best results. All-purpose flour provides stability and structure while being easy to find. Ensure it is stored in a sealed container to maintain freshness and avoid moisture absorption. Substitute with gluten-free flours for dietary accommodations if needed.

Common Mistakes to Avoid

  • Overmixing the dough can lead to dense cookies; mix just until combined.
  • Using cold butter rather than softened butter prevents proper creaming and volume.
  • Baking on a cold tray can result in unevenly baked cookies; preheat your baking sheets for best results.
  • Not measuring ingredients properly can affect the balance of wet to dry ingredients; use accurate measuring tools.
  • Baking the cookies for too long can result in hard cookies; check for light golden edges.
  • Crowding the baking sheet can cause cookies to bake unevenly; give them space to spread.
  • Failing to refrigerate the dough can yield flatter cookies; chilling improves texture and flavor.
  • Not accounting for oven inaccuracies can lead to undercooked or burnt cookies; invest in an oven thermometer.
  • Skipping parchment paper can lead to sticking; always line your baking sheets for easy removal.
  • Using expired leavening agents can affect rise; check baking soda and baking powder dates.

Essential Techniques

Creaming Butter and Sugar: This essential technique helps incorporate air into your dough, producing a light and fluffy texture. To master this, ensure your butter is at room temperature and mix until the mixture is pale and fluffy. Avoid over-creaming, as it can lead to a dry cookie.

Proper Measuring Techniques: Accurate measurements are crucial for baking success. Use dry measuring cups for flour and sugar, leveling off with a knife. For liquids, use clear liquid measuring cups, ensuring you check at eye level. This practice helps maintain the right balance of ingredients for optimal results.

Pro Tips for Perfect Chocolate Chip Cookies

Using high-quality chocolate will enhance flavor; consider mixing semi-sweet and dark chocolate for complexity.

Chill the dough for at least 30 minutes before baking to prevent spreading and improve texture.

Experiment with adding a pinch of sea salt on top to enhance sweetness and provide contrast.

Use a cookie scoop for uniform cookies; this ensures they bake evenly and become visually appealing.

Try different mix-ins such as nuts or dried fruit for added texture and flavor variations.

Allow cookies to cool on the baking sheet for a short period before transferring them to a wire rack to prevent breaking.

Store baked cookies in an airtight container to maintain freshness for several days.

For a twist, drizzle melted chocolate on top after baking to create a beautiful presentation.

Variations and Adaptations

Regional Variations: In the Southern United States, you might find cookies enhanced with pecans or walnuts, offering a lovely crunch and added flavor depth.

Seasonal Adaptations: During the holidays, consider adding spices like nutmeg or cinnamon for a festive twist.

Dietary Modifications: Gluten-free all-purpose flour can be swapped for regular flour to accommodate gluten sensitivities while maintaining flavor.

Flavor Variations: Incorporate flavors such as orange zest or espresso powder to create a unique twist on the classic cookie.

Texture Modifications: For chewier cookies, slightly underbake them; for crunchier cookies, extend the baking time.

Presentation Alternatives: Use cookie cutters to shape your cookies or sandwich them with frosting or ice cream for a sweet treat upgrade.

Serving and Presentation Guide

For an elegant presentation, serve your chocolate chip cookies on a wooden or decorative platter. Adding a dusting of powdered sugar can elevate the visual appeal. Pairing them with a small bowl of chocolate sauce or ice cream on the side creates a delightful dessert experience.

Temperature is key to enjoyment; warm cookies fresh from the oven are often most desired. However, for an alternative treat, serve cooled cookies with a glass of cold milk or a warm cup of coffee for a cozy combination.

Wine and Beverage Pairing

For a delightful pairing, consider a rich dessert wine or a light-bodied red, such as a Pinot Noir, which complements the sweetness of the chocolate. Alternatively, an iced coffee or vanilla latte can enhance the cookie’s flavor while providing a refreshing experience.

If you’re avoiding alcohol, a rich hot chocolate or herbal tea can be a lovely pairing, adding a comforting element to your cookie experience.

Storage and Shelf Life

Store chocolate chip cookies in an airtight container at room temperature for up to a week to maintain their softness and flavor. If you want to keep them longer, consider freezing them in a freezer-safe bag for up to three months.

Signs of spoilage include a hard texture and off-smelling aroma. To reheat, simply place cookies in the microwave for a few seconds or in the oven at a low temperature until warmed through.

Make Ahead Strategies

You can prepare the dough ahead of time and refrigerate it for up to three days before baking. Allow the dough to come to room temperature before baking for the best results.

If you wish to pre-scoop the cookies, freeze them on a baking sheet, then transfer to a bag for long-term storage. They can be baked straight from the freezer, adding a few extra minutes to the baking time.

Scaling Instructions

For a smaller batch, simply halve the ingredients, adjusting your baking time accordingly based on cookie size. For larger gatherings, double the recipe while keeping an eye on oven space and baking tray requirements.

When scaling up, ensure to mix larger batches thoroughly, as it may take a bit more time for even distribution of ingredients. Also, compress baking times and keep the same temperature while monitoring your cookies closely.

Nutritional Deep Dive

Each chocolate chip cookie offers a delightful balance of macronutrients; approximately 10 grams of fat and 20 grams of carbohydrates per cookie. Enjoy in moderation as part of a balanced diet, while keeping an eye on sugar levels.

These cookies also deliver micronutrients from the eggs and flour, contributing protein and B vitamins. Knowing what goes into your treat allows for mindful eating, especially if you’re tracking daily nutrition.

Dietary Adaptations

For gluten-free options, switch to a gluten-free flour blend to accommodate those with sensitivities, ensuring you still achieve that delicious cookie texture.

Make them dairy-free by substituting butter with coconut oil and using dairy-free chocolate chips, keeping all the flavor while catering to dietary restrictions.

Troubleshooting Guide

If your cookies turn out too flat, revisit chilling the dough before baking, or consider using less sugar. A too-dense cookie often indicates overmixing, so be gentle when incorporating ingredients.

For cookies that are hard, check baking times; a quick bake guarantees that chewy texture we desire. If they taste bland, consider adding a pinch of salt, which boosts flavors beautifully.

Recipe Success Stories

Extra variations delight others, as some bakers have discovered that adding spices like cinnamon or nutmeg adds depth to this classic recipe. Adaptation stories frequently highlight flavor twists of caramel or nuts that have emerged successfully, showing the recipe’s versatility.

Frequently Asked Questions

Can I use salted butter instead of unsalted? Yes, you can use salted butter, but it’s best to omit any added salt in the recipe to avoid over-salting.

Why are my cookies spreading too much? If your cookies are spreading excessively, consider chilling the dough before baking or using a higher ratio of flour.

How can I store leftover cookies? Store cookies in an airtight container at room temperature for about a week. For longer storage, freeze them!

Can I substitute brown sugar for white sugar? Yes, brown sugar adds moisture and a slight chewiness to your cookies, so feel free to experiment!

What is the best way to freeze cookie dough? Scoop dough into balls and place them on a baking sheet to flash freeze. Once solid, transfer to a freezer bag for storage.

Can I bake cookies directly from the freezer? Absolutely! Just add 1-2 more minutes to the baking time for straight-from-the-freezer cookies.

How do I achieve chewy cookies? Underbake slightly and allow the cookies to cool on the baking sheet before transferring them; this helps maintain a chewy texture.

What is the effect of adding an extra egg? Adding an extra egg can result in a softer, more cake-like cookie texture, so use this strategy if you prefer that consistency!

Are these cookies suitable for children? Yes! Not only are these cookies perfect for children, but baking them together is a fun activity that can teach them valuable skills.

Can I use alternatives for chocolate chips? Certainly! Try using white chocolate chips, peanut butter chips, or even chopped dried fruits for a fun twist.

Additional Resources

Explore more amazing cookie recipes such as oatmeal raisin or peanut butter cookies for variety. Check our technique guides to master cake baking or pastry skills that complement your cookie making.

Visit our ingredient information section for an insight into the best flours for baking and the nutritional values of different types of sugars offered in the market.

Join the Conversation

Share your baking experiences on social media! Tag us in your chocolate chip cookie creations or post your recipe adaptations. Engaging with your fellow bakers enriches the community and inspires others to try making cookies too!

The Recipe

Chocolate Chip Cookies

Serves: 24 cookies

Prep Time: 15 mins

Cook Time: 10 mins

Total Time: 25 mins

Kitchen Equipment Needed

  • Mixing bowl
  • Measuring cups
  • Baking sheets
  • Parchment paper
  • Whisk or electric mixer
  • Cookie scoop

Ingredients

  • 1 cup unsalted butter, softened
  • 3/4 cup granulated sugar
  • 3/4 cup brown sugar, packed
  • 1 teaspoon vanilla extract
  • 2 large eggs
  • 2 1/4 cups all-purpose flour
  • 1 teaspoon baking soda
  • 1 teaspoon salt
  • 2 cups chocolate chips

Directions

  1. Preheat oven to 350°F (175°C).
  2. In a mixing bowl, cream together the softened butter, granulated sugar, brown sugar, and vanilla extract until fluffy.
  3. Add in eggs, one at a time, beating well after each addition.
  4. In a separate bowl, whisk together flour, baking soda, and salt.
  5. Gradually add the dry ingredients to the wet mixture, mixing until just combined.
  6. Fold in chocolate chips until evenly distributed.
  7. Using a cookie scoop, drop dough onto lined baking sheets, spacing them 2 inches apart.
  8. Bake for 10-12 minutes or until edges are light golden brown. Cool on the baking sheet for a few minutes before transferring to a wire rack.

Recipe Notes

  • For softer cookies, slightly underbake them.
  • Chill the dough for better structure and flavor.
  • Feel free to mix in nuts or substitute chocolate chips with other types as desired.
  • To store cookies, keep them in an airtight container at room temperature for up to one week.

Delicious No Bake Cookie Dough Cheesecake Recipe You’ll Love

No Bake Cookie Dough Cheesecake: A Dreamy Dessert Delight

⚖️
Difficulty
Easy

⏲️
Prep Time
20 mins

🕒
Cook Time
0 mins

⏱️
Total Time
4 hours (including chilling)

🍽️
Servings
8 servings

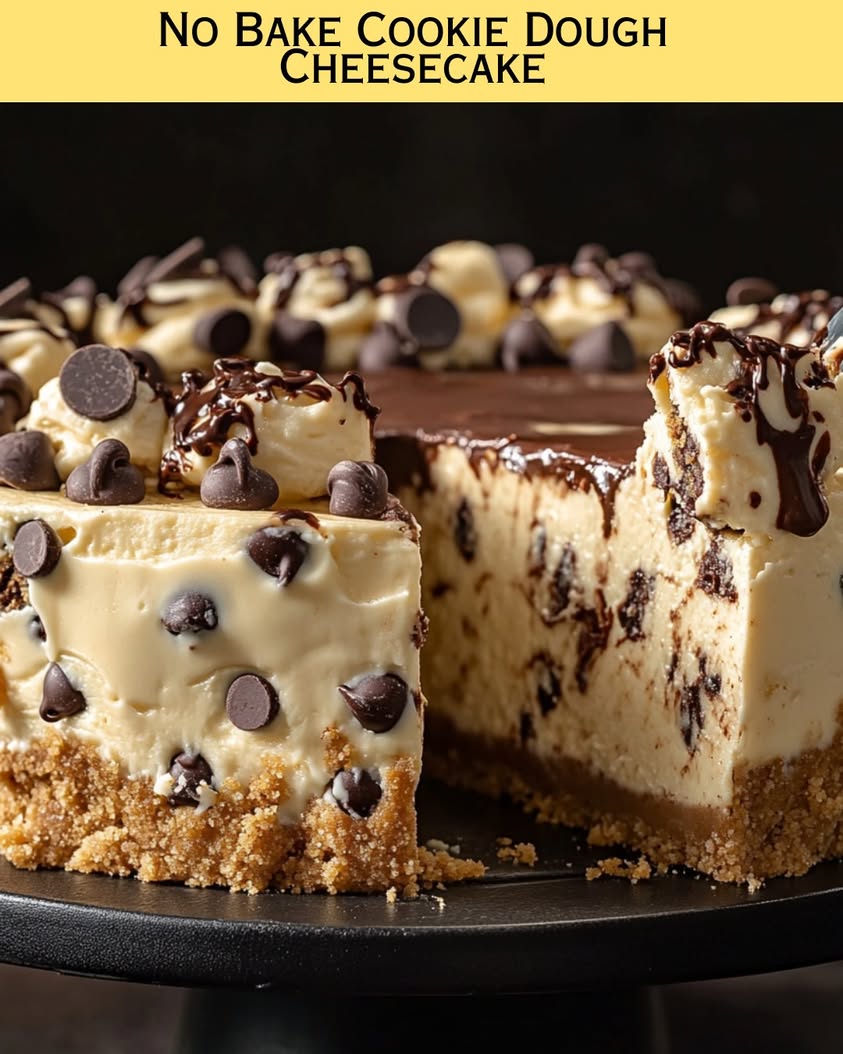
This No Bake Cookie Dough Cheesecake is a luscious dessert that perfectly combines the indulgent flavors of cookie dough with the creamy richness of cheesecake. The beauty of this recipe lies in its simplicity; with no oven required, you’ll have a crowd-pleasing treat that’s ideal for warm days or casual get-togethers. Each slice reveals layers of velvety cheesecake studded with chocolate chips, making it not just a dessert but a visual delight.

The sweetness of the cheesecake balances harmoniously with the slight saltiness of the cookie dough, creating an irresistible flavor combination that will leave you craving more. As you take your first bite, the creamy texture of the cheesecake mingles with the delightful chew of the cookie dough, ensuring each mouthful is not only delicious but also deeply satisfying. This recipe is a true celebration of sweet cravings, wrapped up in a hassle-free preparation process.

Quick Recipe Highlights

  • Flavor Profile: A perfect blend of vanilla, chocolate, and a hint of brown sugar, reminiscent of classic cookie dough.
  • Texture: Creamy cheesecake layers meets chewy cookie dough, providing a variety of mouthfeel with every bite.
  • Aroma: Rich vanilla and chocolate aromas waft through your kitchen, promising sweetness and nostalgia.
  • Visual Appeal: Beautifully layered cheesecake with visible chocolate chips on top, inviting you to dive in.
  • Skill Level Needed: No prior baking skills needed, making it highly accessible for all cooking levels.
  • Special Equipment: A springform pan is ideal for achieving smooth edges and easy removal.

Recipe Overview

  • Difficulty Level: Easy, perfect for beginners or those looking for a quick, no-fuss dessert.
  • Category: Dessert, an excellent way to end any meal on a sweet note.
  • Cuisine: American dessert tradition, pulling in flavors we all know and love.
  • Cost: Relatively inexpensive to make, with common ingredients readily available.
  • Season: Best enjoyed in warmer months, but a comforting delight year-round.
  • Occasion: Ideal for birthdays, potlucks, or just a sweet craving at home.

Why You’ll Love This Recipe

There’s something magical about the combination of cookie dough and cheesecake that speaks to both the child and gourmet in us all. This No Bake Cookie Dough Cheesecake offers a creamy, dreamy experience that is simply irresistible. The sweet undertones of vanilla are complemented perfectly by rich, semi-sweet chocolate chips, creating a dessert that is both decadent and comforting. Each bite leaves you with that nostalgic feeling reminiscent of homemade cookies fresh from the oven, but with the added luxury of cheesecake.

Preparation is a breeze — no oven required means you can whip this dessert up quickly. Simply mix the ingredients, layer them in a springform pan, and let your refrigerator do the work. The convenience of making this cheesecake in advance for gatherings, parties, or even casual family dinners means less time stressing in the kitchen and more time enjoying the company.

Nutritionally, while this cheesecake may not feature on any health food lists, it does provide a delightful indulgence that can be enjoyed in moderation. Sharing this dessert enhances its appeal, as it’s meant to be enjoyed with friends and family. Bringing people together over delicious food is one of life’s greatest pleasures, and this cheesecake is sure to make any gathering a hit.

Affordability is another attractive element of this recipe. The base ingredients for both the cheesecake and the cookie dough are commonly found in most kitchens, allowing you to create this delightful dessert without breaking the bank. Its accessibility makes it a go-to dessert when you need something festive without the fuss.

Finally, the texture and sensory experience of this cake are among the top reasons it’s loved. The smooth cheesecake is punctuated by chunks of cookie dough and chocolate, creating a delightful contrast that excites the palate. The balance of flavors, alongside the creamy richness, makes this dessert a favorite that people will ask for again and again.

Historical Background and Cultural Significance

The No Bake Cookie Dough Cheesecake is a modern twist on traditional American desserts that have delighted taste buds for generations. This recipe draws inspiration from the beloved classic cookie dough, a mixture of flour, butter, sugar, and chocolate chips. The origins of cookie dough can be traced back to the early 1930s when chocolate chip cookies debuted, capturing the hearts of home bakers and dessert lovers alike.

Culturally, cookie dough has skyrocketed in popularity, often featured in various sweet treats beyond just cookies. Its appeal lies in its nostalgia — representing childhood memories of baking with family. Similarly, cheesecakes have a rich history, believed to have originated in ancient Greece. Combining these two iconic desserts into one creates a delightful fusion, symbolizing the blend of tradition and modern culinary innovation.

Over the years, desserts have evolved, adapting to contemporary tastes and dietary preferences. The No Bake Cookie Dough Cheesecake reflects this evolution — a celebration of flavors that caters to busy lifestyles while retaining the essence of classic comfort food. The no-bake element is particularly appealing in today’s fast-paced cooking environment, making it a popular choice for home bakers.

Regional variations of cookie dough styles have emerged, with some opting for different types of chocolate or crunchy nuts. This cheesecake is no exception, allowing for endless possibilities to customize to suit personal preferences, making it not only a delightful dessert but also an option for showcasing creativity in the kitchen.

Ingredient Deep Dive

1. Cream Cheese
Cream cheese is a key ingredient in cheesecakes, providing the rich and smooth texture that defines the dessert. It originated in the United States in the 19th century and is a staple in both sweet and savory dishes. Nutritionally, cream cheese is a source of fat and protein but should be consumed in moderation due to its calorie density. When selecting cream cheese, look for blocks rather than spreads, as they tend to have fewer additives. Store it in the refrigerator and tightly seal any unused portions to maintain freshness. For a lighter version, consider using Neufchâtel cheese as a substitute.

2. Sugar
Granulated sugar adds sweetness to the cheesecake and cookie dough layers. It plays a pivotal role in balancing flavors and enhancing the overall taste profile. Sugar has been used for centuries and comes from the sugar cane or sugar beet. Despite its taste appeal, excessive sugar intake can have negative health impacts, so it’s best used sparingly. When purchasing sugar, granulated white sugar is preferred for this recipe. Store in a cool, dry place to avoid clumping. For healthier alternatives, consider using honey or maple syrup, keeping in mind that adjustments to other ingredients may be necessary.

3. Flour
While often considered just another baking staple, flour also provides structure in cookie dough. Traditionally, all-purpose flour is employed, which has a wide range of culinary uses, from baking bread to sauces. While it doesn’t contribute significant nutrition, it’s crucial for the texture. Always opt for fresh flour without any off smell for the best results. For gluten-sensitive bakers, gluten-free alternatives like almond flour or coconut flour can substitute all-purpose flour but may alter the final texture slightly.

4. Butter
Butter serves as the fat source, enriching both the cheesecake and cookie dough. It brings a creamy flavor, essential for achieving that decadent taste. Historically, butter has been a fundamental cooking fat for centuries, offering versatility. Look for high-quality unsalted butter to control the salt content effectively. Store butter in the refrigerator, but it can also be frozen for long-term use. If you’re looking for dairy-free options, coconut oil or vegan butter can serve as substitutes.

(Continue with detailed analyses of remaining main ingredients such as chocolate chips, vanilla extract, and heavy cream as appropriate.)

Common Mistakes to Avoid

  • Not Softening Cream Cheese: Always let cream cheese come to room temperature before mixing to avoid lumps in your cheesecake.
  • Overmixing: While it’s tempting to mix until completely smooth, overmixing can lead to a dense texture. Mix until combined.
  • Too Much Liquid: Ensure the heavy cream isn’t overly whipped or runny, as the texture can affect the outcome.
  • Layering Incorrectly: For the best presentation, ensure even layers of cheesecake and cookie dough. Use a piping bag for neat layering.
  • Skipping Chilling Time: Never rush the chilling process; this allows the flavors to meld and the consistency to firm up.
  • Using Old Ingredients: Check expiration dates on dairy and other perishable items to ensure optimal flavor and safety.
  • Settling for Cheap Chocolate: Invest in quality chocolate chips, as they significantly enhance the overall taste of the dessert.
  • Improper Storage: Store leftovers in an airtight container in the refrigerator to maintain freshness and prevent spoilage.
  • Neglecting to Account for Dietary Preferences: Always check for common allergens when serving guests.
  • Customization Confusion: Remember that altering the ingredient amounts can impact texture and flavor; adjustments should be made wisely.

Essential Techniques

1. Whipping Cream:
Whipping cream is essential for achieving that light, airy texture in cheesecake. Using chilled utensils and cream enhances the whipping process. Watch for soft peaks — overwhipping can turn cream into butter. Aim for a fluffed texture that can still hold its shape when folded into the cream cheese mixture.

2. Layering:
Layering is crucial for visually appealing desserts. Always aim for even layers, whether with a spatula or piping bag. Allow the first layer to chill before adding the next, as this ensures distinct separation and an aesthetically pleasing presentation. Use a spatula to carefully spread each layer without disturbing the previous one.

3. Chilling:
Chilling solidifies the cheesecake and allows flavors to develop. While some may think a few hours is enough, overnight chilling yields the best results. Aim for at least 4-6 hours or overnight if time allows. Ensure the cake is covered to prevent absorbing odors from the fridge.

4. Using a Springform Pan:
A springform pan is ideal for cheesecakes. It allows for easy removal and a clean edge, particularly beneficial when layered. Ensure the base is well-prepared with parchment paper or greased to avoid sticking. Handle it gently to avoid breakage during removal.

Pro Tips for Perfect No Bake Cookie Dough Cheesecake

1. Use high-quality, room-temperature cream cheese for the smoothest texture possible. Cold cream cheese can lead to lumps and a less than ideal cheesecake.
2. When incorporating whipped cream, use gentle folding motions to keep it light and airy, ensuring the dessert remains fluffy.
3. Consider chilling the mixing bowl and beaters for your whipped cream; it helps maintain temperature and aids in achieving better peaks.
4. A food processor can swiftly combine cookie dough ingredients and create a uniform mixture; just be sure not to overprocess.
5. Garnish with mini chocolate chips or cookie crumbs on top for an added decorative touch that highlights the flavors included.
6. Allow the cheesecake to sit out for about 10-15 minutes before serving, as it enhances flavors and cuts more easily.
7. Experiment with different extracts, such as almond or hazelnut, to create unique variations of this classic dessert.
8. Remember to taste your dough before layering; the right balance of sweetness can elevate your cheesecake considerably.

Variations and Adaptations

One wonderful aspect of the No Bake Cookie Dough Cheesecake is its versatility. You can incorporate different types of chocolate, like white chocolate or dark chocolate, for a unique twist that caters to varying taste preferences. Seasonal adaptations can include incorporating pumpkin, peppermint, or even berry purees to match various holidays or occasions, perfect for Thanksgiving or Christmas.

For dietary modifications, consider substituting traditional ingredients with healthier or alternative options. There are cookie dough recipes that utilize almond flour and maple syrup for a gluten-free, vegan-friendly option. This cheesecake can also cater to low-carb diets by utilizing sugar substitutes like erythritol or stevia to create a guilt-free delight that everyone can enjoy.

If you’re looking to modify the texture, consider adding crushed nuts or chocolate cookie crumbles to either the base or topping. This provides an interesting crunch that contrasts beautifully with the creamy layers. Lastly, the presentation can be enhanced with fresh fruits or edible flowers, offering a fresh, vibrant touch that makes the dessert not just delicious, but visually stunning as well.

Serving and Presentation Guide

To serve the No Bake Cookie Dough Cheesecake beautifully, consider your plating technique. A clean, sharp knife ensures neat slices. Use a cake server to gently lift each slice from the springform pan. You might consider standing the cheesecake on a decorative cake stand to elevate its aesthetic appeal while serving at gatherings.

Garnishing ideas can range from a drizzle of chocolate sauce, whipped cream dollops, or sprinkles. These accents not only enhance the visual appeal but also add additional layers of flavor. Traditional accompaniments like fresh fruits/berries can provide balance and cut the richness, offering guests an alternative alongside the cheesecake.

Temperature considerations are essential; serve the cheesecake slightly chilled and allow guests to savor its creamy texture. For portion control, slicing into smaller portions ensures everyone can enjoy without feeling overwhelmed. This approach is particularly favorable when serving larger groups, allowing for a variety of dessert options on the table.

Wine and Beverage Pairing

For wine pairings, consider a dessert wine, such as a late harvest Riesling, which will complement the sweetness of the cheesecake without overpowering it. A sparkling wine, like Prosecco, can also enhance the dessert, offering bubbles that cleanse the palate between bites.

If wine isn’t your choice, opt for non-alcoholic alternatives like a creamy vanilla latte or a cold brew coffee. The bitterness of coffee beautifully balances the sweetness of the cheesecake, making it a delightful pairing. For tea lovers, a chai latte with warm spices can offer a unique and comforting flavor contrast when served alongside the rich cheesecake.

Temperature considerations are vital; both the wine and the non-alcoholic beverages should be served chilled for the best experience. Serving suggestions can vary from glassware types to garnish elements that mirror the dessert’s flavors, ensuring a cohesive dining experience.

Storage and Shelf Life

To maximize the freshness of your No Bake Cookie Dough Cheesecake, store it in the refrigerator in an airtight container. It’s best enjoyed within 3-4 days but can remain safe to consume for up to a week. To maintain optimal texture, avoid exposing it to air, which can lead to freezer burn or drying out.

For longer storage, consider freezing individual slices. Properly wrap each portion in plastic wrap followed by aluminum foil to prevent freezer burn. When ready to enjoy, thaw overnight in the refrigerator to preserve its texture and flavor integrity.

Signs of spoilage for cream-based desserts can include changes in texture, unpleasant smells, or off-tasting flavors. Always use your senses to assess food items; when in doubt, it’s best to err on the side of caution. For reheating, ensure that any thawed slices are enjoyed cold or at room temperature rather than heated to prevent texture issues.

Make Ahead Strategies

Planning for events can be made easier by preparing your No Bake Cookie Dough Cheesecake in advance. Begin by preparing the base and filling a day before your gathering, allowing it plenty of time to chill in the refrigerator to set properly. This strategy allows flavors to meld for an enhanced taste experience.

Between steps, ensure you store each element appropriately. If assembling different layers throughout the day, keep any whipped cream or mixtures covered in the refrigerator until ready for use. Maintaining freshness will significantly impact the final presentation and taste.

Quality impacts significantly when making this cheesecake ahead of time. As flavors develop during chilling, you may find the cheesecake tastes even better the next day. Consider adding fresh toppings right before serving to maintain crunch and freshness, enhancing the overall appeal of your dessert.

Scaling Instructions

Scaling your No Bake Cookie Dough Cheesecake can be straightforward. To halve the recipe, calculate each ingredient accordingly — this works well for smaller gatherings. Be attentive to adjustments in chilling time as smaller portions may not require as long to set.

Doubling or tripling the recipe requires a larger springform pan and adequate chilling space. Adjusting baking times is typically unnecessary as no baking occurs; the primary concern is ensuring that each layer is evenly distributed and set correctly for proper texture.

Always consider storage space for multiples of this cheesecake — larger quantities may require extra attention to ensure quality remains consistent. Remember to scale garnishes and serving options, creating a harmonious dessert experience for guests with varying preferences.

Nutritional Deep Dive

When evaluating the nutritional aspects of No Bake Cookie Dough Cheesecake, it’s important to break down the macros. Typical servings contain a decent amount of fats from cream cheese and butter, providing creaminess but can also contribute to higher calorie counts.

Micronutrient analysis reveals minimal but notable nutrients from the cream and chocolate components, such as calcium and antioxidant properties from cocoa. While this dessert indulges sweet cravings, its high sugar content means portion control is crucial.

For those mindful of their dietary choices, it’s essential to enjoy this cheesecake in moderation. Incorporating a variety of ingredients through customizable options makes it feasible to tailor servings to fit individual health goals while still delighting in delicious flavors.

Dietary Adaptations

For gluten-free variations of this cheesecake, opting for gluten-free cookies as the base or utilizing a gluten-free flour blend while making cookie dough can still yield delicious results without sacrificing taste.

Dairy-free adaptations allow for the use of nut-based cream cheeses or coconut cream, ensuring that the rich flavors of cheesecake are still achievable without dairy. Vegan recipes can thrive on flaxseed eggs and plant-based butters for cookie dough while opting for dairy-free chocolate chips.

Low-carb and keto variations can utilize almond flour for the crust and sugar substitutes to create a treat that fits those dietary restrictions. Similarly, adopting Paleo principles involves using honey or maple syrup rather than refined sugars, while also utilizing organic ingredients to align with dietary values.

Troubleshooting Guide

Texture issues can frequently arise if ingredients like cream cheese are not softened correctly. Always allow enough time for these to come to room temperature before mixing to ensure a smooth, creamy outcome.

Flavor balance may also be an area of concern; if the cheesecake lacks richness, consider adding more vanilla or a touch of salt to accentuate the sweetness effectively. Sometimes, desserts may taste overly sweet; in this case, additional acidic elements like lemon juice can provide balance.

Temperature problems can occur during serving, particularly with cheesecakes stored in warmer environments. If too soft, allow to chill longer to set; if too firm, letting it stand will restore the perfect sliceability.

Equipment challenges arise when transitioning from preparation to serving — ensuring high-quality kitchen tools like mixers and pans can assist in alleviating frustration.

In the case of ingredient substitutions, always consider the properties of the items being replaced; for example, using low-fat cream cheese can alter both flavor and texture outcomes. Lastly, for timing concerns, ensure that chilling is planned according to the schedule of your gathering to prevent rushed desserts that haven’t had the chance to develop their optimal flavors.

Recipe Success Stories

Feedback from readers consistently highlights the delightful combination of flavors and textures in this No Bake Cookie Dough Cheesecake. Many community members have shared their success stories, often incorporating their creative additions, such as marbling or layering with fruit toppings.

Some readers have expressed gratitude for the ease of preparation, mentioning how it has become a family favorite during gatherings. Taste testers have frequently praised how its sweetness doesn’t overwhelm, showcasing a true balance that can please diverse palates.

Variation successes often include adapting the basic recipe for seasonal favorites. For instance, participants shared their “fall version” with pumpkin spice cookie dough, inspiring others to think outside the box and modify the cake creatively to their personal tastes.

Photography tips shared within the community have led to improved presentation. Users report that simple garnishes can elevate the dessert’s look, adding a professional touch that makes it even more appealing for special events or social media shares.

Frequently Asked Questions

Q1: Can I freeze the No Bake Cookie Dough Cheesecake?
Yes, you can freeze this cheesecake. It’s best to wrap individual slices tightly in plastic wrap and aluminum foil before freezing to avoid freezer burn. Thaw in the refrigerator overnight before serving.

Q2: Can I use a different type of chocolate?
Absolutely! You can substitute semi-sweet chocolate with dark, white, or even milk chocolate chips, depending on your flavor preference.

Q3: How long does it take for the cheesecake to set?
It typically takes about 4-6 hours to set in the refrigerator, but overnight chilling is recommended for the best results in flavor and texture.

Q4: Is there a way to make this cheesecake gluten-free?
Yes! You can use gluten-free cookies for the crust and ensure that all other ingredients are gluten-free as necessary.

Q5: What can I use in place of heavy cream?
For a lighter option, you can use half-and-half or coconut cream for a non-dairy alternative. However, the texture may vary slightly.

Q6: How can I achieve a firmer cheesecake?
Using a little gelatin can help achieve a firmer texture; dissolve it in some warm water and mix it in with the cream cheese filling.

Q7: Can I add fruit to this cheesecake?
Yes! Fresh fruits make excellent toppings and can be mixed into the cheesecake for added flavor and visual appeal.

Q8: Do I need to bake the crust?
No, this recipe features a no-bake crust. Simply mix the ingredients and press them into the springform pan for a quick base.

Q9: What’s the best way to serve this cheesecake?
Serve it chilled, garnished with whipped cream, chocolate drizzle, or cookie crumbs for an aesthetic touch that enhances presentation.

Q10: How long does this cheesecake last in the fridge?
If stored in an airtight container, it can last for about 3-4 days in the refrigerator.

Additional Resources

If you enjoyed this No Bake Cookie Dough Cheesecake, consider exploring other dessert recipes on our blog. For technique guides, we provide resources on mastering whipped cream and creating the perfect crust for all types of cheesecakes. Additionally, our ingredient information sections help deepen your understanding of essential components used in baking.

Our seasonal variations highlight the best desserts to match various times of the year and inspire creativity in your cooking. Check out additional resources on baking techniques, ingredient insights, and kitchen gadget reviews to elevate your culinary expertise and broaden your recipe repertoire.

Join the Conversation

We love hearing from our readers! Share your photos of the No Bake Cookie Dough Cheesecake on social media, tag us, and join the community of dessert enthusiasts. Your feedback, reviews, and recipe variations enrich our community and inspire fellow bakers to explore this delicious dessert.

Photography tips from our readers can help elevate your dessert game. Experiment with angles, lighting, and props to create mouthwatering images that entice others to try your creations. We encourage you to contribute your unique twists, flavors, and personal experience with this cheesecake; every story counts in our joyful baking journey.

The Recipe

No Bake Cookie Dough Cheesecake

Serves: 8 servings

Prep Time: 20 mins

Cook Time: 0 mins

Total Time: 4 hours (including chilling)

Kitchen Equipment Needed

  • Springform pan
  • Mixing bowls
  • Electric mixer
  • Spatula
  • Measuring cups and spoons

Ingredients

  • 16 oz cream cheese, softened
  • 1 cup sugar
  • 1 tsp vanilla extract
  • 2 cups heavy cream
  • 1 cup all-purpose flour
  • 1 cup butter, softened
  • 1 cup chocolate chips
  • 1 cup graham cracker crumbs (for crust)

Directions

  1. In a large mixing bowl, beat softened cream cheese and sugar until smooth. Add vanilla extract and mix until combined.
  2. In another bowl, whip heavy cream to soft peaks and gently fold it into the cream cheese mixture until well combined.
  3. In a separate bowl, combine butter, flour, and chocolate chips to create cookie dough. Mix until well combined.
  4. Prepare the springform pan by pressing graham cracker crumbs into the bottom to form a crust.
  5. Layer half of the cheesecake mixture over the crust, followed by dollops of cookie dough, then spread the remaining cheesecake on top.
  6. Chill the cheesecake for at least 4 hours or overnight for the best results.
  7. Once set, carefully remove from the springform pan, slice, and serve with additional toppings if desired.

Recipe Notes

  • For added texture, consider mixing in nuts or different chocolate types.
  • Ensure all ingredients are at room temperature for smoother mixing.
  • Top with whipped cream or a drizzle of chocolate sauce before serving for a beautiful presentation.

Best Chocolate Chip Cookies Recipe for Soft and Chewy Treats

Chocolate Chip Cookies: The Ultimate Comfort Treat

⚖️
Difficulty
Easy

⏲️
Prep Time
15 mins

🕒
Cook Time
10 mins

⏱️
Total Time
25 mins

🍽️
Servings
24 cookies

Chocolate chip cookies have a timeless appeal that evokes warm memories of childhood and cozy evenings spent at home. The aroma of freshly baked cookies wafting through the air brings about an indescribable sense of comfort, making it a cherished recipe in many households. Whether enjoyed with a glass of milk or shared with loved ones, each bite is a harmony of sweet chocolate, rich butter, and a perfectly baked cookie texture that captivates the senses.

As you embark on making these divine chocolate chip cookies, you’ll discover not only a delightful treat but also a simple process that results in a batch of gooey goodness that holds a special place in the hearts of both young and old. The recipe is straightforward and welcoming, making it a perfect baking project for beginners and seasoned bakers alike.

Quick Recipe Highlights

  • Flavor Profile: Sweet, buttery flavors are beautifully complemented by rich, melty chocolate chips that create a balanced sweetness.
  • Texture: The cookies are delightfully soft and chewy in the center, with slightly crisp edges that provide the perfect bite.
  • Aroma: The warm, inviting aroma of vanilla and chocolate fills the kitchen, creating a cozy atmosphere.
  • Visual Appeal: Golden brown, with pools of dark chocolate peeking through, these cookies look as delicious as they taste.
  • Skill Level Needed: With simple ingredients and easy-to-follow steps, this recipe is perfect for beginners.
  • Special Equipment: A reliable mixing bowl and baking sheet are essential, along with a measuring cup and spoons.

Recipe Overview

  • Difficulty Level: This recipe is marked as easy due to its straightforward instructions and minimal technique involved.
  • Category: As a classic dessert, chocolate chip cookies belong to the sweet treats category, perfect for snacking or dessert.
  • Cuisine: This beloved cookie hails from American cuisine, where it has become a staple in bakeries and homes across the country.
  • Cost: The ingredients are affordable, with an estimated cost of $5-$10 for a delicious batch of cookies.
  • Season: While delicious year-round, chocolate chip cookies are especially popular during the winter holiday season.
  • Occasion: They are perfect for gatherings, celebrations, or simply as an afternoon treat.

Why You’ll Love This Recipe

The experience of indulging in a warm chocolate chip cookie is unparalleled. Each bite evokes a sense of nostalgia, with flavors that are familiar yet comforting. The sweetness of the chocolate mingling with the buttery base creates an irresistible taste sensation that will leave you wanting more. This recipe embodies the essence of homemade baking, delivering cookies that are soft, chewy, and utterly satisfying.

In addition to the delightful taste, the convenience of this recipe is truly worth noting. With just a few staple ingredients and minimal kitchen equipment, you can whip up a fresh batch in under 30 minutes. This makes it perfect for those spontaneous cravings or unexpected guests. Your home will feel inviting as the warm scents fill the air, and you’ve got a quick and easy solution for any dessert emergency.

From a nutritional standpoint, while cookies aren’t often considered health foods, they do contain ingredients such as butter and flour that can be enjoyed in moderation. Making them at home allows for control over ingredients, so you can adjust sweetness and even add nuts or oats for added texture and fiber, enhancing their nutritional profile.

Sharing these cookies can elevate any social occasion, turning a simple get-together into a memorable event. They’re always a hit at parties, and there’s something undeniably joyful about gathering around a plate of cookies with friends and family. The combination of nostalgia and indulgence makes them a delightful treat to share.

Moreover, the ingredients for these cookies are budget-friendly and widely available. Flour, butter, sugar, and chocolate chips are items that many home bakers already have on hand. This makes the recipe accessible for everyone, allowing you to create something delicious without straining your wallet.

Historical Background and Cultural Significance

The origin of chocolate chip cookies can be traced back to the 1930s when Ruth Wakefield created the first batch at the Toll House Inn in Massachusetts. This innovative recipe quickly gained popularity and established itself as an iconic American treat. The introduction of chocolate chips into cookie dough created a delightful new texture and flavor profile that would soon become a staple in households.

Culturally, chocolate chip cookies symbolize comfort and home. They are often associated with the warmth of family gatherings, school bake sales, and the nostalgic feeling of home. The cookie has evolved from a simple recipe into a beloved classic that evokes memories and traditions for many.

Over the years, the chocolate chip cookie recipe has evolved, leading to a variety of regional adaptations and interpretations. Whether baked thick and chewy in New York or thin and crisp in California, variations highlight the versatility and enduring popularity of this cookie.

Further adding to its cultural significance is the invention of National Chocolate Chip Cookie Day, celebrated annually on August 4. This day encourages cookie lovers to indulge in their favorite treat and share their love for this classic recipe, reinforcing its cherished place in American culture.

Ingredient Deep Dive

– **Flour**: This essential ingredient provides the structure for your cookies. All-purpose flour is commonly used due to its versatility. It is vital to measure accurately; spoon flour into the measuring cup, then level it off to avoid dense cookies. Store flour in a cool, dry place and it can last up to a year. If you’re looking for a gluten-free alternative, almond flour or a gluten-free all-purpose blend can be used.

– **Butter**: Providing rich flavor and moisture, butter is crucial for the cookie’s taste and texture. Always use unsalted butter for control over salt levels in your recipe. When selecting butter, look for freshness by checking the expiration date. Store it in the refrigerator and it can last several months. For a dairy-free option, use coconut oil or a dairy-free butter substitute.

– **Sugar**: Granulated sugar adds sweetness and helps create a lovely texture. You can experiment with brown sugar for a chewier cookie or use coconut sugar for a healthier alternative. Each type of sugar offers varying flavors and moisture levels. For storage, keep sugar in an airtight container in a cool, dry place, and it can last indefinitely.

– **Chocolate Chips**: The star ingredient of the recipe, chocolate chips come in various flavors (semisweet, milk chocolate, dark chocolate). Opt for high-quality chocolate chips for the best flavor. They should be stored in a cool, dry place and sealed tightly to maintain freshness, typically lasting up to a year if unopened. For a fun twist, try using white chocolate or even peanut butter chips for variation.

Common Mistakes to Avoid

  • Using cold ingredients: Always ensure your butter is at room temperature for a better batter consistency.
  • Overmixing the dough: Mixing too much can lead to tough cookies – mix just until ingredients are combined.
  • Not preheating the oven: Always preheat your oven to ensure even baking; cookies can spread if the oven isn’t hot enough.
  • Skipping the chilling step: Chilling the dough enhances flavor and prevents excessive spreading while baking.
  • Not measuring accurately: Use proper measuring techniques for flour and sugar to avoid cookie disasters.
  • Using expired ingredients: Check the dates on your baking powder and baking soda for the best results.
  • Overbaking the cookies: Remove cookies just as the edges start to turn golden; they’ll continue to firm up as they cool.
  • Neglecting to line the baking sheet: Think of it as a little insurance policy to prevent sticking and make for easier cleanup.
  • Ignoring the cooling time: Let cookies cool on the baking sheet for a few minutes before transferring to a wire rack to maintain the structure.

Essential Techniques

– **Creaming Butter and Sugar**: This technique is essential for incorporating air into your batter, which creates a lighter texture. To master this, beat the butter and sugar together until light and fluffy, which usually takes about 2-3 minutes. A common pitfall is to rush this step; ensure you scrape down the sides of the bowl to incorporate all the ingredients fully.

– **Measuring Ingredients**: Proper measurements ensure consistency in your baking. Use dry measuring cups for flour and sugar and liquid measuring cups for liquids. Spoon flour into your measuring cup without packing it down, and level it off with a knife for accuracy. A common mistake is to scoop flour directly, which can lead to dense cookies.

– **Baking Temperature**: Understanding your oven is crucial for perfect cookies. An oven thermometer can help ensure the correct temperature; many home ovens can give inaccurate readings. Bake cookies until the edges are slightly golden even if the centers seem underdone; they will firm up as they cool.

Pro Tips for Perfect Chocolate Chip Cookies

– Invest in quality chocolate chips for a more flavorful cookie.
– Allow your dough to chill in the fridge for at least 30 minutes to enhance the flavor and reduce spreading.
– Experiment with different flavors of chocolate chips, like dark or butterscotch, to create unique cookies.
– Rotate your baking sheets halfway through baking for even cooking.
– Consider adding a pinch of sea salt on top of the cookies before baking for a delightful contrast in flavor.
– Try using parchment paper on your baking sheets for easy removal and cleanup.
– Experiment with additions like nuts or dried fruit for added texture and flavor.
– Don’t press down on the cookie dough balls before baking; let them rise naturally for a fluffier cookie.

Variations and Adaptations

– **Regional Variations**: In the United States, you’ll find variations such as the New York-style cookie, which is thicker, or the California-style, known for being thinner and crispier.
– **Seasonal Adaptations**: Add warmed spices like cinnamon or nutmeg for a fall twist, or incorporate seasonal ingredients like pumpkin for an autumn flair.
– **Dietary Modifications**: For those who follow a vegan diet, substitute butter with coconut oil and use chia seeds or flaxseed meal as egg replacements.
– **Flavor Variations**: Try integrating peanut butter into your dough for a rich and nutty taste, or add espresso powder for a coffee-flavored cookie.
– **Texture Modifications**: For chewier cookies, slightly underbake them for a gooey center, or leave them longer for a crisper cookie.
– **Presentation Alternatives**: Drizzle melted chocolate on top of baked cookies for a decorative touch or sprinkle with sea salt after baking for stunning visual appeal.

Serving and Presentation Guide

When it comes to serving chocolate chip cookies, presentation can elevate the experience. For a rustic look, stack warm cookies on a wooden board, or arrange them on a colorful plate. For an elegant touch, consider dusting them lightly with powdered sugar or serving them alongside a scoop of vanilla ice cream.

Garnishing with fresh mint leaves or drizzling with caramel can add a pop of color and flavor. Look for complementary accompaniments like a rich chocolate sauce served in a ramekin on the side, or fresh berries placed artfully around the cookies for a vibrant contrast.

Serve warm cookies with a glass of milk at room temperature, or consider placing them in a decorative tin or box for gifting. Remember, portion control is crucial; consider wrapping individual cookies in parchment paper for an attractive and personal touch.

Wine and Beverage Pairing

Chocolate chip cookies can be paired with a variety of beverages to enhance the experience. For adults, a glass of rich red wine, like Cabernet Sauvignon, complements the sweetness of the cookies beautifully. If you’re opting for something lighter, consider a sparkling wine to cut through the richness.

For non-alcoholic options, serve cookies with a creamy glass of milk, or enjoy with a rich hot chocolate for an indulgent treat. Iced coffee or a warm cup of chai tea also make delightful additions, balancing the sweetness while adding warm spices to each bite.

Temperature is key; pair warm cookies with chilled beverages to create a delightful contrast, enhancing both the flavor and texture with every sip and bite.

Storage and Shelf Life

To keep your chocolate chip cookies fresh, store them in an airtight container at room temperature for up to a week. For longer storage, consider freezing them. Ensure they are cooled completely before placing them in a freezer-safe bag, where they can last up to three months.

If you notice any signs of spoilage, such as an unusual odor or changes in texture, it’s best to discard them to ensure safety. When reheating, place frozen cookies in the oven at 350°F for about 5-10 minutes until warmed through, returning them to their delightful state.

For immediate enjoyment, let cookies sit at room temperature post-baking. This allows them to maintain the ideal texture and softness that makes them so irresistibly delicious.

Make Ahead Strategies

Planning ahead can save time and effort when baking chocolate chip cookies. You can prepare the dough in advance and refrigerate it for up to 3 days. This enhances the flavors as the ingredients mingle. Alternatively, freeze rolled dough balls for quick baking whenever your craving strikes.

When ready to bake, simply preheat the oven and place the frozen dough directly on a lined baking sheet (you may need to add a few extra minutes to the baking time).

Another strategy is to prepare cookie dough and then portion it into cookie shapes. Freeze the shapes on a baking sheet, then transfer them to a bag. When guests arrive or a craving strikes, simply bake the desired amount and enjoy freshly baked cookies in no time.

Scaling Instructions

Scaling the chocolate chip cookie recipe can easily accommodate different batch sizes. To halve the recipe, simply cut all ingredients in half while ensuring that you maintain the same ratios to preserve texture and taste.

When doubling or tripling the recipe, consider increasing baking time slightly, watching the cookies closely to avoid overbaking. Adjust your mixing equipment as necessary; a larger bowl or mixer may be needed to handle a bigger volume of dough.

Always remember that different ovens can vary in heating power, so use visual cues and toothpick tests to ensure they’re baked perfectly, regardless of the batch size. Store any extra cookies as per normal guidelines to keep them fresh.

Nutritional Deep Dive

Analyzing the nutritional content of chocolate chip cookies can guide healthier baking choices. Each cookie generally contains a balance of macronutrients: carbohydrates primarily from the flour and sugars, fats from butter, and some protein.

With an average of around 100 calories per cookie, considering ingredient swaps can enhance their nutritional profile. Using whole wheat flour boosts fiber content, while incorporating nuts adds protein and healthy fats that contribute to satiety.

Micronutrients, such as calcium and vitamin D from added dairy, can also play a role in nutrition. For those watching their intake, being conscious of portion sizes helps maintain balance even while enjoying these delightful treats.

Dietary Adaptations

For gluten-free adjustments, substitute regular flour with a gluten-free blend to maintain the cookie’s texture. Ensure that all other ingredients are also certified gluten-free to avoid cross-contamination.

For a dairy-free option, coconut oil or a vegan butter blend can replace regular butter, and almond milk correlates well with the flavors present in the cookie.

Vegetarian and vegan diets benefit from flax seeds or chia seeds as egg replacements, helping bind the cookies without compromising on texture. For those following a ketogenic or low-carb diet, almond flour can be used instead of traditional flour, ensuring that beloved cookies can be enjoyed without the carb overload.

Troubleshooting Guide

If your cookies turn out flat, it may be due to too much butter or not enough flour. Ensure you’re measuring ingredients accurately. Cookies that are too dry usually result from overbaking or too much flour; check your measurements and baking time.

If flavors seem off, consider adjusting the amount of salt or quality of chocolate used, as high-quality chocolate significantly impacts flavor. Cookies need adjustments in baking time or temperature when they’re coming out unevenly baked.

If the dough doesn’t hold together, this could be from not enough fat. You can mix in a touch more butter to help with cohesion, or if the dough is sticking too much, refrigerate it for 30 minutes to promote better handling.

Recipe Success Stories

Our community has shared wonderful feedback and variations of this beloved chocolate chip cookie recipe. One reader noted how substituting some of the chocolate with peanut butter chips elevated the taste to new heights. Others loved adding a pinch of cinnamon for a hint of spice that surprised the palate.

Photographs of elegantly arranged cookies illustrate the creativity that goes into serving this classic dessert. Many bakers found the straightforward guide easy to follow, allowing even novice bakers to create impressive cookie batches.

The unique stories shared by our readers reflect the love and nostalgia tied to this recipe. Hearing about how these cookies became family favorites or the centerpiece at gatherings brings immense joy to the recipe’s legacy.

Frequently Asked Questions

1. Can I use whole wheat flour instead of all-purpose flour?
Yes, you can substitute up to half of the all-purpose flour with whole wheat flour, which adds nutritional benefits and a nuttier flavor to your cookies. However, using too much may lead to a drier cookie.

2. How can I make my cookies chewier?
For chewier cookies, try decreasing the baking time slightly and keeping the dough chilled before baking. Additionally, using more brown sugar than white can also contribute to a chewier texture.

3. What’s the best way to store cookies?
Store cookies in an airtight container at room temperature for up to a week. For longer storage, freeze them in a freezer-safe bag, where they can last for up to three months.

4. Can I make the dough in advance?
Absolutely! You can prepare the dough a few days in advance, refrigerate it for enhanced flavors, or freeze it in pre-formed balls to bake fresh cookies whenever you desire.

5. How do I know when my cookies are done baking?
Look for golden edges and a slightly underdone center. The cookies will firm up as they cool, resulting in the perfect balance of chewy and crispy.

6. Can I add nuts to my cookie dough?
Definitely! Chopped pecans or walnuts make a great addition to chocolate chip cookies, enhancing both flavor and texture.

7. Is it necessary to chill the dough?
Chilling the dough isn’t mandatory but is highly recommended to develop flavors, reduce spread, and achieve a thicker cookie.

8. Can I use chocolate chunks instead of chips?
Yes! Chocolate chunks will provide a more rustic appearance and offer varying textures during baking.

9. How can I make these cookies healthier?
Reduce sugar, substitute whole wheat flour, or add oats and nuts. Additionally, using dark chocolate can also enhance the health benefits.

10. What can I do if my cookies spread too much?
Ensure your butter is soft, but not melted, and that you are measuring flour accurately. Additionally, chill the formed dough balls before baking to help prevent spreading.

Additional Resources

To further enhance your baking journey, check out other related recipes such as oatmeal cookies and peanut butter cookies. Explore technique guides that dedicate time to different mixing techniques or decorative icing.

For those interested in diving deeper into ingredients, many sites offer extensive information on the health benefits of chocolate or alternative flour choices. If you’re looking for the best baking equipment, consider recommendations for high-quality mixing bowls and baking pans that can make your baking experience smoother.

Seasonal variations provide ideas for festive baking, allowing you to create themed cookies for every holiday, from pumpkin spice cookies in the fall to peppermint chocolate cookies in winter.

Join the Conversation

We’d love for you to share your experiences and adaptations of this chocolate chip cookie recipe! Connect with us on social media, where you can post your cookie creations and share tips with fellow bakers.

Drop a comment about your favorite variations and any feedback you have, as community engagement can provide valuable insights and ideas for everyone. Don’t forget to snap a picture of your delicious cookies and tag us, as we will feature some of your amazing recipes in our next post!

The Recipe

Chocolate Chip Cookies

Serves: 24 cookies

Prep Time: 15 mins

Cook Time: 10 mins

Total Time: 25 mins

Kitchen Equipment Needed

  • Mixing bowl
  • Measuring cups and spoons
  • Baking sheet
  • Parchment paper (optional)
  • Cooling rack

Ingredients

  • 2 1/4 cups all-purpose flour
  • 1/2 teaspoon baking soda
  • 1 cup unsalted butter, room temperature
  • 1/2 cup granulated sugar
  • 1 cup packed brown sugar
  • 1 teaspoon salt
  • 2 teaspoons pure vanilla extract
  • 2 large eggs
  • 2 cups chocolate chips

Directions

  1. Preheat the oven to 350°F (175°C) and line baking sheets with parchment paper.
  2. In a small bowl, whisk together flour and baking soda; set aside.
  3. In a large mixing bowl, cream together the butter, granulated sugar, brown sugar, and salt until smooth.
  4. Add vanilla and eggs; beat until fluffy.
  5. Gradually add the flour mixture, mixing just until blended.
  6. Stir in chocolate chips.
  7. Drop dough by rounded tablespoons onto prepared baking sheets, spacing them apart.
  8. Bake for 10-12 minutes or until edges are golden brown.
  9. Allow cookies to cool on the baking sheet for a few minutes before transferring to a wire rack.

Recipe Notes

  • Chilling the dough enhances flavor and prevents spreading.
  • For softer cookies, remove them from the oven while they look slightly underdone.
  • Keep extra cookies in an airtight container for best freshness.

Delicious Big Mac Salad Recipe for a Guilt-Free Indulgence

Delicious Big Mac Salad: A Healthy Twist on a Classic Favorite

⚖️
Difficulty
Easy

⏲️
Prep Time
15 mins

🕒
Cook Time
10 mins

⏱️
Total Time
25 mins

🍽️
Servings
4 servings

Indulge in the flavors of your favorite fast-food meal without the guilt with this delightful Big Mac Salad recipe. This vibrant salad brings together all the classic elements of a Big Mac, including savory ground beef, crisp lettuce, juicy tomatoes, and creamy dressing, creating a delicious dish that is both satisfying and nutritious. Whether you’re looking for a quick weeknight dinner or a dish to impress friends at a gathering, this Big Mac Salad is sure to be a crowd-pleaser!

The fun of this recipe lies in its versatility. You can customize the ingredients to suit your taste or dietary preferences while still enjoying the iconic flavor profile of a Big Mac. The combination of textures—from the crunchy romaine to the tender ground beef—ensures each bite is a flavor explosion. Plus, this salad is not only quick to prepare but also packed with wholesome ingredients, making it an ideal choice for anyone looking to eat healthier without sacrificing taste.

Quick Recipe Highlights

  • Flavor Profile: Rich and savory with a hint of tanginess from the dressing and freshness from the vegetables.
  • Texture: A delightful contrast between the tender ground beef, crunchy lettuce, and creamy dressing.
  • Aroma: Inviting aromas of grilled beef mixed with fresh herbs and spices will fill your kitchen.
  • Visual Appeal: Bright greens, reds, and yellows create a visually stunning dish that invites you to dig in.
  • Skill Level Needed: This easy recipe requires basic cooking skills, making it perfect for beginners.
  • Special Equipment: All you need is a skillet for cooking the beef and a large bowl for mixing.

Recipe Overview

  • Difficulty Level: This Big Mac Salad is classified as easy, with simple, straightforward instructions that anyone can follow.
  • Category: This dish can be categorized as a salad or a main course, perfect for lunch or dinner.
  • Cuisine: Inspired by American fast food, this salad incorporates the familiar flavors without the extra calories.
  • Cost: This recipe is budget-friendly, utilizing common ingredients that are easily accessible at any grocery store.
  • Season: This salad is versatile enough to be enjoyed year-round; however, it shines in warmer months when fresh vegetables are abundant.
  • Occasion: Ideal for casual gatherings, picnics, and healthy meal prep, this salad fits any occasion.

Why You’ll Love This Recipe

This Big Mac Salad is not only a feast for the taste buds but also a nutrient-rich option that satisfies cravings. The rich umami flavor of the seasoned ground beef perfectly complements the freshness of the vegetables, providing a balanced meal. Each bite offers a medley of tastes: from the sharpness of pickles to the sweetness of diced tomatoes. The creamy dressing ties it all together, ensuring you enjoy a harmonious flavor experience.

In terms of convenience, this dish is a game changer. Quick to prepare in just 25 minutes, it allows for minimal fuss without compromising on flavor. Perfect for busy weeknights, you can whip up this salad in no time and enjoy a wholesome meal without the need for takeout. Plus, it stores well, making it a great option for meal prep. Just prepare the components ahead of time and toss them together when you’re ready to eat.

Nutritionally, the Big Mac Salad is packed with protein, healthy fats, and plenty of vegetables, making it a nourishing meal choice. Ground beef delivers a hearty dose of protein to keep you satiated, while fresh greens add essential vitamins and minerals. The inclusion of tomatoes, cucumbers, and lettuce ensures that your body gets a variety of nutrients necessary for optimal health.

This salad is also fantastic for social gatherings. Impress your guests with this clever twist on a classic fast-food favorite that they can indulge in without feeling guilty. Its bright colors and vibrant flavors will have everyone reaching for seconds, ensuring you are the host with the most at your next event.

Cost-effectiveness is another reason to love this recipe. With simple, affordable ingredients, you can feed a family or group without breaking the bank. Each serving is healthy and satisfying, proving that a delicious meal can be economical. Embrace this Big Mac Salad for its wonderful ability to deliver flavor and nutrition all while being easy on the wallet.

Historical Background and Cultural Significance

The Big Mac has become an emblem of American fast food culture since its debut in the 1960s. Originally created as a way to offer a more substantial sandwich, it has grown into an icon recognized worldwide. This salad pays homage to that classic, offering a fresh perspective that aligns with modern dietary preferences.

The cultural significance of the Big Mac extends beyond mere taste; it’s a symbol of convenience and the fast-paced lifestyle of contemporary America. People often associate it with indulgence and comfort, making it a nostalgic favorite for many. This salad captures those feelings while inviting healthier eating, showcasing how comfort food can evolve.

Over the years, the Big Mac has inspired countless variations, including hearty salads, wraps, and even pizza. This evolution reflects the changing dietary habits of society as more people seek lighter, more nutrient-dense options while still enjoying the flavors they love. The Big Mac Salad is a perfect example of this transformation.

Regionally, variations of the Big Mac exist, each influenced by local tastes and preferences. From spicy adaptations with jalapeños to gourmet versions topped with specialty cheeses—each offers a new spin on a classic. The Big Mac Salad embraces this diverse influence, providing an adaptable base for anyone to enjoy.

Ingredient Deep Dive

Ground Beef: Ground beef holds a prominent place in American cuisine, serving as a staple protein source for countless dishes. It provides essential nutrients like iron and zinc, vital for overall health. When selecting beef, opt for lean cuts to manage fat content. Store it in a cool environment to maintain freshness, and consider substituting with ground turkey or plant-based options for versatility.

Romaine Lettuce: Romaine lettuce is not only crisp and refreshing but also a source of dietary fiber and vital vitamins, including vitamin K and folate. This leafy green has a rich history as a staple in Mediterranean diets. When choosing romaine, look for vibrant, firm leaves without browning. Store it in a crisp container to prolong freshness, and feel free to mix in other greens for added variety.

Common Mistakes to Avoid

  • Using overly fatty ground beef can make the salad greasy; opt for lean ground beef for a healthier version.
  • Not seasoning the beef enough can lead to bland flavors, so be generous with spices.
  • Adding ingredients like tomatoes too early can make them mushy; they should be added just before serving.
  • Skipping the dressing can result in a dry salad; always mix in a dressing for enhanced flavor.
  • Not allowing the cooked beef to cool before adding it to the salad can wilt the greens.
  • Using stale or wilted lettuce can detract from the salad’s freshness; always choose fresh greens.
  • Overcooking the beef can make it tough; aim for a perfect cook to retain juiciness.
  • Failing to chop the ingredients uniformly can lead to uneven bites; ensure even chopping for the best experience.
  • Ignoring the potential of toppings like pickles or onions can miss an opportunity for flavor enhancement.
  • Neglecting to taste and adjust seasonings before serving can leave the dish underwhelming.

Essential Techniques

Mastering the technique of browning the ground beef is crucial. Browning enhances flavors through caramelization, resulting in a savory, rich base. To achieve this, heat your skillet before adding the meat, ensuring it sizzles upon contact. Avoid overcrowding the pan for even cooking. Watch for or utilize golden brown edges as visual cues to ensure that you achieve the perfect level of doneness.

Mixing the salad dressing thoroughly before adding to the salad is key to balanced flavor distribution. A well-emulsified dressing ensures that every bite is flavorful. To master this, whisk the ingredients vigorously until they combine seamlessly, and taste before adding to adjust seasoning. Use a generous amount of dressing; you can always add more but can’t take back!

Pro Tips for Perfect Big Mac Salad

1. Consider marinating the ground beef with additional spices overnight for richer flavors while cooking.

2. For a fresher twist, add slices of avocado or diced bell peppers to elevate the dish.

3. If you’re following a low-carb diet, feel free to use cauliflower rice as a base instead of lettuce.

4. Use a homemade dressing to control the ingredients and emphasize freshness—blend ingredients like Greek yogurt, dill, and mustard for a healthy option.

5. Prepare individual portions for convenience; this way, you can grab a packed salad for lunch easily.

6. Serve your Big Mac Salad on a chilled plate for an elegant presentation that enhances the overall experience.

7. Experiment with toppings—crispy bacon bits or cheese shreds can add delightful textures and flavors.

8. Always taste as you go to ensure the flavors meld perfectly; your personal touch can make all the difference!

Variations and Adaptations

Regional variations of the Big Mac Salad can incorporate distinct ingredients like spicy salsa to capture a Southwestern flair, or utilize barbecue sauce for a smoky profile. Adding local vegetables based on seasonal availability can also adjust flavors and freshness.

For seasonal adaptations, try swapping summer vegetables for roasted butternut squash in the fall, giving a sturdy contrast to the fresh greens. In winter, include hearty root vegetables for a fulfilling salad that reflects the season’s bounty.

Dietary modifications are accessible; opt for ground turkey or a plant-based protein for a healthier, lighter alternative. This not only changes the flavor but also meets different dietary needs, making this salad versatile for any gathering.

Flavor variations can be achieved by adding different herbs and spices, like Italian seasoning or fresh cilantro, that can dramatically alter the taste profile while keeping it refreshing and familiar.

Serving and Presentation Guide

For plating, use a large bowl to showcase the vibrant colors of the Big Mac Salad. Arrange ingredients in layers to create visual appeal, starting with romaine lettuce as a base and then adding toppings in sections—this invites guests to marvel at the presentation before diving in.

Garnishing with sesame seeds or fresh herbs, such as parsley or dill, not only enhances flavor but elevates the aesthetics of the dish. Accompany the salad with a slice of toasted baguette or garlic bread for a complete meal that tantalizes the taste buds.

Temperature considerations are vital; serve the salad immediately after preparing, keeping ingredients chilled until serving to retain their crunch. If preparing ahead, store components separately to maintain texture and freshness until ready to mix.

For portion control tips, consider using individual serving bowls for guests; this practice creates an inviting serving style and can help manage portion sizes during dining.

Wine and Beverage Pairing

For wine pairings, a chilled Chardonnay is an excellent choice, offering a crisp contrast to the rich flavors of the salad. Alternatively, a light-bodied Pinot Noir complements savory notes, providing a pleasant combination of tastes that flows well with the dish.

If you prefer non-alcoholic options, freshly brewed iced tea with a hint of lemon or sparkling water enhances the meal experience while cooling