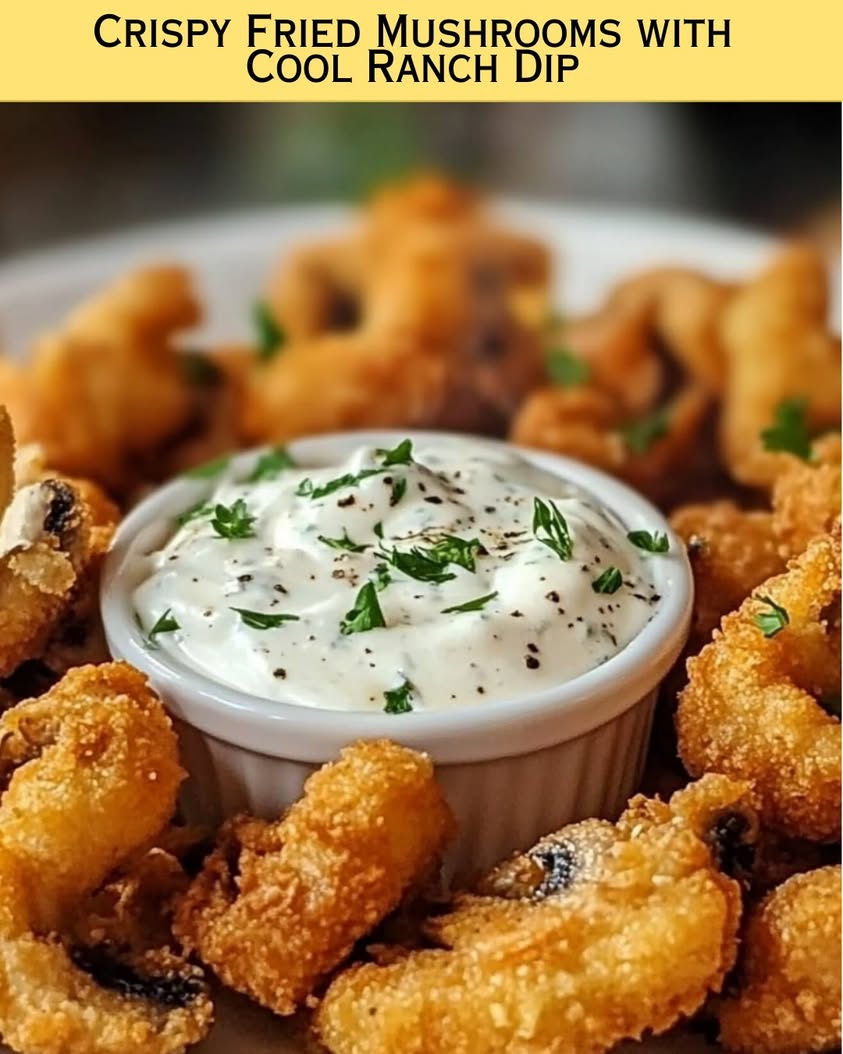
Irresistibly Crispy Fried Mushrooms with Cool Ranch Dip Recipe

Crispy Fried Mushrooms with Cool Ranch Dip: A Delightful Appetizer

⚖️
Difficulty
Easy

⏲️
Prep Time
15 mins

🕒
Cook Time
10 mins

⏱️
Total Time
25 mins

🍽️
Servings
4 servings

Crispy Fried Mushrooms with Cool Ranch Dip is a crowd-pleasing appetizer that promises to tantalize your taste buds with each mouthwatering bite. The mushrooms’ crispy, golden-brown exterior perfectly contrasts the tender, juicy insides, offering a delightful crunch. The Cool Ranch dip, creamy and bursting with flavor, serves as the perfect complement, enhancing the mushrooms’ earthiness while adding an addictive flavor twist.

When you take a bite, the aroma of freshly fried mushrooms combined with herbs and spices wafts into the air, beckoning everyone to gather around the table. This dish is not just about satisfying hunger; it’s about sharing joy and experience, making it an ideal choice for game day, family gatherings, or casual nights at home. The simplicity of this recipe allows you to whip it up quickly while impressing your guests with a restaurant-quality dish right in your kitchen.

Quick Recipe Highlights

  • Flavor Profile: The earthy richness of mushrooms combined with zesty ranch flavors creates an unforgettable taste experience.
  • Texture: Enjoy the satisfying crunch of the outer layer while the inside remains soft and succulent.
  • Aroma: The enticing fragrance of fried mushrooms complemented by herb-infused ranch makes this appetizer irresistible.
  • Visual Appeal: Beautifully golden-brown mushrooms nestled in a bowl with a vibrant Cool Ranch dip create a colorful culinary masterpiece.
  • Skill Level Needed: This dish is beginner-friendly and does not require advanced culinary skills, making it accessible for all.
  • Special Equipment: You’ll only need a frying pan or deep fryer to achieve that perfect crispy texture.

Recipe Overview

  • Difficulty Level: This recipe is marked easy due to its straightforward preparation and quick cooking process, making it perfect for novice cooks.
  • Category: Crispy Fried Mushrooms fit into the appetizer category, ideal for starting meals or sharing during gatherings.
  • Cuisine: Rooted in American cuisine, these fried mushrooms showcase how simple ingredients can create exciting flavors that are beloved in households across the country.
  • Cost: The ingredients are budget-friendly, primarily consisting of common pantry staples and fresh mushrooms, keeping costs low.
  • Season: While delicious year-round, these mushrooms shine during the fall and winter months, making them ideal for cozy gatherings.
  • Occasion: Perfect for parties, game nights, or casual get-togethers, they serve as an easy appetizer that guests love.

Why You’ll Love This Recipe

Crispy Fried Mushrooms offer a perfect balance of taste and texture, providing a satisfying crunch that leads to a juicy, savory center. The flavorful batter can be customized to suit your taste preferences, ensuring maximum enjoyment. Pair them with a Cool Ranch dip that adds a creamy, zesty contrast, making each bite a delightful experience.

Convenience is another reason this recipe shines. With only a short prep and cook time, you can have a delicious appetizer ready in just 25 minutes. The simplicity of the recipe also allows for easy adjustments based on what you have in your kitchen, making it a go-to dish for spontaneous gatherings.

These crispy mushrooms not only satisfy hunger but also have nutritional advantages. Mushrooms are low in calories while being rich in vitamins and minerals, making them a healthier snacking option. When paired with a homemade ranch dip, you get a flavorful treat without excessive fat and heaviness.

Serving Crispy Fried Mushrooms can elevate any social occasion. They are finger foods that encourage sharing, making them perfect for gatherings where guests mingle. Your friends and family will love picking at these delicious bites while chatting and enjoying each other’s company.

Finally, the cost-effectiveness of this recipe cannot be overlooked. With just a handful of affordable ingredients, you can whip up a crowd-pleasing dish that won’t break the bank, allowing you to entertain without stressing your budget.

Historical Background and Cultural Significance

The origins of fried mushrooms can be traced back to various culinary traditions across the globe, where mushrooms have always been a popular ingredient. Their popularity surged in the United States as home cooking evolved in the mid-20th century, leading to the introduction of simple yet flavorful snacks and appetizers.

Crispy Fried Mushrooms hold cultural significance not only in American homes but also in international cuisines where mushrooms are integrated into flavorful dishes. The technique of frying has been embraced worldwide, allowing for versatile preparations within different culinary frameworks.

Over the years, the recipe has evolved from using regular flour to incorporating diverse spices and herbs, adapting to prevailing flavor trends and dietary preferences. Today, preparing fried mushrooms offers endless possibilities for customization, making them appealing to all palates.

Various regional variations exist, including adding cheese or using unique spices to create distinct flavors. These adaptations showcase the versatility of mushrooms and how they can adapt to local tastes and ingredients.

Ingredient Deep Dive

Mushrooms serve as the star ingredient in this recipe, offering not only great flavor but also nutritional benefits like antioxidants, vitamins B and D, and minerals like selenium. When selecting mushrooms for frying, opt for firm, fresh specimens, avoiding any signs of slime or bruising. Proper storage involves keeping them in a paper bag in the refrigerator, where they can remain fresh for up to a week.

The batter typically consists of flour and seasonings, which can be varied to enhance flavor. When selecting flour, all-purpose flour is commonly used for its versatility. Gluten-free options are available for those with dietary restrictions, including almond or chickpea flour, which add unique flavors and textures.

For the ranch dip, the base usually includes sour cream or mayonnaise, providing a creamy texture. Greek yogurt serves as a healthy alternative that adds protein without sacrificing flavor. Fresh herbs, such as dill and parsley, add brightness, showcasing how herbs can significantly elevate a dip’s profile.

Common Mistakes to Avoid

  • Using Wet Mushrooms: Wet mushrooms will not achieve a crispy texture. Ensure they are well dried before coating with batter.
  • Skipping Seasoning: Under-seasoned batter can result in bland mushrooms. Always season your flour with salt, pepper, and preferred spices.
  • Cooking at Incorrect Temperature: Frying at too low a temperature can lead to soggy mushrooms. Ensure oil is hot enough (around 350°F) for the best results.
  • Overcrowding the Pan: Adding too many mushrooms at once can lower the oil temperature, causing uneven cooking. Fry in small batches for consistent results.
  • Neglecting to Drain Oil: Letting fried mushrooms sit in oil will make them greasy. Use a wire rack or paper towels to absorb excess oil.
  • Not Allowing for Resting Time: Letting the fried mushrooms sit for a minute after cooking can enhance crispiness by allowing steam to escape.
  • Using Old Oil: Frying in used or old oil can contribute off flavors. Fresh oil ensures a clean and delicious taste.
  • Forgetting Dipping Options: Variety in dipping sauces enhances the experience. Consider offering multiple dips for guests to enjoy.

Essential Techniques

To achieve the perfect crispy texture when frying mushrooms, mastering the deep frying technique is key. This involves heating oil to the correct temperature and maintaining it while cooking, allowing the batter to crisp without absorbing too much oil. A candy thermometer works best — aim for between 350°F to 375°F, which ensures a golden, crunchy exterior while keeping the mushroom centers juicy.

Another important technique is the proper dredging process. Start by tossing your mushrooms in seasoned flour before dipping them in liquid and coating them in dry flour again. This double-dipping method creates a thicker crust and ensures that the batter adheres properly during frying. Also, be cautious not to squeeze excess batter; light coating provides the ideal crunch.

Pro Tips for Perfect Crispy Fried Mushrooms

Always select fresh mushrooms; their firmness and juiciness contribute to the final texture. Avoid aged mushrooms, as they often become slimy and lose flavor.

Make sure your frying oil is at the correct temperature before adding the mushrooms. Using a thermometer will ensure you’re frying optimally.

Use a combination of flours to achieve a unique texture. All-purpose flour works well, but adding cornstarch can elevate the crispiness.

Ensure that your mushrooms are thoroughly dried after washing. Whisk away any moisture to prevent a soggy batter.

Consider infusing the batter with spices, such as garlic powder, onion powder, or paprika, to enhance flavor without extra effort.

Keep the ranch dip chilled before serving; it enhances the flavor profile and adds freshness when paired with crispy mushrooms.

Dust fried mushrooms with a pinch of sea salt right after frying to enhance their flavor profile.

If preparing in advance, store fried mushrooms in a single layer on a wire rack to maintain crispiness until ready to serve.

Variations and Adaptations

Crispy Fried Mushrooms can be easily adapted to suit different tastes and preferences. For a spicy kick, add cayenne pepper or chili flakes to the batter. This variation adds to the dish’s overall excitement and can cater to those who enjoy heat in their appetizers.

Seasonal adaptations can also shine through creativity. Incorporating pumpkin spice into the batter during fall or using fresh herbs in spring can offer a delightful seasonal twist. These variations celebrate flavors that reflect the seasons while maintaining the core crispy mushroom experience.

Dietary modifications include gluten-free options by replacing standard flour with almond or coconut flour, catering to those with dietary restrictions or preferences.

For flavor variations, consider using different dips, such as spicy sriracha mayo or a classic garlic aioli, each bringing its unique flair to the overall experience.

Texture modifications can occur by selecting different types of mushrooms, like portobello or shiitake, which offer fascinating flavor profiles and textures in contrast to classic white button mushrooms.

For presentation, serve the fried mushrooms in a rustic wooden bowl, giving off an inviting vibe. A sprinkle of fresh herbs on top or alongside colorful veggies can enhance visual appeal.

Serving and Presentation Guide

Top your fried mushrooms with freshly chopped herbs like parsley or chives for an elegant presentation. When plating, consider using a large, contrasting plate to make this golden dish stand out visually. Serve with the Cool Ranch dip in a small bowl at the center, encouraging guests to scoop their portions while maintaining an aesthetically pleasing arrangement.

Place a slice of lemon or lime beside the mushrooms for an added splash of color and a zest of flavor that complements the richness of the dip. It’s also helpful to consider portion sizes; allow approximately 4-5 mushrooms per serving to keep guests satisfied without overwhelming them.

Serve while still warm for the best sensory experience, and consider using a wooden platter for a rustic touch that appeals to casual gatherings. Elevated presentation enhances not only the dish’s look but also boosts its appeal as a crowd-pleasing appetizer.

Wine and Beverage Pairing

Pairing wine with crispy fried mushrooms can enhance the flavors and elevate your dining experience. A light and crisp white wine, like Sauvignon Blanc or Pinot Grigio, balances nicely with the richness of the fried dish, offering a refreshing contrast. For red wine lovers, consider a light-bodied Pinot Noir that can complement the earthiness of mushrooms.

If you’re looking for non-alcoholic alternatives, a zesty lemonade or a sparkling water with a splash of lime can add refreshing balance. The acidity in these drinks cuts through the richness, making them ideal accompaniments.

For coffee enthusiasts, a light roast coffee can pair surprisingly well, as its subtle acidity and body enhance the dish’s flavors without overwhelming them. Each beverage enhances the overall experience, encouraging exploration of flavors in perfect harmony.

Storage and Shelf Life

To store leftover Crispy Fried Mushrooms, allow them to cool completely before placing them in an airtight container. They can typically be stored in the refrigerator for up to 3 days. For optimal freshness, it’s best to reheat them in an oven to restore their crispiness, rather than using a microwave, which can lead to a soggy texture.

If you anticipate not finishing the mushrooms, consider freezing them after cooling. Arrange the fried mushrooms in a single layer on a baking sheet and freeze them until solid. Once frozen, transfer them to freezer-safe bags for about 2-3 months. This method allows for convenient reheating without sacrificing quality.

Be sure to watch for signs of spoilage; a change in texture or off smells means it’s time to toss any leftovers. Proper reheating is essential for maintaining texture—fry them for a few minutes uncovering their crispy goodness.

Make Ahead Strategies

To streamline your cooking process, consider prepping key components of the Crispy Fried Mushrooms in advance. Clean and slice fresh mushrooms, pat them dry, and store them in the refrigerator for 1-2 days before frying. This saves time on the day of serving while ensuring mushrooms retain their freshness.

You can also prepare the ranch dip ahead of time and store it in the refrigerator, allowing flavors to meld together fully. The morning of your event, simply whip up the fried mushrooms and serve them warm.

Quality is essential; do not fry the mushrooms too far in advance, as they lose their delightful crispiness. Reheating in an oven as described earlier will help restore some of that tantalizing texture, keeping your appetizer as delicious as freshly cooked.

Scaling Instructions

Scaling the recipe for Crispy Fried Mushrooms is simple. For smaller gatherings, you can halve the recipe, adjusting flour and mushrooms to suit your needs, while still following the same cooking instructions. If you’re hosting a larger group, doubling or even tripling the ingredients is a breeze; just ensure you have ample frying space to avoid overcrowding the pan, which can lead to unevenly cooked mushrooms.

Timing adjustments may be necessary when cooking larger batches. Fry mushrooms in batches, allowing the oil to return to temperature between each batch for optimal crispiness. As for storage, remember that larger portions require larger containers, and be mindful that leftovers may need longer to cool completely.

This flexibility allows you to delight any crowd with this delicious dish while enjoying the simplicity of scaling.

Nutritional Deep Dive

Crispy Fried Mushrooms offer a unique combination of nutrition and satisfaction. From a macro perspective, they typically consist of around 200-250 calories per serving, primarily from healthy fats when prepared correctly. The mushrooms themselves provide beneficial fibers and protein, essential for maintaining balanced meals.

In terms of micronutrients, mushrooms are a good source of B vitamins, particularly riboflavin, niacin, and pantothenic acid, which are crucial for energy metabolism. They also contain selenium, a powerful antioxidant that supports immune function. Adding herbs to the ranch dip contributes additional vitamins that further enhance nutritional value.

Health benefits of mushrooms include their low-calorie content and ability to provide crucial nutrients without excessive sugar or unhealthy fats. Choosing healthier frying oils, such as avocado or grapeseed, can boost heart health, and making the ranch dip with yogurt adds a punch of protein. For those mindful of their diet, the crispy mushrooms make an excellent snack option, providing a variety of nutrients to support overall health.

Dietary Adaptations

For viewers following gluten-free diets, it’s easy to adapt the Crispy Fried Mushrooms recipe. Substitute regular flour with almond flour or gluten-free all-purpose flour to ensure a crispy texture without gluten. Likewise, individuals with dairy allergies can create a dairy-free ranch dip by using vegan mayonnaise and coconut yogurt as bases.

Vegan followers can easily tweak the recipe by using alternatives such as a chickpea or lentil batter instead of conventional flour. This not only makes the dish plant-based but also adds unique flavors while preserving that satisfying crunch.

Low-carb or keto adherents may choose to forgo the batter altogether or opt for a low-carb coating, such as crushed pork rinds or shredded coconut. Meanwhile, those on a Paleo diet can experiment with nut flours and create their version of a light batter without compromising on texture.

For those following low-FODMAP diets, stick to mushrooms that are lower in FODMAP content, such as bok choy or spinach. Explore dairy-free dips to complement the dish while remaining mindful of digestion.

Troubleshooting Guide

Texture issues can arise if mushrooms are not dried or coated properly before frying. Ensure mushrooms are dry and that the batter sticks well to achieve that desired crunch.

Flavor balance is crucial; if the mushrooms taste bland, you may need to enhance seasoning in the batter. Consider mixing in herbs or spices to create a more vibrant flavor.

Temperature problems can be identified through visual cues; if the mushrooms absorb too much oil and become greasy, they’re likely cooking at too low a temperature. Conversely, if the outside browns too quickly while the inside remains raw, the oil is excessively hot.

Equipment challenges might occur with the type of frying pan or oil used. A deep fryer generally yields the best results, while a heavy-bottomed pot can also suffice. Always use fresh oil for a cleaner taste.

Ingredient substitutions can lead to variations in texture and flavor. If you replace flour with an alternative, ensure you follow similar ratios for consistent results.

Lastly, careful timing is essential; undercooking can lead to soggy mushrooms. Aim to fry until golden brown and follow strict cooking times to maintain that crispy quality.

Recipe Success Stories

Feedback from the community often highlights how easy and delicious Crispy Fried Mushrooms are to prepare. Many readers have shared how their families request them for gatherings and even competitive events, noting their versatility that allows for quick adaptations based on preference or available ingredients.

A variation success story involves a reader who experimented by adding grated parmesan to the batter, enhancing the flavors even further. This addition became a new favorite and has since become a staple at family functions.

Several readers have also suggested unique adaptations such as using different types of mushrooms – shiitake or oyster – resulting in exciting texture variations that remain true to the original concept.

The recipe has garnered increased interest on social media, with photography tips pointing out how to capture the crispiness of the mushrooms and the visual appeal of the ranch dip, encouraging readers to share their culinary masterpieces.

Feedback consistently praises the ease of preparation, allowing home cooks to impress guests with minimal effort while enjoying the satisfaction of serving delicious, homemade appetizers.

Frequently Asked Questions

Can I use any type of mushroom for this recipe?

Yes! While white button mushrooms are typical, you can experiment with various kinds like portobello, shiitake, or even breaded cauliflower for delicious variations. Each type offers unique flavors and textures, enhancing your culinary experience.

How do I make the batter stick better?

Ensure mushrooms are well-dried before applying the batter. You can also dip them briefly in an egg wash before coating them in flour, aiding adherence. The right moisture content allows for the desired crispy crust during frying.

What can I serve with the mushrooms other than Cool Ranch dip?

Consider serving with sriracha mayo, garlic aioli, or a balsamic reduction. These variations add a different flavor profile and enhance the overall experience of enjoying your crispy creations.

Can I freeze leftover fried mushrooms?

Absolutely! Once fried and cooled, arrange them in a single layer on a tray, freeze, then store in a freezer-safe bag to preserve freshness. Reheat in an oven to restore its crispness when ready to enjoy.

What oil is best for frying mushrooms?

A high smoke point oil, such as canola, peanut, or avocado oil, is best suited for frying. These oils handle high temperatures without breaking down, ensuring a crispy result that won’t impart off-flavors to your dish.

How long does it take to fry the mushrooms?

Frying typically takes about 3-5 minutes per batch, depending on the size of the mushrooms and the heat of the oil. Keep an eye on them, ensuring they turn golden brown without becoming overcooked.

Can I make the ranch dip ahead of time?

Yes, you can prepare the ranch dip and store it in the fridge for a few days before serving. This allows the flavors to meld beautifully. Just give it a good stir before serving to refresh its texture.

What should I do if the mushrooms become soggy?

If your mushrooms end up soggy, ensure they are well-dried before frying, and that your oil is hot enough when they go in. After frying, let them drain on paper towels to absorb any excess oil.

Can I use a different dip other than ranch?

Absolutely! Explore various dipping sauces such as spicy aioli, blue cheese dressing, or homemade tzatziki for different flavor profiles that can complement crispy mushrooms beautifully.

Are these mushrooms suitable for a vegan diet?

Yes, simply replace any eggs in the batter with plant-based alternatives like aquafaba or non-dairy milk for binding. This allows you to maintain the crispiness while keeping it vegan-friendly!

Additional Resources

Explore similar recipes for appetizers that can delight your family and friends. Consider trying light and crispy sweet potato fries or herbed zucchini fritters, both of which can pair excellently with your newfound crispy mushroom recipe.

Dive into technique guides that focus on frying methods or breading techniques; these skills will enhance your cooking repertoire and help you tackle various fried dishes confidently.

Learn more about different types of mushrooms and their culinary uses. This knowledge enables you to expand your horizon beyond just frying, exploring roasted, sautéed, or grilled mushroom dishes.

Familiarize yourself with quality frying equipment recommendations to ensure you achieve optimal results. Consider investing in a deep fryer or a sturdy Dutch oven to manage heat effectively while cooking.

Join the Conversation

Share your cooking experiences with crispy fried mushrooms on social media. Use vibrant images that showcase your beautiful plating, encouraging friends and followers to recreate your culinary masterpiece.

Engage with the community by asking for tips and suggestions or sharing your variations of the recipe that made the dish uniquely yours.

Participate in recipe reviews to help others discover this crispy delight, allowing everyone to enjoy the flavor and fun surrounding this classic favorite. Each contribution enhances the collective culinary journey, making it richer and more inclusive.

The Recipe

Crispy Fried Mushrooms

Serves: 4 servings

Prep Time: 15 mins

Cook Time: 10 mins

Total Time: 25 mins

Kitchen Equipment Needed

  • Deep fryer or large frying pan
  • Bowls for battering
  • Slotted spoon or spider
  • Paper towels or wire rack for draining

Ingredients

  • 1 lb fresh mushrooms, cleaned and stems trimmed
  • 1 cup all-purpose flour
  • 1 tsp paprika
  • 1 tsp garlic powder
  • 1 tsp salt
  • ½ tsp black pepper
  • ½ cup milk (or plant-based milk for a vegan option)
  • Oil for frying
  • Cool Ranch dip (store-bought or homemade)

Directions

  1. Start by heating oil in a deep fryer or large frying pan to 350°F.
  2. In a bowl, mix the flour, paprika, garlic powder, salt, and pepper.
  3. In another bowl, pour milk. Dip each mushroom into the milk and then coat in the flour mixture, ensuring an even layer.
  4. Once the oil is hot, carefully place a few mushrooms at a time into the oil, frying until golden brown (about 3-5 minutes).
  5. Using a slotted spoon, remove mushrooms and place them on a paper towel or wire rack to drain excess oil.
  6. Serve hot with your Cool Ranch dip.

Recipe Notes

  • Feel free to add your favorite spices to the batter for personalized flavors.
  • Store leftovers in an airtight container; reheat in an oven to restore crispiness.
  • Experiment with different mushroom types for varied tastes and textures.
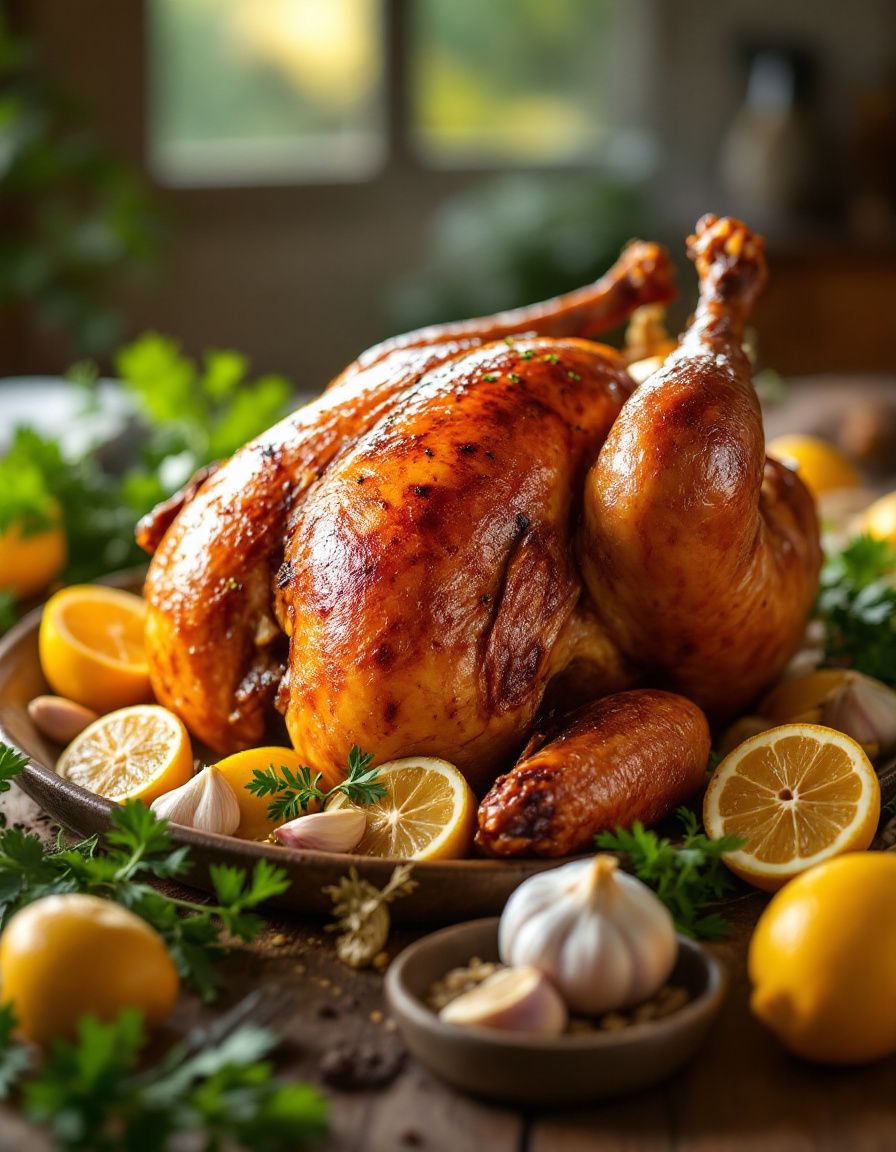
Best Lemon Garlic Roasted Chicken – Perfect for Dinner

Lemon Garlic Roasted Chicken: A Citrusy Delight for Any Occasion

⚖️
Difficulty
Easy

⏲️
Prep Time
15 mins

🕒
Cook Time
1 hour

⏱️
Total Time
1 hour 15 mins

🍽️
Servings
4

Lemon Garlic Roasted Chicken is the perfect centerpiece for any dining occasion. This dish not only showcases the vibrant flavors of fresh citrus and aromatic garlic but also offers a simple yet impressive culinary experience that will leave your guests raving. Imagine the sunny fragrance of lemon wafting through your kitchen, mingling with the savory scent of roasted chicken, creating an inviting atmosphere that calls everyone to the table.

As the chicken cooks, the lemon juice tenderizes the meat, infusing it with bright zesty notes that perfectly complement the rich flavors of the roasted skin. The garlic adds warmth and depth, ensuring that each bite is a delightful combination of flavors. Whether you’re serving it for a weeknight family meal or for special gatherings, this easy-to-follow recipe promises a juicy and delicious chicken that will satisfy all palates.

Quick Recipe Highlights

  • Flavor Profile: This dish balances tangy lemon with savory garlic, offering a bright and aromatic taste experience.
  • Texture: The roasted chicken skin is crispy, while the meat remains juicy and tender, creating a wonderful contrast.
  • Aroma: The enticing blend of roasted garlic and fresh lemon creates a mouthwatering aroma that fills the kitchen.
  • Visual Appeal: Golden brown chicken with vibrant green herbs and golden lemon slices makes for an eye-catching presentation.
  • Skill Level Needed: This recipe is beginner-friendly, requiring simple techniques that anyone can master.
  • Special Equipment: You will need a roasting pan, kitchen twine, and a basting brush to achieve the best results.

Recipe Overview

  • Difficulty Level: Preparing Lemon Garlic Roasted Chicken is quite manageable, making it accessible for cooks at any skill level. The steps are straightforward, involving marinating and roasting.
  • Category: This dish can be categorized as a main course and is perfect for any meal, from family dinners to holiday feasts.
  • Cuisine: The recipe draws inspiration from classic Mediterranean cooking, highlighting simple, fresh ingredients that celebrate flavor.
  • Cost: This recipe is budget-friendly, as the primary ingredients are affordable and easy to find in any grocery store.
  • Season: Lemon Garlic Roasted Chicken is ideal for year-round cooking, especially during warmer seasons when fresh herbs and citrus are at their peak.
  • Occasion: Suitable for both casual meals and special celebrations, it’s a versatile recipe that works for various settings.

Why You’ll Love This Recipe

Lemon Garlic Roasted Chicken is not just about taste; it also provides incredible texture that appeals to every food lover. The crispy skin contrasts beautifully with the tender, juicy meat, making each bite an exquisite experience. Every mouthful bursts with lively flavors that dance on the palate, offering a sense of satisfaction that’s hard to beat.

This recipe is perfect for those with a busy lifestyle as it requires minimal hands-on time. After a quick marinade, simply pop the chicken in the oven and relax while it roasts. This convenience allows for easy meal preparation, especially when entertaining guests, freeing you up to socialize rather than sweat in the kitchen.

Additionally, this dish offers numerous nutritional advantages. Chicken is a great source of lean protein, while lemons are rich in vitamin C and antioxidants. Together, they create a nutritious meal that supports a healthy diet without sacrificing flavor or indulgence.

The social component of this recipe can’t be understated. Roasted chicken has a communal feel, making it perfect for gatherings. Serving this dish encourages sharing and conversation, creating a warm atmosphere where everyone feels welcome.

Finally, this recipe is a great bang for your buck. With accessible ingredients and a simple preparation process, Lemon Garlic Roasted Chicken is an affordable option for creating impressive meals. It’s a delightful way to make the most of your grocery budget while still providing delicious, hearty meals your family and friends will love.

Historical Background and Cultural Significance

The origins of roasted chicken trace back centuries, where chickens were farmed for their meat and eggs in various cultures around the world. This particular lemon and garlic preparation style offers a nod to Mediterranean cuisine, where bold flavors and fresh ingredients are the norm.

Garlic, often revered in many culinary traditions, has been celebrated not only for its flavor but also for its medicinal properties. Lemon was prized in ancient cultures as a preservative and flavoring agent, a combination that elevates this dish into a classic favorite.

Lemon Garlic Roasted Chicken has evolved over time, with many regional adaptations taking hold. In some regions, additional spices and herbs might be included to personalize the dish, showcasing local flavors and preferences.

From family gatherings to festive meals, this dish signifies comfort and home. Its simplicity yet striking presentation makes it a dish that resonates across generations, bringing families together around the table.

Ingredient Deep Dive

– **Chicken**: This protein is not only a staple in kitchens around the world but is also packed with nutrients. When selecting chicken, look for organic options where possible, and consider the leg quarters for a more flavorful experience. Store in airtight containers to keep fresh and use within 1-2 days of purchase. If you need alternatives, turkey or duck can also work well.

– **Lemons**: The use of lemons in this recipe brings brightness. These fruits are loaded with vitamin C and antioxidants. Choosing firm, heavy lemons ensures juiciness. Store them at room temperature or in the fridge if you want them to last longer. If you don’t have fresh lemons, consider using lemon juice, although the flavor may not be as vibrant.

– **Garlic**: Garlic’s robust flavor enhances the overall taste of the dish, while also offering health benefits. When purchasing garlic, select bulbs that feel firm and heavy, avoiding any that appear sprouted. Store whole bulbs in a dark, cool space. For substitutes, garlic powder or shallots can be used in a pinch, but fresh garlic is recommended for best results.

Common Mistakes to Avoid

  • Not marinating the chicken long enough: Marinating for at least 30 minutes will ensure the flavors penetrate the meat.
  • Overcrowding the roasting pan: Leave space around the chicken to allow for even cooking and skin crispiness.
  • Using old ingredients: Ensure your garlic and lemons are fresh; stale ingredients can diminish flavor.
  • Failing to bring chicken to room temperature before roasting: Allow the chicken to sit at room temperature for about 30 minutes to promote even cooking.
  • Not checking for doneness: Always use a meat thermometer to check if the chicken has reached 165°F for safe consumption.
  • Skipping the basting step: Basting the chicken during roasting keeps it moist and adds extra flavor.
  • Not resting the chicken post-roasting: Letting the chicken rest for 10-15 minutes after cooking allows juices to redistribute and enhances tenderness.
  • Ignoring the garlic: Burnt garlic will taste bitter, so add it during the last 30 minutes of cooking if roasting whole cloves.

Essential Techniques

– **Marinating**: This step is crucial for infusing flavor into the chicken. To master marinating, create a balanced mix of acidic components (like lemon juice) with aromatic spices. Avoid over-marinating, which can make the chicken mushy. Visual cues of a correctly marinated chicken include a slightly softer texture and a distinct flavor profile.

– **Roasting**: Roasting chicken at a high temperature creates a crispy exterior and ensures the meat cooks through evenly. Master this technique by preheating the oven properly and positioning the chicken in the center for balanced heat exposure. A common pitfall is not letting the oven fully heat before placing the chicken inside, which can lead to uneven cooking.

Pro Tips for Perfect Lemon Garlic Roasted Chicken

1. Use a good quality extra virgin olive oil for marinating to enhance the flavor and promote browning.
2. For added depth, consider adding herbs like thyme or rosemary to the marinade.
3. Choose a cast-iron skillet for roasting, as it retains heat well and produces a beautifully roasted chicken.
4. Squeeze some fresh lemon over the chicken just before serving for an extra burst of flavor.
5. If using a whole chicken, truss it properly to cook evenly and maintain its shape during roasting.
6. Place lemon slices in the cavity or around the chicken for a boost of freshness and presentation.
7. Save any drippings for homemade gravy or sauces; they hold incredible flavor from the roasted chicken.
8. Consider letting the chicken marinate overnight for an even richer flavor.

Variations and Adaptations

Lemon Garlic Roasted Chicken can be adapted to include various herbs and spices, depending on your preference. Experimenting with fresh herbs like parsley or dill can add new dimensions to the flavor.

For seasonal adaptations, consider adding root vegetables such as carrots, potatoes, and onions to the roasting pan for a complete meal in one dish. This method not only adds delicious sides but also infuses the vegetables with the chicken’s savory juices.

If dietary restrictions arise, substituting the chicken for firm tofu or seitan can provide a delightful vegan alternative without losing the essence of the flavors.

For a different flavor profile, you can try adding spices such as paprika or cayenne for heat, or swapping fresh lemon for orange for a sweeter citrus twist.

In terms of texture modifications, consider flattening the chicken using a meat mallet for a quicker cooking method or even spatchcocking it for even crispier skin.

Presentation can also vary greatly; serving the chicken sliced with colorful herbs sprinkled on top, or accompanied by vibrant salads can elevate its visual appeal.

Serving and Presentation Guide

A beautifully plated Lemon Garlic Roasted Chicken can impress any guest. Start by carefully slicing the chicken at the joints, allowing the juices to flow onto the platter. You can use a generous amount of fresh herbs for garnish to enhance the aesthetic.

Consider serving it with lemon wedges, which not only add a pop of color but also provide guests with the option to enhance their servings with more citrus.

For a more modern twist, consider presenting the chicken on a wooden board surrounded by roasted vegetables, offering a rustic yet elegant touch.

Remember to serve at a warm temperature, as colder temperatures can dull flavors and textures. It’s also essential to control portions—make sure each serving includes a balance of meat and sides for a complete meal experience.

Wine and Beverage Pairing

A crisp white wine pairs exceptionally well with Lemon Garlic Roasted Chicken. A Sauvignon Blanc or Pinot Grigio’s acidity complements the dish perfectly, bringing out the lemon’s zestiness.

For non-alcoholic options, consider serving sparkling water with a slice of lemon or a light herbal iced tea that won’t overpower the meal. For those who enjoy coffee, a light roast brewed with citrus notes can also serve as an interesting pairing option.

Serve these beverages chilled to enhance the meal experience while keeping the atmosphere refreshing.

Storage and Shelf Life

To store leftovers, place them in airtight containers and refrigerate. Properly stored, roasted chicken can last up to four days in the fridge. For longer storage, consider freezing; wrap the chicken tightly in aluminum foil and place it in a freezer-safe bag.

When reheating, it’s best to do so in the oven to maintain the texture and prevent drying out. Keep the chicken covered to help retain moisture.

Check for signs of spoilage such as an off smell or discoloration before consuming leftovers. Reheat at 350°F until warmed through to ensure safety.

Make Ahead Strategies

To save time, consider marinating the chicken a day in advance. This allows for deeper flavor penetration, and all you’ll need to do the next day is roast the chicken.

You can also prepare the garlic and lemon mixture ahead, storing it in the fridge to save time on a busy cooking day. Simply combine the ingredients for the marinade and refrigerate until you’re ready to use.

If you prefer, you can roast the chicken ahead of time and serve it cold or at room temperature, making it a great option for picnics or gatherings.

Be mindful of adding any fresh herbs after reheating; it invigorates the dish and offers a fresher taste.

Scaling Instructions

Should you need to adjust the recipe servings, doubling or tripling the ingredients is straightforward; just ensure you have a sufficiently sized roasting pan to accommodate the increased quantities.

If halving the recipe, check the cooking time as the chicken may take less time to roast. It’s essential to monitor doneness with a meat thermometer to ensure safety.

Additionally, for larger gatherings, consider spatchcocking two chickens instead of one; this method enables even cooking and requires less time overall.

For storage, keep in mind that leftovers should be adjusted to fit the amount cooked; ensure all is fully cooled before placing it in the fridge or freezer.

Nutritional Deep Dive

Lemon Garlic Roasted Chicken is not only delicious but also packs a nutritious punch. It offers a well-rounded macronutrient profile, providing ample protein while remaining lower in fat, especially if skinless options are chosen.

Using whole chicken enhances micronutrient intake, offering B vitamins for energy, iron for circulation, and selenium for antioxidant support.

In terms of dietary considerations, those watching their calorie intake can choose to limit portions or serve it alongside healthier sides such as steamed vegetables.

Watching portion sizes can aid in maintaining a balanced diet; consider protein needs alongside age, activity level, and personal health goals.

Incorporating this dish into a well-balanced meal plan can significantly contribute to overall health and wellness, making it an excellent addition to any menu.

Dietary Adaptations

For a gluten-free option, this recipe is naturally compliant; simply ensure that all added seasonings and accompaniments are gluten-free.

Dairy-free adaptations can also easily incorporate plant-based alternatives in sauces or sides without compromising flavor.

While the recipe centers around chicken, it can be adjusted for those following a vegan or vegetarian diet by substituting with hearty vegetables or plant-based proteins.

Low-carb variations could reduce the amount of accompanying starchy vegetables while pairing it with leafy greens dressed in lemon vinaigrette.

For keto diets, retain the chicken and adjust sides to include avocados or low-carb vegetables, enhancing the dish’s health profile.

Troubleshooting Guide

If you encounter texture issues with the chicken, undercooking it could lead to rubberiness; always ensure proper cooking temperatures are maintained.

For a flavor balance problem, if the dish is too lemony, consider adding a touch of honey to dull the acid while enhancing the overall taste.

Should temperature problems arise during cooking, adjust the oven settings and ensure the chicken is placed evenly within the oven.

If your equipment challenges hamper the roasting process, adjust cooking times or consider using convection settings for better heat circulation.

If you find substitutions have altered the dish undesirably, revisit flavors to incorporate complementary herbs or spices to factor in the change.

Timing concerns can arise when roasting large pieces; always choose slightly smaller chickens or adjust for even cooking across sizes.

Recipe Success Stories

Community feedback often highlights the ease of preparation involved in this Lemon Garlic Roasted Chicken recipe. Readers have shared their adaptations, showcasing how a simple dish can transform into many variations suited to diverse palates.

Variations like adding spices such as cumin or smoked paprika have been especially popular, with many praising the extra layers of flavor this brings to the roasted dish.

Success stories have also noted surprise guests asking for the recipe, showcasing how this dish transcends ordinary meal expectations.

Photography tips include taking a few moments to style the plated dish; fresh herbs and colorful vegetables make a great impact in the final presentation.

Frequently Asked Questions

Q: Can I use chicken breasts instead of a whole chicken?

A: Yes, chicken breasts work well but will cook faster. Adjust the cooking time accordingly to avoid drying out the meat.

Q: Can I roast the chicken in an air fryer?

A: Absolutely! Air frying can produce a crispy exterior while ensuring juicy meat. Just be sure to adjust the time based on the model.

Q: Is it safe to marinate chicken overnight?

A: Yes, marinating chicken overnight is safe and can enhance flavor. Just balance acidity to avoid altering the texture excessively.

Q: Can I add other vegetables to the roasting pan?

A: Yes! Root vegetables like potatoes and carrots complement the dish and can be roasted alongside the chicken.

Q: How do I prevent the chicken from drying out?

A: Basting during cooking and allowing the chicken to rest post-roasting helps keep it moist.

Q: Can I substitute other herbs and spices?

A: Absolutely! Feel free to experiment with your favorite herbs like thyme, rosemary, or mixed Italian herbs for unique variation.

Q: What side dishes pair well with this recipe?

A: Fresh salads, roasted vegetables, or a grain like couscous are great accompaniments that enhance the dining experience.

Q: How should leftovers be stored?

A: Store leftovers in airtight containers in the fridge for up to four days and freeze if you want to keep them longer.

Q: Is this dish freezer-friendly?

A: Yes, you can freeze the chicken. Wrap it well to prevent freezer burn, and it will last for about 3 months.

Q: Can I make this recipe without garlic?

A: While garlic adds significant flavor, you can make the dish without it, simply increasing the lemon or adding another aromatic like onion.

Additional Resources

Consider exploring related recipes featuring lemon, garlic, and chicken for an array of new ideas. Technique guides on roasting and seasoning can enhance your cooking repertoire.

For ingredient information, look into local farmers’ markets to find fresh produce for your dish, as these can elevate flavors considerably.

If you’re interested in kitchen tool recommendations, consider investing in high-quality roasting pans and measuring devices to increase your success rate in the kitchen.

Also, keep an eye out for seasonal variations based on your local produce to keep meals exciting and fresh throughout the year.

Join the Conversation

We encourage you to share your Lemon Garlic Roasted Chicken experiences on social media! Feel free to tag your photos and variations as we love to see how you’ve made this recipe your own.

For those who have tried this dish, sharing recipes and suggestions can enrich our community, helping others discover the joy of cooking. Your reviews and experiences may inspire someone else to dive into this flavorful dish!

Join us in discussing tips and suggestions for modifying the recipe to cater to different dietary needs. Every voice adds to the vibrant tapestry of cooking experiences we create together.

The Recipe

Lemon Garlic Roasted Chicken

Serves: 4

Prep Time: 15 mins

Cook Time: 1 hour

Total Time: 1 hour 15 mins

Kitchen Equipment Needed

  • Roasting pan
  • Kitchen twine
  • Basting brush
  • Meat thermometer

Ingredients

  • 1 whole chicken (around 4-5 lbs)
  • 2 lemons, juiced and zested
  • 1 head of garlic, cloves minced
  • 1/4 cup olive oil
  • Salt and pepper to taste
  • Fresh herbs (thyme, rosemary, or parsley) for garnish

Directions

  1. Preheat your oven to 425°F (220°C).
  2. In a bowl, combine lemon juice, zest, minced garlic, olive oil, salt, and pepper to create a marinade.
  3. Place the chicken in a roasting pan and pat it dry with paper towels.
  4. Gently separate the skin of the chicken and rub the marinade beneath the skin and all over the chicken.
  5. Truss the legs with kitchen twine and tuck the wings underneath the chicken.
  6. Roast the chicken in the preheated oven for about 1 hour, basting every 20 minutes with the drippings.
  7. Use a meat thermometer to ensure the internal temperature has reached 165°F (74°C).
  8. Remove from the oven and allow to rest for 10-15 minutes before slicing.
  9. Serve garnished with fresh herbs and lemon wedges.

Recipe Notes

  • You can use chicken parts instead of a whole chicken; adjust cooking time accordingly.
  • Feel free to adjust seasonings according to your taste preferences.
  • For a spicier kick, add red pepper flakes to the marinade.

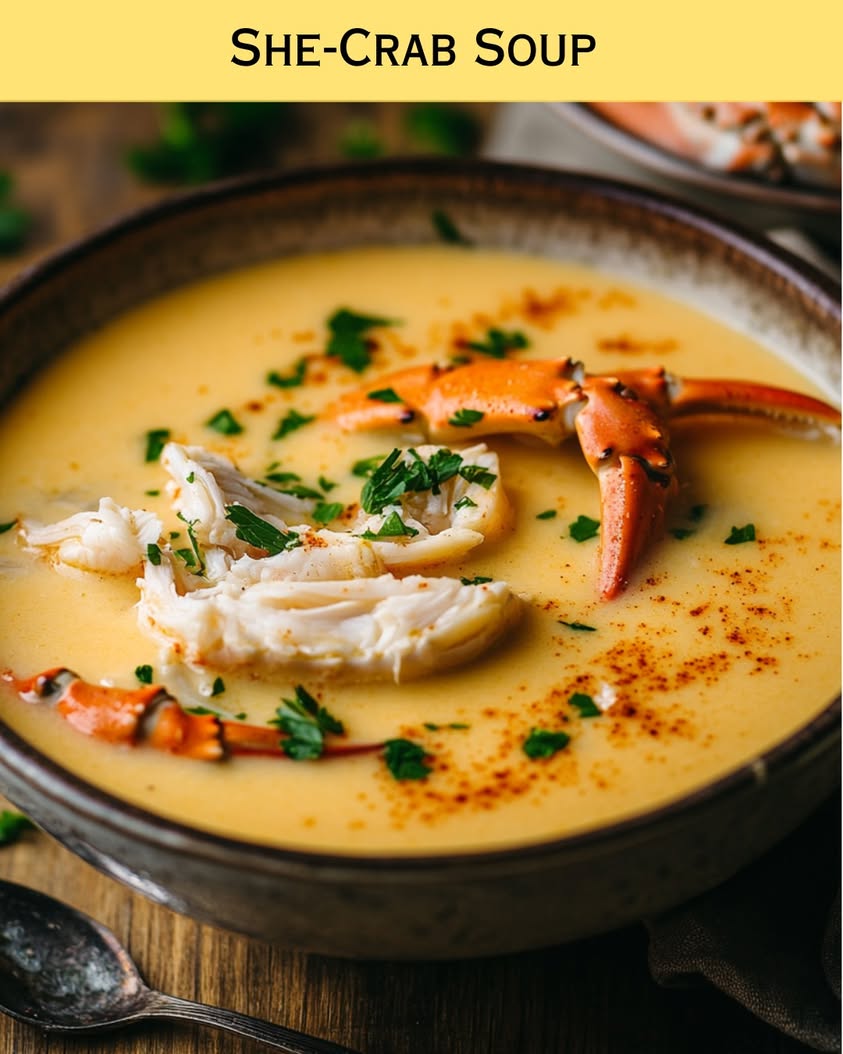
Delicious She-Crab Soup Recipe: A Southern Culinary Delight

Delicious She-Crab Soup: A Seafood Delight

⚖️
Difficulty
Moderate

⏲️
Prep Time
20 mins

🕒
Cook Time
30 mins

⏱️
Total Time
50 mins

🍽️
Servings
4 servings

She-Crab Soup is a delightful and rich dish that captures the essence of coastal cuisine. With its creamy texture and flavorful crab meat, this soup invites anyone to experience the allure of the sea from the comfort of their home. Made with fresh ingredients, including sweet crab meat and a hint of sherry, each spoonful is a warm embrace of oceanic flavor, perfect for any occasion.

This recipe not only highlights the delicate taste of crab, but it also creates a luxurious experience with every taste. The warm, comforting aroma of the soup as it simmers on the stove fills your kitchen with a sense of anticipation as you prepare to delight your family and friends with this culinary masterpiece.

Quick Recipe Highlights

  • Flavor Profile: Rich and creamy with a distinct sweetness from crab meat complemented by a hint of sherry, making each spoonful a taste of luxury.
  • Texture: Smooth and velvety with tender chunks of crab providing a delightful contrast to the creamy base, creating a satisfying mouthfeel.
  • Aroma: An inviting blend of aromatic herbs, fresh crab, and the subtle warmth of sherry fills the air, making it hard to resist.
  • Visual Appeal: A beautiful golden color flecked with rich crab meat, garnished with fresh herbs, making it as pleasing to the eye as it is to the palate.
  • Skill Level Needed: This recipe is moderate in complexity, requiring attention to detail but perfect for home cooks ready to impress.
  • Special Equipment: A deep soup pot and a whisk are essential for achieving the perfect creamy consistency.

Recipe Overview

  • Difficulty Level: This She-Crab Soup is moderately challenging, as it requires balancing flavors and achieving the right consistency, but it is well within reach for enthusiastic cooks.
  • Category: Perfect as a main course or an elegant appetizer, it’s a versatile dish suitable for both casual dinners and special occasions.
  • Cuisine: Rooted in Southern culinary tradition, this recipe reflects the charm of coastal cooking, combining fresh seafood with creamy ingredients.
  • Cost: The quality ingredients may slightly increase costs, but the rich flavors make it worth the investment for a special meal.
  • Season: Best enjoyed during colder months, the soup serves as a warm, hearty dish; however, fresh crab can make it a delightful treat year-round.
  • Occasion: Ideal for family gatherings, holiday celebrations, or romantic dinners, providing a touch of sophistication to your meal.

Why You’ll Love This Recipe

She-Crab Soup offers an impressive blend of taste and texture that is sure to please seafood lovers. The combination of creamy broth and tender crab meat creates a comforting dish that envelops you in warmth. Each bite reveals a burst of flavor, highlighting the sweet and delicate notes of the crab paired with a hint of sherry. This is not just a meal; it’s an unforgettable experience that tantalizes the palate.

This soup is incredibly convenient to prepare, taking only a few steps to create a hearty dish. The beauty of She-Crab Soup lies in its simplicity – just sauté, simmer, and serve. It’s a delightful choice for busy weeknights or for impressing guests with minimal effort. Make it in advance, and enjoy the flavors as they deepen overnight!

From a nutritional standpoint, She-Crab Soup is a source of protein and healthy fats thanks to the crab meat. It provides essential vitamins and minerals while delivering comfort food satisfaction. When prepared with care, this dish can fit perfectly into a well-balanced diet, making it a wholesome choice for every occasion.

She-Crab Soup serves not only as a delicious dish but also as a centerpiece for social gatherings. It encourages sharing and conversation around the table, making for memorable dining experiences. Whether served as an appetizer or a main dish, it brings people together and creates lasting connections.

Considering its accessibility, She-Crab Soup can be made with a variety of substitutes for crab meat, allowing creativity while keeping the essential spirit of the dish intact. By using readily available ingredients, you can easily create a beautiful and delicious seafood soup that doesn’t break the bank.

Historical Background and Cultural Significance

The origins of She-Crab Soup trace back to the coastal regions of the Southern United States, particularly in Charleston, South Carolina. It draws heavily from the local culinary traditions that celebrate the bounty of the sea. Historically, the dish was a way to utilize the local catch of blue crabs, showcasing the seafood bounty of the Atlantic.

Culturally, She-Crab Soup signifies the rich heritage of Southern cooking, intertwining seafood with creamy, sophisticated flavors. It has deep roots in African American cuisine as well, evolving through generations and adapting to modern palates while retaining its traditional essence.

Over the years, She-Crab Soup has evolved, with variations emerging across different regions. Some recipes call for the addition of spicy elements, while others lean more towards a classic creamy base. This evolution reflects the diverse influences and seafood traditions throughout the culinary landscape of America.

Regional variations offer an exciting twist, with some areas utilizing different seafood or spices, allowing for personalization and creativity. Each adaptation tells a story of influences, preferences, and the unique flavors of the local culture, making every bowl of She-Crab Soup a reflection of heritage and place.

Ingredient Deep Dive

Crab Meat: Crab meat is the star of She-Crab Soup. With a delicate flavor that elevates the dish, it provides vital protein and is rich in omega-3 fatty acids, promoting heart health. When selecting crab meat, opt for fresh or pasteurized varieties, avoiding canned products for the best quality. Proper storage in the refrigerator is essential to maintain freshness, and it should be consumed within a few days.

Sherry: Sherry adds depth and complexity to She-Crab Soup. This fortified wine comes in various styles, each imparting unique nuances to the dish. When choosing sherry, consider the flavor profile you desire—dry sherry lends a sharp note, while cream sherry adds sweetness. Always store sherry in a cool, dark place to preserve its flavors after opening.

Common Mistakes to Avoid

  • Using canned crab meat can lead to a loss of flavor and texture, so always opt for fresh or high-quality pasteurized meat.
  • Overcooking the soup may result in tough crab meat and curdled cream; ensure gentle simmering.
  • Skipping the sherry can dull the flavor profile; use a suitable wine that enhances the soup’s richness.
  • Not seasoning adequately could result in a bland flavor, so taste and adjust before serving.
  • Skipping the seafood stock can leave the soup lacking depth; homemade is best, but store-bought can work in a pinch.
  • Neglecting to sauté the aromatics before adding liquids can miss out on essential flavor building.
  • Allowing the soup to sit too long before serving can lead to a change in texture, so serve it fresh for the best quality.
  • Forgetting to reserve some crab for garnish may lead to an unappealing presentation; always set some aside.

Essential Techniques

Sautéing Aromatics: This technique is crucial as it forms the flavor base for the soup. Heat oil or butter in a pot and add onions, garlic, or herbs to release their natural flavors. Aim for a soft texture without browning them too much for a balanced taste.

Creating the Roux: A roux, which thickens the soup, is made by combining equal parts fat and flour. It’s vital for achieving that creamy texture without lumps. Cook it slowly on low heat until it is a golden color—this is the key to a great She-Crab Soup.

Pro Tips for Perfect She-Crab Soup

1. Use fresh ingredients whenever possible, as they significantly enhance the flavor of your soup.

2. Always taste and adjust the seasoning before serving to ensure a well-rounded flavor.

3. Add sherry just before serving; this will enhance the aroma and retain its flavor.

4. Garnish with fresh parsley or chives for a splash of color and freshness on top of your soup.

5. Serve with crusty bread or crackers to complement the creamy soup’s richness.

6. For an extra creamy texture, consider stirring in a bit of cream right at the end of cooking.

7. Make sure to let the soup simmer gently—this allows the flavors to meld perfectly.

8. Experiment with different types of crab for diverse flavor profiles and textures.

Variations and Adaptations

For those looking to explore regional variations of She-Crab Soup, consider adding spices like Old Bay seasoning to introduce a familiar coastal taste. Alternatively, during warmer months, vegetables like corn or fresh peas can enhance the soup with seasonal brightness.

Seasonal adaptations are also possible; swap out traditional crab for shrimp or lobster to create delightful seafood variations. Dairy-free options can be made using coconut milk or cashew cream for a vegan twist without sacrificing the creamy texture of the soup.

For those who wish to modify flavors, adding a splash of hot sauce or a sprinkle of smoked paprika can bring a kick to the dish, making each spoonful a new adventure. Texture modifications can include pureeing part of the soup to create a different mouthfeel while retaining crab chunks for added substance.

Presentation alternatives can include serving She-Crab Soup in a hollowed-out bread bowl, enhancing the visual appeal while introducing an edible component, adding to the overall experience.

Serving and Presentation Guide

To present She-Crab Soup beautifully, consider using wide, shallow bowls that allow the rich colors and textures to shine. A dollop of sour cream or crème fraîche, combined with a sprinkling of fresh herbs, adds an elegant touch while enhancing the creamy element.

Garnishing ideas can range from a light drizzle of truffle oil to a scattering of crispy fried onions, enhancing both flavor and visual appeal. Traditional accompaniments include crusty bread, which is perfect for dipping, while modern serving suggestions may involve a side salad with citrus vinaigrette to refresh the palate.

Temperature considerations are vital; She-Crab Soup is best served hot, so consider warming your bowls beforehand to maintain the dish’s warmth. Portion control tips suggest filling bowls generously but keeping individual servings in check, allowing guests to savor and enjoy without overwhelming them.

Wine and Beverage Pairing

When pairing wine with She-Crab Soup, a crisp Chardonnay complements the creamy richness beautifully, enhancing the delicate flavors of the crab. A light Sauvignon Blanc with its fresh acidity can also provide a refreshing contrast to the rich soup.

For non-alcoholic alternatives, consider serving iced tea with a hint of lemon or a fizzy water infused with citrus, which can refresh alongside the meal. If you enjoy coffee or tea, opt for a light herbal tea that won’t overpower the dish.

Temperature considerations are essential to maintain in beverages. Ensure that white wines are chilled but not overly cold to mask the flavors, while serving teas at the right warmth to harmonize with the rich soup without overwhelming the palate. When recommending drinks, consider serving a choice that enhances the meal without overpowering the main flavors.

Storage and Shelf Life

Proper storage is key to maintaining the quality of She-Crab Soup. Store it in an airtight container in the refrigerator, and ensure it is consumed within 3-4 days for the best freshness. The soup can also be frozen for longer shelf life—separate it into portions for easy use later.

When it comes to temperature requirements, ensure that the soup is cooled down to room temperature before refrigerating or freezing to avoid condensation. Use glass or BPA-free plastic containers for optimal storage, and always label them with the date for reference.

Signs of spoilage include off smells and changes in texture; avoid consuming the soup if these are present. To reheat, gently warm over low heat on the stove, stirring frequently, and consider adding a splash of cream to restore the original consistency after freezing.

Make Ahead Strategies

For those who like to plan ahead, She-Crab Soup can be prepared in advance up to two days prior to serving. Consider making the soup and letting it cool before refrigerating to enhance the flavors as they meld overnight.

An effective prep timeline involves preparing the crab and vegetables a day in advance. Ensure all ingredients are prepped and stored properly, keeping flavors fresh. Assembly tips suggest rewarming gently before serving, adjusting seasoning as necessary.

Assessing the quality impact, while it is highly recommended to serve the soup fresh, letting it sit for a day in the fridge allows flavors to deepen, making it even more delicious when reheated. Fresh elements like chopped herbs can be added just before serving to maintain their vibrancy.

Scaling Instructions

Halving the She-Crab Soup recipe can easily be done by splitting the quantities of ingredients while ensuring to maintain the cooking times, adjusting to your stovetop’s heat as necessary. Doubling or tripling the recipe requires larger pots and may necessitate longer cooking times, so watch for texture and consistency.

Equipment adjustments may require larger stockpots and additional preparation space depending on the amount you’re making. Keep in mind that as recipe volume increases, adjustments in timing and temperature may be necessary to ensure even cooking.

When it comes to storage considerations, if doubling the recipe, ensure you have enough containers to store leftovers after serving. Proper labeling and temperature management are crucial at larger scales to ensure safety and freshness.

Nutritional Deep Dive

She-Crab Soup offers comprehensive nutritional benefits, providing a balanced macro breakdown of protein from crab, healthy fats from cream, and carbohydrates from flour. Each bowl can supply essential amino acids that are crucial for bodily functions.

A micronutrient analysis reveals the soup is rich in vitamin B12 from crab, contributing to heart and nervous system health, while providing minerals like selenium that play an important role in antioxidant protection and immune support. Careful ingredient selection can further improve its health profile.

Health benefits stretch beyond basic nutrition; the omega-3 fatty acids found in crab promote cardiovascular health. The dish is also dense in vitamins, making it a nourishing choice for all ages, especially when enjoyed as a meal or comforting dish.

When considering dietary aspects, assess portion size for weight management, keeping awareness of added fats from cream or butter. Being mindful of ingredient choices allows this dish to fit into various dietary needs and preferences seamlessly.

Dietary Adaptations

For a gluten-free version, substitute all-purpose flour with gluten-free flour to maintain the creamy texture without compromising flavor. Use a cornstarch slurry for thickening instead of a roux for best results.

Dairy-free diets may benefit from utilizing coconut cream in place of heavy cream, providing a similar mouthfeel. This option suits those who want a vegan She-Crab Soup without losing the luxurious experience.

For low-carb diets such as keto or paleo, skip the flour and focus on a rich crab and vegetable base while using a low-carb thickening agent if necessary, ensuring full flavor without excess carbohydrates.

Adapting She-Crab Soup for a low-FODMAP diet can be achieved by omitting onions and garlic, relying on shallots or green onions for flavor, while ensuring to keep the core ingredients intact for that important taste and texture.

Troubleshooting Guide

If you encounter texture issues, a blender can help smooth out the soup if it becomes too thick. Carefully balance with additional cream or broth if needed.

To address flavor balance problems, ensure to taste as you go; a sprinkle of salt or twist of lemon can brighten flavors significantly if they feel muted.

Temperature problems can often arise when reheating; keep it on low heat and stir constantly to avoid scorching at the bottom, which can alter the flavor.

Equipment challenges are common, so make sure your stovetop pot is large enough to accommodate all ingredients comfortably; overcrowding can hinder proper cooking.

If using substitutes, like different seafood, adjust cooking times as they may vary from crab, leading to either inconsistent textures or flavors if not monitored.

Recipe Success Stories

Community feedback reveals many who have tried the She-Crab Soup rave about its delectable flavors and comforting nature. Home cooks often report success with the base recipe, incorporating their adaptations for unique twists.

Variation successes include experimenting with different seafood, with several readers enthusiastically sharing their successful substitution stories, adding homage to local seafood varieties.

Adaptation stories highlight how families who had traditionally shied away from crab have embraced the dish, sharing joint family cooking experiences that have revamped their culinary approach.

Many photography tips have been shared within the community. Capturing the vibrant colors and creamy texture of the She-Crab Soup has ignited inspiration in home cooks as they showcase their dishes on social media.

Frequently Asked Questions

Can I make She-Crab Soup in advance? Yes, you can prepare the soup a day before and refrigerate it. It often tastes even better the next day as the flavors meld together; just reheat gently before serving.

What type of crab meat should I use? Fresh or pasteurized lump crab meat is ideal for She-Crab Soup. Avoid canned crab meat for a fresher flavor and better texture.

How can I thicken my soup? If your soup is too thin, consider making a roux or using cornstarch mixed with water to thicken it. Remember to add gradually and stir to prevent lumps.

What can I substitute for sherry? If you don’t have sherry, try using dry white wine or a splash of apple cider vinegar mixed with water for a similar tangy flavor.

Is She-Crab Soup suitable for freezing? Yes, but for the best results, freeze without cream. You can add cream after thawing to maintain the texture.

Can I make She-Crab Soup dairy-free? Absolutely! Use coconut cream or a plant-based cream alternative to achieve a similar richness.

How do I store leftovers? Store leftovers in an airtight container in the refrigerator for up to 4 days, or freeze them for longer storage.

What should I serve with She-Crab Soup? Crusty bread, crackers, or a light salad are great accompaniments that complement the rich flavors of the soup.

Can I add vegetables to this recipe? Yes! Vegetables like asparagus, corn, or spinach can be great additions that elevate the flavors and nutrition of the soup.

How does the flavor change if I use different seafood? Substituting different seafood can introduce varied flavor profiles, while it is essential to adjust cooking times accordingly to avoid overcooking.

Additional Resources

For more delicious recipes, check out our collection of seafood dishes, or refer to our ingredient guide for insights on selecting the best fish and shellfish. Additionally, search for equipment recommendations tailored to seafood preparation, ensuring that you have everything you need to enjoy future cooking adventures. Seasonal variations will keep your cooking fresh all year round!

Join the Conversation

We’d love to hear about your She-Crab Soup experiences! Share your creations on social media, and don’t forget to tag us. Your photography tips and recipe reviews can inspire others to try this delightful dish. Celebrating the variations you’ve created will help foster a community around this recipe, ensuring everyone can enjoy a taste of this coastal classic!

The Recipe

She-Crab Soup

Serves: 4

Prep Time: 20 mins

Cook Time: 30 mins

Total Time: 50 mins

Kitchen Equipment Needed

  • Large pot
  • Whisk
  • Measuring cups and spoons
  • Cutting board
  • Sharp knife

Ingredients

  • 2 cups lump crab meat
  • 4 tablespoons butter
  • 1 small onion, diced
  • 2 garlic cloves, minced
  • ¼ cup all-purpose flour
  • 4 cups seafood stock
  • 2 cups heavy cream
  • ½ cup dry sherry
  • Salt and pepper to taste
  • Fresh parsley for garnish

Directions

  1. In a large pot, melt butter over medium heat. Sauté onions and garlic until softened.
  2. Add flour to the mixture, stirring continuously to form a roux, cooking for about 2-3 minutes.
  3. Gradually whisk in the seafood stock until smooth, then bring to a gentle simmer.
  4. Stir in the heavy cream and allow the mixture to thicken slightly.
  5. Gently fold in the crab meat and sherry, cooking for an additional 5-10 minutes without boiling.
  6. Season with salt and pepper to taste before serving. Garnish with fresh parsley.

Recipe Notes

  • For a smoother texture, consider blending part of the soup before adding crab.
  • Feel free to substitute crab meat with shrimp or lobster for a different flavor profile.
  • This recipe can easily be doubled for larger gatherings.

Best Chocolate Chip Cookies Recipe – Soft and Chewy

Delicious Chocolate Chip Cookies: The Ultimate Treat for Cookie Lovers

⚖️
Difficulty
Easy

⏲️
Prep Time
15 mins

🕒
Cook Time
10 mins

⏱️
Total Time
25 mins

🍽️
Servings
24 cookies

Indulging in warm, homemade chocolate chip cookies can evoke fond memories and fill your home with a comforting aroma. This recipe takes the classic cookie, which has a special place in many hearts, and enhances it with rich flavors and a perfect balance of textures. Picture biting into a freshly baked cookie; the surface is slightly crisp, giving way to a soft, gooey center filled with melty chocolate. This simple yet beloved treat invites you to share it with family and friends or enjoy it on your own with a glass of milk.

These chocolate chip cookies are not just any cookies—they’re the epitome of comfort food. Each bite offers an explosion of sweetness complemented by the semi-sweet chocolate morsels that melt in your mouth. The buttery dough, mixed with a dash of vanilla, creates a rich flavor that makes them irresistible. Whether you’re baking them for a special occasion or just to satisfy your sweet tooth, this recipe is bound to become a staple in your baking repertoire.

Quick Recipe Highlights

  • Flavor Profile: These cookies feature a wonderfully sweet and buttery flavor, with a hint of vanilla that elevates the chocolate’s richness.
  • Texture: Enjoy the contrast of the crisp edges and the soft, chewy center that combines to create a perfect mouthfeel.
  • Aroma: The warm, inviting smell of freshly baked cookies fills your kitchen, balanced by notes of chocolate and vanilla.
  • Visual Appeal: Beautifully golden-brown with melted chocolate chips glistening on top, these cookies are a treat for the eyes.
  • Skill Level Needed: Ideal for beginners, this recipe requires only basic baking skills and minimal specialized equipment.
  • Special Equipment: You will need a mixing bowl, baking sheets, and an oven—no fancy gadgets required!

Recipe Overview

  • Difficulty Level: This chocolate chip cookie recipe is easy, with straightforward steps that anyone can follow, making it perfect for novice bakers.
  • Category: Cookies; this recipe falls under the baked goods category, ideal for snacks or desserts.
  • Cuisine: An American classic, these cookies have become a cherished treat in households worldwide.
  • Cost: Made with affordable ingredients, this recipe is budget-friendly, costing approximately $5-$7 for 24 cookies.
  • Season: Perfect for any season, these cookies are particularly enjoyed during the holidays or cozy winter months.
  • Occasion: Great for parties, gatherings, or as a simple afternoon treat, they are versatile and loved by all.

Why You’ll Love This Recipe

Each bite of these chocolate chip cookies provides an unparalleled taste and texture that can brighten anyone’s day. The combination of simple ingredients transforms into something truly magical, making them a favorite among all ages. From the first warm cookie pulled from the oven to the last crumb, each moment is filled with joy and satisfaction that only homemade baking can deliver.

The convenience of this recipe cannot be overstated. With minimal prep time and an effortless cooking process, you can have a batch of cookies ready in just 25 minutes. This makes it an ideal choice for spontaneous dessert cravings or for when guests pop by unexpectedly. Simply mix the ingredients, scoop onto a baking sheet, and let your oven work its magic.

Nutritionally, while these cookies are still a treat, they can offer a semblance of balance by using brown sugar, which retains moisture and adds a deeper flavor compared to white sugar. Additionally, by choosing high-quality chocolate, you can increase the antioxidant content, making these cookies a slightly more guilt-free indulgence.

Socially, baking cookies is a wonderful way to connect with others, whether you’re baking with family or sharing your freshly made treats with friends. The act of baking together fosters creativity and camaraderie, creating joyous memories in the kitchen.

Cost-effectiveness is another advantage of this recipe. Accessible ingredients mean you can bake sweet delights without breaking the bank. Plus, with a yield of 24 cookies, it’s a great way to feed a crowd or stock your pantry with homemade goodness.

Historical Background and Cultural Significance

The origins of chocolate chip cookies trace back to the early 1930s, attributed to Ruth Wakefield, who owned the Toll House Inn in Massachusetts. She invented the recipe by adding chunks of semi-sweet chocolate to her butter cookie dough, creating the first-ever chocolate chip cookie. This innovative twist attracted fame, and soon, the cookie became a staple in American homes.

Culturally, chocolate chip cookies symbolize warmth and comfort. They have become so iconic that they are often associated with the idea of home-baking and family gatherings. Many American families have their variations of the recipe, passed down through generations, emphasizing the cookie’s role in tradition and togetherness.

Over the years, the chocolate chip cookie has evolved beyond its original recipe. Creative bakers have experimented with various flavors, from nutty additions to different types of chocolate, catering to all taste preferences while keeping the essence of the classic cookie alive.

Regionally, different areas in the United States have developed unique takes on the chocolate chip cookie. For instance, you might find larger, bakery-style cookies in urban areas compared to the smaller, chewier versions typically preferred in rural settings. This adaptability speaks to the cookie’s versatility and beloved place in American culture.

Ingredient Deep Dive

All-Purpose Flour:
All-purpose flour is the foundation of any good cookie, providing structure and texture. This ingredient is versatile, allowing for various baking applications, making it a kitchen staple. Furthermore, it balances the moisture from the fats and wet ingredients.

When selecting flour, look for brands that offer consistent quality, and always check for freshness indicated by a “best by” date. For storage, keep it in an airtight container in a cool, dry place to maintain its quality. For gluten-sensitive individuals, consider using alternatives like almond or oat flour.

Granulated Sugar:
Granulated sugar sweetens the cookies while contributing to their structure and tenderness. It helps create a crispy edge while allowing the center to stay chewy. Beyond its role in sweetness, sugar plays a critical part in browning, enhancing flavor through caramelization.

Choosing high-quality sugar is essential, even though it may seem standard. Store it in a cool, dry place, and keep it dry to avoid clumping. For substitutions, you can try coconut sugar for a healthier alternative, although it will impart a distinct flavor.

Butter:
Butter provides richness and moisture to chocolate chip cookies. Its creamy texture enhances the dough, contributing to both flavor and texture. Using unsalted butter allows you to control the salt content better in your recipe.

Opt for high-fat butter for the best results, and keep it chilled until ready to use. Proper storage involves wrapping it tightly or keeping it in its original packaging. If you’re in a pinch, substitutes like coconut oil or margarine can be used, but they may affect texture.

Chocolate Chips:
Chocolate chips add sweetness and a gooey texture to cookies. The semi-sweet variety is particularly popular as it balances perfectly with the sweetness of the dough, making every bite delightful. High-quality chocolate offers a better depth of flavor.

Store chocolate chips in a cool and dry environment, ideally in a sealed container to keep them fresh. If you’re looking for variations, feel free to substitute dark chocolate, white chocolate, or even add nuts for an extra crunch.

Common Mistakes to Avoid

  • Not measuring ingredients accurately: Always use the right measuring cups and techniques to ensure perfect proportions.
  • Using chilled butter: Room temperature butter creams better with sugar, resulting in a fluffier texture.
  • Overmixing the dough: Mixing too long activates gluten, which can result in tougher cookies.
  • Baking on a hot baking sheet: Always allow baking sheets to cool between batches to prevent unwanted spreading.
  • Not chilling the dough: Giving the dough time to chill helps prevent cookies from spreading too much while baking.
  • Skipping the parchment paper: Lining baking sheets aids in even cooking and easier cleanup.
  • Removing cookies too early: Cookies may still appear soft when done; they will set as they cool on the baking sheet.
  • Using expired ingredients: Always check the expiry dates on baking soda or baking powder for optimal results.
  • Ignoring personal oven variations: Ovens can heat unevenly. Keep an eye on your cookies to avoid burning.
  • Rushing the cooling process: Allow cookies to cool on a wire rack to achieve the right texture.

Essential Techniques

Creaming Butter and Sugar:
This technique is vital as it incorporates air, creating a light and fluffy texture in the cookies. Ensure the butter is at room temperature for optimal results. Cream for 2-3 minutes until the mixture is pale and creamy, which is key for achieving the desired texture.

Measuring Flour Correctly:
Flour should be properly measured to avoid dense cookies. Use the spoon-and-level method: scoop flour into your measuring cup and level it off with a knife. Avoid using the cup directly in the flour container to prevent packing.

Chilling the Dough:
Chilling the dough is essential for preventing cookies from spreading during baking. Aim to chill your dough for at least 30 minutes. It also allows for improved flavor development as the ingredients meld.

Pro Tips for Perfect Chocolate Chip Cookies

1. Use high-quality chocolate chips for the best flavor experience.
2. Incorporate a mix of chocolate types (e.g., dark and milk) for a delightful variety.
3. Add a pinch of sea salt on top before baking to enhance flavors further.
4. Experiment by adding nuts or oats for a new texture twist.
5. For chewier cookies, slightly underbake them to keep the centers soft.
6. Use an ice cream scoop for uniform cookie sizes, ensuring even baking.
7. Try different extracts such as almond or coconut for unique flavor profiles.
8. Let the cookies cool completely before stacking to avoid sogginess.

Variations and Adaptations

Chocolate chip cookies can be easily adapted to suit different tastes. For a regional twist, add cardamom for a warm, spiced flavor reminiscent of Scandinavian baked goods. Seasonal variations can include pumpkin spice or peppermint during holiday months.

For those with dietary restrictions, consider gluten-free flour blends that perform well in cookie recipes. Vegan adaptations can be made by using coconut oil and flaxseed meal as an egg substitute, ensuring each bite remains decadent and delicious.

Feel free to adjust the flavor profile by adding different types of chocolate, such as white, dark, or even peanut butter chips. You can also modify textures by incorporating crushed nuts like walnuts or pecans for an added crunch. Lastly, consider serving cookies with unique garnishes like drizzles of caramel or icing for an attractive presentation.

Serving and Presentation Guide

Perfectly plating your chocolate chip cookies can elevate their visual appeal. Stack a few cookies on a decorative plate, and consider using vibrant napkins or small cake stands to draw attention. A sprinkle of sea salt can create an elegant look alongside deliciousness.

Traditional accompaniments include a glass of cold milk, but modern pairings might consist of coffee or herbal teas for a delightful afternoon treat. When considering portion control, ensure that each serving is consistent in size, enhancing the experience for everyone at the table.

For an appealing setup, creating a cookie bar with different toppings or dips can add an interactive element to your serving style. Finally, warm cookies served straight from the oven are often the most irresistible, so be mindful of temperature while serving.

Wine and Beverage Pairing

Pairing beverages with chocolate chip cookies can be a delightful experience. For a classic touch, a glass of full-bodied red wine like Cabernet Sauvignon complements the richness of the chocolate, while a sweet dessert wine such as Ruby Port enhances the dessert experience.

For non-alcoholic options, a cup of rich hot cocoa or chai tea can pair beautifully, echoing the comforting flavors of the cookies. If you’re opting for coffee, a robust dark roast can provide an excellent balance to the sweetness of the cookies, while milk or white chocolate lattes create a cozy match.

Serving temperatures are important; beverages should be warm but not scalding, ensuring all flavors are pronounced without overwhelming the palate.

Storage and Shelf Life

To maintain freshness, chocolate chip cookies should be stored in an airtight container at room temperature. This helps to retain their moisture, combating inevitable staleness over time. If stored properly, they can last for about a week on the counter or two weeks in the refrigerator.

For longer storage, freezing cookies is an excellent option. Ensure they are in a sealed plastic bag or container to prevent freezer burn; they can last for up to three months in the freezer. When you’re ready to enjoy them, simply thaw at room temperature or warm them in the oven for a few minutes.

When reheating cookies, do so briefly to restore their original texture without drying them out. Look for signs of spoilage, such as off smells or mold, indicating that they have passed their prime.

Make Ahead Strategies

Preparing chocolate chip cookies ahead of time can streamline your baking endeavors. You can mix the dough, shape it into balls, and freeze them on a baking sheet. Once frozen, transfer them to a zip-top bag, where they can be stored for a few months.

When you’re ready to bake, simply preheat your oven and bake the frozen cookie dough straight without thawing. This allows you to enjoy fresh cookies any day without extensive prep time.

For added texture and flavor, you could also prepare the dough in advance, refrigerate it, and allow flavors to meld overnight. Just ensure you cover it tightly to prevent it from drying out.

Scaling Instructions

If you wish to scale the recipe, consider using these adjustments. To halve the recipe, simply divide all ingredients by two, ensuring cooking times remain the same.

When doubling or tripling the recipe, it’s best to use larger mixing bowls. Keep in mind that the baking time could slightly increase due to the larger batch; check for doneness by visual and tactile cues.

Equipment adjustments may include using additional baking sheets or rotating them for even baking. Stay aware of your oven’s specific characteristics for the best outcome, particularly if you’re working with a smaller or unevenly heated oven.

Make sure to plan for adequate storage for larger batches, as compounded cookies may need to be stored in multiple containers to maintain freshness.

Nutritional Deep Dive

Understanding the nutritional makeup of chocolate chip cookies can be insightful. On average, one cookie offers about 150-200 calories, depending on ingredients and portion size. This includes macros such as carbohydrates from flour and sugars, fats primarily from butter, and a smaller contribution from protein.

Micronutrient levels in chocolate chip cookies can vary based on added ingredients. Dark chocolate provides antioxidants, while whole grain flours add fiber, making these cookies slightly more nutritious compared to their traditional counterparts.

While cookies can be part of a balanced diet, moderation is key to weight management and overall health. Consider enjoying them with fruits or nuts to balance out your sweet tooth with more nutrients.

Dietary Adaptations

For those pursuing gluten-free diets, consider using gluten-free flour blends that function similarly to regular flour. Make sure to investigate brands that include xanthan gum for optimal structure in cookies.

Vegans can enjoy similar delights by substituting plant oils for butter; coconut oil offers a delicious alternative. Replace eggs with flaxseed meal or chia seeds mixed with water to replicate the binding effect.

Low-carb diets can adapt this recipe using almond flour and sugar substitutes like erythritol, offering a guilt-free treat. Keto and paleo followers may incorporate dark chocolate or nuts to enrich the cookie’s appeal while adhering to their dietary guidelines.

For those on a low-FODMAP diet, it’s essential to use lactose-free butter or vegetable oil and sugar alternatives to minimize digestive discomfort while still enjoying a sweet treat.

Troubleshooting Guide

If your cookies aren’t coming out as expected, there might be a few common issues to consider. If cookies are too flat, confirm that your butter wasn’t melted and that your baking soda is fresh.

In case your cookies are too tough, check that you didn’t overmix after adding the flour. A quick stir should suffice.

For flavor balance problems, ensure you’re adjusting sugar levels according to personal taste and that your vanilla extract is high-quality.

If you’re encountering temperature issues, invest in an oven thermometer to verify that the temperature aligns with what you’re setting; ovens can often run hotter or cooler than indicated.

Lastly, if you’re adapting ingredients, consider the flavors and moisture content of replacements to preserve texture.

Recipe Success Stories

Readers often share their delightful experiences with this chocolate chip cookie recipe in various forums. Many have enjoyed big batches during family gatherings, with compliments pouring in from friends and relatives.

Variations like adding nuts, toffee bits, or even different chocolate flavors have become favorite adaptations for many bakers seeking a unique twist. Community feedback showcases how versatile this recipe truly is, catering to diverse tastes and preferences while maintaining its core appeal.

Additionally, some readers have shared tips on photography, noting that a rustic setting or a clean background can enhance the beauty of these delectable cookies online, encouraging others to try their hand at baking.

Frequently Asked Questions

Can I freeze chocolate chip cookie dough?

Yes, you can absolutely freeze the chocolate chip cookie dough. Form it into balls, freeze them on a baking sheet, and then transfer the frozen dough balls into an airtight bag. You can bake them straight from frozen; just add a minute or two to the cooking time.

What can I use instead of eggs?

For each egg in the recipe, you can use a flaxseed meal or chia seed mixture to replace it. Combine 1 tablespoon of ground flax and 3 tablespoons of water, allow it to sit for 5-10 minutes until it thickens. Alternatively, you can also use unsweetened applesauce (1/4 cup per egg).

How do I know when my cookies are done baking?

Cookies are done when they are golden brown around the edges but still soft in the center. They will firm up as they cool, so don’t wait for them to look fully firm in the oven. Lightly pressing the center should leave a gentle indentation.

Can I use whole wheat flour instead?

Yes, whole wheat flour can be substituted for all-purpose flour, but it may yield denser cookies. If using whole wheat flour, try using a mix of half whole wheat and half all-purpose for a balanced texture and taste.

What should I do if my cookies are too dry?

If your cookies come out too dry, they may have been overbaked. Ensure that you closely monitor baking time and check for doneness as specified. To add moisture next time, consider slightly reducing the flour or increasing the sugar or fat content.

How can I make my cookies chewy?

To achieve a chewy texture, ensure to properly cream the butter and sugar, avoid overbaking, and use more brown sugar than white sugar. Chilling the dough also aids in achieving a chewy texture while preventing excessive spreading.

Is there a gluten-free alternative?

Yes! You can use gluten-free all-purpose flour blends that are specifically designed to replace regular flour in baking. Ensure the blend includes xanthan gum or add it separately to retain the cookie’s structure.

What gift ideas utilize chocolate chip cookies?

Chocolate chip cookies are wonderful gifts! Consider packing a batch in decorative tins or jars. Tie them with ribbons for holidays, or pair them with milk or coffee for a thoughtful present. They also make excellent contributions to cookie swaps or potlucks!

Can I add flavors to the base dough?

Absolutely! You can infuse your dough with flavor by adding spices such as cinnamon or nutmeg, or even zests from citrus fruits like oranges or lemons for a fresh twist. Just be mindful of balancing the quantity to not overpower the chocolate flavor.

What temperature should I bake cookies at?

The ideal temperature for baking chocolate chip cookies is typically around 350°F (175°C). This temperature allows for even cooking, leading to the perfect crisp edges and soft centers.

Additional Resources

If you enjoyed this chocolate chip cookie recipe, explore other delicious cookie recipes available on our blog. Check out peanut butter cookies or oatmeal raisin variations while diving deeper into baking techniques through our dedicated guides on butter temperatures and mixing methods.

For ingredient information, we have a variety of resources on flour types and their applications in baking. Make sure to browse our recommended equipment section for essential baking tools to help enhance your kitchen experience.

Lastly, look into seasonal variations for cookies during the holidays—unique spices or festive shapes provide different approaches to baking classic treats.

Join the Conversation

We love to see your baking successes! Share your chocolate chip cookie creations on social media using our hashtag and connect with other baking enthusiasts. Sharing your photographs can inspire others to try this beloved recipe and help build a community around simple homemade treats.

Consider leaving a review or suggesting your favorite variations in the comments below. Your feedback enriches our platform and encourages new bakers to experiment in the kitchen.

The Recipe

Chocolate Chip Cookies

Serves: 24 cookies

Prep Time: 15 mins

Cook Time: 10 mins

Total Time: 25 mins

Kitchen Equipment Needed

  • Mixing bowl
  • Baking sheets
  • Measuring cups and spoons
  • Whisk or electric mixer
  • Spoon or cookie scoop
  • Oven

Ingredients

  • 2 1/4 cups all-purpose flour
  • 1 teaspoon baking soda
  • 1/2 teaspoon salt
  • 1 cup unsalted butter, softened
  • 3/4 cup granulated sugar
  • 3/4 cup brown sugar, packed
  • 1 teaspoon vanilla extract
  • 2 large eggs
  • 2 cups semi-sweet chocolate chips

Directions

  1. Preheat your oven to 350°F (175°C) and line a baking sheet with parchment paper.
  2. In a small bowl, mix together flour, baking soda, and salt; set aside.
  3. In a large bowl, beat the softened butter with granulated and brown sugars until creamy.
  4. Add in the vanilla and eggs, mixing until well incorporated.
  5. Gradually add your dry ingredients to the wet ingredients until combined.
  6. Fold in chocolate chips with a spatula.
  7. Drop tablespoon-sized balls of dough onto the prepared baking sheets.
  8. Bake for 9-11 minutes, or until the edges are golden-brown but the centers remain soft.
  9. Let cool on the baking sheet for 5 minutes before transferring to a wire rack to cool completely.

Recipe Notes

  • For a thicker cookie, chill the dough for 30 minutes before baking.
  • Substitute different types of chocolate or add nuts for variations.
  • Store cookies in an airtight container for up to a week.
  • For best results, use room temperature egg and butter.

Refresh Your Day with a Tropical Strawberry Mango Smoothie

Tropical Strawberry Mango Smoothie: A Refreshing Blend for Any Occasion

⚖️
Difficulty
Easy

⏲️
Prep Time
10 mins

🕒
Cook Time
0 mins

⏱️
Total Time
10 mins

🍽️
Servings
2 servings

Welcome to your new favorite drink: the Tropical Strawberry Mango Smoothie! Brimming with vibrant colors and refreshing flavors, this smoothie is a delightful way to kickstart your day or cool down during the summer heat. The luscious combination of ripe strawberries and juicy mangoes creates a naturally sweet and tangy blend that invigorates the senses. Not only is this smoothie delicious, but it’s also packed with essential nutrients and antioxidants, making it a wonderful addition to any balanced diet.

Picture yourself enjoying this Tropical Strawberry Mango Smoothie on a sun-drenched patio, feeling the sweet breeze as you sip on this refreshing drink. With its creamy texture and delightful taste, this smoothie quickly transforms ordinary moments into something extraordinary. Perfect for breakfast, an afternoon treat, or a post-workout re-fuel, this recipe will have you returning for more!

Quick Recipe Highlights

  • Flavor Profile: The Tropical Strawberry Mango Smoothie offers a perfect balance of sweetness from the ripe fruits and a hint of tartness, delivering a flavorful experience that dances on your palate.
  • Texture: The creamy consistency from the yogurt and mango puree harmonizes beautifully with the juicy strawberries, creating a smooth and luscious mouthfeel.
  • Aroma: A fragrant mix of tropical notes fills the air, with the sweetness of mango combined with the fresh scent of strawberries.
  • Visual Appeal: Bright shades of red and gold, coupled with a garnish of fresh fruit, make this smoothie an eye-catching and appetizing choice.
  • Skill Level Needed: This recipe requires little to no culinary skills. Even beginner cooks can whip up this refreshing smoothie with ease.
  • Special Equipment: All you need is a blender to create this delightful beverage, making it easy to prepare in just a few minutes.

Recipe Overview

  • Difficulty Level: This Tropical Strawberry Mango Smoothie is marked as easy, perfect for anyone—whether you are a skilled chef or just starting out in the kitchen. It’s straightforward and quick to make!
  • Category: This recipe falls under healthy beverages and smoothies, making it a nutritious beverage option suitable for breakfast or snacks.
  • Cuisine: Inspired by tropical cuisines, this smoothie takes influence from regions like the Caribbean and Southeast Asia where mangoes and strawberries thrive.
  • Cost: The approximate cost to create this smoothie is quite affordable, highlighting the use of seasonal fruits, making it budget-friendly.
  • Season: The best time to enjoy this refreshing smoothie is during summer when strawberries and mangoes are in their prime, ensuring optimal flavor and sweetness.
  • Occasion: This Tropical Strawberry Mango Smoothie is ideal for brunch gatherings, summer picnics, or simply as an energizing post-exercise treat.

Why You’ll Love This Recipe

This Tropical Strawberry Mango Smoothie is packed with health benefits and allows you to start your day on a nutritious note. The bright, fruity flavors of mango and strawberries not only taste amazing but also provide an array of essential vitamins and antioxidants. Kids and adults alike will love the deliciousness, ensuring everyone enjoys their daily fruit intake without feeling like it’s a chore.

The convenience of this smoothie makes it a fantastic option for busy mornings or any time you crave a light refreshment. It requires minimal preparation and can be made in just ten minutes, allowing you to spend more time enjoying your smoothie rather than preparing it. The quick and straightforward recipe means you can make it in batches for larger gatherings or keep the ingredients ready for quick access.

Nutritively, this smoothie is a powerhouse; mangoes are rich in vitamin C and A, while strawberries boost your immune system and are high in fiber. This means you’re not only treating your taste buds but also fueling your body with energy and essential nutrients. It’s an easy way to embrace a healthy lifestyle while enjoying a deliciously sweet treat.

Socially, this smoothie is perfect for gatherings. Whether you are hosting friends or family, serving a fresh and colorful drink creates a festive atmosphere. It’s also a fantastic alternative for anyone looking for vegan, gluten-free, or dairy-free options, making it versatile for a range of dietary needs.

Lastly, from a cost perspective, creating this Tropical Strawberry Mango Smoothie at home is much more economical than purchasing pre-made smoothies from cafes. Buying seasonal fruits in bulk and preparing this drink yourself allows you to enjoy this tropical delight without breaking the bank.

Historical Background and Cultural Significance

The origins of this Tropical Strawberry Mango Smoothie are rooted in regions where both mangoes and strawberries grow abundantly. Mangoes hold a rich history, often celebrated in Indian culture as the “king of fruits,” symbolizing love and prosperity. They have been cultivated in South Asia for thousands of years. Strawberries, on the other hand, are native to North America and were enjoyed by Native Americans long before European settlers arrived.

In many tropical cultures, smoothies made from local fruits have become popular due to their refreshing qualities, particularly in hot climates. They are often served as thirst-quenching drinks following meals or as snacks, providing essential hydration and energy. This smoothie brings together diverse traditions, merging the best of both mango and strawberry to create a refreshing and vibrant beverage.

Over the years, smoothies have evolved to incorporate various ingredients such as yogurt, honey, and additional fruits, enhancing their nutritional value and flavor profiles. This Tropical Strawberry Mango Smoothie is a modern take on traditional recipes, allowing the freshness of the fruits to shine while also welcoming innovative combinations.

Regional variations now exist, with some cultures adding spices or herbs to their smoothies for an extra flavor kick. The beauty of this smoothie lies in its adaptability, allowing it to be embraced across many culinary traditions while remaining enjoyable to people of various backgrounds.

Ingredient Deep Dive

Mango
Mango is often referred to as the “super fruit” for its rich nutritional profile and diverse health benefits. Native to South Asia, mangoes have been valued for centuries not just for their delightful taste but also for their high content of vitamins A, C, and E. When selecting mangoes, look for those that yield slightly when pressed, indicating ripeness. Store mangoes at room temperature until ripe, then transfer to the refrigerator to increase shelf life. If you’re out of mangoes, pineapple or peaches can serve as delicious substitutes while retaining the smoothie’s tropical essence.

Strawberries
Strawberries are a popular berry known for their bright color and sweet flavor. They are packed with antioxidants and provide a great source of vitamin C, fiber, and folate. When choosing strawberries, opt for those that are fully red and plump. Store them in the refrigerator, and avoid washing them until you are ready to dice them to prevent spoilage. If fresh strawberries are not available, frozen strawberries can work beautifully in this smoothie, achieving a thick and creamy texture.

Common Mistakes to Avoid

  • Using unripe mangoes or strawberries can result in a less flavorful smoothie. Always use ripe fruits for optimal taste.
  • Not measuring ingredients accurately may lead to an unbalanced flavor profile; ensure to use the recommended ratios.
  • Adding too much liquid can dilute the smoothie, making it too thin; start with less and adjust as needed.
  • Forgetting to blend thoroughly can leave chunks in the smoothie, compromising the creamy texture; blend until completely smooth.
  • Neglecting to chill fruits can lead to a less refreshing smoothie; use cold fruits or add ice to enhance the chill factor.
  • Not tasting before serving can lead to an overly sweet or tart smoothie; adjust sweetness before finishing the blend.
  • Overloading the blender can lead to ineffectual blending; process in smaller batches for the best consistency.
  • In neglecting to customize ingredients, you miss out on flavor variations; include additional fruits or flavors to tweak the recipe.

Essential Techniques

Identifying ripe fruits is key for making the perfect smoothie. Ripe mangoes should slightly yield under gentle pressure and have a sweet aroma, while strawberries should be bright red and firm. Properly preparing your fruits—removing peels where necessary and cutting them into manageable chunks—ensures that your blender can smoothly process them without requiring excessive effort.

Another important technique involves blending. Start on a low speed to break down the fruits, then gradually increase to high speed for a creamy consistency. If your blender has a “smoothie” setting, that can help achieve the desired results. If you find your smoothie is too thick, you can add almond milk or coconut water, blending gradually until the texture is just right.

Pro Tips for Perfect Tropical Strawberry Mango Smoothie

1. Always use frozen fruits to enhance creaminess and result in a thicker smoothie.
2. If you prefer added sweetness, consider a touch of honey or agave syrup, but taste test before adding.
3. Incorporate leafy greens like spinach to boost nutritional content without compromising taste.
4. Blender power matters; ensure your blender is capable of smoothly combining frozen ingredients.
5. Consider topping with chia seeds or granola for an extra crunch and nutritional boost.
6. Adjust your base liquid depending on how thick or thin you like your smoothies, and experiment with different liquids.
7. Add a scoop of protein powder if you’re looking for a post-workout snack that keeps you full.
8. Garnish with fresh fruit or mint for a beautiful presentation and added freshness.

Variations and Adaptations

You can easily customize your Tropical Strawberry Mango Smoothie based on what you have available or your flavor preferences. For a regional twist, you can integrate coconut milk for a richer texture while enhancing the tropical vibe. Seasonal adaptations include swapping out strawberries for local berries, such as blueberries or blackberries, when they are at their peak.

For those with dietary needs, make the smoothie dairy-free by choosing almond or coconut yogurt instead of regular yogurt. Add-ins such as chia or flax seeds can increase the nutritional profile while providing healthy fats. If you’re looking for a protein-packed option, include a scoop of protein powder or Greek yogurt for an extra kick. For enhanced fiber, consider blending in a banana or some oats.

Serving and Presentation Guide

To elevate your Tropical Strawberry Mango Smoothie, consider unique plating techniques. Serve in clear, tall glasses to showcase the vibrant colors. Add a sprinkle of hemp seeds or a slice of fresh fruit on the rim for a stunning presentation.

Garnishing with fresh mint leaves can enhance both visual appeal and freshness. Traditional accompaniments for smoothies include granola on top or accompanied by a small slice of whole-grain toast. Always serve chilled, as the refreshing nature of this smoothie is best experienced cold. Keep portion control in mind; aim for approximately 8-12 ounces per serving to keep it satisfying yet healthy.

Wine and Beverage Pairing

For those looking to pair a beverage with their Tropical Strawberry Mango Smoothie, consider lighter whites like Sauvignon Blanc that complement the fruitiness. If you prefer non-alcoholic alternatives, coconut water served chilled provides a refreshing balance to the sweetness of the smoothie. Herbal teas, especially peppermint or chamomile, make excellent pairings as well, offering a pleasant contrast. Serve drinks chilled, mimicking the refreshing qualities of the smoothie itself for a cohesive dining experience.

Storage and Shelf Life

To maintain freshness, consume your Tropical Strawberry Mango Smoothie immediately after preparation. If you need to store it, keep it in an airtight container in the refrigerator for a maximum of 24 hours. Note that separation may occur, so give it a good shake or stir before enjoying.

If you’ve made a larger batch, consider freezing it in ice cube trays for later use, blending the frozen cubes into a future smoothie for a quick, refreshing treat. Watch for telltale signs of spoilage, such as off odors or color change, as these will indicate that it’s time to discard.

Make Ahead Strategies

Preparation can be straightforward. Dice and freeze mangoes and strawberries prior to smoothie making, keeping a stash ready for quick blending. You can assemble the base in advance by adding yogurt, fruits, and any chosen add-ins into a container in the fridge, and blend when ready.

If you’re considering a lunch or snack for later, make it the morning of, and keep it in a thermos to maintain temperature. Just remember to add any delicate ingredients, like nuts or seeds, post-blending to keep them crunchy.

Scaling Instructions

This Tropical Strawberry Mango Smoothie recipe can easily be halved or doubled based on your needs. For larger gatherings, simply triple the ingredients; just be mindful of your blender capacity.

If you opt to double the recipe, ensure your blending duration is longer to maintain a creamy texture. If using more than one blender, pour the mixtures into a large pitcher for easy serving.

When scaling, adjust the liquid base to retain your desired smoothie texture. If scaling down, the same portions remain relative but can be prepared in more personal sizes for a quick digestible treat.

Nutritional Deep Dive

The Tropical Strawberry Mango Smoothie is not only a delightful treat but also a powerhouse of nutrition. Each serving offers a balance of carbohydrates, proteins, and healthy fats that keep you energized throughout the day. The macro breakdown indicates a blend of natural sugars from fruits that provide quick energy while the fats from yogurts and seeds maintain fullness.

Essential vitamins from mangoes and strawberries enhance your immune system, while calcium from yogurt supports bone health. The dietary fiber content helps with digestion and may help regulate blood sugar levels, creating a versatile snack or meal.

In terms of weight management, this smoothie can be a part of a healthy diet plan, being low in calories yet high in satisfaction when incorporating whole fruits and natural sweeteners instead of added sugars.

Dietary Adaptations

This recipe is highly customizable to fit various diets. For a gluten-free option, involve ingredients like gluten-free granola as a topping or not at all. If you’re looking for dairy-free alternatives, coconut yogurt can serve well in place of regular yogurt.

Vegan modifications are simple; all the ingredients are plant-based. For low-carb or keto-focused individuals, swap sugar-based fruits with avocados and low-carb vegetables for a different yet still nutrient-packed drink.

Low-FODMAP modifications include controlling portion sizes of fruits and yogurt, ensuring they fit within your dietary guidelines while enjoying this smoothie without digestive discomfort.

Troubleshooting Guide

One common issue could be a too-thick or too-thin consistency. If your smoothie turns out too thick, add a bit more liquid and blend again to reach the desired smoothness. Conversely, if it’s too thin, consider tossing in another half banana or handful of frozen fruit to achieve a thicker texture.

Flavor imbalances can also occur. If you find it too sweet, a squeeze of lemon or lime juice can help balance the flavors out. On the other hand, if it’s too tart, adding a bit more honey or sweetener can enhance the overall taste.

If your blender isn’t functioning as expected and isn’t mixing properly, ensure the base ingredients are weighted down by the liquids and softer fruits first, or consider blending in batches to alleviate strain on the blender.

Recipe Success Stories

Community feedback surrounding this Tropical Strawberry Mango Smoothie has been overwhelmingly positive. Many readers have shared their experiences, noting how easy it is to create a customizable version based on personal preference. Participating in variations led to some delightful inventions, such as adding spinach or protein powder for fueling workouts.

Adaptation stories have emerged highlighting unique flavors added to their smoothies, from tantalizing chia seeds to a splash of coconut milk for an extra tropical flair. Readers suggest their photography tips for capturing vibrant images of the smoothie, making it appear as appetizing as it tastes.

Peer inspiration leads to continuous improvement with this recipe, showcasing the bond within the community. It’s not just a smoothie but a means to gather ideas for keeping it fresh and exciting.

Frequently Asked Questions

Q1: Can I use frozen mango and strawberries?

A1: Absolutely! Frozen fruits actually work great in smoothies and can help create a thicker consistency. Just be mindful to adjust the liquid content to ensure it blends smoothly.

Q2: Is this smoothie kid-friendly?

A2: Yes! The Tropical Strawberry Mango Smoothie is an excellent way to sneak in nutrients while delivering on flavor. Kids typically love the sweetness and vibrant colors.

Q3: How can I make it vegan?

A3: You can easily make this smoothie vegan by using plant-based yogurt alternatives like almond or coconut yogurt. This way, you maintain the creaminess without using dairy products.

Q4: What can I substitute for yogurt?

A4: If you prefer not to use yogurt, try alternatives like silken tofu or nut-based yogurts. You can also blend in a banana or avocado for creaminess.

Q5: Can I add protein powder?

A5: Yes! Adding a scoop of protein powder is a fantastic option, especially for post-workout nourishment. Just ensure the flavor complements the fruit blend.

Q6: How long can I store this smoothie?

A6: Ideally, consume the smoothie immediately, but you can store it for up to 24 hours in an airtight container in the fridge. Give it a good shake before drinking!

Q7: Can I make this smoothie ahead of time?

A7: Yes, pre-chop and freeze fruits for easy access. You can prepare your smoothie early in the day and blend when you’re ready to enjoy it!

Q8: What’s the best liquid to use?

A8: The best liquid depends on personal preference! You can use water, almond milk, coconut water, or even fruit juice. Each provides a unique flavor profile.

Q9: Can I use a different fruit?

A9: Definitely! This smoothie is versatile, so feel free to experiment with other fruits like peaches, apricots, or berries depending on what you have on hand!

Q10: How do I prevent separation?

A10: To reduce separation, ensure all ingredients are sufficiently blended. If stored, give it a shake before drinking to recombine settled ingredients.

Additional Resources

Explore related recipes including our Berry Bananza Smoothie and Green Detox Smoothie for more flavorful blends. Check out our technique guides for valuable tips on smoothie-making and ingredient information for insights into the best fruits for blending. If you want to explore new kitchen gadgets, our equipment recommendations can help you find the right blender for smooth results every time. Don’t forget to revisit seasonal variations to adjust your smoothie recipes based on what’s fresh and delicious!

Join the Conversation

We love hearing from our readers! Share your photographs and experience with the Tropical Strawberry Mango Smoothie on social media, using the hashtag #TropicalSmoothieJoy. Your feedback on recipe variations and suggestions enriches our community, guiding fellow smoothie lovers toward their perfect blend. Join the discussion by commenting below and inspire others with your delicious adventures in creating this fantastic smoothie.

The Recipe

Tropical Strawberry Mango Smoothie

Serves: 2 servings

Prep Time: 10 mins

Cook Time: 0 mins

Total Time: 10 mins

Kitchen Equipment Needed

  • High-speed blender
  • Measuring cups
  • Knife
  • Cutting board

Ingredients

  • 1 ripe mango, peeled and diced
  • 1 cup fresh strawberries, hulled
  • 1 cup yogurt (dairy or non-dairy)
  • 1/2 cup almond milk (or preferred milk)
  • 1 tablespoon honey or maple syrup (optional)
  • Ice cubes (to preference)

Directions

  1. In a blender, add the diced mango, hulled strawberries, yogurt, and almond milk.
  2. Add honey or maple syrup if desired for sweetness.
  3. Include ice cubes if you prefer a chilled smoothie.
  4. Blend on high speed until all ingredients are well combined and smooth.
  5. Pour into glasses and serve immediately, garnished with fresh fruit or mint if desired.

Recipe Notes

  • For a thicker texture, add more frozen fruit or reduce the amount of liquid.
  • Adjust sweetness based on personal preference—feel free to reduce or omit the sweetener entirely.
  • Store leftovers in the refrigerator for up to 24 hours; give it a shake before enjoying.