Table of Contents
Catch a Husband Cake
Introduction: The Allure of Catch a Husband Cake
Ever wondered why a simple dessert could earn such a bold, romantic name? With over 2 million searches for “easy Brazilian desserts” monthly, the legendary Catch a Husband Cake stands out as a top contender for its irresistible charm and creamy texture. This isn’t just folklore; it’s a testament to the power of a perfectly balanced, custard-like cake that truly melts in your mouth. Originating from Brazil, this dessert combines the rich, tropical sweetness of coconut milk with the velvety depth of sweetened condensed milk and eggs, creating a flan-like masterpiece that’s perfect for any occasion, from a casual family dinner to a show-stopping potluck. Let’s dive into the magic behind this beloved treat and why it might just be the key to winning hearts (and taste buds).
Ingredients List
The beauty of this cake lies in its simplicity and the harmonious blend of just a few pantry staples. Here’s what you’ll need for the classic version, along with sensory notes and potential substitutions.
- For the Caramel Layer:
- 1 cup (200g) granulated sugar – This will melt into a deep amber caramel, providing a bittersweet counterpoint to the sweet cake and a beautiful glossy coating. Substitute: You can use light brown sugar for a more molasses-like, softer caramel.
- For the Cake Batter:
- 1 can (14 oz / 396g) sweetened condensed milk – The backbone of sweetness and creamy body. Its thick, sticky texture is essential for the custard-like consistency.
- 1 can (13.5 oz / 400ml) full-fat coconut milk – Infuses the cake with a subtle tropical aroma and lush moisture. Shake the can well before using. Substitute: For a less pronounced coconut flavor, use half coconut milk and half whole milk.
- 4 large eggs – Act as the binding and leavening agent, giving the cake structure and its signature golden top.
- 1 cup (125g) all-purpose flour – Provides just enough structure without making the cake dense. It should be sifted to avoid lumps.
- 1 tablespoon unsalted butter, melted – Adds richness and helps create a tender crumb.
- 1 tablespoon coconut flakes (optional, for garnish) – Toasted, these add a delightful crunch and enhance the visual appeal.
Timing and Efficiency
15 minutes
50-60 minutes
About 1 hour 15 minutes (plus cooling)
Compared to many layered or frosted cakes that can take hours, Catch a Husband Cake is remarkably efficient. The active prep time is under 15 minutes—most of the work is done by your blender. The baking time is standard for a custard-based dessert, requiring patience as it slowly sets to perfection. The majority of the “total time” is hands-off cooling, which is crucial for the perfect slice. This makes it an ideal dessert for busy hosts who want maximum impact with minimal fuss.
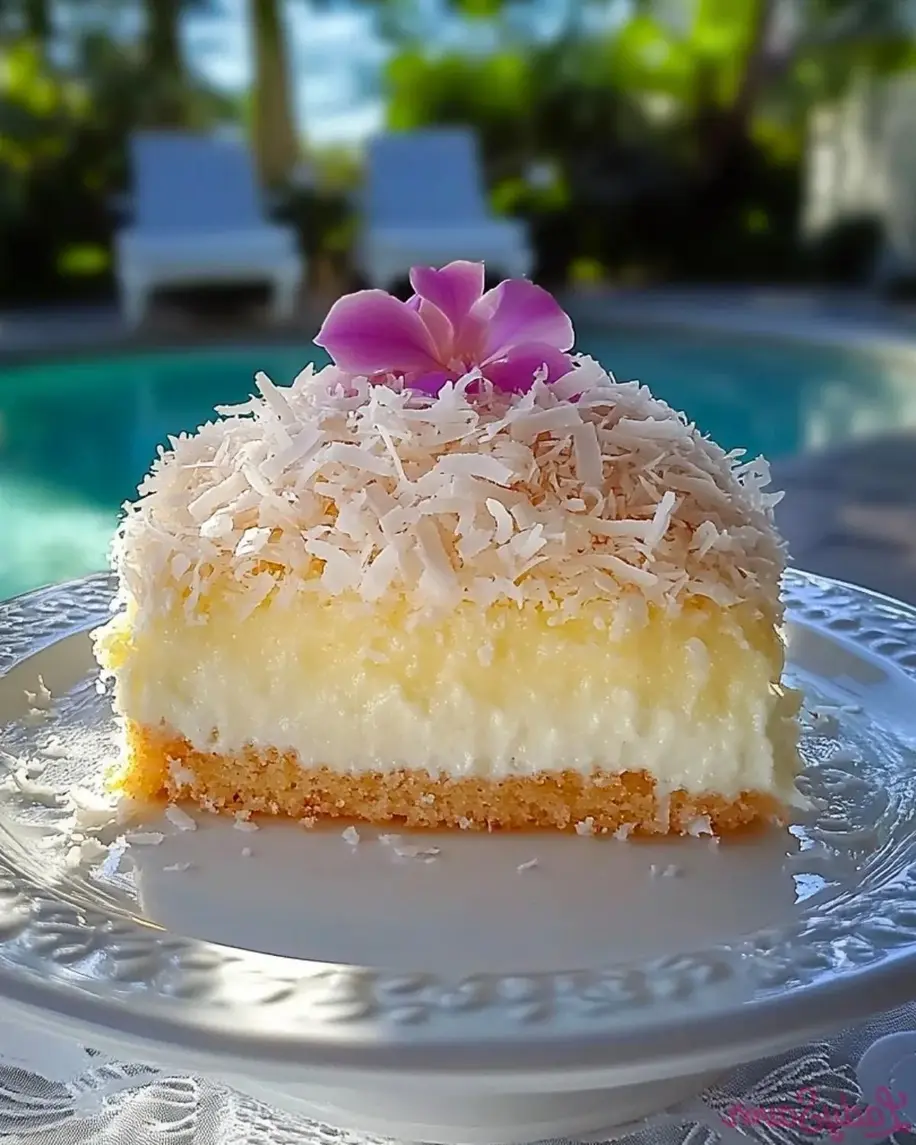
A slice of the irresistible Catch a Husband Cake, showcasing its creamy, flan-like texture and golden caramel top.
Step-by-Step Instructions
Follow these detailed steps to ensure your cake turns out silky, perfectly set, and stunningly presented.
Step 1: Prepare the Baking Dish
Preheat your oven to 350°F (180°C). Place a deep baking dish or a 9-inch round cake pan (with at least 2-inch high sides) on the counter. In a small, heavy-bottomed saucepan over medium heat, melt the 1 cup of granulated sugar. Do not stir aggressively; instead, swirl the pan occasionally until the sugar dissolves and turns a deep, golden amber color. This should take about 5-7 minutes. Immediately pour the hot caramel into the bottom of your baking dish. Using oven mitts, carefully tilt and rotate the dish to coat the entire bottom evenly. Set aside to harden and cool slightly while you make the batter.
Step 2: Blend the Batter
In a powerful blender, combine the sweetened condensed milk, coconut milk, eggs, all-purpose flour, and melted butter. Blend on high speed for a full 2-3 minutes until the mixture is completely smooth, homogenous, and slightly frothy. This aeration is key for the cake’s light texture. You should not see any streaks of flour or lumps. For an extra flavor boost, you can add a teaspoon of vanilla extract at this stage, though it’s not traditional.
Step 3: Assemble and Bake
Gently pour the blended batter over the hardened caramel in the prepared dish. Do this slowly to avoid disturbing the caramel layer. Place the filled dish inside a larger roasting pan. Create a water bath (bain-marie) by carefully pouring hot water into the larger pan until it comes about halfway up the sides of the cake dish. This gentle, indirect heat is what gives the cake its signature custard-like, melt-in-your-mouth texture. Carefully transfer the pans to the preheated oven. Bake for 50 to 60 minutes. The cake is done when the top is a beautiful golden brown, and the center is set but still has a slight, gentle jiggle—it will firm up as it cools.
Step 4: Cool and Unmold
Once baked, remove the cake dish from the water bath and place it on a wire rack. Let it cool to room temperature for at least 1-2 hours. This cooling period is non-negotiable for proper setting. Then, cover the dish with plastic wrap and refrigerate for a minimum of 4 hours, preferably overnight. This chilling step makes unmolding effortless and intensifies the flavors. To serve, run a thin knife around the edge of the dish. Place your serving plate upside-down over the dish, and with confidence, flip the whole assembly over. The cake should release smoothly, revealing the glossy caramel top (now the bottom) that will cascade deliciously over the slices.
Nutritional Information
(Approximate values per serving, based on 12 slices.)
- Calories: ~320 kcal
- Total Fat: 12g
- Saturated Fat: 8g
- Cholesterol: 75mg
- Sodium: 80mg
- Total Carbohydrates: 48g
- Sugars: 38g
- Protein: 7g
This is a rich, indulgent dessert. The high sugar and saturated fat content come from the condensed milk, coconut milk, and caramel, making it a perfect treat for occasional enjoyment.
Healthier Alternatives
You can create a slightly lighter version without sacrificing the soul of the dessert. These swaps reduce calories and refined sugar while maintaining great flavor.
- Reduced-Sugar Caramel: Use a sugar substitute like monk fruit or erythritol designed for caramelizing. The texture may be slightly different, but it will still provide that essential layer.
- Lighter Dairy: Substitute the full-fat coconut milk with “lite” coconut milk. Use fat-free or low-fat sweetened condensed milk if available.
- Flour Swap: For a gluten-free version, use a 1:1 gluten-free all-purpose flour blend. The texture will be nearly identical.
- Egg Option: While eggs are crucial for structure, for a dairy-free version, ensure your condensed milk is plant-based (often made from oat or coconut). The eggs themselves are not dairy.
Serving Suggestions
- Classic & Elegant: Serve a clean slice on its own, allowing the creamy texture and caramel to be the stars.
- With Fresh Fruit: Accompany with a side of fresh berries (strawberries, raspberries) or tropical fruits like mango or passion fruit pulp. The acidity cuts through the richness beautifully.
- Creamy Additions: A dollop of lightly sweetened whipped cream or a scoop of vanilla bean ice cream takes it to another level of decadence.
- Coffee Pairing: This cake is a classic companion to a strong cup of Brazilian coffee or espresso. The bitterness of the coffee balances the dessert’s sweetness perfectly.
Common Mistakes to Avoid
- Skipping the Water Bath: Baking without the bain-marie will result in a rubbery, dense texture, not the desired creamy custard. This is the most critical step.
- Overbaking: Remove the cake when the center still jiggles slightly. Overbaking causes it to become eggy and firm.
- Not Cooling Completely: Attempting to unmold the cake while it’s warm will cause it to break apart. Patience with cooling and chilling is key.
- Blending Insufficiently: If the batter isn’t perfectly smooth, you’ll get pockets of raw flour in the final cake. Blend for the full recommended time.
- Stirring the Caramel: Stirring melting sugar can cause it to crystallize into a grainy mess. Swirl the pan instead.
Storing and Reheating Tips
- Refrigeration: Once cooled, cover the cake tightly with plastic wrap or store in an airtight container. It will keep beautifully in the refrigerator for up to 5 days.
- Freezing: This cake freezes surprisingly well. Wrap individual slices or the whole cake (once fully set) tightly in plastic wrap and then aluminum foil. Freeze for up to 2 months. Thaw overnight in the refrigerator.
- Serving After Storage: Serve chilled straight from the fridge for the best texture and clean slices. It is not recommended to reheat this cake, as it can alter the delicate custard texture.
Conclusion: Your Perfect Dessert Awaits
The Catch a Husband Cake is more than just a dessert; it’s an experience. Its magical combination of simple ingredients transforming into a luxurious, creamy, and unforgettable treat is what makes it a global favorite. Whether you’re aiming to impress a special someone or simply treat your family to a