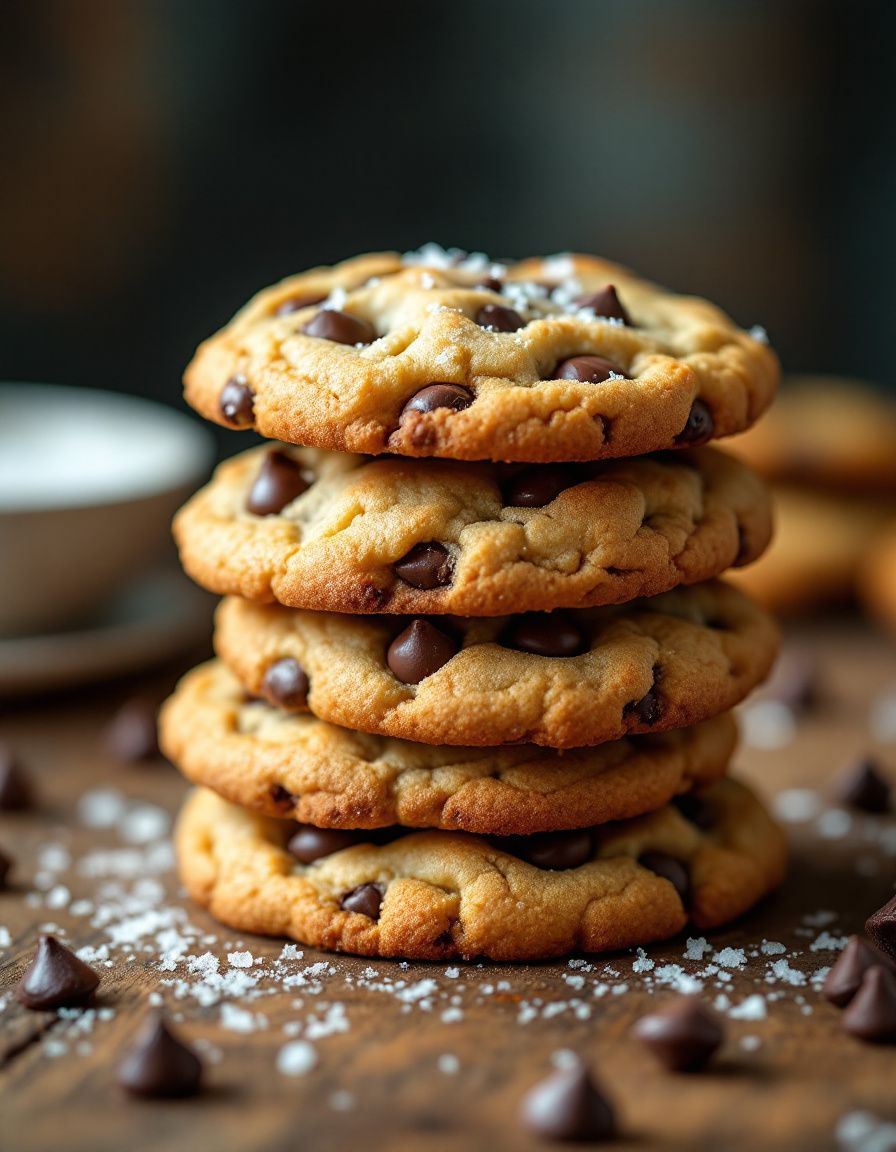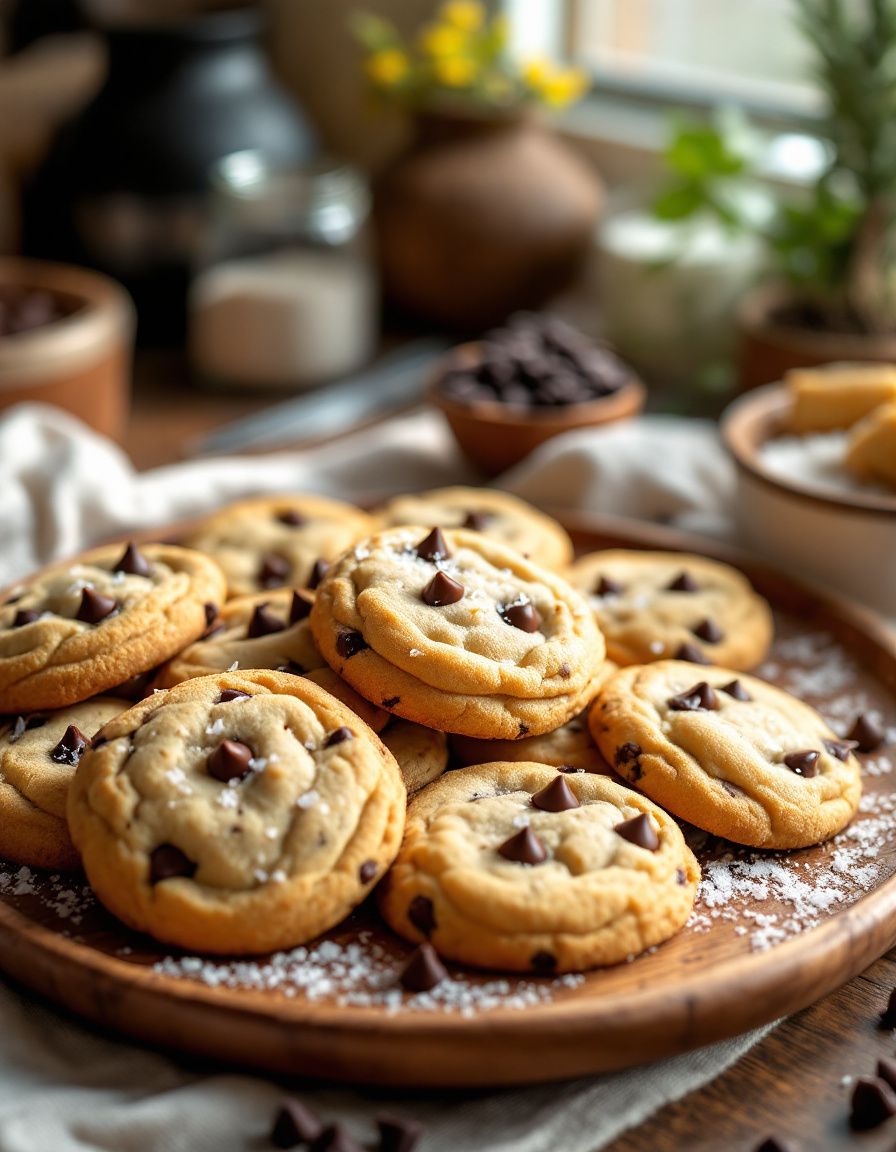
Classic Chocolate Chip Cookies: A Timeless Treat for Every Occasion
Chocolate chip cookies are a classic favorite that bring joy to every bite. This timeless recipe has been passed down through generations and is beloved for its rich flavors and comforting texture. The combination of butter, sugar, and chocolate creates a sweet, satisfying treat that evokes warmth and nostalgia. Whether you’re baking for family gatherings, celebrations, or a simple weeknight dessert, these classic chocolate chip cookies never disappoint.
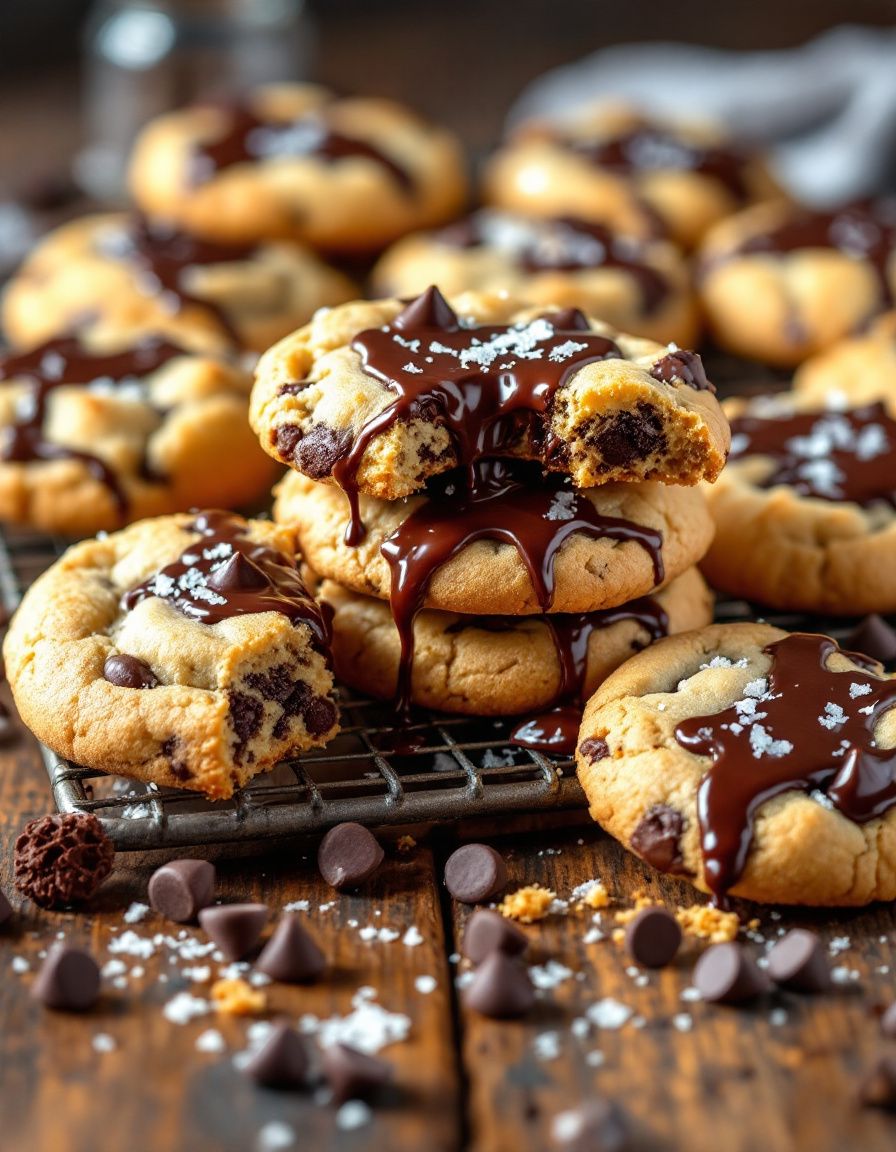
As you bite into these cookies, you’ll be greeted with the perfect balance of sweetness and a gooey, melt-in-your-mouth chocolate experience. The enticing aroma of freshly baked cookies wafting through your kitchen creates an atmosphere of comfort that no one can resist. Just one bite of these delicious cookies will have you reminiscing about childhood memories or creating new ones with loved ones.
Quick Recipe Highlights
- Flavor Profile: These cookies boast a sweet and buttery flavor with deep chocolate undertones.
- Texture: Expect a slightly crisp exterior with a chewy and soft center that melts in your mouth.
- Aroma: The smell of melted chocolate and baked dough will fill your kitchen, enticing everyone around.
- Visual Appeal: Golden brown edges and melty chocolate chunks make these cookies visually irresistible.
- Skill Level Needed: This recipe is beginner-friendly, requiring minimal baking skills.
- Special Equipment: All you need is a mixing bowl, baking sheet, and an oven.
Recipe Overview
- Difficulty Level: This classic chocolate chip cookie recipe is easy to follow, making it a great project for novice bakers.
- Category: These cookies fall under desserts and are perfect for snacks or sweet treats at any time.
- Cuisine: Chocolate chip cookies are an iconic American treat, celebrating homemade baked goods.
- Cost: The ingredients are affordable, typically costing under $10 for a full batch.
- Season: These cookies are loved year-round but are especially popular during the holiday season.
- Occasion: Perfect for family gatherings, birthday parties, bake sales, or casual evenings at home.
Why You’ll Love This Recipe
Indulging in a classic chocolate chip cookie is an experience unlike any other. The combination of rich chocolate and buttery dough creates a delightful balance of flavors that will satisfy any sweet tooth. Each cookie offers a delicious contrast between soft and chewy, making it hard to stop at just one. Whether enjoyed warm from the oven or stored for later, the taste remains remarkable.
The convenience of this recipe is another reason to love it. With only a few simple steps, you can whip up a batch in no time. This recipe is forgiving, allowing for small variations in preparation without affecting the overall outcome. Additionally, the ability to freeze the cookie dough for future baking makes this recipe a favorite for busy families.
Beyond the flavors, these cookies provide nutritional benefits like your daily dose of carbohydrates, and they can offer a comforting treat for those moments when you need a break. Sharing freshly baked cookies not only spreads joy but also fosters friendships and connections, making each baking session a special occasion.
Affordability also plays a vital role in the appeal. Everything you need to create a batch can be found at your local grocery store without breaking the bank. Classic chocolate chip cookies are an accessible treat for everyone and fit any budget.
Finally, who can resist the universal appeal of cookies? They bring together people across different backgrounds and create shared moments of happiness. Whether you’re enjoying them alone or hosting a cookie swap with friends, this recipe embodies warmth and joy.
Historical Background and Cultural Significance
The origin of chocolate chip cookies is delightfully tied to a happy accident. In the 1930s, Ruth Wakefield, the owner of the Toll House Inn in Massachusetts, created the first chocolate chip cookie by combining dough with broken chocolate chunks. This innovative twist quickly captured the hearts and taste buds of many, leading to widespread popularity. Today, the Toll House brand remains synonymous with chocolate chip cookies.
These cookies are more than a dessert; they hold cultural importance in American kitchens, symbolizing warmth and hospitality. They are often baked for special occasions, shared among friends, and exchanged during holidays, cementing their status as a beloved treat. The chocolate chip cookie has become an enduring American icon, representing the essence of homemade goodness.
The recipe has evolved over the decades, with various adaptations appearing over time. From the original recipe, bakers have experimented with dark chocolate, nuts, and even alternative flours to suit different tastes and dietary restrictions. This adaptability has kept chocolate chip cookies relevant and cherished.
Regional variations have also emerged, with different areas of the United States adding their flair. For instance, some regions prefer softer cookies, while others may lean towards a firmer and crispier texture. This diversity showcases the cookie’s flexibility in accommodations, ensuring it is enjoyed by everyone, regardless of preference.
Ingredient Deep Dive
Flour is a foundational ingredient in chocolate chip cookies, creating the structure necessary for them to hold their shape. It has a deep-rooted history in baking, contributing to many beloved recipes. Selecting all-purpose flour offers the best result, while storing it in a cool, dry place will prolong its shelf life. There are alternatives for gluten-free baking; almond flour or oat flour can work well but may require adjustments to the overall recipe.
Sugars play a significant role, adding sweetness and influencing texture. Granulated sugar gives a crispness to the cookies, while brown sugar adds moisture and a hint of caramel flavor. This duality makes for a balanced sweet treat. When purchasing sugar, consider organic options for the best flavor. Store sugars in sealed containers to maintain freshness, and feel free to replace white sugar with coconut sugar for a healthier twist.
Butter adds richness and flavor, crucial for achieving that melt-in-your-mouth texture. Its history dates back centuries, with modern bakers opting for unsalted butter to have better control over sodium levels. Choose high-quality butter for the best flavor, and store it in the fridge for longer freshness. If you’re looking for substitutes, coconut oil or margarine can work, though they may slightly alter the taste.
Chocolate chips are the star of this cookie. Various types, such as dark, milk, or semi-sweet, can be used to create a customized flavor experience. They are essential for adding that irresistible chocolatey goodness that pairs beautifully with the cookie dough. Look for high-quality brands, and store in a cool place to avoid melting. If desired, you can also use chocolate chunks for a more rustic presentation.
Eggs serve as a binding agent, bringing together the ingredients and providing structure. Their historical use in baking is significant, offering versatility in recipes. Fresh, large eggs provide the best results, and they should be stored in the refrigerator for optimal freshness. For egg-free options, take a look at applesauce or flaxseed meal as potential alternatives.
Common Mistakes to Avoid
- Using cold butter: Cold butter doesn’t cream well with sugars, leading to dense cookies instead of fluffy ones. Always use softened butter for optimal results.
- Overmixing the dough: Overmixing can lead to tough cookies. Mix just until incorporated for the perfect chewy texture.
- Incorrect oven temperature: An inaccurate temperature can yield underbaked or burnt cookies. Always preheat your oven and use an oven thermometer to ensure accuracy.
- Skipping the chilling step: Chilling the dough enhances flavor and texture. Don’t skip this step if you want well-structured cookies.
- Using expired or poor-quality ingredients: Ensure that all your ingredients are fresh for the best-tasting cookies.
- Not measuring ingredients accurately: Baking is a science; using a scale or precise measuring tools can make a significant difference in your cookies.
- Using too much flour: Flour should be spooned and leveled; scooping directly from the bag can lead to packing, resulting in dry cookies.
- Ignoring the resting time: After baking, allow cookies to rest on the tray for a few minutes before transferring them to a wire rack. This helps them firm up.
- Not tasting the dough: A taste test ensures the perfect balance of flavors. Adjust sweetness as needed.
- Storing improperly: Store cookies in an air-tight container to maintain freshness and prevent them from becoming stale.
Essential Techniques
Creaming butter and sugar is crucial for creating air pockets in the dough, which leads to a lighter texture. Use room temperature butter to ensure it blends well with sugar, achieving a fluffy consistency. Avoid overmixing after adding flour to protect the cookie structure and prevent toughness.
Baking time and temperature should be closely monitored. The cookies will continue to cook slightly after they’re removed from the oven due to residual heat. Look for slightly golden edges while the centers remain soft for the best results.
Cooling cookies properly is vital to maintaining their texture. Let them rest on the baking tray for 5-10 minutes before transferring to a wire rack to ensure they set perfectly.
Pro Tips for Perfect Classic Chocolate Chip Cookies
1. Use high-quality chocolate chips for the best flavor, as the chocolate is a major contributor to the cookie’s deliciousness.
2. Experiment with different types of chocolate, including milk, dark, or even white chocolate, for a delightful twist.
3. Mix-in nuts, like walnuts or pecans, to add texture and enhance the cookie experience.
4. For a touch of sea salt atop the cookies before baking, to elevate the flavor profile considerably.
5. Add a splash of vanilla extract, even if the recipe doesn’t call for it, to amp up the flavor.
6. Try adding oats for a chewy variation that also enhances nutritional value.
7. Bake half the dough immediately and save the rest in the fridge or freezer for fresh cookies any time.
8. When storing, layer cookie sheets with parchment paper to prevent sticking.
Variations and Adaptations
There are countless delightful variations for classic chocolate chip cookies. For a seasonal twist, consider adding pumpkin spice in the fall or swapping out the chocolate for cranberry during winter holidays. Gluten-free options can be made using almond flour or a pre-made gluten-free blend without sacrificing any delicious flavor.
For an irresistibly chewy cookie, substituting half the butter with coconut oil can provide a soft texture. Vegan adaptations can utilize flax eggs and dairy-free chocolate chips, making these cookies accessible to a broader audience.
If you’re feeling adventurous, why not try different textures? Sea-salt chocolate chip cookies utilize coarse sea salt sprinkled on top for an extra crunch. You could also experiment with adding flavored extracts such as almond, mint, or hazelnut for unique twists on the classic recipe.
Presentation can also be adjusted; try serving mini cookies on a platter with fresh fruit for a gourmet touch, or create a cookie ice cream sandwich for a fun summer treat.
Serving and Presentation Guide
For an inviting presentation, stack warm cookies on a cake stand or arrange them on a colorful plate. Garnishing with fresh mint leaves adds a pop of color. Pairing the cookies with a glass of milk or a scoop of vanilla ice cream enhances the experience.
Consider using parchment paper to layer your cookies for gifting or presentation. Wrapping them in confectionery boxes or placing them in mason jars can create beautiful gifts for any occasion.
Set temperature considerations in mind; cookies are best served warm for maximum flavor and a gooey texture. If serving later, a quick warm-up in the microwave (5-10 seconds) can rejuvenate their delightful qualities. Be mindful of portion control; cookie sizes should be manageable for a satisfying experience without overwhelming indulgence.
Wine and Beverage Pairing
While chocolate chip cookies typically pair well with milk, wine enthusiasts can enjoy them alongside dessert wines like port or dessert-style Chardonnay. These choices complement the cookie’s sweetness and enhance the experience.
For a non-alcoholic option, a rich chai latte can provide warm spices that harmonize beautifully with the buttery cookies. Another excellent pairing is brewing a smooth cup of coffee; its bitterness balances the cookie’s sweetness perfectly.
If serving with tea, opt for a robust black tea or an aromatic herbal variety that can provide an intriguing contrast to the flavors of the cookies.
Storage and Shelf Life
To keep your chocolate chip cookies fresh, store them in an airtight container at room temperature. They’ll last up to a week, but be aware that exposure to air can cause them to dry out. If you want to prolong their life, consider freezing them.
When freezing, allow the cookies to cool completely before placing them in a single layer in a freezer-safe bag or container. They can last up to three months in the freezer. For best results, thaw them in the fridge or at room temperature.
For extra crunch, baked cookies can be reheated in a preheated oven for a few minutes. Make sure to monitor them closely to avoid burning.
Make Ahead Strategies
To prepare for future cravings, consider creating and freezing cookie dough. Roll the dough into logs, wrap tightly in plastic wrap, and store in the freezer. When you’re ready for freshly baked cookies, simply slice and bake with minimal effort.
An effective prep timeline includes mixing the dough in advance, chilling overnight, and baking when you’re ready for delicious treats. This way, you can enjoy the luxury of freshly baked cookies with a fraction of the effort.
As for quality, ensure to not skip the chilling step, even if it’s pre-prepared. Chilling enriches flavors while providing optimal baking results.
Note that any additional elements, like chocolate chunks, should be mixed in right before baking, ensuring they remain enticing and smooth.
Scaling Instructions
When it comes to scaling your classic chocolate chip cookies recipe, it’s fairly straightforward. To halve the recipe, divide all ingredients effectively and adjust baking times as necessary for smaller batches.
For doubling or tripling, ensure to use larger mixing bowls and trays. Be cautious of overbaking; larger batches might need slight adjustments in the baking duration.
For storage considerations, split your dough into manageable portions and store as mentioned for freshness. Remember, cookies baked in larger batches should be cooled completely before being layered in storage to prevent sticking.
Nutritional Deep Dive
A chocolate chip cookie’s macro breakdown includes carbohydrates primarily from flour and sugars, proteins from eggs, and fats from butter. For those looking to maintain balance, consider enjoying in moderation.
Micronutrient analysis shows cookies providing small amounts of valuable nutrients from quality chocolate and whole ingredients. However, as a treat, they ideally should support a well-rounded diet.
When enjoying these cookies, pay attention to portion control, as overeating can lead to consuming excessive sugars and fats. Practicing mindful indulging will enhance pleasure without derailing nutritional goals.
In terms of health benefits, opting for dark chocolate can provide heart-healthy antioxidants while making these cookies a more wholesome choice.
Dietary Adaptations
Gluten-free flour blends available can help create an equally delicious chocolate chip cookie that caters to gluten sensitivities. The same goes for a dairy-free option using plant-based butter and dairy-free chocolate chips.
For vegan adaptations, flax eggs can substitute traditional eggs effectively, and coconut oil could replace butter. Low-carb dieters can experiment with almond flour and sugar alternatives like erythritol or monk fruit to enjoy a keto-friendly version.
For those following a Paleo diet, utilizing almond flour and coconut sugar allows you to savor the cookies without compromising dietary preferences. Each alternative may require some adjustments in baking times; adding ingredients gradually is key for success.
Troubleshooting Guide
Texture issues may arise from too much flour or insufficient creaming. Adjusting by using spoons to measure flour accurately is crucial for optimal consistency.
Flavor balance can sometimes feel off; consider adding a pinch more salt to enhance sweetness levels when necessary.
If you encounter temperature problems, ensure that your oven is preheated before placing the cookies in to avoid undercooking.
Equipment challenges, such as inadequate mixers, can pose issues. Consider mixing by hand to control texture better if a mixer is unavailable.
Ingredient substitutions might not produce the same results. When making adaptations, consult trusted resources to guide ratios and alternatives effectively.
Timing concerns can affect the final product vastly. Keep a close eye on baking times, as different ovens and baking dishes can influence cooking duration.
Recipe Success Stories
Community feedback on this classic chocolate chip cookie recipe has been overwhelmingly positive, with many sharing joyful stories of family baking sessions and stunningly perfect results. Variations have flourished, showcasing the creativity of bakers around the world.
People have recounted adapting the recipe for gluten-free diets, with surprising success that preserves the cookie’s integrity. Reader suggestions, such as adding cinnamon or using brown butter, have proven to elevate the flavors even further, transforming the classic favorite into irresistible unique treats.
Photography tips suggest highlighting the melting chocolate or using creative backdrops that complement the warm hues of the cookies, effectively capturing the homey essence of the recipe.
Frequently Asked Questions
1. Can I freeze chocolate chip cookie dough?
Absolutely! You can freeze cookie dough for up to three months. Portion the dough into balls and freeze them on a tray before transferring to an airtight container. When you’re ready to bake, simply add a couple of minutes to the baking time.
2. What’s the best way to store baked cookies?
For fresh cookies, store them in an airtight container at room temperature for up to a week. To keep them longer, consider freezing them wrapped individually in plastic wrap.
3. Can I use margarine instead of butter?
While margarine can be used, it may slightly alter the flavor and texture of the cookies. For the best results, stick with unsalted butter.
4. How do I make my cookies chewy instead of crispy?
To achieve a chewy texture, use more brown sugar than granulated sugar and remove cookies from the oven when they’re still soft in the center.
5. Is it okay to use mini chocolate chips?
Yes! Mini chocolate chips offer a fun twist and distribute throughout the dough more evenly, enhancing that chocolatey goodness in every bite.
6. Can I omit the eggs in the recipe?
For egg-free cookies, you can substitute each egg with 1/4 cup of unsweetened applesauce or a flaxseed meal mixture (1 tablespoon flaxseed meal + 2.5 tablespoons water).
7. How do I avoid overbaking my cookies?
Keep a close eye on your cookies while baking and take them out when the edges look firm but the centers are still soft. They’ll continue to bake as they cool.
8. What can I do if my cookie dough is too sticky?
If the dough is too sticky, try chilling it in the refrigerator for about 30 minutes. This helps it firm up and makes it easier to scoop.
9. What size cookies should I make?
Standard-sized cookies are about 2 tablespoons of dough. However, you can make smaller or larger cookies based on your preference; just remember to adjust the baking time accordingly.
10. Can I use a different type of flour?
While all-purpose flour is recommended, you can experiment with whole wheat or gluten-free flour, but be aware that it may change the texture slightly. Adjustments may be needed when substituting.
Additional Resources
For those interested in expanding their baking repertoire, check out related recipes such as oatmeal chocolate chip cookies or double chocolate cookies.
For techniques, consider reading guides on how to properly mise en place for baking or expert tips on understanding baking temperatures.
Ingredient information can be found in many cookbooks that delve deeper into flour types and their specific properties. Furthermore, investing in quality kitchen equipment will make a significant difference in your baking journey.
Seasonal variations can yield delicious results, so remember to keep an eye on festive flavors that you can incorporate into classic baking recipes throughout the year.
Join the Conversation
We would love to see your baking creations! Share your chocolate chip cookie photos on social media using our designated hashtags for a chance to be featured. Engage with fellow bakers by sharing tips, experiences, and any remarkable adaptations you’ve made to the classic recipe.
Leave a comment below sharing your favorite variation or a memory connected to baking chocolate chip cookies. Your feedback helps us grow and create more delicious recipes for everyone to enjoy. Let’s keep the spirit of baking alive together!
The Recipe
Classic Chocolate Chip Cookies
Serves: 24 cookies
Prep Time: 15 mins
Cook Time: 10 mins
Total Time: 25 mins
Kitchen Equipment Needed
- Mixing bowl
- Measuring cups and spoons
- Baking sheet
- Spatula
- Wire rack for cooling
Ingredients
- 2 1/4 cups all-purpose flour
- 1 teaspoon baking soda
- 1/2 teaspoon salt
- 1 cup unsalted butter, softened
- 3/4 cup granulated sugar
- 3/4 cup packed brown sugar
- 1 teaspoon vanilla extract
- 2 large eggs
- 2 cups semi-sweet chocolate chips
Directions
- Preheat your oven to 375°F (190°C).
- In a small bowl, combine flour, baking soda, and salt; set aside.
- In a large mixing bowl, cream together the softened butter, granulated sugar, brown sugar, and vanilla extract until smooth.
- Add the eggs one at a time, mixing well after each addition.
- Gradually add the flour mixture, and beat until well blended.
- Stir in the chocolate chips.
- Drop rounded tablespoons of dough onto ungreased baking sheets.
- Bake for 9 to 11 minutes or until golden brown.
- Let the cookies cool on the baking sheet for 5 minutes before transferring them to a wire rack to cool completely.
Recipe Notes
- You can customize the cookies by adding nuts or using different types of chocolate chips.
- Chill the dough for extra flavor and a better consistency if desired.
- For softer cookies, remove from the oven when they are still slightly underbaked.