Delicious Espinaca Dip: A Creamy Spinach Delight
Espinaca Dip is a classic appetizer that brings a rich, creamy delight to any gathering. This dip is bursting with flavors and offers a delightful texture that pairs beautifully with a variety of dippers. The combination of fresh spinach, creamy cheeses, and savory spices makes for a mouthwatering experience that will have everyone coming back for more. Whether it’s for a game night or a simple family get-together, this dish is sure to impress.
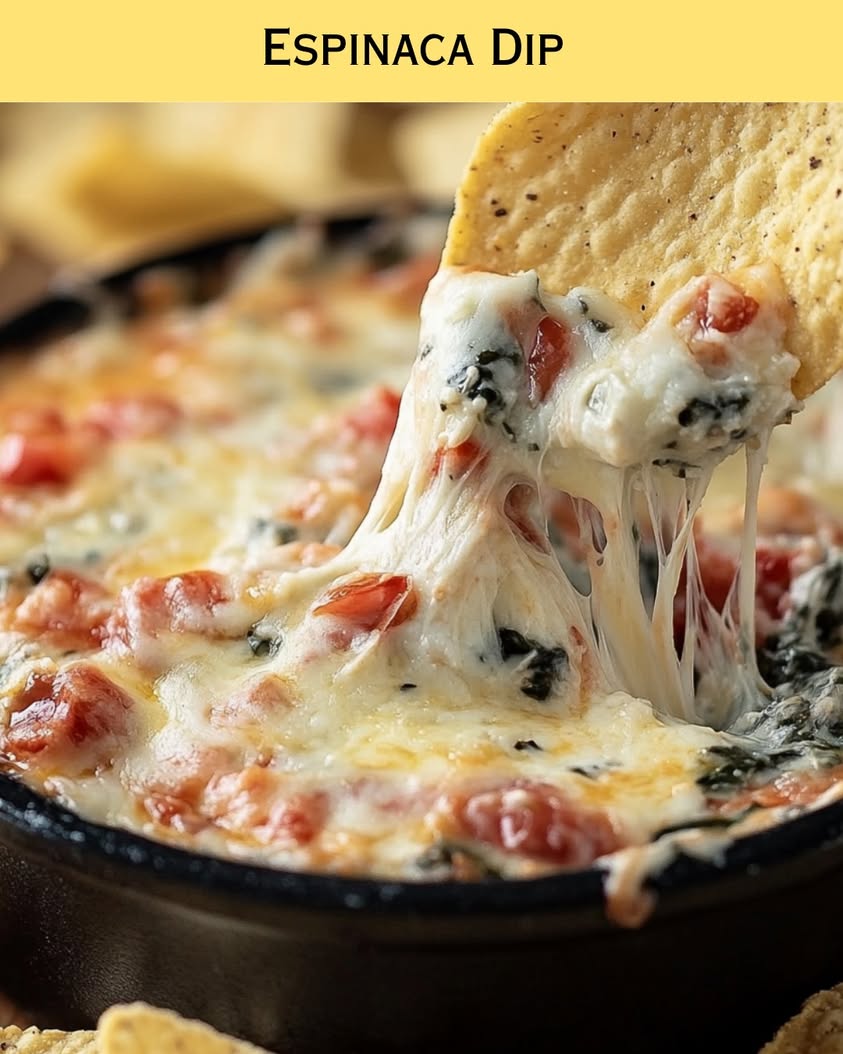
The creamy texture of the Espinaca Dip is complemented by the slight crunch of tortilla chips or the freshness of vegetable dippers. Each bite offers a delicious balance of flavor and texture, making it the perfect crowd-pleaser. The inviting aroma of melted cheese mixed with sautéed spinach fills the air, enticing your guests to dig in. This dip not only pleases the palate but also presents beautifully, adding a splash of vibrant green to your serving table.
Quick Recipe Highlights
- Flavor Profile: This Espinaca Dip features a buttery, cheesy flavor with the fresh taste of spinach, topped with a hint of garlic that adds depth.
- Texture: The creamy dip is smooth and luscious, while the occasional spinach nibble offers just the right amount of chew.
- Aroma: The warm, cheesy scent combined with sautéed garlic and spinach creates an irresistible inviting aroma.
- Visual Appeal: With its creamy texture and bright green spinach, this dip is not only delicious but also visually stunning.
- Skill Level Needed: This recipe is simple enough for beginners, making it a fun task for anyone wanting to learn how to whip up a tasty dip.
- Special Equipment: A skillet and a mixing bowl are all you need to create this scrumptious Espinaca Dip!
Recipe Overview
- Difficulty Level: With minimal cooking techniques required, this dip is easy to make, perfect for novice cooks and seasoned experts alike.
- Category: Ideal for appetizers, snacks, or party food, Espinaca Dip is versatile enough to fit in various meal categories.
- Cuisine: Originating from Mexican cuisine, this dip reflects a beautiful blend of flavors and culinary traditions.
- Cost: This economical recipe utilizes affordable ingredients, making it a budget-friendly option for any gathering.
- Season: Perfect for year-round enjoyment, but especially delightful during spring and summer when fresh produce is abundant.
- Occasion: Whether it’s a casual snack night or formal celebration, Espinaca Dip fits perfectly into any occasion.
Why You’ll Love This Recipe
Espinaca Dip is undeniably delicious, combining the rich flavors of creamy cheeses with the freshness of spinach. Each bite is a treat, offering a delightful combination of creamy and cheesy textures with a hint of garlic. This balance makes it incredibly addictive and perfect for sharing with friends and family.
Preparation is a breeze, which adds to the appeal of this dip. In less than 30 minutes, you can create a crowd-pleasing appetizer without the hassle of complicated cooking techniques. This ease of preparation is ideal for those last-minute gatherings or when you’re craving something tasty without spending hours in the kitchen.
Nutritionally, spinach brings a wealth of benefits, providing essential vitamins and minerals. This dip allows you to enjoy a delicious treat while incorporating healthy greens into your diet. It’s a clever way to sneak in some nutrients amidst the indulgence.
Socially, type of foods that are shareable, like dips, fosters a spirit of togetherness and encourages mingling. Espinaca Dip brings people together, creating a fun and lively atmosphere, whether it’s at a potluck or a family gathering.
Finally, this dish is cost-effective. Utilizing pantry staples and fresh spinach, you don’t have to break the bank to serve an appetizing dip. Its affordability allows you to make generous portions, ensuring everyone leaves satisfied.
Historical Background and Cultural Significance
The origins of Espinaca Dip can be traced back to Mexican cuisine, where it has evolved as a favorite among appetizer options. Spinach is a staple ingredient in many dishes across cultures, adored for its versatility and nutritional benefits. This dip showcases how traditional flavors can be reimagined in modern cooking.
Culturally, dip dishes like this one represent communal dining experiences. The act of gathering around a table to enjoy shared foods solidifies bonds among family and friends, making Espinaca Dip a cultural favorite at social gatherings.
Over time, the recipe has seen various adaptations, incorporating different types of cheese, spices, and even adding meat for a heartier version. This evolution helps cement Espinaca Dip as a lasting classic while allowing for individual creativity in the kitchen.
Regional variations exist, with some areas incorporating local flavors or additional ingredients like chiles or cream cheese, showcasing how this beloved dip can adapt to different culinary environments while maintaining its essence.
Ingredient Deep Dive
– **Spinach**: A vital component of Espinaca Dip, spinach not only adds flavor but also provides significant nutritional benefits. Rich in vitamins A, C, and K, as well as iron and magnesium, spinach is a powerhouse green. When selecting spinach, look for bright green leaves free from wilting or yellowing. Store in a plastic bag in the refrigerator to maintain its freshness, and if you find yourself with extra, consider using it in salads or other cooked dishes.
– **Cream Cheese**: This ingredient gives Espinaca Dip its signature creamy texture. Cream cheese is a versatile product that can enrich both sweet and savory dishes. With a high-fat content, it lends a luscious mouthfeel to dips. When storing cream cheese, keep it tightly sealed in the fridge and consume it before its expiration date. If you’re looking to reduce calories, consider using a low-fat version or substitute with Greek yogurt for a healthier option.
Common Mistakes to Avoid
- Overcooking the spinach can lead to a mushy texture. Sauté until just wilted to maintain its vibrant color and nutritional value.
- Using too much cheese can overpower the other flavors; balance is key to ensure that the spinach and spices shine.
- Not seasoning adequately will result in a bland dip; don’t shy away from spices like garlic powder, onion powder, or even red pepper flakes.
- Failing to properly soften the cream cheese can create lumps in your dip; always allow it to come to room temperature before mixing.
- Ignoring texture variations by not blending well can lead to uneven consistency; be sure to mix until smooth when necessary.
- Not serving it hot or warm can lead to a less appealing eating experience; this dip is best when it’s fresh out of the oven.
- Using stale chips or dippers can ruin the overall experience; always provide fresh accompaniments for a better presentation.
- Forgetting about garnishes can make a dish seem less inviting; fresh herbs or a sprinkle of paprika add visual appeal.
Essential Techniques
Sautéing spinach properly is crucial for this recipe. The key is to cook the spinach until it just wilts, ensuring it retains its nutrition and color. Overcooking can lead to a soggy dip, so watch closely while cooking.
Mixing ingredients thoroughly will provide a consistent flavor throughout your dip. Blend all components until smooth, ensuring every bite is equally delicious. A stand mixer can help achieve a creamy texture quickly if you find it difficult with a spatula.
Pro Tips for Perfect Espinaca Dip
To ensure your Espinaca Dip turns out perfectly every time, consider these pro tips. First, make sure to use full-fat cream cheese for the best creamy texture. If looking for a lighter option, opt for Greek yogurt but adjust the other ingredients accordingly.
Secondly, experiment with different cheeses. A blend of mozzarella and cheddar can add complexity and depth to the flavor.
Additionally, try seasoning the dip with a pinch of nutmeg or cayenne pepper for an unexpected kick. These spices can elevate the overall flavor profile.
Don’t skip the garnishing; a sprinkle of fresh parsley or chives on top adds not only flavor but also color, making the dish more visually appealing.
Always taste and adjust seasonings as you mix—every spinach batch varies in flavor! Finally, serve the dip warm for the best experience, as the flavor and texture are at their peak.
Variations and Adaptations
There are numerous delightful ways to adapt Espinaca Dip to suit various tastes. For those who enjoy a spicy kick, consider adding chopped jalapeños or a few dashes of hot sauce to the mix.
Seasonal vegetables can be incorporated as well. During summer, you might add roasted bell peppers or corn for a fresh twist.
For a heartier version, adding crumbled bacon or diced chicken can turn this dip into a satisfying meal. Vegetarian variations can include replacing regular cheese with vegan cheese options for a dairy-free experience.
Seasonal adaptations are another way to keep this dip fresh. In fall, you can experiment with pumpkin puree mixed in for an autumn-themed version, providing warmth and earthiness.
Serving and Presentation Guide
When plating your Espinaca Dip, opt for a shallow dish to allow for easy access and plenty of surface area for garnishing. A beautiful touch can be adding a drizzle of olive oil or a sprinkle of smoked paprika for an eye-catching presentation.
For garnishing, freshly chopped herbs like cilantro or parsley add color and freshness. Serve alongside a variety of dippers: crispy tortilla chips, fresh vegetable sticks like carrots and cucumbers, or even warm pita bread for a lovely presentation.
Consider the temperature of the dip when serving; while it should be served warm, keep it on a warming tray if it’s part of a buffet spread to maintain its ideal serving condition.
Lastly, portion control is essential, especially if serving at large gatherings. Provide smaller bowls or ramekins for guests to fill, preventing the main bowl from becoming a mess.
Wine and Beverage Pairing
When selecting wines to pair with Espinaca Dip, think about light to medium white wines such as Sauvignon Blanc or a refreshing Chardonnay that can complement the creaminess of the dip.
For those who prefer non-alcoholic options, consider sparkling water with a twist of lime or a light iced tea. These beverages can cleanse the palate between bites.
If you’d like to go for coffee or tea pairings, opt for a mild green tea that won’t overpower the dish. The lightness of the tea beautifully balances the richness of the dip.
Be sure to serve the beverages chilled; this contrast enhances the warm, creamy dip and creates a balanced dining experience.
Storage and Shelf Life
Storing your Espinaca Dip properly ensures that it maintains its deliciousness. Allow the dip to cool completely, then transfer it to an airtight container. This dip can be stored in the refrigerator for up to 3 days without losing its flavor.
If you wish to store it for longer, consider freezing it. A tightly sealed container or freezer bag will allow you to keep it frozen for up to 2 months. Just remember to thaw it in the refrigerator overnight before reheating.
To reheat, gently warm the dip in the microwave or on the stovetop, stirring periodically to ensure the cheese melts evenly without becoming greasy. Avoid reheating too quickly, as overheating can alter the texture.
When checking for spoilage, if the dip has an off odor, discoloration, or unusual texture, it’s best to discard it.
Make Ahead Strategies
Preparing Espinaca Dip ahead of time can ease stress on the day of your event. You can mix all ingredients the night before and store it in the refrigerator. This allows the flavors to meld beautifully, creating an even more delicious dip.
Organizing a prep timeline can help streamline the process; chop and sauté your vegetables early, then combine them with the remaining ingredients right before serving.
When storing between steps, keep each element in its own container to maintain freshness. This method is especially useful if you plan to make several dishes simultaneously.
Assessing the quality impact is essential; while some dips maintain their flavor when made ahead, others might require fresh herbs added just before serving.
Lastly, consider reheating the dip slowly to preserve the creamy texture—avoid excessive heat to prevent separation of ingredients.
Scaling Instructions
Scaling your Espinaca Dip recipe is straightforward. If you wish to halve the recipe, make sure to adjust cooking times accordingly, checking for doneness as you go.
Doubling or tripling the ingredients means you may need to use a larger mixing bowl and potentially a bigger baking dish. Keep an eye on cooking times as larger quantities may require more time to heat evenly.
Pay attention to your equipment; ensure that your mixing devices can handle the increased ingredient volume to avoid any mishaps in the kitchen.
Timing adjustments are crucial; remember to taste and check the consistency as you scale up the recipe.
When storing larger batches, use more significant containers to store portions, ensuring each is airtight to maintain flavor.
Nutritional Deep Dive
Espinaca Dip, while indulgent, can be made health-conscious. This dip typically boasts a well-rounded macro breakdown, with proteins from cheese, carbohydrates, and healthy fats contributing to its creamy texture.
Micronutrient analysis reveals that spinach is packed with vitamins A, C, and K, alongside iron and antioxidants, making it a nutritional powerhouse. The cheese in the dip provides calcium and additional protein, reinforcing its nutritional value.
Exploring the health benefits, this dish is not just delicious; it’s a source of integral vitamins and supports strong bones and immune function. The fiber content in spinach aids digestion, providing a well-rounded snack option.
Dietary considerations for guests can also be addressed; adjustments can be made to fit various eating styles while still delivering rich flavors.
Portion analysis is key to mindful eating; consider using small bowls or serving sizes to keep portions manageable while enjoying the flavor of the dip without overindulgence.
Dietary Adaptations
For a gluten-free variation, ensure that your dippers are gluten-free, avoiding traditional chips and opting for fresh vegetables or gluten-free crackers.
To create a dairy-free version, replace regular cheese with plant-based cheese options and use coconut cream to maintain creaminess without lactose.
Vegans can enjoy this dip by using cashew cheese or nutritional yeast to give a cheesy flavor without using animal products.
Low-carb dieters can replace tortilla chips with keto-friendly vegetables such as bell peppers, cucumbers, or radishes, maintaining a low carbohydrate count.
Keto adaptations may include adding additional healthy fats such as avocado to enrich the dip while remaining in line with dietary goals.
Paleo followers can likewise modify the recipe by using a mayonnaise base and eliminating dairy, creating a unique twist on the classic dip.
For those following a Low-FODMAP diet, replace onion with green onion tops and substitute garlic with the green parts to align everything with their dietary restrictions.
Troubleshooting Guide
If your Espinaca Dip turns out too thick, adding a little milk or vegetable broth can help reach that desired creamy consistency. A splash at a time will allow for better control over the texture.
Should the flavor come out too bland, try adjusting it with more seasonings or a squeeze of fresh lemon juice. A simple acidity boost can brighten the flavors significantly.
If reheating results in a grainy texture, stir vigorously to reincorporate the oils and water; sometimes, the ingredients can separate upon cooling and need a good mix.
Facing equipment challenges? If you don’t have a mixer, use a fork to thoroughly combine ingredients—this can also give you a great workout!
Timing concerns are crucial; ensure everything is ready before you serve to avoid having the dip sitting out too long and losing its ideal texture.
Texture issues can occasionally arise; undercooked spinach may cause an undesirable texture. Ensure it is wilted before adding it to your mixture for the best experience.
Recipe Success Stories
Community feedback is often overwhelmingly positive for this Espinaca Dip. Many readers share how it was the star of their gatherings, with friends and family raving about the flavors.
Variation successes are abundant, with readers noting their wish to experiment with additional ingredients like artichokes or different types of cheeses—these adaptations have turned into memorable versions of the dip.
Adaptation stories often highlight how the dip has fit seamlessly into various cultural traditions, evolving from a simple appetizer into a beloved dish served at family functions, showcasing how food can bring people together.
Photography tips also emerge from community members who enjoy sharing their creations online, highlighting the importance of displaying bright colors and garnishes to enhance the visual appeal of their Espinaca Dip.
Frequently Asked Questions
Can I make Espinaca Dip in advance?
Yes! You can prepare your Espinaca Dip ahead of time. Simply mix all ingredients and store in the refrigerator. Reheat before serving to enjoy it warm and fresh.
Can I freeze Espinaca Dip?
Absolutely, this dip freezes well! Place it in an airtight container, and you can store it in the freezer for up to 2 months. Just thaw in the refrigerator overnight before reheating.
What can I serve with Espinaca Dip?
Espinaca Dip pairs wonderfully with tortilla chips, fresh vegetable sticks, pita bread, or crackers. Feel free to get creative with your dippers!
Is Espinaca Dip vegetarian?
Yes, this dip is vegetarian as it primarily consists of spinach, cheese, and cream. Always check specific ingredient labels to ensure no meat products are included.
Can I adjust the spice level of the dip?
Absolutely! Feel free to add diced jalapeños or a dash of hot sauce to bring more heat to the dip. Adjust the level according to your personal preference.
How long does Espinaca Dip last in the fridge?
When stored properly in an airtight container, Espinaca Dip can last in the refrigerator for up to 3 days. Always check for freshness before consuming.
Can I use different cheeses?
Yes, experimenting with different cheeses can enhance flavor! Try combinations of mozzarella, cheddar, or even pepper jack for a spicier kick!
Is it necessary to cook the spinach?
Cooking the spinach helps reduce moisture and enhances its flavor. It ensures that the dip has a well-rounded taste and creamy texture.
Can I make it dairy-free?
Yes, you can substitute regular cheese with plant-based alternatives and use coconut cream to maintain the dip’s creamy texture without any dairy.
What if my dip is too thick?
If your dip has become too thick, simply mix in a little milk or vegetable broth to reach your desired consistency.
Additional Resources
If you’re interested in exploring more recipes like Espinaca Dip, consider checking out related appetizers such as creamy artichoke dips or cheese-based spreads. Additionally, technique guides on sautéing vegetables or blending dips can enhance your culinary skills.
Gather ingredient information and explore options for fresh herbs that can enhance flavors in your cooking. Equipment recommendations may include food processors or quality mixing bowls for creating superb dips. Lastly, seasonal variations in your ingredients can help bring freshness to your dishes.
Join the Conversation
We’d love to hear your thoughts on this Espinaca Dip recipe! Share your versions and adaptations through social media and join the conversation with other culinary enthusiasts. Your feedback helps shape our community, and photography tips for showcasing your dishes can inspire others.
Feel free to leave a recipe review or share your personal success stories with Espinaca Dip. Engaging with our audience cultivates a lively community focused on delicious cooking experiences.
The Recipe
Espinaca Dip
Serves: 6
Prep Time: 10 mins
Cook Time: 20 mins
Total Time: 30 mins
Kitchen Equipment Needed
- Skillet
- Mixing Bowl
- Spatula
- Oven-Safe Baking Dish
Ingredients
- 2 cups fresh spinach, chopped
- 8 oz cream cheese, softened
- 1 cup sour cream
- 1 cup shredded cheese (cheddar or mozzarella)
- 1/2 cup cream
- 2 cloves garlic, minced
- 1/4 tsp salt
- 1/4 tsp pepper
Directions
- Preheat your oven to 375°F (190°C).
- In a skillet, sauté the minced garlic for 1-2 minutes until fragrant.
- Add the chopped spinach and cook until wilted; remove from heat.
- In a mixing bowl, combine the softened cream cheese, sour cream, and cream.
- Mix in the sautéed spinach and garlic, followed by the shredded cheese, salt, and pepper.
- Transfer the mixture to an oven-safe baking dish.
- Bake for 20 minutes until bubbling and golden on top.
- Remove from the oven and let cool slightly before serving.
Recipe Notes
- Feel free to experiment with different types of cheese.
- For a spicier kick, add chopped jalapeños.
- This dip can be made in advance and stored in the refrigerator overnight.