Delicious Chocolate Chip Cookies: The Ultimate Indulgence
Indulge in the timeless delight of homemade chocolate chip cookies, a classic treat that captures the hearts of cookie lovers everywhere. These soft, chewy cookies are a perfect blend of sweet, buttery goodness with rich, melt-in-your-mouth chocolate chips. Ideal for all occasions, from family gatherings to quiet nights at home, this recipe will leave you with an irresistible craving for more. Imagine the heavenly aroma wafting through your kitchen as they bake – nothing beats the satisfaction of biting into a warm chocolate chip cookie fresh from the oven!
Not only do these cookies taste fantastic, but they also evoke nostalgia for simpler times. There’s something magical about measuring out ingredients, mixing them together, and watching them transform in the oven. Whether you’re making them for yourself or as a thoughtful gift, these chocolate chip cookies are sure to create joyous moments filled with laughter and love.
Quick Recipe Highlights
- Flavor Profile: The sweet buttery flavor perfectly complements the rich chocolate, creating a balanced taste that’s simply irresistible.
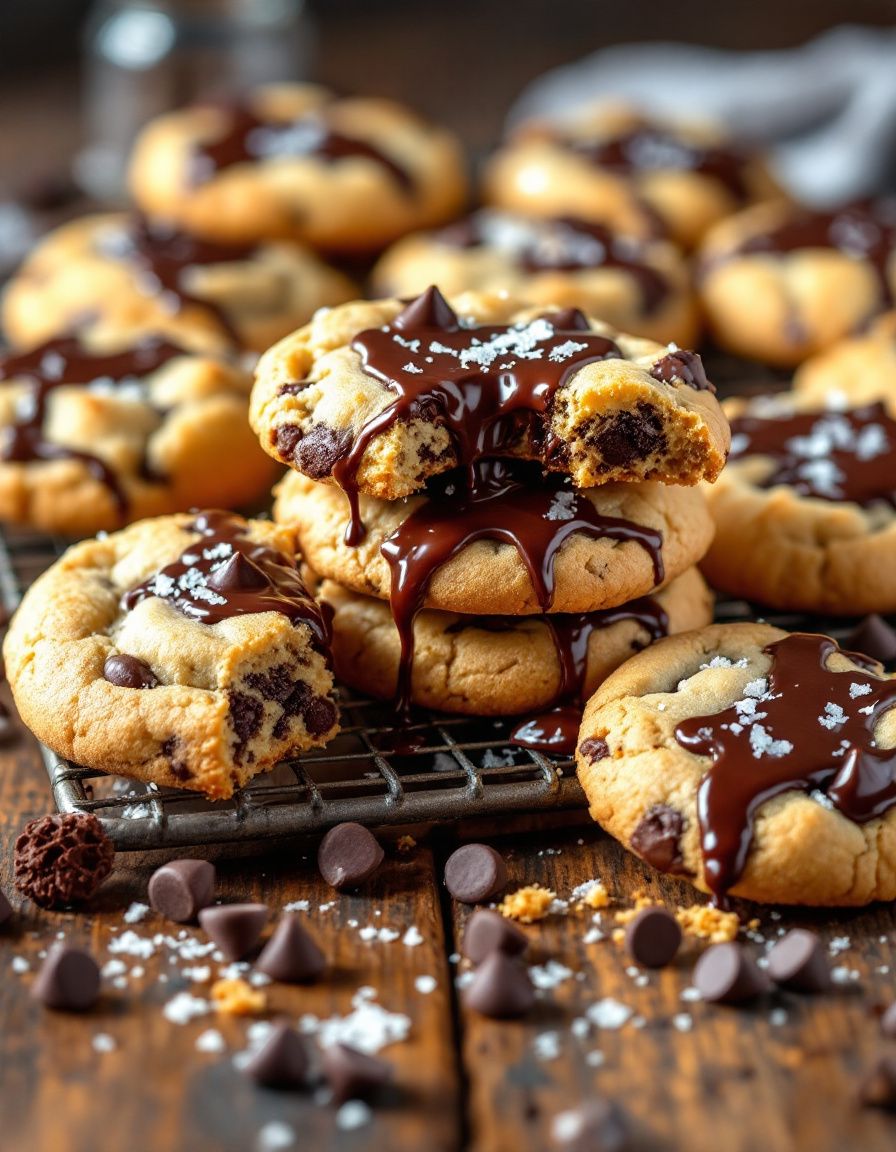
- Texture: Each cookie offers a delightful chewiness, with a crisp edge and a soft, gooey center.
- Aroma: The warm blend of vanilla and baked brown sugar creates an inviting aroma that fills your kitchen.
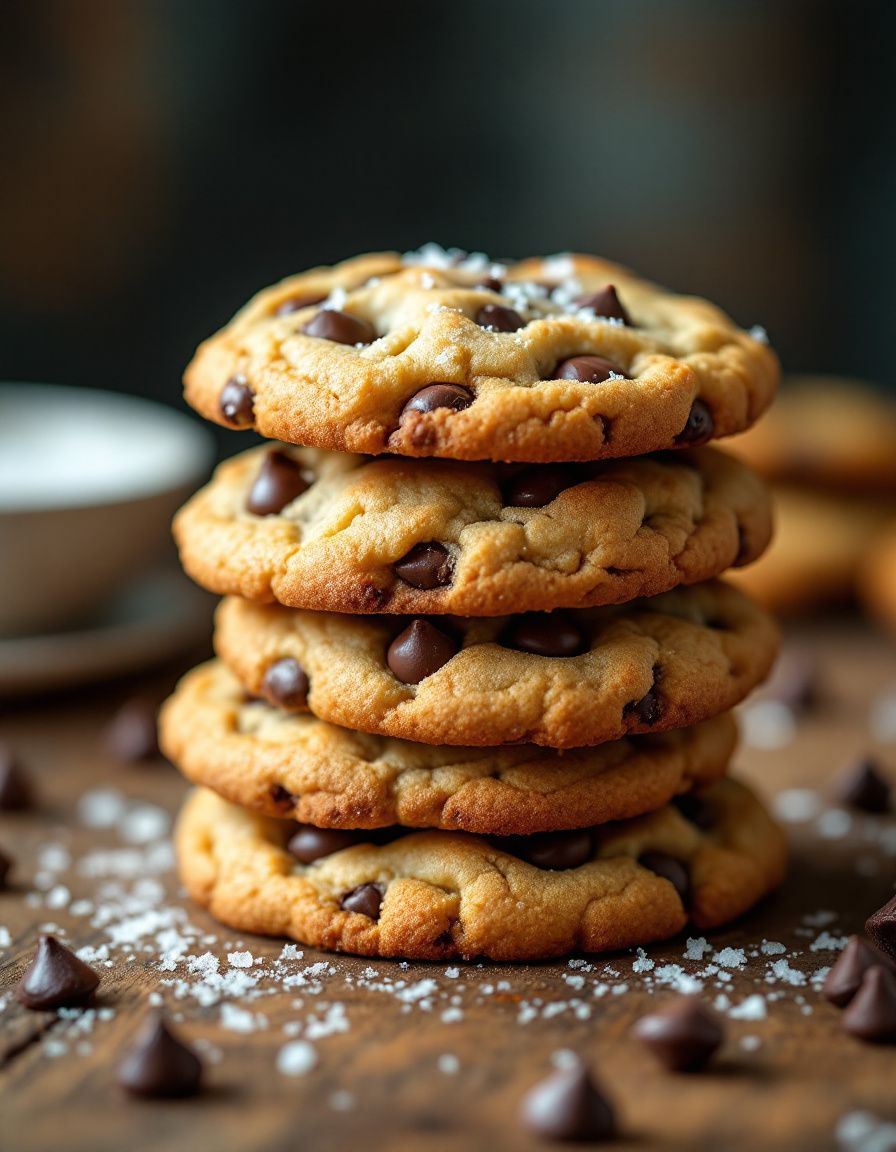
- Visual Appeal: These cookies boast a golden-brown hue with rich chocolate chunks peeking through, making them visually enticing.
- Skill Level Needed: This recipe is easy to follow, making it suitable for beginners as well as seasoned bakers.
- Special Equipment: Basic kitchen tools such as a mixing bowl, baking sheet, and spatula are all you need to create these cookies.
Recipe Overview
- Difficulty Level: This easy recipe is perfect for beginner bakers. With straightforward steps, you’ll gain the confidence to create cookies everyone will love.
- Category: These chocolate chip cookies fit perfectly into the dessert category, ideal for satisfying sweet cravings.
- Cuisine: American in origin, chocolate chip cookies have become a beloved staple in many households worldwide.
- Cost: The recipe is budget-friendly, with basic pantry ingredients that won’t break the bank.
- Season: Chocolate chip cookies can be enjoyed year-round, making them a versatile treat for any season.
- Occasion: Ideal for birthdays, holiday gatherings, or a casual snack, these cookies fit perfectly in any situation.
Why You’ll Love This Recipe
The taste and texture of these chocolate chip cookies make them an all-time favorite. Each bite offers a delightful combination of crunchy edges and soft centers, while the gooey chocolate melts beautifully in your mouth. Whether you enjoy them straight from the oven or with a glass of milk, they will become a staple in your recipe collection.
In terms of convenience, this recipe takes minimal time to prepare, allowing you to whip up a batch even on a busy day. The straightforward steps mean you won’t spend hours in the kitchen, making them an accessible treat for any occasion. You’ll be thankful to have such a quick and easy recipe in your arsenal.
Nutritionally, while cookies are a treat, they can also provide an opportunity to enjoy simple ingredients. With the balance of flour, sugar, and chocolate, they can offer energy and satisfaction. When enjoyed in moderation, these cookies can be a delightful part of a balanced diet.
Socially, chocolate chip cookies carry a certain nostalgia that brings people together. Baking and sharing these cookies can create treasured memories with family and friends, serving as the perfect excuse for gatherings. Who can resist a homemade cookie straight from the oven?
Financially, making chocolate chip cookies is an affordable option compared to store-bought versions. With minimal ingredients, you can create multiple servings at a fraction of the cost of purchasing cookies, ensuring everyone can enjoy this classic treat without the guilt of overspending.
Historical Background and Cultural Significance
Chocolate chip cookies originated in the United States, with Ruth Wakefield credited with creating the first batch in the 1930s. She added chunks of semi-sweet chocolate to her butter cookie recipe, expecting them to melt. Instead, the chocolate held its shape, leading to a delicious new innovation. Since then, chocolate chip cookies have become synonymous with American baking culture, often associated with comfort and nostalgia.
Over the years, chocolate chip cookies have evolved, influencing various baking traditions. The recipe has seen countless adaptations, from adding nuts to experimenting with different types of chocolate. This adaptability demonstrates the cookie’s popularity, showing how it has transcended generations and regions.
Different regions boast unique varieties of chocolate chip cookies, influenced by local ingredients and preferences. For example, some versions incorporate caramel, while others may include sprinkled sea salt to enhance flavor contrast. This widespread appeal has made chocolate chip cookies a beloved choice worldwide.
Culturally, chocolate chip cookies symbolize the warmth of home cooking and the joy of sharing. They are often associated with family gatherings, holiday celebrations, and simple get-togethers, highlighting their significance in reinforcing connections among loved ones.
Ingredient Deep Dive
- Flour: Flour is the foundation of the cookie, providing structure while contributing to the cookie’s overall texture. Look for all-purpose flour to achieve the perfect balance between tenderness and sturdiness. Store it in a cool place to maintain freshness, and consider alternatives like whole wheat for different textures.
- Butter: Butter adds richness and flavor, resulting in a tender cookie. Unsalted butter is preferred, as it allows for better control over the sodium content. Make sure to use room temperature butter for easier mixing, and store it in the fridge to extend its shelf life.
- Brown Sugar: Brown sugar adds moisture and a rich flavor profile, contributing to the chewiness of cookies. Choose packed brown sugar for the best results and store it in an airtight container to prevent it from hardening. For alternative sweetness, consider coconut sugar.
- Chocolate Chips: The star of the show, chocolate chips bring a delightful sweetness and chocolate flavor to each cookie. Use high-quality chocolate for the best taste, and explore options like dark or milk chocolate based on your preference. Store them in a cool, dry place to maintain freshness.
- Eggs: Eggs bind the ingredients together while providing moisture and richness. Use large eggs for consistency, and remember to keep them refrigerated until ready to use. For egg substitutes, try unsweetened applesauce or flaxseed meal mixed with water.
Common Mistakes to Avoid
- Using cold butter: Cold butter leads to dense cookies as it won’t cream properly. Always use room temperature butter for optimal dough texture.
- Overmixing the dough: Too much mixing can develop gluten, causing tough cookies. Mix just until the ingredients are combined.
- Baking at the wrong temperature: A too-hot oven can cause cookies to spread too quickly, resulting in thin, crispy cookies. Make sure to preheat your oven for even baking.
- Not measuring ingredients accurately: Improper measuring can throw off the ratios. Use a kitchen scale for the best results.
- Skipping the chilling step: Chilling the dough allows flavors to meld and prevents excessive spreading. For softer cookies, refrigerate the dough for at least 30 minutes.
- Using expired baking soda: Old baking soda may not produce the desired rise. Always check the expiration date to ensure effective leavening.
- Overbaking the cookies: Cookies should be slightly underbaked as they continue to cook on the pan. Keep a close eye on them during the last few minutes of baking.
- Not allowing cooling time: Cookies need to cool on the baking sheet for a few minutes before transferring to a wire rack. This helps improve texture.
- Not tasting the dough: A critical mistake! Always taste your cookie dough and adjust sweetness as needed.
- Failing to line the baking sheet: Using unlined pans may lead to sticking. Always line with parchment paper for easy removal.
Essential Techniques
Creaming Butter and Sugar: This technique is vital for incorporating air into the dough, resulting in light and fluffy cookies. To master it, beat softened butter with sugar until the mixture is light and fluffy. Avoid overbeating, as it can lead to overly sweet or dry cookies. Look for a pale color and fluffy texture as visual cues for success.
Chilling the Dough: Chilling the cookie dough improves flavor and texture by allowing the ingredients to meld while preventing excessive spreading. To master this technique, wrap the dough in plastic wrap and refrigerate for at least 30 minutes. If the dough is too hard after chilling, let it sit at room temperature for a few minutes before scooping. Look for a firmer texture as a sign of success.
Proper Measuring: Accurate measurements are crucial for balanced cookie dough. To master this technique, use a scale for dry ingredients and measuring cups for liquids. Spoon flour into a cup without packing it down to avoid dense cookies. Visual cues include leveling the flour to ensure consistent results.
Testing for Doneness: Knowing when cookies are done can be tricky. The key is to look for slightly golden edges, with the centers appearing soft but set. For chewy cookies, remove them from the oven when they are just set but not browned. This ensures a perfect texture every time.
Pro Tips for Perfect Chocolate Chip Cookies
1. Use high-quality chocolate chips for richer flavor.
2. Experiment with different types of chocolate, such as dark, semi-sweet, or milk chocolate, for unique combinations.
3. Add a pinch of sea salt to enhance sweetness and balance flavors.
4. Consider browning the butter for a deeper flavor profile.
5. Use fresh ingredients for the best taste; check expiration dates for baking soda and flour.
6. Don’t skip the chilling step; it makes a big difference in texture and flavor.
7. Bake cookies in small batches to ensure freshness.
8. Always let cookies cool on the baking sheet briefly before transferring to a wire rack to maintain texture.
Variations and Adaptations
Regional variations of chocolate chip cookies abound, ranging from adding oatmeal for a chewy twist to incorporating nuts for crunch. Seasonal adaptations can include spices like cinnamon during the fall or peppermint flavoring for a festive touch at the holidays. Dietary modifications are also easy, with options for gluten-free or vegan cookies.
Flavor variations can elevate your cookies; try by adding a tablespoon of espresso powder for a coffee-flavored cookie or mixing in peanut butter chips for added richness. Texture modifications can also be made by adjusting baking time or incorporating shredded coconut for a tropical flair.
For presentation alternatives, consider shaping the cookies into fun designs or sandwiching them with frosting for a more elaborate treat. These adaptations allow you to get creative in the kitchen while enjoying this classic recipe.
Serving and Presentation Guide
When serving chocolate chip cookies, presentation is key. Aim for a rustic look by stacking them on a wooden board or a decorative plate. Enhance visual appeal by dusting powdered sugar on top or adding fresh mint leaves for a pop of color. Consider pairing with a glass of cold milk or hot chocolate for a comforting experience.
For garnishing, simply sprinkle a few chocolate chips on top before baking for a delicious finish. Traditional accompaniments can include ice cream, which is perfect for creating cookie sandwiches, or serve alongside a fruit salad for a refreshing contrast. Pay attention to temperature; serve cookies warm for the best taste experience.
Wine and Beverage Pairing
Pairing wine with chocolate chip cookies can enhance the tasting experience. A rich Cabernet Sauvignon complements the sweetness and chocolate flavors, while a dessert wine like Port balances the sugary notes beautifully. If you prefer a lighter option, a fruity sparkling wine like Prosecco can provide refreshing contrast.
For non-alcoholic alternatives, consider serving with freshly brewed coffee or a creamy chai latte that pairs wonderfully with the cookies’ sweetness. Cold beverages, such as iced tea, can also serve as a delightful refresher, especially in warm weather, ensuring your chocolate chip cookies are enjoyed in style!
Storage and Shelf Life
To store chocolate chip cookies, place them in an airtight container at room temperature for up to a week. To maintain freshness, include a slice of bread in the container, which will absorb moisture and keep the cookies soft. If you prefer, refrigerate the cookies for extending their shelf life; just ensure they’re sealed properly to avoid dryness.
For longer storage, freeze the cookies by placing them in a single layer on a baking sheet until solid, then transfer them to a freezer-safe bag or container. Frozen cookies can last up to three months. When reheating, simply place the cookies in a warm oven, or microwave for a few seconds to restore their original texture before serving.
Make Ahead Strategies
To make chocolate chip cookies ahead of time, prepare the dough and chill it in the fridge for up to 48 hours before baking. This allows the flavors to meld beautifully, enhancing taste. Alternatively, you can bake the cookies and freeze them, thawing as needed for a quick treat.
For ease, portion the dough into balls and freeze them, allowing you to bake fresh cookies on demand. When ready to bake, there’s no need to thaw; just add a couple of extra minutes to the baking time. This strategy helps maintain the cookies’ fresh taste and chewy texture.
Scaling Instructions
If you’re looking to half this recipe, simply divide each ingredient in half. For a larger batch, double or triple the ingredients accordingly. Consider using larger baking sheets or two pans if you increase the quantity significantly. You’ll also need to monitor the baking time, as larger cookie batches may take longer to cook through.
To store extra cookies, ensure that they are fully cooled before sealing them in an airtight container. This prevents condensation and potential sogginess. Cooking times may vary slightly based on the thickness of the cookies, so keep an eye on them while baking.
Nutritional Deep Dive
These chocolate chip cookies offer a delightful balance of carbohydrates and a small amount of protein from the eggs and flour. Each cookie has a moderate caloric profile, making them a sweet indulgence best enjoyed in moderation as part of a balanced diet.
Micronutrient analysis reveals that these cookies provide small amounts of essential vitamins and minerals, including B vitamins and calcium. Opting for whole-grain flour or adding nuts can enhance nutritional value without sacrificing flavor. When considering portion sizes, keep in mind personal health goals, and enjoy each cookie mindfully.
Dietary Adaptations
For gluten-free chocolate chip cookies, substitute all-purpose flour with a gluten-free blend or almond flour. For those with dairy allergies, use coconut oil or vegan butter as a dairy alternative. Enjoy the same delicious flavors while accommodating dietary preferences.
Vegans can replace eggs with flaxseed meal mixed with water, and use dairy-free chocolate chips to maintain the luscious flavor of traditional cookies. Low-carb and keto adaptations can involve almond flour and erythritol as sugar substitutes, ensuring everyone can enjoy a sweet treat.
Troubleshooting Guide
If your cookies turn out too flat, it might be due to warm dough or too much butter. Chill the dough before baking and ensure the butter is softened, not melted. If they are too dry, it may be a sign of overbaking or incorrect flour measurement; test for doneness a minute or two early.
For flavor balance, if the cookies taste bland, consider adjusting the amount of salt or adding a splash of vanilla extract. In situations where cookies spread too much, reduce baking soda slightly, and chilling the dough can help. Always monitor the dough closely during the preparation process.
Recipe Success Stories
Community feedback has shown that everyone has their special touch with chocolate chip cookies. Some fans have shared their favorite variations, adding dried fruits for a chewy finish or infusing the dough with spices. Their success stories inspire many, showcasing how simple the recipe can be adapted for unique flavors.
Readers have shared tips for making the cookies even better, such as browning the butter for that extra layer of flavor. From holiday gatherings to casual afternoons, the cookies have created lasting memories, further emphasizing the connection food has with our experiences.
Frequently Asked Questions
1. Can I freeze chocolate chip cookie dough?
Absolutely! Portion the dough into balls and freeze them for quick baking later. Just add a couple of extra minutes to the baking time if baking from frozen.
2. What type of chocolate is best for chocolate chip cookies?
Using high-quality semi-sweet chocolate chips is traditional, but feel free to experiment with dark or milk chocolate based on your preference.
3. How do I know when my cookies are done baking?
Look for slightly golden edges and set centers for a chewy texture. They may look a bit underdone, but they will continue to cook as they cool.
4. Can I make these cookies vegan?
Yes! Substitute eggs with flaxseed meal mixed with water and use dairy-free butter and chocolate chips for a scrumptious vegan option.
5. What can I do with leftover cookies?
Leftover cookies can be stored in an airtight container at room temperature for up to a week or frozen for longer preservation.
6. Can I add nuts to the cookie dough?
Certainly! Chopped nuts like walnuts or pecans make a lovely addition to add texture and flavor complexity to your cookies.
7. What’s the best way to store chocolate chip cookies?
Store baked cookies in an airtight container at room temperature for up to a week or refrigerate them for longer freshness.
8. How do I fix cookies that turned out too tough?
Tough cookies may be a result of overmixing or too much flour; next time, measure ingredients carefully and mix just until combined.
9. What’s the ideal way to scoop cookie dough?
Using a cookie scoop or ice cream scoop ensures consistent size throughout baking, leading to even cooking.
10. Can I use brown sugar instead of white sugar?
Yes, using brown sugar can add moisture and a richer flavor. You can also mix both for a more complex taste.
Additional Resources
For those looking to experiment further, consider trying related recipes like oatmeal raisin cookies or peanut butter cookies. Technique guides on whipping butter for baked goods and beginner baking tips can also enhance your skills. Learning about ingredient options can inspire variations and encourage creativity in your kitchen.
Join the Conversation
We love seeing your chocolate chip cookie creations! Share your photos and variations on social media, and don’t forget to leave a review of this recipe. Engage with other baking enthusiasts to share tips and tricks, and let’s celebrate cookie season together!
The Recipe
Chocolate Chip Cookies
Serves: 24 cookies
Prep Time: 15 mins
Cook Time: 10 mins
Total Time: 25 mins
Kitchen Equipment Needed
- Mixing bowl
- Baking sheet
- Spatula
- Measuring cups and spoons
- Cookie scoop or spoon
Ingredients
- 2 1/4 cups all-purpose flour
- 1/2 teaspoon baking soda
- 1 cup (2 sticks) unsalted butter, softened
- 3/4 cup granulated sugar
- 3/4 cup packed brown sugar
- 1 teaspoon salt
- 2 teaspoons pure vanilla extract
- 2 large eggs
- 2 cups chocolate chips
Directions
- Preheat oven to 350°F (180°C).
- In a bowl, whisk flour and baking soda together; set aside.
- In another large bowl, beat butter, granulated sugar, brown sugar, and salt until creamy.
- Add vanilla and eggs; mix until well combined.
- Gradually blend in flour mixture, and fold in chocolate chips.
- Drop rounded tablespoons of dough onto a baking sheet, spaced about 2 inches apart.
- Bake for 9-11 minutes or until golden brown around the edges.
- Allow to cool on the baking sheet for 5 minutes before transferring to a wire rack.
Recipe Notes
- For extra flavor, consider browning the butter before mixing.
- Experiment with flavored chocolate chips like mint or caramel.
- Store cookies in an airtight container for optimal freshness.