Table of Contents
Mexican Street Corn Bowl
Introduction
Did you know that a recent survey found over 75% of home cooks are looking for ways to transform classic street food into a complete, balanced meal? If you’re craving the vibrant, smoky, and creamy flavors of Mexican street corn but want a more substantial dish, you’ve landed on the perfect recipe. This Mexican Street Corn Bowl is your answer. It’s a hearty, deconstructed feast featuring succulent grilled spiced chicken, the iconic charred and creamy Elote-style corn, fluffy cilantro-lime rice, and a tangy lime dressing that ties it all together. It’s a flavor-packed, customizable bowl that brings the bustling energy of a Mexican mercado right to your dinner table in under an hour.
Ingredients List
Gather these fresh, vibrant ingredients to build layers of flavor. Don’t be afraid to use the substitutions to tailor the bowl to your pantry or dietary needs.
- For the Spiced Chicken:
- 1.5 lbs boneless, skinless chicken thighs – Thighs stay juicier on the grill, but substitute with chicken breasts for a leaner option.
- 2 tbsp olive oil
- 2 tsp chili powder – Provides a warm, earthy base.
- 1 tsp smoked paprika – The key to that irresistible smoky aroma.
- 1 tsp ground cumin – Adds a nutty, toasty depth.
- 1 tsp garlic powder
- 1/2 tsp onion powder
- 1/2 tsp salt, plus more to taste
- Juice of 1 lime – For a bright, acidic punch in the marinade.
- For the Mexican Street Corn (Elote):
- 4 cups fresh or frozen corn kernels (about 4-5 ears) – Frozen fire-roasted corn is a fantastic shortcut for instant charred flavor.
- 1 tbsp neutral oil (like avocado or vegetable)
- 1/3 cup mayonnaise – Creates the classic creamy coating. For a lighter version, use Greek yogurt or a vegan mayo.
- 1/3 cup crumbled cotija cheese – This salty, crumbly cheese is non-negotiable for authentic taste. Substitute with feta if needed.
- 1/4 cup finely chopped fresh cilantro
- 1 jalapeño, seeds removed and finely diced – Adjust for your heat preference.
- 1 clove garlic, minced
- Juice of 1/2 a lime
- 1/2 tsp chili powder, for garnish
- For the Cilantro-Lime Rice:
- 1 cup long-grain white rice – Brown rice or cauliflower rice are excellent whole-food swaps.
- 2 cups water or chicken broth – Broth adds a richer flavor.
- Juice and zest of 1 lime
- 1/4 cup chopped fresh cilantro
- Salt to taste
- For the Creamy Lime Dressing:
- 1/2 cup sour cream – Plain full-fat Greek yogurt works beautifully for extra protein.
- Juice of 1 lime
- 1 tbsp milk or water – To thin to a drizzling consistency.
- 1 tsp honey or agave – A hint of sweetness balances the tang.
- Salt and pepper to taste
- For Serving (Optional but Recommended):
- Sliced avocado or guacamole
- Fresh lime wedges
- Extra cilantro and cotija cheese
- Pickled red onions
Timing
This recipe is designed for efficiency. While the total time is around 50 minutes, much of it is hands-off cooking. Compared to many bowl recipes that require separate cooking for every component, our method uses strategic overlapping to get everything to the table faster.
20 minutes
30 minutes
50 minutes
4 hearty bowls
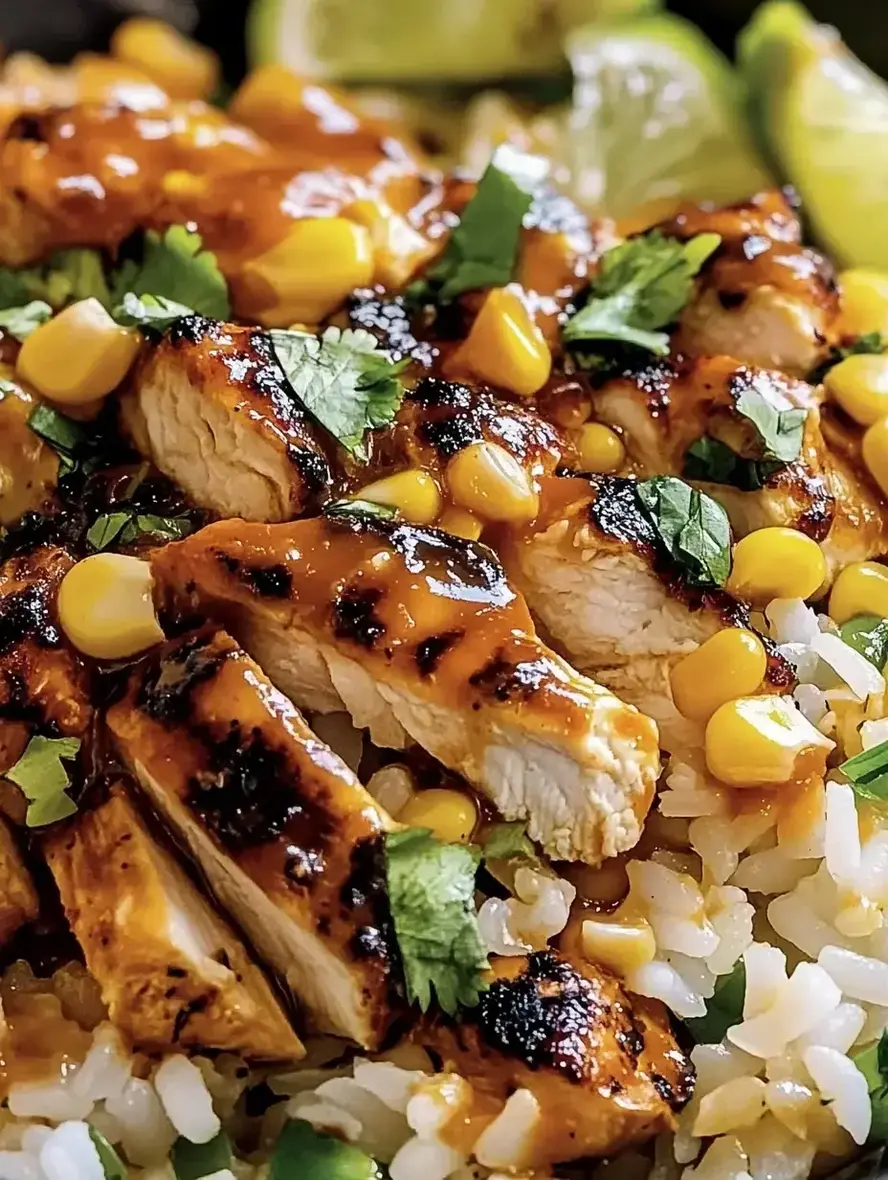
A vibrant, colorful bowl featuring grilled chicken, creamy street corn, and cilantro-lime rice, drizzled with a creamy lime dressing.
Step-by-Step Instructions
Follow these detailed steps to build your bowl with confidence. We’ll layer flavors and textures for the ultimate eating experience.
Step 1: Marinate the Chicken
In a medium bowl, whisk together the olive oil, chili powder, smoked paprika, cumin, garlic powder, onion powder, salt, and the juice of one lime. Add the chicken thighs and toss until every piece is thoroughly coated in the vibrant spice paste. Let it marinate for at least 15 minutes at room temperature. If you have more time, cover and refrigerate for up to 4 hours for deeper flavor penetration. This step is crucial for tender, flavorful chicken.
Step 2: Prepare the Street Corn
While the chicken marinates, cook your corn. Heat a large cast-iron skillet or grill pan over medium-high heat. Add the oil and corn kernels. Cook, stirring occasionally, for 8-10 minutes until the corn is tender and has developed beautiful charred spots. Transfer the hot corn to a mixing bowl. Immediately add the mayonnaise, cotija cheese, cilantro, diced jalapeño, minced garlic, and lime juice. Stir vigorously until the cheese begins to melt into the mayo, creating a creamy, cohesive mixture. Set aside. The residual heat wilts the cilantro and mellows the raw garlic perfectly.
Step 3: Cook the Rice and Chicken
Now, multitask! Start your rice. Rinse the rice under cold water until the water runs clear. Combine it with 2 cups of water or broth in a saucepan, bring to a boil, then reduce heat to low, cover, and simmer for 15-18 minutes. Once cooked, fluff with a fork and stir in the lime zest, lime juice, chopped cilantro, and salt.
As the rice cooks, preheat your grill, grill pan, or a heavy skillet over medium-high heat. Cook the marinated chicken thighs for 5-7 minutes per side, or until they reach an internal temperature of 165°F and have gorgeous grill marks. Transfer to a cutting board and let them rest for 5 minutes before slicing into strips. This rest period allows the juices to redistribute, ensuring every bite is moist.
Step 4: Assemble Your Bowl
This is where the magic happens. In a small bowl, whisk together all the ingredients for the creamy lime dressing, adding milk or water until it reaches a smooth, pourable consistency. Now, build your bowls: start with a generous base of fluffy cilantro-lime rice. Top with a portion of the creamy street corn mixture. Arrange the sliced spiced chicken over the corn. Drizzle lavishly with the creamy lime dressing. Finish with your chosen garnishes—I highly recommend a few slices of creamy avocado and a sprinkle of extra cotija and cilantro for color and texture contrast.
Nutritional Information
The following estimates are for one serving (approximately 1/4 of the recipe), including chicken, corn, rice, and dressing, without optional toppings. Values are approximate and can vary based on specific ingredients and substitutions used.
- Calories: ~680 kcal
- Protein: ~38g
- Carbohydrates: ~65g
- Dietary Fiber: ~6g
- Sugars: ~10g
- Fat: ~30g
- Saturated Fat: ~8g
Healthier Alternatives
You can easily lighten up this bowl without sacrificing the iconic Elote flavor. Here are my favorite nutrition-friendly swaps:
- Rice Swap: Use cauliflower rice (sautéed in a pan with a little oil until tender) or quinoa to significantly reduce carbs and increase fiber and protein.
- Creamy Element Swap: Replace the mayonnaise in the street corn with plain, non-fat Greek yogurt. For the dressing, use all Greek yogurt instead of sour cream.
- Cheese & Protein: Use a light sprinkle of cotija or feta for flavor without overdoing it. Opt for chicken breasts instead of thighs to lower the overall fat content.
- Boost Veggies: Add a layer of sautéed bell peppers, zucchini, or black beans to increase volume, fiber, and nutrients.
Serving Suggestions
This bowl is a complete meal on its own, but it pairs wonderfully with these sides and drinks:
- As a Starter: Serve with a light, crisp salad like a jicama slaw or a simple tomato and cucumber salad with lime.
- Beverage Pairing: A classic margarita (on the rocks!), a cold Mexican lager, or a refreshing agua fresca like hibiscus or watermelon.
- For a Crowd: Set up a “bowl bar” with all the components (rice, corn, chicken, dressings, and all toppings) in separate dishes and let guests build their own masterpiece.
Common Mistakes
- Overcooking the Chicken: Chicken thighs are forgiving, but they can still dry out. Use a meat thermometer and pull them at 165°F. Letting them rest is non-negotiable.
- Skipping the Char on the Corn: That smoky, slightly bitter char is what defines street corn. Don’t rush this step—let the corn sit in the hot pan to develop color.
- Using Pre-Shredded Cheese: