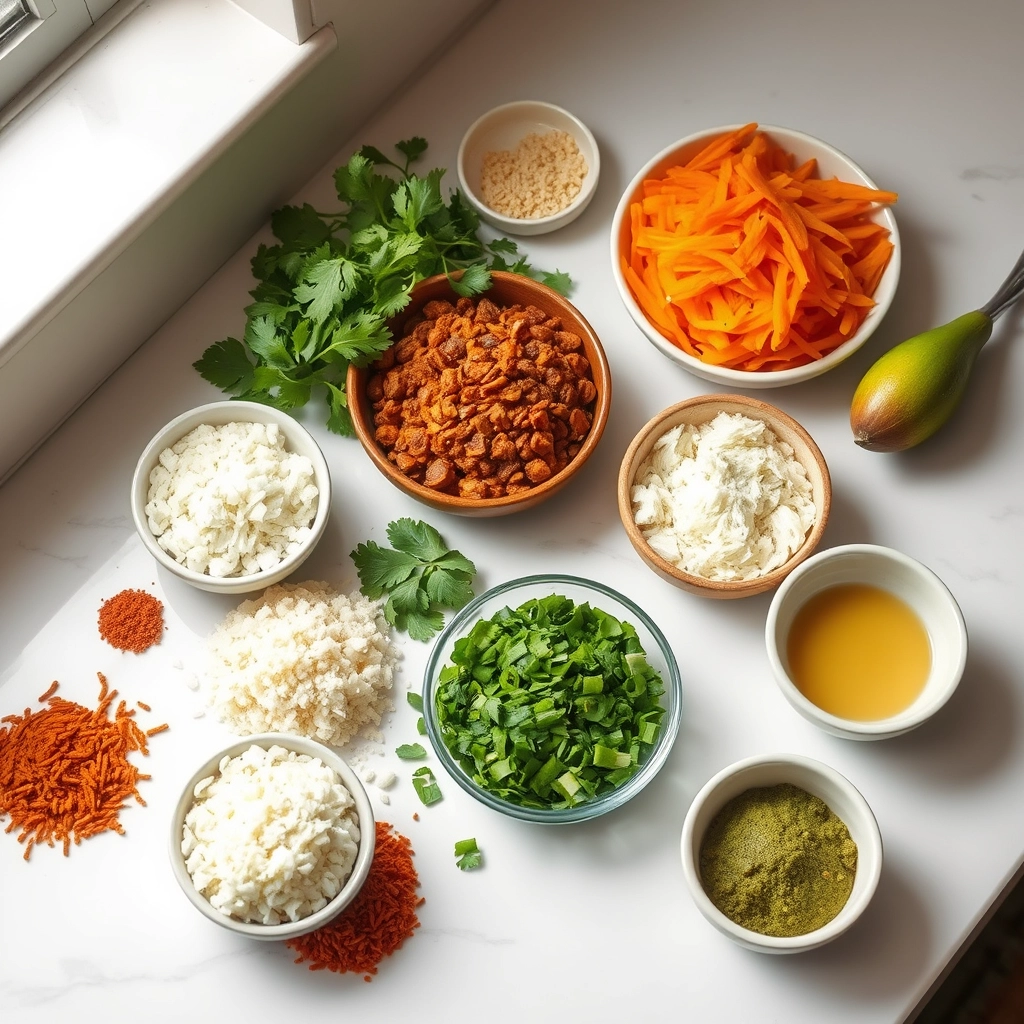
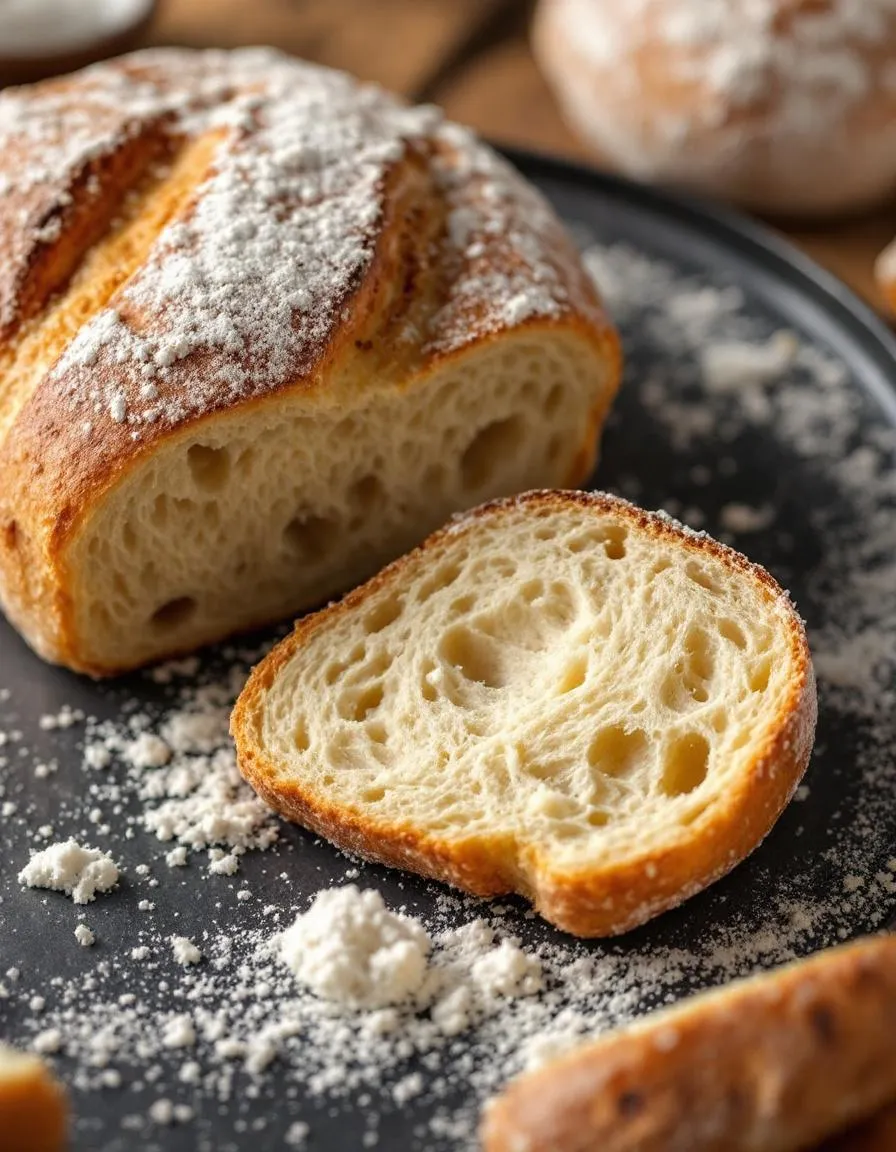
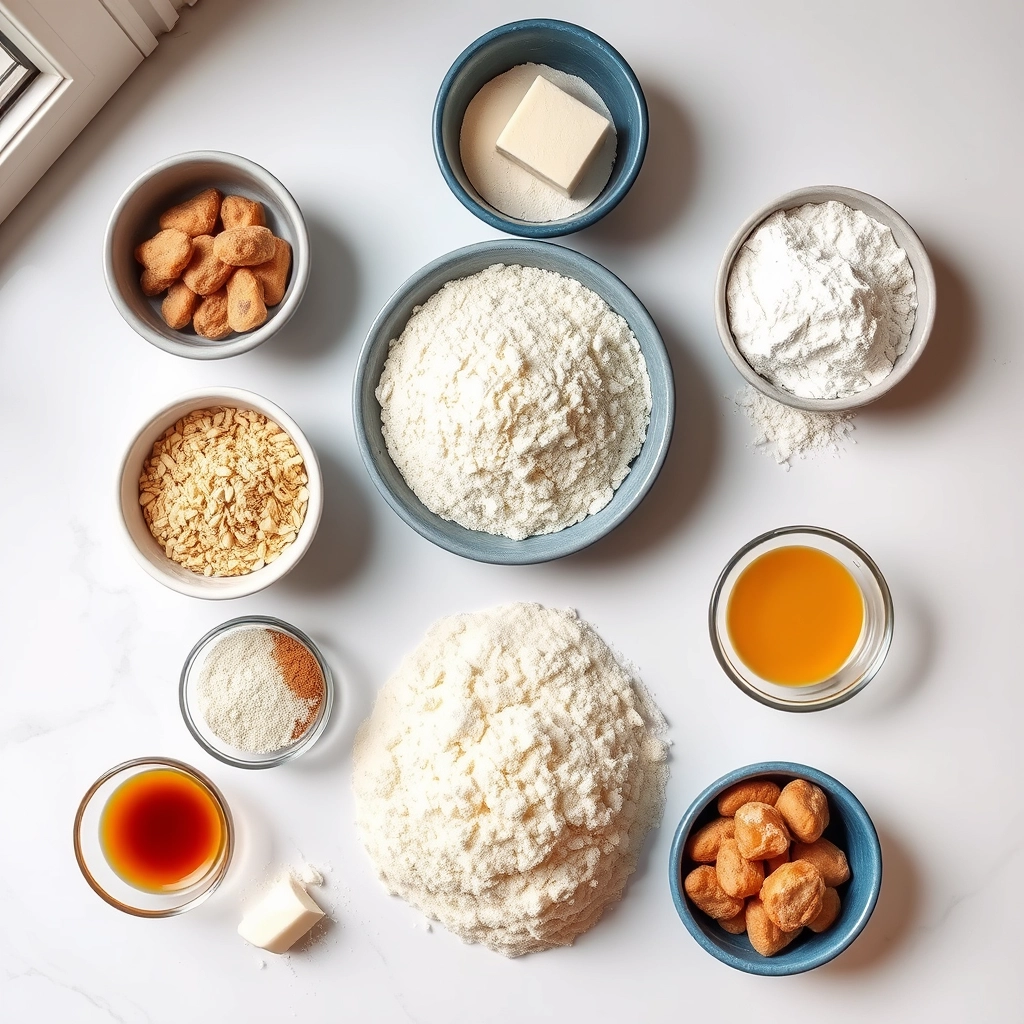
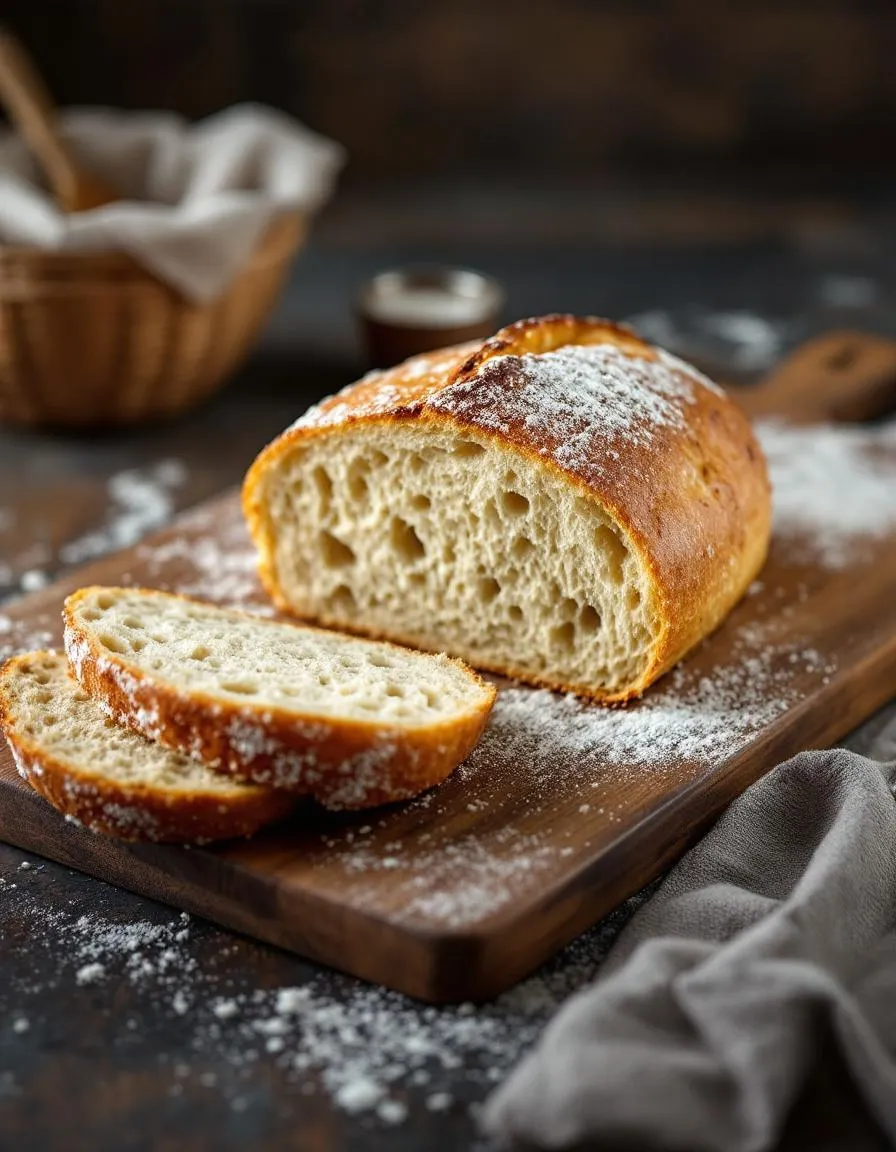
There’s something undeniably comforting about a dish that transports you to another place, and Authentic Mexican Rice does just that. Whether you grew up with it or are discovering it for the first time, this vibrant, flavorful side dish brings people together. Moreover, it’s the perfect companion to so many meals, from Tacos al Pastor to simple weeknight dinners. Let’s dive into what makes this recipe so special—and why it deserves a spot in your kitchen.
Authentic Mexican Rice, or “arroz rojo,” is a staple in Mexican cuisine, known for its rich tomato-infused flavor and fluffy texture. Unlike plain white rice, this dish gets its depth from sautéed onions, garlic, and a blend of spices that create a symphony of taste. What sets it apart is the technique—toasting the rice before simmering it locks in flavor while keeping each grain perfectly separate. For anyone who loves exploring global flavors, this recipe is a must-try. It’s also incredibly versatile, pairing beautifully with everything from Chicken Tinga Tostadas to grilled meats. Best of all, it captures the essence of home-cooked meals, making it a favorite for both busy weeknights and festive gatherings.
Why I Love This Recipe
Authentic Mexican Rice holds a special place in my heart because it reminds me of family. My abuela taught me how to make it when I was just old enough to stir a pot, and the aroma still takes me back to her kitchen. Over the years, I’ve tweaked her recipe slightly, but the soul of it remains the same—a dish that’s as nourishing as it is delicious. Every time I make it, I feel connected to those cherished moments, and I hope it brings the same joy to your table.
Health and Nutrition
Why it’s good for your body
Authentic Mexican Rice packs a nutritious punch while delivering bold flavors. First, it combines fiber-rich ingredients like tomatoes, onions, and garlic, which support digestion and gut health. Additionally, the dish often includes healthy fats from olive oil or avocado oil, helping your body absorb fat-soluble vitamins.
Moreover, Authentic Mexican Rice provides complex carbs from long-grain rice, offering steady energy without blood sugar spikes. The tomatoes and peppers also contribute antioxidants like lycopene and vitamin C, which fight inflammation and boost immunity. Meanwhile, spices such as cumin and cilantro add not just flavor but also antimicrobial and anti-inflammatory benefits.
Finally, this dish adapts easily to protein-packed variations. For instance, you can pair it with beans or lean meats for a balanced meal. Whether you enjoy it as a side or main, Authentic Mexican Rice delivers both taste and nourishment in every bite.
How it fits in a healthy lifestyle
Authentic Mexican Rice fits seamlessly into a balanced diet. If you’re gluten-free, this dish naturally avoids gluten-containing ingredients, making it a safe choice. For heart-healthy eating, simply use less salt and opt for unsaturated fats like avocado oil.
You can also customize it to match your protein goals. Try adding black beans for plant-based protein or grilled chicken for a lean option. Pair it with a fresh salad or roasted veggies for a well-rounded plate. If you’re looking for more gluten-free meal ideas, check out our gluten-free dinner recipes.
Even better, Authentic Mexican Rice works great for meal prep. Make a big batch and store it for quick, wholesome lunches. For more tips on healthy meal planning, explore our meal prep guide. With simple tweaks, this dish helps you stay on track without sacrificing flavor.
Fluffy and flavorful rice cooked with tomatoes, onions, and garlic for a classic Mexican side dish.
Ingredients
Scale
For the Crust:
1 cup long-grain white rice
2 tablespoons vegetable oil
1/2 cup finely chopped onion
2 cloves garlic, minced
1/2 cup tomato sauce
2 cups chicken broth
1 teaspoon ground cumin
1/2 teaspoon salt
1/4 cup chopped fresh cilantro
Instructions
1. Prepare the Crust:
Rinse the rice under cold water until the water runs clear, then drain well.
Heat the oil in a large skillet over medium heat. Add the rice and cook, stirring frequently, until golden brown.
Add the onion and garlic to the skillet and cook for 2 minutes until softened.
Stir in the tomato sauce, chicken broth, cumin, and salt. Bring to a boil.
Reduce heat to low, cover, and simmer for 20 minutes or until the rice is tender and the liquid is absorbed.
Remove from heat and let stand, covered, for 5 minutes. Fluff with a fork and stir in cilantro before serving.
Notes
You can customize the seasonings to taste.
Nutrition
Calories:15kcal
How to Prepare This Dish
Steps and time-saving tips
Start by rinsing the rice under cold water until it runs clear to remove excess starch. Meanwhile, heat oil in a large skillet over medium heat and toast the rice until golden, stirring constantly for even browning. Next, add minced garlic and finely chopped onion, sautéing until fragrant. Stir in tomato sauce, chicken broth, and a pinch of salt, then bring the mixture to a gentle boil. Reduce the heat to low, cover tightly, and simmer for 20 minutes without peeking—this ensures perfectly fluffy Authentic Mexican Rice. For a time-saving trick, use pre-minced garlic or frozen diced onions. Once the rice absorbs all the liquid, fluff it with a fork and fold in fresh cilantro for a vibrant finish. If you’re doubling the recipe, use a wider pan to prevent uneven cooking. Let the rice rest off the heat for 5 minutes before serving to lock in moisture.
and-learned-from">Mistakes I’ve made and learned from
I once rushed the toasting step, leaving the rice pale and bland—now I patiently wait for that deep golden color to develop maximum flavor. Another blunder? Lifting the lid too soon, which made the rice gummy. Trust the process! If your broth ratio feels off, check out my guide on perfect rice ratios for foolproof adjustments. For busy nights, I’ve learned to prep ingredients ahead using my meal prep hacks, like pre-measuring spices or batch-cooking broth. Authentic Mexican Rice is forgiving once you nail these details, so don’t stress over small mishaps.
Cultural Connection and Variations
Where this recipe comes from
Authentic Mexican Rice, or “arroz rojo,” carries generations of tradition in every flavorful bite. Originating in Mexico, this dish transforms simple ingredients like rice, tomatoes, and spices into a vibrant staple. Families often pass down their own versions, tweaking the recipe with local touches. For instance, coastal regions might add seafood, while inland areas stick to classic chicken or keep it vegetarian.
Interestingly, Authenti
c Mexican Rice also reflects global influences. Spanish colonizers introduced rice to Mexico, but locals made it their own by blending native tomatoes and chilies. Today, you’ll find variations worldwide. In Texas, cooks might use cumin for extra warmth, while California versions often include fresh cilantro. My abuela swore by toasting the rice first, a trick that adds depth to every forkful.
Whether served at celebrations or weeknight dinners, this dish connects people. It’s the star of fiestas, yet humble enough for daily meals. No matter how you prepare it, Authentic Mexican Rice always feels like home.
How it fits in today’s cooking
Modern kitchens love Authentic Mexican Rice for its versatility and crowd-pleasing flavors. Busy cooks appreciate one-pan meals like this, especially when paired with easy weeknight dinners. Plus, it’s a budget-friendly way to feed a family without sacrificing taste.
Today’s adaptati
ons keep the dish fresh. Health-conscious cooks swap white rice for quinoa or cauliflower rice, while others load it with extra veggies. It’s also a hit at potlucks and seasonal gatherings, proving tradition can evolve. Whether you stick to the classic recipe or put your spin on it, Authentic Mexican Rice remains a timeless favorite.
Taste and Texture
What makes it delicious
Authentic Mexican Rice delivers a vibrant, savory experience with every bite. The fluffy grains soak up a rich tomato-infused broth, creating a subtly sweet and smoky depth. Garlic and onions add aromatic warmth, while a hint of cumin ties everything together with earthy warmth. Each forkful offers a satisfying texture—firm yet tender, with just the right amount of chew. Meanwhile, fresh cilantro sprinkled on top brightens the dish with a citrusy pop. Whether served as a side or a base for toppings, Authentic Mexican Rice brings comfort and bold flavor to the table.
Boosting the flavor
Elevate your Authentic Mexican Rice by stirring in roasted poblano peppers for a mild, smoky kick. Alternatively, top it with crumbled queso fresco or creamy avocado slices for a cool contrast. A squeeze of lime juice just before serving heightens the freshness, while a drizzle of homemade chipotle sauce adds a spicy, tangy twist. For extra depth, toast the rice in oil before simmering—this unlocks a nutty aroma. Pair it with grilled chicken marinade for a complete meal bursting with complementary flavors.
Always rinse the rice thoroughly before cooking to remove excess starch, which helps Authentic Mexican Rice stay fluffy instead of sticky. Toast the rice in oil first until golden, as this step deepens the flavor and prevents mushiness. Use a heavy-bottomed pot to distribute heat evenly, and resist stirring once you add the broth—letting it steam undisturbed ensures perfect texture. For extra depth, toast whole spices like cumin seeds before grinding them fresh. Finally, let the rice rest covered for 5 minutes off the heat to finish absorbing moisture evenly.
Mistakes to avoid
Avoid overcrowding the pot with too much rice, as this leads to uneven cooking. Instead, cook in batches if needed, or use our guide on perfect rice ratios for precise measurements. Never skip toasting the rice, since raw grains lack the nutty flavor essential to Authentic Mexican Rice. If your rice turns out soggy, check your broth quantity—too much liquid is a common culprit. For troubleshooting, refer to our tips on fixing soggy rice, which covers simple adjustments for next time. Lastly, don’t lift the lid too early—patience ensures steam works its magic.
g-suggestions">Serving and Pairing Suggestions
How to serve this dish
Bring out the vibrant colors of Authentic Mexican Rice by serving it in a wide, shallow bowl or a traditional clay cazuela. For a festive touch, top it with fresh cilantro, lime wedges, and a sprinkle of crumbled queso fresco. Meanwhile, this dish shines at family gatherings, whether you’re hosting a casual weeknight dinner or a Cinco de Mayo celebration. If you want to impress guests, pair it with warm tortillas or serve it alongside sizzling fajitas for a complete meal.
What goes well with it
First, try pairing Authentic Mexican Rice with a refreshing agua fresca, like our hibiscus agua fresca, to balance the rich flavors. Alternatively, a cold Mexican lager or a citrusy margarita enhances the dish’s spices. For sides, consider serving it with creamy black bean soup or grilled street corn for a satisfying contrast. Finally, a dollop of cool avocado crema adds a creamy finish that ties everything together.
math-faq-block">
What makes Authentic Mexican Rice different from Spanish rice?
Authentic Mexican Rice gets its distinct flavor from browning the rice in oil before simmering, which creates a nutty taste. Unlike Spanish rice, it typically includes tomatoes, onions, and garlic for a richer, more aromatic dish. The key is using long-grain white rice and chicken broth for the best texture.
How do you keep Authentic Mexican Rice from getting mushy?
To prevent mushy Authentic Mexican Rice, rinse the rice thoroughly before cooking to remove excess starch. Use a 2:1 liquid-to-rice ratio and avoid stirring once the rice starts simmering. Let it rest covered for 10 minutes after cooking to achieve perfect fluffy grains.
Can I make Authentic Mexican Rice without tomatoes?
Yes, you can make a tomato-free version of Authentic Mexican Rice by substituting tomato paste with roasted red peppers or annatto paste for color. The dish will still have great flavor from garlic, onions, and cumin. Some traditional recipes from northern Mexico skip tomatoes entirely.
rank-math-faq-item">What protein goes best with Authentic Mexican Rice?
Authentic Mexican Rice pairs perfectly with grilled chicken, carne asada, or carnitas for a complete meal. For vegetarian options, try black beans or sautéed peppers. The rice’s robust flavor complements both mild and spicy proteins equally well.
Easy Artisan Bread Recipe – Perfect Crust Every Time
Introduction
There’s something undeniably special about the aroma of freshly baked Artisan Bread filling your home. Whether you’re a seasoned baker or just starting out, this recipe invites you to slow down and savor the process. After all, great bread isn’t just food—it’s a story waiting to unfold. With each knead and rise, you’ll create something that nourishes both body and soul. Trust me, once you taste that crisp crust and airy crumb, you’ll never look at store-bought loaves the same way again.
Artisan Bread stands apart because it celebrates tradition, craftsmanship, and simplicity. Unlike mass-produced bread, it relies on time-honored techniques, minimal ingredients, and patience. The result? A loaf with deep flavor, a chewy texture, and a crust that crackles with every bite. For home bakers, mastering Artisan Bread feels like unlocking a secret—one that connects us to generations of bakers before us. Here at brekcakes.com, we embrace recipes that honor authenticity, just like our Homemade Sourdough Starter guide. Whether you’re pairing it with soup or enjoying it with a smear of butter, this bread transforms everyday moments into something memorable. Plus, if you love baking projects, you’ll adore our Rustic Focaccia Recipe—another testament to the beauty of handmade bread.
Why I Love This Recipe
Artisan Bread holds a special place in my heart because it taught me the power of patience. Years ago, my first attempt turned into a dense brick, but I kept trying. Now, every time I pull a golden loaf from the oven, I remember how far I’ve come. Sharing this recipe feels like passing down a piece of my journey—one that I hope inspires you to create your own delicious memories.
Health and Nutrition
Why it’s good for your body
Artisan bread delivers wholesome nutrition while satisfying your cravings for hearty, flavorful food. Unlike mass-produced loaves, it often contains simple, high-quality ingredients like whole grains, natural yeast, and minimal additives. As a result, artisan bread provides more fiber, which supports digestion and keeps you fuller longer. Additionally, the slow fermentation process enhances nutrient absorption, making vitamins and minerals easier for your body to use.
Moreover, artisan bread typically avoids preservatives and artificial enhancers, reducing unnecessary chemicals in your diet. The natural fermentation also promotes gut health by encouraging beneficial bacteria. When you enjoy artisan bread, you get a satisfying source of energy without the blood sugar spikes linked to refined flour products. Plus, the rich, complex flavors mean you’ll savor each bite, helping you eat more mindfully.
Finally, artisan bread often includes seeds, nuts, or ancient grains, boosting its protein and healthy fat content. These additions provide essential nutrients like omega-3s and antioxidants. Whether you choose a rustic sourdough or a seeded multigrain loaf, artisan bread offers a delicious way to nourish your body.
How it fits in a healthy lifestyle
Artisan bread fits seamlessly into a balanced diet, especially when paired with nutrient-rich toppings like avocado, lean proteins, or fresh vegetables. Its hearty texture and robust flavor make it a satisfying base for open-faced sandwiches or wholesome snacks. If you’re watching your carb intake, simply opt for thinner slices and pair them with protein to balance your meal.
For those exploring gluten-free options, some artisan bakers craft loaves using alternative flours like buckwheat or quinoa. Check out our guide to gluten-free baking for more ideas. Meanwhile, heart-healthy eaters will appreciate artisan bread’s lower sodium content compared to commercial brands. Pair it with olive oil or nut butter for a dose of healthy fats.
Artisan bread also encourages mindful eating. Its rich taste and chewy texture slow you down, helping you enjoy meals without overindulging. For more tips on incorporating wholesome carbs into your routine, explore our balanced meal planning strategies. Whether you’re fueling up for the day or winding down with a cozy dinner, artisan bread supports your health goals deliciously.
A simple, no-knead artisan bread with a crispy crust and soft interior.
Ingredients
Scale
For the Crust:
3 cups all-purpose flour
1 1/2 teaspoons salt
1/2 teaspoon active dry yeast
1 1/2 cups warm water
Instructions
1. Prepare the Crust:
In a large bowl, mix flour, salt, and yeast. Add warm water and stir until a sticky dough forms.
Cover the bowl with plastic wrap and let it rise at room temperature for 12-18 hours.
Preheat oven to 450°F (230°C). Place a Dutch oven inside to heat for 30 minutes. Transfer dough to a floured surface, shape into a ball, and place on parchment paper. Carefully transfer dough into the hot Dutch oven, cover, and bake for 30 minutes. Remove lid and bake for another 15 minutes until golden brown.
Notes
You can customize the seasonings to taste.
Nutrition
Calories:15kcal
s-dish">How to Prepare This Dish
Steps and time-saving tips
Start by mixing the flour, salt, and yeast in a large bowl. Gradually add warm water while stirring with a wooden spoon until a shaggy dough forms. Let it rest for 10 minutes—this autolyse step helps the gluten develop naturally. Next, fold the dough gently every 30 minutes for 2 hours to build structure without overworking it. Meanwhile, preheat your oven with a Dutch inside to mimic a professional bread oven’s steam effect. Shape the dough into a round or oval on a floured surface, then let it rise in a proofing basket for 1-2 hours. Score the top with a sharp knife to control expansion, then bake covered for 20 minutes. Uncover and bake another 15-20 minutes until golden brown. For a crisp crust, cool it on a wire rack. To save time, prepare the dough the night before and refrigerate it overnight for a slow, flavor-boosting rise.
Mistakes I’ve made and learned from
Early on, I rushed the proofing stage, resulting in dense Artisan Bread. I learned to watch for bubbles and a slight jiggle—signs the yeast did its job. Another blunder? Skipping the Dutch oven, which led to pale, dry loaves. Now I swear by this method for that bakery-worthy crust. If your dough feels too sticky, resist adding extra flour; high hydration is key to airy crumbs. For more troubleshooting, check out my guides on fixing dense bread and perfecting crusts. Trust me, even imperfect loaves taste great with butter!
n-and-variations">Cultural Connection and Variations
Where this recipe comes from
Artisan bread carries centuries of tradition in its crusty, golden layers. Bakers in Europe perfected the craft over generations, using simple ingredients like flour, water, salt, and wild yeast. In France, a country famous for its bread culture, Artisan Bread often takes center stage at meals, paired with cheese, wine, or just a smear of butter. Meanwhile, Italian bakers might fold olive oil or herbs into the dough for a regional twist.
Across the globe, cultures put their own spin on Artisan Bread. In Morocco, bakers add semolina for a denser texture, while German bakers might mix in rye or seeds for heartier loaves. Even within families, recipes evolve. Some home bakers swear by a longer fermentation for deeper flavor, while others prefer a quicker rise for convenience. No matter the method, Artisan Bread always feels like a labor of love—a connection to the past and a staple for the present.
How it fits in today’s cooking
Today, Artisan Bread bridges old-world charm and modern convenience. Busy home cooks embrace no-knead recipes or use stand mixers to simplify the process. It’s a star at holiday gatherings, like Thanksgiving, where a warm loaf pairs perfectly with homemade herb butter. Even on weeknights, a slice of crusty bread elevates simple soups or salads.
Health-conscious bakers
also adapt Artisan Bread by using whole grains or sourdough starters for gut-friendly benefits. And let’s not forget its role in comfort food—nothing beats fresh bread with classic tomato soup on a chilly evening. Whether baked at home or picked up from a local bakery, Artisan Bread remains a timeless favorite in today’s kitchens.
Taste and Texture
What makes it delicious
Artisan Bread delivers a symphony of textures and flavors that make every bite unforgettable. The crust crackles with a golden crispness, giving way to a soft, airy interior that’s delightfully chewy. As you tear into a warm loaf, the nutty aroma of fermented dough mingles with hints of caramelized sweetness from the Maillard reaction. Each slice boasts a subtle tang from slow fermentation, while high-quality flour adds depth and richness. Whether you savor it plain or slathered with butter, Artisan Bread transforms any meal into a rustic, satisfying experience.
Boosting the flavor
Elevate your Artisan Bread with easy tweaks that amplify its natural charm. For a savory twist, brush the crust with garlic-infused olive oil before baking, or fold rosemary and sea salt into the dough for an herby kick. Sweet lovers can swirl cinnamon and honey into the batter or top slices with whipped honey butter. Pair your loaf with a tangy homemade jam or a creamy whipped herb cheese for contrasting flavors. Experiment with different grains, like rye or spelt, to add earthy notes. With these simple upgrades, every bite becomes even more irresistible.
Always measure your ingredients precisely for Artisan Bread, as even small variations can affect the texture. Use room-temperature water to activate the yeast properly, and let the dough rest in a warm spot for optimal rise. Additionally, score the top of the loaf before baking to control expansion and create that classic Artisan Bread crust. For best results, bake on a preheated stone or steel to mimic professional oven conditions.
Mistakes to avoid
One common error is over-kneading the dough, which can make Artisan Bread dense instead of airy. Instead, stop mixing as soon as the dough becomes smooth and elastic. Another mistake is skipping the proofing stage, which leads to poor oven spring. For more guidance, check out our guide on perfect dough consistency. Also, avoid using cold ingredients straight from the fridge, as they slow fermentation. Learn how to troubleshoot fermentation issues in our yeast fermentation tips post.
g-suggestions">Serving and Pairing Suggestions
How to serve this dish
Artisan bread shines as the star of any table, whether you’re hosting a cozy dinner or a festive gathering. For a rustic touch, serve it warm on a wooden board with a sharp knife for easy slicing. Alternatively, slice it thick and arrange it in a basket lined with a linen napkin for an inviting family-style meal. If you’re aiming for elegance, pair it with a small dish of olive oil and balsamic glaze for dipping. During holidays or brunch, toast slices lightly and top them with avocado or smoked salmon for a quick yet impressive appetizer. No matter the occasion, the crusty exterior and soft interior of artisan bread will always steal the show.
What goes well with it
Artisan bread pairs beautifully with rich, flavorful accompaniments. First, try it with a creamy spinach artichoke dip—the tangy flavors contrast perfectly with the bread’s hearty texture. For a lighter option, drizzle slices with olive oil and serve alongside a fresh caprese salad. If you’re craving something heartier, pair it with a warm bowl of roasted tomato soup for ultimate comfort. Don’t forget to explore our homemade garlic butter recipe or this easy whipped honey butter to elevate your bread experience. Finally, a crisp white wine or chilled sparkling water with lemon makes a refreshing drink pairing.
math-faq-block">
What makes artisan bread different from regular bread?
Artisan bread is handcrafted using traditional methods, high-quality ingredients, and longer fermentation times, giving it a unique flavor and texture. Unlike mass-produced bread, artisan bread often has a crisp crust and an airy, irregular crumb. The focus on craftsmanship and natural processes sets artisan bread apart from commercial loaves.
How do you keep artisan bread fresh?
Store artisan bread in a paper bag or bread box at room temperature for up to 2 days to maintain its crust. For longer storage, wrap it tightly in foil and freeze it—reheat in the oven to restore freshness. Avoid plastic bags, as they trap moisture and soften the crust, which is a key feature of artisan bread.
Why is artisan bread so expensive?
Artisan bread costs more due to the time-intensive process, premium ingredients like organic flour, and skilled labor required. Bakers often use slow fermentation and hand-shaping techniques, which add to the production time. The superior taste and quality of artisan bread justify the higher price for many enthusiasts.
rank-math-faq-item">Can you make artisan bread without a Dutch oven?
Yes! While a Dutch oven helps create steam for a crisp crust, you can bake artisan bread on a baking stone or steel with a tray of water below. The key is trapping steam during the first few minutes of baking. Artisan bread can still turn out delicious with alternative methods.
Best Creamy Crack Chicken Soup Recipe
Introduction
There’s something undeniably comforting about a bowl of soup that warms you from the inside out, especially when it’s as rich and flavorful as Creamy Crack Chicken Soup. Whether you’re craving a cozy weeknight dinner or need a crowd-pleasing dish for gatherings, this recipe delivers every time. Plus, it’s incredibly easy to make, so you can enjoy that homemade goodness without spending hours in the kitchen. Trust me, one spoonful of this velvety, bacon-studded soup, and you’ll understand why it’s a fan favorite.
Creamy Crack Chicken Soup combines tender chicken, crispy bacon, sharp cheddar, and a luscious cream base into a dish that feels like a hug in a bowl. Inspired by the viral crack chicken trend, this soup takes all the addictive flavors of the original and transforms them into a hearty, spoonable meal. What makes it special? First, it’s versatile—you can customize it with your favorite toppings or even swap in rotisserie chicken for a shortcut. Second, it’s perfect for busy families or meal preppers since it reheats beautifully. And finally, it embodies the brekcakes.com philosophy: uncomplicated recipes with big, satisfying flavors. If you love dishes like my Cheesy Garlic Bread or One-Pot Chicken Alfredo, you’ll adore this soup for its same foolproof, comfort-food appeal.
Why I Love This Recipe
This Creamy Crack Chicken Soup holds a special place in my heart because it’s the dish I turn to when I need both comfort and convenience. I first made it during a hectic week when my family needed a pick-me-up, and the way their faces lit up after the first bite sealed the deal. Now, it’s my go-to for potlucks, snowy days, or anytime I want to share a little extra love through food. The best part? It reminds me that the simplest recipes often create the most memorable moments.
Health and Nutrition
Why it’s good for your body
Creamy Crack Chicken Soup packs a nutritious punch while delivering rich, comforting flavors. First, it’s loaded with lean protein from tender chicken, which helps repair muscles and keeps you full longer. Additionally, the creamy base often includes dairy or dairy alternatives, providing calcium for strong bones. Moreover, the soup’s blend of vegetables and spices adds fiber and antioxidants, supporting digestion and immunity.
Since Creamy Crack Chicken Soup balances protein, healthy fats, and veggies, it fuels your body without empty calories. For instance, garlic and onions in the recipe offer anti-inflammatory benefits, while herbs like thyme may boost heart health. Furthermore, the warmth of the soup can soothe your throat and improve hydration, especially during colder months. Whether you’re recovering from a workout or craving comfort food, this dish nourishes you without guilt.
Finally, Creamy Crack Chicken Soup adapts easily to dietary needs. You can swap heavy cream for coconut milk or use low-sodium broth to tailor it to your health goals. With each spoonful, you’re treating your body to a meal that’s as wholesome as it is delicious.
How it fits in a healthy lifestyle
Creamy Crack Chicken Soup fits seamlessly into a balanced diet, whether you’re focusing on high-protein meals or gluten-free eating. The chicken provides a lean protein source, perfect for post-workout recovery or maintaining energy levels. Pair it with a side salad or whole-grain bread for a complete, satisfying meal.
If you’re watching your carb intake, you can easily adjust the recipe by skipping starchy thickeners or adding extra veggies. For heart-healthy choices, opt for low-fat dairy and load up on garlic and herbs, which support cardiovascular health. Plus, the soup’s versatility makes it ideal for meal prep, so you can enjoy nutritious lunches all week.
Looking for more ways to balance comfort food and nutrition? Explore our gluten-free recipe collection for inspiration. Creamy Crack Chicken Soup proves that eating well doesn’t mean sacrificing flavor or convenience.
A rich and creamy soup loaded with tender chicken, crispy bacon, and a blend of cheeses for ultimate comfort.
Ingredients
Scale
For the Crust:
1 lb boneless, skinless chicken breasts
6 slices bacon, cooked and crumbled
1 cup shredded cheddar cheese
1/2 cup cream cheese, softened
1/2 cup ranch dressing
4 cups chicken broth
1/2 cup heavy cream
1 tsp garlic powder
1 tsp onion powder
Salt and pepper to taste
2 green onions, chopped (for garnish)
Instructions
1. Prepare the Crust:
In a large pot, cook chicken breasts in chicken broth over medium heat until fully cooked (about 15-20 minutes). Remove and shred the chicken.
Return the shredded chicken to the pot. Stir in ranch dressing, cream cheese, heavy cream, garlic powder, and onion powder. Simmer for 5-7 minutes until creamy and well combined.
Add shredded cheddar cheese and half of the crumbled bacon. Stir until cheese is melted.
Season with salt and pepper to taste. Serve hot, garnished with remaining bacon and chopped green onions.
Notes
You can customize the seasonings to taste.
Nutrition
Calories:210 kcal
“`html
s-dish">How to Prepare This Dish
Steps and time-saving tips
Start by heating a large pot over medium heat and adding diced bacon. Cook it until crispy, then remove it with a slotted spoon and set it aside. Next, toss in diced onions and minced garlic, sautéing them in the bacon fat until they turn golden and fragrant. Add cubed chicken breast to the pot, seasoning it generously with salt, pepper, and ranch seasoning. Stir everything together and let the chicken cook through for about 5-7 minutes. Once the chicken is no longer pink, pour in chicken broth and bring the mixture to a gentle boil. Reduce the heat and stir in cream cheese, shredded cheddar, and a splash of heavy cream. Let the soup simmer until the cheeses melt completely, stirring occasionally to avoid sticking. For a time-saving tip, use pre-shredded cheese and rotisserie chicken to cut prep work in half. Finally, crumble the reserved bacon on top along with chopped green onions before serving. The result is a rich, creamy Crack Chicken Soup that’s ready in under 30 minutes.
Mistakes I’ve made and learned from
When I first made Creamy Crack Chicken Soup, I rushed the cheese step and ended up with a grainy texture. I learned that adding cold cream cheese directly to hot broth causes it to clump. Now, I let the cream cheese soften at room temperature first, then whisk it in gradually. Another mistake? Overcrowding the pot with chicken, which made it steam instead of sear. For better flavor, I brown the chicken in batches, just like I do with my Slow Cooker Beef Stew. And if your soup thickens too much, thin it with a bit of extra broth—trust me, it’s easier than fixing a gluey mess. For more creamy soup tricks, check out my Creamy Tomato Basil Soup guide. These small tweaks make all the difference between good and restaurant-worthy results.
Creamy Crack Chicken Soup might sound like a modern comfort food craze, but its roots stretch back to hearty, home-style cooking. Originally inspired by the flavors of Southern crack chicken—a dish known for its rich, cheesy, and bacon-loaded goodness—this soup version brings warmth to chilly nights. Families in the Midwest often tweak the recipe by adding extra veggies like corn or carrots, while others in Texas might spice it up with jalapeños for a fiery kick.
Interestingly, Creamy Crack Chicken Soup also shares similarities with European creamy chicken stews, like Belgium’s waterzooi or France’s velouté de volaille. Yet, what sets it apart is its indulgent blend of cream cheese and ranch seasoning, a distinctly American twist. In my own kitchen, I love making it during football season, where it becomes a crowd-pleasing dip with tortilla chips. Whether served thick like a chowder or thin as a brothy soup, this dish adapts beautifully to personal tastes.
ays-cooking">How it fits in today’s cooking
Today, Creamy Crack Chicken Soup stays popular because it’s both nostalgic and endlessly customizable. Busy cooks appreciate its one-pot simplicity, while meal preppers often double the batch for easy lunches. During the holidays, some families even swap the chicken for leftover turkey, turning it into a post-Thanksgiving staple. Plus, with keto and low-carb diets on the rise, many skip the noodles and load up on extra bacon instead.
Modern twists also keep this recipe fresh. For instance, some add a splash of hot sauce for heat, while others stir in spinach for a nutrient boost. If you love cozy soups, you might also enjoy our slow-cooked pot roast or classic chicken pot pie. Whether you’re craving weeknight comfort or a game-day crowd-feeder, Creamy Crack Chicken Soup fits right in—no matter the season.
Taste and Texture
What makes it delicious
Creamy Crack Chicken Soup wraps you in comfort with its rich, velvety broth and tender shreds of chicken. The first spoonful bursts with savory notes from crispy bacon and sharp cheddar, while a hint of ranch seasoning adds a tangy depth. Meanwhile, the cream cheese melts into the soup, creating a luscious, smooth texture that clings to every bite. Fresh green onions brighten each mouthful, adding a mild crunch and a pop of color. Whether you savor it slowly or dive in hungrily, Creamy Crack Chicken Soup delivers a satisfying balance of hearty and indulgent flavors.
r">Boosting the flavor
For an extra kick, stir in a dash of smoked paprika or a sprinkle of crushed red pepper flakes to elevate the warmth of Creamy Crack Chicken Soup. Top it with crispy fried onions or extra bacon bits for added crunch. If you love bold flavors, swap the ranch seasoning for a zesty homemade taco blend or mix in a spoonful of garlic parmesan sauce for a creamy, umami twist. Experiment with fresh herbs like dill or chives to keep each bowl vibrant and aromatic.
Tips for Success
Best practices for results
Always use full-fat cream cheese for the richest texture in your Creamy Crack Chicken Soup. Meanwhile, shred your chicken while it’s warm to ensure it blends seamlessly into the broth. For extra flavor, sauté your onions and garlic until golden before adding other ingredients. Additionally, stir the soup frequently to prevent the cream base from sticking to the pot. Finally, let the soup simmer for at least 15 minutes to meld the flavors perfectly.
>Mistakes to avoid
Avoid overcooking the chicken, as it can turn dry and tough. Instead, follow our guide on how to cook chicken perfectly for tender results every time. Another common mistake is skipping the step of deglazing the pot after browning the bacon. If you leave those flavorful bits behind, your Creamy Crack Chicken Soup will lack depth. For more tips on building rich flavors, check out our post on soup flavor hacks.
Serving and Pairing Suggestions
How to serve this dish
Bring warmth to the table by serving Creamy Crack Chicken Soup in rustic bread bowls for a cozy, edible presentation. Alternatively, ladle it into deep bowls and top with crispy bacon bits, fresh chives, or a sprinkle of shredded cheddar for extra flair. This dish shines at casual gatherings, holiday potlucks, or even as a comforting weeknight meal. For a touch of elegance, garnish with a drizzle of sour cream and a side of buttery toast points.
What goes well with it
Pair Creamy Crack Chicken Soup with a crisp green salad like our Avocado Spinach Salad to balance its rich flavors. For heartier appetites, serve it alongside warm, flaky Garlic Cheddar Biscuits that soak up every creamy bite. A chilled glass of iced tea or a light lager also cuts through the soup’s decadence perfectly.
What makes Creamy Crack Chicken Soup so addictive?
Creamy Crack Chicken Soup gets its addictive quality from the perfect blend of rich cream cheese, savory bacon, and tender chicken. The combination of flavors and textures creates a comforting dish that keeps you coming back for more. Many fans say it’s the ultimate comfort food.
Can I make Creamy Crack Chicken Soup in a slow cooker?
Yes! Creamy Crack Chicken Soup works great in a slow cooker. Simply add all ingredients except the cream cheese and dairy, then stir in the creamy components during the last 30 minutes. This method enhances the flavors while keeping the soup perfectly smooth.
rank-math-faq-item">What sides go well with Creamy Crack Chicken Soup?
Crusty bread, garlic toast, or a simple green salad pair perfectly with Creamy Crack Chicken Soup. For a heartier meal, try serving it with baked potatoes or cornbread to soak up the delicious creamy broth.
How long does Creamy Crack Chicken Soup last in the fridge?
Creamy Crack Chicken Soup stays fresh for 3-4 days when stored in an airtight container. Reheat it gently on the stove to maintain the creamy texture. The flavors often deepen, making leftovers even more delicious.
Classic Zombie Cocktail Recipe – Tiki Bar Favorite
Introduction
There’s something undeniably thrilling about mixing up a cocktail that packs both flavor and flair. Whether you’re hosting a spooky Halloween bash or just craving a tropical escape, the Zombie Cocktail Recipe delivers a punch of excitement. With its bold blend of rums and fruity notes, this drink transports you to a tiki paradise—no plane ticket required. Plus, it’s the perfect way to impress guests or treat yourself after a long day.
The Zombie Cocktail Recipe is a legendary tiki drink that dates back to the 1930s, created by Donn Beach as a “cure” for hangovers (though we wouldn’t recommend testing that theory). What makes it special is its complex layers of flavor, combining multiple rums, citrus, and a hint of spice. Unlike simpler cocktails, the Zombie demands attention, much like the decadent Chocolate Lava Cake from my dessert collection. It’s a drink that embodies adventure, perfect for those who love experimenting with bold tastes. On brekcakes.com, we celebrate recipes that tell a story, and the Zombie’s rich history fits right in. Whether you’re a cocktail enthusiast or a curious beginner, this recipe invites you to shake things up—literally. For more tropical inspiration, check out my Piña Colada Cupcakes, another favorite that brings vacation vibes home.
Why I Love This Recipe
I’ll never forget the first time I tried a Zombie Cocktail at a tiny tiki bar during a road trip. The vibrant flavors and playful presentation instantly won me over. Since then, I’ve loved recreating that moment at home, tweaking the recipe to suit my taste. It’s more than just a drink—it’s a mini getaway in a glass, reminding me to embrace fun and spontaneity. Every sip feels like a celebration, and that’s exactly what good food and drinks should do.
Health and Nutrition
Why it’s good for your body
The Zombie Cocktail Recipe packs a flavorful punch while offering surprising health perks. First, it combines fresh citrus juices like orange and lime, which deliver a hefty dose of vitamin C. This nutrient boosts immunity and supports collagen production for healthy skin. Additionally, the rum in the Zombie Cocktail Recipe contains polyphenols, which may promote heart health when enjoyed in moderation.
Moreover, the grenadine or fruit syrups often used in the Zombie Cocktail Recipe provide natural sweetness without relying solely on refined sugars. If you opt for homemade syrups, you can control the sugar content even further. Meanwhile, the tropical flavors encourage hydration, especially if you pair the drink with water to stay balanced.
Finally, the Zombie Cocktail Recipe often includes bitters, which may aid digestion. While it’s not a health elixir, this cocktail offers a fun way to enjoy antioxidants and vitamins. Just remember to savor it mindfully as part of a varied diet.
How it fits in a healthy lifestyle
The Zombie Cocktail Recipe can fit into a balanced lifestyle when enjoyed occasionally. For those watching sugar intake, swapping store-bought syrups for fresh fruit purees or low-sugar alternatives keeps the flavors vibrant without excess calories. If you’re exploring gluten-free options, rum is naturally gluten-free, making this cocktail a safe choice for sensitive diets.
Pairing the Zombie Cocktail Recipe with protein-rich snacks, like our gluten-free appetizers, helps balance blood sugar levels. For a heart-healthy twist, garnish with fresh pineapple or mango, both rich in fiber and enzymes. If you’re curious about other mindful drinking tips, check out our guide to healthy cocktail pairings. Moderation and smart choices let you enjoy the Zombie without derailing your wellness goals.
A potent and fruity tropical cocktail that packs a punch with multiple types of rum.
Ingredients
Scale
For the Crust:
1 oz light rum
1 oz dark rum
1 oz overproof rum
1 oz lime juice
1 oz orange juice
1 oz passion fruit syrup
1/2 oz grenadine
1/2 oz falernum
1 dash Angostura bitters
Crushed ice
Mint sprig and cherry for garnish
Instructions
1. Prepare the Crust:
Fill a shaker with crushed ice.
Add all the liquid ingredients (light rum, dark rum, overproof rum, lime juice, orange juice, passion fruit syrup, grenadine, falernum, and bitters) to the shaker.
Shake vigorously for about 10-15 seconds until well chilled.
Strain the mixture into a tall glass filled with crushed ice.
Garnish with a mint sprig and a cherry on top.
Serve immediately with a straw.
Notes
You can customize the seasonings to taste.
How to Prepare This Dish
Steps and time-saving tips
Start by gathering all your ingredients for the Zombie Cocktail Recipe so everything is within reach. First, fill a cocktail shaker halfway with ice to chill your drink properly. Pour in the light rum, dark rum, apricot brandy, and lime juice, then add a splash of grenadine for that signature color. Shake vigorously for about 15 seconds to blend the flavors and create a frothy texture. Meanwhile, grab a tall glass and fill it with fresh ice to keep your cocktail cold longer. Strain the shaken mixture over the ice, letting the vibrant layers settle naturally. Top it off with a float of overproof rum for an extra kick, but be careful—this step packs a punch. Garnish with a mint sprig and a cherry for a tropical touch. To save time, pre-measure your ingredients before mixing, and always use fresh lime juice for the brightest flavor. If you’re serving a crowd, batch-mix everything except the overproof rum and add it individually to each glass.
and-learned-from">Mistakes I’ve made and learned from
When I first tried the Zombie Cocktail Recipe, I underestimated the importance of balancing the rums. The drink tasted harsh until I learned to use a quality dark rum for depth and a lighter one for smoothness. Another misstep? Skipping the shake—it’s essential for melding the flavors, not just chilling the mix. If your cocktail tastes flat, check out our guide on common cocktail mistakes to troubleshoot. Also, overproof rum can overpower the drink if poured too generously. For more tips on mastering bold flavors, explore our rum pairing guide. Now, I always taste as I go and adjust the sweetness with a touch more grenadine if needed.
Cultural Connection and Variations
Where this recipe comes from
The Zombie Cocktail Recipe first clawed its way into the world in the 1930s, thanks to Donn Beach, the tiki bar pioneer who mixed rum, fruit juices, and spices into a dangerously delicious concoction. Legend says he created it to cure a hungover customer, but the drink quickly became a symbol of escapism during Prohibition-era America. Today, the Zombie Cocktail Recipe still carries that rebellious spirit, blending tropical flavors with a punch strong enough to wake the dead.
Across the globe, barte
nders put their own spin on the Zombie. In Hawaii, they often add fresh guava or lilikoi for a brighter twist. Meanwhile, Caribbean versions might swap dark rum for overproof varieties, turning up the heat. Even at home, some mixologists sneak in extra bitters or a dash of cinnamon syrup to make it their own. No matter how you tweak it, the Zombie Cocktail Recipe remains a celebration of creativity and bold flavors.
How it fits in today’s cooking
The Zombie Cocktail Recipe isn’t just a relic of the past—it’s a star of modern mixology. Bartenders today love reviving tiki classics, and the Zombie’s layered flavors fit right into the craft cocktail revival. Whether you’re hosting a summer luau or just craving a tropical escape, this drink delivers. Plus, with so many homemade syrup options, you can easily customize it to your taste.
Home cooks also embrace the Zombie for its versatility. Pair it with tropical desserts for a themed dinner, or simplify the recipe for weeknight happy hours. Some even use it as a base for boozy popsicles! However you serve it, the Zombie Cocktail Recipe proves that great flavors never go out of style.
>Taste and Texture
What makes it delicious
The Zombie Cocktail Recipe delivers a bold, tropical explosion with every sip. Its vibrant mix of sweet, tangy, and spicy flavors dances on your tongue, thanks to the pineapple juice, grenadine, and a hint of cinnamon. The rum blend adds a rich, warming depth, while the fresh lime juice keeps it crisp and refreshing. Meanwhile, the crushed ice gives the Zombie Cocktail Recipe a satisfyingly smooth, slushy texture that melts perfectly as you drink. The aroma alone—fruity, zesty, and slightly smoky—will transport you straight to a beachside tiki bar.
Boosting the flavor
For an even more unforgettable Zombie Cocktail Recipe, try swapping regular rum for a dark spiced variety to deepen the caramel notes. A float of overproof rum on top adds a fiery kick, while a garnish of toasted coconut flakes or a charred pineapple wedge enhances the tropical vibe. If you love experimenting with bold flavors, check out our tropical cocktail pairings for inspired ideas. Alternatively, a dash of homemade spiced syrup can elevate the warmth and complexity without overpowering the drink. Small tweaks make a big difference!
Tips for Success
Best practices for results
Always use fresh citrus juice for your Zombie Cocktail Recipe to ensure bright, vibrant flavors. Meanwhile, chill your glassware beforehand to keep the drink refreshingly cold. Measure each ingredient precisely, especially the rum blend, for a balanced taste. Additionally, shake the cocktail vigorously with ice to achieve the perfect dilution and texture. Finally, garnish with fresh mint or a pineapple wedge to elevate the presentation.
Mistakes to avoid
Avoid overpouring the rum, as it can overpower the other flavors in your Zombie Cocktail Recipe. Instead, follow the measurements closely for harmony. Many people skip crushing the ice finely enough, which leads to weak dilution. For the best results, check out our cocktail ice guide to master this technique. Another common mistake is using bottled lime juice, which lacks freshness. For more tips on selecting quality ingredients, explore our citrus for cocktails article.
Serving and Pairing Suggestions
How to serve this dish
Serve your Zombie Cocktail Recipe in a tall tiki mug or hurricane glass to capture its tropical vibe. For an extra festive touch, garnish with a pineapple wedge, maraschino cherry, and a sprig of fresh mint. Meanwhile, a colorful paper umbrella or flaming lime shell adds playful flair. This drink shines at summer parties, Halloween gatherings, or luau-themed events. If you want to impress guests, layer the ingredients carefully for a striking ombre effect. Finally, always serve it ice-cold with a reusable straw for sipping convenience.
h-it">What goes well with it
Pair your Zombie Cocktail Recipe with spicy appetizers like coconut shrimp or jerk chicken skewers to balance its sweet and tangy flavors. Alternatively, try it alongside our Hawaiian Pineapple BBQ Chicken for a full tropical feast. For a lighter option, fresh fruit platters with mango and papaya enhance the drink’s fruity notes. If you prefer another cocktail, our Mai Tai Recipe makes a perfect companion for a tiki-inspired duo. Either way, these pairings elevate the experience while keeping the vibe fun and relaxed.
What alcohol is in a Zombie Cocktail Recipe?
A classic Zombie Cocktail Recipe typically includes three types of rum: light rum, dark rum, and overproof rum. Some variations also add apricot brandy or falernum for extra depth. The combination creates a potent yet balanced tropical flavor.
rank-math-faq-item">How strong is a Zombie Cocktail?
The Zombie Cocktail Recipe packs a punch, often containing 3-4 ounces of alcohol per serving. Its strength comes from the blend of multiple rums, making it one of the strongest tiki drinks. Always drink responsibly and pace yourself with this potent cocktail.
What’s the origin of the Zombie Cocktail?
The Zombie Cocktail Recipe was created in 1934 by Donn Beach at his Hollywood tiki bar. Legend says he designed it to cure a hungover customer who later claimed it made him feel like a zombie. The original recipe remains a closely guarded secret.
Can I make a non-alcoholic Zombie Cocktail?
Yes! For a mocktail version of the Zombie Cocktail Recipe, replace the rums with pineapple juice, orange juice, and ginger beer. Add grenadine and bitters for complexity. While not identical, it captures the tropical spirit of the original.
>
Easy Meal Prep Chicken – Quick and Healthy Recipe
Introduction
If you’ve ever felt overwhelmed by busy weeknights or struggled to eat healthy without spending hours in the kitchen, Meal Prep Chicken might just become your new best friend. Trust me, I’ve been there too. That’s why I’m so excited to share this game-changing recipe with you. Not only does it save time, but it also delivers delicious, protein-packed meals that keep you energized all week long. Whether you’re a meal prep pro or just starting out, this dish will make your life easier and tastier.
Meal Prep Chicken is more than just a time-saver. It’s a versatile, budget-friendly way to enjoy flavorful, wholesome meals without the daily cooking grind. By preparing a big batch at once, you free up precious time for the things that truly matter. Plus, with endless seasoning and pairing options, you’ll never get bored. If you love simple yet satisfying recipes, you’ll appreciate how this one aligns with the breezy, practical vibe of brekcakes.com. For more inspiration, check out my Healthy Weeknight Dinners or explore Meal Prep Tips to streamline your routine even further.
Why I Love This Recipe
Meal Prep Chicken holds a special place in my heart because it got me through some of my busiest years. As a new mom juggling work and family, I relied on this recipe to keep us nourished without sacrificing flavor or quality. It became my secret weapon for stress-free dinners and lunches that everyone enjoyed. To this day, the aroma of seasoned chicken roasting in the oven reminds me of those chaotic yet beautiful moments—proof that good food can be both practical and deeply comforting.
Health and Nutrition
Why it’s good for your body
Meal Prep Chicken packs a powerful nutritional punch, making it a standout choice for anyone looking to eat well. First, it delivers high-quality protein, which helps build and repair muscles while keeping you full longer. Additionally, chicken contains essential nutrients like vitamin B12, iron, and zinc, all of which support energy levels and immune function.
Because Meal Prep Chicken is lean and versatile, you can pair it with fiber-rich veggies or whole grains for a balanced meal. Furthermore, cooking it at home lets you control ingredients, avoiding excess sodium or unhealthy fats found in processed foods. Whether you grill, bake, or sauté it, Meal Prep Chicken remains a reliable source of clean fuel for your body.
Another benefit of Meal Prep Chicken is its convenience. By preparing it ahead, you save time while ensuring you always have a healthy option ready. Moreover, studies show that meal prepping helps people stick to nutritious eating habits. With Meal Prep Chicken as your go-to protein, you’ll find it easier to stay on track with your health goals.
How it fits in a healthy lifestyle
Meal Prep Chicken fits seamlessly into almost any diet plan, whether you’re focusing on high-protein meals, gluten-free eating, or heart-healthy choices. Its lean profile makes it ideal for weight management, while its versatility lets you customize flavors to avoid mealtime boredom. Pair it with quinoa or roasted sweet potatoes for a nutrient-dense meal that fuels your day.
For those following specific dietary goals, Meal Prep Chicken adapts easily. If you’re building muscle, it provides the protein you need without unnecessary carbs. Meanwhile, if you’re watching your sodium intake, you can season it with herbs and spices instead of salt. Looking for more meal prep inspiration? Check out our guides on easy meal prep ideas and healthy eating tips to keep your routine fresh and satisfying.
By incorporating Meal Prep Chicken into your weekly routine, you create a foundation for consistent, wholesome eating. It’s a simple yet effective way to prioritize nutrition without sacrificing flavor or convenience.
A simple and versatile meal prep chicken recipe that can be used in salads, wraps, or as a main dish.
Ingredients
Scale
For the Crust:
4 boneless, skinless chicken breasts
2 tablespoons olive oil
1 teaspoon garlic powder
1 teaspoon paprika
1 teaspoon salt
1/2 teaspoon black pepper
1/2 teaspoon dried thyme
Instructions
1. Prepare the Crust:
Preheat oven to 375°F (190°C).
In a small bowl, mix garlic powder, paprika, salt, black pepper, and thyme.
Rub chicken breasts with olive oil, then coat evenly with the spice mixture.
Place chicken on a baking sheet and bake for 25-30 minutes, or until internal temperature reaches 165°F (74°C).
Let chicken rest for 5 minutes before slicing or storing.
Notes
You can customize the seasonings to taste.
How to Prepare This Dish
Steps and time-saving tips
Start by preheating your oven to 375°F so it’s ready when you are. While it heats, grab a large mixing bowl and whisk together olive oil, lemon juice, minced garlic, and your favorite spices for the Meal Prep Chicken marinade. Next, add the chicken breasts to the bowl and toss them until they’re fully coated. Let them sit for 10 minutes to soak up the flavors—or if you’re short on time, skip the wait and move straight to baking. Arrange the chicken on a lined baking sheet, making sure the pieces don’t touch for even cooking. Pop them in the oven for 25-30 minutes, flipping halfway through. Meanwhile, prep your sides like roasted veggies or quinoa for a complete meal. Once the chicken reaches 165°F internally, pull it out and let it rest for 5 minutes before slicing. Pro tip: Double the batch and store extras in airtight containers for quick lunches all week.
Mistakes I’ve made and learned from
Early on, I’d overcrowd the baking sheet, which steamed the Meal Prep Chicken instead of giving it that perfect golden crust. Now, I leave space between each piece and use two trays if needed. Another blunder? Skipping the rest time—slicing too soon let all those juicy flavors escape. Patience pays off! For more kitchen hacks, check out my guides on perfectly cooked chicken and meal prep storage. Trust me, a little extra care makes all the difference.
Meal Prep Chicken might seem like a modern convenience, but its roots stretch back to cultures that mastered the art of preserving and repurposing food. In many Mediterranean households, families roast whole chickens with lemon and herbs, then use the leftovers for salads, soups, or sandwiches throughout the week. Similarly, in West Africa, grilled or stewed chicken often appears in meal prep, paired with jollof rice or plantains for vibrant, flavor-packed lunches.
In my own kitchen, Meal Prep Chicken became a lifesaver during busy workweeks. My grandmother, though, would laugh at the term “meal prep”—she simply called it “smart cooking.” She’d slow-cook chicken with garlic and paprika, then shred it for tacos, casseroles, or even breakfast scrambles. Whether you’re leaning into Italian-style herb rubs, Jamaican jerk marinades, or Korean gochujang glazes, the beauty of Meal Prep Chicken lies in its adaptability. Every culture—and every family—adds its own twist.
ays-cooking">How it fits in today’s cooking
Today, Meal Prep Chicken thrives as a staple for health-conscious eaters, busy parents, and fitness enthusiasts alike. It’s the ultimate blank canvas, fitting seamlessly into keto bowls, protein-packed salads, or cozy grain bowls. Plus, with the rise of air fryers and instant pots, cooks can whip up juicy batches in half the time. For meal prep inspiration, check out our quick weeknight dinners guide.
Beyond convenience, this dish bridges tradition and modern life. Some families still honor Sunday roast rituals, while others rely on it for meal prep ideas that cut down weekday stress. Whether you’re seasoning it with za’atar for a Middle Eastern flair or tossing it with buffalo sauce for game day, Meal Prep Chicken proves that practicality doesn’t have to sacrifice flavor or heritage.
Taste and Texture
What makes it delicious
Meal Prep Chicken delivers a satisfying balance of juicy tenderness and savory depth. Each bite bursts with umami richness, thanks to a blend of garlic, herbs, and a hint of smokiness from paprika. The exterior caramelizes slightly, adding a subtle crispness that contrasts beautifully with the succulent interior. Meanwhile, aromatic notes of rosemary and thyme weave through every forkful, making the dish as fragrant as it is flavorful. Whether you enjoy it warm or chilled, Meal Prep Chicken stays moist and flavorful, with a texture that holds up perfectly in salads, wraps, or grain bowls.
r">Boosting the flavor
For an extra punch, try marinating your Meal Prep Chicken in a zesty lemon-herb blend or a touch of honey mustard before cooking. Alternatively, top it with a drizzle of creamy avocado dressing for a cool, tangy contrast. If you love heat, a sprinkle of chili flakes or a side of spicy mango salsa will elevate the dish instantly. Experiment with different spice mixes, like cumin and coriander, to keep your weekly prep exciting. Small tweaks can transform your Meal Prep Chicken into a whole new experience.
Tips for Success
Best practices for results
Always pat your Meal Prep Chicken dry before seasoning to help the spices stick better. Meanwhile, preheat your oven or pan to ensure even cooking from the start. For juicier results, use a meat thermometer to check that the internal temperature reaches 165°F. Additionally, let the chicken rest for 5 minutes after cooking so the juices redistribute. Finally, store leftovers in airtight containers to keep your Meal Prep Chicken fresh for days.
>Mistakes to avoid
Avoid overcrowding the pan when searing, as this steams the chicken instead of browning it. Instead, cook in batches or use a larger skillet for crispier results. Many home cooks also skip brining, which can lead to dry meat. For a simple solution, try our easy brine method to lock in moisture. Lastly, don’t slice the chicken too soon after cooking. If you need meal prep ideas that save time without sacrificing quality, check out our meal prep basics guide for smarter strategies.
Serving and Pairing Suggestions
How to serve this dish
Meal Prep Chicken shines when you plate it with vibrant colors and textures. For a casual weeknight dinner, arrange the chicken over a bed of fluffy quinoa or brown rice, then drizzle it with a squeeze of fresh lemon for brightness. Alternatively, slice it thin and layer it on a rustic wooden board with roasted vegetables for a family-style gathering. If you’re packing lunches, tuck the chicken into airtight containers with a side of crisp greens for an easy grab-and-go meal. Garnish with chopped herbs like parsley or cilantro to add a pop of freshness and make the dish Instagram-worthy.
What goes well with it
Pair Meal Prep Chicken with a tangy yogurt dip or a creamy avocado sauce to balance its savory flavors. For a hearty meal, serve it alongside our Garlic Herb Roasted Potatoes, which add a crispy contrast to the tender chicken. If you prefer lighter options, a refreshing Lemony Kale Salad complements the dish with its zesty dressing and crunchy texture. Finally, a chilled glass of citrus-infused sparkling water or a light white wine enhances the meal without overpowering it.
How long does meal prep chicken last in the fridge?
Properly stored meal prep chicken stays fresh in the fridge for 3–4 days. For best results, use airtight containers and refrigerate within 2 hours of cooking. If you need longer storage, freeze your meal prep chicken for up to 3 months.
What’s the best way to reheat meal prep chicken?
The best method is to reheat meal prep chicken in the oven at 350°F for 10–15 minutes or until warmed through. For quicker options, microwave it with a damp paper towel to retain moisture. Avoid overheating to keep your meal prep chicken tender.
rank-math-faq-item">Can I freeze cooked chicken for meal prep?
Yes, cooked chicken freezes well for meal prep. Portion it into freezer-safe bags or containers, removing excess air to prevent freezer burn. Thaw overnight in the fridge before reheating for the best texture in your meal prep chicken dishes.
What are the best seasonings for meal prep chicken?
Simple seasonings like garlic powder, paprika, and Italian herbs work great for versatile meal prep chicken. For bolder flavors, try marinades with lemon pepper, cumin, or soy sauce. Season generously to keep your meal prep chicken flavorful throughout the week.