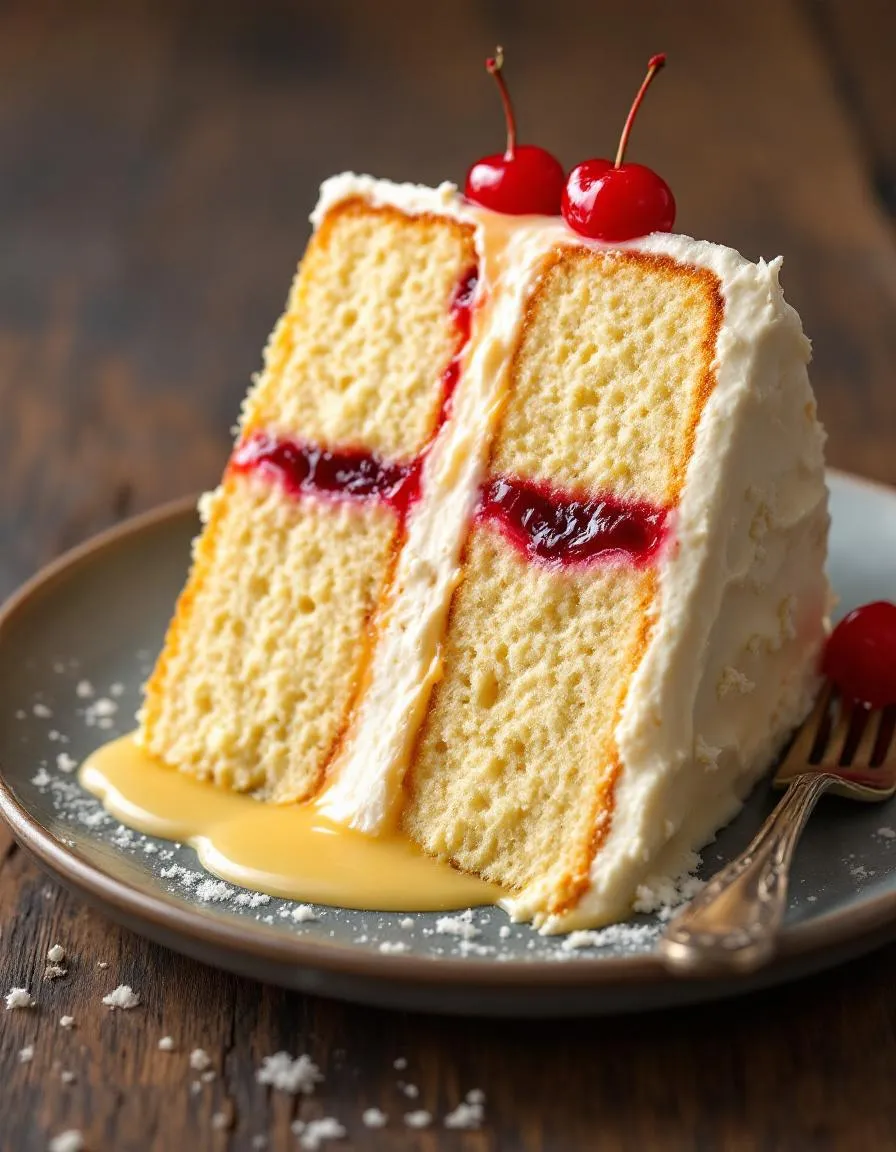
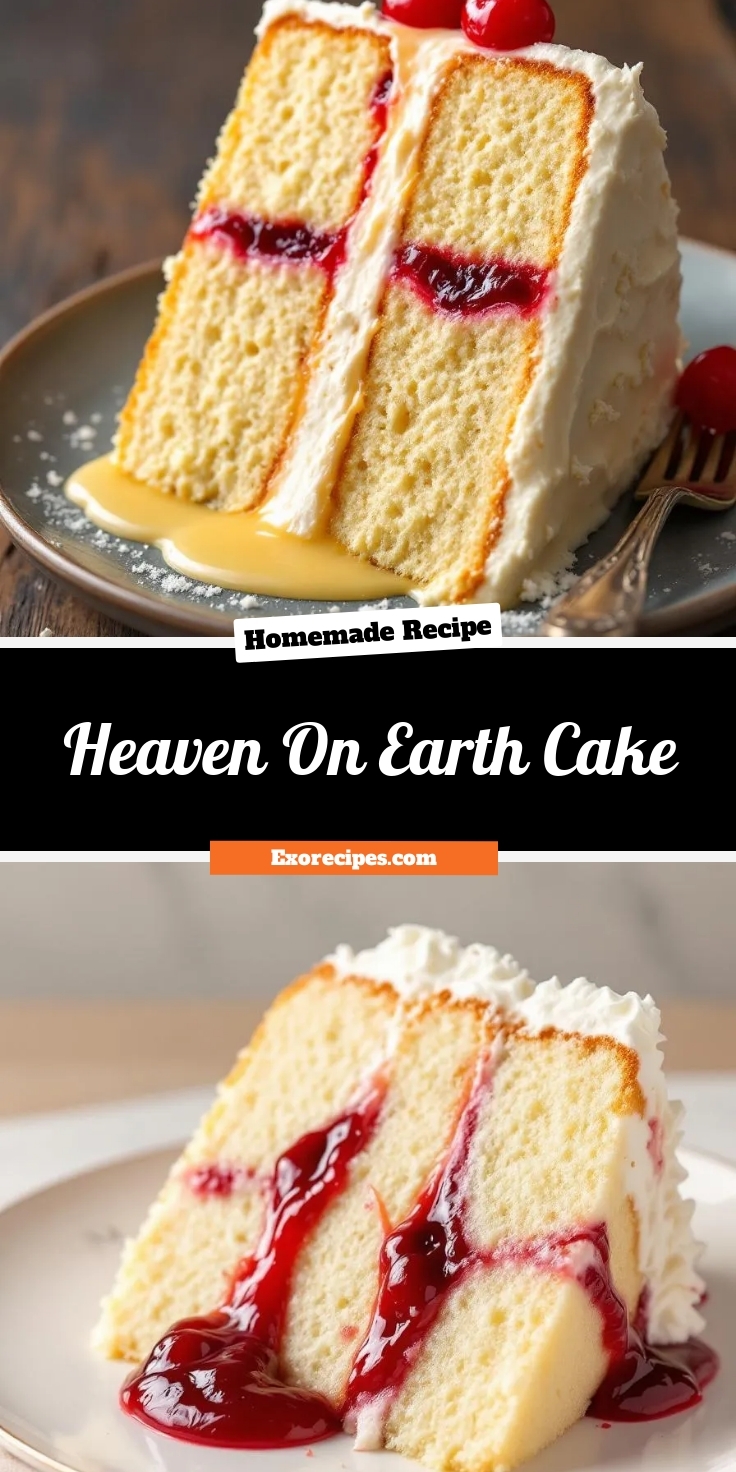
If you’ve ever craved a dessert that feels like a sweet escape, you’re in the right place. Today, I’m sharing my all-time favorite recipe: Heaven On Earth Cake. This dreamy treat combines layers of fluffy cake, creamy pudding, and whipped topping for a bite that truly lives up to its name. Whether you’re celebrating a special occasion or simply treating yourself, this cake delivers pure joy with every forkful. Trust me, one slice and you’ll understand why it’s a staple in my kitchen.
The Heaven On Earth Cake is more than just a dessert—it’s a masterpiece of textures and flavors. First, imagine tender cake layers soaked in a hint of pineapple juice for brightness. Next, picture velvety vanilla pudding and airy whipped cream mingling in perfect harmony. Finally, a sprinkle of toasted coconut or crushed nuts adds the perfect crunch. What makes this recipe stand out is its versatility. You can customize it with different fruits, like the ones I used in my Berry Chantilly Cake, or keep it classic for a crowd-pleasing finish. Plus, it’s surprisingly easy to make, even if you’re new to baking. If you love no-fuss desserts, you’ll appreciate how this recipe aligns with the simplicity of my Easy Vanilla Cupcakes. Above all, it captures the essence of what I strive for at brekcakes.com: approachable recipes that feel indulgent yet achievable.
Why I Love This Recipe
This cake holds a special place in my heart because it reminds me of Sunday dinners at my grandma’s house. She’d always surprise us with Heaven On Earth Cake, and the moment it hit the table, everyone’s faces lit up. Now, whenever I bake it, I’m transported back to those cozy afternoons filled with laughter and second helpings. It’s more than a dessert—it’s a bite of nostalgia, and I can’t wait for you to create your own memories with it.
Health and Nutrition
Why it’s good for your body
Heaven On Earth Cake isn’t just a treat for your taste buds—it also offers some surprising health perks. First, the creamy layers often include Greek yogurt or whipped cream, which provide a good dose of protein and probiotics. These ingredients support gut health and keep you feeling satisfied longer. Additionally, the fruit layers, like cherries or berries, pack antioxidants that help fight inflammation.
Moreover, Heaven On Earth Cake balances indulgence with smart choices. For example, many recipes use lighter alternatives like sugar-free pudding or fresh fruit to cut down on refined sugars. This way, you still enjoy a decadent dessert without the usual guilt. The cake’s layers also incorporate nuts or whole-grain crusts in some variations, adding fiber and healthy fats.
Finally, Heaven On Earth Cake can even boost your mood. Dark chocolate or cocoa powder, often used in the recipe, contains flavonoids linked to improved brain function. Whether you savor it as an occasional treat or a celebratory dessert, this cake delivers both flavor and nourishment.
How it fits in a healthy lifestyle
Enjoying Heaven On Earth Cake as part of a balanced diet is easier than you think. Pair a small slice with a protein-rich snack, like a handful of almonds, to stabilize blood sugar. If you’re watching your sugar intake, try our healthy dessert swaps to tweak the recipe with natural sweeteners.
For those with dietary preferences, Heaven On Earth Cake adapts well. Use gluten-free crusts or dairy-free whipped toppings to meet specific needs. If you’re looking for more ways to indulge mindfully, explore our guide to balanced dessert ideas. Remember, moderation is key—savor each bite, and you’ll find this dessert fits perfectly into your wellness routine.
A decadent layered cake with fluffy angel food cake, creamy pudding, and whipped topping.
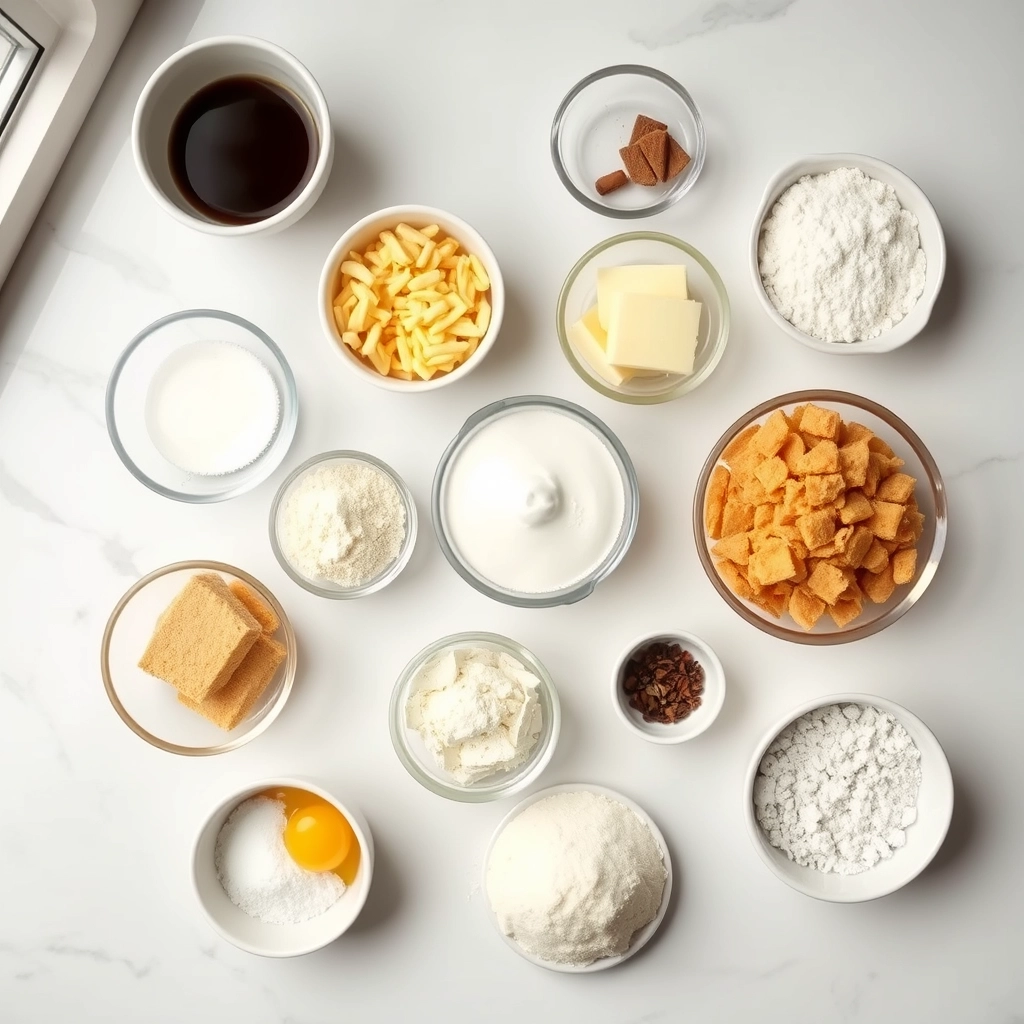
Ingredients
Scale
For the Crust:
1 (16 oz) prepared angel food cake, cubed
2 (3.4 oz) packages instant vanilla pudding mix
3 cups cold milk
1 (8 oz) container frozen whipped topping, thawed
1 (21 oz) can cherry pie filling
Instructions
1. Prepare the Crust:
In a large bowl, whisk together pudding mixes and milk until thickened.
Fold in whipped topping until fully combined.
In a 9×13 inch dish, layer half of the angel food cake cubes.
Spread half of the pudding mixture over the cake layer.
Repeat with remaining cake cubes and pudding mixture.
Top with cherry pie filling, spreading evenly.
Refrigerate for at least 4 hours before serving.
Notes
You can customize the seasonings to taste.
s-dish">How to Prepare This Dish
Steps and time-saving tips
Start by preheating your oven to 350°F and greasing a 9×13-inch baking dish. Next, whisk together the cake mix, eggs, oil, and water in a large bowl until smooth. Pour the batter into the prepared dish and bake for 25-30 minutes, or until a toothpick comes out clean. While the cake bakes, mix the instant pudding with cold milk in another bowl and let it thicken for 5 minutes. Once the cake cools slightly, poke holes all over the top with a fork or skewer. Then, drizzle the pudding evenly over the warm cake so it seeps into the holes. Chill the cake for at least an hour to set the pudding layer. Meanwhile, whip the heavy cream with powdered sugar and vanilla until stiff peaks form. Spread the whipped cream over the chilled pudding layer and sprinkle with crushed graham crackers or toasted coconut for crunch. Finally, refrigerate the Heaven On Earth Cake for another 2 hours before serving. To save time, use store-bought whipped topping instead of homemade, or prepare the pudding layer a day ahead.
Mistakes I’ve made and learned from
Early on, I rushed the chilling steps and ended up with a soggy Heaven On Earth Cake. Skipping the initial refrigeration meant the pudding didn’t set properly, causing the layers to slide apart. Now, I always plan ahead and let each layer chill fully—patience pays off! Another lesson? Overmixing the cake batter led to a dense texture instead of the light crumb I wanted. I’ve since learned to gently fold the ingredients just until combined, similar to the technique I use in my Perfect Vanilla Cupcakes. And if you’re new to pudding-based desserts, my Pudding Cake Troubleshooting Guide covers fixes for common issues like runny layers or uneven soaking. Trust me, even small adjustments make a big difference in this dreamy dessert.
n-and-variations">Cultural Connection and Variations
Where this recipe comes from
Heaven On Earth Cake carries a legacy as rich as its layers. Many trace its roots to mid-20th century American potlucks, where home bakers combined pantry staples like cake mix, pudding, and cherries into a dessert that felt indulgent yet approachable. Over time, regional twists emerged. In the South, some swap cherries for peaches, while others in the Midwest fold in crushed pineapple for extra tang. Families often pass down their own versions, like my aunt’s famous take with a splash of almond extract.
Interestingly, the concept of layered, creamy desserts spans cultures. For instance, Eastern European versions might use sour cream or farmer’s cheese, while tropical adaptations feature coconut or mango. No matter the variation, Heaven On Earth Cake always delivers that nostalgic, crowd-pleasing magic. Whether it’s the centerpiece at a summer picnic or a comforting winter treat, this cake bridges generations and geographies with every bite.
How it fits in today’s cooking
Today, Heaven On Earth Cake holds its own in modern kitchens. Busy cooks love its no-fuss assembly, while food bloggers give it fresh spins—like swapping traditional cherries for seasonal berries or even turning it into a chocolate lover’s paradise. It’s a staple at holidays, but also shines as a weeknight dessert when you crave something sweet without the hassle.
Health-conscious bakers
tweak it too, using sugar-free pudding or gluten-free cake layers. Others pair it with a scoop of homemade vanilla ice cream for extra decadence. Whether you stick to the classic or experiment, Heaven On Earth Cake proves that some recipes never go out of style—they just get better with time.
Taste and Texture
What makes it delicious
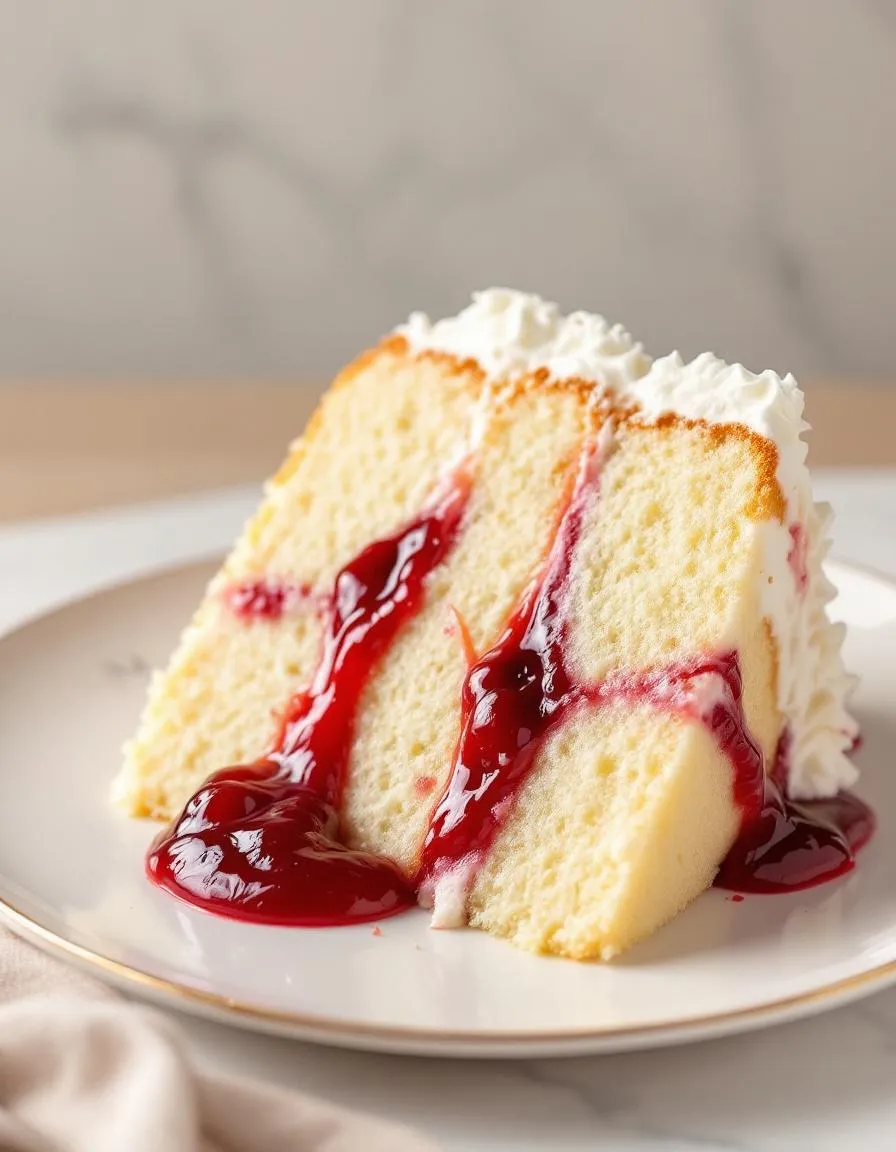
Heaven On Earth Cake delivers a dreamy, melt-in-your-mouth experience with every bite. The layers of fluffy angel food cake soak up a luscious vanilla pudding and whipped cream mixture, creating a cloud-like texture that’s both airy and indulgent. Meanwhile, bursts of tart cherry pie filling cut through the sweetness, adding a vibrant contrast. The aroma alone—a blend of buttery cake, fresh cream, and fruity cherries—will have you reaching for seconds. Whether served chilled or at room temperature, Heaven On Earth Cake feels like a decadent yet light dessert that satisfies every craving.
Boosting the flavor
For an extra flavor twist, try swapping the cherry pie filling for a homemade berry compote to add a fresher, tangier note. Alternatively, a drizzle of warm salted caramel sauce over each slice enhances the creamy layers with a rich, buttery depth. A sprinkle of toasted coconut or crushed nuts introduces a delightful crunch, while a pinch of cinnamon in the whipped cream can elevate the warmth of the dessert. With these simple tweaks, Heaven On Earth Cake becomes even more irresistible.
Always use room-temperature cream cheese for the filling to prevent lumps in your Heaven On Earth Cake. Meanwhile, chill the cake layers for at least 30 minutes before assembling to ensure clean slices. For the best texture, spread the whipped cream evenly and avoid overmixing the batter. Additionally, toast the coconut flakes lightly to enhance their flavor before sprinkling them on top. Finally, let the cake set overnight in the fridge for maximum richness.
Mistakes to avoid
Avoid overbaking the cake layers, as this can make them dry instead of tender. Instead, check for doneness a few minutes early by inserting a toothpick. Another common mistake is skipping the parchment paper lining, which can cause sticking. For more baking essentials, explore our must-have baking tools. Also, resist the urge to substitute low-fat ingredients, as they can alter the creamy texture of Heaven On Earth Cake. If you need ingredient guidance, check out our baking basics guide for reliable alternatives.
g-suggestions">Serving and Pairing Suggestions
How to serve this dish
For a stunning presentation, slice your Heaven On Earth Cake into generous portions and plate them on elegant dessert dishes. Meanwhile, drizzle a touch of caramel or chocolate sauce around the edges for a restaurant-worthy finish. Fresh berries or a dusting of powdered sugar make perfect garnishes, especially when serving this cake at brunches or holiday gatherings. If you want to impress guests, pair each slice with a dollop of whipped cream or a scoop of vanilla ice cream. Alternatively, serve Heaven On Earth Cake as the centerpiece of a dessert table, surrounded by complementary treats.
What goes well with it
A hot cup of coffee or tea balances the sweetness of Heaven On Earth Cake, making it ideal for afternoon tea parties. For a refreshing contrast, try serving it with a glass of cold milk or a fruity iced tea. If you love dessert pairings, consider offering our Classic Vanilla Ice Cream alongside the cake for a creamy texture contrast. Another great option is our Berry Compote, which adds a tangy twist to each bite. Whether you choose a warm beverage or a cool side, these pairings elevate the flavors of Heaven On Earth Cake beautifully.
math-faq-block">
What is Heaven On Earth Cake made of?
Heaven On Earth Cake typically features layers of angel food cake, creamy pudding or custard, whipped topping, and fruit like cherries or strawberries. Some versions include crushed pineapple or coconut for extra flavor. This dessert earns its name with its light, fluffy texture and decadent layers.
Why is it called Heaven On Earth Cake?
The name “Heaven On Earth Cake” comes from its heavenly combination of light angel food cake, rich creamy layers, and sweet fruit toppings. Many describe the taste as so delicious it feels like a slice of paradise. The dessert’s airy texture and indulgent flavors make it a crowd-pleaser.
Can you make Heaven On Earth Cake ahead of time?
Yes! Heaven On Earth Cake actually tastes better when made a day ahead, as the flavors meld together in the fridge. Just cover it tightly with plastic wrap to keep it fresh. The chilled cake holds its shape well for serving.
rank-math-faq-item">How long does Heaven On Earth Cake last in the fridge?
Heaven On Earth Cake stays fresh for 3-4 days when refrigerated in an airtight container. The whipped topping and pudding layers may soften over time, so it’s best enjoyed within 2 days for ideal texture. Always check for freshness before serving leftovers.
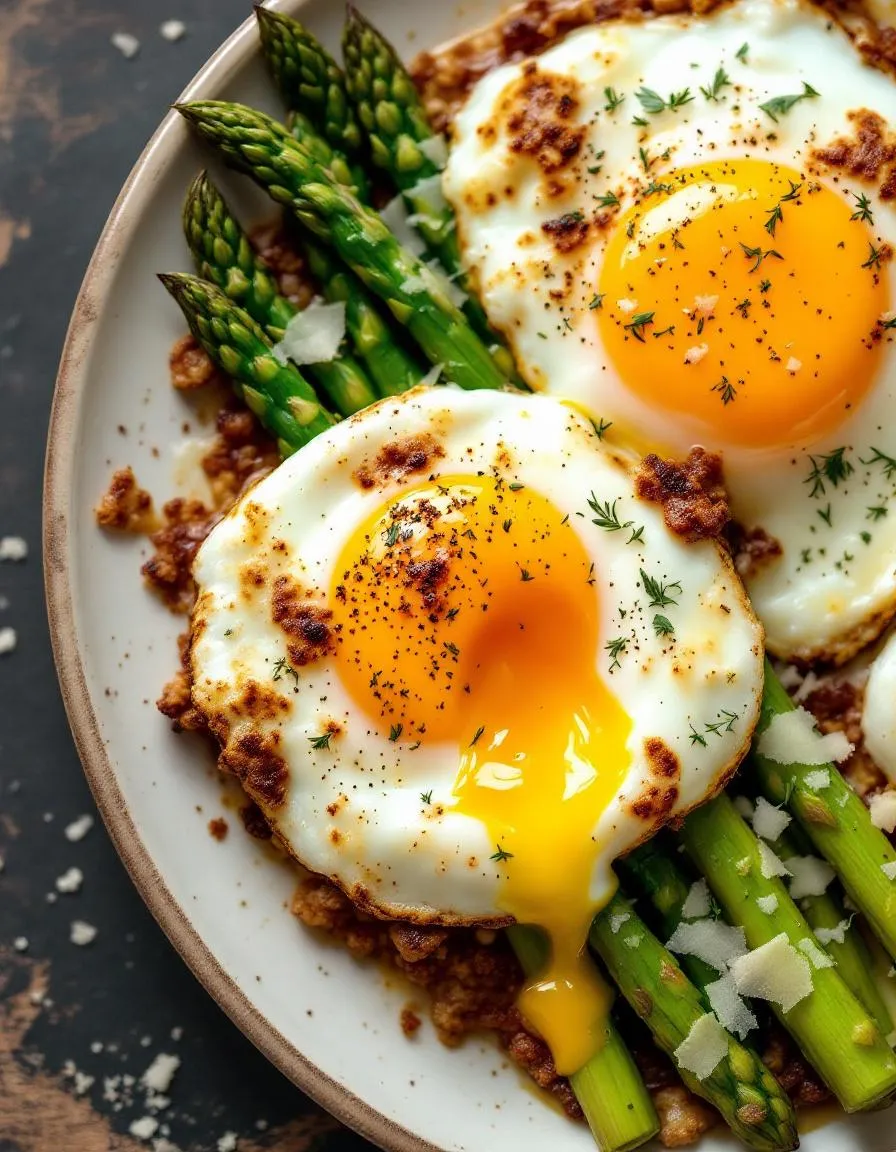
Easy Baked Eggs with Asparagus – Simple Breakfast Recipe
Introduction
There’s something undeniably comforting about a dish that feels both elegant and effortless. That’s exactly why I adore Baked Eggs with Asparagus. Whether you’re hosting a brunch or simply treating yourself to a cozy morning, this recipe delivers rich flavors and vibrant colors without demanding hours in the kitchen. Plus, it’s a fantastic way to celebrate seasonal produce while keeping things simple and satisfying.
Baked Eggs with Asparagus is a versatile dish that combines tender asparagus spears with creamy, perfectly cooked eggs, all baked to golden perfection. The beauty of this recipe lies in its simplicity—it requires just a handful of fresh ingredients yet feels indulgent enough for special occasions. Asparagus adds a crisp, earthy note that pairs beautifully with the richness of the eggs, while a sprinkle of herbs or cheese elevates the flavors even further. If you’re looking for a dish that’s as nutritious as it is delicious, this one checks all the boxes. It’s also a great way to use up leftover veggies, making it a staple in my weeknight dinner rotation. For more inspiration on seasonal cooking, check out my guide to spring recipes.
Why I Love This Recipe
Baked Eggs with Asparagus holds a special place in my heart because it reminds me of slow Sunday mornings with my family. My mom used to whip up this dish when we had guests over, and I loved how something so simple could feel so celebratory. Now, whenever I make it, the aroma of roasted asparagus and melted cheese takes me right back to those moments. It’s a recipe that proves good food doesn’t need to be complicated—just made with care and enjoyed with the people you love.
Health and Nutrition
Why it’s good for your body
Baked Eggs with Asparagus packs a powerful nutritional punch while keeping flavors fresh and satisfying. First, asparagus delivers a wealth of vitamins like A, C, and K, which support immunity, skin health, and strong bones. Additionally, this veggie is rich in fiber, helping digestion and keeping you full longer. Meanwhile, eggs provide high-quality protein to fuel muscles and keep energy levels steady throughout the day.
Moreover, Baked Eggs with Asparagus offers a balanced mix of healthy fats and antioxidants. The eggs contain choline, a nutrient vital for brain function and mood regulation. At the same time, asparagus boasts glutathione, a detoxifying compound that fights inflammation. Together, these ingredients create a meal that nourishes your body from the inside out.
Finally, this dish is naturally low in carbs but high in flavor, making it a smart choice for those watching their sugar intake. Whether you enjoy it for breakfast or brunch, Baked Eggs with Asparagus provides lasting energy without the crash. Plus, its simple preparation means you can savor a wholesome meal without spending hours in the kitchen.
How it fits in a healthy lifestyle
Baked Eggs with Asparagus fits seamlessly into a balanced diet, whether you’re focusing on high-protein meals, gluten-free eating, or heart-healthy choices. The dish leans on whole, unprocessed ingredients, aligning with clean-eating principles. For those managing weight, the protein and fiber combo helps curb cravings and prevents overeating later in the day.
If you’re exploring gluten-free options, this recipe naturally avoids grains while still delivering satisfaction. Pair it with a side of avocado or a light salad for extra healthy fats. For more gluten-free inspiration, check out our guide to gluten-free breakfast ideas.
Heart-healthy eaters will appreciate the dish’s minimal saturated fat and cholesterol-balancing nutrients from asparagus. It’s also a great way to incorporate more veggies into your morning routine. Looking for other nutrient-dense breakfasts? Try our high-protein breakfast recipes to keep your energy levels optimized all day.
A simple yet elegant dish featuring baked eggs nestled in fresh asparagus, perfect for brunch or a light dinner.
Ingredients
Scale
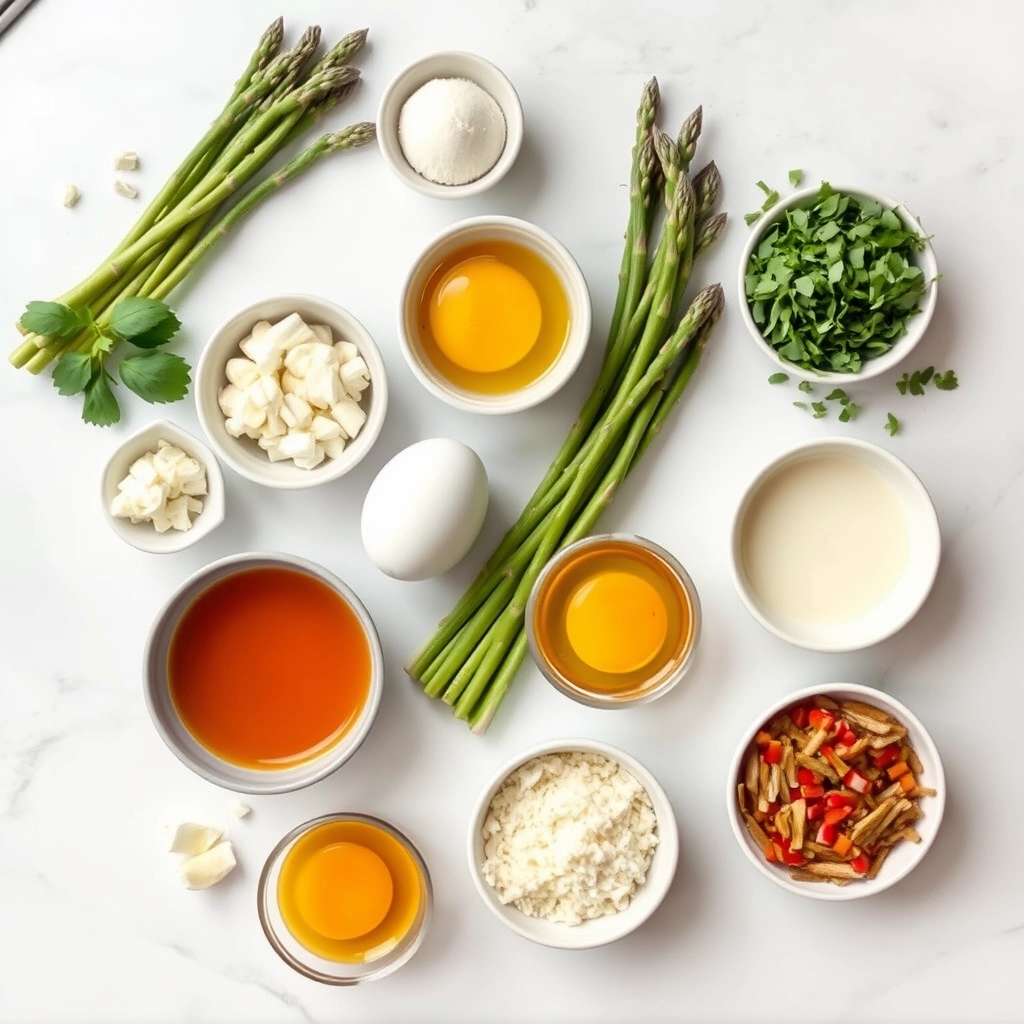
For the Crust:
1 bunch fresh asparagus, trimmed
4 large eggs
2 tablespoons olive oil
1/2 teaspoon salt
1/4 teaspoon black pepper
1/4 teaspoon garlic powder
1/4 teaspoon paprika
2 tablespoons grated Parmesan cheese
Instructions
1. Prepare the Crust:
Preheat oven to 400°F (200°C). Lightly grease a baking dish with olive oil.
Arrange the asparagus in a single layer in the baking dish. Drizzle with olive oil and sprinkle with salt, pepper, garlic powder, and paprika.
Bake for 10 minutes, then remove from oven. Make small wells among the asparagus and crack an egg into each well. Sprinkle with Parmesan cheese.
Return to the oven and bake for another 10-12 minutes, or until the eggs are set to your liking. Serve immediately.
Notes
You can customize the seasonings to taste.
How to Prepare This Dish
Steps and time-saving tips
Preheat your oven to 375°F while you prep the ingredients for Baked Eggs with Asparagus. Lightly grease a baking dish with olive oil or butter to prevent sticking. Trim the tough ends off the asparagus, then arrange the spears in a single layer at the bottom of the dish. Crack the eggs directly over the asparagus, spacing them evenly so they cook uniformly. Drizzle everything with a bit of cream or milk for richness, then sprinkle salt, pepper, and a pinch of red pepper flakes for a subtle kick. If you’re short on time, skip blanching the asparagus—just bake it a few minutes longer until tender. Slide the dish into the oven and bake for 12-15 minutes, or until the egg whites set but the yolks stay slightly runny. For a golden finish, broil the top for 30 seconds right before serving. Garnish with fresh herbs like chives or parsley, and pair with crusty bread for dipping. To save cleanup, use a ceramic or cast-iron dish that transitions seamlessly from oven to table.
Mistakes I’ve made and learned from
I once overcrowded the baking dish with asparagus, thinking more would be better. The result? Unevenly cooked eggs and soggy spears. Now I leave space between each egg and use a larger dish—like the ones I recommend in my bakeware guide. Another blunder: forgetting to grease the dish. The eggs stuck stubbornly, turning my elegant brunch into a scrambled mess. A quick spray of oil fixes this, and I’ve since mastered non-stick tricks from my cleanup tips post. Timing matters too; overbaking by even a minute can turn creamy yolks rubbery. I set a timer and check early, especially with smaller eggs. These lessons transformed my Baked Eggs with Asparagus from a hit-or-miss experiment to a foolproof favorite.
Baked Eggs with Asparagus feels like a love letter to spring. Farmers in Provence, France, often whip up similar dishes when asparagus peaks in April, pairing it with fresh eggs from their chickens. Meanwhile, in northern Italy, cooks might swap the asparagus for wild greens or add a sprinkle of Parmesan for extra richness. My grandmother, however, always insisted on a dash of nutmeg, claiming it brought out the earthiness of the asparagus.
Across the pond, American home cooks embraced Baked Eggs with Asparagus as a brunch staple, especially in the Midwest where farm-to-table traditions run deep. Some families bake it in cast iron skillets, while others layer the asparagus with crumbled bacon for a smoky twist. No matter the variation, the dish celebrates simplicity and seasonal abundance. Whether you enjoy it with crusty bread or a light salad, Baked Eggs with Asparagus bridges cultures through shared appreciation for fresh, vibrant ingredients.
ays-cooking">How it fits in today’s cooking
Today, Baked Eggs with Asparagus fits perfectly into our fast-paced lives. Busy cooks love it because it’s easy to prep ahead and bake while tackling morning routines. Plus, it’s a hit for Easter brunch or Mother’s Day, blending tradition with modern convenience. Many health-conscious eaters also adore it, since it packs protein and veggies into one satisfying dish.
Modern twists keep it exciting too. Some add feta for tang, while others toss in cherry tomatoes for color. If you’re meal prepping, pair it with a make-ahead breakfast for a stress-free week. And for those who crave extra indulgence, a drizzle of quick hollandaise takes it to restaurant-level luxury. Whether you stick to the classics or experiment, Baked Eggs with Asparagus remains a timeless favorite.
Taste and Texture
What makes it delicious
Baked Eggs with Asparagus delivers a rich, satisfying experience with every bite. The eggs turn luxuriously creamy as they bake, while the asparagus stays tender-crisp, adding a fresh, earthy contrast. Fragrant garlic and melted cheese weave through the dish, creating layers of savory depth. Meanwhile, a hint of cracked black pepper or smoked paprika sparks warmth on your tongue. The aroma alone—a mix of toasty butter and roasted greens—will draw everyone to the table. Whether you scoop it onto crusty bread or enjoy it straight from the dish, Baked Eggs with Asparagus feels indulgent yet light, making it perfect for any meal.
r">Boosting the flavor
For an extra flavor kick, try swapping regular cheese for tangy goat cheese or sharp cheddar. A drizzle of homemade chili oil adds heat, while fresh herbs like dill or chives brighten each bite. If you love crunch, sprinkle toasted breadcrumbs or crispy roasted chickpeas on top just before serving. Don’t shy away from spices—a pinch of cumin or a dash of lemon zest can elevate Baked Eggs with Asparagus from simple to spectacular. Experiment and make it your own!
Tips for Success
Best practices for results
Preheat your oven fully before baking to ensure even cooking for your Baked Eggs with Asparagus. Meanwhile, lightly blanch the asparagus first to soften it slightly and enhance its flavor. Use fresh eggs at room temperature for a creamier texture, and always grease the baking dish well to prevent sticking. For extra richness, sprinkle a pinch of grated Parmesan or crumbled feta over the eggs before baking. Finally, check for doneness early—overcooked eggs lose their silky appeal.
>Mistakes to avoid
Avoid overcrowding the baking dish, as this leads to unevenly cooked eggs and soggy asparagus. Instead, space the ingredients evenly for consistent results. Many cooks also forget to season in layers—salt the asparagus lightly before adding the eggs, then adjust seasoning at the end. For more on balancing flavors, explore our guide to seasoning basics. Another common misstep is skipping the resting time after baking; let the dish sit for 2 minutes so the flavors meld. If you struggle with timing, our perfect bake times cheat sheet can help.
Serving and Pairing Suggestions
How to serve this dish
Baked Eggs with Asparagus shines as a centerpiece for brunch or a cozy weekend breakfast. For a stunning presentation, serve it straight from the skillet or transfer it to a rustic ceramic dish. Top with fresh herbs like chives or parsley for a pop of color. Meanwhile, a sprinkle of flaky sea salt or crumbled feta adds texture and flavor. If you’re hosting a holiday gathering, pair it with crusty bread or a light salad for a balanced spread. The vibrant green asparagus and golden yolks make this dish as visually appealing as it is delicious.
What goes well with it
For a refreshing contrast, serve Baked Eggs with Asparagus with a crisp mimosa or a citrusy iced tea. The brightness of these drinks cuts through the richness of the eggs. Alternatively, try pairing it with our Garlic Herb Focaccia for a satisfying crunch. If you prefer something heartier, our Creamy Avocado Salad adds a creamy texture that complements the dish perfectly. Each pairing enhances the flavors while keeping the meal light and balanced.
How long does it take to bake eggs with asparagus?
Baked Eggs with Asparagus typically take 15–20 minutes in a preheated oven at 375°F (190°C). The exact time depends on your preferred egg doneness—shorter for runny yolks, longer for fully set eggs. The asparagus should be tender but still crisp.
What cheese pairs best with baked eggs and asparagus?
Goat cheese, feta, or grated Parmesan work wonderfully with Baked Eggs with Asparagus. These cheeses add a creamy or salty contrast without overpowering the dish. For a melty option, try Gruyère or sharp cheddar.
rank-math-faq-item">Can I make baked eggs with asparagus ahead of time?
While Baked Eggs with Asparagus taste best fresh, you can prep the asparagus and seasoning ahead. Store them in the baking dish, then add eggs just before baking. Reheated eggs may become rubbery, so we recommend serving immediately.
Is baked eggs with asparagus a healthy breakfast?
Absolutely! Baked Eggs with Asparagus provide protein, vitamins A and K, and fiber. Asparagus adds antioxidants, while eggs offer complete protein. For a lighter version, use less cheese and olive oil instead of butter.
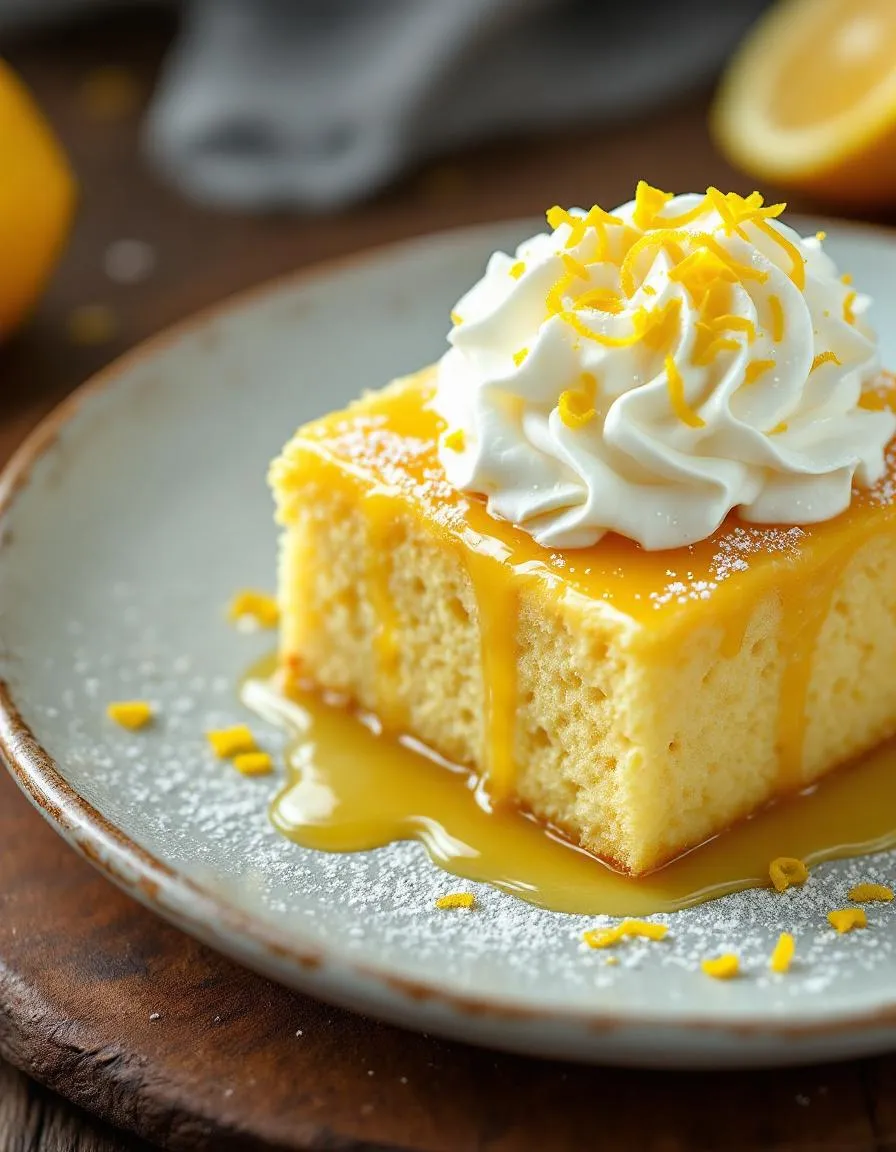
Easy Lemon Poke Cake – Moist and Tangy Dessert
Introduction
There’s something undeniably special about a dessert that brings sunshine to even the gloomiest days. That’s exactly why I adore this Lemon Poke Cake—it’s bright, refreshing, and effortlessly delightful. Whether you’re celebrating a special occasion or simply craving a sweet escape, this cake delivers a burst of citrusy joy in every bite. Plus, its easy preparation means you can focus on savoring the moment rather than stressing over complicated steps.
A Lemon Poke Cake is a moist, tender dessert infused with zesty lemon flavor and topped with a luscious glaze that seeps into every crevice. Unlike traditional cakes, this one gets its signature texture from poking holes after baking, allowing the glaze to soak deep into the layers. The result? A perfectly balanced treat that’s tangy, sweet, and irresistibly light. For anyone who loves citrus desserts, this cake is a must-try. It fits seamlessly into brekcakes.com’s mission of sharing approachable, crowd-pleasing recipes that feel like a hug from the inside. If you’re new to baking or just short on time, you’ll appreciate how this recipe simplifies the process without sacrificing flavor. And if you’re looking for more inspiration, check out our guide to easy dessert recipes or our tips for baking with citrus.
Why I Love This Recipe
This Lemon Poke Cake holds a special place in my heart because it reminds me of summer picnics with my grandmother. She always had a way of turning simple ingredients into something magical, and this cake captures that same spirit. Every time I make it, I’m transported back to those lazy afternoons, laughing under the shade of an old oak tree. It’s more than just a dessert—it’s a little slice of happiness, and I can’t wait for you to experience it too.
Health and Nutrition
Why it’s good for your body
Lemon Poke Cake offers a refreshing twist on dessert while packing some surprising health perks. First, the citrusy lemon flavor provides a natural dose of vitamin C, which supports immune function and skin health. Additionally, the bright tang of lemon helps balance the sweetness, making it easier to enjoy without overindulging.
Moreover, Lemon Poke Cake often includes yogurt or buttermilk in the recipe, which adds probiotics for gut health. These ingredients also contribute to a moist texture without excessive fats. Meanwhile, the light and airy cake base keeps calories in check compared to denser desserts.
Another benefit of Lemon Poke Cake is its versatility. You can easily adapt it to include whole-grain flour or reduce sugar without sacrificing flavor. Whether you serve it at gatherings or enjoy a slice as an afternoon treat, this dessert delivers satisfaction without heavy guilt. With its balanced profile, Lemon Poke Cake proves that indulgence and nutrition can go hand in hand.
How it fits in a healthy lifestyle
Lemon Poke Cake fits seamlessly into a balanced diet when enjoyed mindfully. For those watching their sugar intake, you can tweak the recipe with natural sweeteners or serve smaller portions. If you prefer gluten-free options, swap the flour for almond or coconut flour, as detailed in our gluten-free baking guide.
This dessert also pairs well with fresh berries or a dollop of Greek yogurt for added protein. For heart-healthy choices, use olive oil instead of butter, which aligns with tips from our heart-smart desserts article. By making small adjustments, Lemon Poke Cake becomes a flexible treat that supports your dietary goals without feeling restrictive.
Finally, its light and refreshing qualities make it perfect for warm-weather gatherings or post-meal cravings. When you prioritize balance, Lemon Poke Cake can be part of a joyful, health-conscious lifestyle.
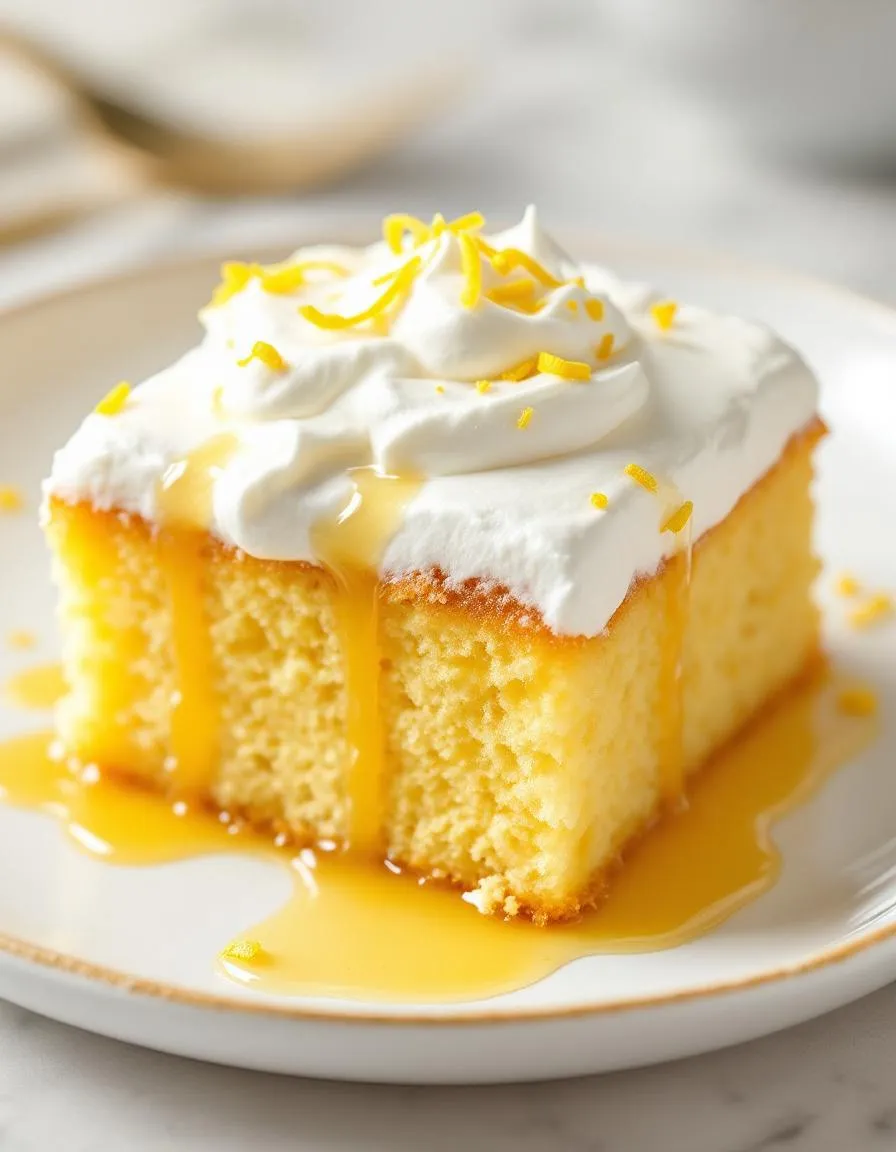
A moist and tangy lemon cake soaked with sweet lemon syrup, topped with whipped cream and lemon zest.
Ingredients
Scale
For the Crust:
1 box lemon cake mix
3 large eggs
1/2 cup vegetable oil
1 cup water
1 cup granulated sugar
1/2 cup fresh lemon juice
2 cups whipped topping
1 tbsp lemon zest
Instructions
1. Prepare the Crust:
Preheat oven to 350°F (175°C) and grease a 9×13-inch baking pan.
In a large bowl, mix cake mix, eggs, oil, and water until smooth. Pour into the prepared pan.
Bake for 25-30 minutes or until a toothpick inserted comes out clean.
While the cake bakes, combine sugar and lemon juice in a small saucepan. Heat over low until sugar dissolves.
Once the cake is done, use a fork to poke holes all over the top. Pour the warm lemon syrup over the cake.
Let the cake cool completely, then spread whipped topping over the top and sprinkle with lemon zest.
Refrigerate for at least 2 hours before serving.
Notes
You can customize the seasonings to taste.
“`html
How to Prepare This Dish
Steps and time-saving tips
Start by preheating your oven to 350°F and greasing a 9×13-inch baking pan. Then, mix the lemon cake batter according to the box instructions, but add a tablespoon of lemon zest for extra flavor. Pour the batter into the pan and bake for 25-30 minutes until a toothpick comes out clean. While the cake bakes, whisk together the lemon pudding mix with cold milk until smooth. Once the cake is out of the oven, immediately poke holes all over the top using the handle of a wooden spoon. Drizzle the lemon pudding mixture over the warm cake, letting it seep into the holes. Chill the cake for at least two hours to set. Meanwhile, whip the heavy cream with powdered sugar until stiff peaks form. Spread the whipped cream over the cooled cake and garnish with lemon slices or zest. For a time-saving tip, use store-bought whipped topping instead of making it from scratch. The cake tastes even better the next day, so prepare it ahead if you can.
and-learned-from">Mistakes I’ve made and learned from
I once overbaked my Lemon Poke Cake, leaving it dry and crumbly. Now I set a timer for 25 minutes and check early. Another time, I poured the pudding mixture too quickly, and it pooled on top instead of soaking in. The trick is to drizzle slowly and use a spatula to gently spread it. If your cake turns out too dense, try sifting the dry ingredients first—I learned this from my common cake mistakes post. Also, don’t skip chilling the cake; it needs time to absorb the pudding. For more lemon dessert inspiration, check out my lemon dessert recipes roundup. Trust me, a little patience makes all the difference!
“`
n-and-variations">Cultural Connection and Variations
Where this recipe comes from
Lemon Poke Cake carries a sunny, nostalgic charm that feels like a slice of summer any time of year. Many trace its roots to mid-20th-century American potlucks, where home bakers embraced shortcuts like boxed cake mix and instant pudding to create crowd-pleasing desserts. Yet, the bright citrus twist sets it apart. Some families swear by adding lemon zest to the batter, while others layer in lemon curd for extra tang. Down South, you might find it topped with toasted coconut, and in coastal regions, a sprinkle of sea salt balances the sweetness.
Interestingly, similar citrus-infused cakes pop up worldwide. In Italy, lemon-infused olive oil cakes soak up limoncello syrup, while British bakers often drizzle their sponges with elderflower cordial. Lemon Poke Cake, however, stays uniquely approachable—no fancy techniques required. My grandma made hers with a splash of buttermilk for richness, a trick she learned from a neighbor. Whether served at picnics or birthday parties, this dessert bridges generations with its cheerful flavor.
How it fits in today’s cooking
Today, Lemon Poke Cake still shines as a versatile favorite. Busy cooks love it for its no-fuss assembly, while food bloggers gussy it up with whipped cream frosting or fresh berries. It’s a star at spring brunches, but honestly, its zesty kick works year-round. Some even swap the classic yellow cake for a vanilla bean version to let the lemon filling take center stage.
Modern twists keep it r
elevant, too. Health-conscious bakers use Greek yogurt in the glaze, and gluten-free adaptations abound. For holiday spins, try folding crushed candy canes into the topping for a festive touch. Whether you’re reviving a family tradition or discovering it for the first time, Lemon Poke Cake fits seamlessly into today’s kitchens. Pair it with a chilled iced coffee, and you’ve got a match made in dessert heaven.
Taste and Texture
What makes it delicious
Lemon Poke Cake bursts with bright, tangy flavor, balanced by a lusciously sweet undertone. Each bite delivers a refreshing citrus punch, thanks to fresh lemon juice and zest woven into the batter. The cake itself stays irresistibly moist, soaking up a lemon-infused syrup that seeps into every tender crumb. Meanwhile, the fluffy whipped topping adds a creamy contrast, melting smoothly on the tongue. Fragrant and zesty, Lemon Poke Cake offers a perfect harmony of textures—soft, airy, and just a little sticky—making it impossible to resist a second slice.
Boosting the flavor
For an extra flavor kick, try folding lemon curd into the whipped topping or layering it between cake slices. A sprinkle of toasted coconut adds subtle crunch, while a drizzle of raspberry coulis introduces a fruity tang. If you love bold citrus, swap the syrup with a mix of lemon and lime juice. For a richer twist, pair Lemon Poke Cake with a scoop of vanilla bean ice cream, letting the cool creaminess highlight the cake’s vibrant zest. Small tweaks can elevate this dessert from delightful to unforgettable.
Always use room-temperature ingredients for your Lemon Poke Cake batter to ensure even mixing and a smooth texture. Additionally, poke the cake while it’s still warm so the lemon glaze absorbs properly. For the best flavor, let the cake chill for at least two hours before serving. Meanwhile, use fresh lemon juice instead of bottled for a brighter, more vibrant taste. Finally, spread the glaze evenly to guarantee every bite delivers that perfect tangy sweetness.
Mistakes to avoid
Avoid overbaking the cake, as this can make it dry and prevent the glaze from soaking in. Instead, check for doneness a few minutes early by inserting a toothpick into the center. Also, don’t skip the chilling step—rushing this process can leave your Lemon Poke Cake soggy or unevenly flavored. For more baking timing tips, check out our guide on how to tell when a cake is done. Another common mistake is using too much glaze, which can overwhelm the cake. Measure carefully and follow the recipe ratios. If you need help with glaze consistency, our perfect glaze consistency tutorial explains how to adjust it.
g-suggestions">Serving and Pairing Suggestions
How to serve this dish
Brighten any occasion with a beautifully presented Lemon Poke Cake. For a stunning look, dust the top with powdered sugar or add thin lemon slices and fresh mint leaves as garnish. Meanwhile, serve it chilled for the best texture and flavor. This cake shines at summer picnics, baby showers, or even as a refreshing dessert after a hearty meal. If you want to elevate the presentation, try layering it in individual mason jars for a portable treat.
What goes well with it
Pair your Lemon Poke Cake with a hot cup of Earl Grey tea to balance its tangy sweetness. Alternatively, a scoop of vanilla bean ice cream adds a creamy contrast that enhances every bite. For a brunch spread, serve it alongside our Berry Chia Pudding to keep the flavors light and fresh. If you love citrus desserts, try our Orange Poppyseed Cake for another zesty option that complements this recipe perfectly.
math-faq-block">
What is the best way to poke holes in a Lemon Poke Cake?
The best method is to use the handle of a wooden spoon or a skewer to create evenly spaced holes across the cake while it’s still warm. This allows the lemon glaze to soak deep into the Lemon Poke Cake for maximum flavor. Avoid poking too close to the edges to prevent crumbling.
Can I make Lemon Poke Cake ahead of time?
er">
Yes! Lemon Poke Cake actually tastes better when made a day ahead, as the flavors meld together. Store it covered in the refrigerator for up to 3 days. The lemon flavor becomes more pronounced over time, making it perfect for parties.
What can I use instead of lemon pudding in a Lemon Poke Cake?
For a twist, try vanilla pudding mixed with fresh lemon zest and juice, or use lemon curd for intense citrus flavor. Some bakers substitute cheesecake-flavored pudding to create a creamy Lemon Poke Cake variation. Always adjust sweetness to balance the tartness.
rank-math-faq-item">
Why did my Lemon Poke Cake turn out soggy?
Sogginess usually occurs from over-poking or using too much glaze. For perfect texture, poke holes just halfway through the cake and pour glaze slowly until absorbed. A properly made Lemon Poke Cake should be moist but still hold its structure when sliced.
Best Crispy Chicken Salad – Crunchy & Delicious
Introduction
If you’re craving a meal that’s both satisfying and refreshing, you’ve come to the right place. Crispy Chicken Salad is the perfect balance of crunch and freshness, making it a go-to dish for busy weeknights or lazy weekends. Whether you need a quick lunch or a crowd-pleasing dinner, this recipe delivers flavor without the fuss. Plus, it’s versatile enough to customize with your favorite toppings, so you can make it uniquely yours every time.
Crispy Chicken Salad combines tender, golden-brown chicken with crisp greens, vibrant veggies, and a tangy dressing for a meal that’s as delicious as it is nutritious. Unlike heavy comfort foods, this dish feels light yet filling, making it ideal for anyone who wants to enjoy a wholesome meal without sacrificing taste. At brekcakes.com, we celebrate recipes that bring joy to the table, and this one fits perfectly with our philosophy of simple, flavorful cooking. For more inspiration, check out our Easy Weeknight Dinners or explore fresh twists on classics in our Salad Recipes collection.
Why I Love This Recipe
This Crispy Chicken Salad holds a special place in my heart because it reminds me of summer picnics with my family. My mom used to make a similar version, and the crunch of the chicken paired with the cool, crisp lettuce always felt like pure happiness on a plate. Now, whenever I prepare it, I’m transported back to those sunny afternoons. It’s more than just a meal—it’s a bite of nostalgia that never fails to make me smile.
Health and Nutrition
Why it’s good for your body
Crispy Chicken Salad packs a powerful nutritional punch while satisfying your cravings. First, the lean protein from the chicken helps build and repair muscles, keeping you energized throughout the day. Additionally, the fresh vegetables like leafy greens, tomatoes, and cucumbers deliver essential vitamins and antioxidants to support your immune system.
Moreover, Crispy Chicken Salad balances textures and flavors without sacrificing health. The crispy coating adds a satisfying crunch, but baking instead of frying keeps the dish lighter. Meanwhile, the fiber-rich veggies aid digestion and help you feel full longer, making it easier to avoid unhealthy snacking.
Furthermore, this dish adapts easily to your dietary needs. You can swap dressings for lighter options or load up on extra veggies for more nutrients. Whether you enjoy it as a meal or a side, Crispy Chicken Salad offers a delicious way to fuel your body with wholesome ingredients.
How it fits in a healthy lifestyle
Crispy Chicken Salad fits perfectly into a balanced diet, whether you’re focusing on high-protein meals or simply eating cleaner. The lean chicken provides quality protein to support muscle maintenance, while the veggies contribute fiber and micronutrients. For gluten-free eaters, simply skip croutons or use a gluten-free alternative.
If you’re meal prepping, Crispy Chicken Salad stores well for quick lunches or dinners. Pair it with a nutritious side dish for a complete meal. It also works great for those following heart-healthy diets, especially if you opt for a light vinaigrette. For more inspiration on balancing flavors and nutrition, check out these easy meal prep ideas to keep your week on track.
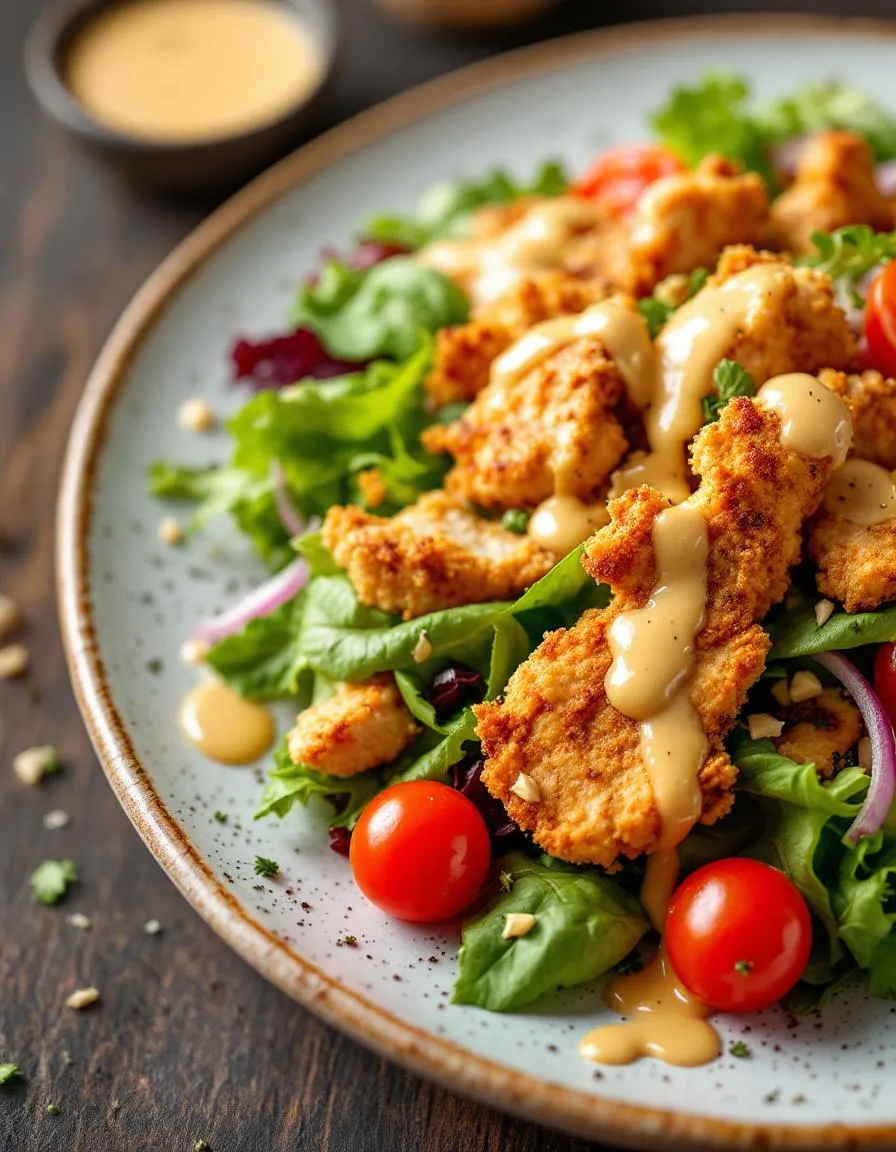
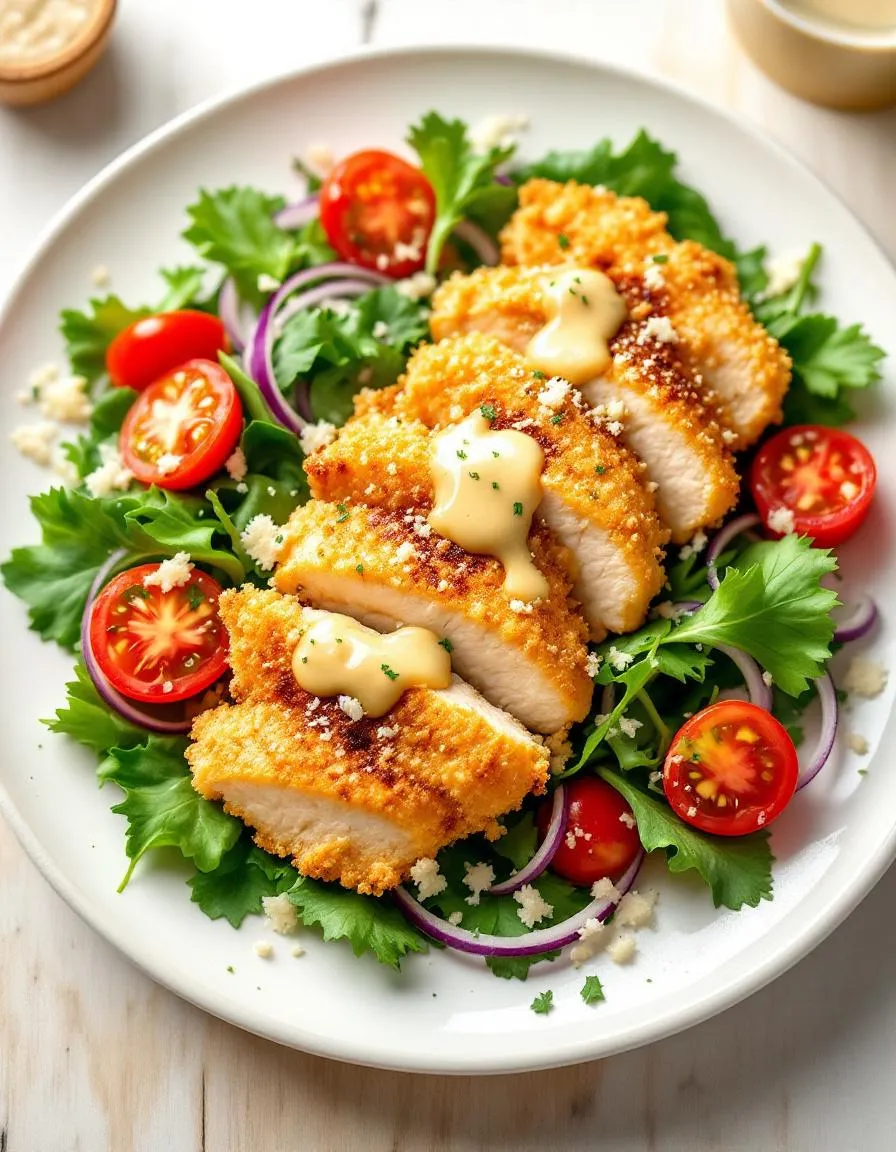
A delicious and crunchy salad featuring crispy chicken, fresh greens, and a tangy dressing.
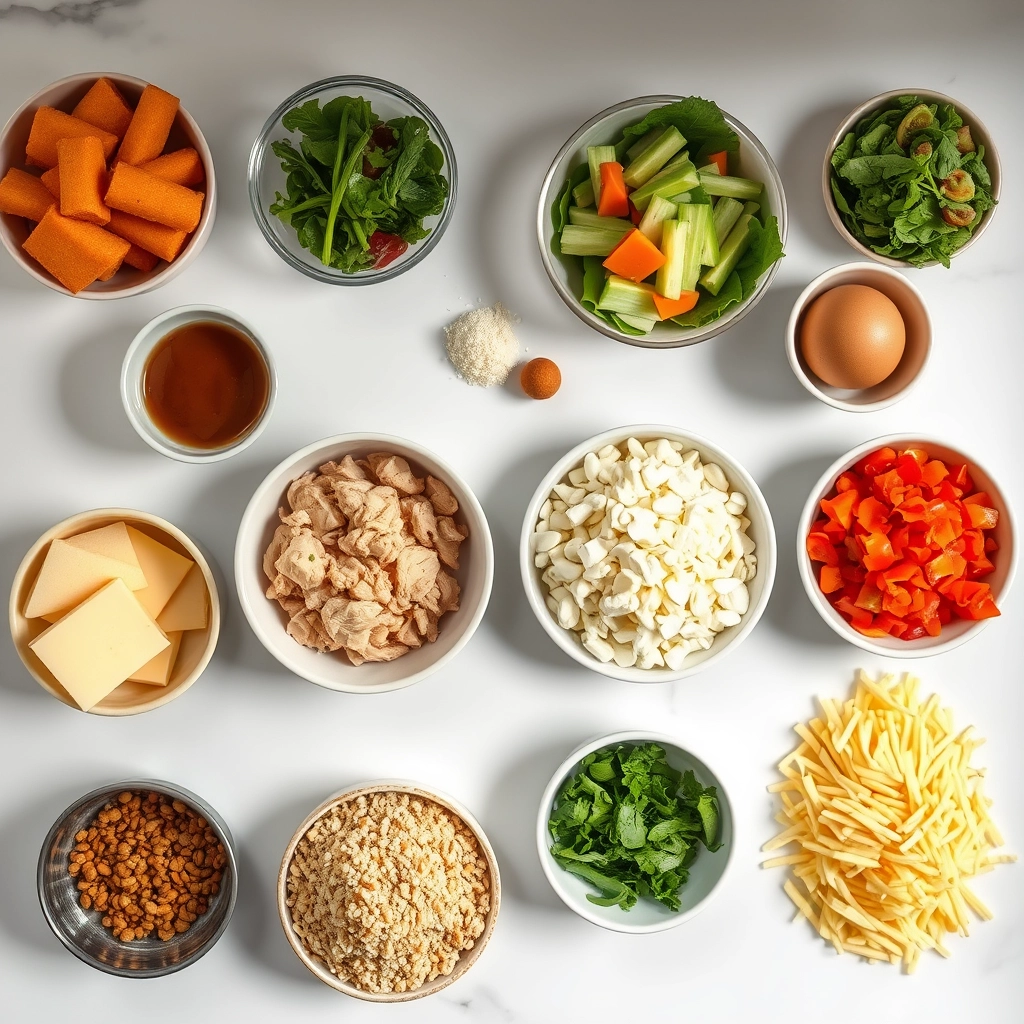
Ingredients
Scale
For the Crust:
2 boneless, skinless chicken breasts
1 cup breadcrumbs
1 egg, beaten
4 cups mixed salad greens
1/2 cup cherry tomatoes, halved
1/4 cup red onion, thinly sliced
1/4 cup grated Parmesan cheese
1/4 cup olive oil
2 tbsp lemon juice
1 tsp Dijon mustard
Salt and pepper to taste
Instructions
1. Prepare the Crust:
Preheat oven to 400°F (200°C). Line a baking sheet with parchment paper.
Dip chicken breasts in beaten egg, then coat with breadcrumbs. Place on the prepared baking sheet.
Bake for 20-25 minutes, or until chicken is cooked through and crispy. Let cool slightly, then slice.
In a large bowl, combine salad greens, cherry tomatoes, red onion, and Parmesan cheese.
In a small bowl, whisk together olive oil, lemon juice, Dijon mustard, salt, and pepper to make the dressing.
Add sliced crispy chicken to the salad, drizzle with dressing, and toss gently to combine.
Notes
You can customize the seasonings to taste.
Nutrition
Calories:210 kcal
s-dish">How to Prepare This Dish
Steps and time-saving tips
Start by preheating your oven to 400°F to ensure it’s ready for the crispy chicken. While the oven heats, pat the chicken thighs dry with paper towels—this helps the seasoning stick and promotes crispiness. Next, whisk together flour, paprika, garlic powder, and a pinch of salt in a shallow bowl. In another bowl, beat two eggs, then dip each chicken thigh first in the flour mixture, then the eggs, and finally back in the flour for a double coating. Place the chicken on a wire rack over a baking sheet to let excess coating drip off. Meanwhile, toss chopped romaine, cherry tomatoes, cucumber, and red onion in a large bowl. For a time-saving hack, use pre-washed greens and store-bought croutons. Bake the chicken for 25 minutes or until golden and crispy, flipping halfway through. While it cooks, whisk olive oil, lemon juice, Dijon mustard, and honey for the dressing. Once the chicken rests for 5 minutes, slice it and layer it over the salad. Drizzle the dressing and toss gently to combine. For extra crunch, add toasted almonds right before serving.
Mistakes I’ve made and learned from
I used to overcrowd the baking sheet, which steamed the chicken instead of crisping it. Now I always use a wire rack for even airflow, just like I do with my perfect roasted vegetables. Another blunder? Skipping the resting time for the chicken, which made the juices run out and left the meat dry. Letting it sit for 5 minutes makes all the difference—similar to how resting dough improves my homemade focaccia. If your coating isn’t sticking, double-check that the chicken is thoroughly dry before dredging. These small tweaks transformed my Crispy Chicken Salad from soggy to sensational.
n-and-variations">Cultural Connection and Variations
Where this recipe comes from
Crispy Chicken Salad has roots in American comfort food, but its inspiration stretches across borders. Southern cooks often add buttermilk-fried chicken for extra crunch, while Asian variations might toss in sesame oil and pickled veggies for a tangy twist. In my family, we always made it for summer potlucks, piling the crispy chicken high over fresh greens and drizzling it with homemade ranch. The dish feels like a celebration—simple, satisfying, and endlessly adaptable.
Globally, Crispy Chicken Salad takes on new identities. In Japan, you’ll find it with katsu-style chicken and tonkatsu sauce. Meanwhile, Mexican versions might swap the greens for cabbage and top it with lime crema. Even the herbs change—Thai cooks favor cilantro and mint, while Mediterranean twists might include oregano and feta. No matter where you go, Crispy Chicken Salad becomes a canvas for local flavors, proving how one dish can tell a hundred stories.
How it fits in today’s cooking
Today, Crispy Chicken Salad stays relevant because it’s both nostalgic and easy to modernize. Meal preppers love it for its make-ahead crunch, and busy families appreciate how it turns leftovers into something special. For a lighter take, some cooks air-fry the chicken or use Greek yogurt dressings—perfect for pairing with healthy meal prep ideas. Others keep it indulgent, serving it as a game-day crowd-pleaser alongside quick party appetizers.
Seasonally, it shines y
ear-round. In summer, it’s a cool, crunchy dinner. Come fall, roasted sweet potatoes or cranberries add warmth. Whether you stick to tradition or play with new flavors, Crispy Chicken Salad fits effortlessly into today’s kitchens—just as comforting as ever, but always ready for a fresh twist.
Taste and Texture
What makes it delicious
Every bite of Crispy Chicken Salad delivers a satisfying crunch from golden-brown chicken, balanced by cool, crisp lettuce and juicy cherry tomatoes. The creamy dressing coats each ingredient, tying together tangy, savory, and slightly sweet flavors. Fresh herbs like parsley or dill add a fragrant brightness, while crunchy cucumbers or radishes give an extra refreshing snap. Whether you enjoy it as a light lunch or a hearty dinner, Crispy Chicken Salad keeps your taste buds engaged with its dynamic mix of textures and bold, layered flavors.
Boosting the flavor
Elevate your Crispy Chicken Salad by tossing in crumbled feta or shaved Parmesan for a salty, umami kick. Alternatively, drizzle with a zesty lemon herb dressing to brighten the dish. For extra heat, sprinkle chili flakes or toss in pickled jalapeños. If you love smoky flavors, try swapping regular chicken with smoked paprika chicken. A handful of toasted nuts or seeds adds irresistible crunch, while fresh avocado brings a buttery richness. Small tweaks make a big difference, so experiment and find your perfect combo!
First, always pat the chicken dry before seasoning to ensure maximum crispiness in your Crispy Chicken Salad. Next, use a hot pan with just enough oil to prevent sticking while creating that golden crust. For the freshest results, toss the salad greens right before serving so they stay crisp. Additionally, let the cooked chicken rest for a few minutes before slicing to keep it juicy. Finally, taste and adjust the dressing as needed—sometimes a little extra lemon or salt makes all the difference.
Mistakes to avoid
One common mistake is overcrowding the pan when cooking the chicken, which steams instead of crisps it. Instead, cook in batches if needed for even browning. Another error is overdressing the salad, which can make it soggy—start with half the dressing and add more as you go. For perfectly cooked chicken every time, check out our guide on how to cook chicken breasts. Also, if your greens wilt too quickly, learn how to keep salad fresh with simple storage tricks.
g-suggestions">Serving and Pairing Suggestions
How to serve this dish
For a stunning presentation, layer your Crispy Chicken Salad on a wide, shallow bowl to showcase its vibrant colors and textures. Alternatively, serve it in a toasted tortilla bowl for a fun, crunchy twist. Top with extra crispy chicken pieces and a sprinkle of fresh herbs like parsley or cilantro to add visual appeal. This dish shines at casual gatherings, whether you’re hosting a summer picnic or a cozy family brunch. If you’re aiming for elegance, arrange individual portions on chilled plates with edible flowers as garnish.
What goes well with it
Pair your Crispy Chicken Salad with a tangy buttermilk ranch dressing or a zesty honey mustard for extra flavor. For a refreshing drink, try a citrusy iced tea or a crisp white wine like Sauvignon Blanc. If you’re serving it as part of a larger meal, consider adding our Garlic Herb Roasted Potatoes for a hearty side. Alternatively, balance the crunch with a light starter like our Creamy Tomato Basil Soup to create a well-rounded dining experience.
math-faq-block">
What’s the best way to keep crispy chicken salad crunchy?
To keep your crispy chicken salad crunchy, store the chicken separately from the greens and dressing until ready to serve. Toss the crispy chicken with the salad just before eating to maintain its texture. You can also use panko breadcrumbs for extra crunch in the chicken coating.
Can I make crispy chicken salad ahead of time?
Yes, but prep components separately for best results. Cook and refrigerate the crispy chicken for up to 2 days, then reheat in an air fryer or oven to restore crispiness. Assemble the salad with fresh greens and dressing right before serving.
What dressing goes well with crispy chicken salad?
Ranch, honey mustard, or a tangy buttermilk dressing pair perfectly with crispy chicken salad. For a lighter option, try a lemon vinaigrette to balance the richness of the fried chicken. Avoid heavy dressings that can make the salad soggy.
rank-math-faq-item">How do you make crispy chicken for salad without deep frying?
Use an air fryer or oven for a healthier crispy chicken salad. Coat chicken in seasoned flour, egg wash, and breadcrumbs, then bake at 400°F (200°C) for 20-25 minutes. Spritz with oil for extra crispiness without deep frying.
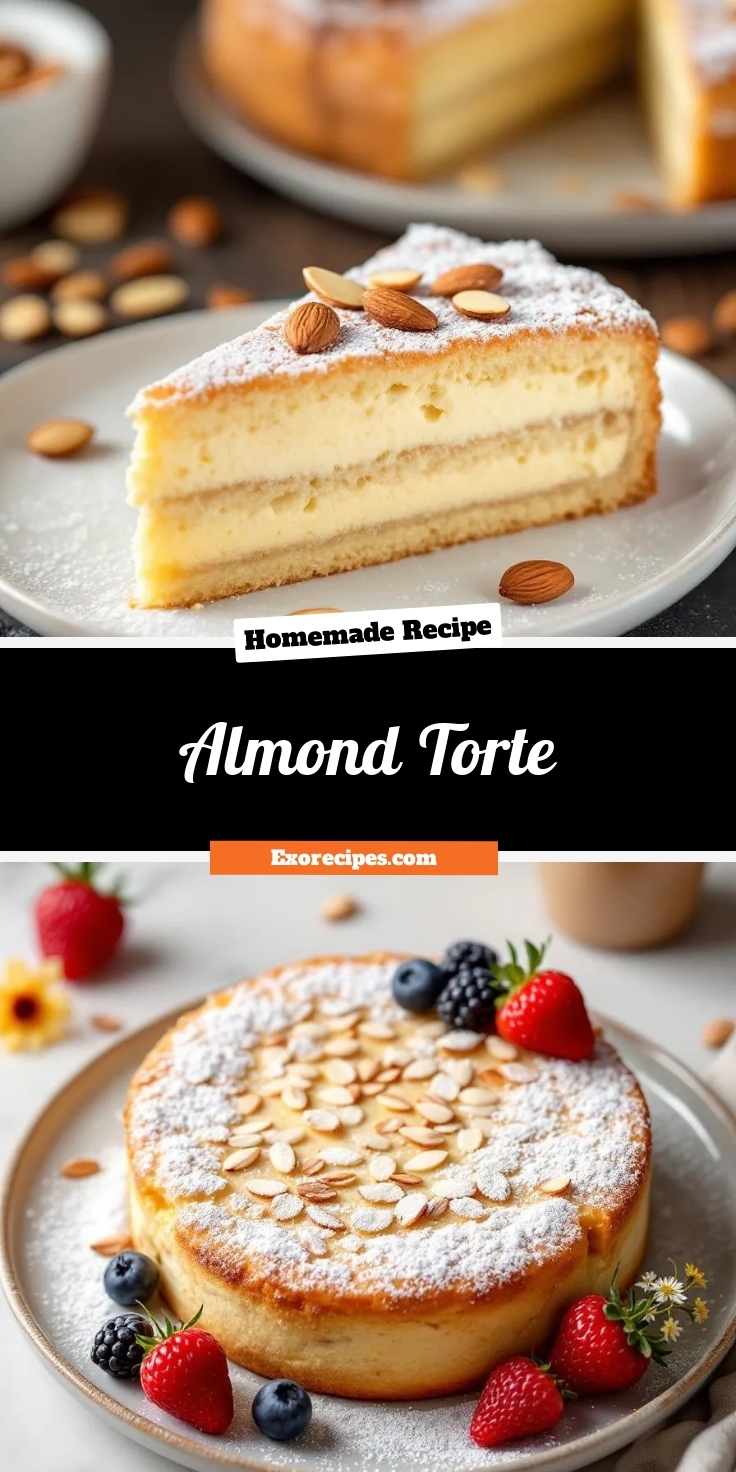
Best Almond Torte – Classic Italian Dessert Recipe
Introduction
If you’ve ever craved a dessert that feels both elegant and comforting, you’re in the right place. Today, I want to share my Almond Torte—a recipe that holds a special spot in my baking journey. Whether you’re celebrating a milestone or simply treating yourself, this cake delivers rich flavor and tender texture, all while keeping things wonderfully simple. Trust me, one bite will make it a staple in your recipe collection.
An Almond Torte is a classic European-inspired cake that highlights the nutty sweetness of ground almonds. Unlike dense traditional cakes, it boasts a light, almost delicate crumb, thanks to the absence of flour. Instead, finely ground almonds and whipped egg whites create a melt-in-your-mouth experience. This dessert matters because it proves that fewer ingredients can still yield incredible depth. Perfect for afternoon tea or a dinner party finale, it fits brekcakes.com’s philosophy of approachable yet impressive baking. If you love almond flavors, you’ll adore how this torte lets them shine. For more nutty inspiration, check out my Hazelnut Chocolate Cake or explore gluten-free baking tips to adapt other favorites.
Why I Love This Recipe
This Almond Torte reminds me of Sunday gatherings at my grandmother’s house, where she’d serve it with a dusting of powdered sugar and stories of her childhood. Baking it now feels like carrying forward a sweet tradition. I also love how forgiving it is—even if you’re new to baking, the recipe guides you to success. Every time I make it, the aroma fills my kitchen with warmth, and that first slice never fails to bring joy. It’s more than a dessert; it’s a little piece of my heart on a plate.
Health and Nutrition
Why it’s good for your body
Almond Torte packs a nutritious punch while satisfying your sweet tooth. First, almonds deliver heart-healthy monounsaturated fats, which help lower bad cholesterol. Additionally, they provide a steady energy boost thanks to their protein and fiber content. Because Almond Torte uses almond flour as its base, it naturally avoids refined grains, making it a smarter choice than traditional desserts.
Moreover, almonds are rich in vitamin E, a powerful antioxidant that supports skin health and immunity. When you enjoy Almond Torte, you also benefit from magnesium, a mineral that aids muscle function and reduces stress. Unlike sugar-heavy treats, this dessert offers a balanced sweetness, so you won’t experience a crash afterward.
Finally, Almond Torte contains minimal processed ingredients, keeping it wholesome. Whether you savor a slice for dessert or an afternoon pick-me-up, you’re fueling your body with nutrients. Plus, the natural richness of almonds means you’ll feel satisfied without overindulging.
How it fits in a healthy lifestyle
Almond Torte fits seamlessly into a balanced diet, especially if you prioritize nutrient-dense foods. For gluten-free eaters, it’s a delicious alternative to wheat-based desserts, thanks to almond flour. If you’re watching your heart health, the unsaturated fats in almonds support cardiovascular wellness. Pair it with fresh berries or a dollop of Greek yogurt for extra protein and antioxidants.
Planning meals ahead? Almond Torte stores well, making it a practical option for busy weeks. For more gluten-free inspiration, explore our gluten-free baking guide. If you’re curious about other heart-healthy desserts, check out our low-sugar treats for ideas. Enjoying treats mindfully keeps your diet sustainable, and Almond Torte delivers both flavor and nutrition.
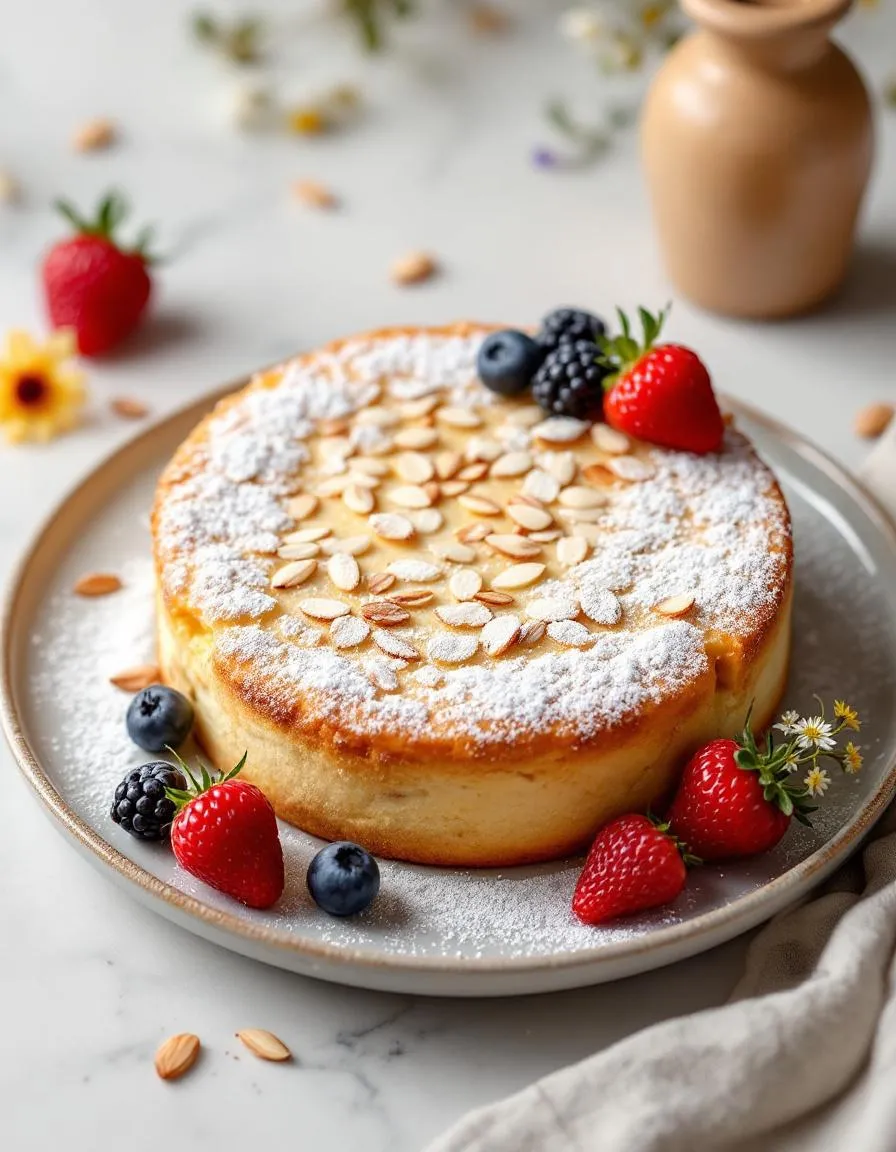
A rich and moist almond cake with a delicate crumb, perfect for any occasion.
Ingredients
Scale
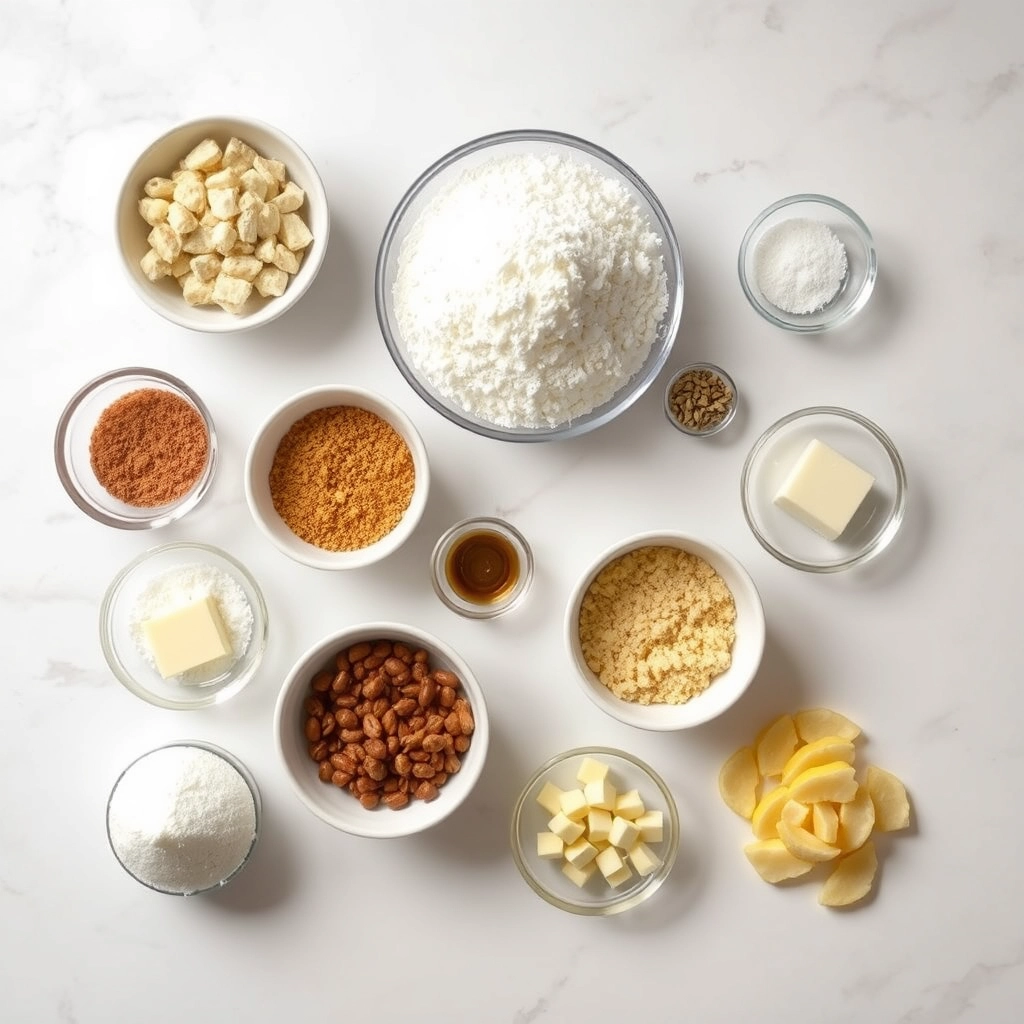
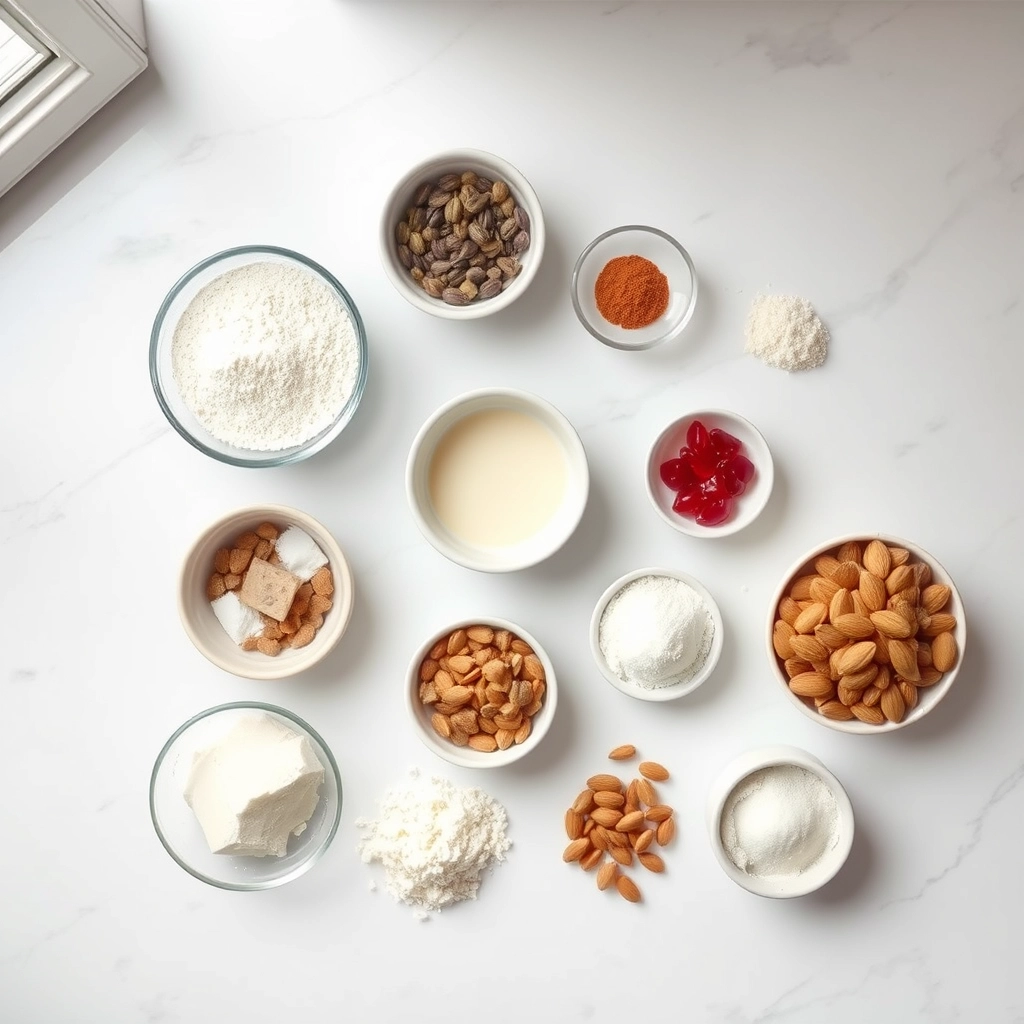
For the Crust:
1 1/2 cups almond flour
1/2 cup all-purpose flour
1 cup granulated sugar
1/2 cup unsalted butter, softened
3 large eggs
1 tsp almond extract
1/2 tsp baking powder
1/4 tsp salt
Powdered sugar for dusting
Instructions
1. Prepare the Crust:
Preheat oven to 350°F (175°C). Grease and flour a 9-inch round cake pan.
In a bowl, whisk together almond flour, all-purpose flour, baking powder, and salt.
In a separate bowl, cream butter and sugar until light and fluffy. Beat in eggs one at a time, then stir in almond extract.
Gradually mix in the dry ingredients until just combined.
Pour batter into the prepared pan and smooth the top.
Bake for 30-35 minutes or until a toothpick inserted in the center comes out clean.
Cool in the pan for 10 minutes, then transfer to a wire rack to cool completely. Dust with powdered sugar before serving.
Notes
You can customize the seasonings to taste.
Nutrition
Calories:515 kcal
How to Prepare This Dish
Steps and time-saving tips
Start by preheating your oven to 350°F and greasing a 9-inch springform pan for your Almond Torte. Meanwhile, toast the almonds in a dry skillet over medium heat until fragrant, then let them cool before grinding them into a fine meal. In a large bowl, whisk together the almond meal, flour, baking powder, and salt. In another bowl, beat the butter and sugar until light and fluffy, then add the eggs one at a time, mixing well after each. Gradually fold the dry ingredients into the wet mixture, alternating with a splash of milk to keep the batter smooth. Pour the batter into the prepared pan and smooth the top with a spatula. Bake for 30-35 minutes until golden and a toothpick comes out clean. Let the torte cool completely before dusting with powdered sugar or adding a glaze. To save time, grind the almonds ahead or use store-bought almond flour, but toast it lightly for extra flavor.
and-learned-from">Mistakes I’ve made and learned from
I once rushed the cooling process and tried to unmold my Almond Torte too soon—it crumbled into sad, uneven layers. Now, I always let it rest for at least an hour, and if I’m impatient, I pop it in the fridge to speed things up. Another lesson? Overmixing the batter makes the texture dense. I learned to gently fold the dry ingredients just until combined, which keeps the crumb tender. For more baking fails turned wins, check out my guide to common baking mistakes. And if you’re new to working with almond flour, my almond flour tips will help you avoid the clumpy disasters I’ve had.
Cultural Connection and Variations
Where this recipe comes from
Almond Torte traces its roots to the sun-drenched hills of Italy, where bakers have long celebrated the nutty richness of almonds in desserts. Originally, families prepared it for special occasions, like weddings or harvest festivals, blending ground almonds with citrus zest for a fragrant, delicate crumb. Over time, the recipe traveled across Europe, adapting to local tastes. In Austria, for instance, bakers often layer it with apricot jam, while in Spain, they might drizzle it with honey for extra sweetness.
In my own kitchen, Almo
nd Torte became a cherished tradition during holiday gatherings. My grandmother insisted on using freshly ground almonds, claiming it made the texture lighter. Meanwhile, some Middle Eastern versions incorporate rosewater or cardamom, adding a floral twist. No matter the variation, Almond Torte always carries a sense of warmth and celebration. Whether served with coffee in the afternoon or as a grand finale to a festive meal, it bridges cultures through shared love of simple, elegant flavors.
How it fits in today’s cooking
Today, Almond Torte holds its own as a versatile dessert for modern cooks. Many embrace it for gluten-free baking, swapping traditional flour for almond meal without sacrificing taste. Others pair it with seasonal fruits, like raspberries in summer or spiced pears in fall, making it a year-round favorite. For busy bakers, our easy dessert recipes collection offers shortcuts, like pre-ground almonds, to save time without losing authenticity.
Beyond holidays, Almond Torte fits seamlessly into everyday indulgences. Some enjoy it as an afternoon treat with tea, while others elevate it for dinner parties with a dollop of whipped cream. If you’re exploring more nut-based desserts, check out our baking with nuts guide for creative twists. Whether you stick to tradition or experiment with new flavors, Almond Torte remains a timeless classic that adapts to any table.
>Taste and Texture
What makes it delicious
The Almond Torte delivers a rich, nutty flavor with a buttery sweetness that lingers on the palate. Ground almonds create a tender, moist crumb, while a hint of vanilla adds a warm, fragrant depth. Each bite offers a delicate balance of crisp edges and a soft, almost velvety center. Toasted almond slices on top provide a satisfying crunch, contrasting beautifully with the cake’s melt-in-your-mouth texture. Whether served warm or at room temperature, the Almond Torte feels indulgent yet light, making it perfect for any occasion.
Boosting the flavor
Elevate your Almond Torte by drizzling it with a glossy homemade caramel sauce, which adds a luxurious, buttery richness. For a citrusy twist, fold lemon zest into the batter or top slices with a dusting of powdered sugar and fresh berries. A scoop of vanilla bean ice cream pairs wonderfully, enhancing the nutty flavors while adding a cool, creamy contrast. Experiment with almond extract for a more intense aroma or a pinch of cinnamon for subtle warmth. These small tweaks transform an already delicious dessert into something extraordinary.
Tips for Success
Best practices for results
Always measure your almond flour precisely for the best Almond Torte texture. Since almond flour lacks gluten, even small variations can affect consistency. Additionally, use room-temperature eggs to help the batter emulsify smoothly. For even baking, rotate the pan halfway through, and let the torte cool completely before slicing. Finally, toast your almonds lightly before garnishing to enhance their flavor and crunch.
Mistakes to avoid
Avoid overmixing the batter, as this can make your Almond Torte dense instead of light. Instead, fold ingredients gently until just combined. Many bakers also skip the step of greasing the pan thoroughly, which leads to sticking. For foolproof removal, line your pan with parchment paper as shown in our parchment guide. Another common error is underbaking the center—use a toothpick test and check our baking time tips for accuracy.
Serving and Pairing Suggestions
How to serve this dish
Serve your Almond Torte as a stunning centerpiece for afternoon tea or an elegant dessert at dinner parties. For a festive touch, dust the top with powdered sugar and arrange fresh berries around the edges. Alternatively, warm individual slices slightly and pair them with a scoop of vanilla ice cream for a cozy treat. During the holidays, decorate the torte with edible flowers or toasted almond slices to make it extra special. Whether you present it whole or slice it ahead of time, this dessert always impresses.
h-it">What goes well with it
Enhance your Almond Torte experience with a cup of freshly brewed coffee, as the rich flavors balance the dessert’s nutty sweetness. For a lighter option, try pairing it with our Iced Lavender Latte, which adds a floral contrast. If you prefer something indulgent, drizzle warm chocolate sauce over each slice or serve it alongside our Honey Whipped Cream for extra decadence. Each pairing elevates the torte’s delicate texture and flavor.
What is the difference between almond torte and regular cake?
Almond torte is denser and richer than a regular cake because it uses ground almonds or almond flour as the primary ingredient instead of wheat flour. The texture is more moist and nutty, with a pronounced almond flavor that sets it apart from traditional cakes.
rank-math-faq-item">Can I make almond torte without almond flour?
While almond flour is key for an authentic almond torte, you can substitute it with finely ground blanched almonds in a food processor. Avoid using all-purpose flour, as it will change the texture and flavor of the torte significantly.
How do you store almond torte to keep it fresh?
Wrap the almond torte tightly in plastic wrap or store it in an airtight container at room temperature for up to 3 days. For longer freshness, refrigerate it for up to a week or freeze slices for up to 3 months.
Is almond torte gluten-free?
Yes, traditional almond torte is naturally gluten-free since it relies on almond flour instead of wheat flour. Always check other ingredients like baking powder or flavorings to ensure they’re gluten-free if you have dietary restrictions.