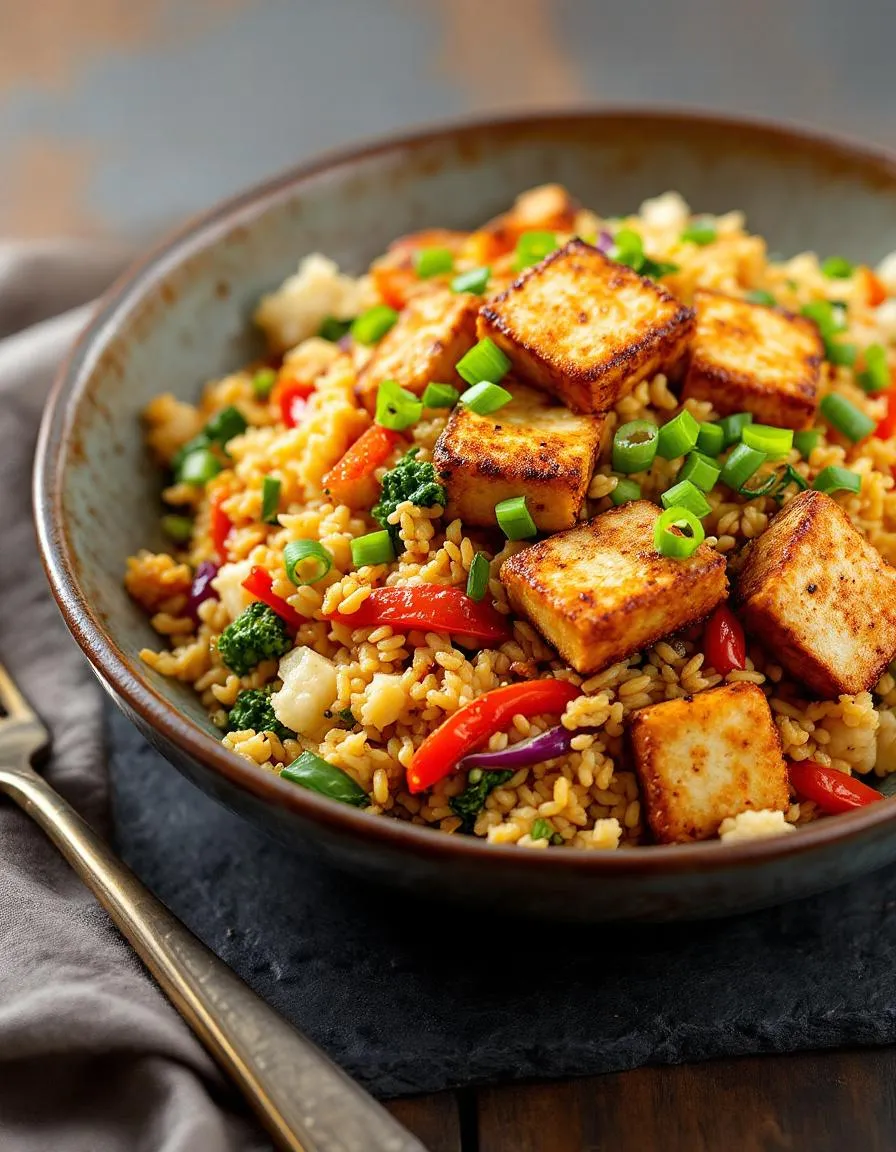
Easy Cauliflower Fried Rice with Crispy Tofu Recipe
Introduction
Ever crave the comforting flavors of fried rice but want something lighter and packed with veggies? Cauliflower Fried Rice with Crispy Tofu delivers all the savory satisfaction without the heaviness. Whether you’re meal-prepping for the week or need a quick, nutrient-dense dinner, this dish checks every box. Plus, it’s a fantastic way to sneak more plant-based goodness into your routine—no guilt, just flavor.
Cauliflower Fried Rice with Crispy Tofu swaps traditional rice for finely chopped cauliflower, creating a low-carb, veggie-loaded base that soaks up all the delicious stir-fry flavors. The crispy tofu adds a protein punch and satisfying crunch, making it a balanced meal that even meat-lovers enjoy. This recipe matters because it proves healthy eating doesn’t mean sacrificing taste or texture. It’s also incredibly versatile—you can toss in whatever veggies you have on hand, making it perfect for reducing food waste. If you love easy, adaptable dishes, you’ll appreciate our Vegetable Stir Fry for similar weeknight inspiration. The blog focuses on approachable, flavorful recipes, and this dish fits right in with its simplicity and crowd-pleasing appeal. Whether you’re new to plant-based meals or a seasoned pro, Cauliflower Fried Rice with Crispy Tofu offers a fresh take on a classic. For more ways to enjoy cauliflower, try our Roasted Cauliflower as a side or snack.
Why I Love This Recipe
Cauliflower Fried Rice with Crispy Tofu became a staple in my kitchen during a busy phase when I needed meals that were fast, nutritious, and satisfying. The first time I made it, I was amazed by how the crispy tofu contrasts with the tender cauliflower, creating a texture combo I now crave. It’s also a recipe that brings my family together—my kids devour it, and my partner adds extra spice for kick. Every bite reminds me that eating well can be effortless and exciting, which is why I keep coming back to it.
Health and Nutrition
Why it’s good for your body
Cauliflower Fried Rice with Crispy Tofu packs a powerful nutritional punch while keeping calories in check. First, cauliflower replaces traditional rice, slashing carbs and adding fiber, which supports digestion and keeps you full longer. Meanwhile, crispy tofu delivers plant-based protein, helping to maintain muscle and stabilize blood sugar. Together, these ingredients create a meal that fuels your body without weighing you down.
Additionally, Cauliflower Fried Rice with Crispy Tofu brims with vitamins and antioxidants. Cauliflower provides vitamin C, boosting immunity, while tofu offers iron and calcium for strong bones and energy. The dish also includes veggies like carrots and peas, adding beta-carotene and folate. Because it’s stir-fried in healthy oils, you absorb these nutrients more efficiently.
Finally, this dish supports heart health. Tofu contains unsaturated fats, which may lower cholesterol, and cauliflower’s anti-inflammatory properties benefit circulation. Whether you’re managing weight or simply craving a nutrient-dense meal, Cauliflower Fried Rice with Crispy Tofu delivers flavor and wellness in every bite.
How it fits in a healthy lifestyle
Cauliflower Fried Rice with Crispy Tofu fits seamlessly into balanced eating habits. If you’re gluten-free, this dish naturally avoids grains, making it a safe and satisfying choice. It’s also ideal for high-protein diets, thanks to tofu’s complete amino acid profile. Plus, the low-carb cauliflower base aligns with keto or low-glycemic plans.
For meal preppers, Cauliflower Fried Rice with Crispy Tofu stores well and reheats quickly, saving time without sacrificing nutrition. Pair it with other plant-based favorites, like our vegan meal prep ideas, for a week of wholesome eating. If you’re exploring heart-healthy options, check out our low-cholesterol recipes to complement this dish. Whether you’re fueling workouts or seeking lighter dinners, this recipe adapts to your goals effortlessly.
A healthy and flavorful twist on fried rice using cauliflower rice and crispy tofu for a protein-packed meal.
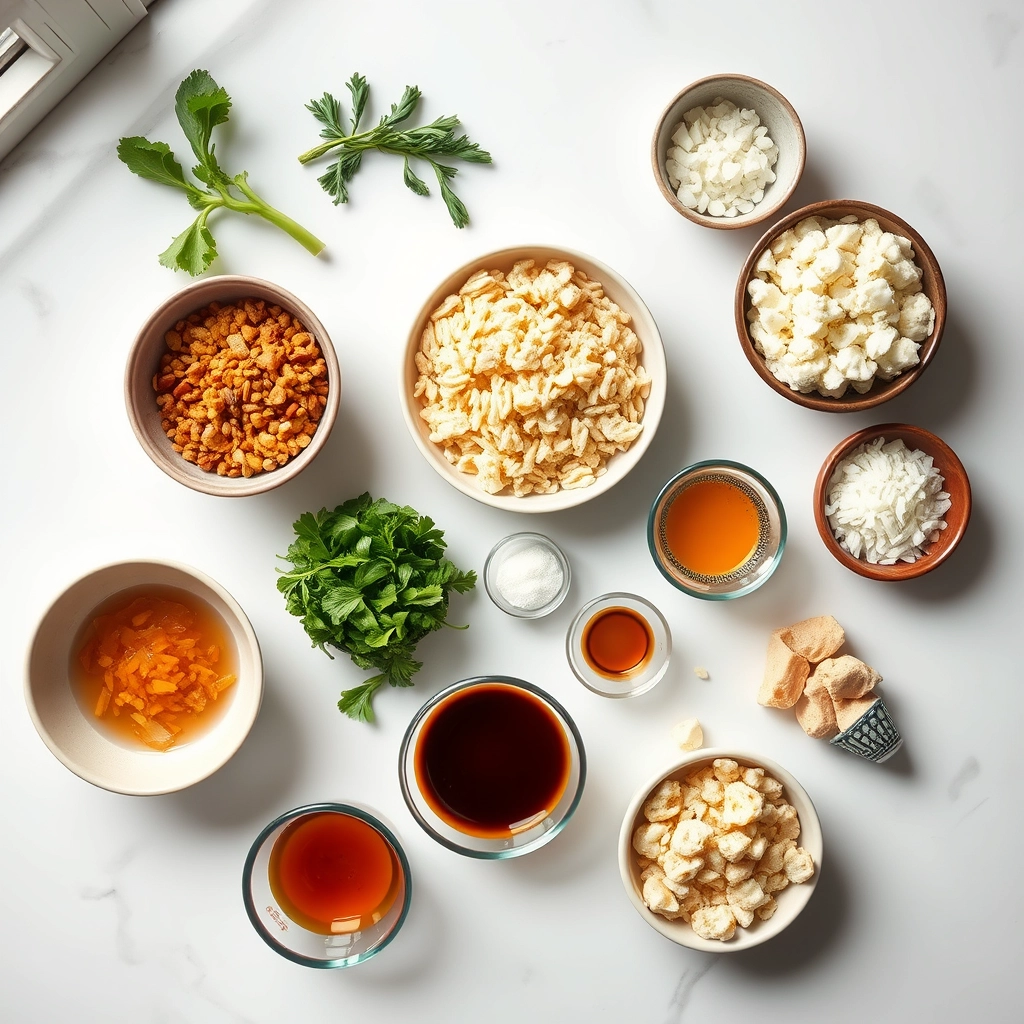
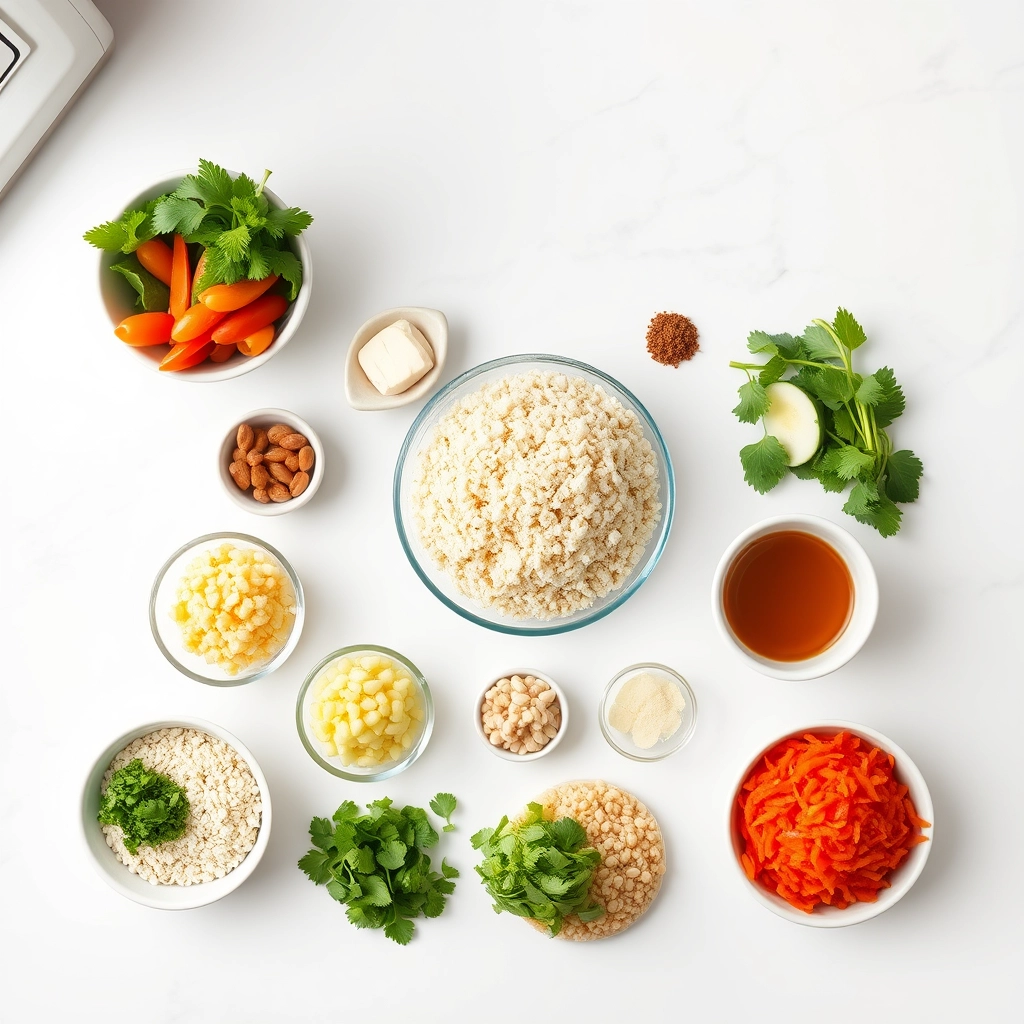
Ingredients
Scale
For the Crust:
1 medium head cauliflower, riced
14 oz extra-firm tofu, pressed and cubed
2 tbsp soy sauce
1 tbsp sesame oil
2 cloves garlic, minced
1 tbsp ginger, grated
1 cup mixed vegetables (carrots, peas, bell peppers)
2 eggs, beaten
2 green onions, sliced
1 tbsp olive oil
Salt and pepper to taste
Instructions
1. Prepare the Crust:
Heat olive oil in a large pan over medium heat. Add tofu cubes and cook until golden and crispy on all sides. Remove and set aside.
In the same pan, add sesame oil, garlic, and ginger. Sauté for 1 minute until fragrant.
Add mixed vegetables and cook for 3-4 minutes until softened.
Push vegetables to one side of the pan and pour beaten eggs into the other side. Scramble until cooked, then mix with vegetables.
Add riced cauliflower and soy sauce. Stir-fry for 5-6 minutes until cauliflower is tender.
Return crispy tofu to the pan and mix well. Season with salt and pepper.
Garnish with sliced green onions before serving.
Notes
You can customize the seasonings to taste.
“`html
="how-to-prepare-this-dish">How to Prepare This Dish
Steps and time-saving tips
Start by pressing the tofu to remove excess moisture, which helps it crisp up beautifully. While the tofu drains, pulse the cauliflower in a food processor until it resembles rice grains. Heat a large skillet over medium-high and drizzle in some oil. Crumble the tofu into the pan and cook until golden, stirring occasionally for even crispiness. Meanwhile, whisk the sauce ingredients—soy sauce, sesame oil, and a touch of maple syrup—in a small bowl. Once the tofu is crispy, transfer it to a plate and set aside. In the same skillet, sauté minced garlic and ginger until fragrant, then add the cauliflower rice. Stir frequently to prevent sticking and cook for about 5 minutes until tender. Pour the sauce over the cauliflower, fold in the tofu, and toss everything together. Garnish with green onions and sesame seeds for a fresh finish. To save time, use pre-riced cauliflower or prep the tofu and sauce a day ahead. This Cauliflower Fried Rice with Crispy Tofu comes together in under 30 minutes, making it perfect for busy weeknights.
Mistakes I’ve made and learned from
I used to skip pressing the tofu, thinking it wouldn’t make much difference—big mistake! The result was soggy, bland cubes that ruined the texture of my Cauliflower Fried Rice with Crispy Tofu. Now I always press it for at least 15 minutes, or I use my favorite quick-press method when I’m short on time. Another lesson? Don’t overcrowd the skillet. I once dumped all the cauliflower rice in at once, and it steamed instead of frying, turning mushy. Cooking in batches ensures perfect texture. If you’re new to plant-based cooking, my guide to vegan kitchen essentials has more tips to avoid common pitfalls. Trust me, a little patience pays off with this dish!
Cauliflower Fried Rice with Crispy Tofu might sound like a modern health trend, but its roots stretch across continents. Inspired by traditional Chinese fried rice, this dish swaps grains for cauliflower while keeping the bold flavors of soy, garlic, and ginger. In Southeast Asia, street vendors often toss fried rice with whatever ingredients they have on hand, and this version follows that spirit—just with a low-carb twist.
Families in Japan and K
orea sometimes prepare similar dishes, adding kimchi or miso for extra depth. Meanwhile, in my own kitchen, Cauliflower Fried Rice with Crispy Tofu became a weeknight hero during busy seasons. My aunt, who loves vegan cooking, taught me to pan-fry the tofu until golden, a trick she picked up from a Buddhist temple recipe. Whether you’re craving something light or need a veggie-packed meal, this dish adapts effortlessly.
How it fits in today’s cooking
Today, Cauliflower Fried Rice with Crispy Tofu fits perfectly into our fast-paced, health-conscious lives. Meal preppers adore it because it reheats well, and fitness enthusiasts appreciate its high-protein, low-calorie profile. During summer, I love pairing it with a chilled watermelon salad for a refreshing contrast. In winter, a dash of chili oil warms it right up.
Modern cooks also tweak the recipe to match their cravings. Some add pineapple for sweetness, while others toss in cashews for crunch. If you’re hosting a brunch, serve it alongside fluffy vegan pancakes for a satisfying spread. Whether you’re cooking for one or feeding a crowd, this dish stays versatile, delicious, and deeply comforting—no matter the season.
>Taste and Texture
What makes it delicious
Cauliflower Fried Rice with Crispy Tofu delivers a satisfying crunch from golden-brown tofu cubes, while the cauliflower rice stays tender yet slightly firm. Each bite bursts with umami richness, thanks to savory soy sauce and nutty sesame oil. Fresh garlic and ginger add a warm, aromatic kick, while scallions bring a bright, peppery finish. The dish balances textures perfectly—creamy avocado slices contrast with the crispy tofu, and toasted sesame seeds add a delicate crunch. Whether you savor it hot or chilled, Cauliflower Fried Rice with Crispy Tofu keeps every mouthful exciting and flavorful.
Boosting the flavor
For extra depth, try marinating the tofu in a mix of tamari and rice vinegar before crisping it up. Alternatively, toss in a spoonful of chili garlic sauce for a spicy twist. A squeeze of lime brightens the dish, while crushed peanuts add a satisfying crunch. If you love bold flavors, drizzle with ginger sesame dressing for a tangy-sweet finish. With these tweaks, Cauliflower Fried Rice with Crispy Tofu becomes even more irresistible.
Tips for Success
Best practices for results
Always dry your cauliflower rice thoroughly before cooking to prevent soggy results. Meanwhile, press your tofu for at least 15 minutes to remove excess moisture, ensuring it crisps perfectly. Use high heat when stir-frying your Cauliflower Fried Rice with Crispy Tofu to lock in flavor and texture. For extra depth, toast the sesame oil lightly before adding other ingredients. Finally, taste and adjust seasoning just before serving for balanced flavors every time.
Mistakes to avoid
Avoid overcrowding the pan when cooking tofu, as this steams instead of crisps it. Instead, cook in batches if needed, just like our guide to perfect crispy tofu recommends. Also, resist stirring the rice constantly—let it sit briefly to develop a slight char. Many skip preheating the wok or skillet, but a hot surface prevents sticking and boosts flavor. For more on mastering stir-fry techniques, check out our stir-fry secrets post.
Serving and Pairing Suggestions
How to serve this dish
For a vibrant presentation, scoop Cauliflower Fried Rice with Crispy Tofu into a shallow bowl and top with extra tofu crumbles, sliced green onions, or a sprinkle of sesame seeds. Meanwhile, if you’re hosting a casual gathering, serve it family-style in a large skillet or colorful platter to encourage sharing. This dish shines at brunch alongside other plant-based favorites, but it also makes a satisfying weeknight dinner when you want something light yet flavorful. To elevate the visual appeal, add a lime wedge on the side for a bright, citrusy finish.
h-it">What goes well with it
Pair Cauliflower Fried Rice with Crispy Tofu with a tangy mango avocado salad for a refreshing contrast to the savory flavors. Alternatively, try it with a side of spicy sriracha mayo for dipping—the creamy heat balances the dish’s subtle sweetness. For drinks, a crisp white wine or a zesty ginger lemonade complements the meal perfectly. If you’re craving more plant-based inspiration, check out our Vegan Buddha Bowl or Garlic Miso Soup to round out your menu.
Is cauliflower fried rice with crispy tofu healthy?
Yes, cauliflower fried rice with crispy tofu is a nutritious and low-carb alternative to traditional fried rice. The cauliflower provides fiber and vitamins, while tofu adds plant-based protein. This dish is also easily customizable with extra veggies for added nutrients.
ank-math-faq-item">
How do you make tofu crispy for cauliflower fried rice?
For perfectly crispy tofu, press it to remove excess moisture, then cube and toss with cornstarch before baking or pan-frying. The cornstarch creates a golden crust that adds great texture to your cauliflower fried rice with crispy tofu. Cook until all sides are evenly browned for best results.
Can I use frozen cauliflower rice for this recipe?
Absolutely! Frozen cauliflower rice works well for cauliflower fried rice with crispy tofu – just thaw and squeeze out excess water first. This prevents your dish from becoming soggy and helps achieve that authentic fried rice texture when cooked.
What sauces go well with cauliflower fried rice and crispy tofu?
Tamari, coconut aminos, or a spicy sriracha mayo complement cauliflower fried rice with crispy tofu beautifully. For authentic flavor, try a mix of sesame oil, rice vinegar, and a touch of maple syrup to balance the savory tofu and mild cauliflower.
div>
Best Elote Style Quinoa Salad Recipe
Introduction
If you love the bold, creamy flavors of Mexican street corn but crave something lighter and packed with protein, you’ll adore this Elote Style Quinoa Salad. Imagine sweet corn, tangy lime, and smoky chili powder mingling with fluffy quinoa—it’s a fiesta in every bite! Whether you need a vibrant side dish for your next BBQ or a satisfying lunch that won’t weigh you down, this recipe delivers. Best of all, it comes together in minutes, proving that healthy eating doesn’t have to be boring. Let’s dive into why this dish deserves a permanent spot in your meal rotation.
Elote Style Quinoa Salad takes inspiration from elote, the iconic Mexican street food where grilled corn gets slathered in creamy mayo, cheese, and spices. Here, we swap the cob for nutrient-dense quinoa, making it gluten-free, protein-rich, and perfect for meal prep. The dish balances smoky, tangy, and sweet flavors with ingredients like cotija cheese, fresh cilantro, and a zesty lime crema. Unlike traditional elote, this salad keeps well in the fridge, so you can enjoy it for days. It’s also versatile—serve it warm, cold, or as a filling for tacos or wraps.
This recipe fits perfectly with our blog’s mission to make wholesome eating exciting and accessible. If you’re a fan of bold flavors, you’ll love our Spicy Mango Avocado Salad, which shares the same vibrant spirit. For more quinoa inspiration, check out our Mediterranean Quinoa Bowl, another reader favorite. Whether you’re a busy parent, a fitness enthusiast, or just someone who loves good food, Elote Style Quinoa Salad is a game-changer. It’s proof that healthy meals can be indulgent, flavorful, and downright fun.
Why I Love This Recipe
Elote Style Quinoa Salad holds a special place in my heart because it reminds me of summer nights at my local farmers’ market, where vendors serve steaming ears of elote wrapped in paper. I wanted to capture that magic in a dish I could eat year-round, and quinoa became the perfect canvas. Every time I make it, the aroma of chili powder and lime takes me back to those warm evenings. Plus, it’s a hit at potlucks—my friends always ask for the recipe. For me, this salad isn’t just food; it’s a celebration of flavor, nostalgia, and simplicity.
Health and Nutrition
Why it’s good for your body
Elote Style Quinoa Salad packs a powerful nutritional punch while delivering bold flavors. First, quinoa serves as a complete protein, providing all nine essential amino acids your body needs. Additionally, this dish includes fiber-rich ingredients like black beans and corn, which support digestion and keep you full longer. Because it’s loaded with fresh vegetables, Elote Style Quinoa Salad also delivers a hefty dose of vitamins C and A, boosting immunity and skin health.
Moreover, the healthy fats from avocado and olive oil promote heart health and help your body absorb fat-soluble nutrients. Unlike traditional elote, this quinoa-based version cuts down on heavy dairy while maintaining that creamy, satisfying texture. Furthermore, the spices and lime juice not only enhance flavor but also offer anti-inflammatory benefits. Whether you need a post-workout meal or a nutrient-dense lunch, Elote Style Quinoa Salad fuels your body efficiently.
Finally, this dish balances macronutrients smartly, making it a great choice for sustained energy. The combination of complex carbs, plant-based protein, and healthy fats ensures steady blood sugar levels. With every bite, Elote Style Quinoa Salad proves that eating well doesn’t mean sacrificing taste.
How it fits in a healthy lifestyle
Elote Style Quinoa Salad fits seamlessly into a balanced diet, whether you’re gluten-free, plant-based, or just aiming for cleaner eating. Since quinoa is naturally gluten-free, this dish works perfectly for those with sensitivities or celiac disease. It’s also a fantastic option for meal prep, as it stays fresh and flavorful for days in the fridge.
If you’re focused on heart health, the unsaturated fats from avocado and olive oil help lower bad cholesterol levels. For anyone tracking macros, Elote Style Quinoa Salad offers a high-protein, high-fiber meal that keeps cravings at bay. Pair it with a light soup or grilled chicken for an even more satisfying dinner. Looking for more gluten-free inspiration? Check out our gluten-free meal ideas to keep your menu varied and exciting.
Busy weeknights call for quick, nutritious options, and this salad delivers. It’s as easy to assemble as it is delicious, making healthy eating effortless. For more tips on balancing convenience and nutrition, explore our guide to quick healthy dinners. No matter your dietary goals, Elote Style Quinoa Salad helps you stay on track without compromise.
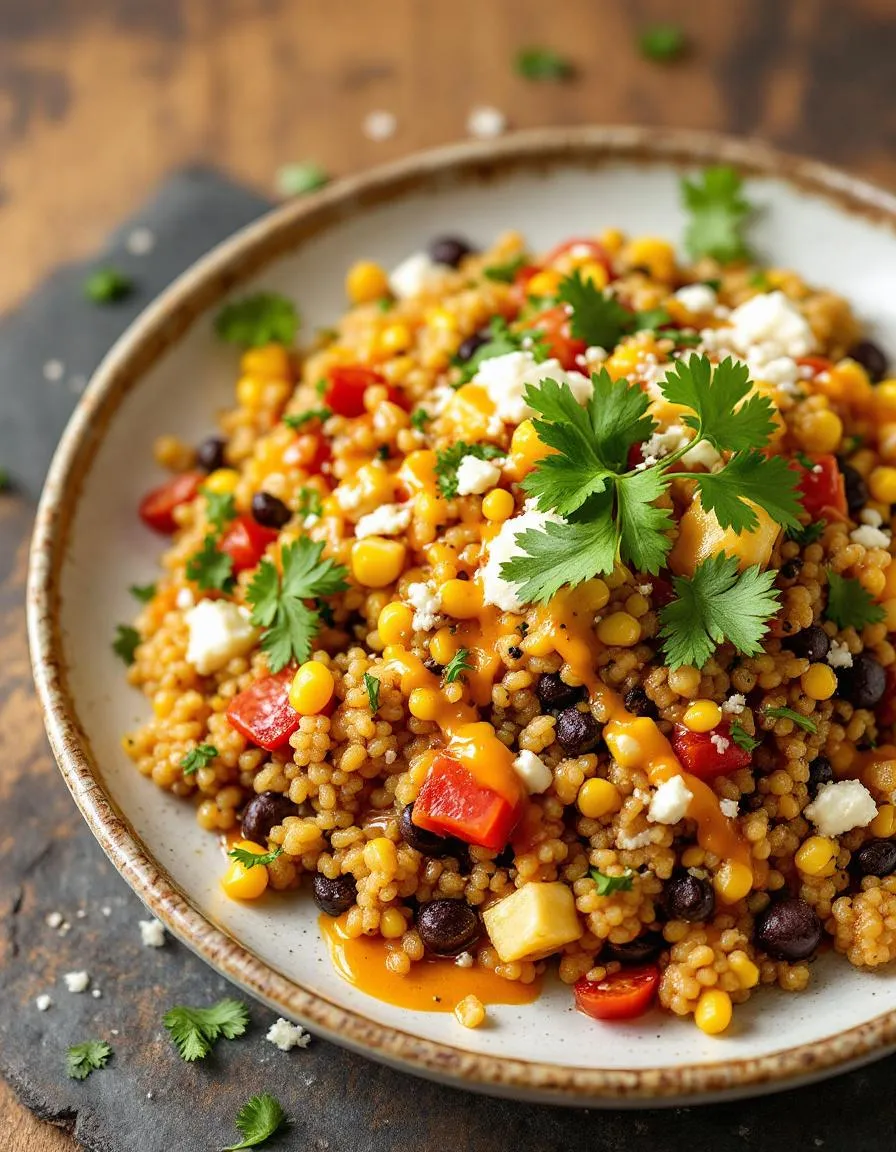
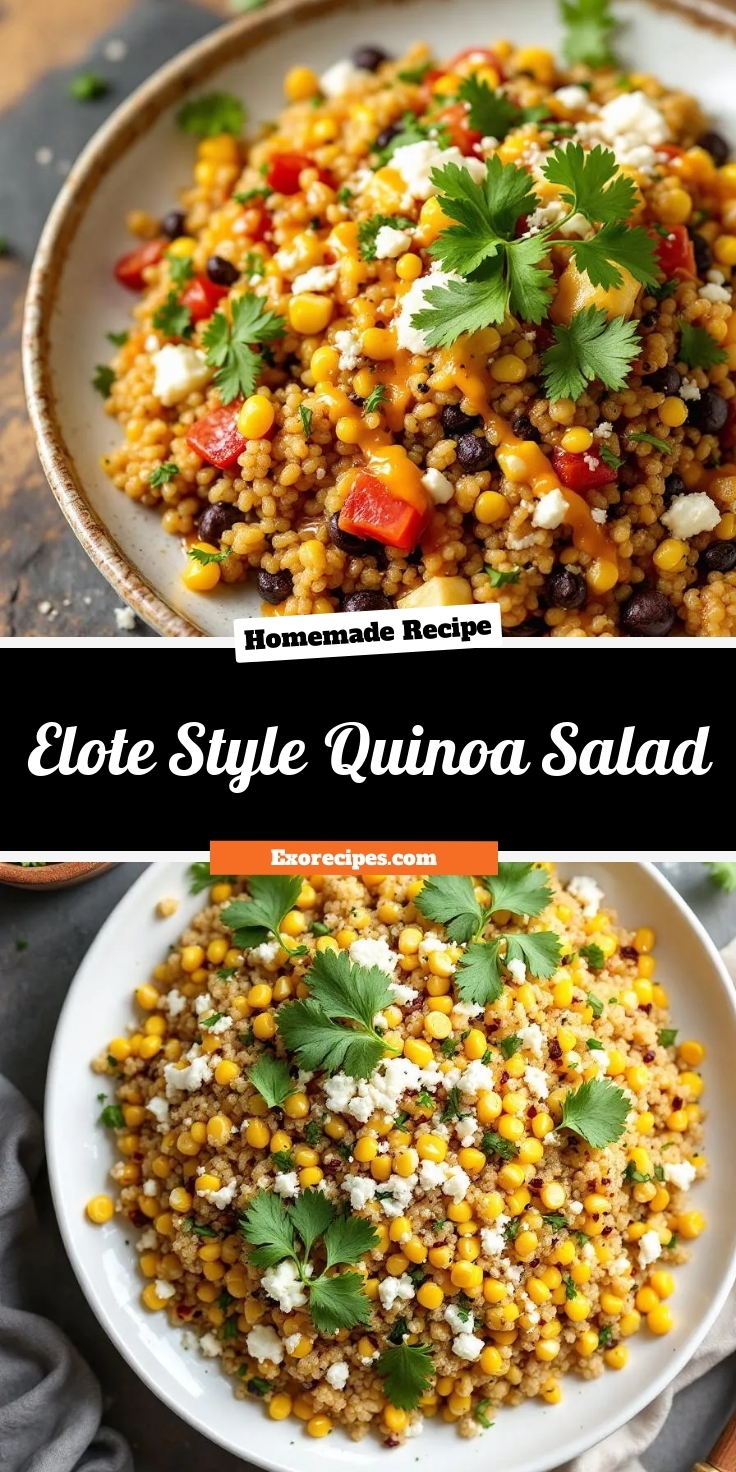
A fresh and flavorful quinoa salad inspired by Mexican street corn, packed with bold flavors and textures.
Ingredients
Scale
For the Crust:
1 cup quinoa, rinsed
2 cups water
1 cup corn kernels (fresh or frozen)
1/2 cup crumbled cotija cheese
1/4 cup mayonnaise
1/4 cup sour cream
1 lime, juiced
1 teaspoon chili powder
1/2 teaspoon smoked paprika
1/4 cup chopped cilantro
1 small red onion, finely diced
1 jalapeño, seeded and minced
Salt and pepper to taste
Instructions
1. Prepare the Crust:
In a medium saucepan, combine quinoa and water. Bring to a boil, then reduce heat to low, cover, and simmer for 15 minutes or until water is absorbed. Fluff with a fork and let cool.
In a large bowl, whisk together mayonnaise, sour cream, lime juice, chili powder, smoked paprika, salt, and pepper.
Add cooked quinoa, corn, cotija cheese, red onion, jalapeño, and cilantro to the bowl. Toss until well combined.
Refrigerate for at least 30 minutes before serving to allow flavors to meld.
Garnish with extra cotija cheese and cilantro if desired.
Notes
You can customize the seasonings to taste.
“`html
s-dish">How to Prepare This Dish
Steps and time-saving tips
Start by rinsing the quinoa thoroughly under cold water to remove any bitterness. Then, cook it in vegetable broth for extra flavor—this simple swap makes a big difference. While the quinoa simmers, char the corn in a hot skillet for that authentic elote smokiness. Let it cool slightly before mixing it with the cooked quinoa. Meanwhile, whisk together the creamy dressing using mayo, lime juice, chili powder, and a pinch of salt. Fold the dressing into the quinoa and corn mixture gently to avoid mushiness. Crumble cotija cheese over the top and sprinkle with chopped cilantro for freshness. If you’re short on time, use pre-cooked quinoa or frozen charred corn from your freezer stash. For a crisp texture, chill the Elote Style Quinoa Salad for 20 minutes before serving. This dish tastes even better the next day, so feel free to prep it ahead.
Mistakes I’ve made and learned from
I once overcooked the quinoa, turning my Elote Style Quinoa Salad into a sticky mess. Now I set a timer and fluff it immediately after cooking. Another time, I skipped rinsing the quinoa, and the bitter taste ruined the whole batch. Lesson learned! If you’re new to cooking quinoa, check out my quinoa cooking guide for foolproof tips. Also, don’t drown the salad in dressing—start with half and add more as needed. For more flavor-balancing tricks, my dressing ratios post breaks it down perfectly. Trust me, a light hand with the mayo lets the other ingredients shine.
Elote Style Quinoa Salad takes inspiration from the vibrant street food culture of Mexico, where elote—grilled corn slathered in creamy, tangy toppings—reigns supreme. Imagine bustling markets filled with the smoky aroma of charred corn, a dish so beloved it’s earned its own fan base. This salad captures that same spirit but swaps the cob for protein-packed quinoa, making it a hearty yet fresh twist on a classic.
Across Mexico, families put their own spin on elote, some adding extra chili powder or a squeeze of lime. Similarly, Elote Style Quinoa Salad adapts easily. In coastal regions, cooks might toss in shrimp for a pescatarian version, while others fold in black beans for extra texture. My aunt, for instance, always adds diced avocado because, as she says, “Everything’s better with avocado.” Whether served warm or chilled, this dish bridges tradition and creativity.
Beyond borders, the con
cept thrives. In the American Southwest, you’ll find versions with roasted poblanos or cotija cheese crumbles. Meanwhile, health-conscious kitchens might lighten the dressing with Greek yogurt instead of mayo. No matter the variation, Elote Style Quinoa Salad keeps its roots alive while inviting personal flair.
How it fits in today’s cooking
Elote Style Quinoa Salad isn’t just a nostalgic nod to street food—it’s a modern kitchen staple. Meal preppers love it for its make-ahead convenience, and plant-based eaters celebrate its protein richness. Plus, it’s a star at summer potlucks, pairing perfectly with grilled favorites like these grilled vegetable skewers.
Today’s cooks also tweak it for dietary needs. Some swap quinoa for cauliflower rice, while others amp up the heat with jalapeños. It’s even found a place in holiday spreads, offering a lighter counterbalance to richer dishes. For a cozy twist, try serving it warm alongside this creamy cilantro lime dressing. Whether you’re craving comfort or a quick lunch, Elote Style Quinoa Salad fits effortlessly into today’s rhythms.
>Taste and Texture
What makes it delicious
Elote Style Quinoa Salad bursts with bold, vibrant flavors and satisfying textures. The nutty, slightly chewy quinoa soaks up the creamy, tangy dressing, while sweet corn adds a juicy crunch. Fresh lime zest brightens every bite, and a sprinkle of chili powder brings just the right amount of smoky heat. Meanwhile, crumbled cotija cheese melts into the mix, offering salty richness that balances the dish. The aroma alone—a mix of toasted cumin, garlic, and citrus—will make your mouth water. Whether served warm or chilled, Elote Style Quinoa Salad delivers a fiesta of flavors in every forkful.
Boosting the flavor
For an extra flavor kick, try swapping cotija for feta or adding diced avocado for buttery creaminess. A drizzle of chipotle lime sauce amps up the smokiness, while toasted pepitas add a nutty crunch. If you love heat, toss in pickled jalapeños or a dash of hot sauce. For a fresh twist, mix in chopped cilantro or a squeeze of orange juice. Pair it with grilled Mexican street corn for a full elote-inspired feast. With these tweaks, your Elote Style Quinoa Salad will taste even more irresistible.
Tips for Success
Best practices for results
Always rinse your quinoa thoroughly before cooking to remove any bitterness. For the best Elote Style Quinoa Salad, cook the quinoa in vegetable broth instead of water to boost flavor. Meanwhile, char the corn lightly for a smoky touch, but avoid overcooking it to keep a crisp texture. Finally, let the salad chill for at least 30 minutes before serving so the flavors meld perfectly.
Mistakes to avoid
One common mistake is skipping the lime juice, which brightens the Elote Style Quinoa Salad. Instead, squeeze fresh lime right before serving for maximum zing. Another error is overdressing the salad, which can make it soggy. For the right balance, check out our guide on perfect dressing ratios. Also, if your quinoa turns out mushy, you might be using too much liquid. Follow our tips for fluffy quinoa every time to avoid this issue.
Serving and Pairing Suggestions
How to serve this dish
For a vibrant presentation, serve Elote Style Quinoa Salad in a large, colorful bowl or on individual plates with a sprinkle of fresh cilantro and crumbled cotija cheese on top. Alternatively, scoop it into crisp lettuce cups for a fun, handheld option. This dish shines at summer barbecues, potlucks, or even as a bright side for taco night. To make it extra inviting, add a lime wedge on the side for a fresh squeeze before digging in.
h-it">What goes well with it
Pair Elote Style Quinoa Salad with grilled proteins like citrus-marinated chicken or smoky shrimp skewers for a satisfying meal. The bold flavors also balance well with a light, refreshing drink such as a mango mint agua fresca or a chilled hibiscus tea. For a heartier spread, try serving it alongside black bean avocado tostadas, which add a satisfying crunch and creamy contrast to every bite.
What is Elote Style Quinoa Salad?
Elote Style Quinoa Salad is a fresh, flavorful twist on Mexican street corn (elote), combining cooked quinoa with classic elote ingredients like cotija cheese, lime, chili powder, and cilantro. This protein-packed salad offers the same smoky, tangy flavors of traditional elote but in a lighter, grain-based dish. It’s perfect as a side or a standalone meal.
ank-math-faq-item">
Can I make Elote Style Quinoa Salad ahead of time?
Yes! Elote Style Quinoa Salad holds up well in the fridge for 2-3 days, making it a great meal-prep option. For the best texture, add fresh toppings like avocado or extra lime juice just before serving. The flavors meld beautifully over time, enhancing the dish’s bold taste.
Is Elote Style Quinoa Salad gluten-free?
Absolutely! Elote Style Quinoa Salad is naturally gluten-free, as quinoa is a safe grain for gluten-sensitive diets. Just double-check that any added seasonings or toppings (like pre-packaged chili powder) are certified gluten-free if you have severe allergies.
What protein pairs well with Elote Style Quinoa Salad?
Grilled chicken, shrimp, or black beans complement Elote Style Quinoa Salad perfectly, adding extra protein while keeping the Mexican-inspired flavors. For a vegetarian option, try crispy tofu or roasted chickpeas. The salad’s versatility makes it easy to customize for any meal.
div>
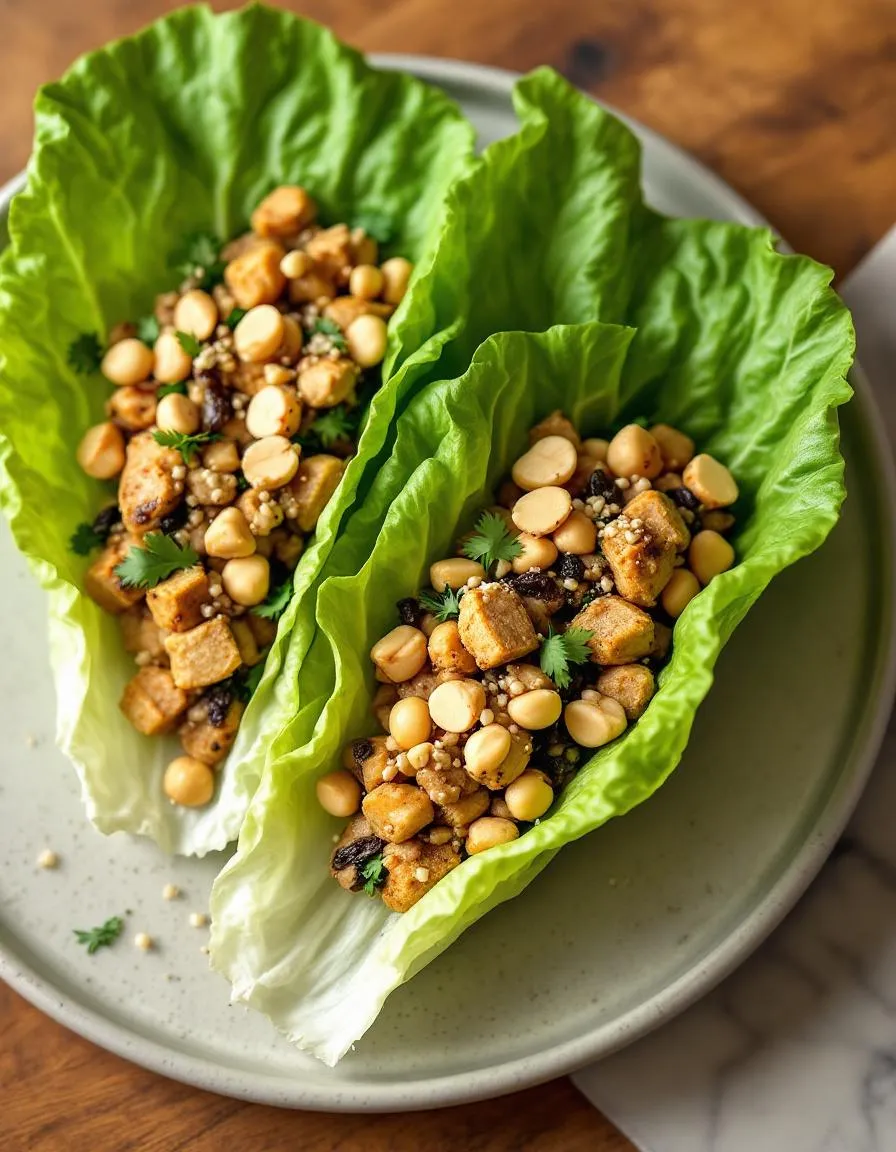
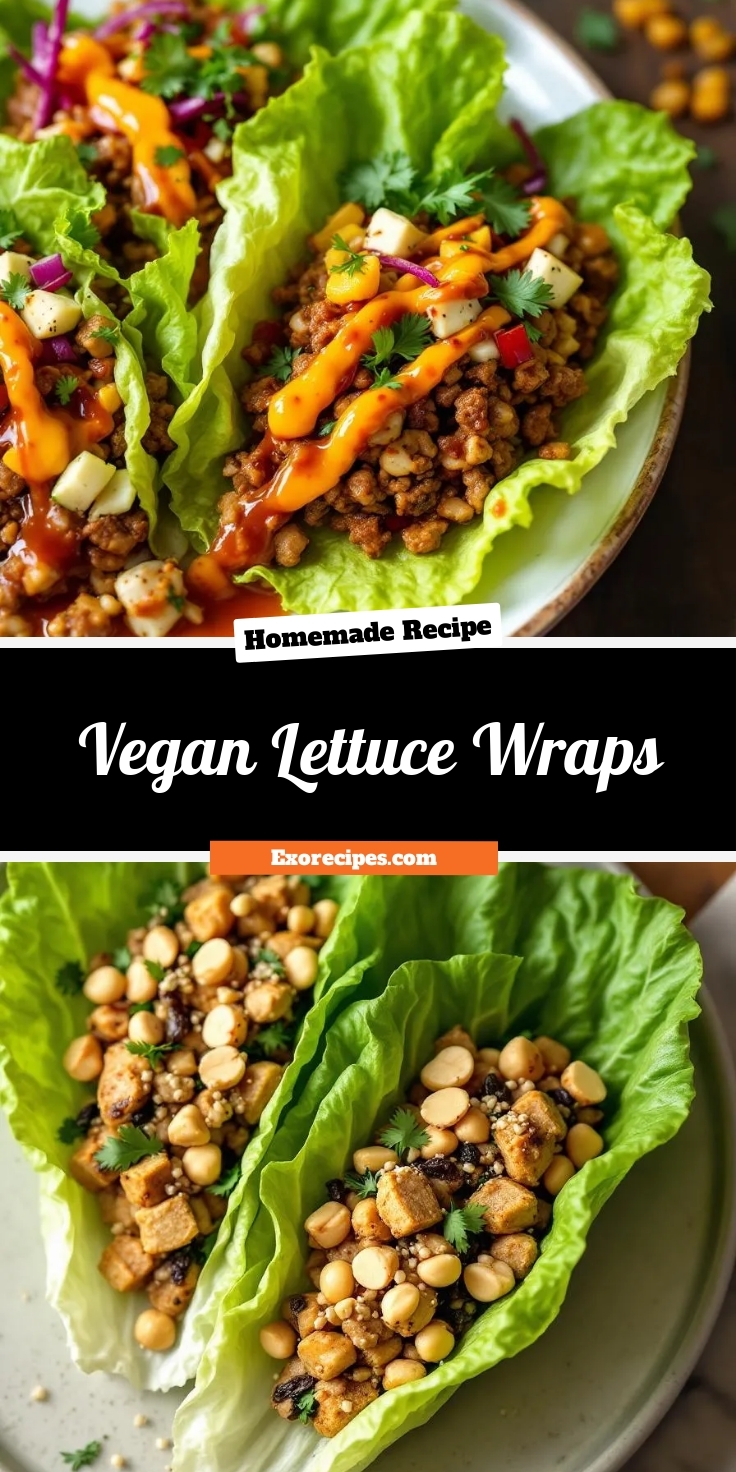
Best Vegan Lettuce Wraps – Easy & Flavorful
Introduction
Craving something light, fresh, and packed with flavor? These Vegan Lettuce Wraps deliver exactly that—a satisfying crunch, vibrant ingredients, and a meal that feels as good as it tastes. Whether you need a quick lunch, a crowd-pleasing appetizer, or a guilt-free dinner, this recipe proves that plant-based eating can be anything but boring. Plus, it’s so easy to customize, even picky eaters will love it.
Vegan Lettuce Wraps are a versatile dish that replaces traditional wraps with crisp lettuce leaves, offering a low-carb, nutrient-dense alternative. They typically feature a savory filling made from ingredients like tofu, mushrooms, or lentils, seasoned with umami-rich sauces and fresh herbs. What makes them special? They’re not just healthy; they’re incredibly fun to eat. The contrast of cool, crunchy lettuce with warm, flavorful fillings creates a texture and taste experience that keeps you coming back for more.
This recipe aligns perfectly with our blog’s mission to make plant-based cooking accessible and exciting. Whether you’re a seasoned vegan or just exploring meatless meals, these wraps fit seamlessly into any lifestyle. They’re also ideal for meal prep—just store the filling separately and assemble when ready. If you’re looking for more easy vegan ideas, check out our vegan meal prep guide or these quick plant-based dinners for busy weeknights.
Why I Love This Recipe
Vegan Lettuce Wraps remind me of family gatherings where everyone customized their plates with fresh toppings and shared stories over bites. I love how adaptable they are—swap the protein, adjust the spice level, or add extra veggies based on what’s in the fridge. Even better, they’re a hit with kids and adults alike, making them my go-to when I want a meal that’s both nourishing and nostalgic. Every time I make them, I’m reminded that simple ingredients can create the most memorable flavors.
Health and Nutrition
Why it’s good for your body
Vegan Lettuce Wraps pack a powerful nutritional punch while keeping flavors fresh and vibrant. First, they load up on fiber thanks to crisp lettuce and plant-based fillings, which support digestion and keep you full longer. Additionally, the mix of vegetables and legumes often found in Vegan Lettuce Wraps delivers essential vitamins like A, C, and K, boosting immunity and skin health.
Moreover, these wraps skip heavy oils and processed ingredients, making them naturally low in calories yet high in satisfaction. The protein from ingredients like tofu or lentils helps maintain muscle health, especially if you follow a plant-based diet. Meanwhile, the absence of animal products means Vegan Lettuce Wraps often contain heart-healthy fats from sources like avocado or nuts.
Finally, because they rely on whole, unprocessed foods, Vegan Lettuce Wraps reduce inflammation and provide steady energy. Whether you enjoy them as a light lunch or a snack, they align perfectly with clean eating goals. Transitioning to nutrient-dense meals like this can make a noticeable difference in how you feel daily.
How it fits in a healthy lifestyle
Vegan Lettuce Wraps fit effortlessly into a balanced diet, whether you focus on weight management, heart health, or simply eating more plants. Their low-carb profile makes them ideal for gluten-free or keto-friendly lifestyles, while the high fiber content supports gut health. If you need more protein, simply add extra tofu or tempeh to keep meals satisfying.
For meal preppers, Vegan Lettuce Wraps are a dream—quick to assemble and easy to customize. Pair them with a vegan meal prep plan for effortless weekday lunches. They also work well as part of a plant-based diet, helping you hit daily veggie goals without sacrificing flavor. Whether you’re fueling workouts or just craving something light, these wraps adapt to your needs seamlessly.
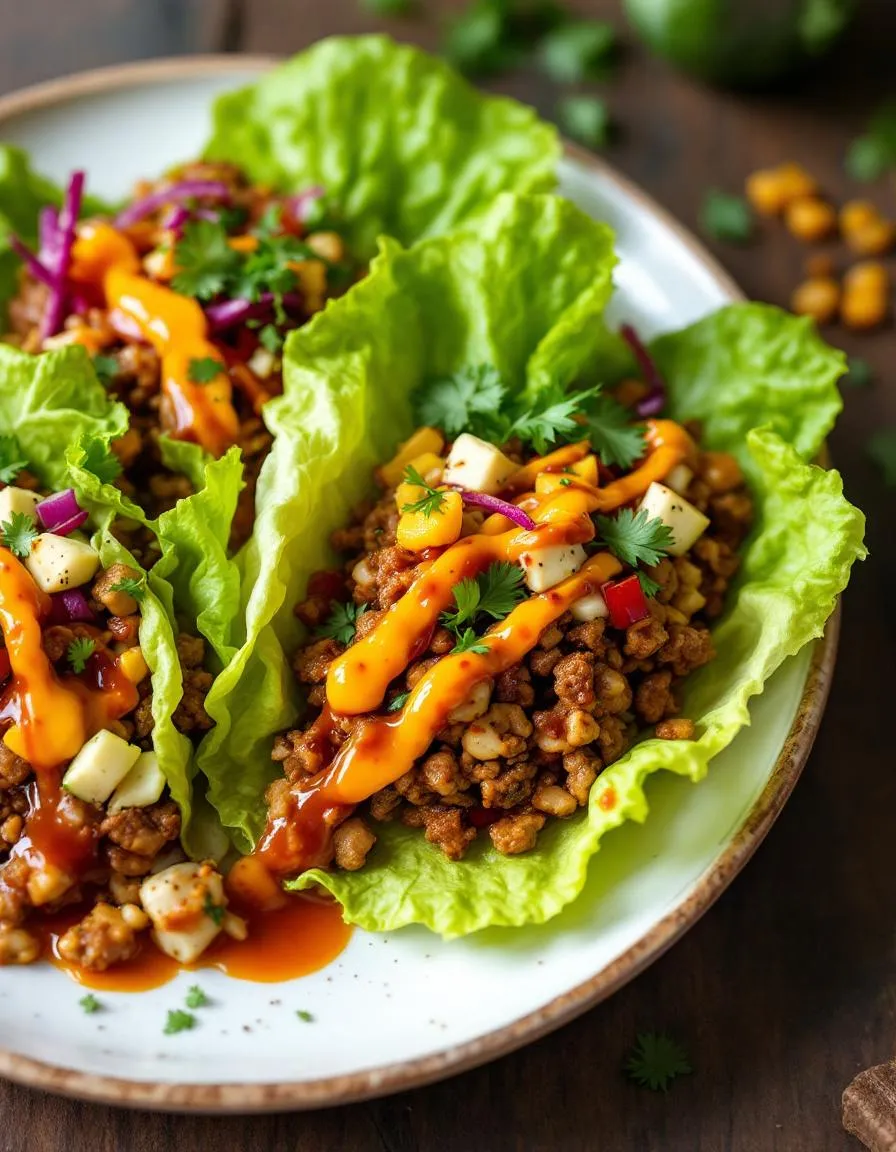
A light and refreshing plant-based version of classic lettuce wraps, packed with flavor and crunch.
Ingredients
Scale
For the Crust:
1 tbsp olive oil
1 cup diced mushrooms
1 cup diced tofu
1/2 cup diced water chestnuts
1/4 cup diced green onions
2 tbsp soy sauce
1 tbsp hoisin sauce
1 tsp minced garlic
1 tsp minced ginger
8 large butter lettuce leaves
1/4 cup chopped peanuts (optional)
Instructions
1. Prepare the Crust:
Heat olive oil in a large skillet over medium heat.
Add mushrooms, tofu, water chestnuts, green onions, garlic, and ginger. Cook for 5-7 minutes until softened.
Stir in soy sauce and hoisin sauce. Cook for another 2 minutes.
Spoon the mixture into lettuce leaves.
Garnish with chopped peanuts if desired.
Notes
You can customize the seasonings to taste.
How to Prepare This Dish
Steps and time-saving tips
Start by washing and drying your lettuce leaves thoroughly, then set them aside to crisp up in the fridge while you prep the filling. Heat a skillet over medium and sauté diced onions until translucent, about 3 minutes. Add minced garlic and grated carrots, stirring for another 2 minutes until fragrant. Crumble in your favorite plant-based protein—like tofu or tempeh—and cook until lightly browned. Meanwhile, whisk together soy sauce, rice vinegar, maple syrup, and a pinch of red pepper flakes for a quick sauce. Pour it over the skillet mixture, folding everything together until well-coated. Let it simmer for 5 minutes to soak up the flavors. For a time-saving hack, use pre-shredded coleslaw mix instead of chopping veggies. Spoon the warm filling into the chilled lettuce leaves, then top with chopped peanuts or sesame seeds for crunch. Serve immediately, or let guests assemble their own Vegan Lettuce Wraps for a fun, interactive meal.
and-learned-from">Mistakes I’ve made and learned from
Early on, I’d overcrowd the skillet, which steamed the filling instead of giving it that perfect caramelized texture. Now I cook in batches for even browning. Another blunder? Using soggy lettuce—it made the wraps fall apart before the first bite. After trial and error, I learned to pat the leaves dry and chill them, just like I do for my Crispy Vegan Spring Rolls. And if your filling turns out too salty (been there!), balance it with a squeeze of lime or a dollop of my go-to Creamy Avocado Dressing. Trust me, these small tweaks make all the difference.
Cultural Connection and Variations
Where this recipe comes from
Vegan Lettuce Wraps trace their roots to Asian cuisine, particularly Chinese and Thai traditions, where crisp lettuce cups cradle flavorful fillings. Originally, these wraps featured minced meat, but plant-based adaptations now celebrate the same vibrant textures and spices. In Thailand, you might find them stuffed with lemongrass-infused tofu, while Chinese versions often highlight water chestnuts for crunch. Meanwhile, families across the U.S. put their own spin on Vegan Lettuce Wraps, swapping ingredients based on seasonal produce or pantry staples.
My grandmother, for ins
tance, added shredded carrots and a dash of maple syrup to her filling, creating a sweet-savory twist. Globally, cooks tweak the dish too—some Korean variations include gochujang for heat, while Mexican-inspired versions might use black beans and avocado. No matter the adaptation, Vegan Lettuce Wraps always deliver a fresh, customizable meal that bridges cultures. They’re perfect for gatherings, letting everyone build their own bite just the way they like it.
How it fits in today’s cooking
Today, Vegan Lettuce Wraps shine as a go-to for health-conscious eaters and busy home cooks. They fit seamlessly into meal-prep routines, and their light yet satisfying nature makes them ideal for summer picnics or quick weeknight dinners. Many modern cooks pair them with vegan meal-prep ideas to streamline lunches, while others serve them as appetizers during holiday feasts. Their versatility keeps them relevant—swap the filling with seasonal veggies, and you’ve got a year-round staple.
Moreover, Vegan Lettuce Wraps align perfectly with plant-based trends, offering a guilt-free way to enjoy bold flavors. Families love how the recipe encourages creativity, much like experimenting with veganized comfort food. Whether you’re craving something light or need a crowd-pleaser, these wraps deliver every time. They’re proof that tradition and innovation can coexist deliciously on your plate.
>Taste and Texture
What makes it delicious
Vegan Lettuce Wraps deliver a vibrant burst of flavors and textures in every bite. The crisp, cool lettuce cups contrast beautifully with the savory, umami-rich filling, which often features tender mushrooms, crunchy water chestnuts, and aromatic garlic. A tangy-sweet sauce ties everything together, while fresh herbs like cilantro add a bright, fragrant finish. Each mouthful offers a satisfying mix of chewy, crunchy, and tender elements, making Vegan Lettuce Wraps irresistibly fresh and light yet deeply flavorful.
Boosting the flavor
Elevate your Vegan Lettuce Wraps with a few easy tweaks. For extra depth, try marinating the mushrooms in a splash of tamari or adding a sprinkle of toasted sesame seeds for nutty crunch. A drizzle of spicy peanut sauce or a squeeze of lime brightens the dish instantly. If you love heat, toss in minced jalapeños or a dash of sriracha. For a creamier twist, top with avocado lime dressing—its richness balances the wraps’ freshness perfectly. Experiment with textures too by adding shredded carrots or crushed peanuts for extra bite.
Tips for Success
Best practices for results
Always pat your lettuce leaves dry before assembling Vegan Lettuce Wraps to prevent sogginess. For the best texture, chop your filling ingredients evenly so every bite has balanced flavor. Additionally, warm your filling slightly before serving to enhance the aromas and make the wraps more satisfying. Finally, serve Vegan Lettuce Wraps immediately after assembling to keep the lettuce crisp and fresh.
Mistakes to avoid
Avoid overfilling your Vegan Lettuce Wraps, as this can cause tearing and make them messy to eat. Instead, aim for a moderate portion that lets you fold the lettuce neatly. Also, skip iceberg lettuce if you want sturdier wraps—opt for butter lettuce or romaine for better hold. For more tips on choosing the right greens, check out our guide to choosing lettuce for wraps. Another common mistake is under-seasoning the filling, so taste and adjust spices as you cook. If you need inspiration, our vegan seasoning combos can help you nail the flavor every time.
Serving and Pairing Suggestions
How to serve this dish
For a vibrant presentation, arrange Vegan Lettuce Wraps on a large platter with colorful garnishes like sliced radishes, shredded carrots, and fresh cilantro. Alternatively, set up a DIY wrap station for gatherings, letting guests customize their own with toppings and sauces. These wraps shine at casual lunches, picnics, or even as a light appetizer for dinner parties. To elevate the visual appeal, serve them in butter lettuce cups or alongside a drizzle of spicy peanut sauce.
h-it">What goes well with it
Pair Vegan Lettuce Wraps with a refreshing cucumber avocado salad for a crisp contrast to the savory filling. For a heartier meal, try serving them with coconut ginger rice, which balances the wraps’ bold flavors. Meanwhile, a tangy mango limeade or chilled jasmine tea makes the perfect drink pairing, cutting through the richness. If you love complementary dips, our creamy tahini dressing or zesty garlic aioli add extra depth to every bite.
What are the best fillings for vegan lettuce wraps?
The best fillings for vegan lettuce wraps include crumbled tofu, sautéed mushrooms, shredded carrots, and avocado. For extra flavor, add a peanut sauce or spicy sriracha mayo. Vegan lettuce wraps work well with any plant-based protein or crunchy veggies.
ank-math-faq-item">
How do you keep lettuce wraps from falling apart?
Choose sturdy lettuce like butter lettuce or romaine to prevent vegan lettuce wraps from falling apart. Pat the leaves dry before filling, and avoid overstuffing them. Serving them chilled also helps maintain their structure.
Are vegan lettuce wraps healthy?
Yes, vegan lettuce wraps are a healthy choice since they’re low in calories and packed with nutrients. The lettuce replaces high-carb wraps, while plant-based fillings provide protein and fiber. They’re perfect for a light, guilt-free meal.
Can you meal prep vegan lettuce wraps?
Yes! Prep the fillings ahead and store them separately from the lettuce leaves. Assemble vegan lettuce wraps just before eating to keep them fresh. This makes them a great option for quick lunches or dinners.
div>
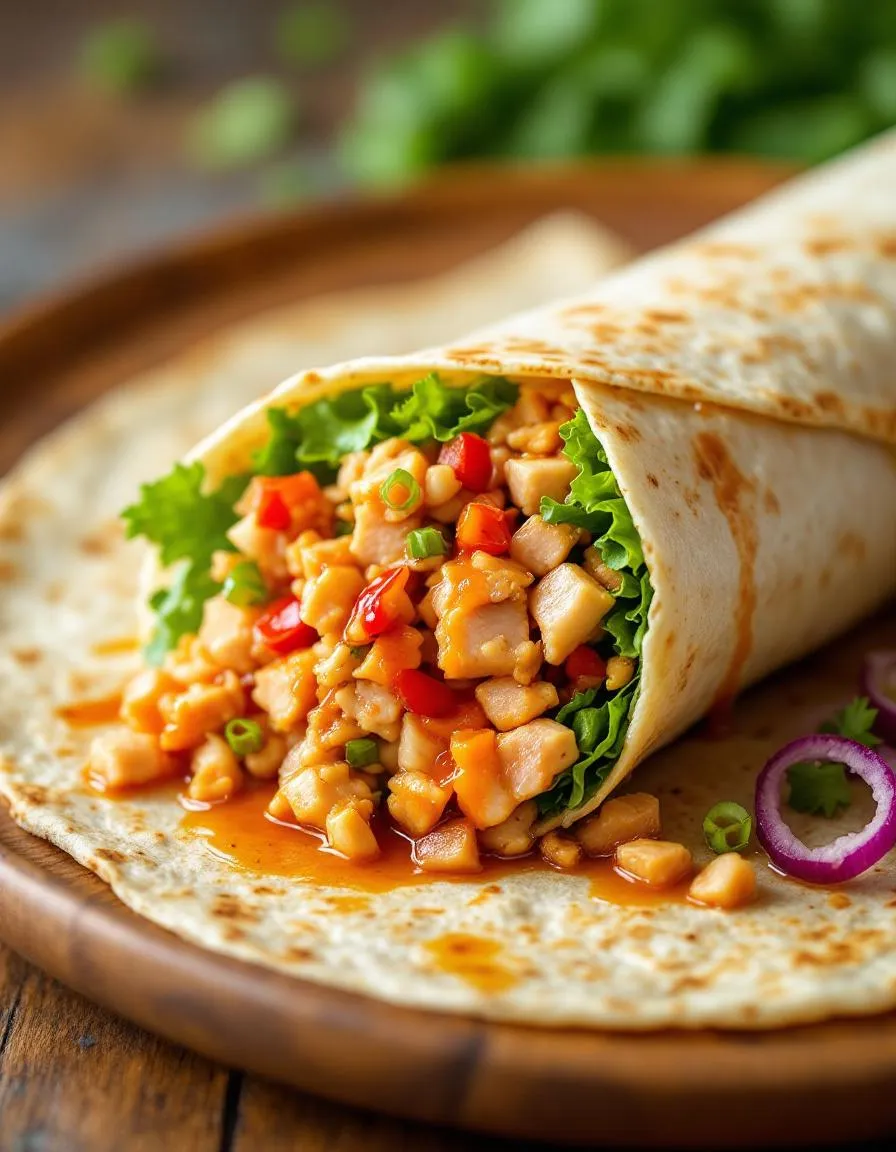
Easy Kimchi Tuna Salad Wrap Recipe
Introduction
Ever crave a lunch that’s bold, healthy, and ready in minutes? Meet your new obsession: the Kimchi Tuna Salad Wrap. This vibrant dish packs a punch of umami, crunch, and creamy texture—all wrapped in a handy tortilla. Whether you’re meal-prepping for a busy week or need a quick bite that doesn’t skimp on flavor, this recipe delivers. Plus, it’s a genius way to use pantry staples like canned tuna while adding a probiotic kick from kimchi. Trust me, after one bite, you’ll wonder how you ever settled for boring lunches.
The Kimchi Tuna Salad Wrap is a fusion of Korean and Western flavors, combining spicy, fermented kimchi with protein-rich tuna and crisp veggies. Unlike traditional tuna salad, this version skips the mayo-heavy base and instead leans on kimchi’s tangy brine for moisture and depth. The result? A lighter yet more exciting dish that’s perfect for warm days, office lunches, or post-workout fuel. What makes it special is its versatility. You can tweak the heat level, swap in Greek yogurt for extra creaminess, or even use lettuce wraps for a low-carb twist. For more creative lunch ideas, check out our meal prep hacks or explore kimchi recipes to level up your ferment game. Fitting our blog’s tone, this recipe balances simplicity with bold flavors—proof that eating well doesn’t mean sacrificing taste or time.
Why I Love This Recipe
This Kimchi Tuna Salad Wrap reminds me of my college days, when I’d experiment with kimchi to stretch my grocery budget. Back then, I loved how its fermented zing transformed even the simplest ingredients. Now, as a busy professional, I appreciate how this wrap comes together in under 10 minutes yet feels like a treat. The spicy crunch of kimchi against the creamy tuna hits all the right notes, and it’s become my go-to for picnics and lazy dinners alike. Most importantly, it’s a recipe that adapts to my mood—sometimes I’ll add avocado or sriracha, but it’s always satisfying.
Health and Nutrition
Why it’s good for your body
Kimchi Tuna Salad Wrap packs a powerful nutritional punch while delighting your taste buds. First, kimchi brings gut-friendly probiotics that support digestion and boost immunity. Meanwhile, tuna delivers lean protein to keep you full and energized. Together, they create a balanced meal that fuels your body efficiently.
Additionally, kimchi offers antioxidants that fight inflammation, while tuna provides heart-healthy omega-3 fatty acids. These nutrients work synergistically to promote overall wellness. The wrap also includes fresh veggies, adding fiber and essential vitamins to the mix. As a result, Kimchi Tuna Salad Wrap becomes a smart choice for anyone seeking both flavor and nourishment.
Moreover, this dish is low in refined carbs, making it a great option for those watching their sugar intake. The combination of protein, healthy fats, and fiber ensures steady energy levels. Whether you enjoy it for lunch or a light dinner, Kimchi Tuna Salad Wrap keeps you satisfied without weighing you down.
How it fits in a healthy lifestyle
Kimchi Tuna Salad Wrap effortlessly fits into various dietary goals. For gluten-free eaters, simply swap the tortilla for a gluten-free wrap or lettuce leaves. High-protein seekers will appreciate the tuna’s muscle-building benefits, especially when paired with a side like our protein-packed snacks for an extra boost.
Heart-healthy eaters can relish the omega-3s from tuna and the anti-inflammatory properties of kimchi. Plus, the dish is light enough for active lifestyles but substantial enough to curb cravings. If you’re meal prepping, Kimchi Tuna Salad Wrap stores well and pairs perfectly with our quick healthy sides for a complete, balanced meal. Whether you’re fueling up post-workout or need a speedy lunch, this wrap adapts to your routine seamlessly.
A spicy and tangy tuna salad wrap with the bold flavors of kimchi, perfect for a quick and healthy lunch.
Ingredients
Scale
For the Crust:
1 can (5 oz) tuna, drained
1/2 cup chopped kimchi
2 tbsp mayonnaise
1 tsp sesame oil
1 tsp soy sauce
1/2 tsp sugar
2 large flour tortillas
1 cup mixed greens
1/4 cup shredded carrots
Instructions
1. Prepare the Crust:
In a bowl, mix the tuna, kimchi, mayonnaise, sesame oil, soy sauce, and sugar until well combined.
Lay out the tortillas and evenly distribute the mixed greens and shredded carrots on each.
Spoon the tuna mixture onto the tortillas, then roll tightly into wraps.
Slice in half and serve immediately or wrap in foil for later.
Notes
You can customize the seasonings to taste.
“`html
How to Prepare This Dish
Steps and time-saving tips
Start by draining a can of tuna and transferring it to a mixing bowl. Use a fork to break the tuna into small flakes, then add a generous spoonful of kimchi for a tangy kick. Next, stir in a tablespoon of mayonnaise and a teaspoon of sesame oil to bind everything together. If you prefer extra crunch, toss in some diced cucumber or shredded carrots. Meanwhile, warm your tortilla wraps in a dry skillet for about 10 seconds per side to make them pliable. Spread the kimchi tuna salad evenly over each wrap, leaving a small border around the edges. For added freshness, layer a few spinach leaves or thinly sliced avocado on top. Carefully fold the sides of the wrap inward, then roll it tightly from the bottom to enclose the filling. Slice the wrap in half diagonally for a neat presentation. To save time, prep the kimchi tuna salad ahead and store it in the fridge for up to two days. Just give it a quick stir before assembling your wraps.
and-learned-from">Mistakes I’ve made and learned from
Early on, I made the mistake of overloading my wraps with too much filling, which caused them to tear when rolling. Now, I use just enough kimchi tuna salad to cover the tortilla without spilling out. Another lesson came from using cold tortillas straight from the fridge—they cracked instead of bending. Warming them slightly first made all the difference. If you’re new to working with kimchi, check out my guide on balancing kimchi flavors to avoid overpowering the dish. Also, if you’re meal prepping, store the wraps tightly wrapped in foil to prevent them from drying out, a tip I picked up from my meal prep hacks post. These small adjustments turned my messy attempts into foolproof wraps every time.
“`
n-and-variations">Cultural Connection and Variations
Where this recipe comes from
The Kimchi Tuna Salad Wrap is a delicious fusion of Korean and Western flavors, born from the love of bold, tangy kimchi and the convenience of pantry-friendly tuna. Originally, kimchi—a staple in Korean cuisine—adds a spicy, fermented kick to dishes, while tuna salad brings creamy, familiar comfort. Together, they create a wrap that’s both exciting and satisfying. In Korea, you might find similar flavors in kimbap or kimchi-jjigae, but the wrap format gives it a modern, portable twist.
Around the world, cooks adapt the Kimchi Tuna Salad Wrap to local tastes. Some add avocado for extra creaminess, while others toss in shredded carrots or swap mayo for Greek yogurt. In my family, we love adding a drizzle of sriracha for extra heat. Whether you enjoy it as a quick lunch or a picnic staple, this wrap bridges cultures effortlessly. Plus, its versatility means you can tweak it to suit your cravings—just like food should be.
How it fits in today’s cooking
The Kimchi Tuna Salad Wrap fits perfectly into today’s fast-paced, flavor-forward kitchens. Busy home cooks appreciate its no-fuss prep, while meal preppers pack it for easy lunches. Because it balances protein, probiotics, and crunch, it’s a smart choice for health-conscious eaters too. For a lighter twist, try pairing it with a refreshing summer salad or serve it alongside quick weeknight dinners for a satisfying meal.
Seasonally, this wrap s
hines year-round. In summer, it’s a cool, zesty option for picnics. Come winter, the spicy kimchi adds warmth to lunchboxes. Modern cooks also experiment with gluten-free tortillas or plant-based tuna alternatives. No matter how you spin it, the Kimchi Tuna Salad Wrap stays relevant because it’s adaptable, delicious, and always ready to surprise your taste buds.
Taste and Texture
What makes it delicious
The Kimchi Tuna Salad Wrap bursts with bold, tangy flavors and satisfying textures. The spicy, fermented kick of kimchi mingles with the rich, savory tuna, while creamy mayo binds everything together. Crisp lettuce and a soft tortilla add contrast, making each bite refreshing yet hearty. Meanwhile, the subtle crunch of scallions and the umami depth of sesame oil elevate the dish. Every mouthful of this Kimchi Tuna Salad Wrap delivers a harmonious blend of spicy, creamy, and crisp sensations that keep you coming back for more.
Boosting the flavor
For an extra flavor boost, try swapping regular mayo with spicy sriracha mayo to amplify the heat. Alternatively, sprinkle toasted sesame seeds or drizzle a touch of gochujang sauce for a deeper, smoky-sweet finish. If you prefer freshness, add thinly sliced cucumbers or avocado for a cool contrast. A squeeze of lime also brightens the Kimchi Tuna Salad Wrap, balancing the richness with a zesty punch.
Drain the tuna thoroughly before mixing to prevent a soggy Kimchi Tuna Salad Wrap. Meanwhile, chop the kimchi finely so it blends evenly with the other ingredients. For the best flavor, let the salad chill for at least 15 minutes before assembling. Additionally, warm the tortillas slightly to make them more pliable and less likely to tear. Finally, spread the filling evenly to ensure every bite has the perfect balance of flavors.
Mistakes to avoid
Avoid overloading the wrap with too much filling, as this can cause it to fall apart when rolling. Instead, aim for a thin, even layer so the Kimchi Tuna Salad Wrap holds together neatly. Also, skip using watery vegetables unless you pat them dry first—excess moisture makes the tortilla soggy. For more tips on handling wraps, check out our guide on perfect wrap techniques. Another common mistake is skipping the resting time for the salad, but letting it sit helps the flavors meld. Learn more about balancing flavors in our flavor pairing basics post.
g-suggestions">Serving and Pairing Suggestions
How to serve this dish
For a vibrant presentation, slice your Kimchi Tuna Salad Wrap diagonally and arrange the pieces on a wooden board or colorful plate. Meanwhile, garnish with extra kimchi or fresh cilantro to add a pop of color. Since this dish packs bold flavors, it works wonderfully for casual lunches, picnics, or even as a party appetizer. If you’re hosting, consider serving it alongside other Korean-inspired bites for a themed spread.
What goes well with it
Pair your Kimchi Tuna Salad Wrap with a crisp, chilled cucumber salad for a refreshing contrast to the tangy kimchi. Alternatively, try it with a side of sweet potato fries, which balance the dish’s umami richness. For drinks, a light hibiscus iced tea or a citrusy sparkling water enhances the flavors without overpowering them. If you love Korean flavors, explore our Korean Spinach Salad for a complementary side. Craving something heartier? Our Kimchi Fried Rice makes a satisfying partner for a full meal.
math-faq-block">
Is kimchi tuna salad wrap healthy?
Yes, a Kimchi Tuna Salad Wrap can be a nutritious choice! Tuna provides lean protein and omega-3s, while kimchi adds probiotics and vitamins. Opt for whole-grain wraps and light mayo to keep it balanced.
What goes well with kimchi tuna salad wrap?
Pair your Kimchi Tuna Salad Wrap with crunchy sides like pickled vegetables, kale chips, or a light miso soup. The tangy kimchi flavor also complements fresh fruit like sliced apples or Asian pear.
Can I make kimchi tuna salad wrap ahead of time?
You can prepare the kimchi tuna salad mixture 1-2 days in advance, but assemble wraps just before eating to prevent sogginess. Store the filling separately in an airtight container for best texture.
ank-math-faq-item">
How spicy is a kimchi tuna salad wrap?
The spice level depends on your kimchi variety—mild versions create a subtle kick, while traditional napa cabbage kimchi adds more heat. For a milder Kimchi Tuna Salad Wrap, rinse the kimchi briefly before mixing.
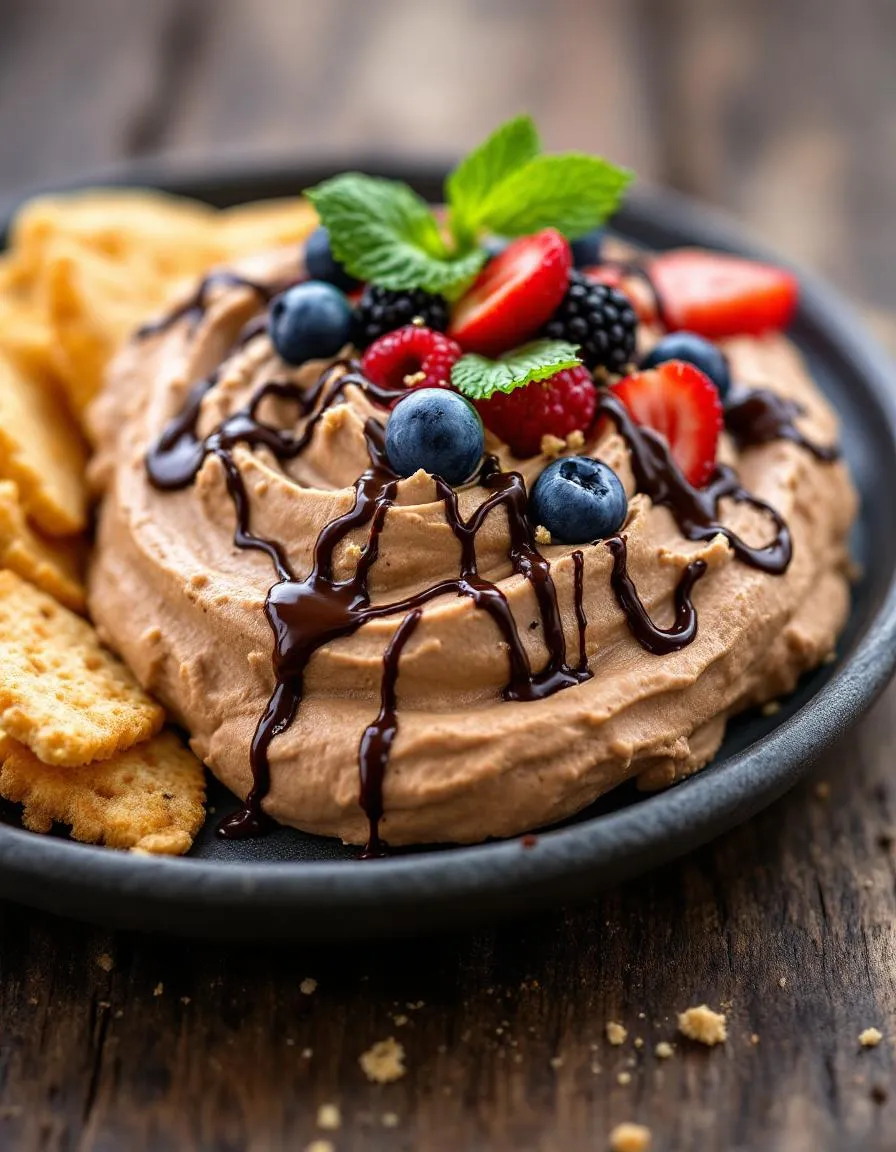
Best Keto Cookie Dough Dip – Easy Low-Carb Snack
Introduction
If you’ve ever craved something sweet but didn’t want to derail your health goals, I totally get it. That’s why I’m so excited to share my Keto Cookie Dough Dip with you. Whether you’re following a low-carb lifestyle or just looking for a guilt-free treat, this creamy, dreamy dip delivers all the nostalgic flavor of classic cookie dough without the sugar crash. Plus, it’s incredibly easy to whip up—perfect for last-minute gatherings or solo indulgence.
Keto Cookie Dough Dip is a game-changer for anyone who loves dessert but wants to stay on track with their wellness journey. Made with almond flour, creamy nut butter, and a touch of keto-friendly sweetener, it’s rich, satisfying, and packed with wholesome ingredients. Unlike traditional cookie dough, this version skips the refined sugars and raw eggs, making it safe to eat by the spoonful. It pairs beautifully with fresh berries, keto-friendly crackers, or even as a frosting for my Keto Chocolate Cake. Best of all, it fits right into the brekcakes.com philosophy: delicious food should nourish both body and soul. If you’re new to keto baking, don’t miss my Keto Baking Guide for more tips and tricks.
Why I Love This Recipe
This Keto Cookie Dough Dip holds a special place in my heart because it reminds me of late-night baking sessions with my mom. We’d sneak spoonfuls of cookie dough while pretending not to notice the mess we’d made. Now, I love making this dip for my own family—it’s a healthier twist on those cherished memories, and it always brings smiles. Whether I’m serving it at a party or enjoying it straight from the bowl, it never fails to feel like a little celebration.
Health and Nutrition
Why it’s good for your body
Keto Cookie Dough Dip packs a nutritious punch while satisfying your sweet tooth. First, it contains healthy fats from ingredients like almond butter and coconut oil, which support brain function and keep you full longer. Additionally, this dip skips refined sugars, so you avoid energy crashes and blood sugar spikes. Instead, natural sweeteners like erythritol or stevia provide sweetness without the guilt.
Moreover, Keto Cookie Dough Dip delivers a good dose of protein, thanks to ingredients like almond flour or collagen peptides. Protein helps repair muscles and keeps hunger at bay. Furthermore, the dip includes fiber from flaxseed or chia seeds, which aids digestion and promotes gut health. Unlike traditional cookie dough, this version aligns with low-carb goals while still tasting indulgent.
Finally, Keto Cookie Dough Dip offers antioxidants from dark chocolate or cacao nibs. These compounds fight inflammation and support heart health. Whether you enjoy it as a snack or dessert, you fuel your body with wholesome ingredients. Best of all, it proves that healthy eating doesn’t mean sacrificing flavor.
How it fits in a healthy lifestyle
Keto Cookie Dough Dip fits seamlessly into a balanced diet, especially if you follow a low-carb or ketogenic lifestyle. It makes a smart alternative to sugary treats, helping you stay on track without feeling deprived. Pair it with fresh berries or celery sticks for extra nutrients and crunch.
For those with dietary restrictions, this dip checks multiple boxes. It’s naturally gluten-free and can easily be dairy-free with simple swaps. If you’re focusing on heart health, the healthy fats in Keto Cookie Dough Dip support cholesterol levels. Plus, it’s a great option for meal prep—whip up a batch and enjoy it all week. For more keto-friendly ideas, explore our keto dessert recipes or discover how to balance macros with our meal planning tips. With this dip, you can indulge wisely while nourishing your body.
A delicious low-carb dip that tastes just like cookie dough, perfect for satisfying sweet cravings without the guilt.
Ingredients
Scale
For the Crust:
1 cup almond flour
1/4 cup coconut flour
1/4 cup powdered erythritol
1/2 cup unsalted butter, softened
1/4 cup sugar-free chocolate chips
1 tsp vanilla extract
1/4 tsp salt
1/4 cup heavy cream
Instructions
1. Prepare the Crust:
In a mixing bowl, combine almond flour, coconut flour, powdered erythritol, and salt.
Add softened butter and vanilla extract, mixing until well combined.
Gradually add heavy cream until the mixture reaches a dip-like consistency.
Fold in sugar-free chocolate chips.
Chill for at least 30 minutes before serving.
Notes
You can customize the seasonings to taste.
How to Prepare This Dish
Steps and time-saving tips
Start by gathering all your ingredients for the Keto Cookie Dough Dip so everything is within reach. First, soften the cream cheese in the microwave for 15 seconds to make blending easier. Then, whisk it with almond butter and vanilla extract until smooth. Next, gently fold in the powdered erythritol or your preferred keto-friendly sweetener, ensuring no lumps remain. For extra richness, stir in sugar-free chocolate chips or chopped nuts. If the mixture feels too thick, drizzle in a tablespoon of almond milk until it reaches your desired consistency. Finally, chill the Keto Cookie Dough Dip for at least 30 minutes to let the flavors meld. Serve with keto-friendly dippers like sliced strawberries or almond flour crackers. To save time, prep the dip a day ahead and store it covered in the fridge. You can also double the batch for gatherings since it keeps well for up to five days.
Mistakes I’ve made and learned from
When I first made Keto Cookie Dough Dip, I used cold cream cheese straight from the fridge, which left stubborn clumps no matter how much I whisked. Now I always soften it slightly for a smoother texture. Another mistake? Over-sweetening—I once added too much erythritol, and the dip tasted oddly metallic. I’ve since learned to taste as I go, especially with alternative sweeteners. If you’re new to keto baking, check out my guide on choosing the right keto sweeteners to avoid similar pitfalls. Also, if your dip separates, don’t panic. A quick fix is blending in a teaspoon of coconut flour, which I discovered while troubleshooting my other keto dip recipes. Trust me, even imperfect batches can turn out delicious with a little patience!
Keto Cookie Dough Dip might sound like a modern twist, but its roots stretch back to the universal love for sweet, creamy treats. Traditionally, cookie dough has always been a nostalgic favorite—whether sneaked from the mixing bowl or enjoyed in ice cream. However, this keto-friendly version swaps out sugar and flour for ingredients like almond butter and erythritol, making it a guilt-free indulgence. Families in the South often add a splash of vanilla extract for warmth, while others on the West Coast might blend in coconut flour for extra texture.
Around the world, similar dips take on different forms. In the Middle East, tahini-based sweet dips pair with fruit, while in Europe, chocolate-hazelnut spreads reign supreme. Keto Cookie Dough Dip fits right into this global tradition but caters to low-carb lifestyles. My grandma used to whip up a similar treat with cream cheese and honey, proving that every culture has its own spin on dessert dips. Today, this recipe bridges old-school comfort and modern dietary needs.
ays-cooking">How it fits in today’s cooking
Keto Cookie Dough Dip isn’t just a trend—it’s a staple for anyone craving sweetness without the sugar crash. Busy parents love it as a quick snack for kids, while fitness enthusiasts enjoy it as a post-workout reward. During the holidays, it doubles as a festive dessert when served with keto-friendly cookies or apple slices. Even better, it’s a hit at summer potlucks, proving versatility year-round.
Modern cooks keep reinventing the recipe. Some add protein powder for an extra boost, while others layer it into chia pudding for breakfast. Whether you stick to the classic or experiment with mix-ins, Keto Cookie Dough Dip fits seamlessly into today’s fast-paced, health-conscious kitchens. It’s proof that comfort food can evolve without losing its soul.
Taste and Texture
What makes it delicious
Keto Cookie Dough Dip delivers a rich, indulgent experience with every spoonful. The velvety texture melts on your tongue, while the buttery sweetness of almond flour and creamy coconut oil creates a luscious base. Fragrant vanilla extract and a hint of sea salt balance the flavors, making each bite reminiscent of classic cookie dough—minus the guilt. Tiny sugar-free chocolate chips add delightful crunch, contrasting the smooth, thick consistency. Whether you scoop it with crisp apple slices or keto-friendly crackers, Keto Cookie Dough Dip satisfies cravings with its irresistible blend of sweet, salty, and nutty notes.
r">Boosting the flavor
Elevate your Keto Cookie Dough Dip with creative tweaks that amplify its taste. For a deeper caramel-like flavor, swap vanilla extract with keto salted caramel sauce, blending it into the dip for a luxurious twist. Alternatively, fold in crushed keto peanut butter cups for a nutty, chocolatey surprise. A sprinkle of cinnamon or a dash of espresso powder can also intensify the warmth, while toasted pecans add earthy crunch. Experiment with these easy upgrades to make your dip even more memorable.
Tips for Success
Best practices for results
Always chill your Keto Cookie Dough Dip for at least 30 minutes before serving, as this helps the flavors blend and the texture thicken perfectly. Use full-fat cream cheese for the creamiest results, and make sure your almond flour is finely ground to avoid grittiness. For extra richness, blend in a tablespoon of keto-friendly maple syrup. Additionally, let your dip sit at room temperature for 5 minutes before scooping to soften it slightly.
>Mistakes to avoid
Avoid overmixing the ingredients, as this can make your Keto Cookie Dough Dip too dense. Instead, gently fold everything together until just combined. Many people also forget to taste as they go, so adjust sweeteners gradually to match your preference. If your dip turns out too thick, simply stir in a splash of almond milk. For more keto dessert tips, check out our guide on keto dessert hacks. Also, ensure your sugar substitutes are well-measured—too much can overpower the flavor. Learn more about balancing sweeteners in our keto sweetener guide.
Serving and Pairing Suggestions
How to serve this dish
Make your Keto Cookie Dough Dip the star of any gathering by serving it in a stylish bowl with a drizzle of sugar-free chocolate sauce on top. For a festive touch, sprinkle crushed keto-friendly nuts or coconut flakes over the dip. Alternatively, arrange a platter with fresh strawberries, keto graham crackers, or cinnamon-dusted apple slices for dipping. Whether you’re hosting a holiday party or a cozy movie night, this creamy treat always delights guests. To elevate the presentation, serve it in mini mason jars for a fun, individual-sized twist.
What goes well with it
Pair your Keto Cookie Dough Dip with a refreshing glass of unsweetened almond milk or a warm cup of bulletproof coffee for a satisfying combo. The rich flavors of the dip balance perfectly with the mild creaminess of almond milk. For a decadent dessert spread, try serving it alongside our chewy keto brownies or crisp keto chocolate chip cookies. These pairings add texture and variety while keeping your menu low-carb. Meanwhile, a scoop of sugar-free vanilla ice cream turns this dip into an irresistible dessert bowl.
Yes, Keto Cookie Dough Dip can be a healthier alternative to traditional cookie dough because it’s typically made with low-carb ingredients like almond flour, sugar-free sweeteners, and healthy fats. Unlike regular cookie dough, this keto-friendly version avoids refined sugars and grains, making it suitable for low-carb diets. Just enjoy it in moderation as part of a balanced keto lifestyle.
rank-math-faq-item">
What can I eat with Keto Cookie Dough Dip?
Keto Cookie Dough Dip pairs perfectly with fresh strawberries, celery sticks, or keto-friendly crackers for a satisfying snack. You can also enjoy it with low-carb cookies or simply eat it by the spoonful for a quick treat. Its creamy texture makes it versatile for dipping or spreading on your favorite keto-approved foods.
How do you store Keto Cookie Dough Dip?
er">
Store Keto Cookie Dough Dip in an airtight container in the refrigerator for up to 5–7 days. For longer storage, you can freeze it for up to 2 months—just thaw it in the fridge before serving. Always give it a quick stir after refrigeration to restore its creamy consistency.
Can I make Keto Cookie Dough Dip without cream cheese?
Absolutely! You can substitute cream cheese with full-fat coconut cream or Greek yogurt for a dairy-free or lighter version of Keto Cookie Dough Dip. Just ensure your replacements are unsweetened and keto-friendly to maintain the low-carb profile. The dip will still be deliciously creamy with a slight variation in flavor.