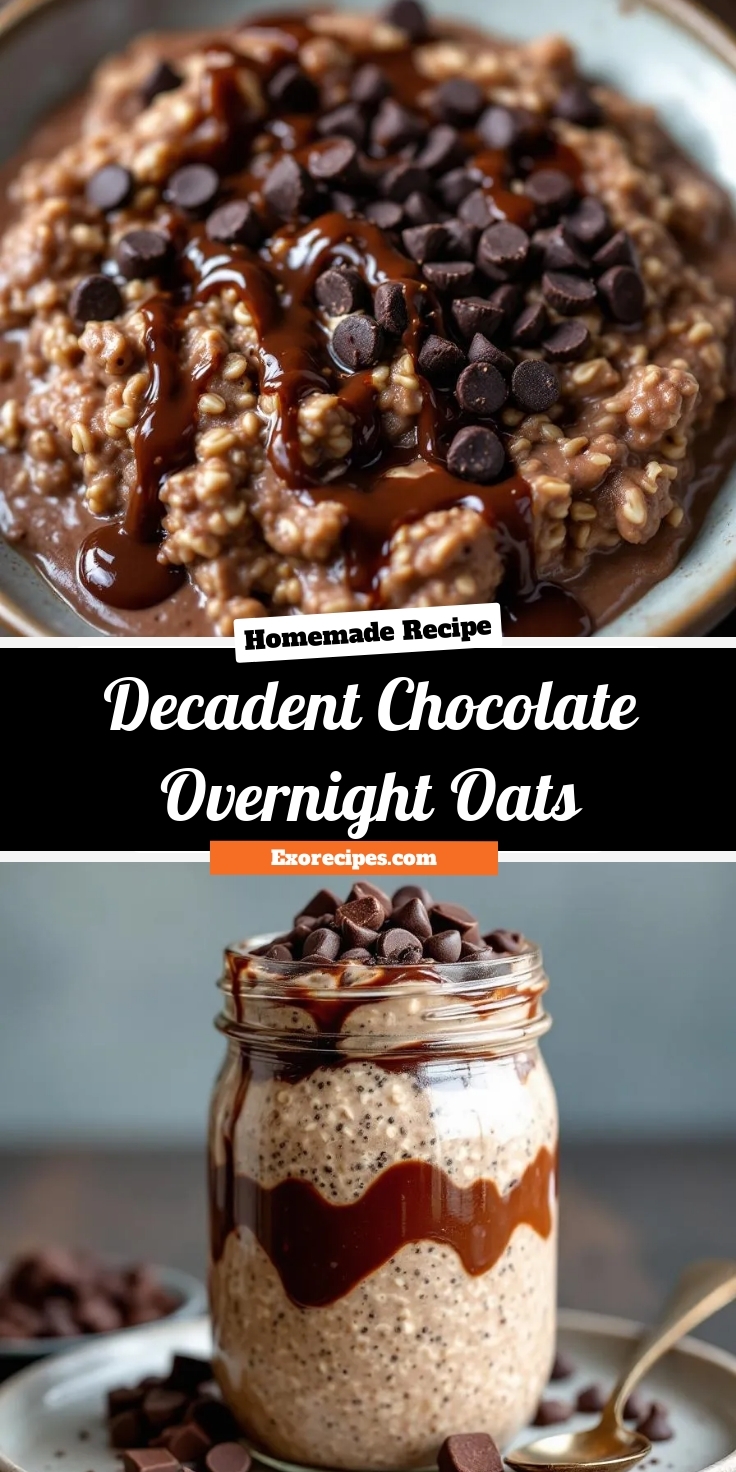
Imagine waking up to a rich, chocolatey breakfast that feels like dessert but fuels your day like a powerhouse. That’s the magic of Decadent Chocolate Overnight Oats—a creamy, no-cook meal prep dream that satisfies your sweet tooth while keeping things wholesome. Whether you’re a busy parent, a fitness enthusiast, or just someone who craves convenience without compromise, this recipe delivers. Plus, it’s perfect for those mornings when you need a little extra indulgence to start your day right.
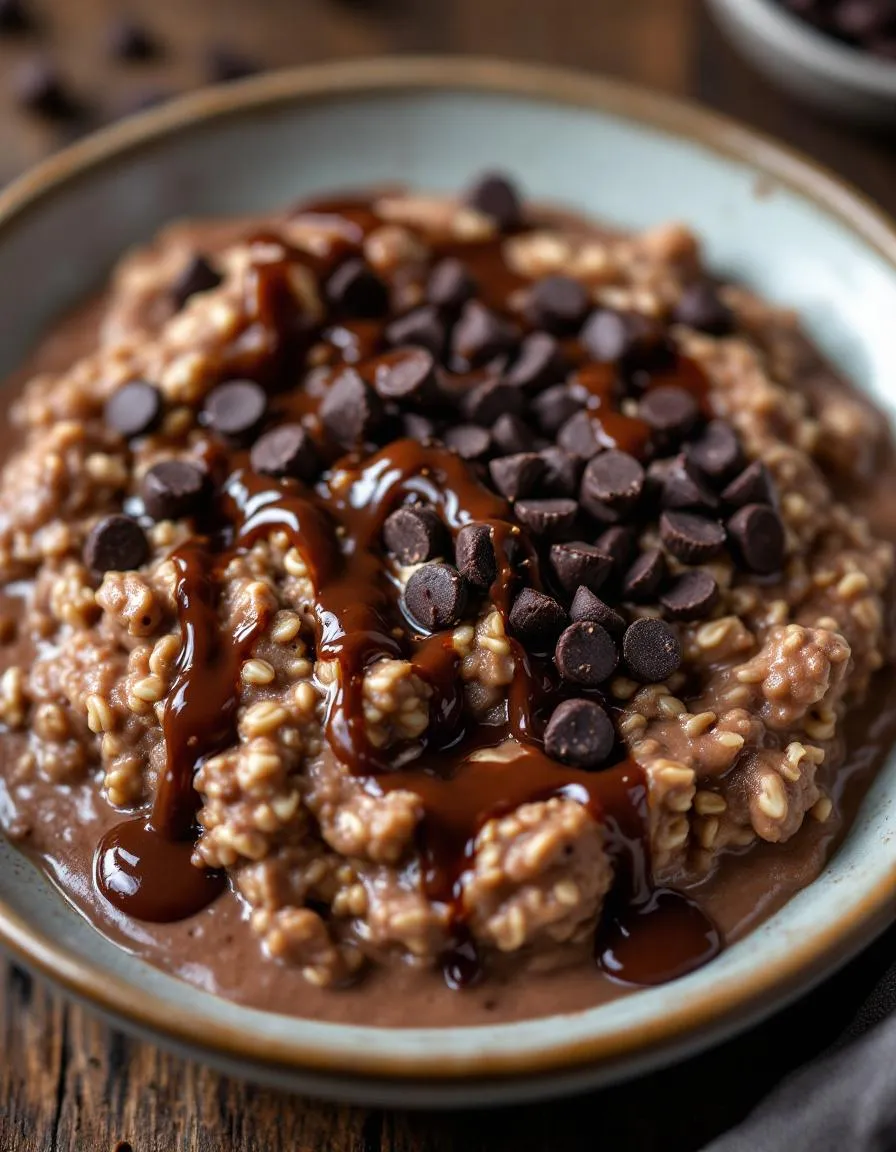
Decadent Chocolate Overnight Oats combines rolled oats, cocoa powder, and your choice of milk (dairy or plant-based) for a luscious, pudding-like texture. Unlike traditional oatmeal, you prepare it the night before, letting the flavors meld while you sleep. The result? A breakfast that’s effortlessly delicious and packed with fiber, protein, and antioxidants. For anyone juggling a hectic schedule, this recipe is a game-changer—no cooking, no fuss, just a spoonful of joy waiting in your fridge. If you love easy meal prep ideas, you’ll adore our 5-Minute Vegan Breakfasts for more quick morning solutions.
This recipe fits perfectly with our blog’s mission to make healthy eating simple and satisfying. We focus on dishes that balance nutrition and flavor, and Decadent Chocolate Overnight Oats nails both. It’s also incredibly versatile—swap in almond butter for extra richness or top with fresh berries for a fruity twist. If you’re new to overnight oats, don’t worry. Our Overnight Oats 101 guide breaks down everything you need to know. Whether you’re meal-prepping for the week or treating yourself to a gourmet breakfast, this recipe never disappoints.
Why I Love This Recipe
Decadent Chocolate Overnight Oats holds a special place in my heart because it got me through countless rushed mornings as a new mom. I needed something quick, nourishing, and—let’s be honest—something that felt like a treat. This recipe checked every box. Even now, I love how it reminds me of chocolate pudding but keeps me full for hours. It’s the kind of breakfast that makes you look forward to waking up, and that’s a win in my book.
Health and Nutrition
Why it’s good for your body
Decadent Chocolate Overnight Oats pack a nutritious punch while satisfying your sweet cravings. First, they deliver a hearty dose of fiber from oats, which keeps you full longer and supports digestion. Additionally, the cocoa powder provides antioxidants that help combat inflammation and boost heart health. Plus, you get plant-based protein from ingredients like chia seeds or almond milk, making it a great energy booster.
Moreover, Decadent Chocolate Overnight Oats balance natural sweetness with wholesome ingredients. Unlike sugary breakfast options, they use minimal added sugars, relying instead on flavors like ripe bananas or a touch of maple syrup. Consequently, you avoid energy crashes and stay fueled throughout the morning. The combination of complex carbs, healthy fats, and protein also stabilizes blood sugar levels.
Finally, this recipe offers versatility for tailoring nutrients. For instance, you can add nuts for crunch and extra omega-3s or top with berries for a vitamin C boost. Whether you enjoy it as a post-workout meal or a quick breakfast, Decadent Chocolate Overnight Oats provide both indulgence and nourishment.
How it fits in a healthy lifestyle
Decadent Chocolate Overnight Oats easily adapt to various dietary needs, making them a staple for balanced eating. If you follow a gluten-free diet, simply use certified gluten-free oats. For a heart-healthy twist, swap in flaxseeds or walnuts to boost omega-3s. The recipe also fits high-protein goals when you stir in Greek yogurt or a scoop of nut butter.
Meal preppers love how Decadent Chocolate Overnight Oats save time without sacrificing nutrition. Prep a batch ahead, and you’ll grab a wholesome breakfast even on busy mornings. Pair it with a fruit-packed smoothie bowl for extra vitamins or enjoy it solo for a satisfying start. If you’re exploring more balanced breakfast ideas, check out these protein-rich muffin recipes to keep your meals varied and nutritious.
A rich and creamy chocolate overnight oats recipe that’s perfect for a quick breakfast or dessert.
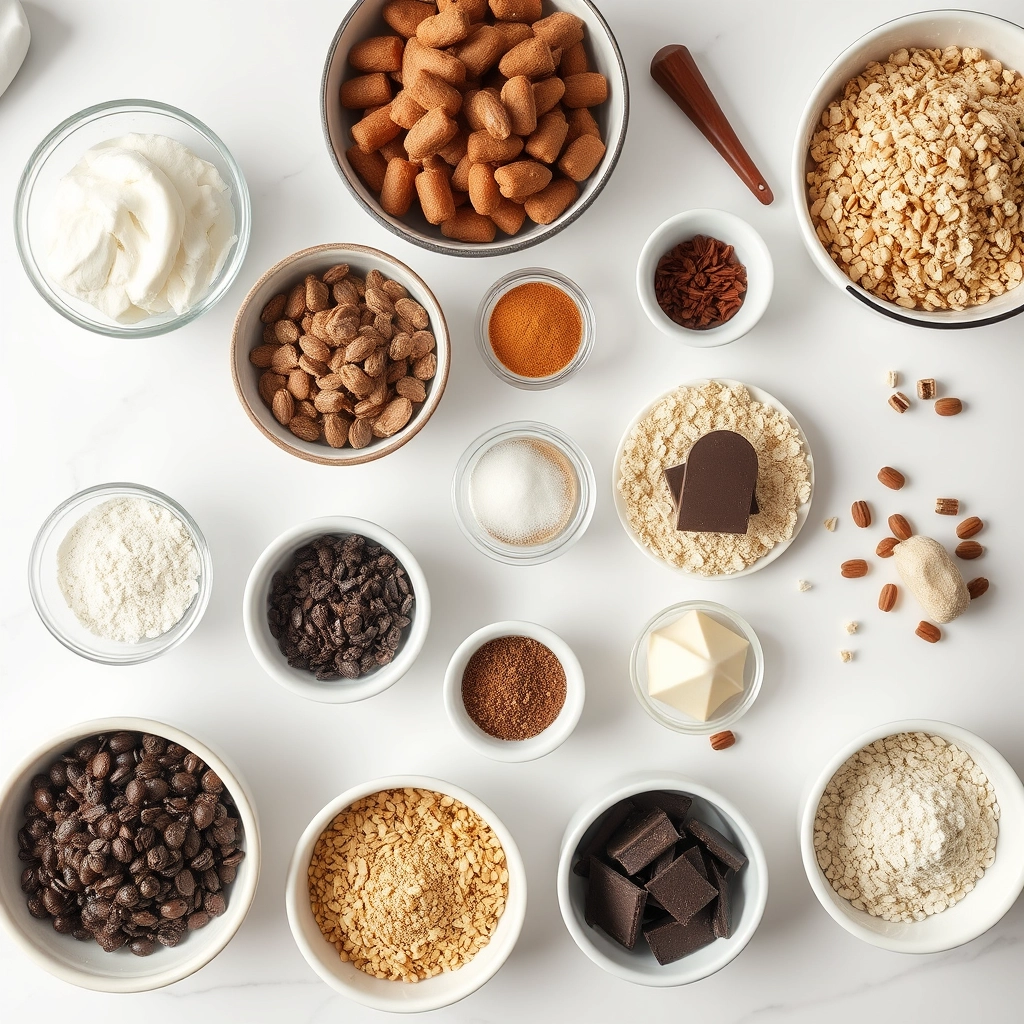
Ingredients
Scale
For the Crust:
1 cup rolled oats
1 cup almond milk
2 tbsp cocoa powder
2 tbsp maple syrup
1 tbsp chia seeds
1/2 tsp vanilla extract
Pinch of salt
Dark chocolate chips (optional)
Instructions
1. Prepare the Crust:
In a mixing bowl, combine rolled oats, almond milk, cocoa powder, maple syrup, chia seeds, vanilla extract, and salt.
Stir well until all ingredients are fully incorporated and no lumps remain.
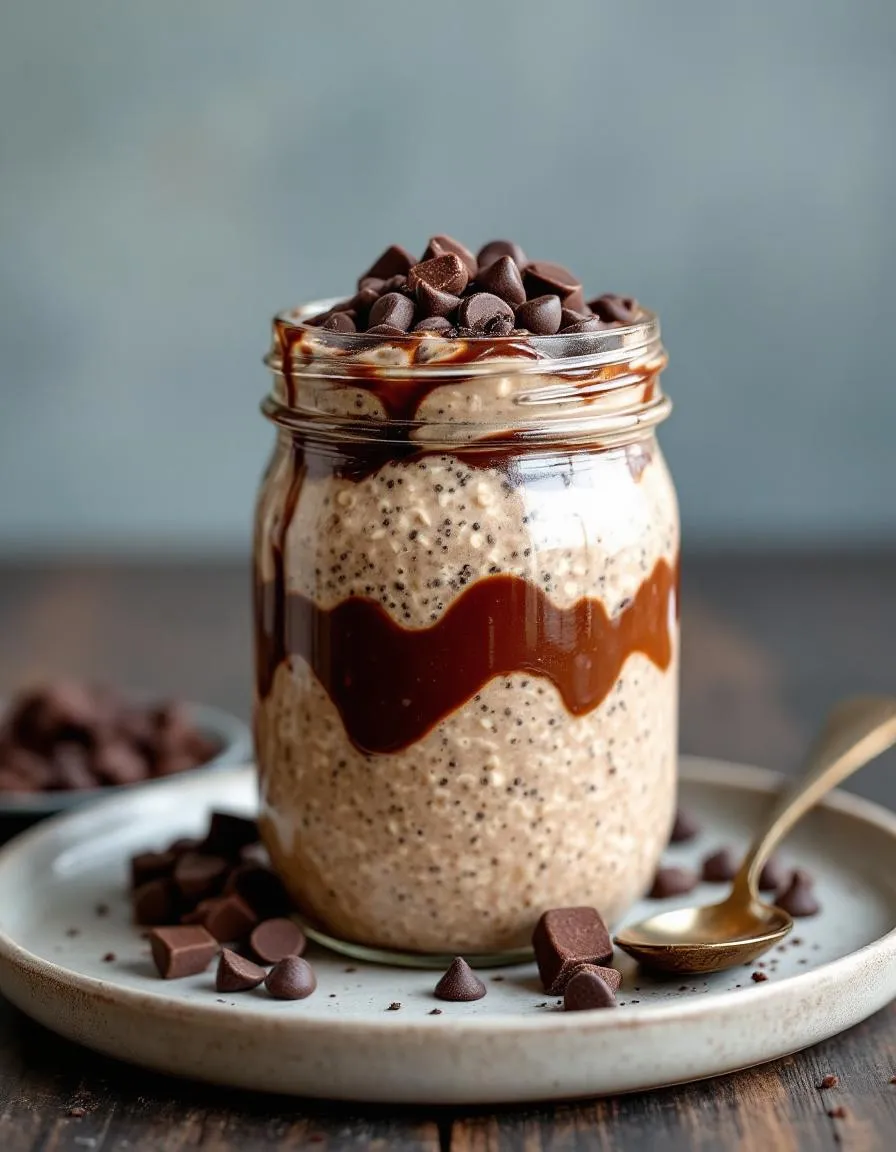
Divide the mixture into serving jars or containers, cover, and refrigerate overnight.
Before serving, top with dark chocolate chips if desired.
Notes
You can customize the seasonings to taste.
“`html
How to Prepare This Dish
Steps and time-saving tips
Start by gathering all your ingredients for Decadent Chocolate Overnight Oats to streamline the process. In a large mixing bowl, whisk together the rolled oats, cocoa powder, chia seeds, and a pinch of salt. Next, pour in the milk of your choice and add a generous drizzle of maple syrup or honey for sweetness. Stir everything until the cocoa powder fully dissolves and the mixture looks smooth. For extra richness, fold in a spoonful of almond butter or Greek yogurt. Then, divide the mixture evenly between two jars or airtight containers. Seal them tightly and refrigerate overnight—or for at least six hours—to let the flavors meld. In the morning, give the oats a quick stir and top with fresh berries, chocolate chips, or a dollop of whipped cream. If you’re short on time, skip the chia seeds or use quick oats for a faster soak. For a warm version, microwave the chilled oats for 30 seconds before serving.
and-learned-from">Mistakes I’ve made and learned from
When I first made Decadent Chocolate Overnight Oats, I used too much cocoa powder, and the bitterness overpowered the dish. Now, I measure carefully and balance it with a touch of vanilla extract. Another time, I skipped the chia seeds, thinking they were optional, but the texture turned out too runny. Chia seeds are key for thickness, as I learned from my oatmeal hacks post. I also once left the oats in the fridge for over 48 hours, and they became overly thick. If you need to prep ahead, just add a splash of milk before serving to loosen them up. For more troubleshooting tips, check out my meal prep mistakes guide. Trust me, these small tweaks make all the difference.
“`
n-and-variations">Cultural Connection and Variations
Where this recipe comes from
Decadent Chocolate Overnight Oats might feel like a modern breakfast trend, but its roots stretch back to simpler, time-honored traditions. People have soaked oats for centuries, from Scottish porridge to Swiss muesli, as a way to soften grains without cooking. The chocolate twist, however, gives it a playful upgrade that feels both indulgent and practical. In Mexico, for example, cooks might blend cocoa with cinnamon and a pinch of chili for a spiced version, while in Sweden, they could layer it with lingonberry jam for a sweet-tart contrast.
My grandmother used to mix oats with leftover coffee and honey, calling it “poor man’s pudding.” Today, Decadent Chocolate Overnight Oats carries that same spirit of resourcefulness—just with a richer, dessert-like flair. Across the U.S., families personalize it too. Some stir in peanut butter for extra protein, while others top it with coconut flakes or fresh berries. No matter the variation, the heart of the dish stays the same: a creamy, no-fuss breakfast that feels like a treat.
How it fits in today’s cooking
Decadent Chocolate Overnight Oats fits perfectly into today’s fast-paced, health-conscious world. Busy parents prep it the night before, and fitness lovers appreciate its balance of fiber and flavor. It’s also a star during holidays—think Christmas morning with crushed candy canes or Valentine’s Day with heart-shaped strawberries. Modern cooks even repurpose it as a dessert, layering it in parfait glasses for a guilt-free chocolate fix.
For those who love meal
prepping, this recipe pairs wonderfully with 5-minute berry chia jam or a scoop of almond butter energy bites. Whether you enjoy it as a quick weekday breakfast or a festive brunch dish, Decadent Chocolate Overnight Oats proves that convenience and indulgence can go hand in hand.
Taste and Texture
What makes it delicious
Decadent Chocolate Overnight Oats deliver a rich, indulgent experience that feels like dessert for breakfast. The creamy oats soak up the deep cocoa flavor, creating a velvety texture that melts in your mouth. Meanwhile, the subtle sweetness of maple syrup or honey balances the bold chocolate, while a hint of vanilla adds warmth. Every bite offers a satisfying chew from the oats, contrasted by crunchy toppings like toasted almonds or chia seeds. The aroma alone—fragrant cocoa mingling with nutty undertones—will have you eager to dig in. Decadent Chocolate Overnight Oats truly turn a simple meal into a luxurious treat.
Boosting the flavor
Elevate your Decadent Chocolate Overnight Oats with easy tweaks that amplify the flavor. For a deeper chocolate hit, stir in a spoonful of dark chocolate ganache or swap regular cocoa powder for Dutch-processed. Fresh berries like raspberries add a tangy contrast, while a drizzle of peanut butter sauce introduces a salty-sweet crunch. If you love warmth, a pinch of cinnamon or cayenne pepper will surprise your taste buds. Finally, a splash of cold brew coffee enhances the chocolate notes without overpowering them. With these small upgrades, your oats will taste even more irresistible.
Always use rolled oats for the best texture in your Decadent Chocolate Overnight Oats, as quick oats can turn mushy. Meanwhile, stir the mixture thoroughly to evenly distribute the cocoa powder and sweetener. For a richer flavor, opt for high-quality dark chocolate or cacao powder. Additionally, let the oats chill for at least 6 hours, though overnight works best for maximum creaminess. Finally, top with fresh berries or nuts just before serving to add crunch and freshness.
Mistakes to avoid
Avoid using too much liquid, which can make your Decadent Chocolate Overnight Oats soupy. Instead, follow the recommended ratios for a perfect consistency. Similarly, don’t skip the sweetener entirely—even if you prefer less sugar, a small amount balances the cocoa’s bitterness. For more guidance on ingredient measurements, check out our guide to perfect oat ratios. Another common mistake is storing the oats in a large container, which can dry them out. Instead, use individual airtight jars like the ones we recommend in our meal prep container roundup.
g-suggestions">Serving and Pairing Suggestions
How to serve this dish
Serve Decadent Chocolate Overnight Oats in clear mason jars or elegant glass bowls to showcase their rich layers. For a festive touch, top them with fresh raspberries, a drizzle of melted chocolate, or a sprinkle of crushed hazelnuts. Meanwhile, this dish shines at brunch gatherings or as a make-ahead breakfast for busy mornings. If you want to impress guests, layer the oats with whipped coconut cream and cocoa nibs for extra texture.
What goes well with it
Pair Decadent Chocolate Overnight Oats with a steaming cup of homemade vanilla latte to balance the chocolatey depth with creamy sweetness. Alternatively, try them alongside a refreshing fruit salad for a light contrast. For a heartier meal, serve with fluffy almond flour pancakes, creating a satisfying sweet-and-savory combo. Each pairing enhances the oats’ richness while keeping the meal balanced.
math-faq-block">
Can you make Decadent Chocolate Overnight Oats with almond milk?
Yes, almond milk works perfectly for Decadent Chocolate Overnight Oats. It creates a creamy texture while keeping the recipe dairy-free. Just substitute it 1:1 for regular milk in your favorite overnight oats recipe.
How long do Decadent Chocolate Overnight Oats last in the fridge?
Decadent Chocolate Overnight Oats stay fresh for up to 5 days when stored in an airtight container. For best texture, we recommend eating them within 3 days. The flavors actually deepen after the first 12 hours.
What toppings go well with Decadent Chocolate Overnight Oats?
Fresh berries, sliced bananas, chopped nuts, or shredded coconut all pair beautifully with Decadent Chocolate Overnight Oats. For extra indulgence, try adding chocolate chips or a drizzle of peanut butter right before serving.
ank-math-faq-item">
Are Decadent Chocolate Overnight Oats healthy?
When made with quality ingredients, Decadent Chocolate Overnight Oats can be a nutritious breakfast. They provide fiber from oats, protein from milk or yogurt, and antioxidants from cocoa. Just watch portion sizes of sweeteners for a balanced meal.
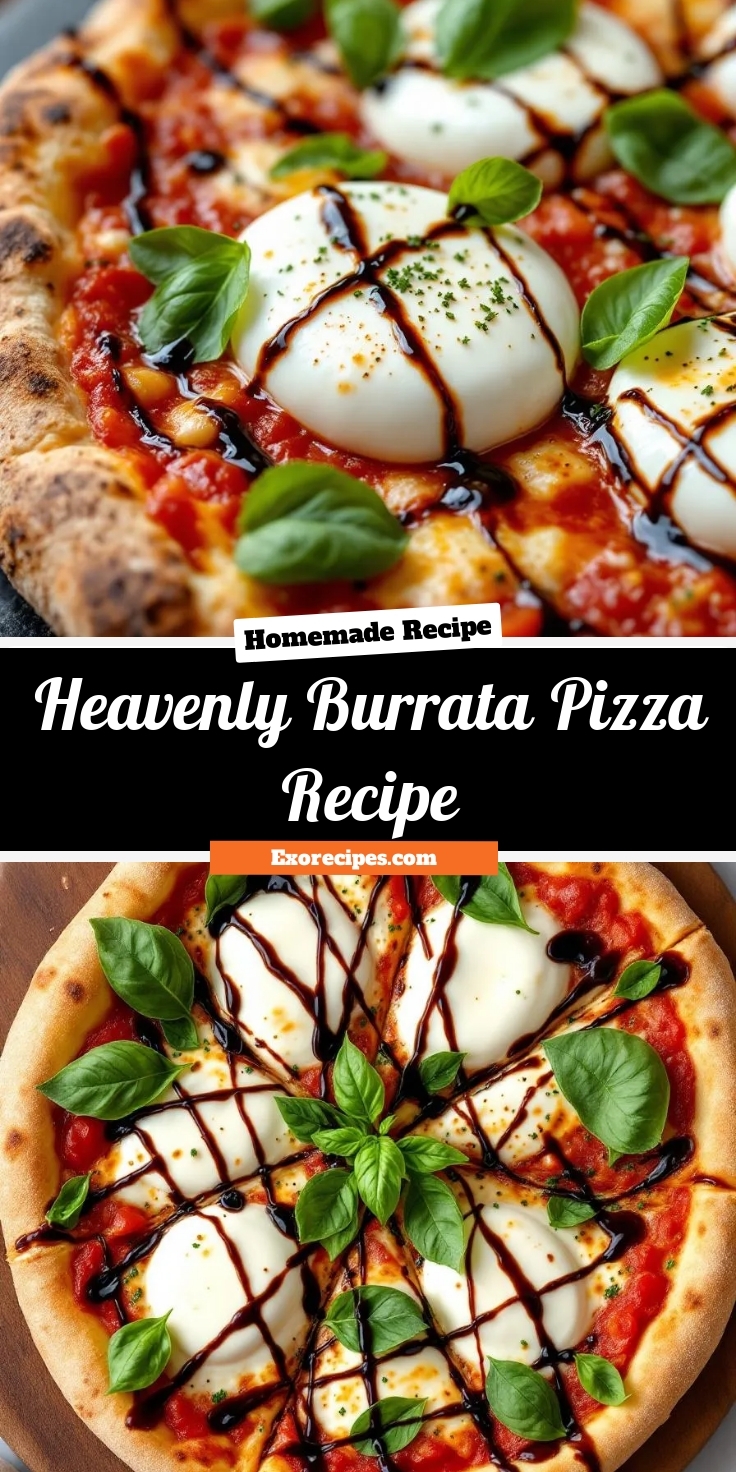
Best Heavenly Burrata Pizza – Creamy & Delicious
Introduction
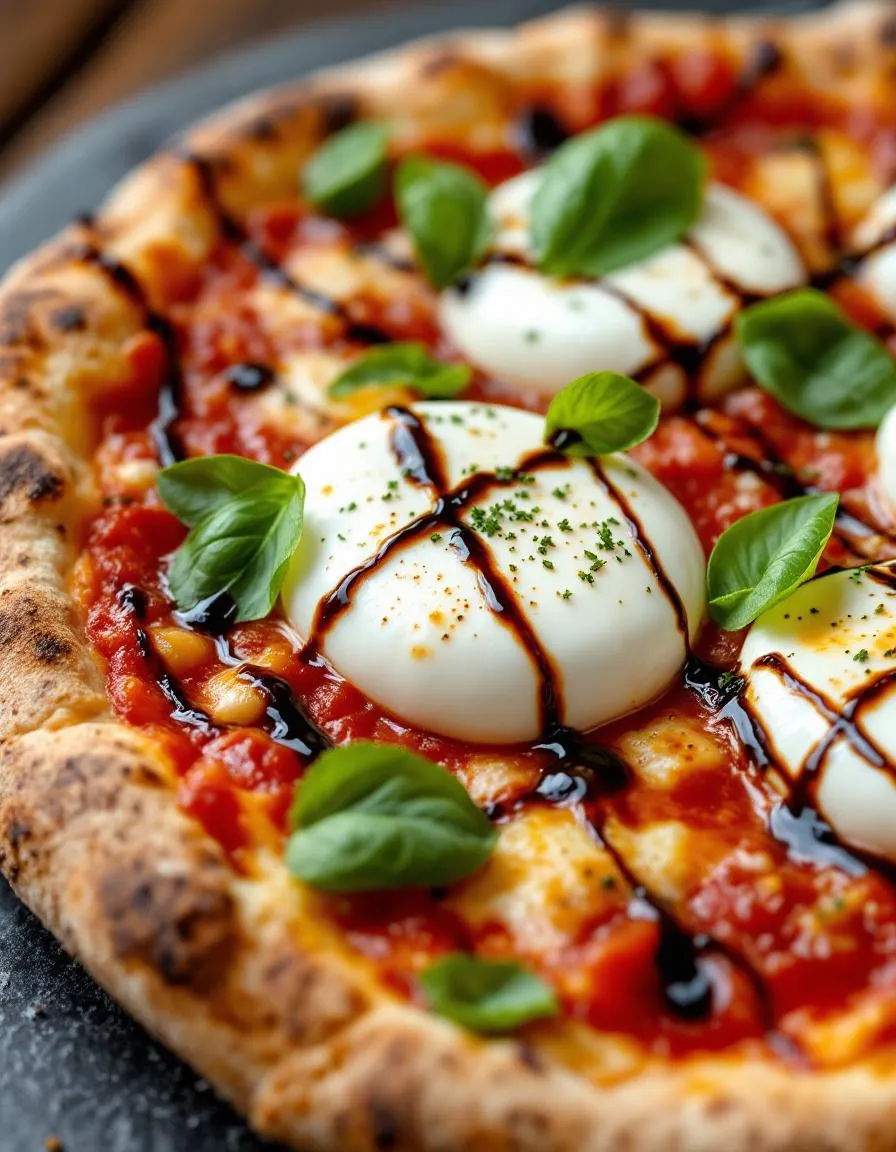
Imagine biting into a pizza so creamy and luxurious that it feels like a little slice of heaven. That’s exactly what you get with this Heavenly Burrata Pizza Recipe. Whether you’re craving a cozy night in or planning a show-stopping dinner for friends, this dish delivers rich flavors and effortless elegance. Best of all, it’s simpler to make than you might think. Let’s dive into why this recipe deserves a spot in your culinary rotation.
The Heavenly Burrata Pizza Recipe combines the best of both worlds: the comforting familiarity of pizza and the indulgent creaminess of fresh burrata. Unlike traditional mozzarella, burrata adds a luscious, velvety texture that melts beautifully over a crisp crust. This recipe matters because it elevates a weeknight staple into something extraordinary without requiring advanced skills. Plus, it fits perfectly with our blog’s mission to share approachable yet impressive dishes. If you love experimenting with flavors, you’ll appreciate how this pizza pairs with everything from tangy tomato sauce to peppery arugula. For more inspiration, check out our Homemade Margherita Pizza or explore creative twists in our Garlic Butter Focaccia guide. Whether you’re a novice or a seasoned cook, this recipe promises a delicious payoff with minimal fuss.
Why I Love This Recipe
I’ll never forget the first time I tried Heavenly Burrata Pizza Recipe at a tiny trattoria in Rome. The way the burrata oozed over the warm crust instantly won me over. Now, I recreate that magic at home whenever I need a taste of comfort or want to impress guests. What I love most is how versatile it is—you can top it with seasonal veggies, spicy honey, or even prosciutto for extra flair. Every bite feels like a celebration, and that’s why this recipe holds a special place in my kitchen.
Health and Nutrition
Why it’s good for your body
Heavenly Burrata Pizza Recipe packs a nutritious punch while satisfying your cravings. First, the creamy burrata delivers high-quality protein and calcium, which strengthen muscles and bones. Meanwhile, the fresh basil and ripe tomatoes add antioxidants that fight inflammation and support immunity. Additionally, the whole-grain crust offers fiber to keep digestion smooth and energy levels steady.
Moreover, Heavenly Burrata Pizza Recipe balances indulgence with wholesome ingredients. Olive oil, a key component, provides heart-healthy monounsaturated fats. These fats help lower bad cholesterol while boosting brain function. Furthermore, the dish’s vibrant veggies contribute vitamins A and C, which promote glowing skin and sharp vision. Even better, the simple ingredient list means fewer processed additives.
Finally, Heavenly Burrata Pizza Recipe fits seamlessly into mindful eating. The combination of protein, healthy fats, and complex carbs keeps you full longer. As a result, you avoid energy crashes and unnecessary snacking. Whether you enjoy it as a weeknight dinner or a weekend treat, this pizza nourishes your body without sacrificing flavor.
How it fits in a healthy lifestyle
Heavenly Burrata Pizza Recipe adapts easily to different dietary needs. For a gluten-free version, swap the crust for a cauliflower or almond flour base. If you’re focusing on heart health, the olive oil and fresh produce align perfectly with Mediterranean diet principles. Even fitness enthusiasts will appreciate the protein-rich burrata for muscle recovery.
This dish also encourages balanced eating habits. Pair it with a crisp simple arugula salad for extra fiber and greens. Or, serve smaller slices alongside roasted vegetable medley to create a well-rounded meal. Because it’s versatile and nutrient-dense, Heavenly Burrata Pizza Recipe makes healthy eating feel effortless and enjoyable.
A luxurious pizza topped with creamy burrata cheese, fresh basil, and a drizzle of balsamic glaze for a heavenly bite.
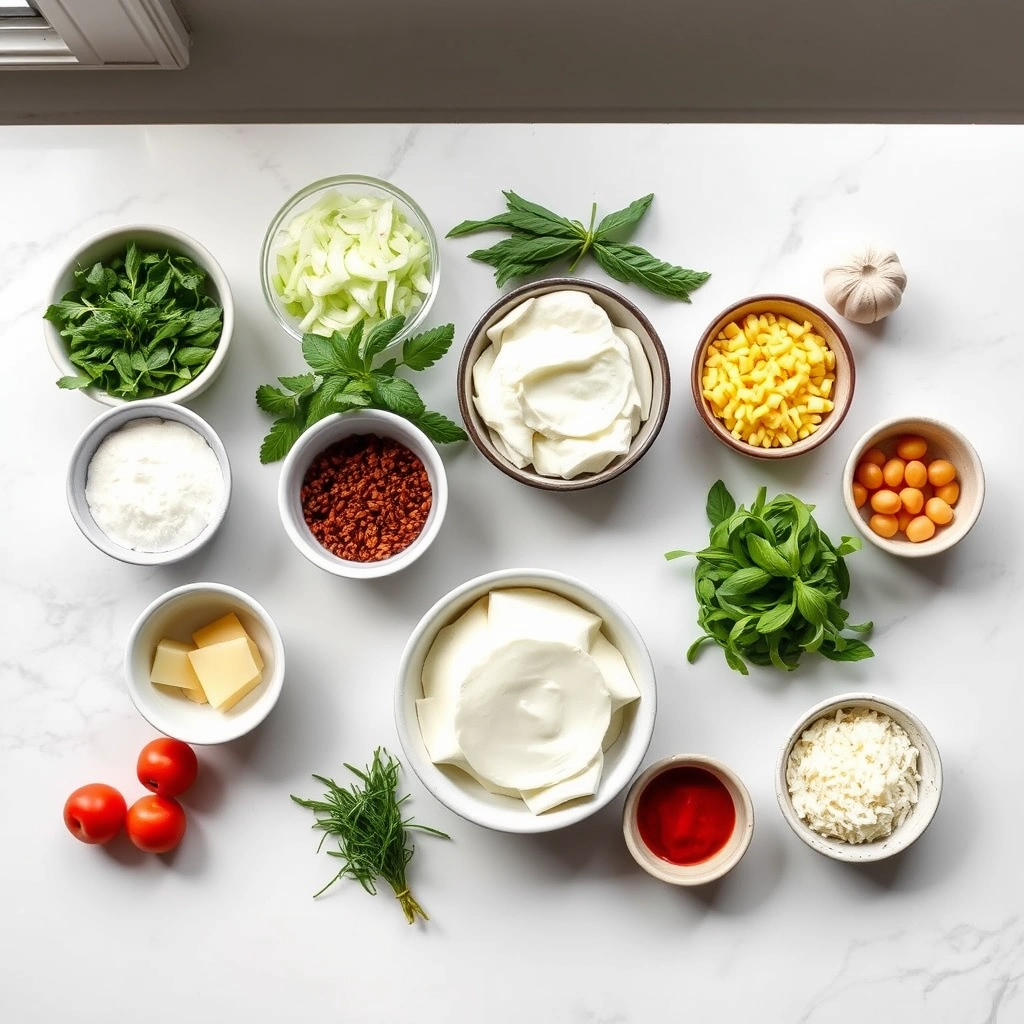
Ingredients
Scale
For the Crust:
1 pre-made pizza dough
1/2 cup tomato sauce
8 oz burrata cheese
1/4 cup fresh basil leaves
2 tbsp olive oil
1 clove garlic, minced
1/4 tsp red pepper flakes
2 tbsp balsamic glaze
Salt and pepper to taste
Instructions
1. Prepare the Crust:
Preheat oven to 475°F (245°C). Roll out the pizza dough on a floured surface to your desired thickness.
In a small bowl, mix olive oil, minced garlic, and red pepper flakes. Brush this mixture over the pizza dough.
Spread tomato sauce evenly over the dough, leaving a small border for the crust.
Bake the pizza for 10-12 minutes until the crust is golden and crispy.
Remove from oven and tear burrata cheese into pieces, placing them over the hot pizza.
Top with fresh basil leaves, salt, and pepper. Drizzle with balsamic glaze before serving.
Notes
You can customize the seasonings to taste.
s-dish">How to Prepare This Dish
Steps and time-saving tips
Start by preheating your oven to 475°F to ensure it’s hot enough for a crispy crust. While the oven heats, roll out your pizza dough on a floured surface, then transfer it to a parchment-lined baking sheet. Drizzle olive oil over the dough and use your hands to spread it evenly, creating a thin layer that will crisp up beautifully. Next, spoon on a generous amount of marinara sauce, leaving a small border for the crust. Sprinkle shredded mozzarella evenly over the sauce, then slide the tray into the oven. Bake for 10-12 minutes until the cheese bubbles and the edges turn golden. Meanwhile, tear fresh burrata into chunks and toss cherry tomatoes with a pinch of salt and basil leaves. Once the pizza comes out, layer the burrata and tomatoes on top, then finish with a drizzle of balsamic glaze and a crack of black pepper. For a time-saving hack, use store-bought dough and pre-shredded cheese—just don’t skip the fresh burrata for that heavenly touch.
Mistakes I’ve made and learned from
I’ve learned the hard way that overloading the pizza with toppings leads to a soggy middle. One time, I piled on too much burrata before baking, and the moisture made the crust limp. Now, I add creamy burrata after baking for the perfect texture. Another lesson? Skipping the parchment paper. Without it, my dough stuck to the pan, tearing the delicate crust. If you’re new to working with pizza dough, check out my guide to handling pizza dough for foolproof tips. Also, rushing the bake time left me with pale cheese—patience is key! For more on balancing flavors, my savory-sweet pairing tips will help you nail the balsamic drizzle.
n-and-variations">Cultural Connection and Variations
Where this recipe comes from
The Heavenly Burrata Pizza Recipe whispers of Italy’s sun-drenched countryside, where creamy burrata first met crispy, wood-fired crust. Originally, southern Italian farmers crafted burrata as a way to use up leftover mozzarella curds, wrapping them in fresh cheese for an indulgent surprise. Today, this pizza celebrates that tradition but with a modern twist—stretchy, molten burrata melting over ripe tomatoes and basil.
Across Italy, you’ll find regional riffs. In Puglia, they might drizzle olive oil pressed from local groves, while Rome could swap basil for peppery arugula. Some families even add a splash of balsamic glaze for sweetness, turning the Heavenly Burrata Pizza Recipe into a canvas for personal flair. My nonna? She’d toss in thinly sliced prosciutto for salty contrast, a trick I still use.
Globally, the dish adapts beautifully. In California, avocado or spicy honey might join the party. Australian cafes often top it with roasted pumpkin seeds for crunch. Yet no matter the variation, the Heavenly Burrata Pizza Recipe always feels like a hug—simple, comforting, and endlessly customizable.
ays-cooking">How it fits in today’s cooking
The Heavenly Burrata Pizza Recipe thrives in modern kitchens because it’s equal parts easy and elegant. Busy weeknights? It’s a 20-minute hero. Date nights? The creamy center makes it feel gourmet. Seasonal twists keep it fresh year-round—think figs in fall or zucchini blossoms in summer.
Home cooks love adapting it too. Some opt for whole-wheat crusts or vegan burrata, proving this dish evolves with dietary trends. Others pair it with a crisp salad, like our Spring Avocado Salad, for a balanced meal. And let’s not forget its star power at gatherings. Serve it alongside Garlic Butter Shrimp, and suddenly, you’re hosting a feast.
Ultimately, the Heavenly Burrata Pizza Recipe sticks around because it’s more than food—it’s a moment. Whether you’re savoring it solo or sharing slices with friends, it turns any meal into a celebration.
>Taste and Texture
What makes it delicious
Heavenly Burrata Pizza Recipe delivers a symphony of flavors and textures in every bite. The crust bakes up golden and crisp, offering a satisfying crunch that contrasts perfectly with the creamy, velvety burrata. As you take a bite, the rich, buttery cheese melts effortlessly, while the tangy tomato sauce adds a bright, zesty kick. Fragrant basil leaves lend a fresh, herbal note, and a drizzle of olive oil ties everything together with its smooth, fruity finish. The combination of gooey cheese, crisp crust, and vibrant toppings makes Heavenly Burrata Pizza Recipe an unforgettable experience.
Boosting the flavor
For an extra flavor boost, try topping your Heavenly Burrata Pizza Recipe with spicy honey or a sprinkle of chili flakes—both add a sweet-heat contrast that elevates the creamy cheese. Alternatively, swap the tomato sauce for a garlic-infused white sauce or layer on roasted cherry tomatoes for deeper sweetness. If you love bold flavors, pair it with a peppery arugula salad or a side of garlic butter shrimp for a surf-and-turf twist. Don’t forget to finish with a pinch of flaky sea salt or a dash of herb-infused oil to amplify every bite.
Tips for Success
Best practices for results
Always preheat your oven for at least 20 minutes before baking your Heavenly Burrata Pizza Recipe to ensure an evenly cooked crust. Meanwhile, stretch the dough gently by hand for an airy texture instead of rolling it thin. For the best flavor, drizzle high-quality olive oil over the pizza just before serving. Additionally, let the burrata sit at room temperature for 10 minutes so it spreads smoothly. Finally, use fresh basil leaves as a garnish to brighten each bite.
Mistakes to avoid
One common mistake is overloading the pizza with toppings, which can make the crust soggy. Instead, keep toppings minimal to let the Heavenly Burrata Pizza Recipe shine. Another error is skipping the pizza stone or steel, which helps achieve a crispier base. If you don’t have one, try preheating a baking sheet as a quick fix. Also, avoid cutting the burrata too early—tear it by hand right before serving for that perfect creamy texture. For more dough tips, check out our pizza dough guide, or explore essential Italian ingredients to elevate your dish.
Serving and Pairing Suggestions
How to serve this dish
Serve your Heavenly Burrata Pizza Recipe hot and fresh for the best experience. For a stunning presentation, drizzle extra virgin olive oil over the top and sprinkle fresh basil leaves just before slicing. Meanwhile, a wooden board or rustic stone platter adds charm to casual gatherings. This dish shines at summer parties, holiday appetizer spreads, or even a cozy Friday night dinner. To elevate the visual appeal, arrange colorful cherry tomatoes or microgreens around the edges. Whether you host friends or enjoy a family meal, the Heavenly Burrata Pizza Recipe always impresses.
h-it">What goes well with it
Pair your Heavenly Burrata Pizza Recipe with a crisp arugula salad for a refreshing contrast to its creamy richness. Alternatively, try a tangy balsamic glaze drizzle for extra depth of flavor. For drinks, a chilled glass of rosé or sparkling lemonade balances the dish perfectly. If you love hearty sides, our garlic butter dinner rolls make a comforting addition. Finally, end the meal on a sweet note with our lemon berry trifle for a light yet satisfying dessert.
What makes Heavenly Burrata Pizza Recipe different from regular margherita pizza?
The Heavenly Burrata Pizza Recipe stands out with its creamy burrata cheese, which adds a rich, velvety texture compared to traditional mozzarella. It often includes fresh basil, cherry tomatoes, and a drizzle of balsamic glaze for a gourmet twist on classic margherita flavors.
ank-math-faq-item">
Can I make Heavenly Burrata Pizza Recipe without a pizza oven?
Absolutely! A standard home oven at 475°F (245°C) with a preheated pizza stone or baking sheet works well for the Heavenly Burrata Pizza Recipe. Just bake until the crust is golden and the burrata melts slightly for that perfect finish.
What are the best toppings to pair with burrata on pizza?
For the Heavenly Burrata Pizza Recipe, try prosciutto, arugula, roasted garlic, or honey for sweet-savory balance. Fresh figs or peaches also complement burrata’s creaminess beautifully, making each bite unforgettable.
How do you prevent burrata from making pizza soggy?
In the Heavenly Burrata Pizza Recipe, add burrata in the last 2-3 minutes of baking or after removing from the oven. This preserves its texture while letting it soften just enough. Always drain excess liquid from the cheese before using.
div>
Best Flavorful Quinoa Burger – Easy Homemade Recipe
Introduction
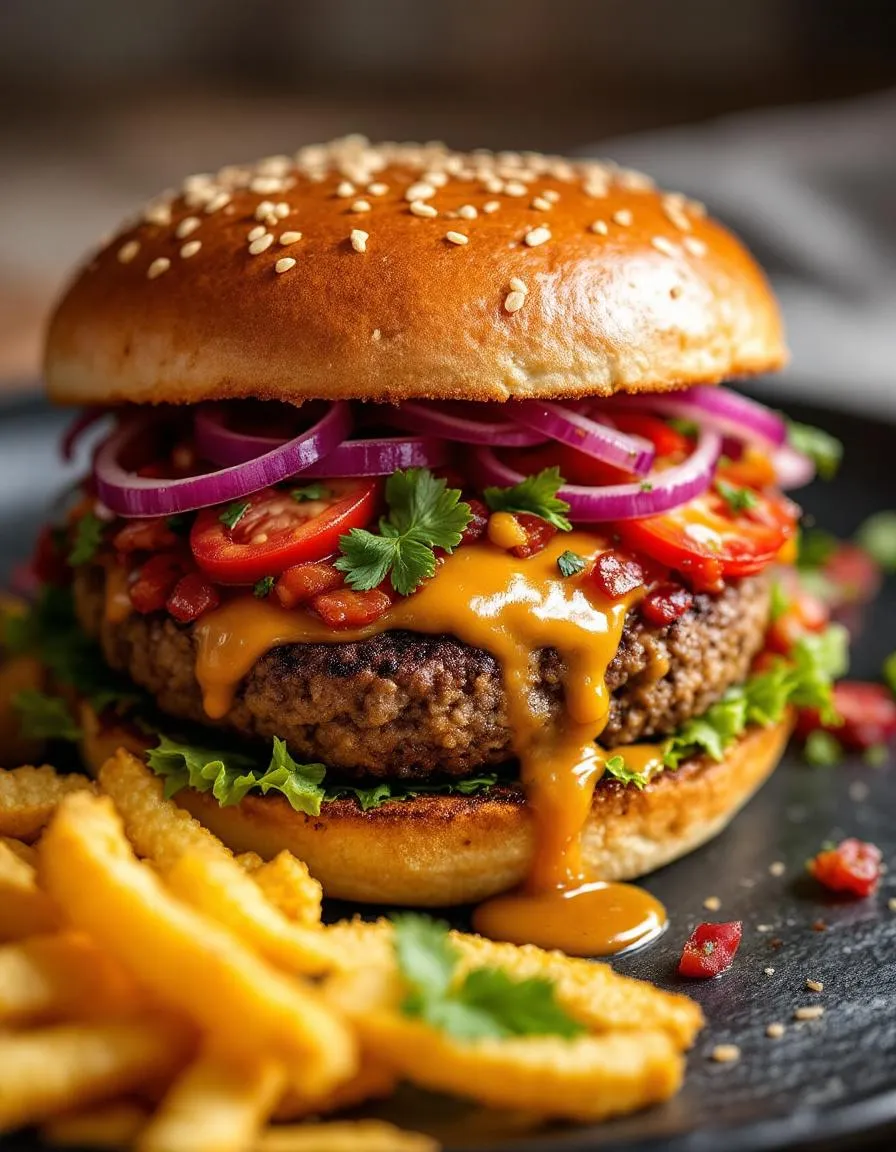
Craving a burger that’s both wholesome and bursting with flavor? Look no further than this Flavorful Quinoa Burger Delight. Whether you’re a seasoned plant-based eater or just dipping your toes into meatless meals, this recipe promises to satisfy your cravings while keeping things nutritious. Plus, it’s perfect for meal prep, gatherings, or even a quick weeknight dinner. Trust me, one bite and you’ll wonder why you didn’t try it sooner.
The Flavorful Quinoa Burger Delight isn’t just another veggie patty—it’s a game-changer. Packed with protein-rich quinoa, savory spices, and a satisfying texture, this burger holds its own against any traditional beef patty. What makes it special? For starters, quinoa delivers a complete protein profile, making it ideal for vegetarians and health-conscious eaters alike. Meanwhile, the blend of herbs and seasonings ensures every bite excites your taste buds. If you’ve ever struggled with bland or crumbly veggie burgers, this recipe solves those problems effortlessly.
On this blog, we celebrate recipes that balance flavor, nutrition, and simplicity. The Flavorful Quinoa Burger Delight fits right in, offering a crowd-pleasing dish without complicated steps. Whether you’re pairing it with crispy sweet potato fries or stacking it high with avocado and sprouts, this burger adapts to your preferences. For more plant-powered inspiration, check out our vegan meal prep guide or explore healthy burger alternatives to mix up your routine.
Why I Love This Recipe
This Flavorful Quinoa Burger Delight holds a special place in my kitchen. Years ago, I struggled to find a veggie burger that didn’t taste like cardboard or fall apart on the grill. After countless experiments, this recipe emerged as the winner—crispy on the outside, tender inside, and packed with layers of flavor. Now, it’s my go-to for backyard barbecues and busy weeknights alike. Even my meat-loving friends ask for seconds, which says it all. It’s proof that eating well doesn’t mean sacrificing taste or satisfaction.
Health and Nutrition
Why it’s good for your body
The Flavorful Quinoa Burger Delight packs a powerful nutritional punch while satisfying your taste buds. First, quinoa serves as a complete protein, providing all nine essential amino acids your body needs. Additionally, this plant-based ingredient keeps you full longer, making it a smart choice for weight management. Moreover, the burger’s blend of fiber-rich vegetables supports digestion and gut health.
Beyond protein and fiber, the Flavorful Quinoa Burger Delight delivers a dose of heart-healthy fats from ingredients like avocado or olive oil. These unsaturated fats help lower bad cholesterol while promoting overall cardiovascular wellness. Furthermore, quinoa contains antioxidants that combat inflammation, reducing the risk of chronic diseases over time.
Finally, this dish offers a balanced alternative to traditional beef burgers without sacrificing flavor. Whether you’re vegetarian or simply seeking a lighter option, the Flavorful Quinoa Burger Delight nourishes your body with vitamins, minerals, and sustained energy. Transitioning to meals like this can help you meet daily nutritional goals effortlessly.
How it fits in a healthy lifestyle
The Flavorful Quinoa Burger Delight fits seamlessly into various dietary preferences, from gluten-free to plant-based eating. Its high protein content makes it ideal for post-workout recovery or muscle maintenance, while the absence of processed ingredients aligns with clean-eating goals. Pair it with a side of roasted veggies or a fresh salad for a well-rounded meal.
For those managing heart health, this recipe avoids saturated fats found in red meat, opting instead for nutrient-dense whole foods. If you’re exploring more plant-powered meals, check out our guide to plant-based nutrition tips for additional inspiration. Busy weeknights also benefit from this dish, as you can prep patties in advance and freeze them for quick, healthy dinners. Discover more time-saving strategies in our meal prep ideas to keep your routine stress-free.
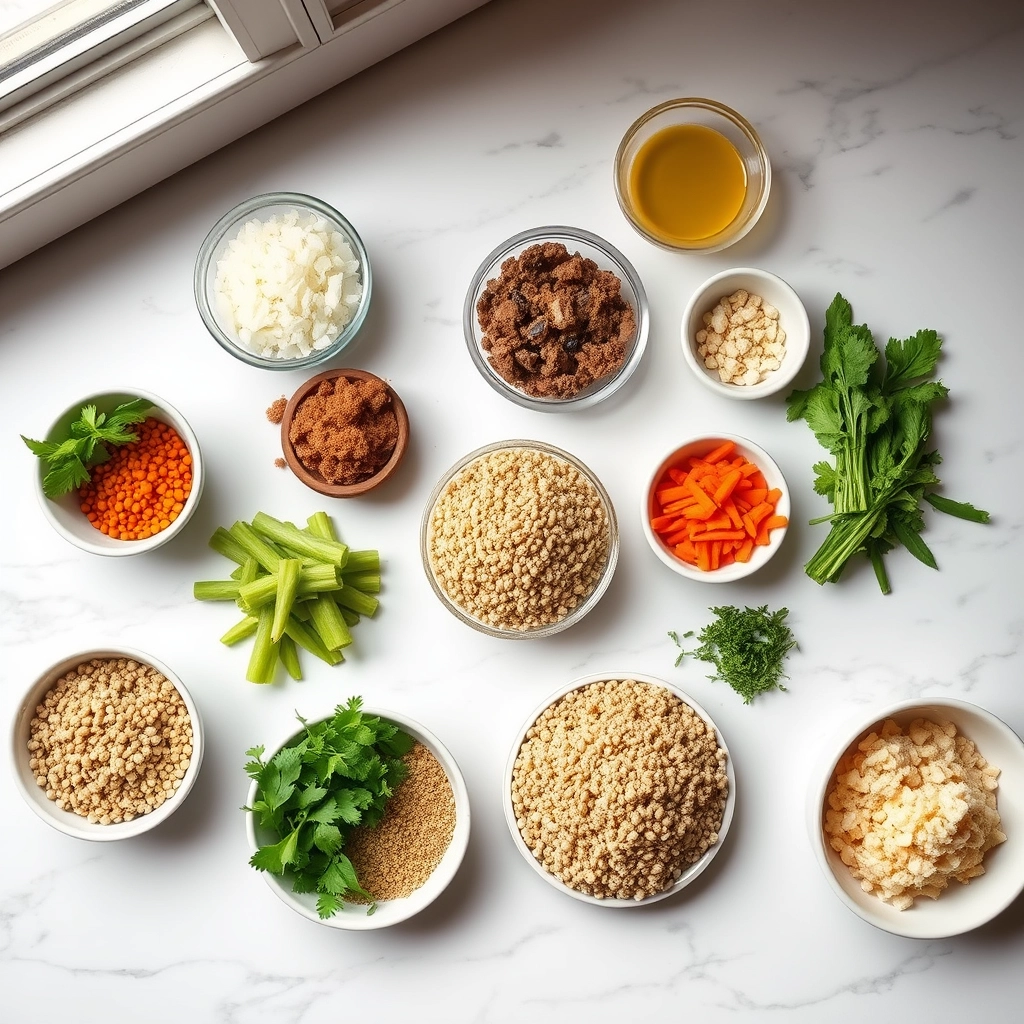
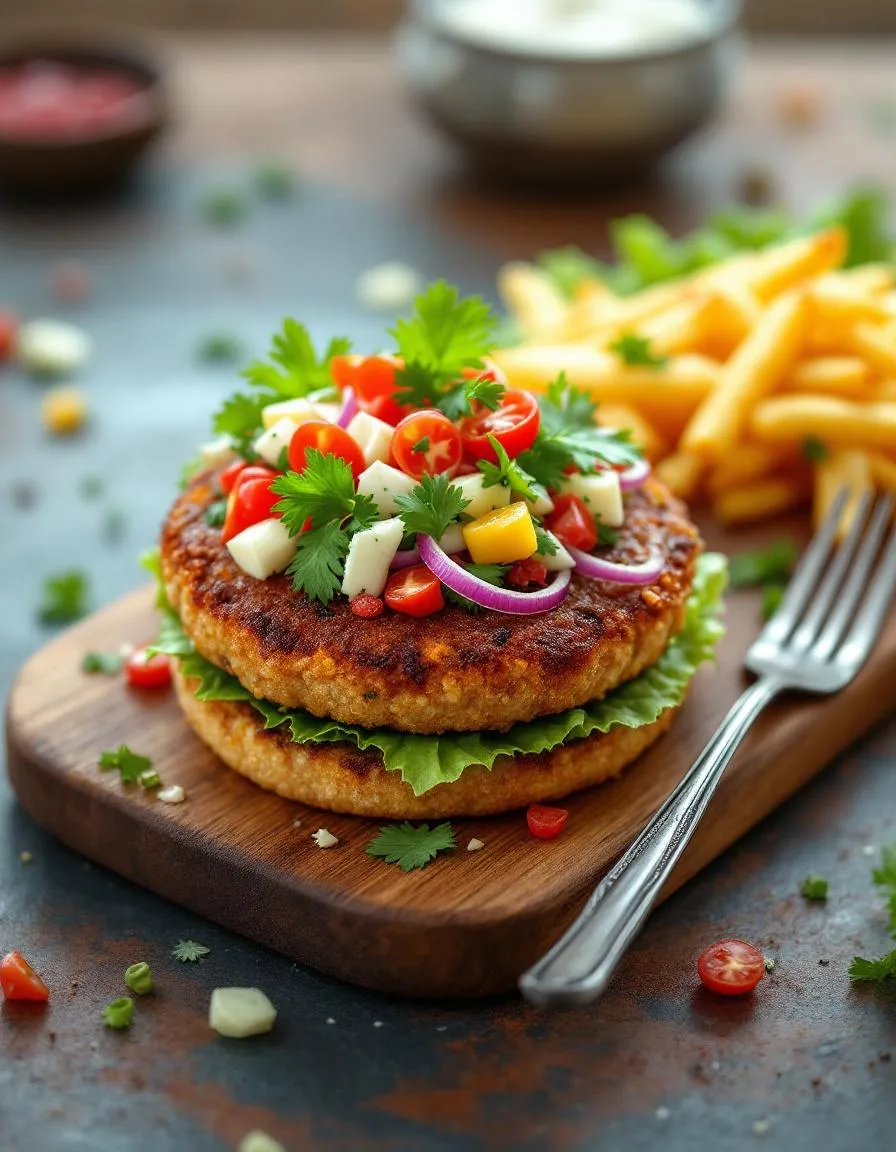
A delicious and healthy quinoa burger packed with flavor and perfect for a nutritious meal.
Ingredients
Scale
For the Crust:
1 cup cooked quinoa
1 can black beans, drained and mashed
1/2 cup breadcrumbs
1 egg
1/4 cup diced red onion
1 tsp garlic powder
1 tsp cumin
1/2 tsp paprika
Salt and pepper to taste
1 tbsp olive oil
Instructions
1. Prepare the Crust:
In a large bowl, combine cooked quinoa, mashed black beans, breadcrumbs, egg, red onion, garlic powder, cumin, paprika, salt, and pepper.
Mix well until all ingredients are evenly incorporated.
Form the mixture into 4 equal-sized patties.
Heat olive oil in a skillet over medium heat.
Cook the patties for 4-5 minutes on each side, until golden brown and crispy.
Serve on buns with your favorite toppings.
Notes
You can customize the seasonings to taste.
How to Prepare This Dish
Steps and time-saving tips
Start by rinsing the quinoa thoroughly under cold water to remove any bitterness. Next, cook it in vegetable broth for extra flavor—this simple swap makes a big difference. While the quinoa simmers, finely chop onions, garlic, and bell peppers, then sauté them until soft. Let the cooked quinoa cool slightly before mixing it with the sautéed veggies, breadcrumbs, mashed black beans, and a whisked egg for binding. Season generously with smoked paprika, cumin, and a pinch of salt. Shape the mixture into even patties, pressing firmly so they hold together. For a time-saving trick, chill the patties for 15 minutes; this prevents crumbling during cooking. Heat olive oil in a skillet and cook the patties over medium heat until golden and crisp, about 4 minutes per side. Alternatively, bake them at 375°F for 20 minutes for a lighter option. Serve your Flavorful Quinoa Burger Delight on toasted buns with avocado slices and a tangy yogurt sauce. If you’re prepping ahead, freeze uncooked patties between parchment paper for quick weekday meals.
and-learned-from">Mistakes I’ve made and learned from
My first attempt at Flavorful Quinoa Burger Delight ended in a crumbly mess because I skipped the chilling step. Patience is key—letting the mixture rest firms it up. Another blunder? Underseasoning. Quinoa absorbs flavors, so I now taste the mix before shaping and adjust spices as needed. For beginners, I recommend checking my guide on perfecting vegan binders to avoid my early mishaps. Also, overcooking dried out the patties; a timer ensures they stay juicy. If you’re new to plant-based cooking, my essential kitchen tools list includes a non-stick skillet, which made all the difference for me. Now, my burgers hold together beautifully every time!
Cultural Connection and Variations
Where this recipe comes from
The Flavorful Quinoa Burger Delight has roots in both ancient traditions and modern creativity. Quinoa itself hails from the Andean region, where indigenous communities have cherished it for thousands of years as a sacred “mother grain.” However, the idea of turning it into a hearty burger is a contemporary twist, blending South American heritage with global plant-based trends. In Bolivia and Peru, you might find quinoa patties seasoned with local spices like aji amarillo, while in Mediterranean kitchens, cooks often add sun-dried tomatoes and feta for a tangy kick.
In my family, the Flavo
rful Quinoa Burger Delight became a staple during summer barbecues when my aunt decided to ditch meat without sacrificing flavor. She loaded hers with smoked paprika and fresh cilantro, a nod to her love for Mexican street food. Meanwhile, in India, chefs might swap the quinoa for millet or amaranth, binding it with chickpea flour and spices like garam masala. No matter the variation, this dish bridges cultures by making wholesome eating deliciously accessible.
How it fits in today’s cooking
Today, the Flavorful Quinoa Burger Delight shines as a versatile star in meal prep and weeknight dinners. Busy home cooks love it because it’s freezer-friendly and pairs perfectly with everything from sweet potato fries to crisp salads. Plus, it fits right into modern diets, whether you’re gluten-free, vegan, or just craving something nutritious. For a cozy twist, try serving it on a toasted brioche bun with avocado crema—a trick I picked up from a healthy dinner ideas roundup that’s full of clever hacks.
Seasonally, this recipe adapts like a champ. In fall, add roasted pumpkin or sage for warmth, or lighten it up in spring with lemon zest and fresh herbs. It’s also a hit at gatherings, proving that plant-based eating can be just as celebratory. If you’re looking for more ways to keep meals exciting, check out these quick meal prep tips to save time without skimping on flavor. No wonder the Flavorful Quinoa Burger Delight keeps winning hearts—it’s as flexible as it is satisfying.
>Taste and Texture
What makes it delicious
The Flavorful Quinoa Burger Delight delivers a satisfying crunch on the outside while staying tender and slightly chewy inside. Earthy quinoa blends with smoky paprika and sweet caramelized onions, creating a rich umami depth. Fresh parsley and garlic add a bright, aromatic kick, while a touch of tahini lends a creamy richness. Every bite of Flavorful Quinoa Burger Delight bursts with savory, nutty, and herbaceous notes, making it irresistible. The texture holds together perfectly—firm enough to pick up but soft enough to melt in your mouth.
Boosting the flavor
For an extra flavor punch, try topping your Flavorful Quinoa Burger Delight with a zesty avocado crema or a smear of spicy sriracha mayo. If you love heat, a sprinkle of crushed red pepper or a dash of smoked cumin will elevate the smokiness. Alternatively, swap tahini for a dollop of creamy cashew dressing to add a tangy twist. Pair it with a side of roasted garlic sweet potatoes for a balanced, hearty meal. Small tweaks can transform this dish into a new favorite every time.
Tips for Success
Best practices for results
Always rinse quinoa thoroughly before cooking to remove bitterness, then drain it well so your Flavorful Quinoa Burger Delight stays firm. Meanwhile, press the patties gently but firmly to prevent crumbling during cooking. For extra flavor, toast the quinoa lightly in a dry pan before boiling, and let the mixture chill for 20 minutes before shaping. Additionally, use medium heat when frying to ensure even browning without burning the exterior.
Mistakes to avoid
Avoid overcooking the quinoa, as mushy grains make the patties fall apart. Instead, follow our perfect quinoa cooking guide for ideal texture. Many cooks also skip the chilling step, but this helps the burgers hold shape—so never rush it. Finally, don’t overcrowd the pan, or the patties will steam instead of crisp. For more troubleshooting, check our vegan burger tips to master Flavorful Quinoa Burger Delight every time.
Serving and Pairing Suggestions
How to serve this dish
Serve your Flavorful Quinoa Burger Delight on a toasted brioche bun for a gourmet touch, or skip the bread and plate it over a crisp salad for a lighter meal. For a vibrant presentation, top each patty with avocado slices, pickled red onions, and a drizzle of garlic aioli. Meanwhile, if you’re hosting a summer cookout, arrange the burgers on a wooden board with colorful skewers for easy grabbing. Whether you’re serving them at a casual weeknight dinner or a festive gathering, Flavorful Quinoa Burger Delight always shines with fresh herbs like cilantro or parsley sprinkled on top.
h-it">What goes well with it
Pair your Flavorful Quinoa Burger Delight with crispy sweet potato fries for a satisfying crunch, or try a refreshing cucumber salad to balance the hearty flavors. For drinks, a chilled glass of lemonade or a hoppy IPA enhances the meal perfectly. If you love dipping sauces, our creamy tahini dressing or tangy mango salsa adds a burst of flavor. Don’t forget to check out our zesty avocado lime dressing and smoky roasted red pepper dip for even more pairing inspiration.
How do I make Flavorful Quinoa Burger Delight stick together better?
To help your Flavorful Quinoa Burger Delight hold its shape, use a binder like flaxseed meal mixed with water or a beaten egg. Chilling the mixture for 20-30 minutes before forming patties also improves texture. Press the patties firmly and cook them on medium heat for a crispy exterior.
ank-math-faq-item">
Can I freeze Flavorful Quinoa Burger Delight for later?
Yes! Flavorful Quinoa Burger Delight freezes well—just cook the patties, let them cool, then layer them between parchment paper in an airtight container. Reheat in a skillet or oven for best results. They’ll stay fresh for up to 3 months.
What toppings go best with Flavorful Quinoa Burger Delight?
Classic toppings like avocado, caramelized onions, or spicy mayo pair perfectly with Flavorful Quinoa Burger Delight. For extra crunch, add pickles or lettuce. The nutty flavor of quinoa also complements tangy sauces like tahini or barbecue.
Is Flavorful Quinoa Burger Delight gluten-free?
Yes, this recipe is naturally gluten-free if you use certified gluten-free oats and avoid breadcrumbs. Flavorful Quinoa Burger Delight works great with gluten-free buns or lettuce wraps. Always check labels if using pre-made sauces or mixes.
div>
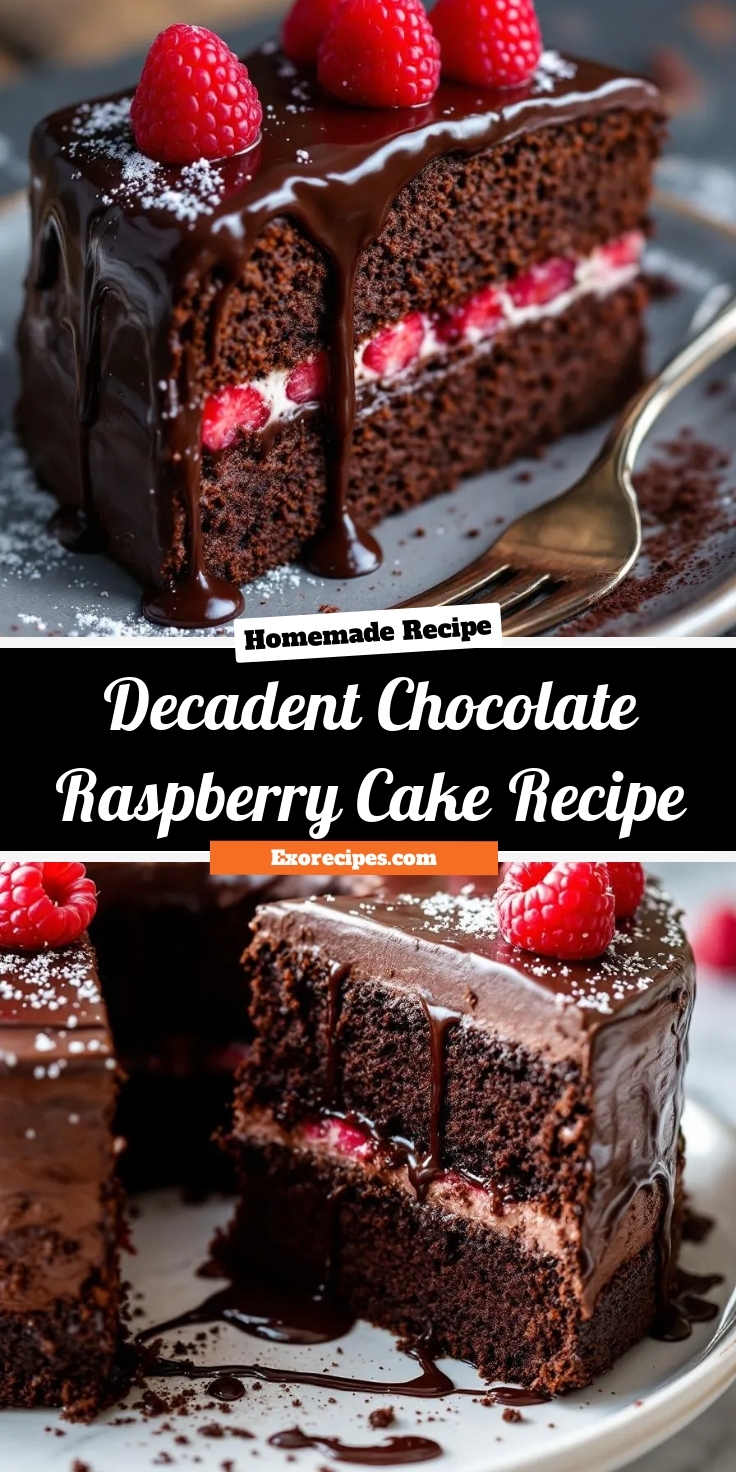
Best Decadent Chocolate Raspberry Cake Recipe
Introduction
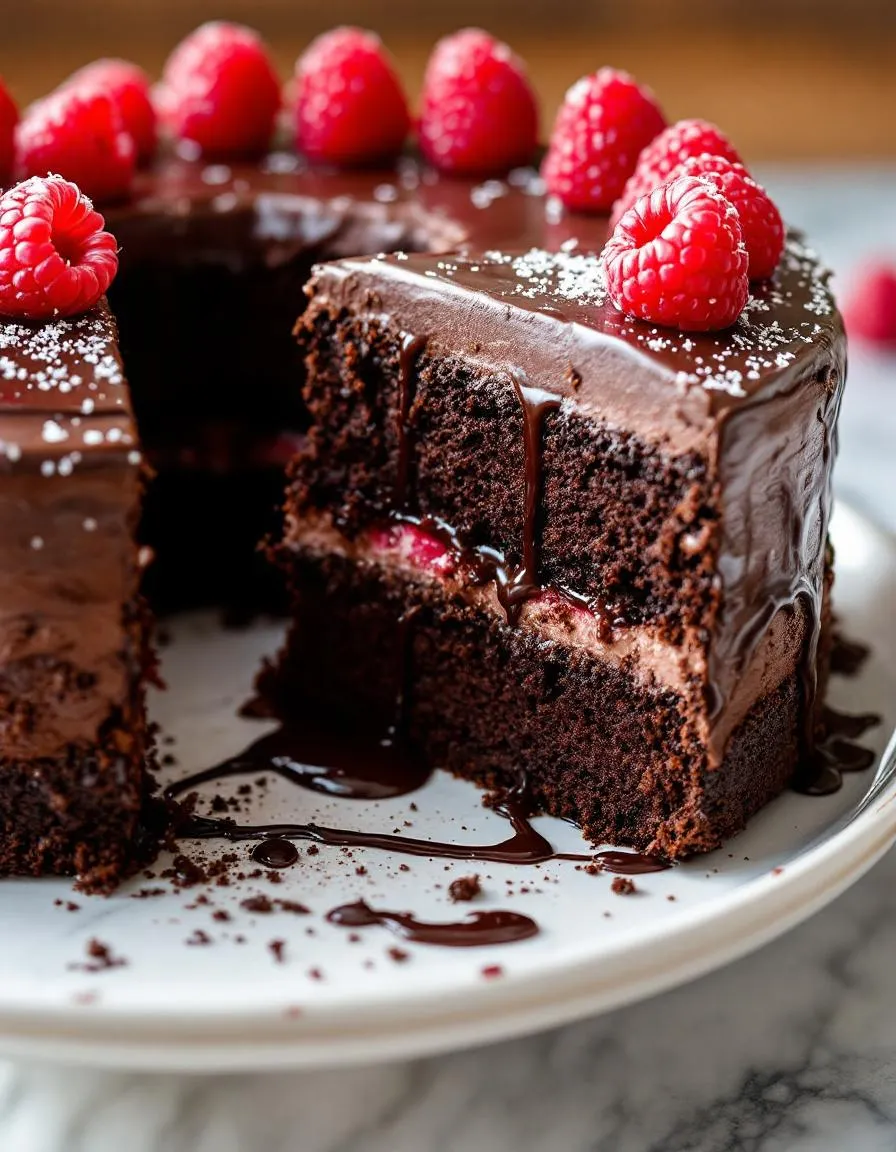
There’s something magical about the combination of rich chocolate and tart raspberries—it’s a match made in dessert heaven. If you’ve ever craved a showstopping treat that balances indulgence with freshness, this Decadent Chocolate Raspberry Cake Recipe will steal your heart. Whether you’re celebrating a special occasion or simply treating yourself, every bite delivers layers of moist chocolate cake, velvety frosting, and bursts of raspberry goodness. Trust me, this isn’t just another cake; it’s an experience worth savoring.
The Decadent Chocolate Raspberry Cake Recipe brings together the deep, comforting flavors of cocoa with the bright, tangy notes of raspberries. Unlike overly sweet desserts, this cake strikes the perfect balance, making it a crowd-pleaser for both casual gatherings and elegant events. What sets it apart is its versatility—you can dress it up with fresh berries for a dinner party or enjoy a slice with your morning coffee. Plus, it fits seamlessly into our blog’s mission of sharing approachable yet impressive recipes, like our Classic Vanilla Bean Cupcakes, which also prioritize flavor and simplicity.
Beyond taste, this recipe matters because it’s designed for bakers of all levels. With clear instructions and accessible ingredients, you’ll feel confident creating a dessert that looks and tastes professional. If you love experimenting with flavors, you might also enjoy our Salted Caramel Brownie Bites, which share the same commitment to bold, satisfying combinations. The Decadent Chocolate Raspberry Cake Recipe isn’t just food—it’s a way to connect, celebrate, and create memories.
Why I Love This Recipe
This cake holds a special place in my heart because it reminds me of my grandmother’s kitchen. She always believed desserts should be as memorable as the moments they accompany, and the Decadent Chocolate Raspberry Cake Recipe embodies that philosophy. The first time I made it for a friend’s birthday, the way their eyes lit up after the first bite told me everything. It’s more than a recipe; it’s a little act of love, one that never fails to bring people together.
Health and Nutrition
Why it’s good for your body
The Decadent Chocolate Raspberry Cake Recipe packs a surprising punch of nutrients while satisfying your sweet tooth. First, dark chocolate delivers antioxidants like flavonoids, which support heart health and reduce inflammation. Meanwhile, raspberries bring vitamin C and fiber to the mix, aiding digestion and boosting immunity. Together, these ingredients make the Decadent Chocolate Raspberry Cake Recipe a smarter indulgence than most desserts.
Additionally, this recipe balances rich flavors with wholesome elements. For example, using natural sweeteners like honey or maple syrup instead of refined sugar can help stabilize blood sugar levels. Moreover, the Decadent Chocolate Raspberry Cake Recipe often incorporates almond flour, adding protein and healthy fats. These choices ensure you enjoy a treat that fuels your body instead of leaving you sluggish.
Finally, the Decadent Chocolate Raspberry Cake Recipe offers mental health perks too. Dark chocolate stimulates endorphins, lifting your mood, while raspberries provide brain-boosting polyphenols. Whether you savor a slice post-workout or as an afternoon pick-me-up, this dessert supports both physical and emotional well-being.
How it fits in a healthy lifestyle
The Decadent Chocolate Raspberry Cake Recipe fits seamlessly into balanced eating habits when enjoyed mindfully. Pair a small portion with a protein-rich snack like Greek yogurt to keep energy levels steady. If you follow a gluten-free diet, simply swap traditional flour for almond or oat flour, as detailed in our Gluten-Free Baking Guide.
For those focused on heart health, the antioxidants in dark chocolate and raspberries align perfectly with a nutrient-dense diet. Balance this treat with fiber-packed meals and regular activity. Craving more healthy dessert ideas? Explore our Balanced Dessert Options for inspiration. The Decadent Chocolate Raspberry Cake Recipe proves that indulgence and nourishment can go hand in hand.
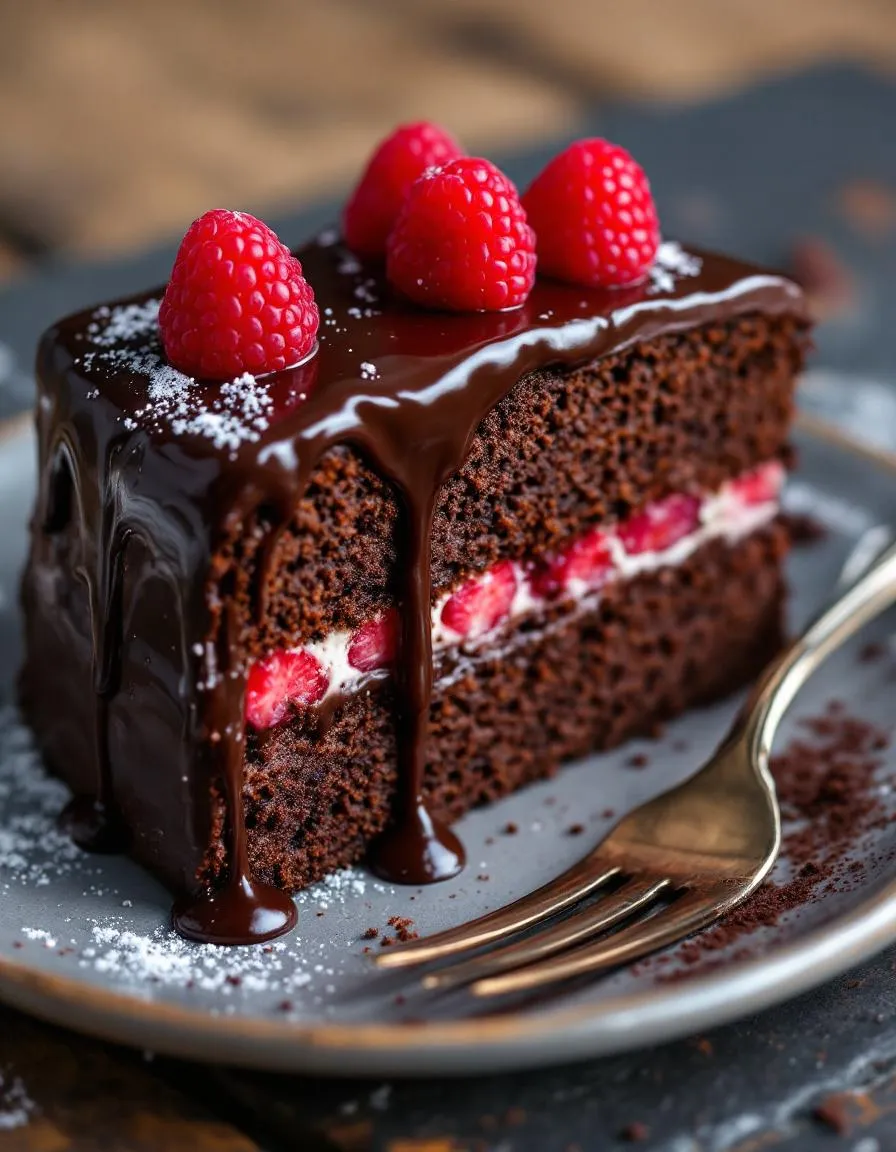
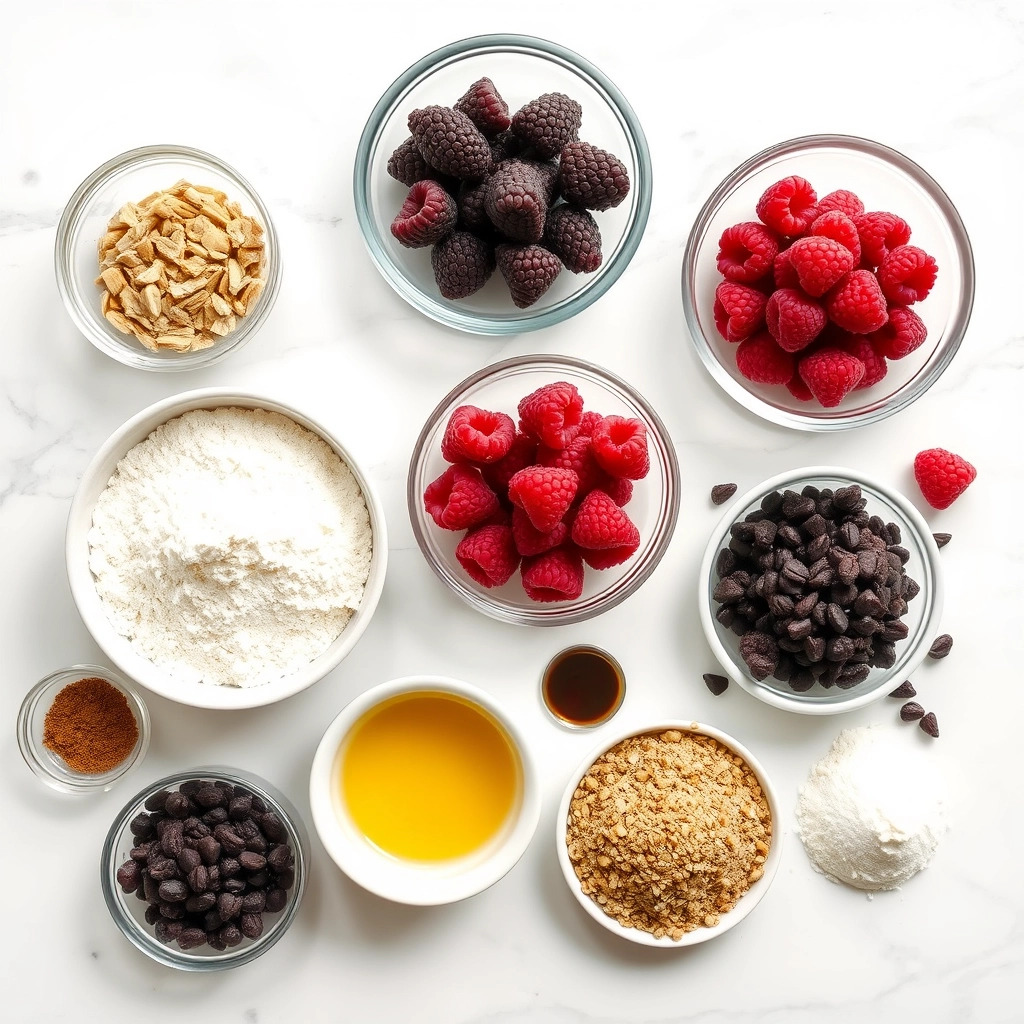
A rich and moist chocolate cake layered with fresh raspberries and creamy chocolate ganache.
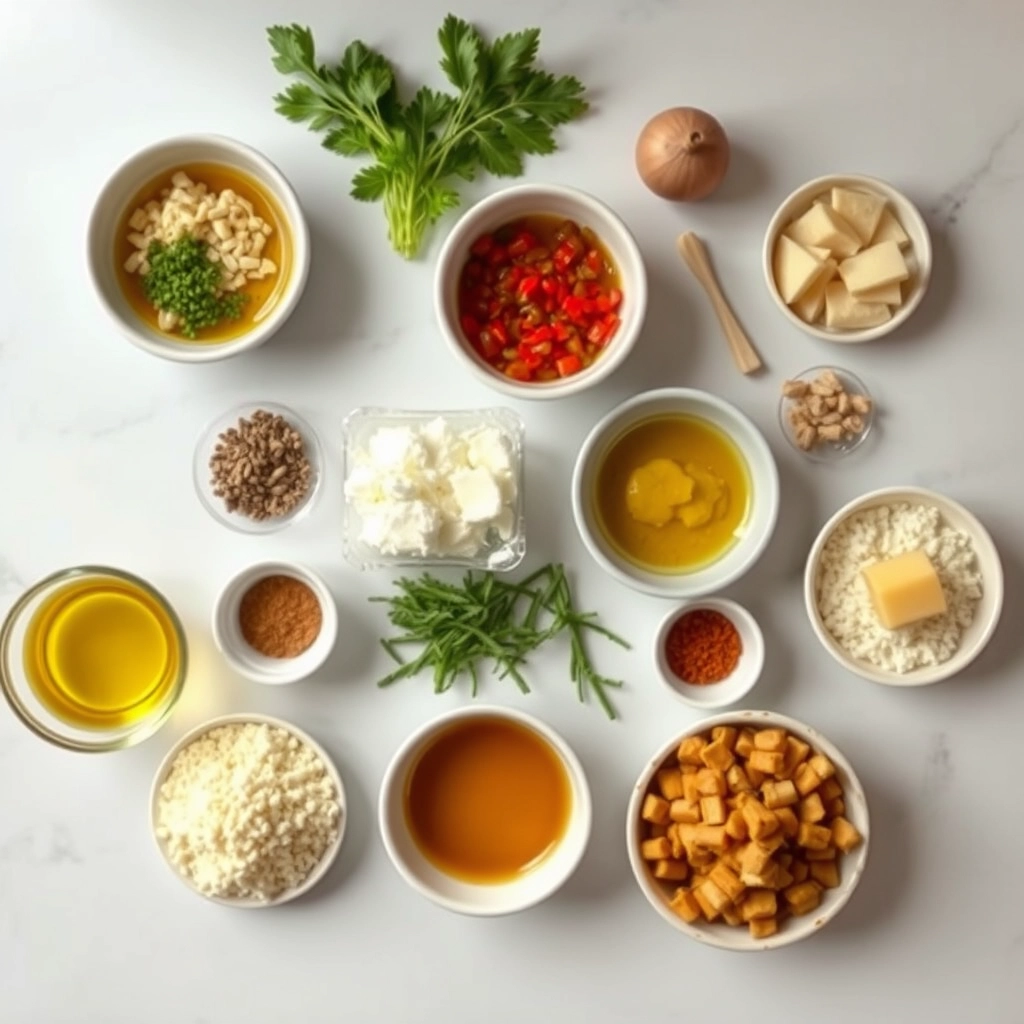
Ingredients
Scale
For the Crust:
1 3/4 cups all-purpose flour
2 cups granulated sugar
3/4 cup unsweetened cocoa powder
1 1/2 tsp baking powder
1 1/2 tsp baking soda
1 tsp salt
2 large eggs
1 cup whole milk
1/2 cup vegetable oil
2 tsp vanilla extract
1 cup boiling water
2 cups fresh raspberries
1 cup heavy cream
8 oz semi-sweet chocolate chips
Instructions
1. Prepare the Crust:
Preheat oven to 350°F (175°C). Grease and flour two 9-inch round cake pans.
In a large bowl, whisk together flour, sugar, cocoa powder, baking powder, baking soda, and salt.
Add eggs, milk, oil, and vanilla. Beat on medium speed for 2 minutes. Stir in boiling water (batter will be thin).
Pour batter evenly into prepared pans. Bake for 30-35 minutes or until a toothpick inserted comes out clean.
Cool cakes in pans for 10 minutes, then transfer to wire racks to cool completely.
For ganache: Heat heavy cream until simmering. Pour over chocolate chips, let sit for 2 minutes, then stir until smooth. Cool slightly.
Assemble cake by spreading ganache between layers and topping with fresh raspberries.
Notes
You can customize the seasonings to taste.
How to Prepare This Dish
Steps and time-saving tips
Start by preheating your oven to 350°F and greasing two 9-inch round cake pans. Meanwhile, whisk together the dry ingredients—flour, cocoa powder, baking soda, and salt—in a large bowl. In a separate bowl, beat the butter and sugar until fluffy, then add the eggs one at a time, mixing well after each. Alternate adding the dry mixture and buttermilk to the butter mixture, stirring just until combined. Fold in the raspberries gently to avoid crushing them. Divide the batter evenly between the pans and bake for 25-30 minutes, or until a toothpick comes out clean. Let the cakes cool completely before frosting.
For the frosting, melt the chocolate and let it cool slightly. Beat the cream cheese and butter until smooth, then gradually add powdered sugar and vanilla. Finally, drizzle in the melted chocolate and mix until creamy. To save time, you can bake the cakes a day ahead and store them wrapped in plastic. When assembling, spread a layer of frosting between the cakes, then cover the top and sides. Garnish with fresh raspberries and a chocolate drizzle for a stunning finish. If you’re short on time, a store-bought raspberry jam works well between layers.
and-learned-from">Mistakes I’ve made and learned from
One of my biggest mistakes with this Decadent Chocolate Raspberry Cake Recipe was overmixing the batter, which made the cake dense instead of light. Now, I stop stirring as soon as the ingredients combine. Another issue was adding raspberries too early, causing them to sink. Tossing them in a bit of flour first helps them stay suspended. I also learned the hard way that warm cakes crumble when frosted—patience is key! For more frosting tips, check out my guide on how to frost cakes smoothly. And if your layers ever turn out uneven, don’t panic. My cake leveling hacks will save the day.
Cultural Connection and Variations
Where this recipe comes from
The Decadent Chocolate Raspberry Cake Recipe we know today has roots that stretch across continents. While chocolate cakes trace back to European confectionery traditions, the addition of raspberries brings a bright, fruity twist that feels distinctly modern. In France, bakers often layer ganache with fresh berries for a lighter version, while in Austria, you might find a richer, denser take with raspberry jam swirled into the batter. Meanwhile, American home cooks love adding a splash of raspberry liqueur for extra depth.
In my family, the Decad
ent Chocolate Raspberry Cake Recipe became a birthday staple after my grandmother discovered it in a 1980s cookbook. She swapped the original blackberries for raspberries because they paired better with dark chocolate. Over time, we’ve tweaked it further—sometimes using frozen raspberries in winter or adding a hint of espresso powder to intensify the chocolate. No matter the variation, though, the cake always feels like a celebration.
How it fits in today’s cooking
Today, this cake bridges nostalgia and innovation. Bakers embrace it for Valentine’s Day or anniversaries, but it’s just as fitting for a weekend treat. Many modern versions, like our vegan chocolate raspberry cake, cater to dietary preferences without sacrificing flavor. Others streamline the process with one-bowl methods or pre-made components, proving that indulgence doesn’t have to be complicated.
Seasonal twists keep it fresh, too. Summer cooks might top it with fresh berries, while winter bakers lean on raspberry preserves. And if you’re exploring more chocolatey inspirations, our moist chocolate cake guide offers tricks to perfect every bite. Whether you’re honoring tradition or experimenting, this cake adapts—always rich, always memorable.
>Taste and Texture
What makes it delicious
The Decadent Chocolate Raspberry Cake Recipe delivers a symphony of rich, indulgent flavors and luxurious textures. Imagine biting into moist, velvety chocolate layers that melt on your tongue, balanced by the bright, tangy burst of fresh raspberries. The deep cocoa aroma mingles with the fruity fragrance of raspberry jam, creating an irresistible scent. Meanwhile, the silky chocolate ganache adds a smooth, creamy finish, while the raspberry filling provides a slight chewiness for contrast. Every forkful of this Decadent Chocolate Raspberry Cake Recipe feels like a celebration, thanks to the harmony of bittersweet chocolate and vibrant berry notes.
Boosting the flavor
Elevate your Decadent Chocolate Raspberry Cake Recipe with a few creative tweaks. For extra depth, swap the standard cocoa powder with Dutch-process cocoa, which intensifies the chocolate flavor. Alternatively, drizzle a warm raspberry coulis over each slice for a glossy, fruity accent. A sprinkle of sea salt on the ganache heightens the sweetness, while a dollop of fresh whipped cream adds lightness. Experiment with a dash of espresso powder in the batter to amplify the chocolate notes without overpowering the raspberries. Small changes make a big impact!
Tips for Success
Best practices for results
For the best Decadent Chocolate Raspberry Cake Recipe, always use room-temperature ingredients. This ensures even mixing and a smooth batter. Additionally, gently fold the raspberries into the batter to prevent crushing them. Meanwhile, line your cake pans with parchment paper to guarantee easy removal and perfect layers. Finally, let the cake cool completely before frosting to avoid a melted mess.
Mistakes to avoid
Avoid overmixing the batter, as this can make the Decadent Chocolate Raspberry Cake Recipe dense instead of light. Instead, mix just until the ingredients combine. Furthermore, don’t skip sifting the cocoa powder, or you may end up with lumps. For more frosting tips, check out our guide to flawless frosting. Also, resist opening the oven door too early, as sudden temperature changes can cause sinking. Learn more about common baking fixes to keep your cake flawless.
Serving and Pairing Suggestions
How to serve this dish
For a stunning presentation, slice the Decadent Chocolate Raspberry Cake Recipe into thick layers to showcase its rich, fudgy interior. Meanwhile, drizzle extra raspberry sauce on the plate for a pop of color. Alternatively, dust the top with powdered sugar or fresh raspberries for a festive touch. Since this cake feels luxurious, serve it at dinner parties or holiday gatherings to impress guests. If you prefer casual treats, pair it with coffee for a cozy afternoon indulgence.
h-it">What goes well with it
Elevate the Decadent Chocolate Raspberry Cake Recipe with a scoop of vanilla bean ice cream—the cool creaminess balances the deep chocolate flavor. For a drink pairing, try a glass of red wine like Cabernet Sauvignon, which enhances the raspberry notes. If you love lighter options, our Berry Mint Lemonade adds a refreshing contrast. Finally, serve it alongside our Classic Cheesecake Bites for a decadent dessert spread.
What makes a chocolate raspberry cake decadent?
A Decadent Chocolate Raspberry Cake Recipe achieves its richness through high-quality dark chocolate, fresh raspberries, and a moist texture. Layers of ganache or raspberry filling between the cake tiers elevate the indulgence, making it a showstopper dessert.
ank-math-faq-item">
Can I use frozen raspberries in a chocolate raspberry cake?
Yes, frozen raspberries work well in a Decadent Chocolate Raspberry Cake Recipe, especially for fillings or sauces. Thaw and drain them first to avoid excess moisture, which could affect the cake’s texture.
How do you prevent a chocolate raspberry cake from drying out?
To keep your Decadent Chocolate Raspberry Cake Recipe moist, use ingredients like sour cream or buttermilk in the batter. Brush the cake layers with simple syrup before assembling, and store it airtight after cooling.
What’s the best chocolate to use for a chocolate raspberry cake?
For a Decadent Chocolate Raspberry Cake Recipe, opt for 60-70% dark chocolate for balanced richness. High-quality cocoa powder in the batter and melted chocolate in the frosting enhance the deep flavor pairing with raspberries.
div>
Easy Tangy Honey Mustard Chicken Delight Recipe
Introduction
There’s something magical about a dish that balances sweet, tangy, and savory flavors in every bite. If you’re craving a meal that feels both comforting and exciting, Tangy Honey Mustard Chicken Delight delivers exactly that. Whether you’re cooking for a busy weeknight or a weekend gathering, this recipe wraps you in warmth while surprising your taste buds. Plus, it’s incredibly easy to make, even if you’re not a kitchen pro. Let’s dive into why this dish deserves a spot in your regular rotation.
Tangy Honey Mustard Chicken Delight is a crowd-pleasing meal that combines juicy chicken with a glossy, flavorful glaze. The honey brings sweetness, the mustard adds a sharp kick, and a splash of lemon juice ties everything together with brightness. What makes this recipe special is its versatility. You can serve it over rice for a hearty dinner, pair it with a crisp salad for a lighter option, or even meal-prep it for lunches. If you love dishes that feel gourmet without requiring fancy techniques, this one checks all the boxes. It’s also a fantastic way to impress guests without stressing over complicated steps.
Here at Exorecipes, we celebrate recipes that fit real life—dishes that are delicious, approachable, and reliable. Tangy Honey Mustard Chicken Delight perfectly aligns with that mission. For more easy dinner ideas, check out our quick weeknight meals collection. And if you’re looking for sides to complement this dish, our roasted vegetable guide offers plenty of inspiration.
Why I Love This Recipe
This recipe holds a special place in my heart because it’s the dish that made my picky eater finally ask for seconds. The first time I made Tangy Honey Mustard Chicken Delight, the aroma filled the kitchen, and my family gathered around the table faster than usual. Seeing their faces light up after the first bite reminded me why I love cooking—it’s not just about feeding people, but creating moments. Now, it’s our go-to celebration meal, whether we’re marking a small win or just enjoying a quiet night together. Simple, satisfying, and full of flavor—that’s what cooking should be.
Health and Nutrition
Why it’s good for your body
Tangy Honey Mustard Chicken Delight packs a nutritious punch while delighting your taste buds. First, the lean chicken breast provides high-quality protein to support muscle growth and repair. Additionally, honey adds natural sweetness without refined sugars, offering antioxidants and a gentle energy boost. Meanwhile, mustard contributes anti-inflammatory properties and a tangy kick that enhances flavor without extra calories.
Moreover, this dish includes wholesome ingredients like garlic and olive oil, which promote heart health. Garlic supports immune function, while olive oil delivers healthy fats that keep your cholesterol in check. Together, these elements make Tangy Honey Mustard Chicken Delight a well-rounded meal. Furthermore, the balanced macronutrients help stabilize blood sugar levels, keeping you full and energized for hours.
Finally, the dish’s versatility allows you to pair it with fiber-rich veggies or whole grains for added nutrients. Whether you serve it over quinoa or alongside roasted Brussels sprouts, Tangy Honey Mustard Chicken Delight fits seamlessly into a nutrient-dense diet. With its combination of protein, healthy fats, and natural flavors, it’s a meal that nourishes your body and satisfies your cravings.
How it fits in a healthy lifestyle
Tangy Honey Mustard Chicken Delight aligns perfectly with a balanced diet, whether you’re focusing on high-protein meals or heart-healthy eating. The lean chicken and olive oil make it a great option for those managing cholesterol, while the absence of gluten-containing ingredients ensures it suits gluten-free lifestyles. For meal preppers, it reheats beautifully, making weekday lunches both convenient and nutritious.
If you’re looking for more high-protein ideas, check out our protein-packed dinners for inspiration. Pairing this dish with a side of steamed greens or a quinoa salad boosts its fiber content, keeping you fuller longer. Plus, the natural sweetness of honey means you can enjoy bold flavors without resorting to processed additives.
For those tracking macros, Tangy Honey Mustard Chicken Delight offers a satisfying ratio of protein to healthy fats. Explore our balanced diet tips to learn how to incorporate meals like this into your routine. Whether you’re fueling workouts or simply eating mindfully, this dish proves that healthy eating can be both simple and delicious.
A succulent chicken dish with a perfect balance of tangy and sweet flavors, glazed with honey mustard sauce.
Ingredients
Scale
For the Crust:
4 boneless, skinless chicken breasts
1/4 cup honey
1/4 cup Dijon mustard
2 tablespoons whole grain mustard
2 cloves garlic, minced
1 tablespoon olive oil
1 teaspoon paprika
Salt and pepper to taste
Fresh parsley for garnish
Instructions
1. Prepare the Crust:
Preheat oven to 375°F (190°C).
In a bowl, whisk together honey, Dijon mustard, whole grain mustard, minced garlic, olive oil, paprika, salt, and pepper.
Place chicken breasts in a baking dish and coat evenly with the honey mustard mixture.
Bake for 25-30 minutes or until chicken is cooked through, basting with the sauce halfway through.
Garnish with fresh parsley before serving.
Notes
You can customize the seasonings to taste.
How to Prepare This Dish
Steps and time-saving tips
Start by preheating your oven to 375°F so it’s ready when you finish prepping the Tangy Honey Mustard Chicken Delight. While the oven heats, whisk together honey, Dijon mustard, apple cider vinegar, and a pinch of garlic powder in a small bowl. Next, season your chicken breasts with salt and pepper, then place them in a baking dish. Drizzle the honey mustard sauce generously over the chicken, making sure each piece gets an even coat. For extra flavor, let the chicken marinate in the sauce for 10 minutes—this step is optional but worth it if you have time. Pop the dish into the oven and bake for 25-30 minutes, or until the chicken reaches an internal temperature of 165°F. While the chicken cooks, toss a simple salad or steam some veggies to round out the meal. To save time, use pre-cut vegetables or a store-bought salad mix. Once the Tangy Honey Mustard Chicken Delight is golden and bubbling, let it rest for 5 minutes before serving. This keeps the juices locked in and makes every bite tender.
Mistakes I’ve made and learned from
I’ve overcooked this dish more times than I’d like to admit, leaving the chicken dry instead of juicy. The fix? A reliable meat thermometer—now I never skip checking the internal temperature. Another blunder was skimping on the sauce, which made the Tangy Honey Mustard Chicken Delight taste bland. Now I double the sauce recipe for extra flavor and even save some for drizzling later. If you’re new to cooking chicken, my guide on perfectly cooked chicken every time has more tips. Also, don’t rush the marinating step like I did once; those extra 10 minutes make a huge difference. For more sauce inspiration, check out my homemade sauces to elevate your meals post. Trust me, learning from these mistakes will save you time and disappointment!
Tangy Honey Mustard Chicken Delight has roots that stretch across continents, blending sweet and savory flavors in a way that feels both familiar and exciting. Many trace its inspiration to European kitchens, where honey mustard sauces often paired with roasted meats. However, some food historians argue that the dish evolved from American Southern cooking, where tangy glazes and juicy chicken reign supreme. Either way, this recipe carries a universal appeal—balancing comfort with a punch of flavor.
Around the world, cooks put their own spin on Tangy Honey Mustard Chicken Delight. In France, chefs might use Dijon mustard for extra sharpness, while in the Caribbean, a splash of lime juice adds tropical brightness. My family’s version includes a hint of smoked paprika, a nod to my grandmother’s Spanish heritage. Whether served over rice, alongside roasted veggies, or stuffed into a sandwich, this dish adapts effortlessly to local tastes.
ays-cooking">How it fits in today’s cooking
Today, Tangy Honey Mustard Chicken Delight remains a weeknight hero and a crowd-pleaser for gatherings. Busy cooks love its quick prep time, while meal preppers often pair it with easy meal prep ideas for hassle-free lunches. The dish also shines during holidays—imagine it as the centerpiece of a cozy fall dinner or a summer barbecue staple.
Modern twists keep it fresh, too. Some swap chicken for tofu or cauliflower, proving its versatility. For those hosting brunch, try serving it with brunch recipes for a crowd to impress guests. No matter how you tweak it, Tangy Honey Mustard Chicken Delight stays timeless, bridging tradition and today’s kitchen creativity.
Taste and Texture
What makes it delicious
Tangy Honey Mustard Chicken Delight bursts with bold, balanced flavors that dance on your tongue. The honey brings a sweet, floral richness, while the mustard adds a sharp, tangy kick that lingers pleasantly. Juicy, tender chicken soaks up the creamy sauce, creating a melt-in-your-mouth texture with every bite. A hint of garlic and a touch of lemon zest brighten the dish, making it irresistibly fragrant. Meanwhile, a sprinkle of fresh herbs adds a subtle earthiness that ties everything together. Whether you serve it over rice or with roasted veggies, Tangy Honey Mustard Chicken Delight delivers a satisfying contrast of savory, sweet, and zesty notes.
r">Boosting the flavor
For an extra flavor boost, try swapping regular mustard for whole-grain mustard—it adds a delightful crunch and deeper tang. A drizzle of balsamic glaze right before serving enhances the sweetness with a sophisticated twist. If you love heat, a pinch of smoked paprika or cayenne pepper amps up the warmth without overpowering the dish. Crumbled bacon or toasted nuts also add a satisfying crunch. Pair Tangy Honey Mustard Chicken Delight with a side of garlic herb roasted potatoes for a meal that’s both hearty and harmonious.
Tips for Success
Best practices for results
For the best Tangy Honey Mustard Chicken Delight, always marinate the chicken for at least 30 minutes to lock in flavor. Meanwhile, preheat your oven to ensure even cooking. Additionally, use a meat thermometer to check that the internal temperature reaches 165°F for perfect doneness. Finally, let the dish rest for 5 minutes before serving to keep it juicy and tender.
>Mistakes to avoid
Avoid overcrowding the baking dish, as this can lead to uneven cooking. Instead, space the chicken pieces evenly for consistent results. Also, don’t skip the honey mustard glaze—it’s key to the signature flavor of Tangy Honey Mustard Chicken Delight. For more on balancing flavors, check out our guide to sauces and glazes. Lastly, resist the urge to overcook the chicken, which can dry it out. For tips on perfect timing, explore our chicken cooking times article.
Serving and Pairing Suggestions
How to serve this dish
For a stunning presentation, plate Tangy Honey Mustard Chicken Delight over a bed of vibrant greens or fluffy jasmine rice. Alternatively, drizzle extra honey mustard sauce on top and garnish with fresh parsley or toasted sesame seeds for a pop of color. Since this dish balances sweet and tangy flavors so well, it works beautifully for both casual weeknight dinners and special occasions like holiday gatherings. To make it even more inviting, serve it family-style on a large platter with lemon wedges on the side.
What goes well with it
Pair Tangy Honey Mustard Chicken Delight with crisp roasted vegetables like Brussels sprouts or carrots—their earthy flavors contrast perfectly with the dish’s zesty sauce. For a heartier meal, try it alongside our Garlic Herb Mashed Potatoes, which soak up the delicious sauce. If you prefer something lighter, a refreshing cucumber salad or our Lemony Quinoa Pilaf adds brightness. To complete the experience, serve it with a chilled glass of riesling or sparkling water with a twist of lime.
What ingredients are needed for Tangy Honey Mustard Chicken Delight?
To make Tangy Honey Mustard Chicken Delight, you’ll need boneless chicken breasts, honey, Dijon mustard, mayonnaise, garlic powder, salt, pepper, and olive oil. The combination of honey and mustard creates the signature tangy-sweet flavor that makes this dish a crowd-pleaser.
How long should I bake Tangy Honey Mustard Chicken Delight?
Bake Tangy Honey Mustard Chicken Delight at 375°F (190°C) for 25–30 minutes, or until the chicken reaches an internal temperature of 165°F. For extra crispiness, broil for the last 2–3 minutes to caramelize the honey mustard glaze.
ank-math-faq-item">
Can I use chicken thighs instead of breasts for Tangy Honey Mustard Chicken Delight?
Yes, chicken thighs work perfectly for Tangy Honey Mustard Chicken Delight and often stay juicier. Adjust cooking time to 35–40 minutes since thighs are thicker, and always check for doneness with a meat thermometer.
What sides pair well with Tangy Honey Mustard Chicken Delight?
Tangy Honey Mustard Chicken Delight pairs beautifully with roasted potatoes, steamed green beans, or a fresh garden salad. For a heartier meal, serve it over rice or quinoa to soak up the delicious sauce.