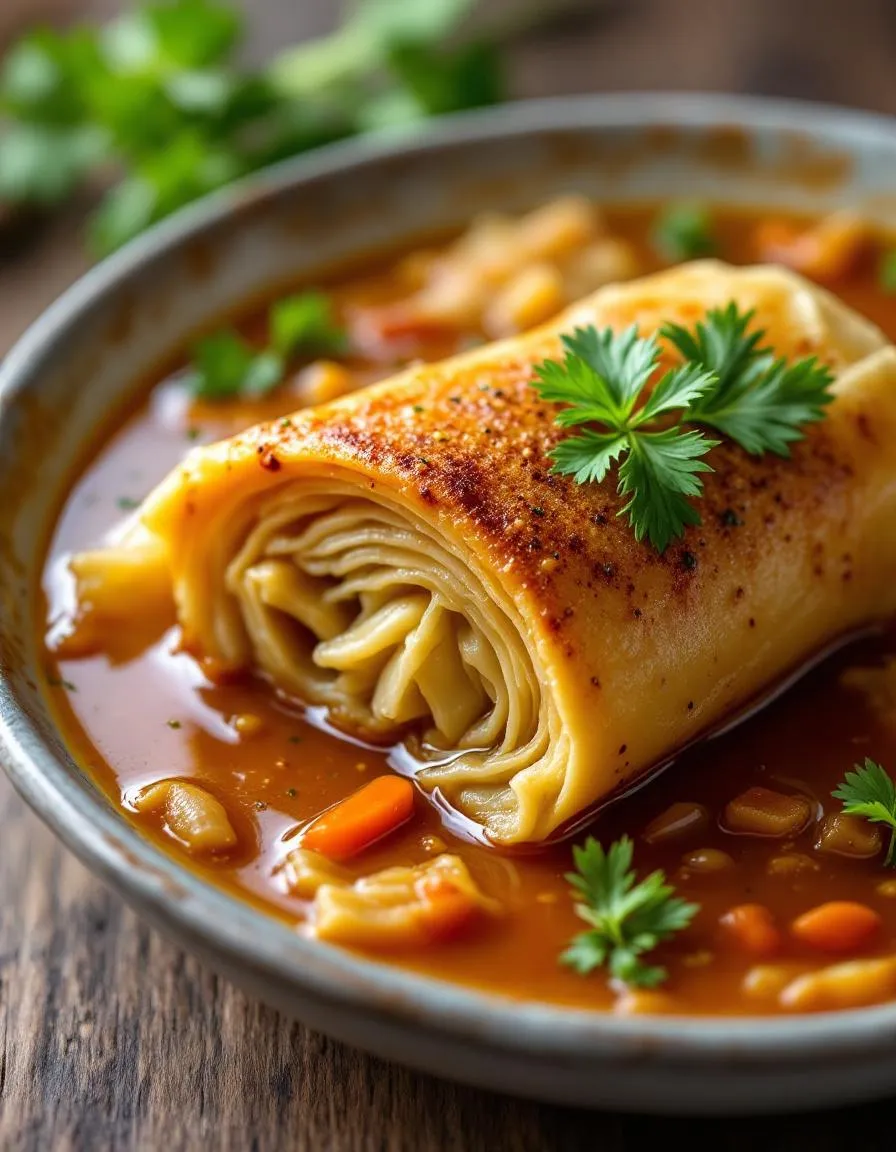
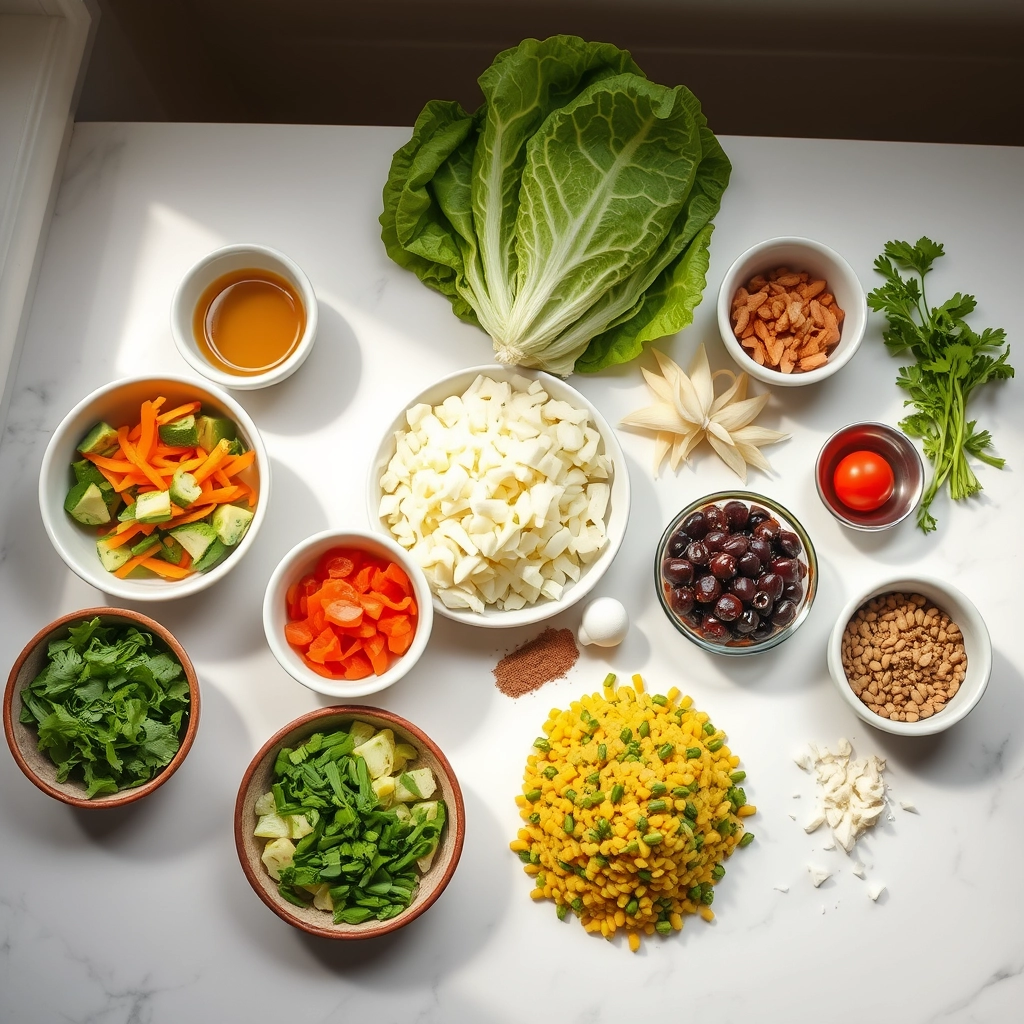
There’s something undeniably comforting about a bowl of soup that warms you from the inside out, especially when it’s packed with wholesome ingredients and nostalgic flavors. If you love the heartiness of traditional cabbage rolls but crave a simpler, cozier version, this Cozy Vegetarian Cabbage Roll Soup is your answer. It delivers all the savory, satisfying goodness of the classic dish—without the fuss. Whether you’re curled up on a chilly evening or need a nourishing meal that comes together quickly, this soup promises to hit the spot every time.
Cozy Vegetarian Cabbage Roll Soup reimagines the beloved Eastern European staple as a one-pot wonder. Instead of rolling cabbage leaves, you’ll simmer tender cabbage, hearty lentils, and aromatic spices in a rich tomato broth. The result? A dish that’s deeply flavorful, protein-packed, and perfect for busy weeknights. What makes this recipe stand out is its versatility. You can easily customize it with your favorite veggies or grains, making it a go-to for meal prep or family dinners. Plus, it aligns perfectly with our blog’s mission to share approachable, plant-based recipes that don’t sacrifice taste or comfort. If you’re a fan of our Vegetarian Lentil Stew, you’ll adore this soup’s similar warmth and simplicity. And for those exploring meatless meals, it’s a delicious gateway—just like our Creamy Vegan Potato Soup—proving that plant-based eating can be both satisfying and effortless.
Why I Love This Recipe
This soup holds a special place in my kitchen because it’s the ultimate comfort food with a healthy twist. I grew up eating my grandmother’s cabbage rolls, but as an adult, I rarely have the time (or patience) to assemble them. The first time I tried this soup, it brought back those cherished memories while fitting seamlessly into my busy routine. Now, it’s my go-to when I need something nourishing, nostalgic, and quick. Every spoonful feels like a hug—proof that the best recipes are the ones that feed both the body and the soul.
Health and Nutrition
Why it’s good for your body
Cozy Vegetarian Cabbage Roll Soup packs a nutritious punch while keeping flavors rich and satisfying. First, cabbage serves as the star ingredient, offering a hefty dose of fiber to support digestion and keep you full longer. Additionally, this soup delivers a variety of vitamins, including vitamin C for immune health and vitamin K for strong bones.
Because it’s loaded with vegetables like tomatoes, carrots, and onions, Cozy Vegetarian Cabbage Roll Soup provides antioxidants that help fight inflammation. Meanwhile, plant-based proteins from lentils or beans add staying power without relying on meat. As a result, this soup balances macronutrients while keeping calories in check.
Furthermore, the broth-based nature of Cozy Vegetarian Cabbage Roll Soup makes it hydrating and light yet deeply flavorful. Unlike heavy cream-based soups, it won’t weigh you down. Instead, it fuels your body with wholesome ingredients that promote energy and overall wellness. Whether you’re craving comfort or a nutrient boost, this soup delivers both.
How it fits in a healthy lifestyle
Cozy Vegetarian Cabbage Roll Soup fits seamlessly into a balanced diet, whether you’re gluten-free, heart-conscious, or simply aiming for more plant-based meals. Since it’s naturally free of gluten and dairy, it’s a safe choice for those with dietary restrictions. Plus, the fiber-rich ingredients support heart health by helping manage cholesterol levels.
If you’re meal prepping, this soup stores beautifully, making it a practical option for busy weeknights. Pair it with a slice of whole-grain bread or a crisp salad for a complete meal. For more gluten-free inspiration, check out our gluten-free meal ideas. And if you love plant-based comfort food, our vegan comfort recipes offer even more hearty options. Cozy Vegetarian Cabbage Roll Soup proves that eating well doesn’t mean sacrificing flavor or convenience.
A hearty and comforting soup inspired by traditional cabbage rolls, packed with vegetables and savory flavors.
Ingredients
Scale
For the Crust:
1 tbsp olive oil
1 medium onion, diced
2 carrots, diced
3 cloves garlic, minced
1 small head green cabbage, chopped
1 can (14 oz) diced tomatoes
4 cups vegetable broth
1 cup cooked brown rice
1 tsp dried thyme
1 tsp smoked paprika
Salt and pepper to taste
1 tbsp lemon juice
Fresh parsley for garnish
Instructions
1. Prepare the Crust:
Heat olive oil in a large pot over medium heat. Add onion and carrots, sauté for 5 minutes until softened.
Add garlic and cook for 1 minute until fragrant.
Stir in chopped cabbage and cook for 3-4 minutes until slightly wilted.
Add diced tomatoes, vegetable broth, cooked rice, thyme, and smoked paprika. Bring to a boil.
Reduce heat to low, cover, and simmer for 20-25 minutes until vegetables are tender.
Season with salt, pepper, and lemon juice. Garnish with fresh parsley before serving.
Notes
You can customize the seasonings to taste.
How to Prepare This Dish
Steps and time-saving tips
Start by heating a large pot over medium heat and drizzling in olive oil. Once warm, toss in diced onions, carrots, and celery, stirring frequently until they soften—about 5 minutes. Next, add minced garlic and sauté for just 30 seconds to release its aroma without burning. Pour in vegetable broth, crushed tomatoes, and a splash of apple cider vinegar for brightness. Then, fold in chopped cabbage, cooked lentils, and uncooked rice, ensuring everything mixes evenly. Let the Cozy Vegetarian Cabbage Roll Soup simmer uncovered for 20-25 minutes, stirring occasionally, until the rice turns tender. Meanwhile, whisk together a simple tomato paste and water mixture to thicken the broth slightly before adding it to the pot. Finally, season with smoked paprika, salt, and pepper, adjusting to taste. For a time-saving hack, use pre-shredded cabbage or canned lentils to cut prep work in half. Serve hot with a sprinkle of fresh parsley or a dollop of vegan sour cream for extra richness.
Mistakes I’ve made and learned from
Early on, I rushed the sautéing step, leaving the onions undercooked and too sharp in the final dish. Now, I take an extra minute to let them turn golden, which deepens the flavor. Another blunder? Overloading the pot with cabbage, which made the broth watery. I’ve since learned to measure it loosely—about 4 cups chopped—for the perfect balance. If you’re new to plant-based soups, my guide on vegetarian soup secrets breaks down how to layer flavors without meat. Also, don’t skip tasting as you go; I once added too much smoked paprika and had to double the broth to mellow it out. For more on seasoning adjustments, check out my spice blending tips. Trust me, a little patience saves a lot of remakes!
Cozy Vegetarian Cabbage Roll Soup carries the heartwarming essence of Eastern European comfort food, where stuffed cabbage rolls (or holubtsi) have long been a staple. Traditionally, families would simmer cabbage leaves stuffed with meat and rice in a rich tomato broth. However, this soup version skips the rolling and keeps all the cozy flavors in one pot. Over time, immigrants adapted the dish to fit new kitchens, swapping ingredients based on what was available. Today, you might find Polish versions with mushrooms, Ukrainian takes with buckwheat, or even Middle Eastern twists featuring fragrant spices like cumin and cinnamon.
In my family, Cozy Vegetarian Cabbage Roll Soup became a weeknight hero during chilly winters. My grandmother would add extra carrots and a splash of apple cider vinegar for brightness, a trick she learned from her neighbors. Meanwhile, in some regions, cooks stir in a dollop of sour cream at the end for extra richness. Whether served with crusty bread or over mashed potatoes, this soup bridges generations and geographies with every spoonful.
ays-cooking">How it fits in today’s cooking
Modern cooks love Cozy Vegetarian Cabbage Roll Soup because it’s flexible, nourishing, and packed with plant-based goodness. Busy families appreciate how it delivers the same comfort as the original rolls without the fuss. Plus, it’s a fantastic way to use up seasonal veggies, making it a star in fall and winter meal rotations. Some even batch-cook it for freezer-friendly lunches, proving it’s as practical as it is delicious.
For those exploring more cozy recipes, this soup pairs perfectly with a slice of vegan banana bread or a side of garlic herb dinner rolls. Whether you’re honoring heritage or simply craving a hearty bowl, this soup fits seamlessly into today’s kitchens—where tradition meets convenience.
Taste and Texture
What makes it delicious
Cozy Vegetarian Cabbage Roll Soup wraps you in warmth with its rich, savory broth and tender cabbage leaves that melt in your mouth. The earthy sweetness of tomatoes balances the hearty bite of lentils, while aromatic garlic and onions infuse every spoonful with depth. Fragrant herbs like thyme and bay leaves add a subtle freshness, and a splash of apple cider vinegar brightens the flavors. Meanwhile, the soft texture of the cabbage contrasts beautifully with the slight chewiness of the lentils, creating a satisfying bowl. Whether you crave comfort or crave bold flavors, Cozy Vegetarian Cabbage Roll Soup delivers both in every bite.
r">Boosting the flavor
For an extra flavor kick, try stirring in a spoonful of miso paste or a dash of smoked paprika to deepen the umami notes. Crumbled feta or a dollop of creamy avocado dressing adds a tangy, luxurious finish. If you love heat, a sprinkle of red pepper flakes or a drizzle of spicy harissa sauce will wake up the broth. Fresh herbs like parsley or dill also brighten the dish, while a squeeze of lemon juice enhances the soup’s natural zest. With these simple tweaks, you can tailor Cozy Vegetarian Cabbage Roll Soup to your taste buds effortlessly.
Tips for Success
Best practices for results
Always sauté the onions and garlic first to build a rich flavor base for your Cozy Vegetarian Cabbage Roll Soup. Meanwhile, chop the cabbage into even, bite-sized pieces so it cooks evenly. For the best texture, stir in the tomatoes and broth before adding the rice, then let everything simmer gently. Finally, taste and adjust the seasoning just before serving to make sure the flavors pop.
>Mistakes to avoid
Avoid overcooking the cabbage, as it can turn mushy. Instead, add it halfway through simmering so it stays tender yet crisp. Also, don’t skip toasting the rice lightly before adding liquid—this step prevents a gummy texture. For more on perfecting grain-based soups, check out our guide to cooking grains. Another common mistake? Using low-quality broth. Since Cozy Vegetarian Cabbage Roll Soup relies on broth for depth, opt for a rich vegetable stock. Learn how to make homemade broth for even better results.
Serving and Pairing Suggestions
How to serve this dish
For a cozy yet elegant presentation, ladle the Cozy Vegetarian Cabbage Roll Soup into deep bowls and top it with a dollop of sour cream or a sprinkle of fresh dill. Meanwhile, if you’re hosting a casual gathering, serve it in rustic bread bowls for a fun, edible twist. This soup shines at family dinners, but it’s also perfect for holiday potlucks or chilly weeknight meals. To make it extra inviting, garnish with a swirl of olive oil and a handful of toasted pumpkin seeds for crunch.
What goes well with it
A crusty loaf of homemade sourdough bread pairs beautifully with Cozy Vegetarian Cabbage Roll Soup, soaking up every flavorful bite. Alternatively, try a crisp green salad with a tangy vinaigrette to balance the soup’s hearty richness. For drinks, a lightly chilled white wine or a warm mug of spiced apple cider enhances the comforting flavors. Each pairing brings out the best in this satisfying dish.
Can I make Cozy Vegetarian Cabbage Roll Soup in a slow cooker?
Yes! Cozy Vegetarian Cabbage Roll Soup adapts perfectly to a slow cooker. Simply sauté the onions and garlic first, then add all ingredients and cook on low for 6-8 hours. The flavors meld beautifully, making it even more comforting.
What protein can I add to vegetarian cabbage roll soup?
For extra protein in your Cozy Vegetarian Cabbage Roll Soup, try adding lentils, chickpeas, or plant-based crumbles. These options maintain the soup’s hearty texture while keeping it vegetarian-friendly.
ank-math-faq-item">
How do I store leftover cabbage roll soup?
Cozy Vegetarian Cabbage Roll Soup keeps well in an airtight container for 3-4 days in the fridge. For longer storage, freeze portions for up to 3 months—the flavors actually improve after thawing!
Can I use red cabbage instead of green in this soup?
While green cabbage is traditional, red cabbage works beautifully in Cozy Vegetarian Cabbage Roll Soup. It adds vibrant color and slightly sweeter flavor, though it may tint the broth purple.
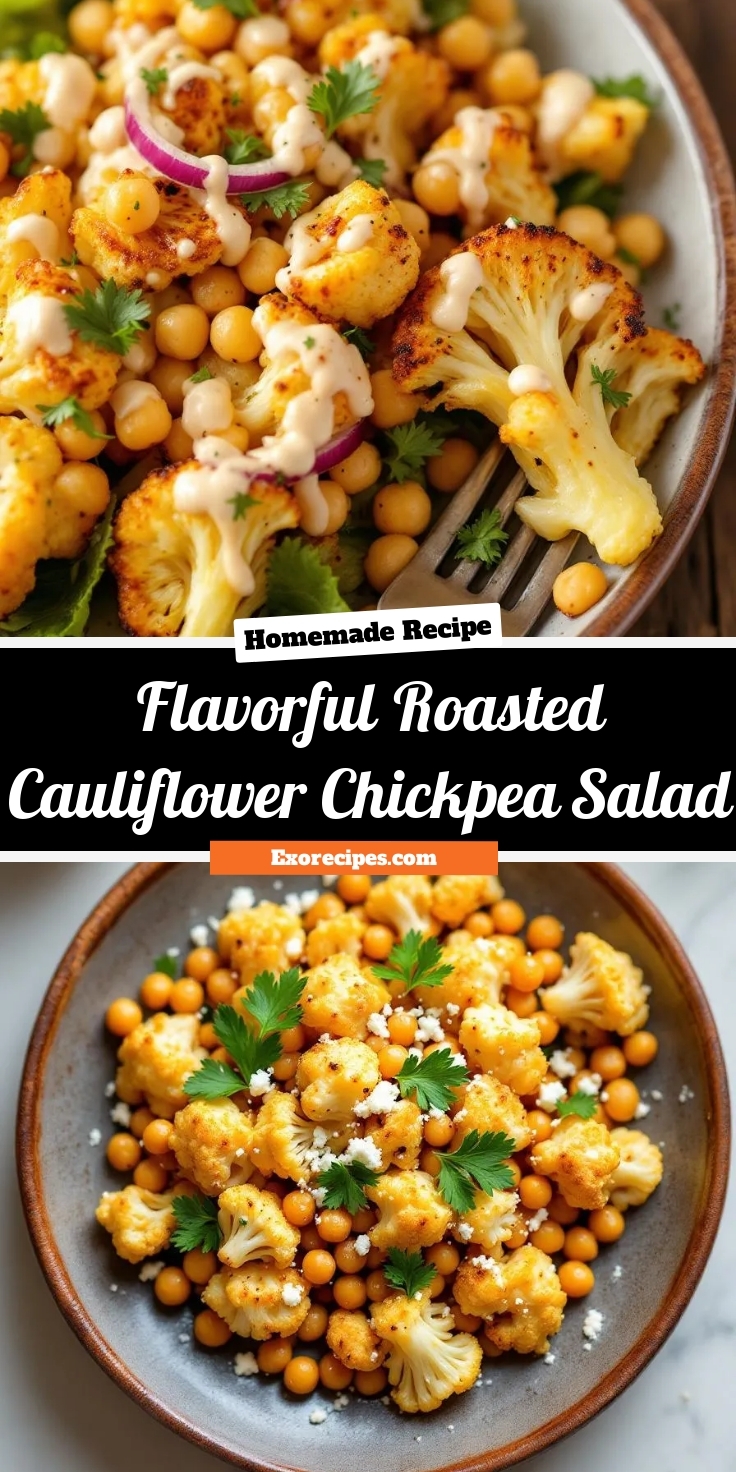
Best Roasted Cauliflower Chickpea Salad Recipe
Introduction
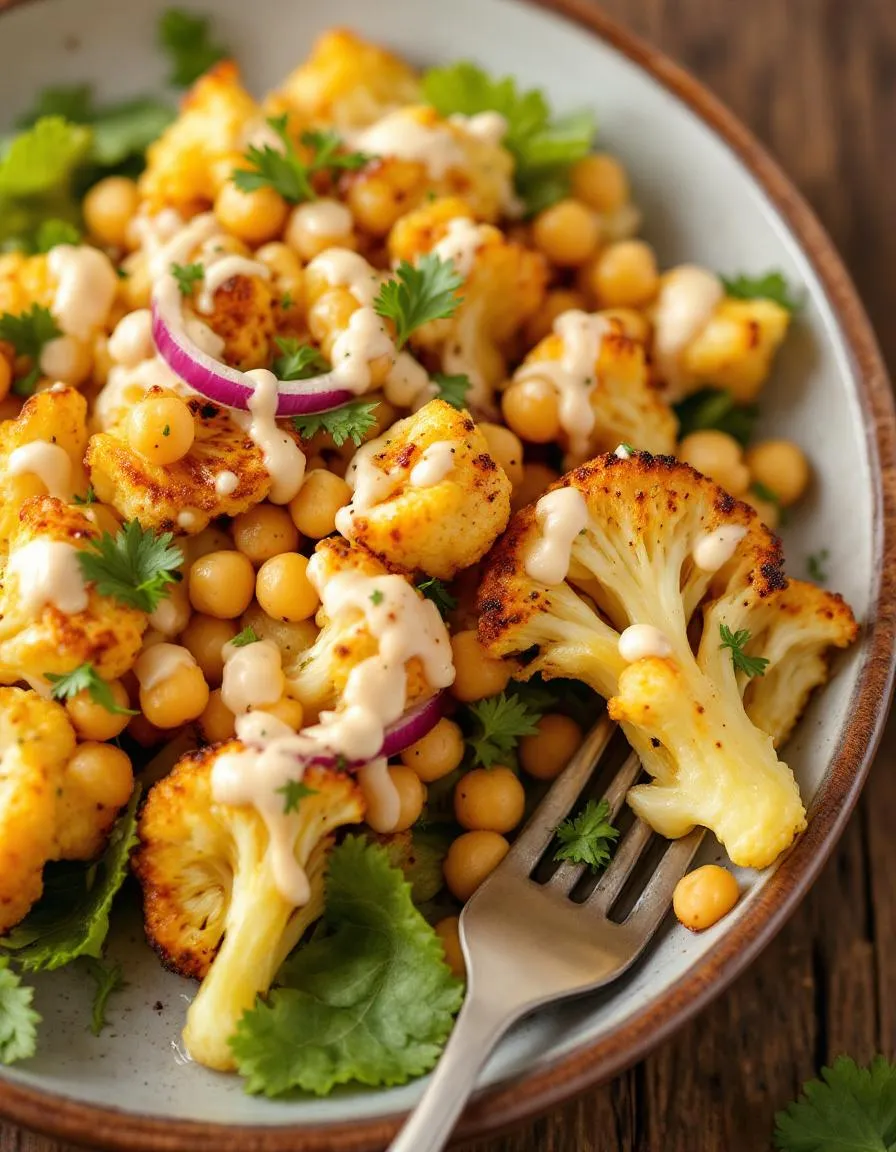
Ever crave a meal that’s both nourishing and bursting with flavor? Something that satisfies your hunger without weighing you down? This Flavorful Roasted Cauliflower Chickpea Salad does exactly that. Whether you need a quick lunch, a vibrant side dish, or a hearty plant-based dinner, this recipe delivers. Plus, it’s packed with textures and spices that make every bite exciting. Trust me, even the pickiest eaters will come back for seconds.
Flavorful Roasted Cauliflower Chickpea Salad combines crispy roasted cauliflower, protein-rich chickpeas, and fresh veggies tossed in a zesty dressing. The dish balances earthy, smoky, and tangy flavors while keeping things simple enough for weeknight cooking. Unlike bland salads, this one celebrates bold spices like cumin and paprika, which elevate the humble ingredients. It’s also versatile—swap in your favorite greens or add a sprinkle of feta for extra richness. If you love easy, nutrient-dense meals, you’ll appreciate how this recipe fits into busy lives. For more inspiration, check out our Healthy Weeknight Dinners or explore Plant-Based Protein Sources to customize the dish further. This salad aligns perfectly with our blog’s mission: delicious food that’s accessible, wholesome, and never boring.
Why I Love This Recipe
I first made Flavorful Roasted Cauliflower Chickpea Salad during a hectic week when takeout lost its appeal. The moment I pulled the golden-brown cauliflower from the oven, I knew it was special. The aroma alone—warm spices mingling with garlic—felt like a hug. Even better, my family devoured it without realizing how healthy it was. Now, it’s my go-to when I want something satisfying yet light. It reminds me that good food doesn’t need to be complicated, just full of love and flavor.
Health and Nutrition
Why it’s good for your body
Flavorful Roasted Cauliflower Chickpea Salad packs a powerful nutritional punch while delighting your taste buds. First, cauliflower delivers a hefty dose of fiber, which supports digestion and keeps you feeling full longer. Additionally, chickpeas provide plant-based protein, making this dish a fantastic option for vegetarians or anyone looking to reduce meat consumption. Moreover, the olive oil and spices in the recipe offer anti-inflammatory benefits, promoting overall wellness.
Beyond its macro-nutrient balance, Flavorful Roasted Cauliflower Chickpea Salad brims with vitamins and minerals. For instance, cauliflower boasts vitamin C, which strengthens your immune system, while chickpeas contribute iron for sustained energy. Furthermore, the roasting process enhances the natural sweetness of the vegetables, so you won’t miss added sugars. Finally, the dish includes heart-healthy fats from olive oil, which help your body absorb fat-soluble nutrients more effectively.
Whether you’re fueling up for a busy day or winding down with a light dinner, Flavorful Roasted Cauliflower Chickpea Salad fits seamlessly into your routine. Its combination of fiber, protein, and healthy fats stabilizes blood sugar levels, preventing energy crashes. Plus, the vibrant colors signal a variety of antioxidants, which combat oxidative stress. In short, this salad isn’t just tasty—it’s a wellness powerhouse.
How it fits in a healthy lifestyle
Flavorful Roasted Cauliflower Chickpea Salad aligns perfectly with balanced eating habits. If you’re following a gluten-free diet, this dish naturally fits the bill, and its high fiber content supports gut health. For those focused on heart health, the olive oil and chickpeas provide monounsaturated fats and plant sterols, which help manage cholesterol levels.
Meal preppers will love how easily this salad stores, making it a convenient grab-and-go option. Pair it with a lean protein like grilled chicken or enjoy it as a standalone meal for a satisfying plant-based lunch. If you’re exploring more high-protein vegetarian meals, check out our high-protein vegetarian recipes for inspiration. For tips on maintaining a balanced diet, our balanced diet guide offers practical advice. With its versatility and nutrient density, Flavorful Roasted Cauliflower Chickpea Salad effortlessly elevates your everyday eating.
A hearty and nutritious salad featuring roasted cauliflower and chickpeas with a blend of spices for a flavorful dish.
Ingredients
Scale
For the Crust:
1 medium head cauliflower, cut into florets
1 can (15 oz) chickpeas, drained and rinsed
2 tbsp olive oil
1 tsp ground cumin
1 tsp smoked paprika
1/2 tsp garlic powder
Salt and pepper to taste
1/4 cup chopped fresh parsley
1/4 cup crumbled feta cheese (optional)
1 tbsp lemon juice
Instructions
1. Prepare the Crust:
Preheat oven to 400°F (200°C). Line a baking sheet with parchment paper.
In a large bowl, toss cauliflower florets and chickpeas with olive oil, cumin, smoked paprika, garlic powder, salt, and pepper until evenly coated.
Spread the mixture in a single layer on the prepared baking sheet. Roast for 25-30 minutes, stirring halfway, until cauliflower is tender and golden.
Transfer the roasted cauliflower and chickpeas to a serving bowl. Add fresh parsley, feta cheese (if using), and lemon juice. Toss gently to combine.
Serve warm or at room temperature.
Notes
You can customize the seasonings to taste.
“`html
="how-to-prepare-this-dish">How to Prepare This Dish
Steps and time-saving tips
Start by preheating your oven to 400°F to ensure it’s hot enough for roasting. While the oven heats, chop one head of cauliflower into bite-sized florets and drain a can of chickpeas. Toss both in a large bowl with olive oil, salt, and your favorite spices—I love smoked paprika and cumin for extra depth. Spread the mixture evenly on a baking sheet, making sure nothing overlaps so everything crisps perfectly. Roast for 25 minutes, stirring halfway, until golden and slightly charred at the edges. Meanwhile, whisk together a simple dressing of lemon juice, tahini, garlic, and a pinch of salt. Once the cauliflower and chickpeas cool slightly, transfer them to a serving bowl and drizzle the dressing generously. Fold in fresh parsley, diced red onion, and crumbled feta for brightness and crunch. If you’re short on time, roast the veggies ahead and assemble just before serving. For a heartier meal, layer the salad over greens or stuff it into a pita.
Mistakes I’ve made and learned from
I once rushed the roasting step and ended up with soggy cauliflower—now I always pat the florets dry before tossing them in oil. Another time, I skipped stirring halfway, which left uneven browning. Lesson learned: a quick shuffle ensures perfect crispness. If your chickpeas turn out too soft, try my crispy chickpea technique for extra crunch. Also, don’t drown the salad in dressing right away; add it gradually to avoid sogginess. For more make-ahead tips, check out my meal-prep salad guide. Trust me, a little patience pays off with this Flavorful Roasted Cauliflower Chickpea Salad.
Flavorful Roasted Cauliflower Chickpea Salad carries a rich history that blends Middle Eastern and Mediterranean influences. Many cultures roast cauliflower and chickpeas separately, but combining them into a hearty salad likely stems from Levantine cuisine, where bold spices and fresh herbs elevate simple ingredients. In Lebanon, for example, cooks often toss roasted cauliflower with tahini and pomegranate molasses, while Moroccan versions might feature cumin and preserved lemon.
My family puts its own
spin on Flavorful Roasted Cauliflower Chickpea Salad by adding toasted almonds and a squeeze of citrus. During fall gatherings, we serve it warm with crusty bread, but in summer, we chill it and mix in cherry tomatoes for a refreshing twist. Across India, street vendors roast chickpeas with chaat masala, and some home cooks fold cauliflower into the mix for extra texture. No matter the variation, this dish always brings people together.
How it fits in today’s cooking
Flavorful Roasted Cauliflower Chickpea Salad fits perfectly into modern meal prep routines. Busy cooks love its versatility—it works as a standalone lunch, a side for grilled meats, or a topping for grain bowls. Many health-conscious eaters also appreciate its plant-based protein and fiber, making it a staple in weekly meal plans.
During holidays, this salad shines as a vibrant alternative to heavier dishes. Some families even adapt it for Thanksgiving by adding dried cranberries and pecans. For quick dinners, try pairing it with 30-minute recipes like lemon garlic chicken or baked salmon. Whether you crave comfort food or something light, this salad effortlessly bridges tradition and contemporary tastes.
>Taste and Texture
What makes it delicious
The Flavorful Roasted Cauliflower Chickpea Salad delivers a symphony of textures and tastes. Crisp roasted cauliflower caramelizes into nutty sweetness, while chickpeas add a creamy, hearty bite. Fresh parsley and lemon zest brighten every forkful with a zesty, herbal punch. Meanwhile, the smoky paprika and garlic infuse warmth, making each mouthful deeply satisfying. The salad strikes a perfect balance—earthy, tangy, and subtly spicy—with a satisfying crunch from toasted almonds. Whether served warm or chilled, the Flavorful Roasted Cauliflower Chickpea Salad keeps you coming back for its vibrant layers.
Boosting the flavor
Elevate your Flavorful Roasted Cauliflower Chickpea Salad with a few easy tweaks. For extra richness, drizzle with creamy tahini dressing, which adds a velvety contrast to the crisp veggies. Alternatively, toss in sun-dried tomatoes or crumbled feta for a salty, umami kick. If you love heat, sprinkle with chili flakes or swap smoked paprika for harissa paste for a bolder spice profile. A squeeze of extra lemon or a handful of fresh herbs like mint or cilantro can also refresh the flavors. Get creative—every small change makes this salad even more irresistible.
Tips for Success
Best practices for results
For the best Flavorful Roasted Cauliflower Chickpea Salad, always roast the cauliflower until the edges turn golden brown. This step adds depth to the flavor. Meanwhile, drain and pat the chickpeas dry before roasting to ensure they crisp up nicely. Additionally, toss the ingredients in dressing while they’re still warm so the flavors absorb better. Finally, let the salad rest for 10 minutes before serving to let the textures settle.
Mistakes to avoid
Avoid overcrowding the baking sheet when roasting the cauliflower and chickpeas. If the pieces are too close together, they’ll steam instead of crisp. For perfectly roasted veggies every time, check out our guide on roasting vegetables. Another common mistake is skipping the lemon zest in the dressing—it brightens the whole dish. If you’re unsure about balancing flavors, our salad dressing ratios post breaks it down simply.
Serving and Pairing Suggestions
How to serve this dish
For a stunning presentation, arrange the Flavorful Roasted Cauliflower Chickpea Salad on a large platter with fresh herbs like parsley or cilantro sprinkled on top. Alternatively, serve it in individual bowls with a wedge of lemon for a bright finishing touch. This dish shines at potlucks, holiday gatherings, or even as a vibrant weeknight dinner centerpiece. To make it extra inviting, add a drizzle of tahini or a handful of pomegranate seeds for color and texture.
h-it">What goes well with it
Pair the Flavorful Roasted Cauliflower Chickpea Salad with a crisp white wine like Sauvignon Blanc, which highlights its tangy lemon dressing. For a heartier meal, serve it alongside our Garlic Herb Focaccia, perfect for soaking up every flavorful bite. If you prefer something refreshing, try our Minty Cucumber Lemonade to balance the salad’s earthy roasted notes with a cool, citrusy sip.
How do you make roasted cauliflower and chickpeas crispy?
For perfectly crispy Flavorful Roasted Cauliflower Chickpea Salad, spread the cauliflower and chickpeas in a single layer on a baking sheet. Roast at 425°F (220°C) for 25-30 minutes, tossing halfway, until golden brown. Avoid overcrowding the pan to ensure even crispiness.
ank-math-faq-item">
What dressing goes well with roasted cauliflower and chickpea salad?
A tangy tahini-lemon dressing or creamy yogurt-based dressing pairs perfectly with Flavorful Roasted Cauliflower Chickpea Salad. For a lighter option, try a simple olive oil and balsamic vinegar drizzle with fresh herbs like parsley or cilantro.
Can I meal prep roasted cauliflower chickpea salad?
Yes! Flavorful Roasted Cauliflower Chickpea Salad stores well for 3-4 days in an airtight container. Keep the dressing separate until serving to maintain texture. The flavors often improve as they meld overnight.
What protein can I add to cauliflower chickpea salad?
Boost the protein in your Flavorful Roasted Cauliflower Chickpea Salad with grilled chicken, quinoa, or crumbled feta cheese. For plant-based options, try adding toasted almonds or hemp seeds for extra crunch and nutrition.
div>
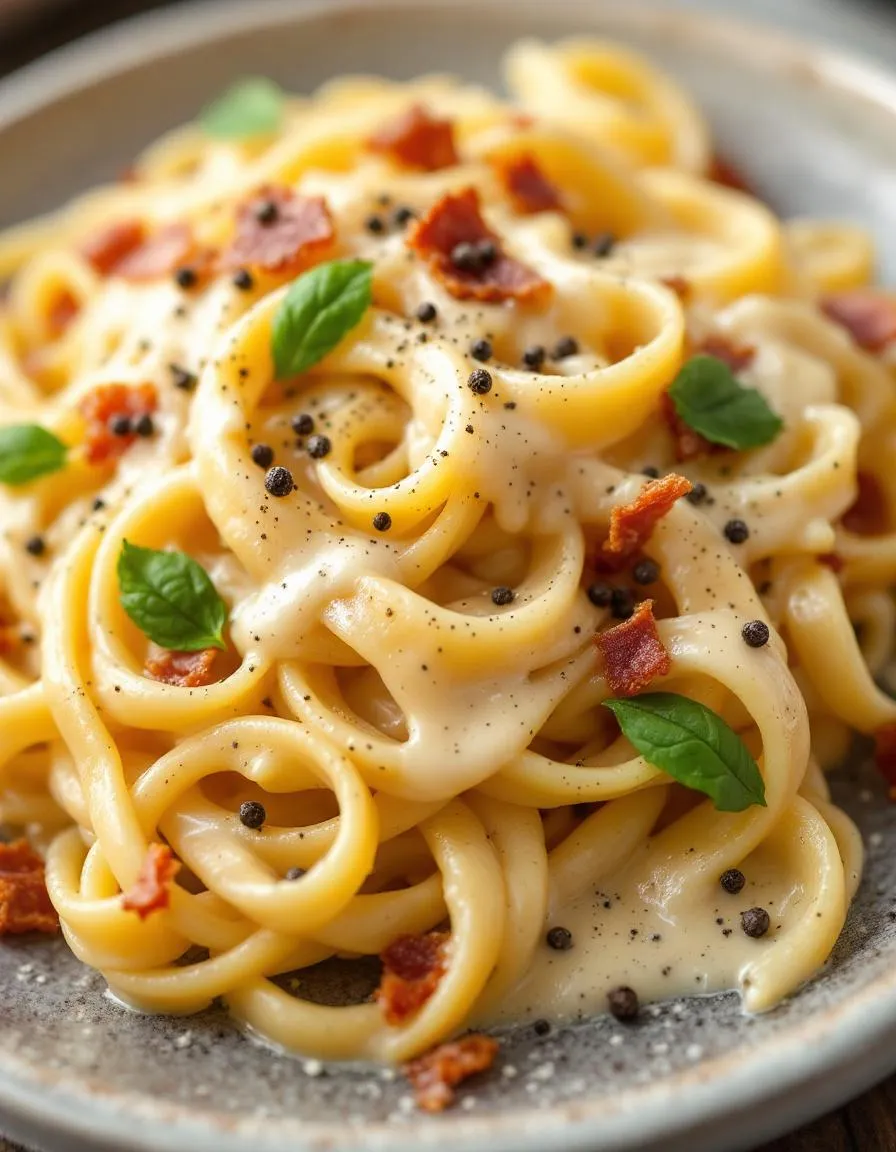
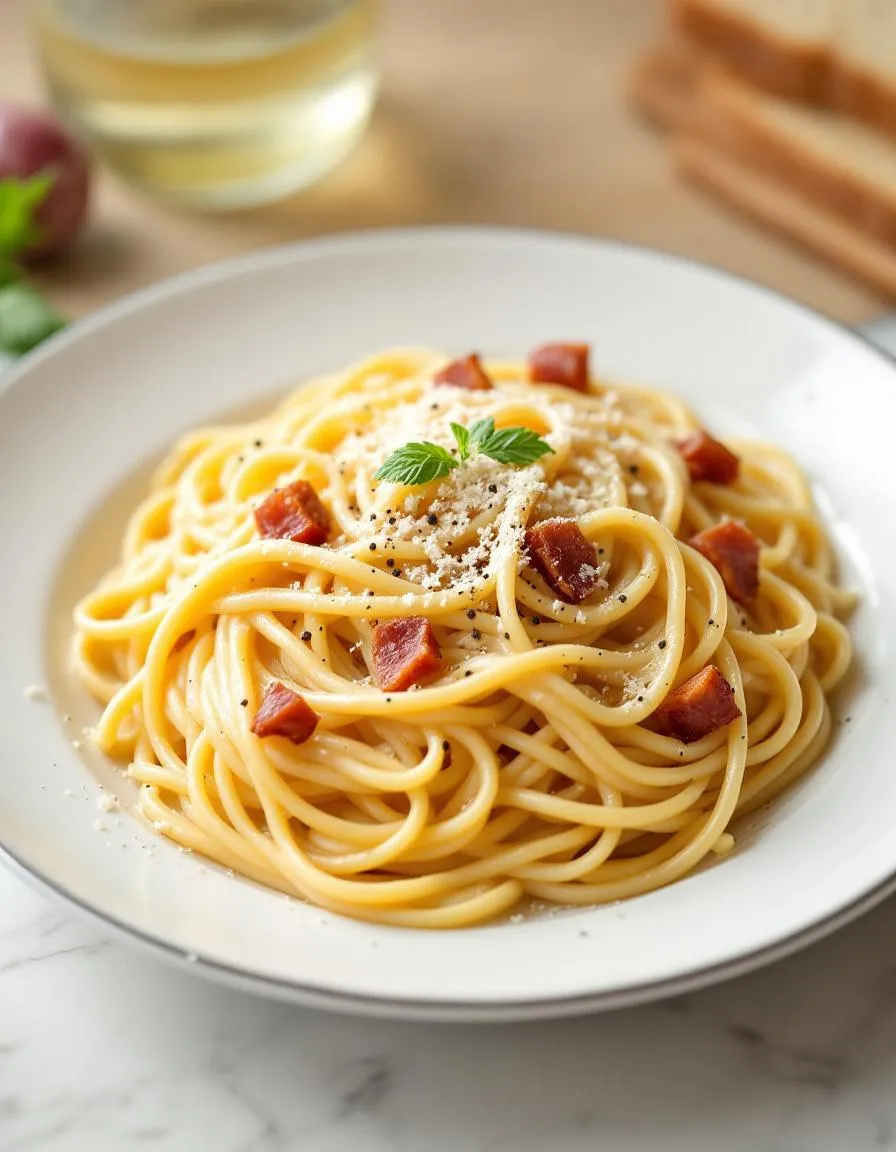
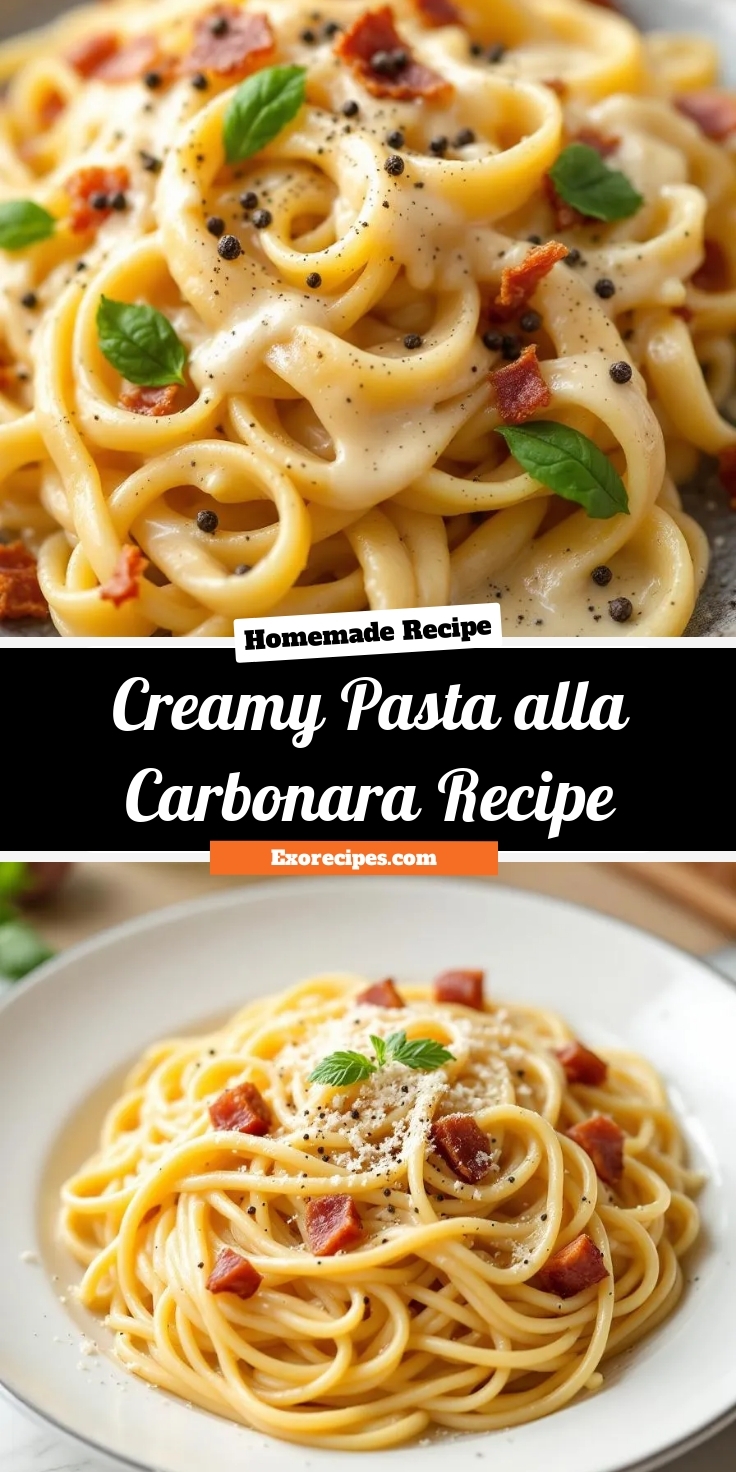
Best Creamy Pasta alla Carbonara Recipe
Introduction
There’s something magical about a bowl of perfectly cooked pasta coated in a rich, velvety sauce. If you’ve ever craved comfort food that feels like a warm hug, this Creamy Pasta alla Carbonara Recipe will hit the spot. Whether you’re cooking for a cozy night in or impressing guests, this dish delivers indulgence without fuss. Plus, it’s quicker to make than you might think. Let’s dive into why this classic Italian favorite deserves a spot in your recipe rotation.
Creamy Pasta alla Carbonara Recipe is a timeless dish that balances simplicity with decadence. Unlike heavy cream-based sauces, authentic carbonara relies on eggs, cheese, and starchy pasta water to create its signature silkiness. The result? A luscious coating that clings to every strand of pasta, punctuated by crispy bits of pancetta or guanciale. What makes this recipe stand out is its versatility. You can tweak it to suit your taste, whether you prefer a sharper pecorino bite or a milder Parmesan finish. For more pasta inspiration, check out our Garlic Butter Shrimp Pasta or explore the secrets behind perfect al dente texture in our Pasta Cooking Guide.
This blog celebrates approachable yet elevated cooking, and Creamy Pasta alla Carbonara Recipe fits right in. It’s a dish that rewards technique but doesn’t demand chef-level skills. Whether you’re a weeknight warrior or a weekend entertainer, mastering carbonara means adding a crowd-pleaser to your arsenal. The key lies in quality ingredients and timing—toss the hot pasta with the egg mixture just right, and you’ll avoid scrambling while achieving that dreamy consistency. It’s the kind of recipe that makes you feel accomplished without hours in the kitchen.
Why I Love This Recipe
I’ll never forget the first time I nailed this Creamy Pasta alla Carbonara Recipe. It was a rainy Sunday, and I wanted something comforting yet impressive. The moment the silky sauce clung to the pasta, I knew I’d unlocked a keeper. Now, it’s my go-to for last-minute dinners and special occasions alike. There’s joy in watching friends twirl their forks with that first blissful bite. For me, carbonara isn’t just food—it’s a little celebration on a plate.
Health and Nutrition
Why it’s good for your body
Creamy Pasta alla Carbonara Recipe delivers a satisfying mix of protein, carbs, and healthy fats. First, the eggs and pancetta provide high-quality protein, which helps repair muscles and keeps you full longer. Meanwhile, the pasta offers complex carbohydrates that fuel your energy levels throughout the day. Additionally, the dish includes healthy fats from ingredients like Parmesan cheese, which support brain function and nutrient absorption.
Moreover, Creamy Pasta alla Carbonara Recipe contains essential vitamins and minerals. Eggs contribute vitamin B12 for nerve health, while cheese adds calcium for strong bones. Furthermore, the dish’s simplicity means fewer processed ingredients, making it a cleaner choice compared to heavy cream-based sauces. When enjoyed in moderation, this recipe balances indulgence with nourishment.
Finally, the dish’s rich flavor satisfies cravings without excessive additives. Because it relies on natural ingredients like eggs and cheese, Creamy Pasta alla Carbonara Recipe avoids artificial thickeners or preservatives. As a result, you get a meal that’s both comforting and wholesome. Whether you need a post-workout refuel or a cozy dinner, this dish delivers taste and nutrition in every bite.
How it fits in a healthy lifestyle
Creamy Pasta alla Carbonara Recipe fits well into a balanced diet when paired with mindful eating habits. For instance, you can serve it with a side of steamed greens or a fresh salad to boost fiber and vitamins. If you’re watching your gluten intake, simply swap regular pasta for a gluten-free alternative—many options work just as well in this recipe.
For those focusing on protein intake, the eggs and pancetta in Creamy Pasta alla Carbonara Recipe make it a solid choice. Pair it with a light dessert like our Healthy Chocolate Avocado Mousse to keep the meal balanced. Alternatively, if you’re meal prepping, portion control is key—this dish reheats beautifully, so you can enjoy it without overindulging.
Looking for more ways to balance indulgence with nutrition? Check out our guide to Balanced Weeknight Meals for easy tips. With smart choices, Creamy Pasta alla Carbonara Recipe becomes a delicious part of a healthy, varied diet.
A classic Italian pasta dish with a rich and creamy sauce made from eggs, cheese, and pancetta.
Ingredients
Scale
For the Crust:
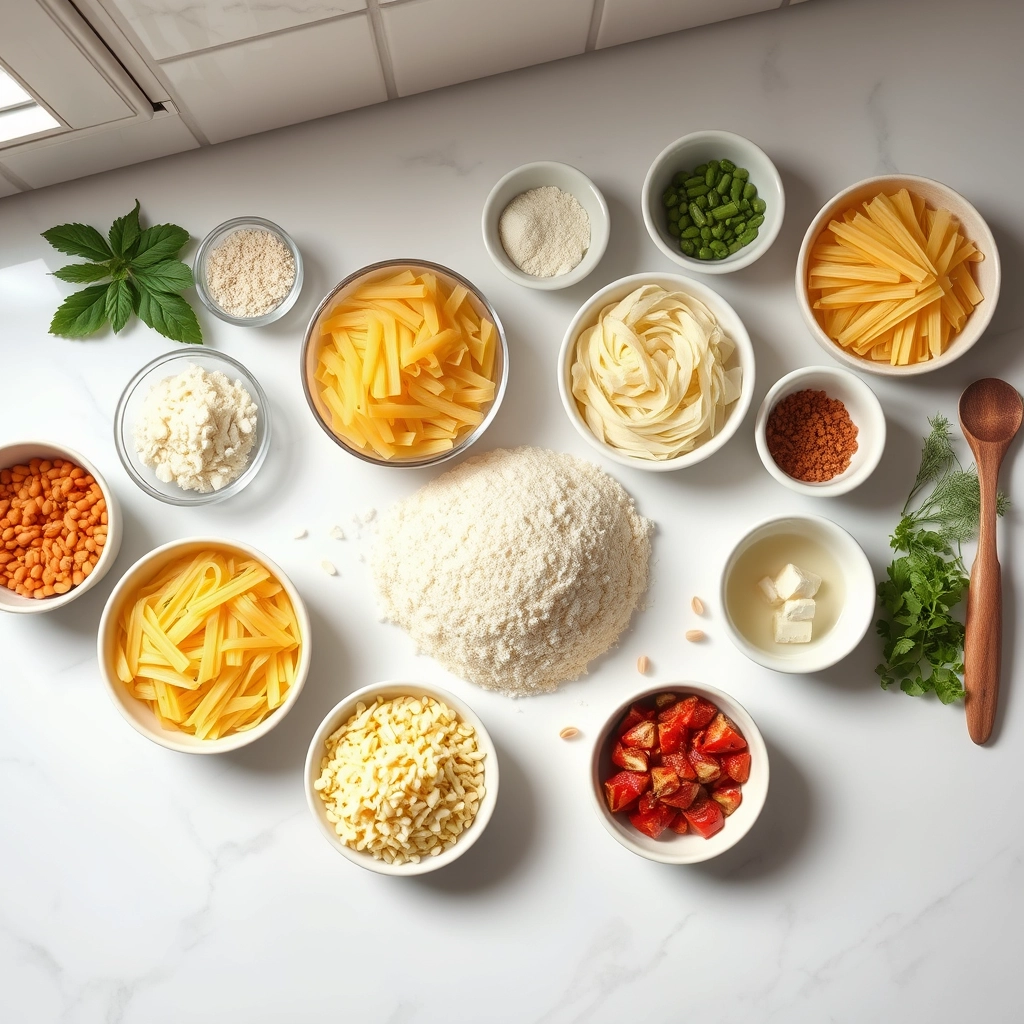
400g spaghetti
200g pancetta or guanciale, diced
4 large eggs
1 cup grated Pecorino Romano cheese
1 cup grated Parmigiano-Reggiano cheese
Freshly ground black pepper
Salt to taste
Instructions
1. Prepare the Crust:
Bring a large pot of salted water to a boil and cook the spaghetti according to package instructions until al dente.
While the pasta cooks, heat a large skillet over medium heat and cook the pancetta until crispy, about 5-7 minutes.
In a bowl, whisk together the eggs, Pecorino Romano, Parmigiano-Reggiano, and a generous amount of black pepper.
Drain the pasta, reserving 1 cup of the pasta water. Quickly add the hot pasta to the skillet with the pancetta and toss to combine.
Remove the skillet from heat and immediately pour in the egg and cheese mixture, stirring quickly to create a creamy sauce. Add reserved pasta water as needed to adjust consistency.
Serve immediately with extra grated cheese and black pepper on top.
Notes
You can customize the seasonings to taste.
s-dish">How to Prepare This Dish
Steps and time-saving tips
Start by bringing a large pot of salted water to a boil for your Creamy Pasta alla Carbonara Recipe. While the water heats, chop the pancetta into small cubes and mince the garlic. Next, whisk the eggs and grated Pecorino Romano in a bowl until smooth. Once the water boils, add the pasta and cook until al dente, reserving a cup of starchy water before draining. Meanwhile, crisp the pancetta in a skillet over medium heat, then toss in the garlic for a quick sauté. Reduce the heat to low and immediately fold in the drained pasta, coating it evenly with the pancetta fat. Remove the skillet from the heat and quickly stir in the egg mixture, adding reserved pasta water a splash at a time until creamy. Season with black pepper and serve right away for the best texture. To save time, prep all ingredients before cooking and use a timer for the pasta. If the sauce thickens too much, just drizzle in more reserved water.
Mistakes I’ve made and learned from
I once rushed the egg mixture in my Creamy Pasta alla Carbonara Recipe, adding it while the skillet was still too hot, which scrambled the eggs instead of creating a silky sauce. Now, I always pull the pan off the heat first and work fast. Another blunder? Using pre-shredded cheese—it never melts as smoothly as freshly grated. For foolproof results, check out my guide on perfect pasta sauces to nail the consistency every time. I also learned the hard way that skipping the pasta water makes the dish dry. If you’re new to Italian cooking, my essential kitchen tools list includes a microplane for grating cheese finely, which makes all the difference here.
n-and-variations">Cultural Connection and Variations
Where this recipe comes from
Few dishes carry the rich history and universal appeal of Creamy Pasta alla Carbonara Recipe. Born in Rome, this iconic dish traces its roots back to mid-20th century Italy, where coal miners (or “carbonai”) needed hearty, quick meals. They combined simple pantry staples—eggs, cured pork, cheese, and pasta—into a dish that balanced indulgence with practicality. Today, you’ll find regional twists everywhere. In northern Italy, some cooks swap guanciale for pancetta, while others add a splash of cream for extra richness. Meanwhile, American versions often lean into the creaminess with extra egg yolks or even a touch of heavy cream.
In my family, Creamy Pasta alla Carbonara Recipe became a Sunday tradition, passed down with a few personal tweaks. My grandmother insisted on freshly cracked black pepper for warmth, while my dad always tossed in peas for a pop of color. Around the world, adaptations keep evolving. In Japan, carbonara sometimes features mushrooms or nori, and in Brazil, you might find it topped with crispy bacon bits. No matter the variation, the soul of the dish remains—a celebration of simplicity and comfort.
How it fits in today’s cooking
Modern kitchens still adore Creamy Pasta alla Carbonara Recipe for its versatility and speed. Busy cooks appreciate that it comes together in under 30 minutes, making it a weeknight hero. Yet, it’s fancy enough for date nights or holiday spreads. Some home chefs lighten it up with zucchini noodles or swap in turkey bacon, while others lean into luxury with truffle oil or artisan cheeses. It’s also a star in seasonal cooking—think spring peas in April or roasted squash in fall.
For those exploring glo
bal flavors, pairing carbonara with a side of garlic butter dinner rolls adds a cozy touch. And if you’re craving dessert afterward, a slice of classic New York cheesecake balances the meal perfectly. Whether you stick to tradition or reinvent it, this dish proves that great food bridges generations and cultures effortlessly.
Taste and Texture
What makes it delicious
Every bite of Creamy Pasta alla Carbonara Recipe delivers a rich, velvety experience that melts in your mouth. The silky sauce, made with eggs and sharp Pecorino Romano, coats each strand of al dente pasta for a luscious, indulgent feel. Crispy pancetta or guanciale adds a smoky, salty crunch, while black pepper brings a warm, fragrant kick. The dish smells heavenly—like toasted cheese and savory pork—making it impossible to resist. Creamy Pasta alla Carbonara Recipe balances bold umami flavors with a comforting, creamy texture that keeps you coming back for more.
Boosting the flavor
For an extra layer of depth, try folding in roasted garlic or a splash of white wine while cooking the pancetta. Fresh herbs like parsley or thyme brighten the dish, while a sprinkle of red pepper flakes adds subtle heat. If you love experimenting with toppings, crispy prosciutto or a drizzle of truffle oil elevates the flavor profile. Pair it with a light salad or crusty bread to round out the meal—our garlic bread variations complement the creamy pasta perfectly. Small tweaks make this classic dish even more memorable.
Always use freshly grated Pecorino Romano or Parmesan for the creamiest texture in your Creamy Pasta alla Carbonara Recipe. Meanwhile, cook the pasta al dente so it holds up when tossed with the sauce. Additionally, reserve a cup of starchy pasta water to adjust consistency if needed. For the richest flavor, whisk the eggs thoroughly before combining them with the cheese. Finally, work quickly off the heat to prevent scrambling the eggs while still achieving a velvety sauce.
Mistakes to avoid
Avoid adding raw garlic directly to the pan, as it can overpower the delicate flavors of your Creamy Pasta alla Carbonara Recipe. Instead, infuse the oil gently for subtle depth. Similarly, never pour the egg mixture over high heat, or you’ll risk curdling it. For more on balancing rich flavors, check out our guide to perfect pairings for creamy dishes. Another common mistake? Skipping the pasta water, which helps bind the sauce. If your dish feels dry, learn how to fix a too-thick pasta sauce with simple adjustments.
g-suggestions">Serving and Pairing Suggestions
How to serve this dish
For a stunning presentation, twirl the Creamy Pasta alla Carbonara Recipe into a warm bowl and top it with extra grated Pecorino Romano and a sprinkle of freshly cracked black pepper. Meanwhile, garnish with a few fresh parsley leaves to add a pop of color. If you’re hosting a dinner party, serve it family-style in a large, rustic dish for a cozy, inviting feel. Alternatively, this dish shines at brunch when paired with a crisp side salad or even as a comforting weeknight meal.
What goes well with it
A light, citrusy arugula salad balances the richness of the Creamy Pasta alla Carbonara Recipe perfectly. For a heartier option, try pairing it with our garlic bread, which adds a satisfying crunch. If you prefer a drink pairing, a chilled glass of Pinot Grigio cuts through the creaminess beautifully. Finally, our roasted vegetables make a flavorful and nutritious side that complements the dish without overpowering it.
math-faq-block">
What’s the secret to making creamy pasta alla carbonara without cream?
The key to a creamy pasta alla carbonara recipe is emulsifying the starchy pasta water with eggs and grated cheese. Traditional carbonara never uses cream—instead, the silky sauce comes from tossing hot pasta with beaten eggs, Pecorino Romano, and crispy guanciale or pancetta. This method creates a rich, velvety texture without overpowering the dish.
Can I substitute bacon for guanciale in creamy pasta alla carbonara?
Yes, bacon works as a substitute if you can’t find guanciale, though the flavor will differ slightly. For the best creamy pasta alla carbonara recipe, use thick-cut bacon and render it slowly for crispiness. Remember to adjust salt levels since bacon is saltier than traditional guanciale.
Why did my carbonara sauce turn into scrambled eggs?
This happens when the eggs cook too quickly from excessive heat. To prevent scrambling in your creamy pasta alla carbonara recipe, temper the eggs by mixing them with grated cheese first, then slowly add hot pasta water. Always toss the pasta off direct heat to create a smooth, custard-like sauce.
ank-math-faq-item">
What pasta shape is best for creamy carbonara?
Spaghetti is classic, but rigatoni or fettuccine also work well for creamy pasta alla carbonara recipes. Choose shapes with ridges or textures to help the sauce cling. Avoid delicate pastas like angel hair—they can’t support the rich sauce and toppings.
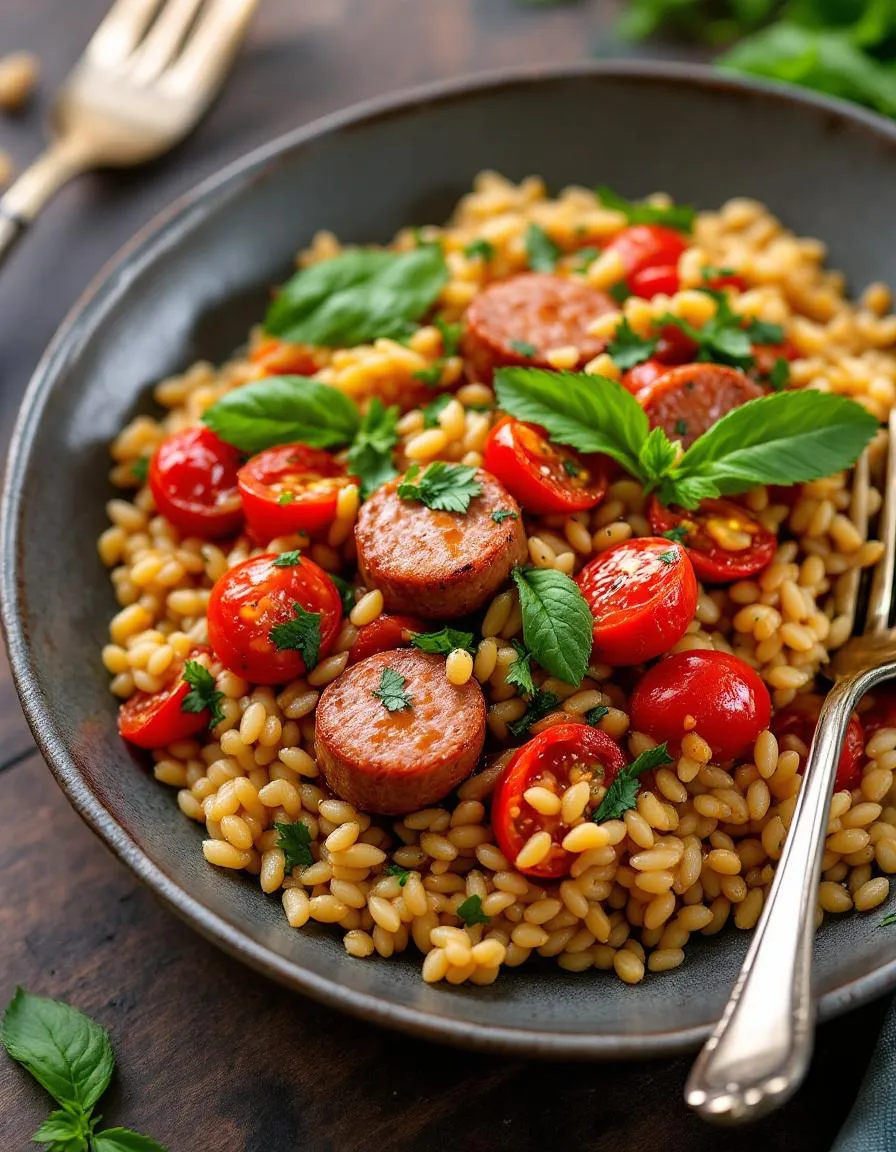
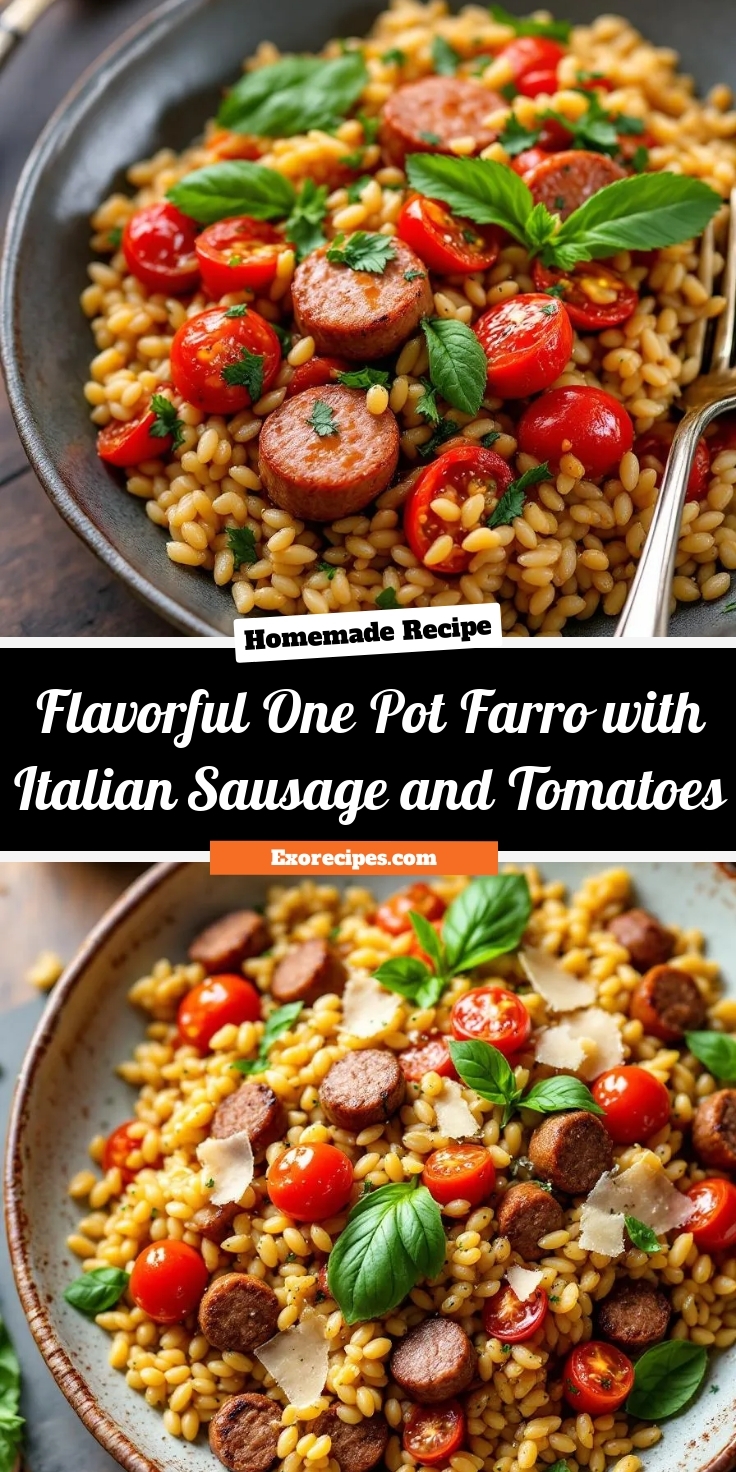
Easy One Pot Farro with Italian Sausage and Tomatoes
Introduction
There’s something deeply comforting about a meal that comes together in one pot, filling your kitchen with rich aromas and your belly with warmth. If you’re craving a dish that’s hearty, flavorful, and fuss-free, this Flavorful One Pot Farro with Italian Sausage and Tomatoes delivers on every level. Whether you’re juggling a busy weeknight or simply want a satisfying dinner without the cleanup, this recipe wraps bold Italian flavors into a single, effortless dish. Plus, it’s packed with wholesome ingredients that keep you coming back for seconds.
Flavorful One Pot Farro with Italian Sausage and Tomatoes combines chewy farro, savory Italian sausage, and sweet tomatoes in a harmony of textures and tastes. Farro, an ancient grain, brings a nutty depth and satisfying chew, while the sausage infuses every bite with robust herbs and spice. The tomatoes add brightness, balancing the dish with their natural acidity. What makes this recipe stand out is its simplicity—everything cooks in one pot, melding flavors while minimizing mess. It’s the kind of meal that feels indulgent yet wholesome, perfect for family dinners or meal prep. If you love easy, crowd-pleasing dishes, you’ll appreciate how this one fits seamlessly into your rotation. For more one-pot inspiration, try our Creamy Tuscan Chicken or explore our guide to cooking farro perfectly every time.
Why I Love This Recipe
This Flavorful One Pot Farro with Italian Sausage and Tomatoes holds a special place in my kitchen because it reminds me of cozy family gatherings. My grandmother used to make a similar dish, and the smell of simmering sausage and tomatoes instantly transports me back to her table. Beyond nostalgia, I adore how adaptable it is—swap in kale for extra greens or add a sprinkle of Parmesan for richness. Most importantly, it’s a recipe that never fails to impress, whether I’m cooking for myself or a hungry crowd. It’s the kind of dish that feels like a hug in a bowl, and that’s why I keep coming back to it.
Health and Nutrition
Why it’s good for your body
Flavorful One Pot Farro with Italian Sausage and Tomatoes packs a nutritious punch while delivering bold flavors. First, farro serves as an excellent whole grain, offering fiber to support digestion and keep you full longer. Additionally, it provides plant-based protein and essential minerals like magnesium and iron. Meanwhile, Italian sausage adds high-quality protein, which helps maintain muscle health and energy levels.
Tomatoes bring a vibrant dose of antioxidants, including lycopene, which may promote heart health. Furthermore, the dish includes garlic and herbs, known for their anti-inflammatory properties. Because Flavorful One Pot Farro with Italian Sausage and Tomatoes combines these ingredients, it delivers a balanced meal in one pot. The fiber from farro and the healthy fats from sausage also help stabilize blood sugar levels.
Finally, this dish is rich in flavor without relying on excessive salt or processed additives. Instead, it uses fresh, wholesome ingredients that nourish your body. Whether you need a post-workout meal or a satisfying family dinner, Flavorful One Pot Farro with Italian Sausage and Tomatoes checks all the boxes.
How it fits in a healthy lifestyle
Flavorful One Pot Farro with Italian Sausage and Tomatoes fits seamlessly into a balanced diet. If you focus on whole foods, this dish delivers nutrient-dense ingredients without unnecessary fillers. For those watching gluten intake, swapping farro for a gluten-free grain like quinoa works perfectly. The recipe also aligns with high-protein diets, thanks to the hearty sausage and fiber-rich farro.
Busy weeknights call for practical meals, and this one-pot wonder saves time without sacrificing nutrition. Pair it with a simple green salad for extra veggies or enjoy it as a standalone dish. If you love meal prepping, it reheats beautifully for lunches throughout the week. For more ideas on balancing flavors and nutrients, explore our guide to healthy dinner swaps.
Whether you prioritize convenience, protein, or heart-healthy ingredients, Flavorful One Pot Farro with Italian Sausage and Tomatoes adapts to your goals. It proves that wholesome eating can be both delicious and effortless.
A hearty and flavorful one-pot dish featuring farro, Italian sausage, and tomatoes, perfect for a quick weeknight meal.
Ingredients
Scale
For the Crust:
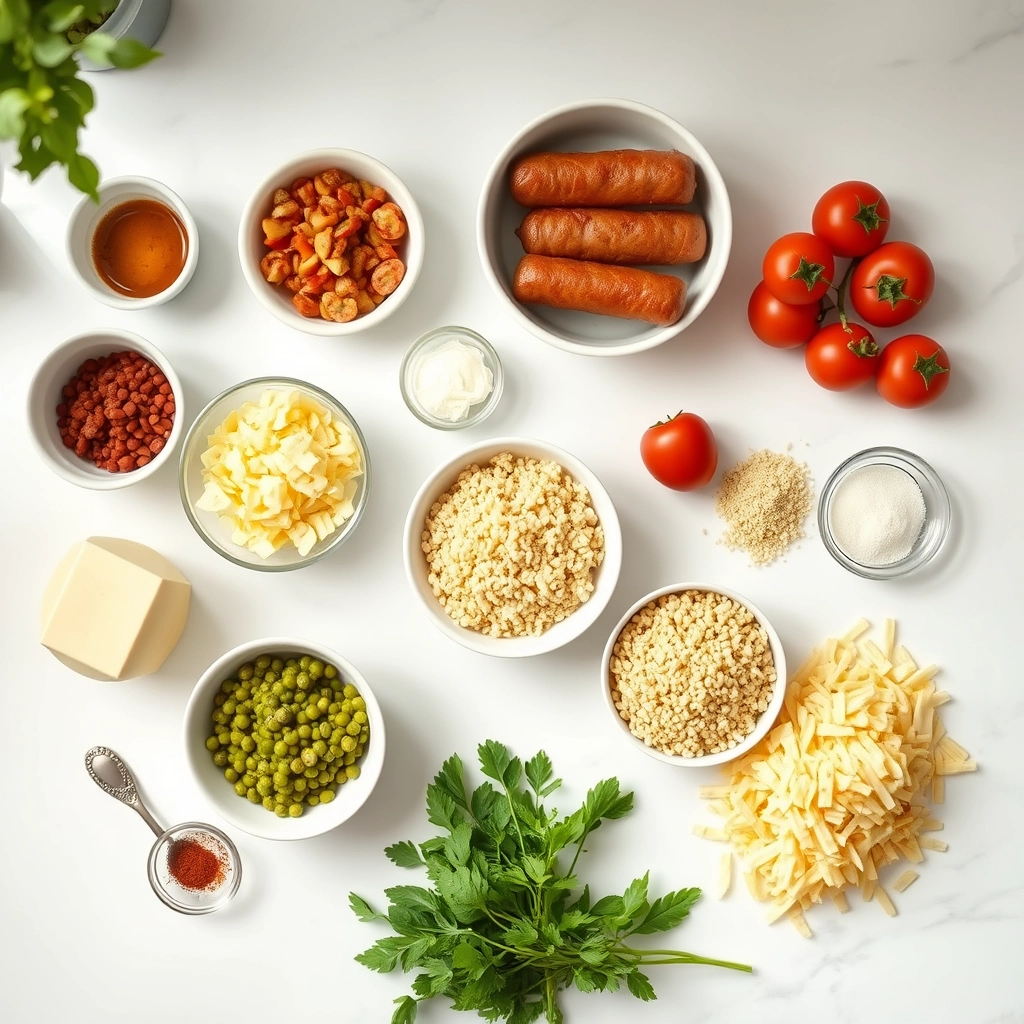
1 cup farro, rinsed
1 lb Italian sausage, casings removed
1 onion, diced
3 cloves garlic, minced
1 can (14 oz) diced tomatoes
2 cups chicken broth
1 tsp dried oregano
1/2 tsp red pepper flakes
1/2 cup grated Parmesan cheese
2 tbsp olive oil
Salt and pepper to taste
Fresh basil for garnish
Instructions
1. Prepare the Crust:
Heat olive oil in a large pot over medium heat. Add the Italian sausage and cook until browned, breaking it into small pieces with a spoon.
Add the diced onion and cook until softened, about 5 minutes. Stir in the minced garlic and cook for another minute until fragrant.
Add the farro, diced tomatoes (with juices), chicken broth, oregano, red pepper flakes, salt, and pepper. Stir to combine.
Bring the mixture to a boil, then reduce heat to low. Cover and simmer for 25-30 minutes, or until the farro is tender and most of the liquid is absorbed.
Stir in the grated Parmesan cheese. Taste and adjust seasoning if needed.
Garnish with fresh basil before serving.
Notes
You can customize the seasonings to taste.
“`html
How to Prepare This Dish
Steps and time-saving tips
Start by heating a large pot over medium heat and browning the Italian sausage, breaking it into crumbles as it cooks. Once the sausage turns golden, transfer it to a plate but leave the flavorful drippings in the pot. Next, sauté diced onions and minced garlic in those drippings until they soften and release their aroma. Stir in the farro, letting it toast slightly for a nutty depth of flavor. Pour in diced tomatoes, chicken broth, and a pinch of red pepper flakes for a gentle kick. Bring everything to a simmer, then cover the pot and let it cook for about 25 minutes, stirring occasionally to prevent sticking.
While the farro simmers
, prep your fresh herbs—basil and parsley work wonders here. Once the farro absorbs most of the liquid and turns tender, fold the cooked sausage back into the pot. Drizzle with a touch of olive oil and sprinkle the herbs on top for a vibrant finish. If you’re short on time, use pre-cooked sausage or swap in quick-cooking farro to cut the simmering time in half. For extra richness, stir in a handful of grated Parmesan just before serving. This Flavorful One Pot Farro with Italian Sausage and Tomatoes tastes even better the next day, so don’t hesitate to make a double batch.
Mistakes I’ve made and learned from
Early on, I underestimated how much liquid farro needs, leaving me with a disappointingly dry dish. Now, I always measure the broth precisely and keep extra on hand in case the farro needs more time to absorb it. Another hiccup? Overcrowding the pot with sausage, which steamed instead of browning. I fixed this by cooking the sausage in batches, as I learned from my guide to perfectly browned meats. Lastly, skipping the farro’s quick toast meant missing out on its full flavor potential—a lesson that reinforced the importance of patience, much like the tips in my umami-boosting tricks. Trust me, these small tweaks make all the difference.
Flavorful One Pot Farro with Italian Sausage and Tomatoes has roots in rustic Italian cooking, where farro, an ancient grain, often stars in hearty, peasant-style dishes. Farmers and home cooks relied on simple, nourishing ingredients like tomatoes, sausage, and grains to create satisfying meals. Over time, this dish evolved, blending regional flavors—some versions add bitter greens from Tuscany, while others in southern Italy might toss in spicy nduja for extra heat.
In my family, we tweak the recipe with a splash of red wine and a handful of fresh basil, making it feel like a celebration of summer. Meanwhile, in other parts of the world, cooks adapt Flavorful One Pot Farro with Italian Sausage and Tomatoes to local tastes. For example, Greek versions might swap sausage for lamb and add feta, while American Midwest renditions sometimes use smoked sausage and sweet corn for a heartier twist.
No matter the variation
, this dish carries a sense of warmth and community. Whether served at a crowded family table or simmered slowly for a weeknight dinner, it’s a reminder of how food connects us across cultures and generations.
How it fits in today’s cooking
Today, Flavorful One Pot Farro with Italian Sausage and Tomatoes fits perfectly into modern cooking routines. Busy home cooks love its one-pot simplicity, while meal preppers appreciate how well it reheats for lunches. Plus, it’s versatile enough to shine in any season—think cozy winter nights or breezy summer evenings with a crisp salad.
Many adapt it for dietary preferences, too. For instance, plant-based cooks might use vegan sausage alternatives, while gluten-free folks opt for quinoa instead of farro. Others pair it with no-knead bread for a complete, comforting meal. Whether you’re cooking for a crowd or just craving a taste of tradition, this dish proves that timeless flavors never go out of style.
>Taste and Texture
What makes it delicious
Flavorful One Pot Farro with Italian Sausage and Tomatoes delivers a hearty, satisfying bite with layers of rich, savory goodness. The farro cooks up tender yet chewy, soaking up the smoky, garlicky notes from the browned sausage. Juicy tomatoes burst with bright acidity, balancing the dish’s deep umami flavors. Meanwhile, fresh herbs like rosemary or thyme add a fragrant earthiness that lingers in every forkful. Each mouthful offers a delightful contrast—creamy farro, crisp-tender veggies, and the occasional punch of spicy sausage. Whether you serve it warm or as leftovers, Flavorful One Pot Farro with Italian Sausage and Tomatoes never loses its comforting, rustic charm.
Boosting the flavor
For an extra flavor kick, try swapping sweet Italian sausage for spicy chorizo or crumbling in feta cheese for a tangy twist. A drizzle of chimichurri sauce adds herby freshness, while toasted pine nuts lend a buttery crunch. If you love heat, stir in red pepper flakes or a spoonful of roasted garlic aioli for creamy depth. Don’t shy away from finishing with a squeeze of lemon—its zesty brightness ties all the flavors together beautifully.
Tips for Success
Best practices for results
Toast the farro lightly before adding liquid to deepen its nutty flavor in your Flavorful One Pot Farro with Italian Sausage and Tomatoes. Meanwhile, brown the sausage thoroughly to build a rich foundation for the dish. Stir the tomatoes gently to prevent breaking them down too early, and always simmer uncovered for the perfect texture. Finally, taste and adjust seasoning just before serving to ensure balanced flavors every time.
Mistakes to avoid
Overcrowding the pot with ingredients can lead to uneven cooking, so give the farro enough space to absorb the broth properly. Additionally, skipping the deglazing step after browning the sausage means missing out on layers of flavor—scrape those tasty bits into the mix. For more on building flavor foundations, check out our guide to skillet techniques. Also, avoid overcooking the farro; it should stay slightly chewy. If you’re new to grain cooking times, our grain texture guide will help you nail the ideal doneness for Flavorful One Pot Farro with Italian Sausage and Tomatoes.
Serving and Pairing Suggestions
How to serve this dish
Flavorful One Pot Farro with Italian Sausage and Tomatoes shines as a hearty centerpiece for casual dinners or festive gatherings. For a rustic touch, serve it family-style in a wide, shallow bowl with a sprinkle of fresh parsley or basil on top. Alternatively, plate individual portions with a drizzle of extra virgin olive oil and a handful of grated Parmesan for added richness. This dish works beautifully for weeknight meals but also impresses at potlucks or holiday feasts. To elevate the presentation, pair it with a crisp green salad or crusty bread for a complete, inviting spread.
h-it">What goes well with it
A chilled glass of Sauvignon Blanc or a light Pinot Noir balances the savory depth of Flavorful One Pot Farro with Italian Sausage and Tomatoes, while a citrusy sparkling water keeps things refreshing. For sides, try our Garlic Parmesan Roasted Broccoli to add a crunchy, cheesy contrast. If you crave something creamy, our Creamy Avocado Dip makes a delightful accompaniment with its cool, tangy flavors. Each pairing enhances the dish’s robust character without overpowering it.
Can I use a different grain instead of farro in this recipe?
Yes, you can substitute farro with quinoa, brown rice, or barley in this Flavorful One Pot Farro with Italian Sausage and Tomatoes recipe. Keep in mind that cooking times may vary, so adjust accordingly. Farro adds a nutty texture, but these alternatives will still deliver a delicious dish.
ank-math-faq-item">
How can I make this dish vegetarian?
For a vegetarian version of Flavorful One Pot Farro with Italian Sausage and Tomatoes, replace the sausage with plant-based alternatives like Beyond Meat or mushrooms. The tomatoes and farro provide plenty of flavor, so you won’t miss the meat. Adjust seasonings to taste for a satisfying vegetarian meal.
What sides pair well with this farro dish?
Flavorful One Pot Farro with Italian Sausage and Tomatoes pairs beautifully with a crisp green salad, garlic bread, or roasted vegetables. The dish is hearty on its own, but these sides add freshness and texture. A light white wine or sparkling water with lemon complements the flavors perfectly.
Can I prepare this recipe ahead of time?
Absolutely! Flavorful One Pot Farro with Italian Sausage and Tomatoes reheats well, making it great for meal prep. Store it in an airtight container in the fridge for up to 3 days. Add a splash of broth or water when reheating to restore moisture if needed.
div>
Easy Tangy Mango Lentil Salad Recipe
Introduction
If you crave a dish that bursts with vibrant flavors while keeping things wholesome, you will adore this Tangy Mango Lentil Salad. Imagine sweet mangoes, hearty lentils, and a zesty dressing coming together in a refreshing bite. Whether you need a quick lunch or a crowd-pleasing side, this recipe delivers both nutrition and excitement. Plus, it effortlessly fits into busy weeknights or leisurely weekend meals. Let us dive into why this salad deserves a spot in your rotation.
Tangy Mango Lentil Salad combines protein-packed lentils, juicy mangoes, crisp veggies, and a bright citrus dressing for a dish that feels indulgent yet nourishing. Unlike heavy comfort foods, this salad energizes you without weighing you down. It works beautifully as a standalone meal or alongside grilled proteins like those in our Herb-Marinated Chicken Skewers. The contrast of sweet and tangy flavors makes it a year-round favorite, though summer mango season truly lets it shine. For those exploring plant-based options, this recipe aligns perfectly with our Vegan Meal Prep Ideas, offering both convenience and bold taste. Beyond its versatility, the salad celebrates fresh ingredients, making it ideal for health-conscious food lovers who refuse to compromise on flavor.
Why I Love This Recipe
This Tangy Mango Lentil Salad holds a special place in my kitchen because it reminds me of sunny picnics and shared meals with friends. The first time I made it, I worried the flavors might clash, but one bite convinced me otherwise. The lentils add substance, while the mango brings a tropical twist that feels like a mini vacation. Every time I serve it, someone asks for the recipe, and that is the best kind of kitchen win. It is the dish I turn to when I want something satisfying yet effortless, and I hope it becomes your go-to as well.
Health and Nutrition
Why it’s good for your body
Tangy Mango Lentil Salad packs a powerful nutritional punch while delighting your taste buds. First, the lentils deliver a hefty dose of plant-based protein and fiber, keeping you full and energized for hours. Additionally, mangoes add a burst of vitamins A and C, which support immune health and glowing skin. Meanwhile, the tangy lime dressing not only enhances flavor but also aids digestion with its natural acidity.
Moreover, this salad balances macronutrients perfectly. The lentils provide slow-digesting carbs, while healthy fats from ingredients like olive oil promote heart health. Furthermore, the colorful veggies and herbs offer antioxidants that combat inflammation. Because of its nutrient density, Tangy Mango Lentil Salad helps stabilize blood sugar levels, making it a smart choice for sustained energy.
Finally, the dish is naturally low in sodium and free from processed ingredients. Whether you need a post-workout meal or a light lunch, Tangy Mango Lentil Salad nourishes your body without weighing you down. With every bite, you’re treating yourself to a meal that’s as wholesome as it is delicious.
How it fits in a healthy lifestyle
Tangy Mango Lentil Salad effortlessly fits into a balanced diet, whether you’re focusing on plant-based eating or simply aiming for more whole foods. Its high protein and fiber content make it ideal for meal prep, keeping you satisfied between meals. If you’re exploring gluten-free options, this salad is a flavorful win—naturally free from grains and packed with nutrients.
For heart-healthy eaters, the combination of lentils, fresh produce, and olive oil aligns perfectly with Mediterranean diet principles. Pair it with a hearty avocado toast for a well-rounded meal, or enjoy it as a standalone dish. If you’re tracking macros, the protein-rich lentils support muscle recovery, making it a great post-workout option. For more high-protein ideas, check out these quinoa bowl recipes to mix up your routine.
Busy weeknights? Tangy Mango Lentil Salad comes together quickly and stores well, so you can prioritize healthy eating without the hassle. It’s a simple way to enjoy vibrant flavors while staying on track with your wellness goals.
A refreshing and nutritious salad combining sweet mangoes with protein-packed lentils, tossed in a zesty dressing.
Ingredients
Scale
For the Crust:
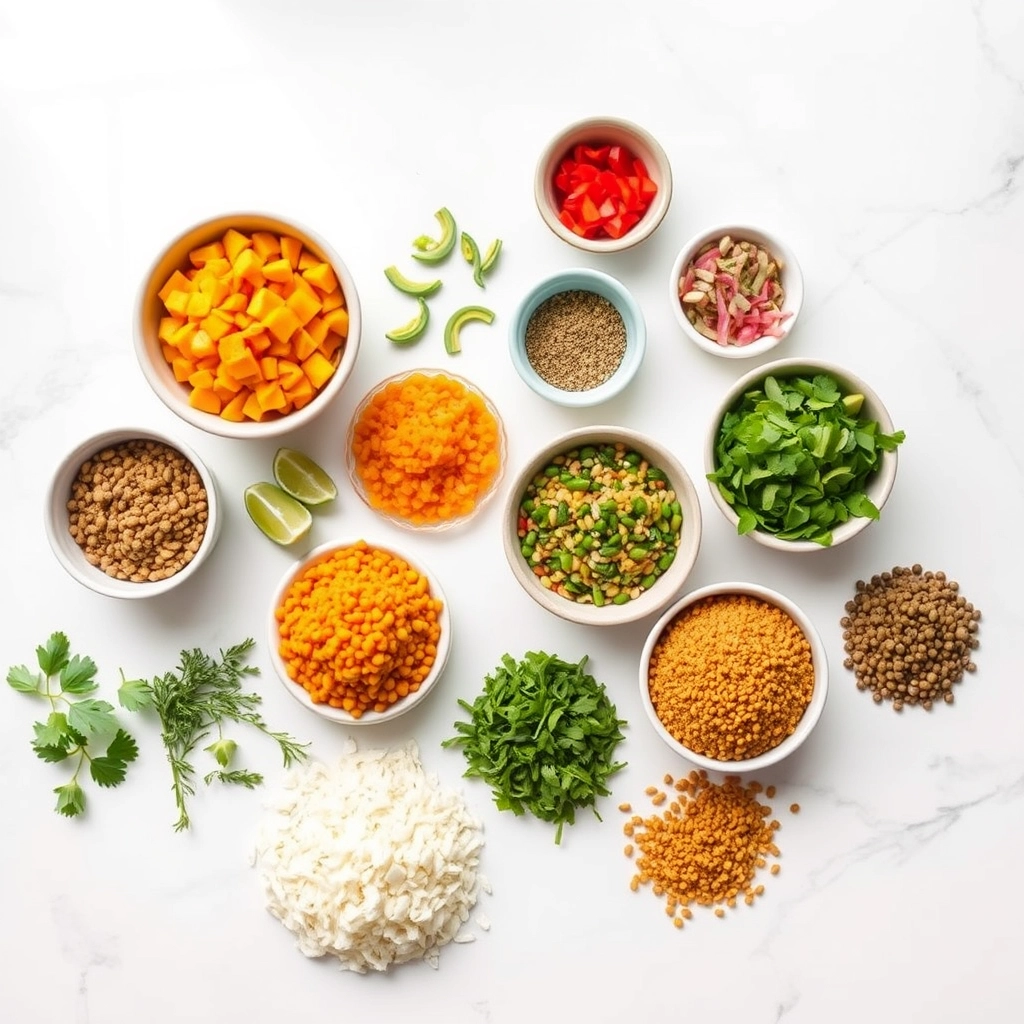
1 cup cooked green lentils
1 ripe mango, diced
1/2 red onion, finely chopped
1/4 cup fresh cilantro, chopped
2 tbsp olive oil
1 tbsp lime juice
1 tsp honey
1/2 tsp ground cumin
Salt and pepper to taste
Instructions
1. Prepare the Crust:
In a large bowl, combine cooked lentils, diced mango, red onion, and cilantro.
In a small bowl, whisk together olive oil, lime juice, honey, cumin, salt, and pepper.
Pour the dressing over the lentil mixture and toss gently to combine. Serve chilled.
Notes
You can customize the seasonings to taste.
How to Prepare This Dish
Steps and time-saving tips
Start by rinsing the lentils thoroughly under cold water to remove any debris. Then, cook them in a pot of boiling water for about 15 minutes until tender but not mushy. Meanwhile, dice the mango into bite-sized pieces and finely chop the red onion for a crisp texture. To save time, use pre-cooked lentils or canned varieties—just drain and rinse them well. In a large bowl, whisk together olive oil, lime juice, honey, and a pinch of salt to create the tangy dressing. Next, gently fold the cooked lentils, mango, red onion, and fresh cilantro into the dressing until everything is evenly coated. For extra crunch, toss in some toasted almonds or sunflower seeds. Finally, chill the Tangy Mango Lentil Salad for at least 30 minutes to let the flavors meld. If you’re in a hurry, skip the chilling step, but the salad tastes even better when it’s slightly cool. Serve it over a bed of greens or as a standalone dish for a refreshing meal.
Mistakes I’ve made and learned from
I once overcooked the lentils, turning them into a mushy mess that ruined the salad’s texture. Now, I set a timer and check them at the 12-minute mark to avoid this. Another time, I skipped toasting the almonds, and their lack of crunch made the dish feel flat. Lesson learned—toasting nuts takes just a few minutes but makes a huge difference. If you’re new to working with lentils, my guide on how to cook lentils perfectly covers all the basics. Also, if your mango isn’t ripe enough, the salad loses its sweetness. For tips on picking the best fruit, check out my guide to choosing ripe mangoes. Trust me, these small tweaks will elevate your Tangy Mango Lentil Salad from good to unforgettable.
Tangy Mango Lentil Salad dances across cultures like a vibrant fusion of flavors. While lentils anchor the dish with their earthy richness, the sweet-tart mango adds a tropical twist that whispers of sunny climates. In India, cooks often pair lentils with ripe mangoes during summer, creating cooling salads with a kick of chaat masala. Meanwhile, Caribbean versions might toss in Scotch bonnet peppers or lime juice for extra zing.
My grandmother first introduced me to Tangy Mango Lentil Salad during monsoon season, when mangoes hung heavy on trees. She’d balance the sweetness with tamarind paste, a trick I still use today. Across the Middle East, you’ll find similar salads featuring pomegranate molasses instead of mango, proving how adaptable this concept remains. Whether served warm in Nepal or chilled in Mexico, the core appeal stays the same: hearty lentils meeting bright, fruity notes.
ays-cooking">How it fits in today’s cooking
Modern kitchens embrace Tangy Mango Lentil Salad as a powerhouse of nutrition and flavor. Meal preppers love it because it keeps well for days, while plant-based eaters appreciate its protein punch. During summer picnics, it often replaces heavier pasta salads, especially when paired with refreshing drinks like these herbal iced teas.
Today’s cooks riff on the recipe endlessly. Some add quinoa for extra texture, while others swap mango for peaches when stone fruit season hits. It’s become a staple for potlucks and quick weeknight dinners alike. The salad’s versatility lets it shine year-round, whether you’re craving something light in August or need a colorful side dish for holiday tables in December.
Taste and Texture
What makes it delicious
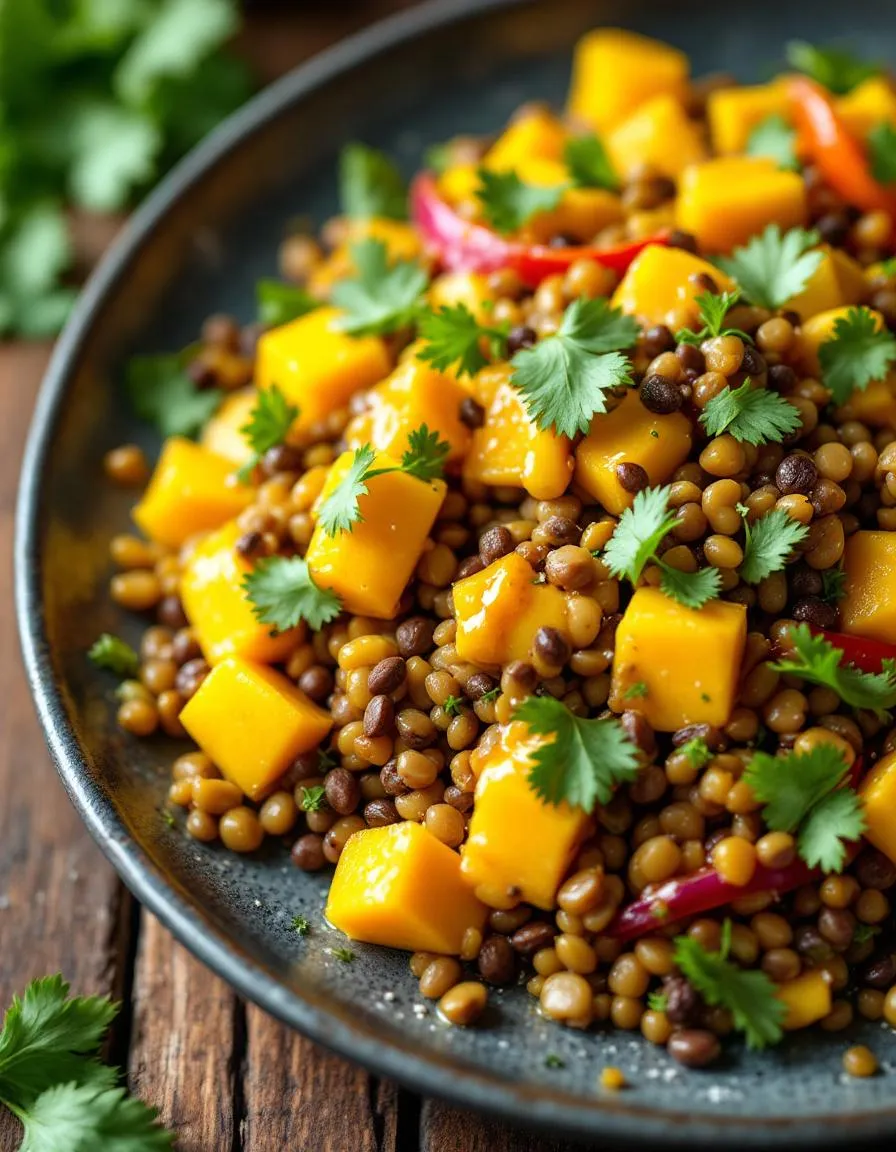
Tangy Mango Lentil Salad bursts with vibrant contrasts—creamy lentils mingle with juicy, sweet mango chunks, while a zesty lime dressing adds a bright, citrusy punch. Each bite delivers a satisfying crunch from crisp red bell peppers and red onions, balanced by the soft chew of tender lentils. Fresh cilantro and a hint of cumin infuse the dish with an earthy, fragrant aroma, making it irresistible. The natural sweetness of mangoes tempers the tangy dressing, creating a harmony of flavors that keeps you reaching for more. Whether served chilled or at room temperature, Tangy Mango Lentil Salad feels refreshing and hearty at the same time.
r">Boosting the flavor
For an extra flavor boost, try swapping lime juice with lemon-garlic dressing to deepen the tangy profile. Toasted coconut flakes or crushed peanuts add a nutty crunch, while a drizzle of spicy honey glaze introduces a sweet-heat kick. If you love herbs, toss in fresh mint or basil for a fragrant twist. A pinch of smoked paprika or chili flakes can also elevate the warmth of the dish. With these tweaks, Tangy Mango Lentil Salad becomes even more dynamic and customizable to your taste.
Tips for Success
Best practices for results
Always rinse your lentils thoroughly before cooking to remove any debris. Meanwhile, chop your mango into uniform pieces so they distribute evenly in the Tangy Mango Lentil Salad. For the best flavor, let the salad chill for at least 30 minutes before serving. Additionally, use fresh lime juice rather than bottled for a brighter tang. Finally, toast your nuts lightly if using them to add extra crunch.
>Mistakes to avoid
Avoid overcooking the lentils, as they will turn mushy and ruin the texture of your Tangy Mango Lentil Salad. Instead, check them frequently and drain them as soon as they’re tender. Another common mistake is skipping the dressing taste test. Always adjust the seasoning before mixing it with the salad. For more tips on balancing flavors, check out our guide on dressing mistakes. Also, don’t forget to store leftovers properly—learn how in our storage tips article.
Serving and Pairing Suggestions
How to serve this dish
For a vibrant presentation, serve Tangy Mango Lentil Salad in a large, shallow bowl or on individual plates lined with fresh lettuce leaves. Meanwhile, sprinkle chopped cilantro or mint on top for a pop of color and freshness. If you’re hosting a summer gathering, consider serving it in mason jars for a portable, picnic-friendly option. Additionally, this dish shines at potlucks or as a light brunch option alongside crusty bread. The bright colors and textures make Tangy Mango Lentil Salad a showstopper for holiday tables too.
What goes well with it
Pair Tangy Mango Lentil Salad with a crisp white wine like Sauvignon Blanc, which balances the dish’s tangy sweetness. Alternatively, try it with a refreshing homemade lemonade for a non-alcoholic option that enhances the tropical flavors. For a heartier meal, serve it alongside grilled chicken or our garlic herb roasted potatoes, which add a savory contrast. Finally, a dollop of creamy yogurt or tzatziki on the side ties all the flavors together beautifully.
What are the health benefits of Tangy Mango Lentil Salad?
Tangy Mango Lentil Salad packs a nutritious punch with protein-rich lentils, fiber, and vitamins from fresh mangoes. The combination supports digestion, boosts energy, and provides antioxidants, making it a wholesome meal or side dish.
Can I make Tangy Mango Lentil Salad ahead of time?
Yes! Tangy Mango Lentil Salad tastes even better when prepared a few hours ahead, allowing the flavors to meld. Store it in an airtight container in the fridge for up to 2 days—just add fresh herbs before serving.
ank-math-faq-item">
What type of lentils work best for Tangy Mango Lentil Salad?
French green lentils or black beluga lentils hold their shape well in Tangy Mango Lentil Salad, offering a firm texture. Avoid red lentils, as they turn mushy when cooked and won’t provide the desired consistency.
Is Tangy Mango Lentil Salad vegan-friendly?
Absolutely! Tangy Mango Lentil Salad is naturally vegan when made with plant-based ingredients like lentils, mangoes, and a citrus dressing. It’s a vibrant, protein-packed option for vegans or anyone seeking a meatless meal.