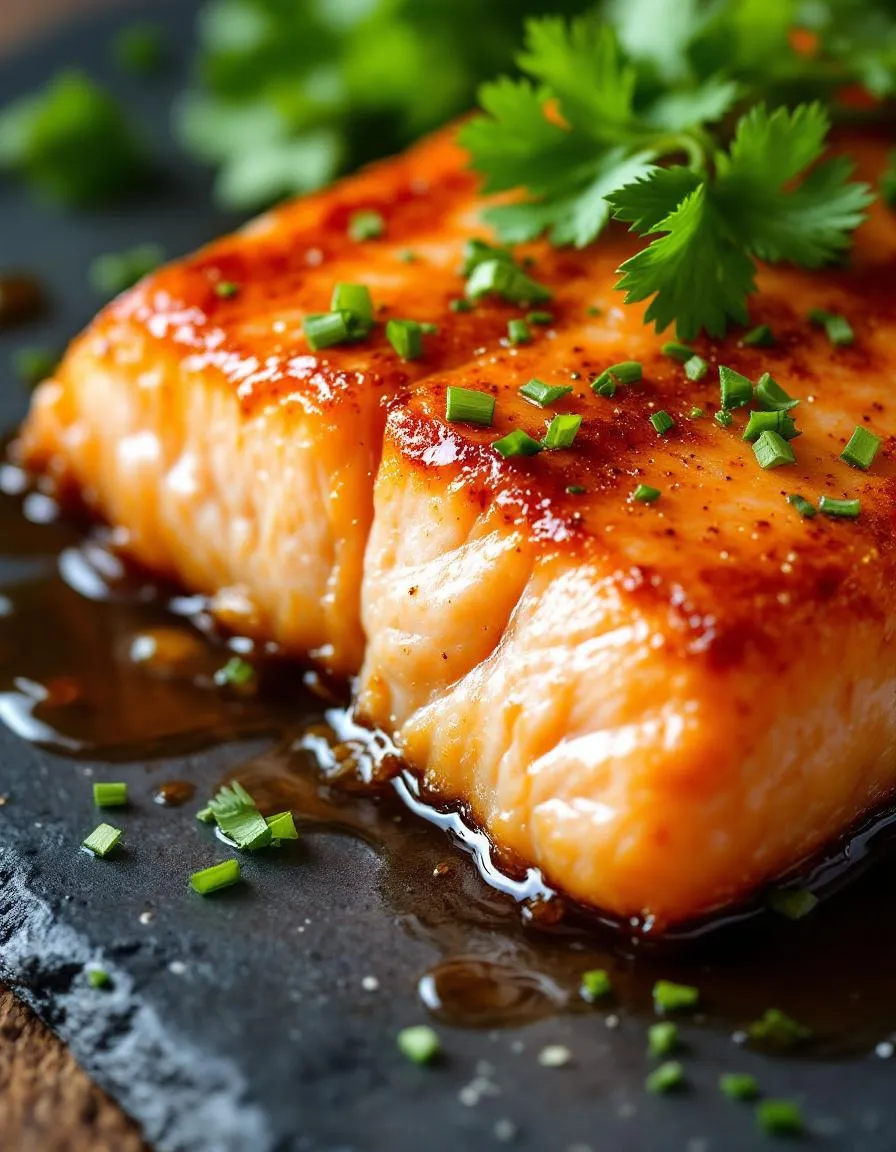
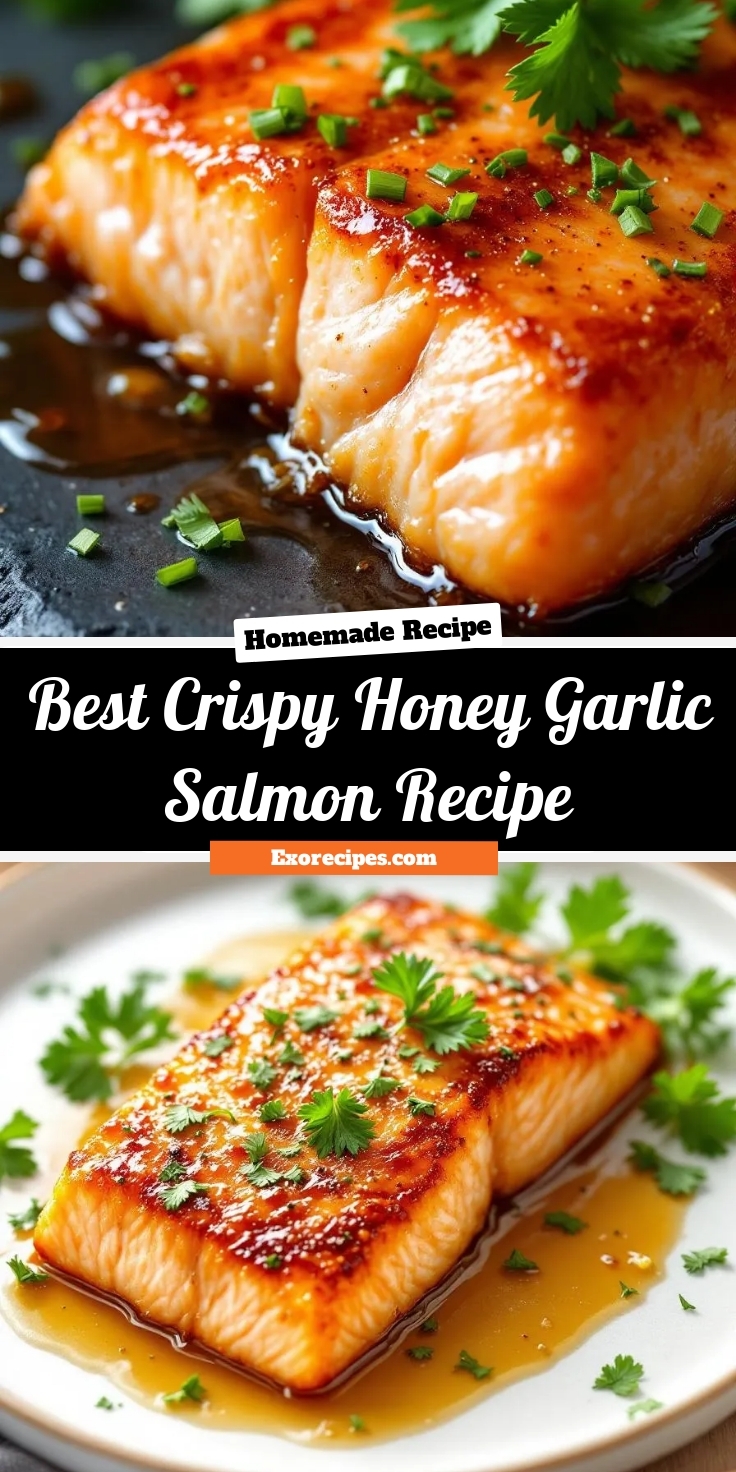
There’s something magical about the way crispy, caramelized edges meet sweet and savory flavors in a dish that feels both indulgent and wholesome. If you’re craving a meal that delivers restaurant-quality taste without the fuss, this Crispy Honey Garlic Salmon Recipe will become your new go-to. Perfectly flaky salmon, glazed with a sticky honey garlic sauce, comes together in under 30 minutes—making it ideal for busy weeknights or impressing dinner guests. Plus, it’s packed with protein and healthy fats, so you can enjoy every bite guilt-free.
This Crispy Honey Garlic Salmon Recipe strikes the perfect balance between simplicity and sophistication. The salmon develops a golden crust while staying tender inside, and the sauce—a blend of honey, garlic, soy sauce, and a hint of lime—adds layers of flavor that complement the fish beautifully. Whether you’re a seafood lover or just looking to incorporate more omega-3s into your diet, this dish delivers. It aligns perfectly with our blog’s mission to share approachable yet elevated recipes, like our Garlic Butter Shrimp or Teriyaki Chicken, that turn everyday ingredients into something extraordinary. Plus, it’s versatile: serve it over rice, alongside roasted veggies, or even atop a salad for a lighter twist.
Why I Love This Recipe
This Crispy Honey Garlic Salmon Recipe holds a special place in my heart because it’s the dish that made me fall in love with cooking salmon at home. Before trying it, I always worried about overcooking fish or ending up with bland flavors. But the combination of crispy skin and that irresistible sauce changed everything. Now, it’s my secret weapon for last-minute dinners that feel celebratory. Every time I make it, I’m reminded how good food doesn’t have to be complicated—just full of flavor and cooked with care.
Health and Nutrition
Why it’s good for your body
Crispy Honey Garlic Salmon Recipe packs a powerful nutritional punch while delivering irresistible flavor. First, salmon is rich in omega-3 fatty acids, which support heart health and reduce inflammation. Additionally, the honey glaze adds natural sweetness without refined sugars, making it a smarter choice for satisfying cravings. Moreover, garlic boosts immunity and adds antioxidants to every bite.
Beyond its standout ingredients, Crispy Honey Garlic Salmon Recipe provides high-quality protein to keep you full and energized. The crispy skin offers a satisfying texture while contributing healthy fats. Furthermore, this dish cooks quickly, so you retain more nutrients compared to longer cooking methods. Whether you need a post-workout meal or a brain-boosting dinner, this recipe delivers.
Finally, Crispy Honey Garlic Salmon Recipe balances indulgence with nourishment. The combination of savory garlic and sweet honey enhances flavor without excessive sodium or additives. As a result, you enjoy a restaurant-worthy dish that aligns with your wellness goals. For anyone seeking a delicious yet nutrient-dense meal, this recipe checks every box.
How it fits in a healthy lifestyle
Crispy Honey Garlic Salmon Recipe fits seamlessly into balanced eating habits. If you follow a high-protein diet, the salmon provides a lean, satisfying option. Likewise, the dish is naturally gluten-free, making it ideal for those with dietary restrictions. Pair it with a side of roasted vegetables or quinoa for a complete, nutrient-packed meal.
For heart-healthy choices, this recipe shines. The omega-3s in salmon support cardiovascular health, while the minimal processed ingredients keep it clean. If you love meal prepping, try doubling the batch for easy lunches throughout the week. For more gluten-free inspiration, explore our gluten-free dinner ideas. You can also pair it with our quick healthy sides to round out your plate. With its versatility and nourishing profile, Crispy Honey Garlic Salmon Recipe makes healthy eating effortless and delicious.
A delicious and easy-to-make salmon dish with a sweet and savory honey garlic glaze.
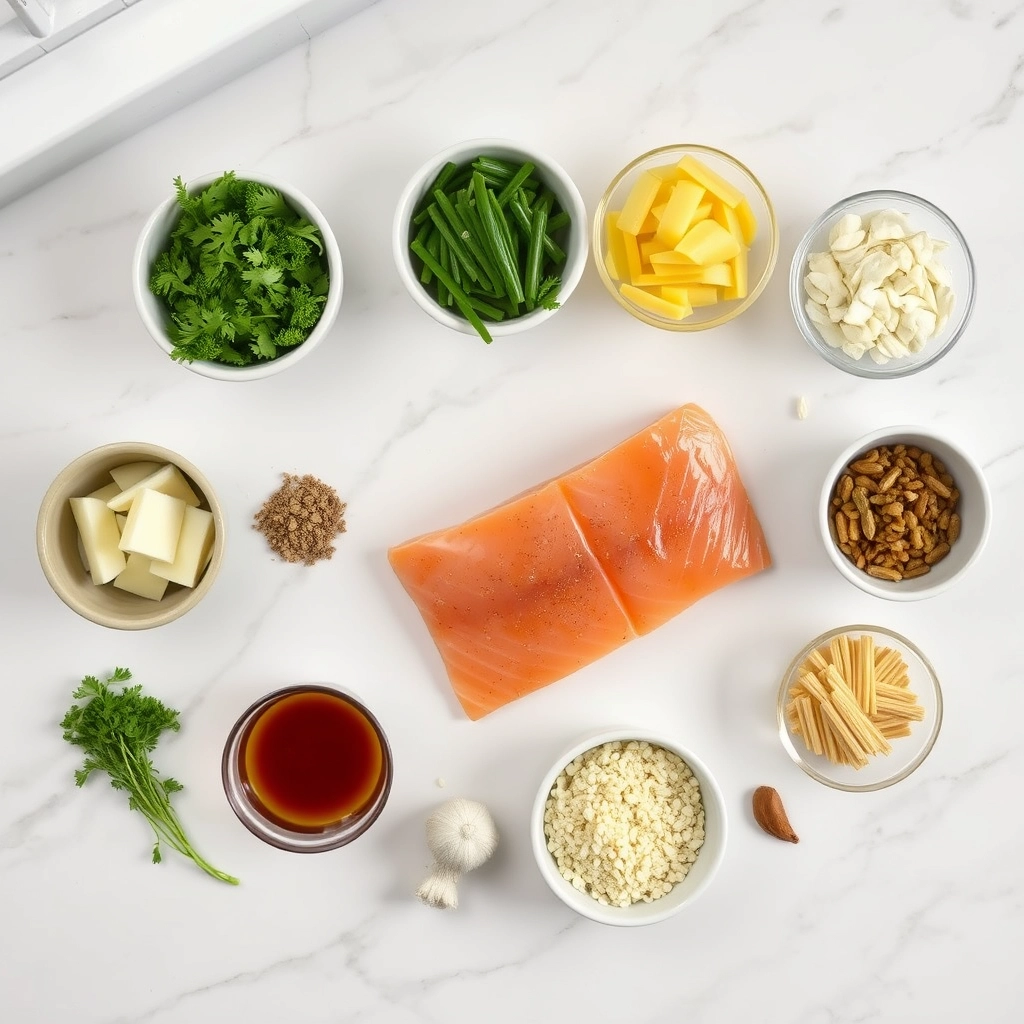
Ingredients
Scale
For the Crust:
4 salmon fillets (6 oz each)
2 tablespoons olive oil
Salt and pepper to taste
3 tablespoons honey
3 cloves garlic, minced
2 tablespoons soy sauce
1 tablespoon lemon juice
1 teaspoon red pepper flakes (optional)
1 tablespoon chopped parsley for garnish
Instructions
1. Prepare the Crust:
Preheat oven to 400°F (200°C). Line a baking sheet with parchment paper.
Season salmon fillets with salt and pepper. Heat olive oil in a large skillet over medium-high heat.
Sear salmon skin-side down for 3-4 minutes until crispy. Flip and cook for another 2 minutes.
In a small bowl, whisk together honey, garlic, soy sauce, lemon juice, and red pepper flakes.
Transfer salmon to the prepared baking sheet. Brush generously with the honey garlic glaze.
Bake for 5-7 minutes until salmon is cooked through and glaze is caramelized.
Garnish with chopped parsley and serve immediately.
Notes
You can customize the seasonings to taste.
“`html
How to Prepare This Dish
Steps and time-saving tips
Start by preheating your oven to 400°F and lining a baking sheet with parchment paper for easy cleanup. Pat the salmon fillets dry with a paper towel to ensure they crisp up nicely in the oven. Meanwhile, whisk together the honey, minced garlic, soy sauce, and a splash of lemon juice in a small bowl for the glaze. Heat a skillet over medium-high heat and sear the salmon skin-side down for 2-3 minutes until golden. Transfer the fillets to the baking sheet, brush generously with the honey garlic mixture, and bake for 8-10 minutes. For extra crispiness, broil the salmon for the last minute while keeping a close eye to prevent burning. While the salmon cooks, use the same skillet to reduce any leftover glaze into a thick sauce for drizzling. Serve the crispy honey garlic salmon recipe hot over rice or greens, garnished with sesame seeds and green onions. To save time, prep the glaze ahead and store it in the fridge for up to two days. If you’re short on ingredients, swap soy sauce for tamari or coconut aminos without sacrificing flavor.
and-learned-from">Mistakes I’ve made and learned from
I once rushed the searing step and ended up with soggy skin—now I always pat the salmon dry and wait for the skillet to get properly hot. Another time, I overbaked the fillets, turning them dry instead of flaky. A meat thermometer solved that; pull the salmon at 125°F, and let carryover cooking do the rest. If your glaze burns in the oven, try brushing it on halfway through baking like I do now. For more foolproof seafood tips, check out my guide on perfect seafood temperatures. And if you’re new to working with salmon, my salmon prep basics will help you avoid the pitfalls I stumbled through.
“`
n-and-variations">Cultural Connection and Variations
Where this recipe comes from
The Crispy Honey Garlic Salmon Recipe we love today has roots in both Asian and North American culinary traditions. Chefs in coastal regions of Japan and Korea often glaze salmon with sweet and savory sauces, while Pacific Northwest cooks highlight the fish’s natural richness with bold flavors. Over time, home cooks blended these influences, creating the sticky-sweet, crispy-skinned version we know now.
In my family, we tweak the Crispy Honey Garlic Salmon Recipe by adding a splash of lime juice for brightness, a trick my aunt picked up from Thai street vendors. Meanwhile, some Scandinavian versions swap honey for lingonberry jam, and Italian kitchens might toss in capers for a briny kick. No matter the variation, the dish always brings people together—whether it’s a weeknight dinner or a festive gathering.
How it fits in today’s cooking
Today, the Crispy Honey Garlic Salmon Recipe shines as a go-to meal for busy households and special occasions alike. Its quick prep time fits modern routines, while the luxurious flavors make it feel like a treat. Many cooks pair it with roasted vegetables for a balanced dinner or serve it over lemony quinoa for a light yet satisfying twist.
Seasonally, this dish a
dapts effortlessly. In summer, we grill the salmon for smoky depth, while winter calls for extra garlic to ward off chilly nights. Food bloggers and chefs keep reinventing it too—some air-fry the fillets for extra crispness, while others drizzle chili oil for heat. No matter how you make it, the Crispy Honey Garlic Salmon Recipe stays a timeless favorite because it’s simple, versatile, and downright delicious.
Taste and Texture
What makes it delicious
The Crispy Honey Garlic Salmon Recipe delivers a mouthwatering balance of sweet, savory, and umami flavors. Each bite starts with a caramelized, sticky-sweet glaze made from honey and garlic, which clings to the perfectly seared salmon. Meanwhile, the exterior crisps up beautifully, offering a satisfying crunch that gives way to tender, flaky flesh. Fragrant garlic and a hint of soy sauce deepen the richness, while a splash of lemon brightens every forkful. The contrast between the crispy edges and melt-in-your-mouth center makes the Crispy Honey Garlic Salmon Recipe irresistible.
Boosting the flavor
For an extra flavor kick, try swapping honey with maple syrup for a deeper, earthy sweetness. A sprinkle of red pepper flakes or a dash of sriracha adds a subtle heat that cuts through the richness. If you love texture, top your Crispy Honey Garlic Salmon Recipe with toasted sesame seeds or chopped scallions for freshness. Pair it with a tangy ginger lime dressing or serve alongside garlic herb roasted carrots to round out the meal. Experimenting with these tweaks keeps every bite exciting.
Pat the salmon dry before seasoning to ensure the skin crisps perfectly in the pan. Meanwhile, warm the honey slightly to help it blend smoothly with the garlic sauce for your Crispy Honey Garlic Salmon Recipe. Use medium-high heat when searing the salmon to lock in moisture while achieving a golden crust. Finally, let the salmon rest for a minute after cooking so the glaze thickens and clings beautifully.
Mistakes to avoid
Avoid overcrowding the pan when searing the salmon, as this steams the fish instead of crisping it. For even cooking, check out our guide on perfect pan-seared fish. Another common mistake is overcooking the garlic, which turns bitter—add it just before the honey to keep the flavor fresh. If you’re new to balancing sweet and savory flavors, our sauce balancing tips will help you adjust the glaze to taste.
g-suggestions">Serving and Pairing Suggestions
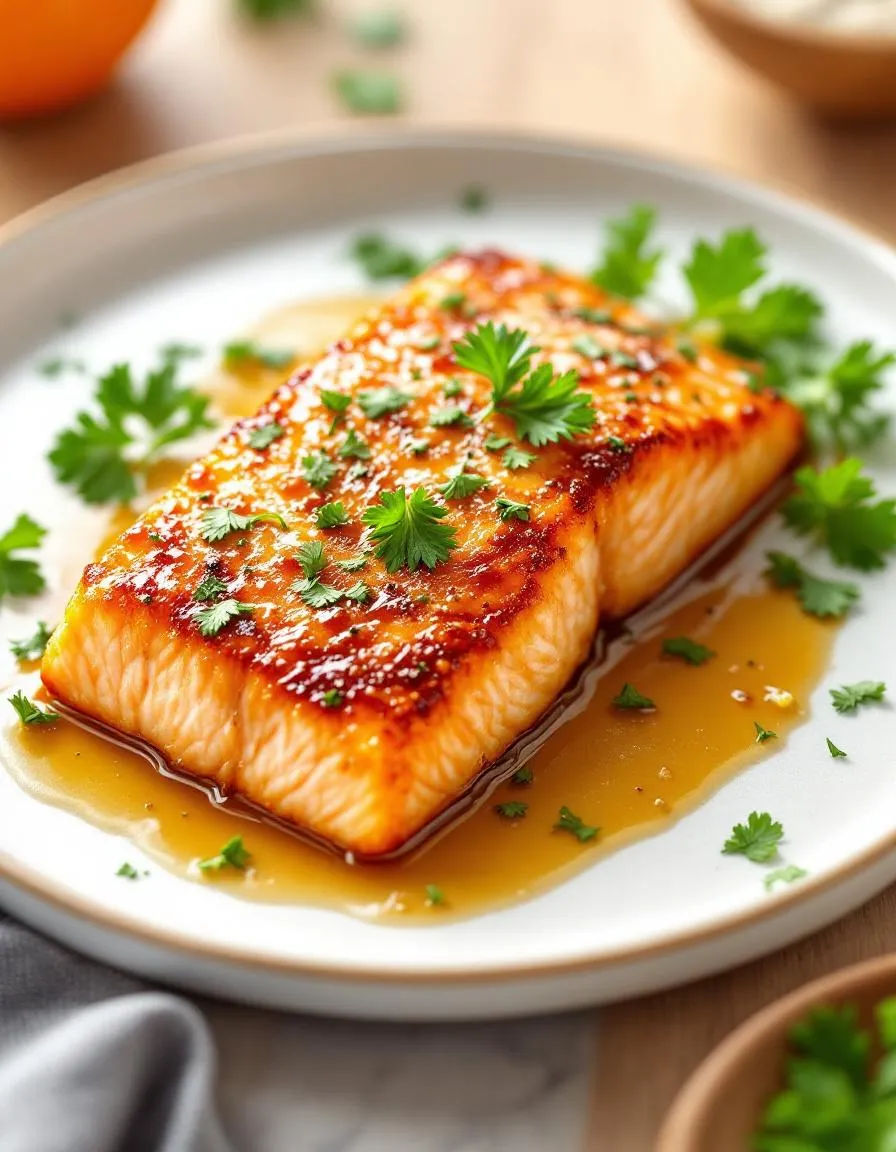
How to serve this dish
Make your Crispy Honey Garlic Salmon Recipe the star of the table by plating it over a bed of vibrant greens or fluffy jasmine rice. For a pop of color, garnish with thinly sliced green onions or a sprinkle of sesame seeds. Meanwhile, serve it alongside lemon wedges to brighten the rich flavors. This dish shines at dinner parties, but it also works beautifully for a cozy weeknight meal. If you want to impress guests, arrange the salmon on a large platter with roasted vegetables for a family-style presentation.
What goes well with it
Pair your Crispy Honey Garlic Salmon Recipe with a crisp white wine like Sauvignon Blanc, which cuts through the sweetness of the honey glaze. For a non-alcoholic option, try sparkling water with a twist of lime. On the side, serve a refreshing Asian Cucumber Salad to balance the dish’s richness. Alternatively, roasted garlic mashed potatoes add a creamy contrast. If you love bold flavors, drizzle extra glaze or pair it with our Spicy Mango Salsa for a tropical kick.
math-faq-block">
How do you get crispy skin on honey garlic salmon?
To achieve crispy skin on your Crispy Honey Garlic Salmon Recipe, pat the salmon dry with paper towels before cooking and cook it skin-side down in a hot skillet with oil. Press the fillet gently with a spatula to ensure even contact with the pan, and avoid moving it until the skin turns golden and crisp.
What sides go well with honey garlic salmon?
The Crispy Honey Garlic Salmon Recipe pairs perfectly with roasted vegetables like asparagus or Brussels sprouts, or light sides such as quinoa or a fresh green salad. For a heartier meal, try serving it with garlic mashed potatoes or steamed jasmine rice to soak up the delicious sauce.
Can I use frozen salmon for this recipe?
Yes, you can use frozen salmon for the Crispy Honey Garlic Salmon Recipe, but thaw it completely in the refrigerator first and pat it dry to remove excess moisture. Fresh salmon yields the best texture, but properly thawed frozen fillets will still work well if handled correctly.
ank-math-faq-item">
How long should I marinate honey garlic salmon?
For the Crispy Honey Garlic Salmon Recipe, marinate the salmon for at least 15–20 minutes to let the flavors penetrate, but no longer than 1 hour to prevent the acidity from breaking down the fish. The honey garlic glaze caramelizes beautifully during cooking, so a shorter marinade time works perfectly.
Best Crispy Bacon Ranch Chicken Melt Recipe
Introduction
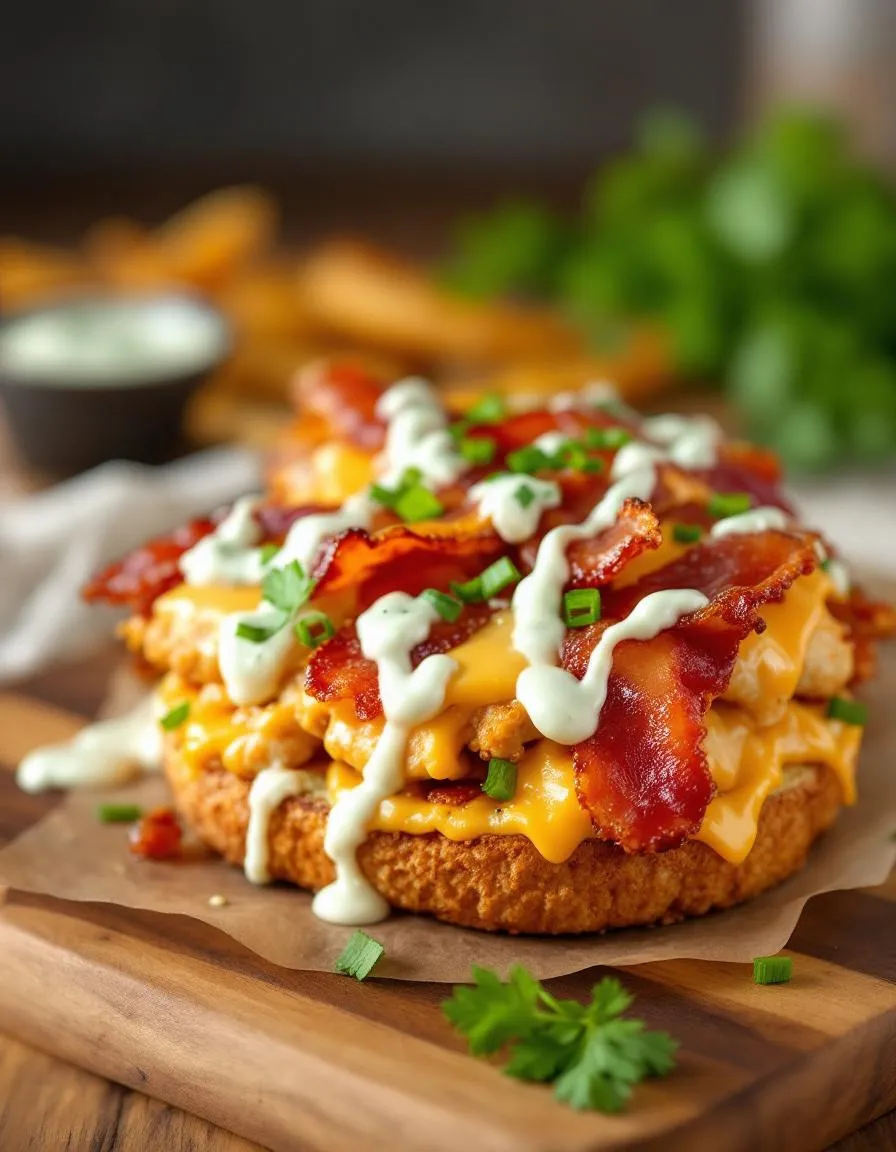
There’s something undeniably comforting about biting into a sandwich that hits all the right notes—crispy, creamy, and packed with flavor. If you’re craving a meal that delivers on every level, the Crispy Bacon Ranch Chicken Melt will quickly become your new favorite. This recipe combines tender chicken, smoky bacon, and tangy ranch dressing, all hugged by golden, toasted bread. Whether you need a quick lunch or a satisfying dinner, this sandwich brings joy to every bite. Plus, it’s easy enough for weeknights but impressive enough for guests. Let’s dive into why this dish deserves a spot in your regular rotation.
The Crispy Bacon Ranch Chicken Melt is more than just a sandwich—it’s a flavor explosion that balances textures and tastes perfectly. Imagine juicy chicken breasts seasoned to perfection, topped with crispy bacon, melted cheese, and a creamy ranch spread that ties everything together. What sets this recipe apart is its versatility. You can customize it with your favorite cheese or add a kick with spicy mayo. For busy home cooks, it’s a lifesaver because it comes together in under 30 minutes. If you love easy yet indulgent meals, you’ll appreciate our quick weeknight dinners collection, which features more time-saving ideas.
This recipe fits our blog’s tone because it’s approachable, flavorful, and designed for real-life cooking. We focus on dishes that deliver maximum taste without complicated steps. The Crispy Bacon Ranch Chicken Melt also pairs well with simple sides, like a fresh salad or crispy fries. For more inspiration, check out our comfort food classics, where you’ll find hearty recipes that never disappoint. Whether you’re cooking for one or feeding a crowd, this sandwich guarantees smiles around the table.
Why I Love This Recipe
I’ll never forget the first time I made the Crispy Bacon Ranch Chicken Melt—it was a rainy Sunday, and I needed something hearty to lift my spirits. One bite transported me to my favorite diner, where comfort food reigns supreme. What I adore most is how effortlessly it comes together, yet it feels like a treat. The crispy bacon adds a satisfying crunch, while the melted cheese and ranch dressing create a creamy contrast. It’s the kind of meal that turns an ordinary day into something special, and that’s why I keep coming back to it.
Health and Nutrition
Why it’s good for your body
The Crispy Bacon Ranch Chicken Melt packs a flavorful punch while delivering solid nutritional benefits. First, the lean chicken breast provides high-quality protein to support muscle repair and keep you full longer. Meanwhile, the crispy bacon adds a savory crunch and healthy fats, which help your body absorb essential vitamins. Additionally, the ranch dressing contributes a tangy kick while offering probiotics for gut health when made with yogurt or buttermilk.
Moreover, the melted cheese in Crispy Bacon Ranch Chicken Melt supplies calcium and vitamin D for strong bones. If you use whole-grain bread or wraps, you also get fiber to aid digestion and stabilize blood sugar. Furthermore, this dish balances indulgence with nourishment, making it a satisfying yet wholesome choice. Whether you enjoy it for lunch or dinner, Crispy Bacon Ranch Chicken Melt fuels your body without sacrificing taste.
How it fits in a healthy lifestyle
Crispy Bacon Ranch Chicken Melt fits seamlessly into a balanced diet when paired with smart choices. For a high-protein meal, serve it with a side of roasted vegetables or a crisp salad. If you follow a gluten-free diet, simply swap the bread for a gluten-free alternative or lettuce wraps. The dish also works well for meal prep, so you can enjoy a quick, protein-rich lunch during busy weekdays.
For those focusing on heart health, opt for turkey bacon and light ranch dressing to reduce saturated fat. Pairing it with fiber-rich sides like quinoa or steamed greens enhances its nutritional profile. If you love flavorful yet wholesome meals, explore our healthy dinner ideas for more inspiration. And if you’re curious about balancing indulgence with nutrition, check out our guide to balanced eating tips for practical advice.
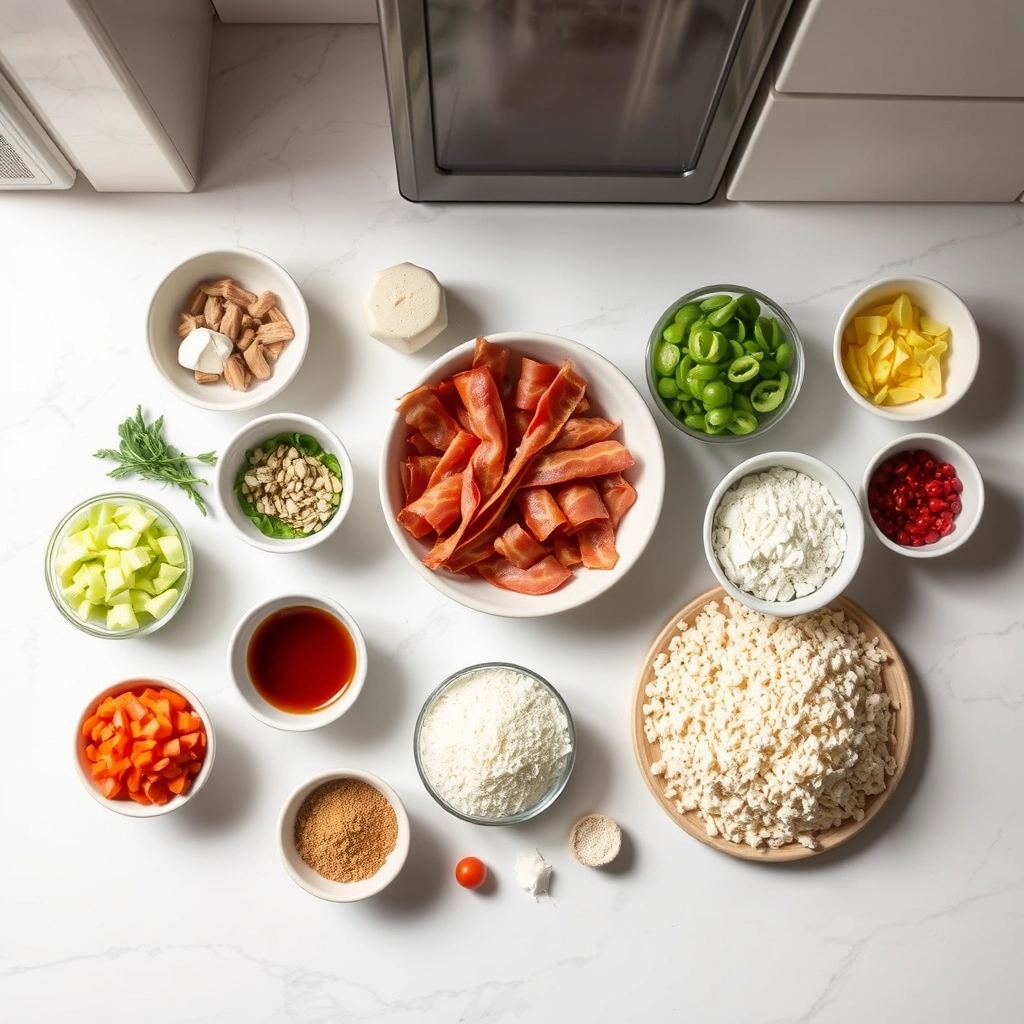
A delicious sandwich featuring crispy bacon, tender chicken, and creamy ranch dressing, all melted together with cheese for the ultimate comfort food.
Ingredients
Scale
For the Crust:
4 boneless, skinless chicken breasts
8 slices bacon
1/2 cup ranch dressing
4 slices cheddar cheese
4 sandwich rolls
1 tbsp olive oil
1 tsp garlic powder
1 tsp onion powder
Salt and pepper to taste
Instructions
1. Prepare the Crust:
Season chicken breasts with garlic powder, onion powder, salt, and pepper.
Heat olive oil in a skillet over medium heat. Cook chicken until golden and cooked through, about 6-7 minutes per side. Set aside.
In the same skillet, cook bacon until crispy. Drain on paper towels.
Slice sandwich rolls in half and lightly toast if desired.
Assemble sandwiches by placing a chicken breast on each roll, topping with 2 slices of bacon, ranch dressing, and a slice of cheddar cheese.
Place under a broiler for 1-2 minutes until cheese is melted. Serve immediately.
Notes
You can customize the seasonings to taste.
s-dish">How to Prepare This Dish
Steps and time-saving tips
Start by preheating your oven to 375°F so it’s ready when you are. While it heats, grab a large mixing bowl and whisk together the ranch seasoning, mayonnaise, and sour cream until smooth. Next, fold in the shredded cheese and crumbled bacon for that irresistible Crispy Bacon Ranch Chicken Melt flavor. Lay your chicken breasts flat on a cutting board and slice them horizontally to create thinner cutlets—this helps them cook evenly and faster. Now, spread the creamy ranch mixture generously over each cutlet, making sure every bite is packed with flavor. Transfer the chicken to a baking sheet lined with parchment paper for easy cleanup, then pop it into the oven for 20-25 minutes. Meanwhile, toast your bread lightly and prep any extra toppings like lettuce or tomato. Once the chicken turns golden and the cheese bubbles, pull it out and let it rest for a couple minutes. Finally, layer the chicken between the toasted bread, add your favorite extras, and dig in. For a time-saving twist, use pre-cooked bacon or store-bought rotisserie chicken to cut prep work in half.
Mistakes I’ve made and learned from
I’ve definitely learned the hard way that overcrowding the baking sheet leads to soggy chicken instead of that perfect Crispy Bacon Ranch Chicken Melt texture. Now, I always leave space between each piece for even heat circulation. Another rookie mistake? Skipping the resting time. I used to slice into the chicken right away, only to watch all those juicy flavors escape. Letting it sit for a few minutes makes all the difference. If you’re new to handling raw chicken, check out my guide on food safety tips to avoid cross-contamination. And if your ranch mixture ever turns out too thick, a splash of milk fixes it right up—just like I discovered in my kitchen hacks post. Trust me, these small tweaks save so much frustration!
n-and-variations">Cultural Connection and Variations
Where this recipe comes from
The Crispy Bacon Ranch Chicken Melt feels like a love letter to American comfort food, blending bold flavors with hearty textures. While its exact origins are hazy, the dish likely evolved from classic diner-style melts, where cooks piled crispy bacon, tender chicken, and creamy ranch between buttery grilled bread. In the South, you might find it with a spicy twist—jalapeños or hot sauce mixed into the ranch. Meanwhile, Midwest versions often swap cheddar for Swiss or add a layer of caramelized onions for extra sweetness.
My family puts its own spin on the Crispy Bacon Ranch Chicken Melt by using sourdough bread and a sprinkle of smoked paprika. But across the globe, similar sandwiches take different forms. In Australia, they might add beetroot for a tangy crunch, while in Mexico, avocado and lime-spiked crema could replace the ranch. No matter where you go, the core idea remains: crispy, cheesy, and utterly satisfying.
How it fits in today’s cooking
Today, the Crispy Bacon Ranch Chicken Melt thrives as a quick weeknight dinner or a game-day crowd-pleaser. Busy cooks love it because they can prep ingredients ahead—like shredded chicken from meal prep—and assemble it in minutes. It’s also a star at potlucks, especially when paired with easy party appetizers for a full spread.
Modern twists keep it f
resh, too. Some air-fry the sandwich for extra crispness, while others load it with spinach or roasted red peppers for a veggie boost. Whether you stick to tradition or experiment, the Crispy Bacon Ranch Chicken Melt stays a timeless favorite because it’s simple, versatile, and always delicious.
Taste and Texture
What makes it delicious
The Crispy Bacon Ranch Chicken Melt delivers a mouthwatering explosion of flavors and textures. First, you’ll notice the golden, buttery crunch of toasted bread giving way to tender, juicy chicken infused with smoky bacon. Meanwhile, the creamy ranch dressing ties everything together with its tangy, herbaceous kick. Each bite offers a satisfying contrast—crispy, chewy, and velvety all at once. The melted cheese adds a gooey richness, while the bacon’s salty crispness elevates every mouthful. Best of all, the aroma of sizzling bacon and toasted bread will have everyone gathering around the table before the Crispy Bacon Ranch Chicken Melt even hits the plate.
Boosting the flavor
For an even bolder twist, try swapping the ranch dressing for a spicy chipotle mayo or adding a handful of caramelized onions for sweetness. If you love heat, a sprinkle of crushed red pepper or a dash of hot sauce will wake up the flavors. Alternatively, layer on extra cheese—like sharp cheddar or pepper jack—for a deeper, more complex taste. Pair your Crispy Bacon Ranch Chicken Melt with a side of garlic parmesan fries or a crisp avocado ranch salad to round out the meal. With a few tweaks, you can make this dish your own while keeping its irresistible core intact.
First, always pat the chicken dry before seasoning to ensure maximum crispiness in your Crispy Bacon Ranch Chicken Melt. Next, preheat the skillet properly so the chicken sears evenly without sticking. Additionally, use freshly shredded cheese instead of pre-shredded for better melt and flavor. Finally, let the sandwich rest for a minute after assembling to prevent the fillings from sliding out.
Mistakes to avoid
Avoid overcooking the chicken, as it can dry out quickly. Instead, use a meat thermometer to check for 165°F internally. Also, don’t skip toasting the bread, which adds crunch and prevents sogginess. For more on perfecting chicken dishes, check out our guide on chicken cooking tips. Another common mistake is overloading the sandwich with toppings, which makes it messy to eat. Stick to balanced layers, and for ideal bread choices, explore our best breads for sandwiches.
g-suggestions">Serving and Pairing Suggestions
How to serve this dish
For a picture-perfect presentation, serve your Crispy Bacon Ranch Chicken Melt on a rustic wooden board or a warm stoneware plate. Meanwhile, drizzle extra ranch dressing over the top and sprinkle fresh chives for a pop of color. This dish shines at casual gatherings like game-day parties or weekend brunches, but it also makes a comforting weeknight dinner. If you want to impress guests, slice the melt diagonally to showcase the gooey cheese and crispy bacon layers.
What goes well with it
Pair your Crispy Bacon Ranch Chicken Melt with a crisp, tangy side like our Classic Coleslaw to balance the richness. Alternatively, roasted garlic parmesan potatoes add a savory crunch that echoes the melt’s crispy texture. For drinks, try an ice-cold lemonade or a light lager—their refreshing qualities cut through the dish’s creamy ranch flavor. If you’re craving something heartier, our Loaded Potato Soup makes a cozy companion on chilly evenings.
math-faq-block">
What ingredients do I need for a Crispy Bacon Ranch Chicken Melt?
To make a Crispy Bacon Ranch Chicken Melt, you’ll need chicken breasts, bacon, ranch dressing, shredded cheese (cheddar or Monterey Jack work well), butter, and breadcrumbs for crispiness. Don’t forget seasonings like garlic powder and black pepper to enhance the flavor.
How do I keep the chicken crispy in a Crispy Bacon Ranch Chicken Melt?
For maximum crispiness, coat the chicken in breadcrumbs and pan-fry it in butter or oil until golden brown. Avoid overcrowding the pan, and let the chicken rest on a wire rack after cooking to prevent sogginess in your Crispy Bacon Ranch Chicken Melt.
Can I make a Crispy Bacon Ranch Chicken Melt in the air fryer?
Yes! An air fryer works great for a Crispy Bacon Ranch Chicken Melt. Bread the chicken as usual, then air-fry at 375°F for 12–15 minutes, flipping halfway. Add the bacon, cheese, and ranch dressing afterward for a perfectly crispy result.
ank-math-faq-item">
What sides go well with a Crispy Bacon Ranch Chicken Melt?
Pair your Crispy Bacon Ranch Chicken Melt with classic sides like french fries, a crisp garden salad, or roasted vegetables. For a lighter option, try coleslaw or steamed broccoli to balance the rich flavors.
Best Peach Pie Recipe – Classic Homemade Delight
Introduction
There’s something magical about the smell of a freshly baked Peach Pie Recipe wafting through the kitchen. Whether it reminds you of summer picnics, family gatherings, or just the simple joy of biting into a sweet, juicy peach, this dessert holds a special place in so many hearts. If you’ve ever craved that perfect balance of flaky crust and tender fruit, you’re in the right place. Today, we’re diving into a timeless classic that never fails to delight.
A Peach Pie Recipe is more than just a dessert—it’s a celebration of seasonal flavors and homemade comfort. With ripe peaches as the star, this pie brings together a buttery, golden crust and a luscious filling that’s both sweet and slightly tangy. What makes it truly special is its versatility. You can serve it warm with a scoop of vanilla ice cream for a decadent treat or enjoy it at room temperature with your afternoon tea. Moreover, this recipe fits perfectly with our blog’s mission to share approachable, crowd-pleasing dishes that anyone can master. If you love fruity desserts, you might also enjoy our Blueberry Rum Cake or explore the secrets behind the perfect Flaky Pie Crust to elevate your baking game.
Why I Love This Recipe
Peach pie holds a special place in my heart because it reminds me of my grandmother’s kitchen. Every summer, she’d pile ripe peaches into her trusty pie dish, and the whole house would smell like sunshine and sugar. I still remember the first time I tried making it myself—the crust was a little lopsided, but the taste transported me right back to those warm childhood memories. That’s the beauty of this Peach Pie Recipe: it’s not just about the ingredients, but the stories and love we bake into every slice.
Health and Nutrition
Why it’s good for your body
Peach Pie Recipe delivers a delicious way to enjoy essential nutrients while satisfying your sweet tooth. First, peaches pack a punch of vitamins A and C, which support immune health and glowing skin. Additionally, the natural sweetness of peaches means you can reduce added sugars without sacrificing flavor. Moreover, the fiber in peaches and the crust aids digestion and helps keep you full longer.
When you bake Peach Pie Recipe, you also benefit from antioxidants found in fresh peaches. These compounds fight inflammation and may lower the risk of chronic diseases. Furthermore, using whole-grain flour or almond flour in the crust boosts the nutritional value, adding protein and healthy fats. Since peaches contain potassium, this dessert even contributes to heart health by helping regulate blood pressure.
Finally, Peach Pie Recipe offers a balanced treat when enjoyed in moderation. Unlike heavily processed desserts, it relies on real fruit for flavor and texture. Whether you serve it warm or chilled, each slice brings a mix of comfort and nourishment.
How it fits in a healthy lifestyle
Peach Pie Recipe fits seamlessly into a balanced diet when paired with mindful eating habits. For a lighter version, try swapping traditional crust with an oat-based alternative or explore our gluten-free baking tips to accommodate dietary needs. The natural sugars in peaches provide energy, making it a smarter choice than refined-sugar desserts.
If you’re watching your calorie intake, serve smaller portions topped with a dollop of Greek yogurt for extra protein. Peach Pie Recipe also works well as an occasional indulgence in heart-healthy meal plans, especially when you use ingredients like coconut oil or whole wheat flour. For more ideas on balancing treats with nutrition, check out our guide on healthy dessert swaps. With simple tweaks, this classic dessert can align with almost any wellness goal.
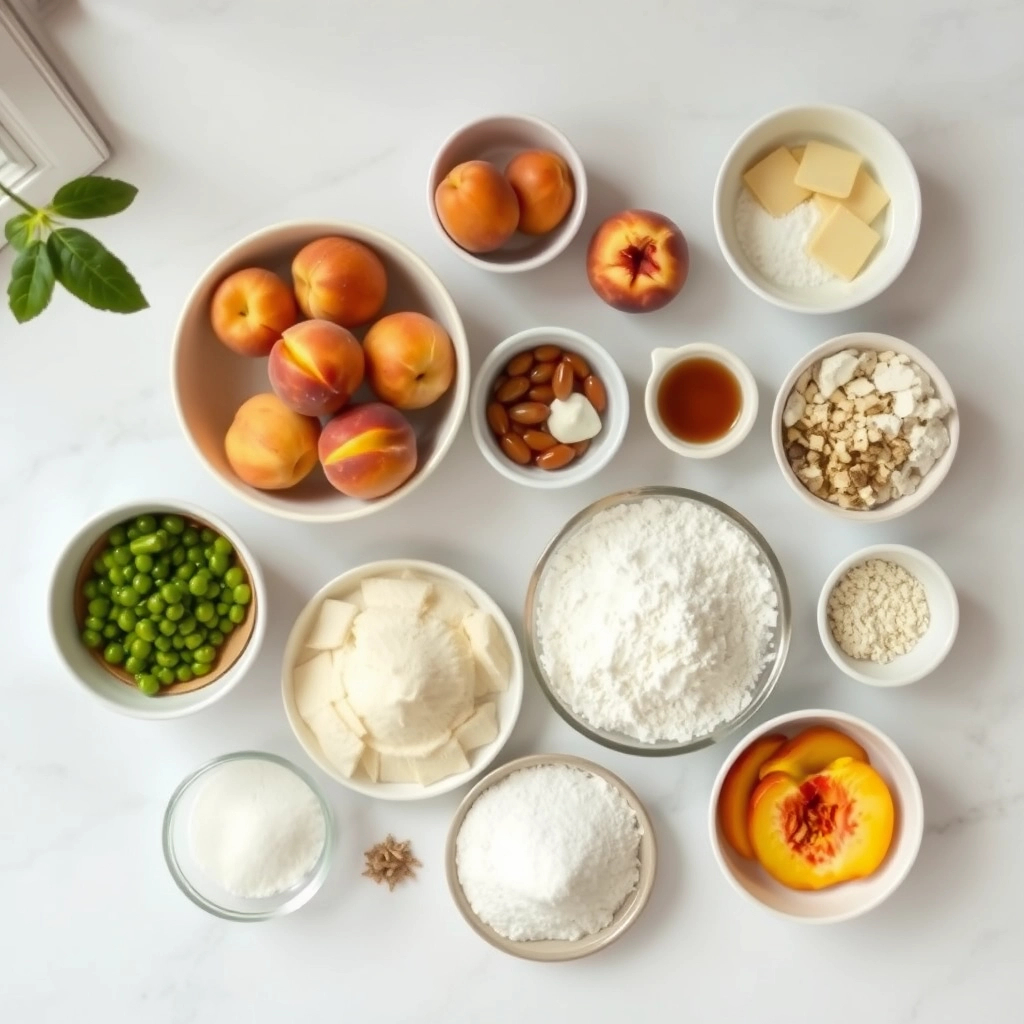
A classic summer dessert featuring sweet, juicy peaches in a flaky, buttery crust.
Ingredients
Scale
For the Crust:
2 1/2 cups all-purpose flour
1 tsp salt
1 cup unsalted butter, chilled and cubed
6–8 tbsp ice water
6 cups fresh peaches, peeled and sliced
3/4 cup granulated sugar
2 tbsp cornstarch
1 tsp cinnamon
1 tbsp lemon juice
1 egg, beaten (for egg wash)
Instructions
1. Prepare the Crust:
In a large bowl, mix flour and salt. Cut in butter until mixture resembles coarse crumbs.
Gradually add ice water, 1 tbsp at a time, until dough comes together. Divide into two discs, wrap in plastic, and chill for 1 hour.
Preheat oven to 375°F (190°C). Roll out one dough disc and fit into a 9-inch pie dish.
In a bowl, combine peaches, sugar, cornstarch, cinnamon, and lemon juice. Pour into pie crust.
Roll out second dough disc and place over filling. Crimp edges, cut slits on top, and brush with egg wash.
Bake for 45-50 minutes until golden brown. Cool before serving.
Notes
You can customize the seasonings to taste.
How to Prepare This Dish
Steps and time-saving tips
Start by preheating your oven to 375°F to ensure it’s ready when your peach pie recipe filling is prepared. While the oven heats, roll out your pie crust and gently press it into a 9-inch pie dish, trimming any excess edges. Next, whisk together sugar, cornstarch, cinnamon, and a pinch of salt in a large bowl. Toss fresh peach slices in this mixture until evenly coated, then let them sit for 10 minutes to release their juices. Meanwhile, prepare a lattice top or a full crust if you prefer—just remember to cut vents for steam. Pour the peach filling into the crust, dot with butter, and layer the top crust. Crimp the edges with a fork or your fingers for a rustic finish. Brush the top with an egg wash for a golden shine, then bake for 45-50 minutes until bubbling and golden brown. To save time, use store-bought crust or prep your filling a day ahead. Let the pie cool for at least 2 hours before slicing to avoid a runny mess.
Mistakes I’ve made and learned from
I once rushed the cooling process for my peach pie recipe, and the filling oozed everywhere—lesson learned! Now, I always let it set completely, even if it tests my patience. Another blunder? Skipping the cornstarch, which turned my pie into a soupy disaster. For foolproof thickening, I stick to the measurements and sometimes add a tablespoon of tapioca flour for extra insurance. If you’re new to pie-making, check out my guide on perfect pie crust to avoid tough or soggy bottoms. And if your peaches aren’t ripe enough, try my fruit ripening tips to sweeten them up naturally. Trust me, a little extra prep makes all the difference.
Peach pie recipe carries a sweet slice of American history, especially in the South where peaches thrive. Farmers in Georgia, known as the Peach State, often baked this dessert during summer harvests, turning ripe fruit into golden, flaky treasures. Meanwhile, in the Midwest, families added cinnamon or nutmeg for warmth, while Southern versions sometimes swapped in buttermilk crusts for extra tang. Even today, you’ll find regional twists—like adding bourbon in Kentucky or layering streusel topping in Pennsylvania Dutch country.
Beyond the U.S., peach pie recipe takes on global flair. In France, they fold peaches into tarts with almond cream, while Italians might layer them atop a crostata. My grandma, though, kept it simple: her secret was a splash of vanilla and a lattice crust so pretty it almost felt wrong to slice. Whether served at a county fair or a family reunion, peach pie bridges generations and geographies with every juicy bite.
ays-cooking">How it fits in today’s cooking
Peach pie recipe still shines as a summer staple, but modern cooks give it fresh life. Some bake mini versions in muffin tins for picnics, while others mix in berries for color. It’s also a star at holidays—think Fourth of July barbecues or Thanksgiving with a scoop of homemade vanilla ice cream. Health-conscious bakers even experiment with gluten-free crusts or coconut sugar, proving this classic adapts without losing its charm.
Busy weeknights? No problem. Many now use store-bought crusts or frozen peaches without guilt. Yet whether you’re honoring tradition or testing twists, peach pie recipe remains a timeless way to celebrate sweetness—one slice at a time.
Taste and Texture
What makes it delicious
Every bite of Peach Pie Recipe delivers a symphony of sweet, juicy peaches wrapped in a buttery, flaky crust. The filling bursts with caramelized fruitiness, balanced by warm hints of cinnamon and vanilla. Meanwhile, the golden-brown crust crumbles just right, offering a satisfying contrast to the tender peaches. As it bakes, the aroma of ripe peaches and toasted pastry fills the kitchen, making it impossible to resist a slice. Whether served warm or chilled, Peach Pie Recipe remains a timeless treat that melts in your mouth with every forkful.
r">Boosting the flavor
For an extra layer of indulgence, drizzle your Peach Pie Recipe with a spoonful of homemade vanilla sauce or add a scoop of cinnamon-spiced whipped cream. Alternatively, toss a handful of fresh raspberries into the filling for a tart twist. If you love deeper flavors, try swapping white sugar for brown sugar or adding a pinch of nutmeg to the crust. For more inspiration, explore our guide to perfect pie crust techniques to elevate your baking game. Small tweaks can transform this classic dessert into something even more memorable.
“`html
Tips for Success
Best practices for results
Always chill the dough before rolling it out for your Peach Pie Recipe, as this prevents shrinkage during baking. Use ripe but firm peaches to balance sweetness and texture, and toss them with sugar and cornstarch right before filling the crust to avoid excess juice. For a golden finish, brush the top crust with an egg wash and sprinkle coarse sugar. Finally, let the pie cool completely before slicing so the filling sets properly.
Mistakes to avoid
Avoid overworking the pie dough, as this makes it tough instead of flaky. Instead, mix the ingredients just until they come together. Many bakers also skip blind baking the crust, which can lead to a soggy bottom. For a crisp base, check out our guide on how to blind bake pie crust. Additionally, don’t slice the pie too soon—wait at least 2 hours to let the filling thicken. If your peaches lack flavor, try our tips for choosing the best fruit for pies to elevate your Peach Pie Recipe.
“`
g-suggestions">Serving and Pairing Suggestions
How to serve this dish
For a stunning presentation, serve your Peach Pie Recipe warm with a scoop of vanilla ice cream melting over the golden crust. Alternatively, dust the top with powdered sugar for an elegant touch. Meanwhile, fresh mint leaves or edible flowers make lovely garnishes for special occasions. Whether you’re hosting a summer barbecue or a cozy holiday gathering, this pie shines as the star dessert. To make it extra inviting, slice it neatly and plate it with a drizzle of caramel sauce.
What goes well with it
Pair your Peach Pie Recipe with a chilled glass of sweet iced tea for a refreshing contrast to its rich flavors. If you prefer something creamy, try our Homemade Whipped Cream for a light, fluffy topping. For a savory balance, serve it alongside a slice of sharp cheddar cheese—a classic Southern tradition. Additionally, our Cinnamon Latte makes a delightful companion, especially on cool autumn evenings.
math-faq-block">
How do you keep peach pie from getting soggy?
To prevent a soggy peach pie, toss the peach slices with a bit of flour or cornstarch before baking. This thickens the juices and creates a perfect texture. Blind-baking the crust for 10 minutes also helps create a barrier for the peach pie recipe.
Should you peel peaches for peach pie?
Yes, peeling peaches is recommended for peach pie recipes to avoid tough skins in the filling. Blanch the peaches in boiling water for 30 seconds, then transfer to ice water—the skins will slide off easily. This ensures a smooth, delicious peach pie texture.
What’s the best thickener for peach pie filling?
Cornstarch is the best thickener for peach pie because it creates a clear, glossy filling without cloudiness. Tapioca flour also works well for a slightly chewier texture. Both options handle the natural juices in a peach pie recipe perfectly.
ank-math-faq-item">
Can you use frozen peaches for peach pie?
Absolutely! Frozen peaches work well in peach pie recipes—just thaw and drain them thoroughly to remove excess liquid. You may need to adjust the thickener slightly since frozen peaches release more juice. The taste will still be delicious in your homemade peach pie.
Best Garlic Butter Brussels Sprouts and Mushrooms Recipe
Introduction
If you crave a side dish that feels indulgent yet wholesome, this Garlic Butter Brussels Sprouts and Mushrooms Recipe will hit the spot. Crispy Brussels sprouts and savory mushrooms caramelize in a rich garlic butter sauce, creating a dish that’s both comforting and elegant. Whether you need a quick weeknight side or a showstopper for gatherings, this recipe delivers flavor without fuss. Plus, it pairs perfectly with everything from roasted chicken to a hearty steak—making it a versatile favorite you’ll return to again and again.
Garlic Butter Brussels Sprouts and Mushrooms Recipe transforms humble ingredients into something extraordinary. Brussels sprouts, often misunderstood, become tender and slightly charred, while mushrooms soak up the garlicky butter for an umami-packed bite. This dish matters because it bridges the gap between simple and sophisticated, proving that side dishes can steal the show. It fits our blog’s tone by focusing on approachable yet elevated cooking, much like our Easy Roasted Vegetables or Creamy Garlic Mushrooms. With minimal prep and maximum flavor, it’s ideal for busy home cooks who refuse to compromise on taste.
Why I Love This Recipe
This recipe holds a special place in my heart because it reminds me of cozy family dinners. My grandmother used to roast Brussels sprouts with bacon, but when I discovered the magic of garlic butter and mushrooms, I knew I’d found my own twist. The aroma alone takes me back to her kitchen, yet the dish feels entirely new. It’s the kind of recipe that makes even veggie skeptics ask for seconds—and that’s a win in my book.
Health and Nutrition
Why it’s good for your body
Garlic Butter Brussels Sprouts and Mushrooms Recipe packs a powerful nutritional punch while delighting your taste buds. First, Brussels sprouts deliver fiber, which supports digestion and keeps you full longer. Additionally, they’re rich in vitamin C, boosting immunity and skin health. Meanwhile, mushrooms add a hearty dose of antioxidants, helping your body fight oxidative stress.
Moreover, garlic butter elevates this dish with its anti-inflammatory properties. Garlic contains allicin, a compound known to support heart health and lower blood pressure. Together, these ingredients create a meal that’s as nourishing as it is flavorful. Whether you’re aiming for better gut health or stronger immunity, Garlic Butter Brussels Sprouts and Mushrooms Recipe delivers.
Finally, this dish offers a low-carb, nutrient-dense option for those watching their macros. Brussels sprouts and mushrooms are naturally low in calories but high in essential vitamins. With every bite, you’re fueling your body with plant-based goodness. For a meal that’s both satisfying and wholesome, Garlic Butter Brussels Sprouts and Mushrooms Recipe checks all the boxes.
How it fits in a healthy lifestyle
Garlic Butter Brussels Sprouts and Mushrooms Recipe fits seamlessly into balanced eating habits. If you’re following a gluten-free or plant-based diet, this dish naturally aligns with your needs. It’s also a great way to incorporate more vegetables into your weeknight dinners without sacrificing flavor.
For those focused on heart health, the combination of garlic and olive oil in this recipe supports cholesterol management. Pair it with a lean protein like grilled chicken or salmon for a complete, nutrient-packed meal. If you’re meal prepping, you’ll love how well it stores and reheats for quick lunches.
Looking for more ways to enjoy healthy, veggie-forward meals? Try our Roasted Vegetable Medley for another simple side dish. Or, if you’re exploring low-carb options, our Zucchini Noodles with Pesto offers a light yet satisfying alternative. Garlic Butter Brussels Sprouts and Mushrooms Recipe proves that eating well never has to mean missing out on flavor.
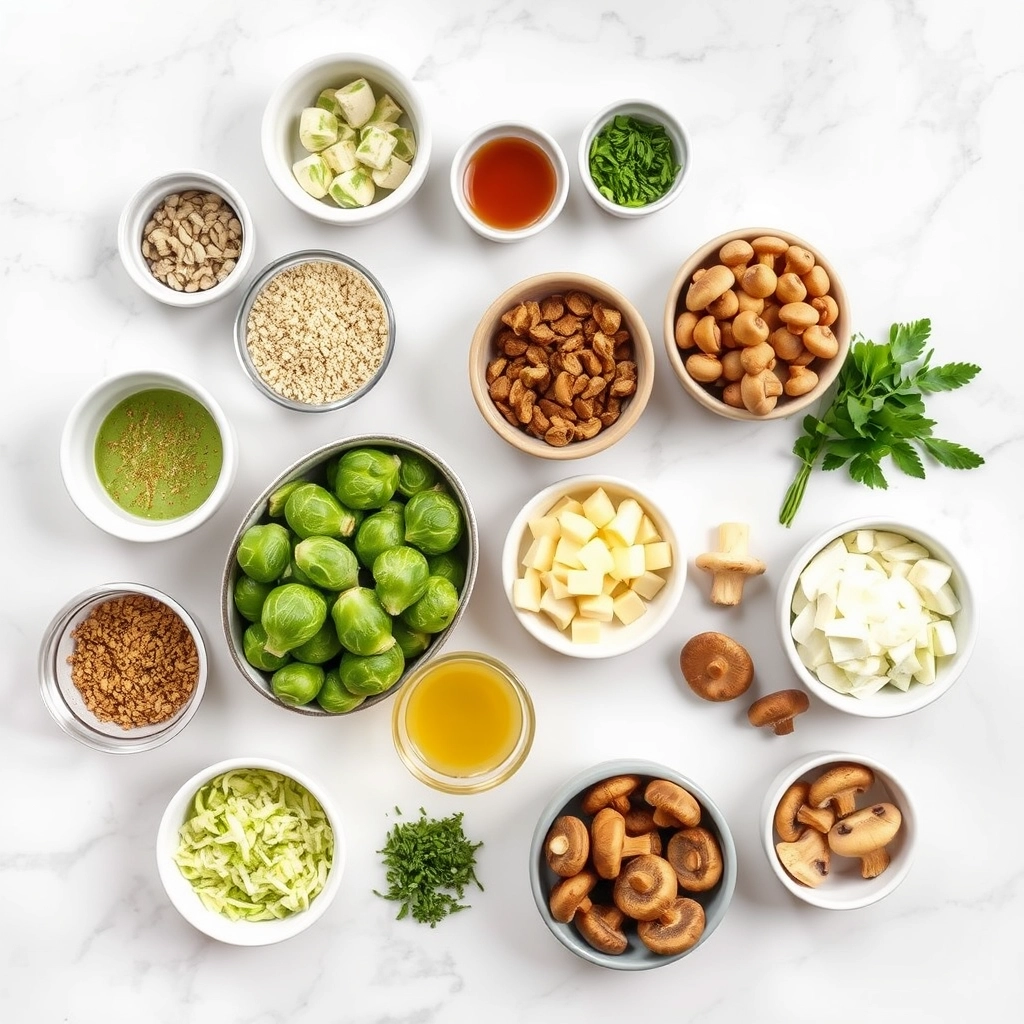
A flavorful side dish featuring roasted Brussels sprouts and mushrooms tossed in a rich garlic butter sauce.
Ingredients
Scale
For the Crust:
1 lb Brussels sprouts, trimmed and halved
8 oz mushrooms, sliced
3 tbsp unsalted butter, melted
3 cloves garlic, minced
1 tbsp olive oil
1/2 tsp salt
1/4 tsp black pepper
1/4 tsp red pepper flakes (optional)
1 tbsp fresh parsley, chopped
Instructions
1. Prepare the Crust:
Preheat oven to 400°F (200°C). Line a baking sheet with parchment paper.
In a large bowl, toss Brussels sprouts and mushrooms with olive oil, salt, and black pepper. Spread evenly on the prepared baking sheet.
Roast for 20-25 minutes, stirring halfway, until vegetables are tender and slightly browned.
In a small bowl, mix melted butter, minced garlic, and red pepper flakes (if using). Drizzle over the roasted vegetables and toss to coat.
Garnish with fresh parsley before serving.
Notes
You can customize the seasonings to taste.
s-dish">How to Prepare This Dish
Steps and time-saving tips
Start by preheating your oven to 400°F to ensure it’s ready when you finish prepping. While the oven heats, trim the Brussels sprouts and slice them in half for even cooking. Next, clean the mushrooms with a damp cloth and slice them into uniform pieces so they roast evenly. Toss both vegetables in a large bowl with olive oil, salt, and pepper until they’re lightly coated. Spread them in a single layer on a baking sheet to prevent steaming and promote crispiness. Meanwhile, melt butter in a small saucepan over low heat and whisk in minced garlic, a pinch of red pepper flakes, and a squeeze of lemon juice for brightness. Drizzle this garlic butter over the vegetables halfway through roasting, then toss gently to coat. Roast for another 10-15 minutes until the edges turn golden and crispy. For a time-saving hack, prep the garlic butter while the vegetables roast or use pre-minced garlic. If you’re short on time, chop the Brussels sprouts and mushrooms ahead and store them in the fridge. Serve immediately for the best texture, garnished with fresh parsley or grated Parmesan if desired.
Mistakes I’ve made and learned from
I once overcrowded the baking sheet, thinking I could save time by roasting everything at once. Instead, the Brussels sprouts steamed and turned mushy instead of crispy. Now I always use two sheets or roast in batches for perfect results. Another blunder? Adding the garlic butter too early—it burned before the vegetables cooked through. I learned to drizzle it halfway, as mentioned in my perfect roasted vegetables guide. Also, skipping the lemon juice left the dish feeling heavy; that acidic kick makes all the difference, just like in my balancing flavors post. Trust me, these small tweaks transform good sides into unforgettable ones.
n-and-variations">Cultural Connection and Variations
Where this recipe comes from
Garlic Butter Brussels Sprouts and Mushrooms Recipe feels like a cozy hug from the kitchen, blending earthy flavors with rich, buttery goodness. Originally, Brussels sprouts trace back to Belgium, where they thrived in cool climates. Meanwhile, mushrooms have been foraged and cherished worldwide for centuries. Together, they create a dish that bridges rustic European roots with modern comfort food.
In Italy, cooks might toss Brussels sprouts and mushrooms with olive oil and rosemary for a Mediterranean twist. Across Asia, stir-frying them with soy sauce and ginger adds umami depth. Some families, like mine, roast everything with crispy pancetta for extra crunch. No matter the variation, Garlic Butter Brussels Sprouts and Mushrooms Recipe adapts beautifully to local tastes.
Seasonally, this dish shines in fall and winter, when Brussels sprouts peak. Yet, it’s versatile enough for spring picnics or summer BBQs with a lighter garlic-lemon glaze. Whether served at holidays or weeknight dinners, it carries a timeless appeal.
ays-cooking">How it fits in today’s cooking
Today, Garlic Butter Brussels Sprouts and Mushrooms Recipe fits perfectly into healthy, flavor-packed meals. Busy cooks love its quick prep time, while meal preppers stash it for easy sides. It’s a star at Thanksgiving, but also pairs well with one-pot chicken and rice for a fuss-free dinner.
Modern twists include air-frying for extra crispness or swapping butter for vegan alternatives. Some even add a drizzle of balsamic glaze for gourmet flair. For those exploring global flavors, this dish complements spicy miso ramen as a hearty side. Ultimately, its adaptability keeps it relevant—whether you’re craving nostalgia or something new.
Taste and Texture
What makes it delicious
The Garlic Butter Brussels Sprouts and Mushrooms Recipe delivers a rich, savory experience with every bite. The Brussels sprouts caramelize into tender, slightly crisp morsels, while the mushrooms soak up the garlicky butter, becoming irresistibly juicy. Fragrant garlic and melted butter coat each vegetable, creating a luxurious mouthfeel. Meanwhile, a hint of salt enhances the natural sweetness of the sprouts, and a touch of black pepper adds a subtle warmth. Together, these ingredients make the Garlic Butter Brussels Sprouts and Mushrooms Recipe a dish that’s both comforting and deeply flavorful.
r">Boosting the flavor
For an extra layer of richness, try sprinkling grated Parmesan or crumbled feta over the finished dish. If you love a bit of crunch, toasted pine nuts or chopped walnuts add a delightful contrast. A drizzle of balsamic glaze or a squeeze of lemon brightens the flavors, balancing the dish’s richness. For more inspiration, explore our guide on garlic butter sauce variations or discover how to pair this recipe with other roasted vegetables. Small tweaks can transform the Garlic Butter Brussels Sprouts and Mushrooms Recipe into a showstopping side or even a hearty main.
Tips for Success
Best practices for results
For the best Garlic Butter Brussels Sprouts and Mushrooms Recipe, always slice your Brussels sprouts evenly so they cook uniformly. Meanwhile, use fresh mushrooms for maximum flavor and avoid overcrowding the pan to ensure proper caramelization. Additionally, melt your butter slowly to prevent burning, and toss the vegetables frequently for even coating. Finally, season generously with salt and pepper right before serving to enhance the dish’s savory notes.
>Mistakes to avoid
One common mistake is undercooking the Brussels sprouts, which leaves them tough and bitter. Instead, roast or sauté them until they’re fork-tender and slightly crispy. On the other hand, overcooking the mushrooms can make them rubbery, so remove them from heat as soon as they release their juices. For more vegetable prep tips, check out our guide on how to chop vegetables like a pro. Also, avoid using cold butter straight from the fridge, as it won’t blend smoothly with the other ingredients. For better results, learn how to master kitchen temperatures for perfect cooking every time.
Serving and Pairing Suggestions
How to serve this dish
For a stunning presentation, arrange the Garlic Butter Brussels Sprouts and Mushrooms Recipe in a wide, shallow bowl or on a rustic wooden platter. Sprinkle fresh parsley or thyme leaves on top to add a pop of color and freshness. Meanwhile, serve this dish warm to highlight the rich garlic butter flavors, making it perfect for holiday gatherings or cozy weeknight dinners. If you’re hosting a brunch, pair it with other vibrant sides to create a balanced spread that delights the senses.
What goes well with it
This Garlic Butter Brussels Sprouts and Mushrooms Recipe pairs beautifully with a crisp white wine like Sauvignon Blanc, which cuts through the richness of the butter. Alternatively, try it alongside a hearty main like our Herb-Crusted Pork Tenderloin for a satisfying meal. For a lighter option, serve it with a refreshing Lemony Quinoa Salad to balance the savory depth of the dish. Each pairing enhances the flavors while keeping the meal well-rounded and delicious.
How do you make garlic butter Brussels sprouts and mushrooms crispy?
To achieve crispy Garlic Butter Brussels Sprouts and Mushrooms, roast them at a high temperature (around 400°F) and spread them in a single layer on the baking sheet. Tossing them in melted garlic butter and ensuring they aren’t overcrowded helps them caramelize and crisp up perfectly.
Can I use frozen Brussels sprouts for this recipe?
Yes, you can use frozen Brussels sprouts for Garlic Butter Brussels Sprouts and Mushrooms, but thaw and pat them dry first to avoid excess moisture. Fresh sprouts yield better texture, but frozen work in a pinch—just roast them a few minutes longer.
ank-math-faq-item">
What type of mushrooms work best with garlic butter Brussels sprouts?
Cremini or baby bella mushrooms are ideal for Garlic Butter Brussels Sprouts and Mushrooms because they hold their shape and absorb flavors well. Shiitake or white button mushrooms also work, but avoid delicate varieties like enoki for roasting.
How long does it take to cook garlic butter Brussels sprouts and mushrooms?
Garlic Butter Brussels Sprouts and Mushrooms typically take 20–25 minutes to roast at 400°F. Stir halfway through for even browning. The sprouts should be tender with crispy edges, and the mushrooms golden brown.
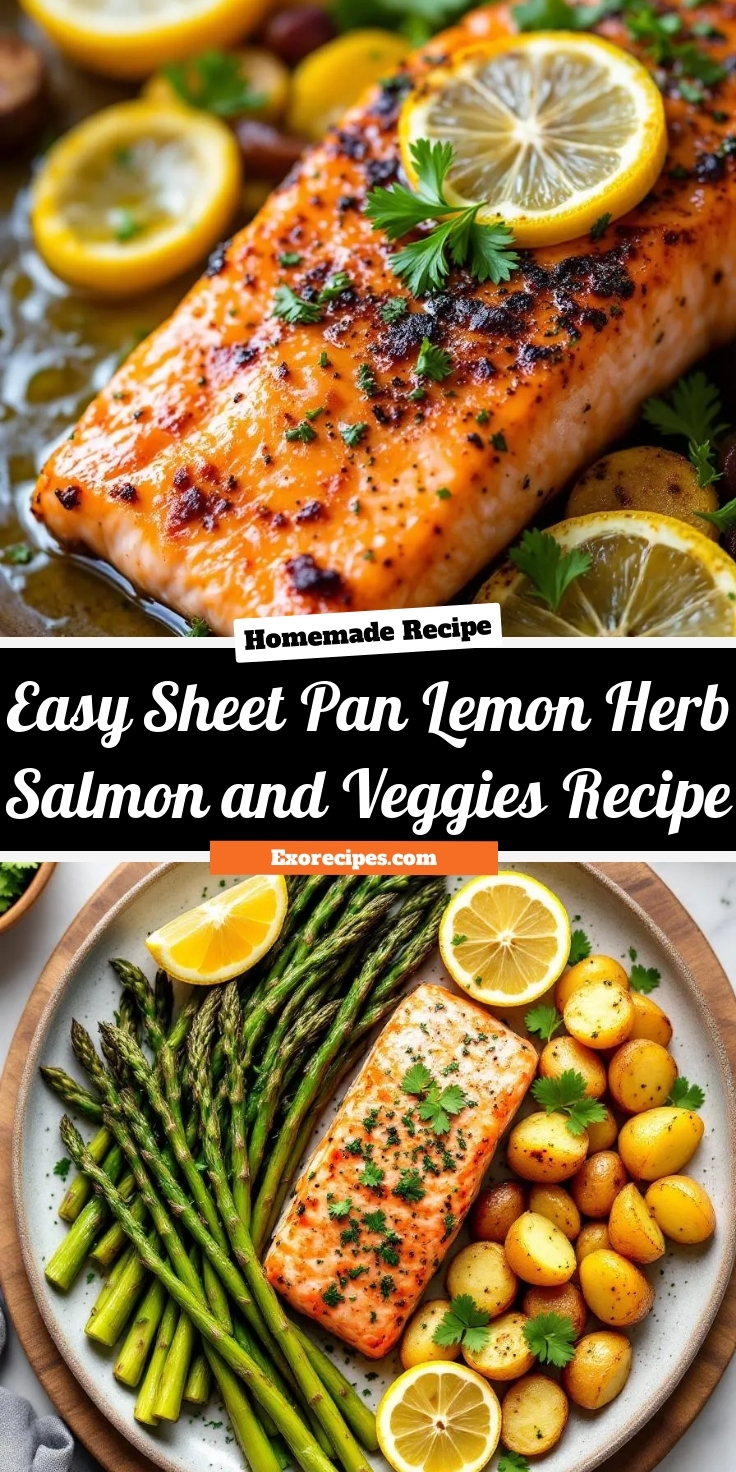
Easy Sheet Pan Lemon Herb Salmon and Veggies Recipe
Introduction
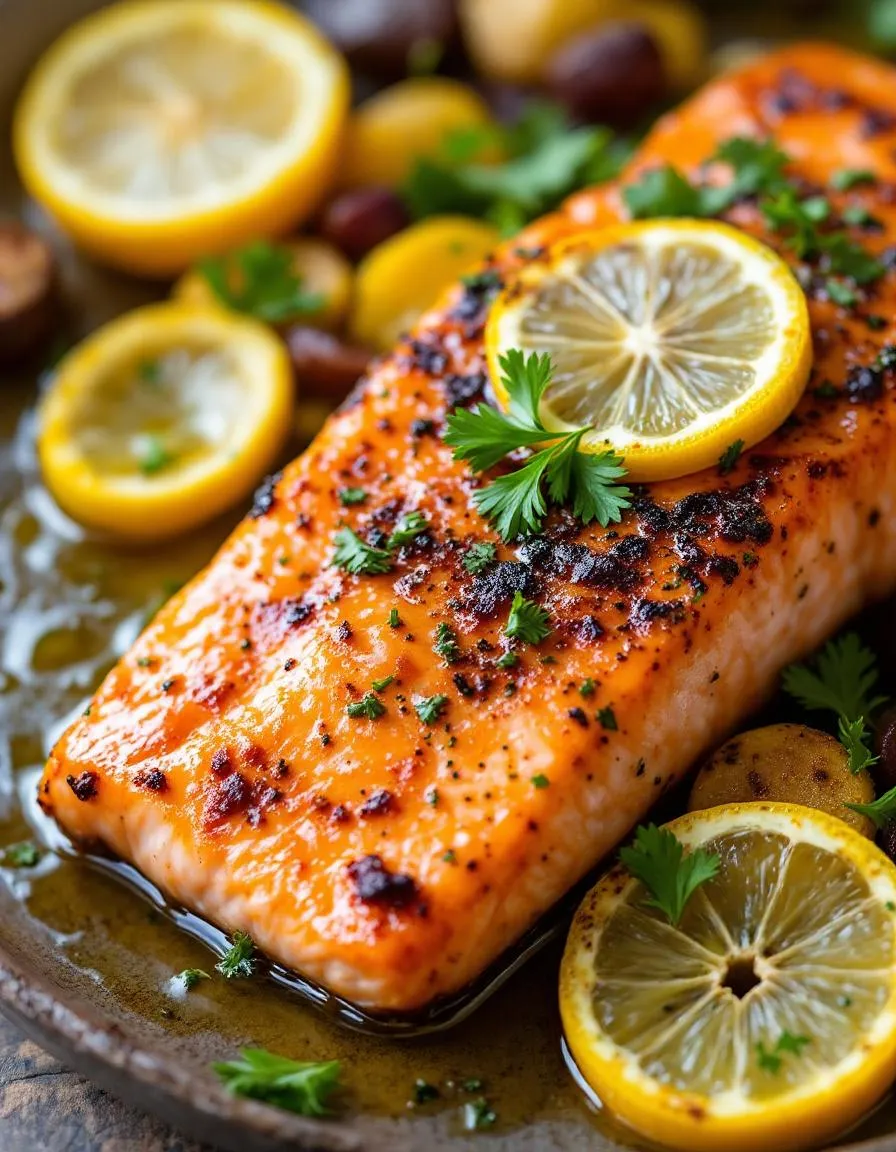
There’s something magical about a meal that comes together effortlessly yet tastes like you spent hours in the kitchen. If you’re craving a dish that’s vibrant, healthy, and packed with flavor, this Sheet Pan Lemon Herb Salmon and Veggies Recipe delivers on every level. Whether you’re juggling a busy weeknight or hosting a casual dinner, this one-pan wonder simplifies cooking without sacrificing taste. Plus, the bright citrus and fresh herbs elevate simple ingredients into a restaurant-worthy meal. Let’s dive into why this recipe deserves a permanent spot in your rotation.
The Sheet Pan Lemon Herb Salmon and Veggies Recipe combines tender salmon fillets with crisp, colorful vegetables, all roasted to perfection on a single pan. This method not only saves time but also minimizes cleanup, making it ideal for hectic schedules. The lemon-herb marinade infuses every bite with zesty, aromatic flavors, while the high-heat roasting locks in moisture and creates a lightly caramelized finish. Beyond convenience, this dish aligns with healthier eating goals, offering lean protein and nutrient-rich veggies in one balanced meal. If you love fuss-free dinners that don’t skimp on taste, you’ll appreciate how this recipe fits seamlessly into our collection of easy weeknight dinners. It’s also a fantastic way to incorporate more seafood into your diet, much like our popular garlic butter shrimp, but with a lighter, herbaceous twist.
Why I Love This Recipe
This Sheet Pan Lemon Herb Salmon and Veggies Recipe holds a special place in my kitchen because it’s the ultimate crowd-pleaser. I first made it for a family gathering, and the way the lemon brightens the salmon while the herbs mingle with the roasted veggies won everyone over. Even my pickiest eater asked for seconds. Since then, it’s become my go-to when I need something reliable yet impressive. The simplicity lets the quality of the ingredients shine, and every time I make it, I’m reminded how good food can be both effortless and unforgettable.
Health and Nutrition
Why it’s good for your body
Sheet Pan Lemon Herb Salmon and Veggies Recipe packs a powerful nutritional punch while keeping flavors bright and fresh. First, salmon delivers high-quality protein and heart-healthy omega-3 fatty acids, which support brain function and reduce inflammation. Meanwhile, the colorful veggies like bell peppers and asparagus provide fiber, vitamins, and antioxidants to boost immunity and digestion. Together, they create a meal that fuels your body without weighing you down.
Another benefit of Sheet Pan Lemon Herb Salmon and Veggies Recipe is its simplicity. Because everything cooks together, you retain more nutrients compared to boiling or overcooking ingredients separately. The lemon and herbs add more than just flavor—they enhance nutrient absorption and offer anti-inflammatory properties. Plus, the dish is naturally low in refined carbs, making it a smart choice for balanced blood sugar levels.
Finally, this recipe keeps portion control effortless. With lean protein and fiber-rich veggies filling most of the plate, you’ll feel satisfied without overeating. Whether you’re aiming for better energy or long-term wellness, Sheet Pan Lemon Herb Salmon and Veggies Recipe makes healthy eating deliciously achievable.
How it fits in a healthy lifestyle
Sheet Pan Lemon Herb Salmon and Veggies Recipe fits seamlessly into almost any dietary plan. If you follow a gluten-free or Mediterranean diet, this dish already aligns with your goals. The omega-3s in salmon promote heart health, while the veggies deliver essential micronutrients without excess calories. It’s also a great option for meal prepping—just double the recipe and enjoy leftovers for lunch.
For those focused on high-protein eating, the salmon provides a lean, satisfying base. Pair it with a side like our quinoa salad for an extra nutrient boost. Busy weeknights? This one-pan wonder cuts cleanup time, making it easier to stick to healthy habits. If you’re exploring more balanced dinners, check out our guide to balanced meals for additional inspiration. No matter your routine, this recipe keeps nutrition simple and flavorful.
A simple, healthy, and flavorful one-pan meal with lemon herb salmon and roasted vegetables.
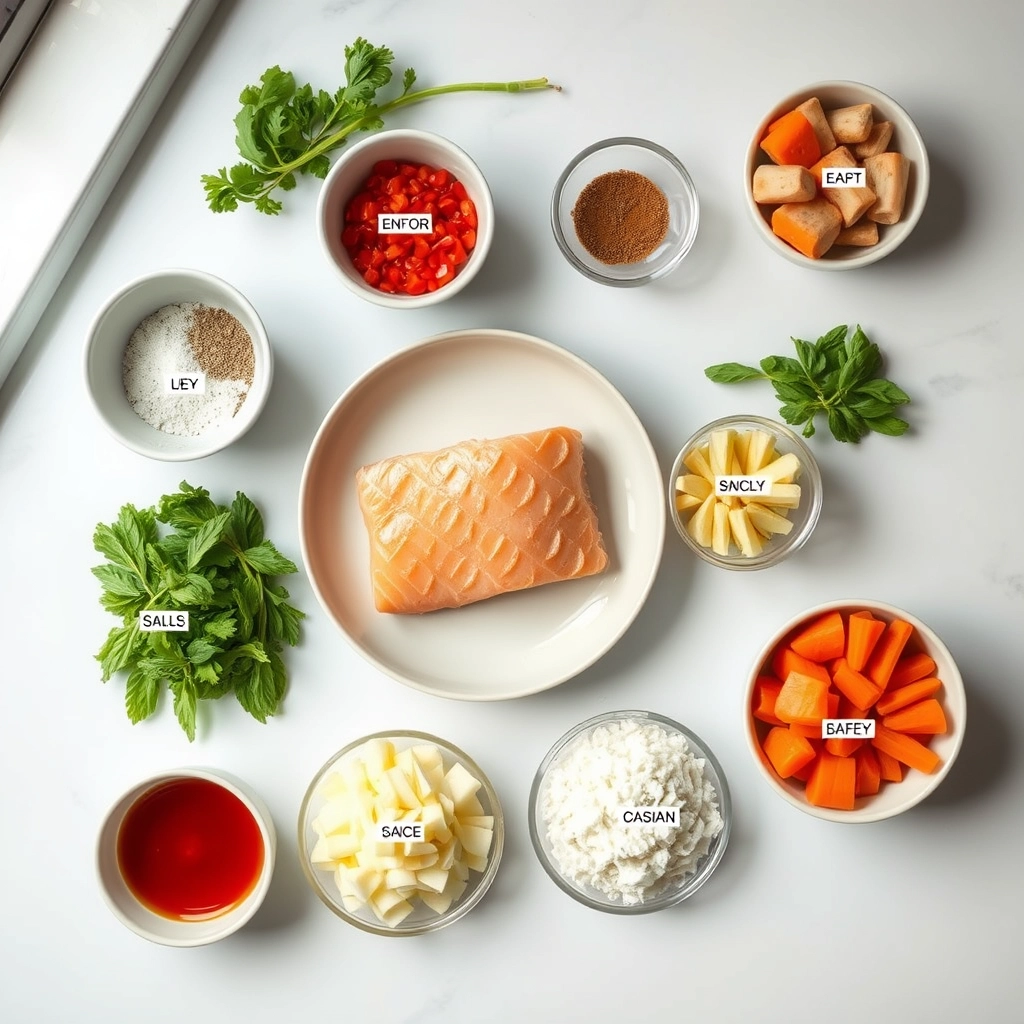
Ingredients
Scale
For the Crust:
4 salmon fillets (6 oz each)
1 lb baby potatoes, halved
1 bunch asparagus, trimmed
1 lemon, sliced
3 tbsp olive oil
2 cloves garlic, minced
1 tsp dried oregano
1 tsp dried thyme
Salt and pepper to taste
Fresh parsley for garnish
Instructions
1. Prepare the Crust:
Preheat oven to 400°F (200°C). Line a sheet pan with parchment paper.
Toss potatoes with 1 tbsp olive oil, half the garlic, oregano, thyme, salt, and pepper. Spread on the pan and roast for 15 minutes.
Add asparagus to the pan with salmon fillets. Drizzle with remaining olive oil and season with remaining garlic, salt, and pepper. Top salmon with lemon slices.
Roast for another 12-15 minutes until salmon is cooked through and veggies are tender.
Garnish with fresh parsley before serving.
Notes
You can customize the seasonings to taste.
s-dish">How to Prepare This Dish
Steps and time-saving tips
Preheat your oven to 400°F and line a large sheet pan with parchment paper for easy cleanup. While the oven heats, whisk together olive oil, lemon juice, minced garlic, dried oregano, and a pinch of salt and pepper in a small bowl. Place fresh salmon fillets in a separate dish and drizzle half of the lemon herb marinade over them, coating both sides. Next, chop your favorite veggies—like asparagus, bell peppers, and zucchini—into even-sized pieces so they cook uniformly. Toss the veggies with the remaining marinade, then spread them in a single layer on the prepared sheet pan. Nestle the salmon fillets among the vegetables, skin-side down if they have skin. Slide the pan into the oven and bake for 12-15 minutes, or until the salmon flakes easily with a fork and the veggies are tender-crisp. For a time-saving twist, prep the marinade and chop veggies the night before, storing them separately in the fridge. If you’re short on time, swap fresh herbs for dried ones—they’re just as flavorful. Serve the Sheet Pan Lemon Herb Salmon and Veggies Recipe straight from the oven with a sprinkle of fresh parsley for a bright finish.
Mistakes I’ve made and learned from
I once overcrowded the sheet pan, thinking I could fit extra veggies, but they steamed instead of roasting and turned soggy. Now I stick to a single layer and use two pans if needed. Another blunder? Forgetting to pat the salmon dry before marinating, which diluted the flavors. A quick towel-dry fixes that. If your salmon sticks, check out my guide on perfectly cooked salmon every time for foolproof tips. Also, I’ve learned that under-seasoning the veggies makes them bland, so I taste the marinade first—just like I do with my must-know seasoning tricks. Trust me, a little extra salt and lemon zest go a long way.
n-and-variations">Cultural Connection and Variations
Where this recipe comes from
The Sheet Pan Lemon Herb Salmon and Veggies Recipe feels like a love letter to coastal kitchens everywhere. While salmon has been a staple in Pacific Northwest Indigenous diets for centuries, the bright, herby flavors we know today reflect Mediterranean influences. Families in Greece might swap dill for oregano, while in Japan, they’d likely add a touch of miso or soy sauce. My grandmother, though, always insisted on extra lemon—enough to make your lips pucker.
In Scandinavia, they roast salmon with simple dill and butter, often serving it alongside root vegetables. Meanwhile, in the American South, you’ll find bold Cajun spices sneaking into the mix. The beauty of the Sheet Pan Lemon Herb Salmon and Veggies Recipe lies in its adaptability. Whether you’re cooking for a weeknight dinner or a festive gathering, it effortlessly bridges cultures and tastes.
How it fits in today’s cooking
Today, the Sheet Pan Lemon Herb Salmon and Veggies Recipe shines as a go-to for busy home cooks. It’s a one-pan wonder that fits into meal prep routines, Sunday dinners, or even holiday spreads. Modern twists include swapping seasonal veggies—think asparagus in spring or Brussels sprouts in winter. Some cooks even pair it with a tangy creamy dill sauce for extra flair.
Health-conscious eaters
love it for its lean protein and veggie-packed goodness, while families appreciate how quickly it comes together. For those hosting gatherings, it’s a lifesaver—just double the batch and add a side of garlic herb potatoes. No matter how you serve it, this dish proves that simple, flavorful cooking never goes out of style.
Taste and Texture
What makes it delicious
The Sheet Pan Lemon Herb Salmon and Veggies Recipe delivers a bright, savory experience with every bite. The salmon flakes apart tenderly, soaking up the zesty lemon and aromatic herbs, while the roasted veggies caramelize into a satisfying crisp-tender texture. Fresh garlic and thyme infuse the dish with a fragrant depth, and a hint of olive oil ties everything together in a rich, buttery finish. Meanwhile, the lemon cuts through with a refreshing tang, balancing the natural richness of the salmon. Whether you savor the melt-in-your-mouth fish or the hearty medley of veggies, the Sheet Pan Lemon Herb Salmon and Veggies Recipe keeps each element vibrant and full of flavor.
Boosting the flavor
For an extra burst of flavor, try swapping the herbs with a smoky paprika or a sprinkle of crushed red pepper for heat. A drizzle of garlic aioli or a squeeze of fresh lime right before serving can also elevate the dish. If you love bold pairings, consider adding roasted cherry tomatoes or tossing the veggies with a balsamic glaze. For more inspiration, check out our guide on herb pairings for seafood or explore ways to perfect roasted vegetables. Small tweaks make the Sheet Pan Lemon Herb Salmon and Veggies Recipe even more irresistible.
Always pat the salmon dry before seasoning to ensure the lemon herb crust sticks perfectly. For even cooking, cut the veggies into uniform sizes and spread them in a single layer on the sheet pan. Additionally, preheat the oven so the Sheet Pan Lemon Herb Salmon and Veggies Recipe cooks evenly from the start. Finally, drizzle the lemon sauce just before serving to keep the salmon moist and flavorful.
Mistakes to avoid
Avoid overcrowding the pan, as this steams the salmon and veggies instead of roasting them. For crispier results, check out our guide on perfect roasted vegetables. Also, don’t skip resting the salmon for a few minutes after baking—this locks in juices. If you’re unsure about seasoning, our herb pairing guide helps balance flavors without overpowering the dish.
g-suggestions">Serving and Pairing Suggestions
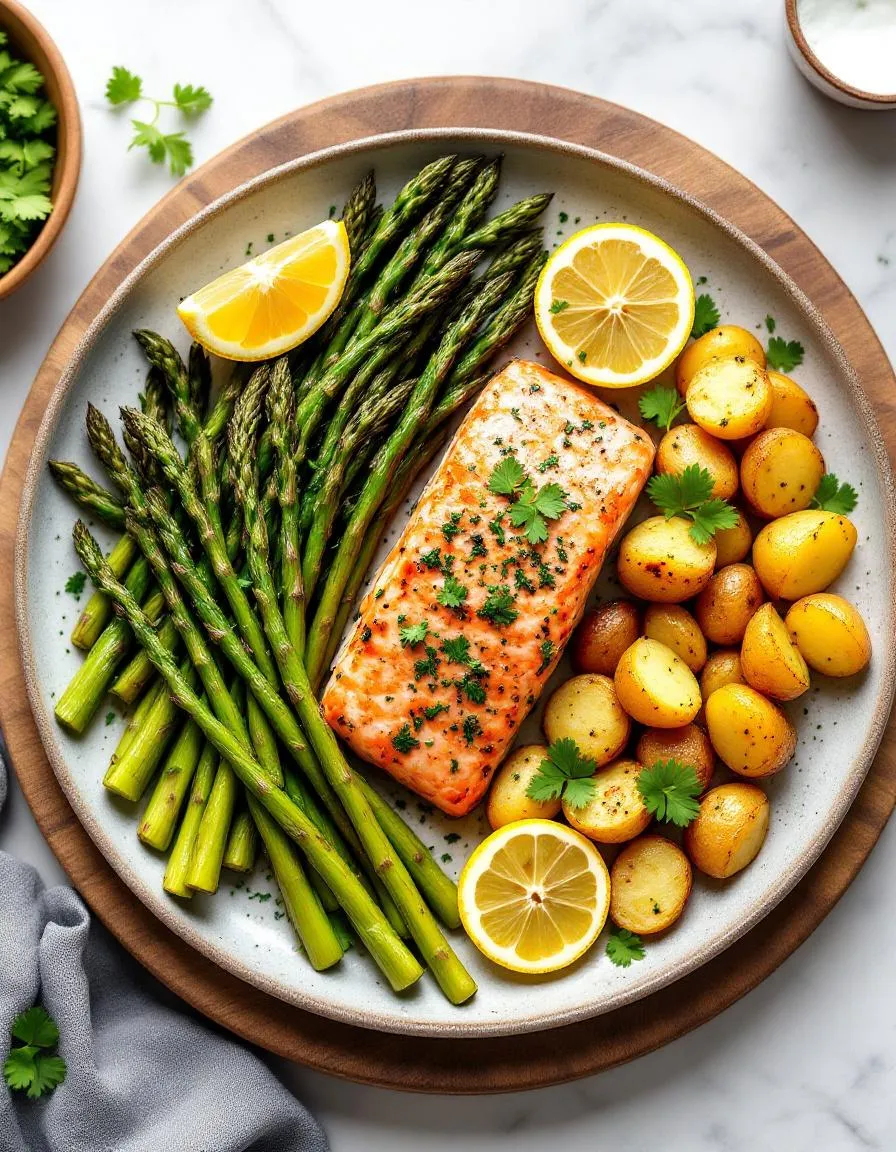
How to serve this dish
Brighten up any meal by serving Sheet Pan Lemon Herb Salmon and Veggies Recipe on a large platter for family-style dining. For a polished look, arrange the salmon fillets atop the roasted veggies and drizzle with extra lemon juice. Meanwhile, garnish with fresh parsley or dill to add a pop of color. This dish works beautifully for casual weeknight dinners yet also shines at brunch gatherings or holiday feasts. If you want to impress guests, pair it with a simple side salad for a restaurant-worthy presentation.
What goes well with it
Elevate your Sheet Pan Lemon Herb Salmon and Veggies Recipe with a crisp white wine like Sauvignon Blanc, which highlights the citrusy flavors. Alternatively, try our Herbed Quinoa Pilaf for a wholesome, protein-packed side that balances the dish. For a refreshing contrast, serve it with a tangy yogurt dill sauce or our Garlic Parmesan Roasted Asparagus to enhance the savory herb notes. Each pairing brings out the best in this vibrant, flavorful meal.
math-faq-block">
What vegetables go well with Sheet Pan Lemon Herb Salmon and Veggies?
For Sheet Pan Lemon Herb Salmon and Veggies, asparagus, zucchini, bell peppers, and cherry tomatoes work best. These veggies roast evenly and complement the salmon’s flavors. Broccoli and carrots also pair well if you prefer heartier vegetables.
How long does it take to bake Sheet Pan Lemon Herb Salmon and Veggies?
Sheet Pan Lemon Herb Salmon and Veggies typically takes 15–20 minutes at 400°F (200°C). The salmon should flake easily with a fork, and the veggies should be tender. Always check for doneness to avoid overcooking.
Can I use frozen salmon for Sheet Pan Lemon Herb Salmon and Veggies?
Yes, but thaw the salmon completely first for even cooking. Pat it dry to prevent excess moisture in your Sheet Pan Lemon Herb Salmon and Veggies. Fresh salmon is ideal, but frozen works in a pinch.
ank-math-faq-item">
What herbs are best for Sheet Pan Lemon Herb Salmon and Veggies?
Dill, thyme, and parsley are classic choices for Sheet Pan Lemon Herb Salmon and Veggies. Rosemary and oregano add bolder flavors. Fresh herbs work best, but dried herbs can be substituted in smaller quantities.