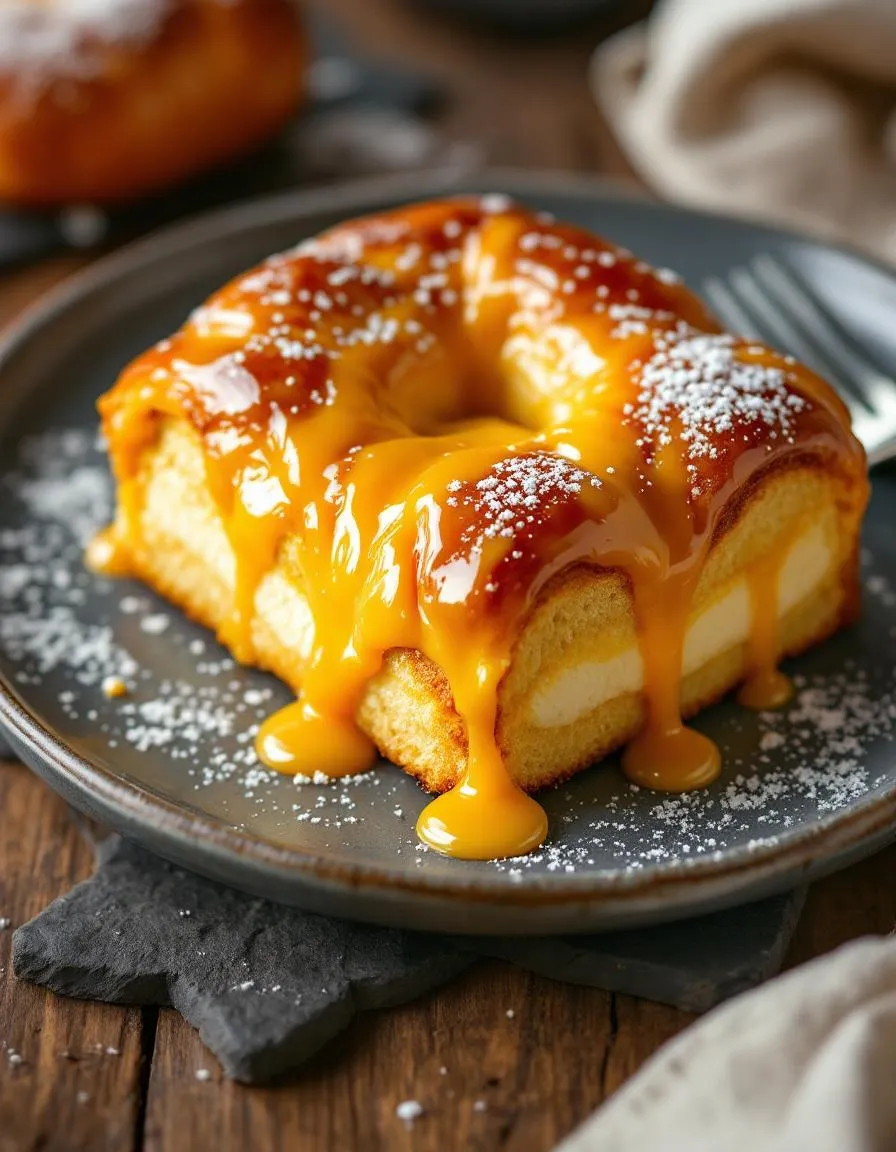
Imagine biting into a warm, flaky pastry that melts in your mouth, revealing a creamy cheesecake filling with just the right touch of sweetness. Now picture that same treat with the irresistible buttery flavor of King’s Hawaiian rolls. That’s exactly what you get with this Irresistible King’s Hawaiian Cheesecake Danish—a dessert so delicious, it’ll have everyone asking for seconds. Whether you’re hosting brunch or craving a cozy weekend treat, this recipe delivers comfort and indulgence in every bite.
The Irresistible King’s Hawaiian Cheesecake Danish combines the soft, slightly sweet texture of King’s Hawaiian rolls with a rich, velvety cheesecake filling. Unlike traditional danishes, this version shortcuts the process without sacrificing flavor, making it perfect for busy bakers who still want to impress. The recipe fits seamlessly into our blog’s focus on easy yet decadent desserts, like our Quick Cinnamon Roll-Ups or Berry Cream Cheese Pastries. What sets it apart is its versatility—serve it for breakfast, dessert, or even as a sweet snack with coffee. Plus, the familiar taste of King’s Hawaiian rolls adds a nostalgic twist that elevates the whole experience.
Why I Love This Recipe
This Irresistible King’s Hawaiian Cheesecake Danish holds a special place in my heart because it reminds me of lazy Sunday mornings with my family. My mom used to whip up similar treats when we had leftover rolls, and the smell of warm pastry and cream cheese filling would fill the whole house. Now, whenever I make this recipe, it brings back those cozy memories while creating new ones with my own kids. It’s the kind of dessert that feels like a hug—simple, comforting, and always worth sharing.
Health and Nutrition
Why it’s good for your body
Irresistible King’s Hawaiian Cheesecake Danish delivers more than just incredible flavor—it also offers surprising health perks. First, the creamy cheesecake filling provides a good source of calcium and protein, which support strong bones and muscle repair. Additionally, the Hawaiian sweet roll base adds a touch of whole grain goodness, offering fiber to aid digestion.
Moreover, this indulgent treat contains less sugar than many traditional desserts, making it a smarter choice for those watching their intake. The balance of carbs, fats, and proteins in Irresistible King’s Hawaiian Cheesecake Danish helps stabilize energy levels, so you avoid the dreaded sugar crash. Plus, the richness of the cheesecake satisfies cravings quickly, preventing overeating.
Finally, the recipe incorporates real ingredients like cream cheese and butter, avoiding artificial additives. Whether you enjoy it for breakfast or dessert, Irresistible King’s Hawaiian Cheesecake Danish brings both nutrition and joy to your table.
How it fits in a healthy lifestyle
Irresistible King’s Hawaiian Cheesecake Danish fits perfectly into a balanced diet when enjoyed mindfully. Pair it with a protein-packed smoothie or fresh fruit to create a satisfying meal that keeps you full longer. For those following a flexible approach to eating, this treat works well as an occasional indulgence that doesn’t derail progress.
If you’re exploring heart-healthy options, consider pairing it with our nutrient-dense breakfast ideas to balance your day. Alternatively, if you’re meal prepping for the week, check out our easy meal prep strategies to incorporate treats like this without guilt. With moderation and smart pairings, Irresistible King’s Hawaiian Cheesecake Danish can be part of a vibrant, healthy lifestyle.
A delightful fusion of sweet King’s Hawaiian rolls and creamy cheesecake filling, baked to golden perfection.
Ingredients
Scale
For the Crust:
1 package King’s Hawaiian Sweet Rolls (12 count)
8 oz cream cheese, softened
1/4 cup granulated sugar
1 tsp vanilla extract
1 egg yolk
1/4 cup powdered sugar
1 tbsp milk
1 tbsp melted butter
1/4 tsp cinnamon (optional)
Instructions
1. Prepare the Crust:
Preheat oven to 350°F (175°C). Line a baking sheet with parchment paper.
Slice the King’s Hawaiian rolls in half horizontally, keeping them connected. Place the bottom half on the baking sheet.
In a bowl, mix cream cheese, granulated sugar, vanilla, and egg yolk until smooth. Spread evenly over the bottom half of the rolls.
Place the top half of the rolls over the cream cheese layer. Brush with melted butter and sprinkle with cinnamon if desired.
Bake for 20-25 minutes until golden brown. Let cool slightly.
Whisk powdered sugar and milk to make a glaze. Drizzle over the warm Danish before serving.
Notes
You can customize the seasonings to taste.
“`html
="how-to-prepare-this-dish">How to Prepare This Dish
Steps and time-saving tips
Start by preheating your oven to 350°F and lining a baking sheet with parchment paper. Next, carefully slice the King’s Hawaiian rolls in half horizontally, keeping them connected so they form a single sheet. Place the bottom half on the baking sheet. In a mixing bowl, whisk together the cream cheese, sugar, and vanilla until smooth. Then, spread this creamy filling evenly over the bottom layer of rolls. Gently press the top half of the rolls onto the filling. Meanwhile, melt the butter and mix it with brown sugar and cinnamon for a rich, gooey topping. Drizzle this mixture over the top, making sure it seeps into the crevices. Bake for 15-18 minutes until golden and bubbly. For a time-saving tip, prep the filling the night before and refrigerate it. Also, let the Danish cool slightly before slicing to keep the layers intact. Finally, dust with powdered sugar or add a cream cheese glaze for extra flair.
Mistakes I’ve made and learned from
When I first made Irresistible King’s Hawaiian Cheesecake Danish, I overmixed the cream cheese filling, which made it too runny. Now, I know to whisk just until combined for the perfect texture. Another mistake? Skipping the parchment paper—trust me, cleaning caramelized sugar off a baking sheet is no fun. If your filling ever turns out lumpy, check out my guide to fixing lumpy cheesecake filling. Also, I once baked the Danish too long, drying out the rolls. A kitchen timer is your best friend here. For more troubleshooting tips, my common baking mistakes post covers how to salvage overbaked treats. Learn from my blunders so yours turns out flawless every time.
The Irresistible King’s Hawaiian Cheesecake Danish blends the sweetness of Hawaiian rolls with the creamy richness of cheesecake, creating a treat that feels both nostalgic and fresh. While the recipe itself is a modern twist, it draws inspiration from Danish pastries, which have roots in European baking traditions. However, the use of King’s Hawaiian rolls gives it a distinctly American flair, merging buttery, pillowy dough with a luscious filling.
Across different region
s, bakers put their own spin on similar pastries. In Scandinavia, for example, they might use cardamom or almond paste in their danishes. Meanwhile, in Hawaii, local bakers often incorporate tropical flavors like coconut or pineapple. The Irresistible King’s Hawaiian Cheesecake Danish stands out because it combines convenience with indulgence—perfect for busy home cooks who still crave something special.
In my family, this recipe became a weekend brunch staple because it’s so easy to customize. Some relatives add lemon zest for brightness, while others drizzle caramel on top. No matter the variation, the result always feels like a celebration.
How it fits in today’s cooking
Today, the Irresistible King’s Hawaiian Cheesecake Danish fits perfectly into our fast-paced lives. Whether you’re hosting a holiday brunch or need a quick dessert for potlucks, this recipe delivers. Modern cooks love it because they can prep it ahead, bake it fresh, and even freeze leftovers—though there’s rarely any left!
Many bakers also adapt
it for different occasions. For example, some swap the cheesecake filling for a chocolate-hazelnut spread for a decadent twist. Others pair it with seasonal fruits, like berries in summer or spiced apples in fall. If you’re looking for more easy brunch ideas, check out this cinnamon roll bites recipe—it’s another crowd-pleaser that pairs well with danishes.
Ultimately, this dish stays relevant because it’s versatile, comforting, and just a little bit indulgent. Whether you’re baking for a special event or a cozy morning at home, the Irresistible King’s Hawaiian Cheesecake Danish never disappoints.
Taste and Texture
What makes it delicious
The Irresistible King’s Hawaiian Cheesecake Danish delivers a symphony of flavors and textures in every bite. First, the golden, buttery layers of King’s Hawaiian bread crisp beautifully in the oven, offering a delicate crunch that gives way to a soft, pillowy interior. Meanwhile, the rich cheesecake filling melts luxuriously on your tongue, balancing tangy cream cheese with just the right touch of sweetness. A hint of vanilla and a whisper of citrus zest brighten the flavor, while the glaze adds a glossy, sugary finish that ties everything together. The aroma alone—warm, caramelized, and faintly tropical—will have you reaching for seconds. Whether enjoyed fresh from the oven or at room temperature, the Irresistible King’s Hawaiian Cheesecake Danish is pure indulgence.
r">Boosting the flavor
Elevate your Irresistible King’s Hawaiian Cheesecake Danish with a few easy tweaks. For a fruity twist, swirl in a spoonful of homemade berry compote before baking—the tartness pairs perfectly with the creamy filling. Alternatively, sprinkle cinnamon sugar over the top for a warm, spiced crunch. If you love contrasting textures, drizzle melted chocolate or caramel sauce just before serving. For more inspiration, explore our guide to easy dessert sauces that transform simple treats into showstoppers. A pinch of sea salt or a dusting of powdered sugar can also make all the difference.
Tips for Success
Best practices for results
Always let the cream cheese soften at room temperature before mixing it into the filling for your Irresistible King’s Hawaiian Cheesecake Danish. This ensures a smooth, lump-free texture. Meanwhile, lightly flour your work surface to prevent the dough from sticking while rolling it out. For even baking, space the danishes at least two inches apart on the tray. Additionally, brush the tops with melted butter right after baking to enhance their golden finish and irresistible flavor.
>Mistakes to avoid
Avoid overfilling the danishes, as too much cheesecake mixture can leak during baking. Instead, use a measured tablespoon for consistent portions. Similarly, don’t skip chilling the dough before shaping—this step keeps the layers flaky. If your filling turns runny, check out our guide to fixing runny cheesecake filling for quick solutions. Finally, resist opening the oven too often, as temperature fluctuations can cause uneven rising. For more troubleshooting, explore our common danish mistakes article to perfect your technique.
Serving and Pairing Suggestions
How to serve this dish
Serve Irresistible King’s Hawaiian Cheesecake Danish warm for a gooey, melt-in-your-mouth experience or at room temperature for a firmer texture. For a stunning presentation, dust the top with powdered sugar or drizzle with honey. Meanwhile, fresh berries or a dollop of whipped cream add a pop of color and freshness. These danishes shine at brunch gatherings, holiday breakfasts, or as a sweet afternoon treat. Finally, arrange them on a tiered stand for a bakery-worthy display that will impress your guests.
What goes well with it
Pair Irresistible King’s Hawaiian Cheesecake Danish with a creamy latte or a cup of spiced chai for a cozy morning combo. The rich flavors of the danish balance perfectly with the bold notes of coffee. For a refreshing contrast, try it alongside our Berry Burst Smoothie, which adds a tangy twist. Alternatively, serve it with a scoop of vanilla ice cream for an indulgent dessert. If you love pairing sweets with savory bites, our Savory Bacon Muffins create a delightful sweet-and-salty brunch spread.
How do you make Irresistible King’s Hawaiian Cheesecake Danish?
To make Irresistible King’s Hawaiian Cheesecake Danish, start by slicing King’s Hawaiian rolls in half and layering them with a creamy cheesecake filling. Bake until golden, then drizzle with icing for a sweet finish. This easy recipe transforms simple ingredients into a decadent treat.
Can you use any bread for Irresistible King’s Hawaiian Cheesecake Danish?
While you can experiment with other breads, King’s Hawaiian rolls are ideal for Irresistible King’s Hawaiian Cheesecake Danish because of their soft, sweet texture. The rolls absorb the cheesecake filling perfectly and create a balanced flavor profile.
ank-math-faq-item">
What’s the best cheesecake filling for Irresistible King’s Hawaiian Cheesecake Danish?
A classic cream cheese-based filling works best for Irresistible King’s Hawaiian Cheesecake Danish. Mix cream cheese, sugar, vanilla, and a touch of lemon zest for a rich, tangy contrast to the sweet rolls. For extra flavor, add a sprinkle of cinnamon.
Can you prepare Irresistible King’s Hawaiian Cheesecake Danish ahead of time?
Yes! Assemble Irresistible King’s Hawaiian Cheesecake Danish the night before and refrigerate. Bake fresh in the morning for a warm, gooey treat. The flavors meld beautifully overnight, making it even more delicious.
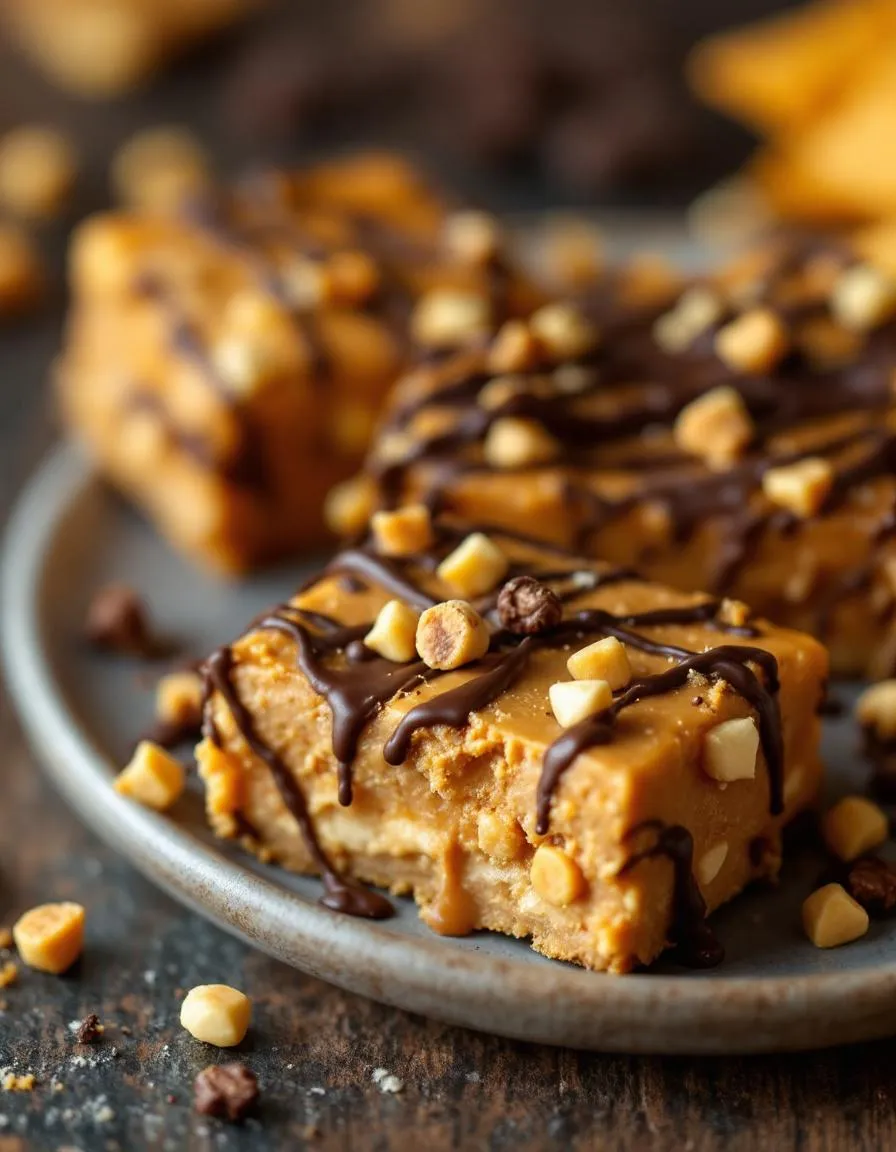
Do you ever crave a sweet-and-salty treat that’s ridiculously easy to make yet impossible to resist? If so, you’re in the right place. This Irresistible Peanut Butter Fritos Candy Recipe delivers the perfect crunch, creamy peanut butter richness, and a chocolatey finish that’ll have you reaching for seconds (or thirds). Whether you need a quick dessert for a party or a nostalgic snack to satisfy your cravings, this recipe is your new go-to. Best of all, it comes together in minutes with just a handful of ingredients you likely already have in your pantry.
The Irresistible Peanut Butter Fritos Candy Recipe combines the bold flavors of crunchy Fritos corn chips, smooth peanut butter, and melted chocolate into a treat that’s as fun to make as it is to eat. Unlike fussy desserts that demand hours in the kitchen, this recipe embraces simplicity without sacrificing flavor. It’s the kind of dish that sparks joy at potlucks, family gatherings, or even solo snack sessions. Plus, it’s a fantastic way to repurpose leftover Fritos if you’ve ever wondered what to do with that half-empty bag. For more easy dessert ideas, check out our no-bake cookies or chocolate-covered pretzels for similarly simple sweets.
What makes this recipe stand out is its versatility. You can customize it with dark, milk, or white chocolate, add a sprinkle of sea salt for contrast, or even drizzle extra peanut butter on top. It’s a crowd-pleaser that appeals to kids and adults alike, and it fits perfectly with our blog’s mission to share approachable, delicious recipes that don’t require fancy techniques. Whether you’re a seasoned home cook or a beginner, this treat proves that great flavors often come from the most unexpected combinations.
Why I Love This Recipe
This Irresistible Peanut Butter Fritos Candy Recipe holds a special place in my heart because it reminds me of childhood road trips. My mom used to pack homemade versions of this snack, and the mix of salty corn chips and sweet peanut butter felt like a secret indulgence. Now, I love making it for my own family because it’s a guaranteed hit—plus, it’s one of those rare recipes where the messier the process, the more fun it becomes. Every bite takes me back to those simple, joyful moments, and I hope it does the same for you.
Health and Nutrition
Why it’s good for your body
Irresistible Peanut Butter Fritos Candy Recipe packs a surprising nutritional punch while satisfying your sweet tooth. First, peanut butter delivers plant-based protein and healthy fats, which keep you full longer and support muscle repair. Additionally, the natural sweetness from honey or maple syrup offers a better alternative to refined sugar, providing quick energy without a major crash. Moreover, Fritos add a satisfying crunch and a dose of whole-grain corn, which contains fiber to aid digestion.
Furthermore, this treat includes antioxidants from peanut butter, which help combat inflammation in the body. Dark chocolate, if used in the recipe, adds flavonoids that support heart health. While Irresistible Peanut Butter Fritos Candy Recipe is indulgent, it balances taste and nutrients better than many store-bought sweets. Finally, the combination of protein, fiber, and healthy fats stabilizes blood sugar levels, preventing energy spikes and crashes. Enjoy it mindfully, and your body will thank you.
How it fits in a healthy lifestyle
Irresistible Peanut Butter Fritos Candy Recipe fits perfectly into a balanced diet when enjoyed in moderation. Its protein and fiber content make it a smarter dessert choice, especially if you’re aiming to curb sugar cravings. For those following gluten-free diets, this recipe easily adapts by ensuring all ingredients, like certified gluten-free Fritos, meet dietary needs. If you’re focused on heart health, the unsaturated fats from peanut butter and dark chocolate offer benefits when paired with an overall nutritious diet.
Pair this treat with a healthy snack routine to keep energy levels steady throughout the day. You can also explore balanced meal prep strategies to incorporate indulgent bites like this without derailing your goals. Remember, a healthy lifestyle isn’t about restriction but finding joy in nourishing foods—and sometimes, that includes a delicious bite of Irresistible Peanut Butter Fritos Candy Recipe.
A sweet and salty treat combining peanut butter, chocolate, and Fritos for a unique candy experience.
Ingredients
Scale
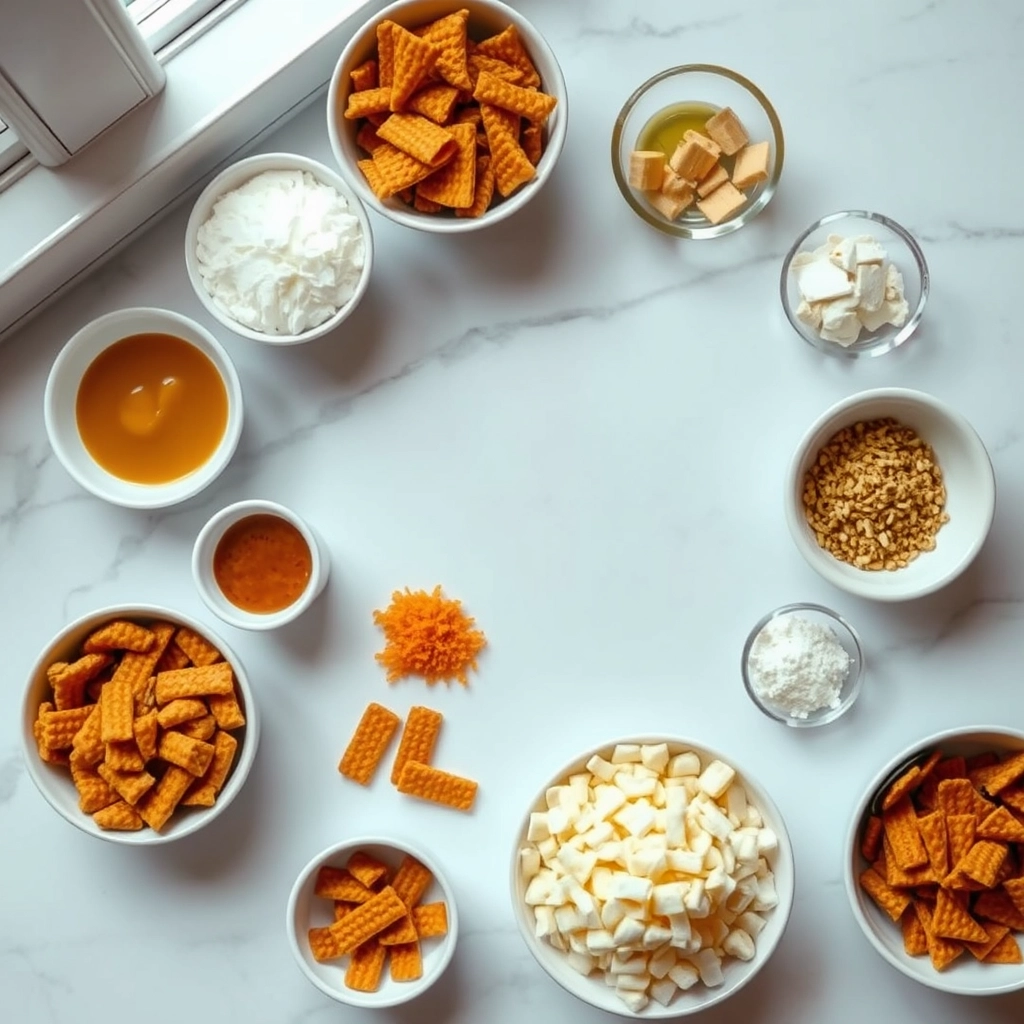
For the Crust:
4 cups Fritos corn chips
1 cup creamy peanut butter
1/2 cup unsalted butter
2 cups powdered sugar
1 1/2 cups semi-sweet chocolate chips
1 tablespoon coconut oil
Instructions
1. Prepare the Crust:
Line a 9×13-inch baking dish with parchment paper and spread Fritos evenly on the bottom.
In a saucepan over medium heat, melt peanut butter and butter together, stirring until smooth.
Remove from heat and whisk in powdered sugar until fully combined.
Pour peanut butter mixture over Fritos and spread evenly with a spatula.
In a microwave-safe bowl, melt chocolate chips and coconut oil in 30-second intervals, stirring until smooth.
Pour melted chocolate over the peanut butter layer and spread evenly.
Refrigerate for at least 2 hours or until set. Cut into squares and serve.
Notes
You can customize the seasonings to taste.
How to Prepare This Dish
Steps and time-saving tips
Start by lining a baking sheet with parchment paper to make cleanup a breeze. Next, spread a generous layer of Fritos evenly across the sheet, creating a sturdy base for your Irresistible Peanut Butter Fritos Candy Recipe. In a microwave-safe bowl, combine peanut butter, honey, and a pinch of salt, then heat the mixture in 30-second intervals, stirring well after each round until smooth. Drizzle this warm peanut butter blend over the Fritos, using a spatula to spread it evenly so every crunchy bite gets coated. Quickly sprinkle mini chocolate chips on top while the peanut butter is still warm—this helps them melt slightly for a richer texture. If you prefer a faster method, swap the stovetop for the microwave when melting the peanut butter mixture, but watch it closely to avoid overheating. Finally, chill the tray in the fridge for at least 30 minutes to set everything perfectly. Once firm, break the candy into rustic chunks and serve. For a time-saving twist, prep this recipe ahead and store it in an airtight container for up to a week.
Mistakes I’ve made and learned from
When I first tried this Irresistible Peanut Butter Fritos Candy Recipe, I rushed the chilling step and ended up with a crumbly mess. Now, I always let it set fully—patience pays off! Another lesson? Measuring the peanut butter mixture precisely matters. Too little, and the Fritos won’t stick; too much, and it overpowers the crunch. If you’re new to no-bake treats, my guide to perfecting no-bake desserts has extra tips. I also learned the hard way that cheap chocolate chips don’t melt as smoothly. For better results, I now use quality brands or even chop up a bar of semi-sweet chocolate. If you’re curious about balancing sweet and salty flavors, my post on sweet and salty combos dives deeper into getting it just right.
The Irresistible Peanut Butter Fritos Candy Recipe feels like a love letter to American snack culture. It blends the salty crunch of Fritos with the creamy sweetness of peanut butter and chocolate, creating a treat that’s both nostalgic and wildly addictive. Many families in the South and Midwest have their own versions, often passed down as a quick, no-bake dessert for potlucks or game-day gatherings. Some cooks drizzle caramel instead of chocolate, while others add a sprinkle of sea salt for a gourmet twist.
Interestingly, this recipe echoes the global love for sweet-and-salty combinations. In Mexico, for example, you’ll find spicy-sweet peanut candies like cacahuates garapiñados, while Asian cuisines often pair peanuts with sticky syrups. The Irresistible Peanut Butter Fritos Candy Recipe, however, stands out for its playful use of corn chips—a distinctly American twist. Whether you grew up making it with your grandma or discovered it at a tailgate, this treat carries a sense of shared joy.
ays-cooking">How it fits in today’s cooking
Today, the Irresistible Peanut Butter Fritos Candy Recipe remains a staple for busy home cooks and creative bakers alike. It’s perfect for holiday cookie swaps, but also fits effortlessly into weeknight dessert rotations. Modern adaptations include using almond butter for a nut-free version or swapping in dark chocolate for extra richness. Some even layer it into no-bake desserts for added texture.
Social media has given this recipe new life, with food bloggers showcasing it as a quick, crowd-pleasing hack. Meanwhile, parents love it as a fun project to make with kids—no oven required! If you’re looking for more easy sweet-and-salty ideas, check out our guide to holiday treats. Whether you stick to the classic or experiment with new flavors, this candy proves that simple ingredients can create unforgettable moments.
Taste and Texture
What makes it delicious
The Irresistible Peanut Butter Fritos Candy Recipe delivers a thrilling contrast of flavors and textures in every bite. First, you’ll notice the rich, creamy peanut butter layer, sweetened just enough to balance its nutty depth. Then comes the satisfying crunch of Fritos, adding a salty, corn-infused crispness that plays perfectly against the smooth filling. A glossy chocolate shell ties it all together, offering a cool, melt-in-your-mouth finish. Meanwhile, a hint of vanilla and a sprinkle of sea salt elevate the aroma, making each piece fragrant and impossible to resist. Whether you savor it slowly or devour it in one go, the Irresistible Peanut Butter Fritos Candy Recipe keeps you coming back for more.
r">Boosting the flavor
Want to take your Irresistible Peanut Butter Fritos Candy Recipe to the next level? Try drizzling melted caramel over the chocolate layer for a buttery, gooey twist. Alternatively, mix crushed pretzels into the Fritos for extra salty crunch. If you love bold flavors, a pinch of cinnamon or cayenne in the peanut butter mixture adds warmth or a subtle kick. For more inspiration, explore our guide to easy homemade candy ideas or discover how to pair sweets with perfect dessert wine pairings. Small tweaks make a big difference, so don’t hesitate to get creative!
Tips for Success
Best practices for results
Always measure your peanut butter precisely for the Irresistible Peanut Butter Fritos Candy Recipe, as too much can make the mixture overly sticky. Meanwhile, use fresh Fritos to ensure the perfect crunch, and press the mixture firmly into the pan so it sets evenly. Additionally, chill the candy for at least two hours before slicing—this prevents crumbling and gives clean edges. For best texture, line your pan with parchment paper so you can lift and cut the bars effortlessly.
>Mistakes to avoid
Avoid microwaving the peanut butter mixture too long, as overheating can cause separation and a greasy texture. Instead, warm it gently while stirring frequently. Furthermore, don’t skip the chilling step, or your Irresistible Peanut Butter Fritos Candy Recipe may fall apart when slicing. For more foolproof tips on handling sticky ingredients, check out our guide on working with melted chocolate. Also, if your candy feels too soft, you might need a binding agent like our recommended kitchen hacks for no-bake treats.
Serving and Pairing Suggestions
How to serve this dish
For a fun twist, serve Irresistible Peanut Butter Fritos Candy Recipe on a rustic wooden board or colorful platter to highlight its crunchy texture. Meanwhile, drizzle extra melted chocolate over the top and sprinkle crushed peanuts for a gourmet touch. Since this treat works for any occasion, pack it in mini mason jars as party favors or arrange it on a dessert table during holidays. Alternatively, layer it in clear cups with vanilla ice cream for an irresistible parfait. No matter how you present it, guests will love the sweet-salty combo.
What goes well with it
Pair Irresistible Peanut Butter Fritos Candy Recipe with a cold glass of milk or creamy homemade vanilla latte to balance its rich flavors. If you prefer something fruity, try it alongside a tangy berry smoothie for contrast. For a savory option, serve it with spiced candied nuts to enhance the nutty profile. Each pairing brings out a different dimension of this addictive snack, making it even more enjoyable.
What ingredients do I need for Irresistible Peanut Butter Fritos Candy Recipe?
You’ll need Fritos corn chips, creamy peanut butter, chocolate chips, butter, and powdered sugar. This Irresistible Peanut Butter Fritos Candy Recipe combines sweet and salty flavors for a quick, no-bake treat.
Can I use crunchy peanut butter instead of creamy in this recipe?
Yes, crunchy peanut butter works, but creamy peanut butter blends smoother for the Irresistible Peanut Butter Fritos Candy Recipe. The texture will vary slightly, but the flavor remains delicious.
ank-math-faq-item">
How long does Peanut Butter Fritos Candy last?
Store the Irresistible Peanut Butter Fritos Candy in an airtight container at room temperature for up to 5 days. For longer freshness, refrigerate for up to 2 weeks.
Can I make this recipe gluten-free?
Absolutely! Use gluten-free Fritos and ensure all other ingredients are certified gluten-free. This Irresistible Peanut Butter Fritos Candy Recipe adapts easily for dietary needs.
Best Creamy Egg Custard Delight – Smooth & Rich Recipe
Introduction
There’s something magical about a dessert that feels like a warm hug—comforting, nostalgic, and utterly irresistible. If you’ve ever craved a treat that’s both luxuriously smooth and delightfully simple, then Creamy Egg Custard Delight is about to become your new favorite. Whether you’re reminiscing about childhood desserts or looking for a foolproof recipe to impress guests, this dish delivers every time. Plus, it’s easier to make than you might think, proving that indulgence doesn’t have to be complicated.
Creamy Egg Custard Delight is a velvety, rich dessert that blends eggs, milk, and sugar into a silky-smooth filling with a delicate vanilla aroma. Unlike heavier custards or overly sweet puddings, this recipe strikes the perfect balance—light yet satisfying, elegant yet approachable. What makes it special is its versatility. Serve it warm for a cozy night in or chilled for a refreshing summer treat. Either way, it’s a crowd-pleaser that fits any occasion. If you love classic desserts with a flawless texture, you’ll adore this one. For more timeless recipes, check out our Classic Vanilla Pudding, which shares the same comforting vibe.
This recipe also aligns perfectly with our blog’s mission: to celebrate simple, high-quality ingredients that transform into extraordinary dishes. You don’t need fancy equipment or hard-to-find items—just pantry staples and a little patience. And if you’re exploring other egg-based desserts, our Fluffy Soufflé Pancakes offer another delicious way to enjoy that airy, custard-like texture. Whether you’re a beginner or a seasoned baker, Creamy Egg Custard Delight welcomes everyone to the table with open arms.
Why I Love This Recipe
My love for Creamy Egg Custard Delight runs deep. Growing up, my grandmother would make it on rainy afternoons, filling the kitchen with the sweet scent of vanilla and warm milk. Even now, every spoonful takes me back to those moments—simple, joyful, and full of love. But what truly won me over is how effortlessly it adapts to my mood. Some days, I top it with fresh berries for a bright finish. Other times, a sprinkle of cinnamon does the trick. No matter how I serve it, the result is always pure happiness in a bowl.
Health and Nutrition
Why it’s good for your body
Creamy Egg Custard Delight packs a nutritious punch while satisfying your sweet tooth. First, eggs provide high-quality protein, which helps repair muscles and keeps you full longer. Additionally, the dish contains calcium from milk or cream, supporting strong bones and teeth. Moreover, the moderate sugar content means you can enjoy it without a major blood sugar spike.
Since Creamy Egg Custard Delight relies on simple, wholesome ingredients, it avoids artificial additives. For example, eggs deliver essential vitamins like B12 and choline, which boost brain function. Furthermore, the custard’s smooth texture makes it easy to digest, perfect for sensitive stomachs. If you use pasture-raised eggs, you’ll also get extra omega-3s for heart health.
Finally, this dessert offers versatility for dietary needs. Whether you prefer dairy-free milk or a low-sugar version, Creamy Egg Custard Delight adapts easily. With its balance of protein, healthy fats, and carbs, it’s a smarter choice than overly processed sweets. Plus, the comforting warmth can even help you unwind after a long day.
How it fits in a healthy lifestyle
Creamy Egg Custard Delight fits seamlessly into balanced eating habits. If you’re watching your gluten intake, this dessert naturally avoids wheat-based ingredients. For those focusing on protein-rich diets, the eggs provide a solid foundation. You can even pair it with fresh berries for extra fiber and antioxidants.
Planning meals ahead? This custard stores well, making it a practical make-ahead treat. If you’re exploring heart-healthy options, try swapping heavy cream for almond milk. For more ideas on balancing indulgences, check out our guide to healthy dessert swaps. And if you love egg-based recipes, our protein-packed breakfasts roundup offers more inspiration. With simple tweaks, Creamy Egg Custard Delight becomes a guilt-free part of your routine.
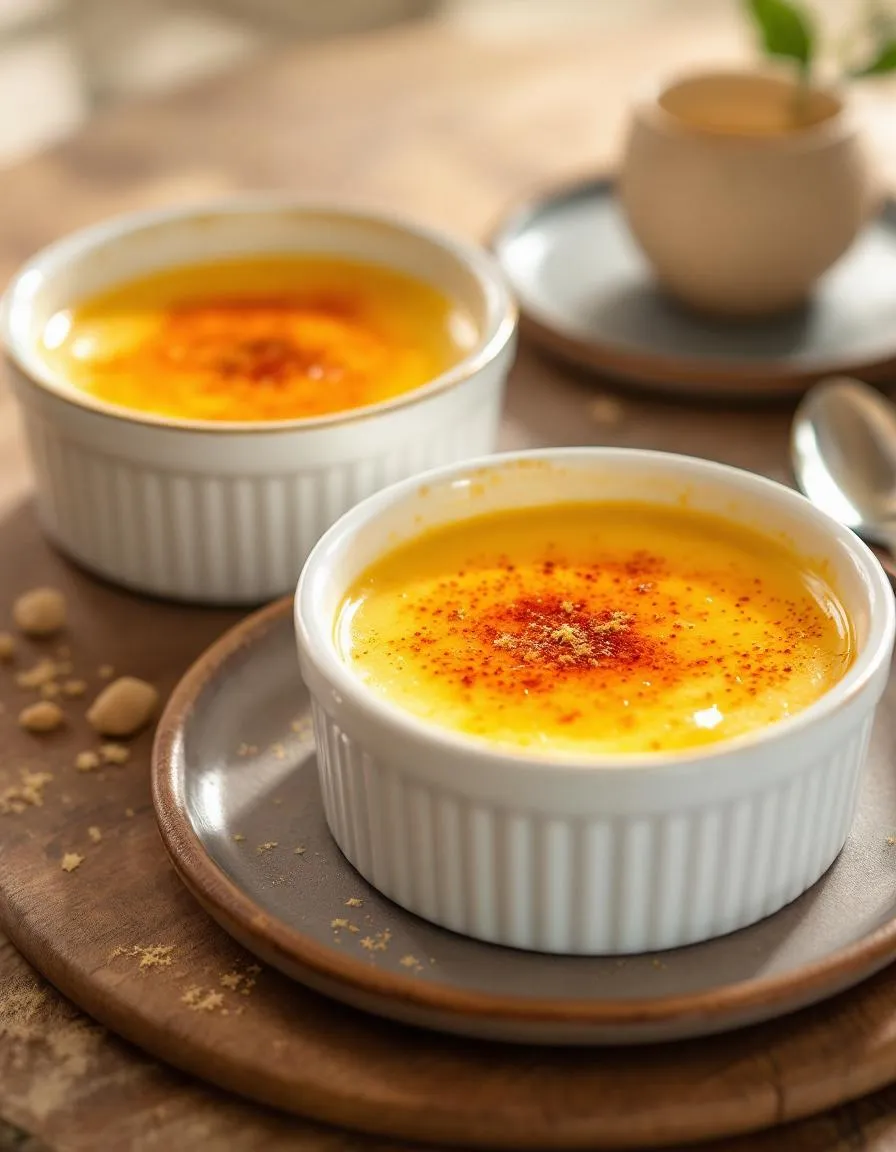
A smooth and creamy egg custard dessert with a hint of vanilla.
Ingredients
Scale
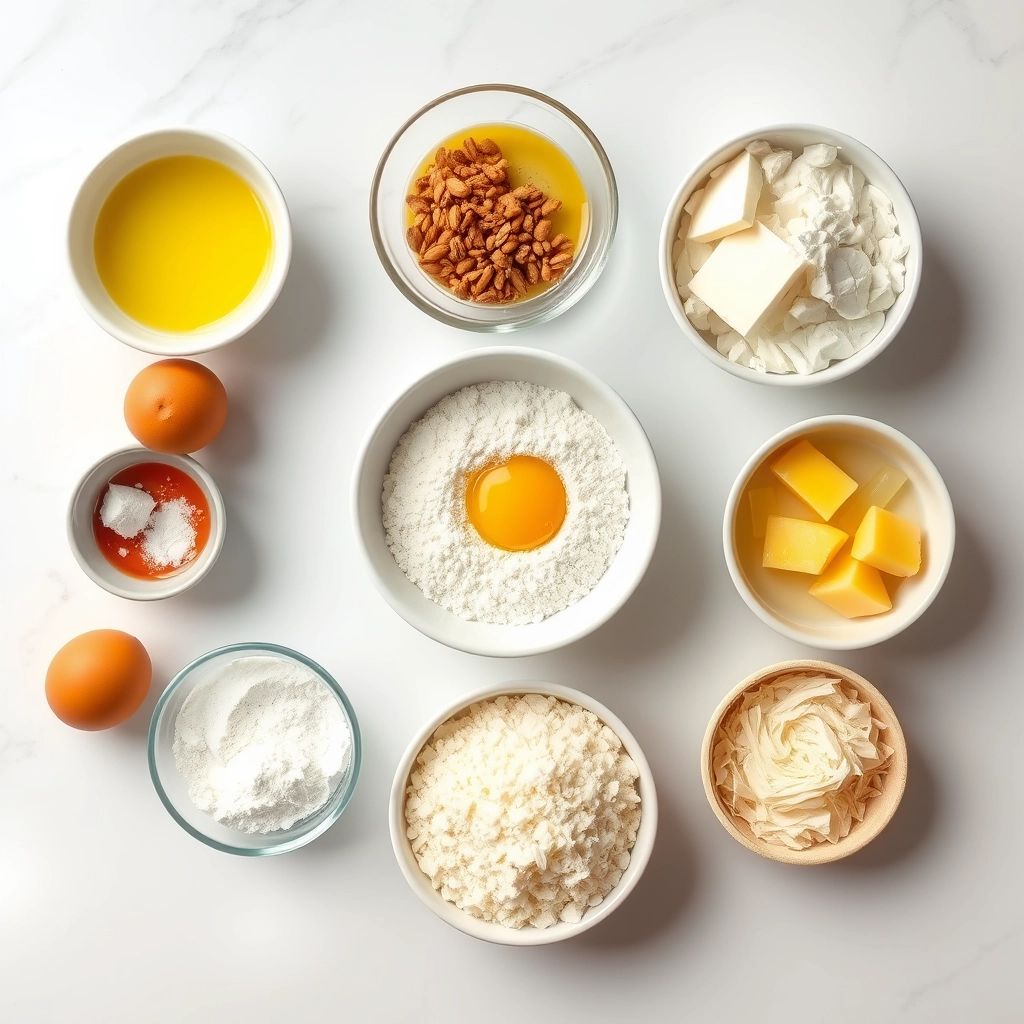
For the Crust:
4 large eggs
2 cups whole milk
1/2 cup granulated sugar
1 tsp vanilla extract
1/4 tsp salt
Ground nutmeg (optional)
Instructions
1. Prepare the Crust:
Preheat oven to 325°F (160°C).
In a bowl, whisk together eggs, milk, sugar, vanilla, and salt until smooth.
Pour mixture into ramekins or a baking dish. Sprinkle with nutmeg if desired.
Place ramekins in a baking pan and fill the pan with hot water halfway up the sides of the ramekins.
Bake for 30 minutes or until custard is set but still slightly jiggly in the center.
Let cool before serving.
Notes
You can customize the seasonings to taste.
“`html
How to Prepare This Dish
Steps and time-saving tips
Start by preheating your oven to 325°F to ensure even baking for your Creamy Egg Custard Delight. While the oven warms up, whisk together eggs, sugar, and vanilla extract in a large bowl until smooth. Gradually pour in warm milk while stirring constantly to prevent curdling. For a silky texture, strain the mixture through a fine-mesh sieve into a baking dish. Meanwhile, place the dish in a larger pan and fill the outer pan with hot water halfway up the sides for a gentle bake. Slide the setup into the oven and bake for 40-45 minutes until the center jiggles slightly. To save time, use a handheld mixer for the eggs and warm the milk in the microwave for 30-second intervals. Let the custard cool at room temperature before chilling it for at least two hours. For extra flair, garnish with fresh berries or a dusting of cinnamon just before serving.
and-learned-from">Mistakes I’ve made and learned from
I once rushed the straining step and ended up with lumps in my Creamy Egg Custard Delight—now I never skip it! Another time, I overbaked the custard, resulting in a rubbery texture. To fix this, I set a timer for 35 minutes and check every 5 minutes afterward. If you’re new to custards, my guide on perfect custard textures explains the science behind the ideal consistency. Also, I learned the hard way that skipping the water bath causes uneven cooking. For more troubleshooting tips, check out my post on common baking fails. Trust me, patience pays off with this dessert!
“`
n-and-variations">Cultural Connection and Variations
Where this recipe comes from
Creamy Egg Custard Delight traces its roots back to ancient Europe, where cooks first blended eggs, milk, and sugar into a simple yet luxurious dessert. Over time, it traveled across continents, adapting to local tastes. In Portugal, they add cinnamon and call it “Pudim Flan,” while in Japan, they steam it gently for a silky-smooth “Chawanmushi” with savory twists. My grandmother, however, always insisted on a dash of vanilla and a caramelized top, turning it into a family favorite for Sunday dinners.
Interestingly, Creamy Egg Custard Delight also holds seasonal significance. Many cultures serve it during holidays—think Christmas in Spain or Lunar New Year in the Philippines. Some regions even bake it in clay pots for an earthy flavor. Whether you enjoy it warm or chilled, this dish bridges generations and geographies with its comforting simplicity.
How it fits in today’s cooking
Today, Creamy Egg Custard Delight remains a star for its versatility. Busy home cooks love it because it requires just a handful of pantry staples, much like our easy pantry desserts. Modern twists include dairy-free versions with coconut milk or protein-packed swaps with Greek yogurt. It’s also a hit in meal prep—make a batch on Sunday, and enjoy it all week.
Beyond everyday treats,
this custard shines at gatherings. Pair it with fresh berries for summer parties or serve it warm with spiced apples in fall. For more inspiration, check out our guide to seasonal dessert ideas. Whether you stick to tradition or experiment, Creamy Egg Custard Delight proves that some classics never go out of style.
Taste and Texture
What makes it delicious
Creamy Egg Custard Delight melts on your tongue like a dream, offering a silky-smooth texture that feels luxuriously rich. The custard’s velvety sweetness balances perfectly with a hint of vanilla, while the warm, caramelized top adds a delicate crispness. Every bite releases a comforting aroma of fresh eggs and cream, making it irresistible. Whether served chilled or slightly warm, Creamy Egg Custard Delight delivers a harmonious blend of flavors that linger pleasantly. The simplicity of high-quality ingredients—like farm-fresh eggs and pure vanilla extract—shines through, creating a dessert that’s both elegant and comforting.
Boosting the flavor
Elevate your Creamy Egg Custard Delight by drizzling it with a homemade salted caramel sauce for a buttery contrast. Alternatively, sprinkle toasted coconut flakes or crushed pistachios for a nutty crunch. For a warm spice twist, infuse the custard with cinnamon or cardamom—just a pinch transforms the flavor profile. Pair it with fresh berries or a dollop of whipped cream to add brightness and lightness. Experimenting with these small tweaks keeps each serving exciting while letting the custard’s creamy base shine.
For the smoothest Creamy Egg Custard Delight, always temper your eggs by slowly adding warm milk to avoid curdling. Additionally, bake the custard in a water bath to ensure even heat distribution and prevent cracking. Strain the mixture before baking to remove any lumps, and let it cool gradually to maintain that signature silky texture. Finally, chill the custard for at least two hours before serving to enhance its rich flavor.
Mistakes to avoid
Avoid overbaking the Creamy Egg Custard Delight, as it can cause a rubbery texture—instead, pull it from the oven when the center still jiggles slightly. Another common mistake is skipping the water bath, which leads to uneven cooking. For more baking tips, check out our guide on perfect water bath techniques. Also, resist the urge to skip straining the custard mixture, as this step ensures the creamiest results. If you’re unsure about ingredient ratios, our custard ingredient balance article can help.
g-suggestions">Serving and Pairing Suggestions
How to serve this dish
For a stunning presentation, serve Creamy Egg Custard Delight in elegant ramekins or small glass jars. Meanwhile, garnish each portion with a sprinkle of cinnamon or fresh berries to add color and texture. This dish shines at brunch gatherings, but it also makes a comforting dessert for cozy dinners. If you’re hosting a holiday meal, consider topping it with whipped cream and a drizzle of caramel for extra indulgence. No matter the occasion, Creamy Egg Custard Delight always impresses with its silky smooth texture and rich flavor.
What goes well with it
Pair Creamy Egg Custard Delight with a cup of spiced chai tea to enhance its warm, comforting notes. Alternatively, a crisp glass of Riesling balances the dessert’s sweetness perfectly. For a heartier pairing, try serving it alongside our Fluffy Buttermilk Pancakes for a decadent brunch spread. If you prefer something lighter, our Fresh Berry Salad adds a refreshing contrast to the custard’s creamy richness. Each pairing brings out the best in this classic dessert.
math-faq-block">
What is Creamy Egg Custard Delight made of?
Creamy Egg Custard Delight is a smooth, velvety dessert made with eggs, milk or cream, sugar, and vanilla. Some recipes add a pinch of nutmeg or cinnamon for extra flavor. The key to its rich texture is slow baking or gentle stovetop cooking.
How do you prevent lumps in Creamy Egg Custard Delight?
To avoid lumps in your Creamy Egg Custard Delight, temper the eggs by slowly whisking in warm milk before cooking. Strain the mixture through a fine sieve before baking to remove any undissolved bits. Constant low heat and stirring also ensure silky results.
Can I make Creamy Egg Custard Delight without an oven?
Yes! Creamy Egg Custard Delight can be made stovetop using a double boiler or heavy saucepan. Cook over low heat while stirring constantly until thickened. The stovetop version has the same rich flavor but may set slightly softer than baked custard.
ank-math-faq-item">
Why did my Creamy Egg Custard Delight turn watery?
Watery Creamy Egg Custard Delight usually means undercooking or sudden temperature changes. Ensure proper cooking time (until a knife inserted comes out clean) and cool gradually at room temperature. Overbaking can also cause separation, so watch for gentle jiggles rather than bubbles.
Best Creamy Smothered Chicken and Rice Delight
Introduction
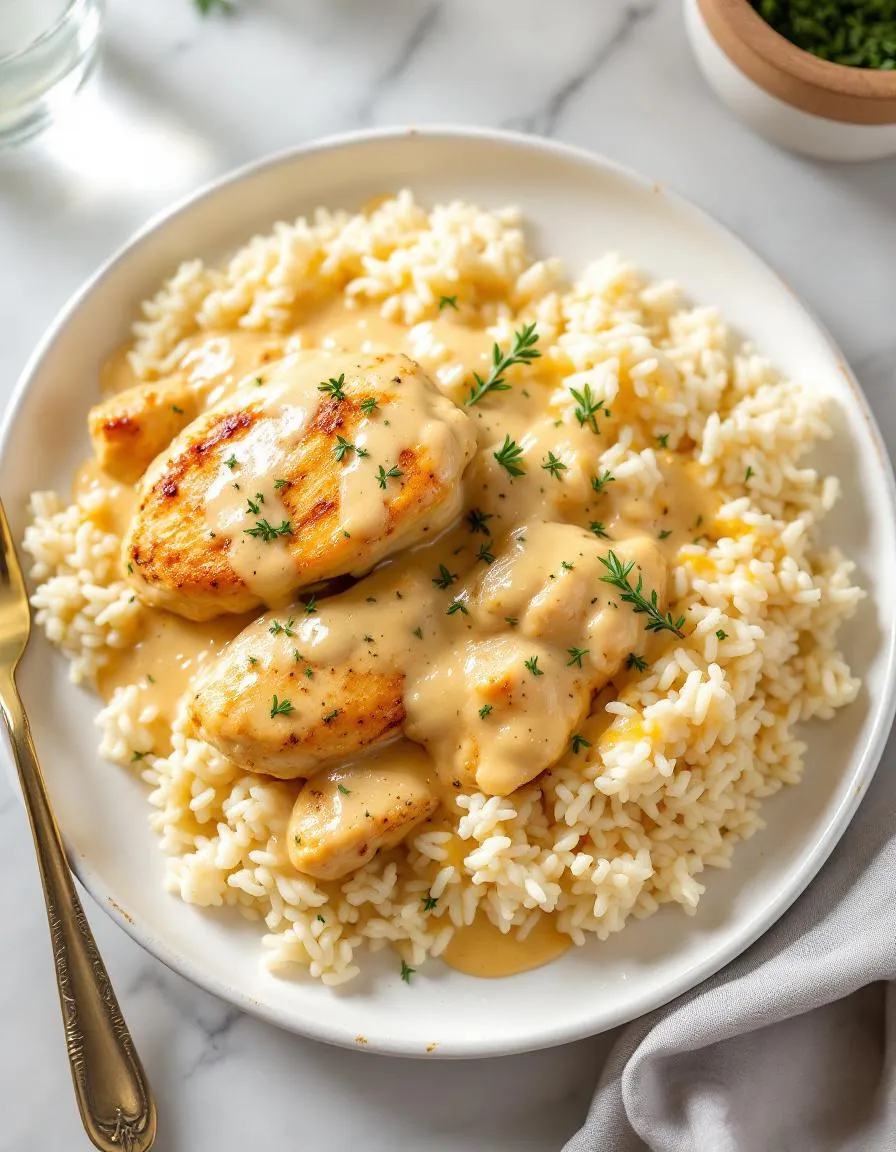
There’s something deeply comforting about a dish that wraps you in warmth with every bite. If you crave a meal that feels like a hug on a plate, you’ll adore this Creamy Smothered Chicken and Rice Delight. It’s the kind of recipe that turns an ordinary weeknight into something special, blending tender chicken, fluffy rice, and a velvety sauce into pure satisfaction. Whether you’re cooking for family or treating yourself, this dish delivers flavor and comfort in every spoonful.
Creamy Smothered Chicken and Rice Delight is a one-pan wonder that combines juicy chicken thighs, aromatic spices, and a rich, creamy sauce with perfectly cooked rice. Unlike dry or bland chicken-and-rice dishes, this recipe ensures every component shines. The chicken stays succulent, the rice absorbs the savory sauce, and the result is a harmonious balance of textures and flavors. Plus, it’s versatile enough to pair with your favorite sides, like a crisp garden-fresh salad or roasted vegetables.
This dish matters because it solves the eternal dinner dilemma: how to make something delicious without spending hours in the kitchen. With simple ingredients and straightforward steps, it fits seamlessly into busy lives while still feeling indulgent. It also aligns perfectly with our blog’s mission to share approachable, crowd-pleasing recipes that don’t sacrifice taste for convenience. If you love cozy meals like our garlic butter shrimp pasta, you’ll appreciate how this recipe brings the same level of satisfaction with minimal effort.
Why I Love This Recipe
This Creamy Smothered Chicken and Rice Delight holds a special place in my heart because it reminds me of Sunday dinners at my grandma’s house. She had a way of turning simple ingredients into something magical, and this dish captures that same spirit. Every time I make it, the aroma fills my kitchen with nostalgia, and the first bite takes me right back to her table. It’s more than just a meal—it’s a reminder of love, comfort, and the joy of sharing good food with the people who matter most.
Health and Nutrition
Why it’s good for your body
Creamy Smothered Chicken and Rice Delight packs a nutritious punch while delivering rich, comforting flavors. First, the lean chicken breast provides high-quality protein, which helps build and repair muscles. Additionally, the dish includes fiber-rich brown rice, which supports digestion and keeps you feeling full longer. Moreover, the creamy sauce, when made with Greek yogurt or light cream, adds calcium and probiotics for gut health.
Beyond protein and fiber, Creamy Smothered Chicken and Rice Delight offers essential vitamins and minerals. For example, the vegetables often included—like bell peppers or spinach—deliver antioxidants and vitamin C. Furthermore, garlic and herbs not only enhance flavor but also boost immunity. Meanwhile, using healthy fats like olive oil promotes heart health by reducing bad cholesterol levels.
Finally, this dish balances indulgence with nourishment. Unlike heavy comfort foods, Creamy Smothered Chicken and Rice Delight avoids excessive calories while still satisfying cravings. Whether you need a post-workout meal or a family-friendly dinner, it delivers both taste and nutrition in every bite.
How it fits in a healthy lifestyle
Creamy Smothered Chicken and Rice Delight easily adapts to various dietary needs, making it a versatile choice for health-conscious eaters. If you follow a gluten-free diet, simply ensure your sauce thickeners and seasonings meet gluten-free standards. For those focusing on heart health, opt for low-sodium broth and lean chicken cuts to keep the dish heart-friendly.
This meal also fits well into high-protein or balanced eating plans. Pair it with a side of steamed greens or a fresh salad for extra nutrients. If you love meal prepping, Creamy Smothered Chicken and Rice Delight stores beautifully, saving you time during busy weeks. For more gluten-free recipe ideas, check out our gluten-free dinner guide.
Even if you’re watching portion sizes, this dish helps you stay on track. The combination of protein, fiber, and healthy fats keeps hunger at bay without overeating. For more tips on balancing comfort food with nutrition, explore our healthy comfort food swaps.
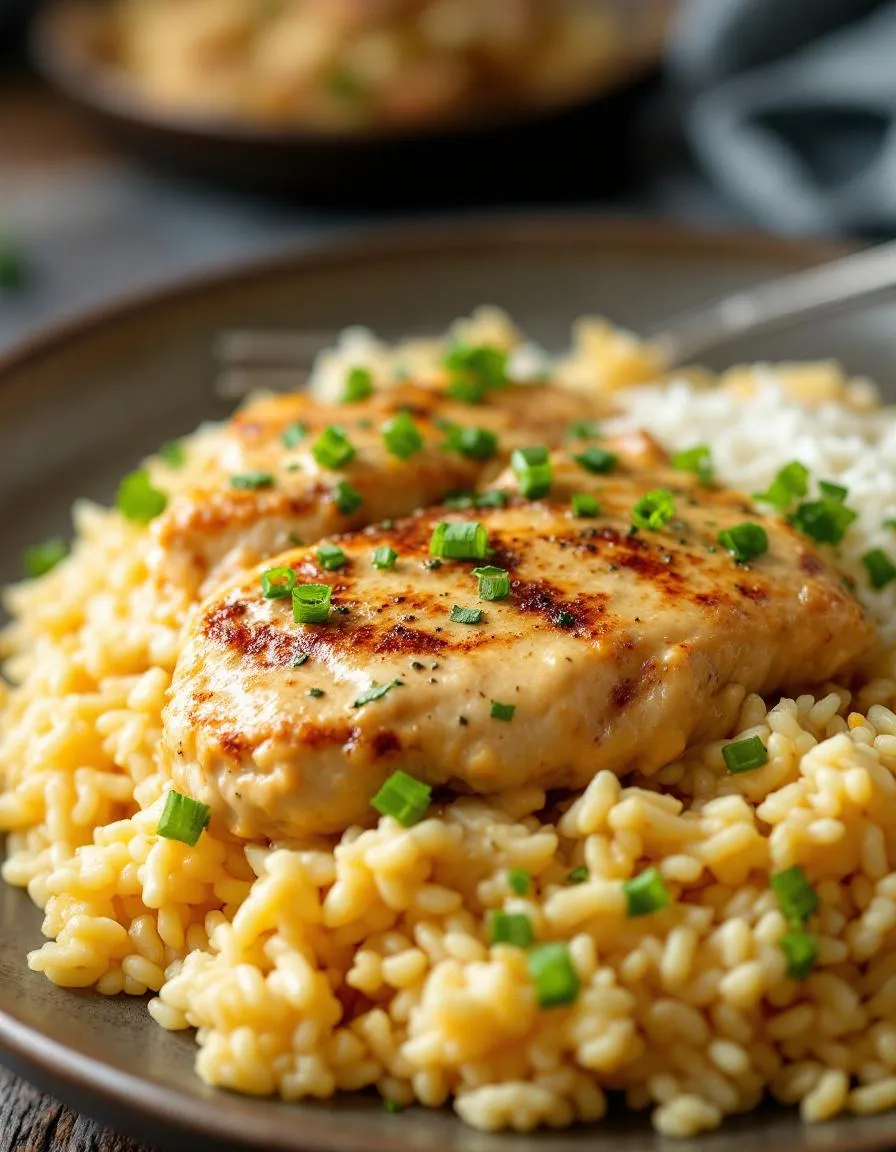
A comforting dish featuring tender chicken smothered in a creamy sauce served over fluffy rice.
Ingredients
Scale
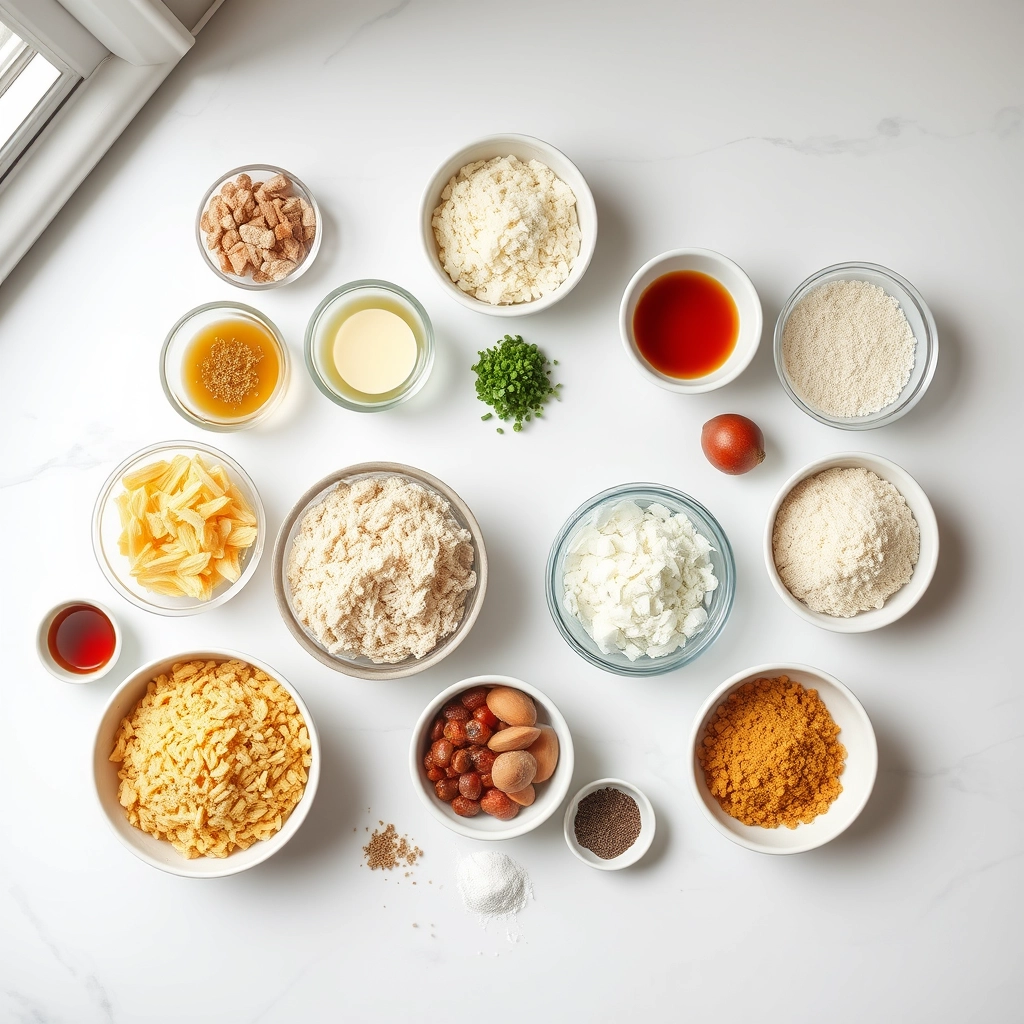
For the Crust:
4 boneless, skinless chicken breasts
1 cup long-grain white rice
2 cups chicken broth
1 cup heavy cream
1 onion, diced
2 cloves garlic, minced
1 teaspoon paprika
1 teaspoon dried thyme
Salt and pepper to taste
2 tablespoons olive oil
1 tablespoon butter
Instructions
1. Prepare the Crust:
Heat olive oil and butter in a large skillet over medium heat. Add chicken breasts and cook until golden brown on both sides, about 5-6 minutes per side. Remove and set aside.
In the same skillet, sauté onion and garlic until softened, about 3-4 minutes.
Add rice, paprika, thyme, salt, and pepper. Stir to coat the rice with the seasonings.
Pour in chicken broth and bring to a simmer. Return the chicken to the skillet, cover, and cook for 20 minutes or until rice is tender and chicken is cooked through.
Stir in heavy cream and let simmer for another 2-3 minutes until the sauce thickens slightly. Serve hot.
Notes
You can customize the seasonings to taste.
s-dish">How to Prepare This Dish
Steps and time-saving tips
Start by preheating your oven to 375°F to save time while you prep the ingredients. Next, season the chicken generously with salt, pepper, and a pinch of garlic powder for extra flavor. Heat a large skillet over medium-high heat and sear the chicken until golden brown on both sides, about 4 minutes per side. Meanwhile, whisk together the cream of chicken soup, milk, and a dash of Worcestershire sauce in a bowl until smooth. Layer the uncooked rice in a greased baking dish, then place the seared chicken on top. Pour the creamy mixture evenly over the chicken and rice, making sure everything gets coated. Cover the dish tightly with foil and bake for 35 minutes. While it bakes, chop some fresh parsley for garnish. After baking, let the dish rest for 5 minutes so the flavors meld together. Finally, drizzle a little melted butter over the top and sprinkle with parsley before serving. For a time-saving hack, use pre-cooked rice and reduce the baking time to 20 minutes.
Mistakes I’ve made and learned from
I once rushed the searing step and ended up with bland chicken—now I always pat the pieces dry and season them well before cooking. Another time, I skipped the foil cover, and the rice turned out undercooked and dry. Lesson learned: trapping steam is key for perfect Creamy Smothered Chicken and Rice Delight. If you’re new to one-pan meals, check out my guide to one-pan dinners for more foolproof tips. Also, if your sauce ever feels too thin, thicken it with a cornstarch slurry like I do in my creamy sauce secrets post. Trust me, these small adjustments make all the difference.
n-and-variations">Cultural Connection and Variations
Where this recipe comes from
Creamy Smothered Chicken and Rice Delight feels like a warm hug from the South, where comfort food reigns supreme. This dish likely traces its roots to Louisiana Creole cuisine, where rich gravies and tender chicken mingle with fluffy rice. However, families across the globe put their own spin on it. In the Caribbean, cooks might add coconut milk for a tropical twist, while in West Africa, peanut butter or groundnuts often thicken the sauce. Even in my own kitchen, I swap the classic mushrooms for bell peppers when my garden overflows with them.
What makes Creamy Smothered Chicken and Rice Delight so special is its versatility. Some versions lean into smoky paprika, while others brighten the dish with lemon zest. During holidays, my aunt layers it with crispy fried onions for extra crunch. No matter the variation, the heart of the recipe stays the same: creamy, hearty, and deeply satisfying. Whether served at a weeknight dinner or a Sunday potluck, it always brings people together.
How it fits in today’s cooking
Today, Creamy Smothered Chicken and Rice Delight fits perfectly into busy lives and food trends. Meal preppers love it because it reheats beautifully, and gluten-free cooks simply swap the flour for cornstarch. It’s also a star during cooler months, pairing wonderfully with roasted vegetables or a crisp salad. For a lighter take, some use Greek yogurt instead of heavy cream, proving this classic adapts to modern tastes.
You’ll often fin
d it on family tables alongside favorites like easy weeknight dinners or holiday spreads. Its cozy appeal even makes it a hit at potlucks, where it stands out next to dishes like comfort food classics. Whether you stick to tradition or tweak it for today’s kitchens, this dish never goes out of style.
Taste and Texture
What makes it delicious
Creamy Smothered Chicken and Rice Delight wraps your taste buds in rich, velvety comfort. The tender chicken melts in your mouth, while the fluffy rice soaks up the savory, garlic-infused sauce. Each bite bursts with smoky paprika and a hint of thyme, balanced by the subtle sweetness of caramelized onions. Meanwhile, the creamy sauce coats everything in a luscious, silky texture that lingers deliciously. The aroma alone—fragrant herbs mingling with buttery goodness—will have everyone gathering around the table before the first spoonful. Creamy Smothered Chicken and Rice Delight isn’t just a meal; it’s a warm, satisfying hug on a plate.
Boosting the flavor
Elevate your Creamy Smothered Chicken and Rice Delight with a few easy tweaks. For extra depth, swap regular paprika for smoked paprika or add a splash of white wine to deglaze the pan. Top it with crispy fried shallots or a sprinkle of fresh parsley for contrasting texture. If you love bold flavors, stir in a spoonful of homemade chipotle sauce or serve it alongside garlic herb dinner rolls to soak up every last drop of sauce. A squeeze of lemon just before serving brightens the dish, making each bite even more irresistible.
Always sear the chicken thighs first to lock in juices before simmering them in the creamy sauce for Creamy Smothered Chicken and Rice Delight. Meanwhile, use a heavy-bottomed pot to cook the rice evenly and prevent sticking. For extra flavor, toast the rice lightly in butter before adding liquid. Additionally, stir the sauce frequently to maintain its smooth texture and prevent curdling. Finally, let the dish rest for 5 minutes before serving so the flavors meld perfectly.
Mistakes to avoid
Avoid overcooking the chicken, as it can turn dry and tough. Instead, check for doneness with a meat thermometer, aiming for 165°F internally. Another common mistake is rushing the rice cooking process, which leads to uneven texture. For foolproof rice, follow our guide on how to cook rice perfectly. Also, don’t skip deglazing the pan after searing the chicken, as those browned bits add depth to the sauce. If your sauce splits, try whisking in a splash of warm broth, as detailed in our fixing broken sauces tutorial.
g-suggestions">Serving and Pairing Suggestions
How to serve this dish
For a stunning presentation, plate Creamy Smothered Chicken and Rice Delight in shallow bowls to showcase its rich texture. Top it with a sprinkle of fresh parsley or chopped green onions for a pop of color. Alternatively, serve it family-style in a rustic casserole dish for cozy gatherings. This dish shines at weeknight dinners, but it also makes a comforting addition to holiday potlucks. To elevate the experience, pair it with warm, crusty bread for soaking up every last bit of the creamy sauce.
What goes well with it
A crisp, tangy side like our Garlic Parmesan Roasted Broccoli balances the richness of Creamy Smothered Chicken and Rice Delight perfectly. For a refreshing contrast, try a light citrus salad or a chilled glass of unoaked Chardonnay. If you crave extra indulgence, drizzle the dish with a touch of our Homemade Garlic Aioli for a creamy, garlicky kick. Each pairing enhances the flavors while keeping the meal satisfying and well-rounded.
math-faq-block">
What makes Creamy Smothered Chicken and Rice Delight so flavorful?
The rich flavor of Creamy Smothered Chicken and Rice Delight comes from a combination of sautéed onions, garlic, and a creamy sauce made with broth and heavy cream. Seasonings like paprika, thyme, and black pepper add depth, while the tender chicken and fluffy rice absorb all the delicious flavors.
Can I use brown rice instead of white rice for Creamy Smothered Chicken and Rice Delight?
Yes, you can substitute brown rice, but keep in mind it will take longer to cook and may require extra liquid. For best results, partially cook the brown rice before adding it to the Creamy Smothered Chicken and Rice Delight to ensure it absorbs the sauce properly.
How do I store leftovers of Creamy Smothered Chicken and Rice Delight?
Store leftovers in an airtight container in the refrigerator for up to 3 days. Reheat gently on the stove with a splash of broth or water to restore the creamy texture of your Creamy Smothered Chicken and Rice Delight.
ank-math-faq-item">
What sides pair well with Creamy Smothered Chicken and Rice Delight?
This dish pairs beautifully with steamed green beans, roasted Brussels sprouts, or a crisp garden salad. For a heartier meal, serve Creamy Smothered Chicken and Rice Delight with warm garlic bread or buttery cornbread.
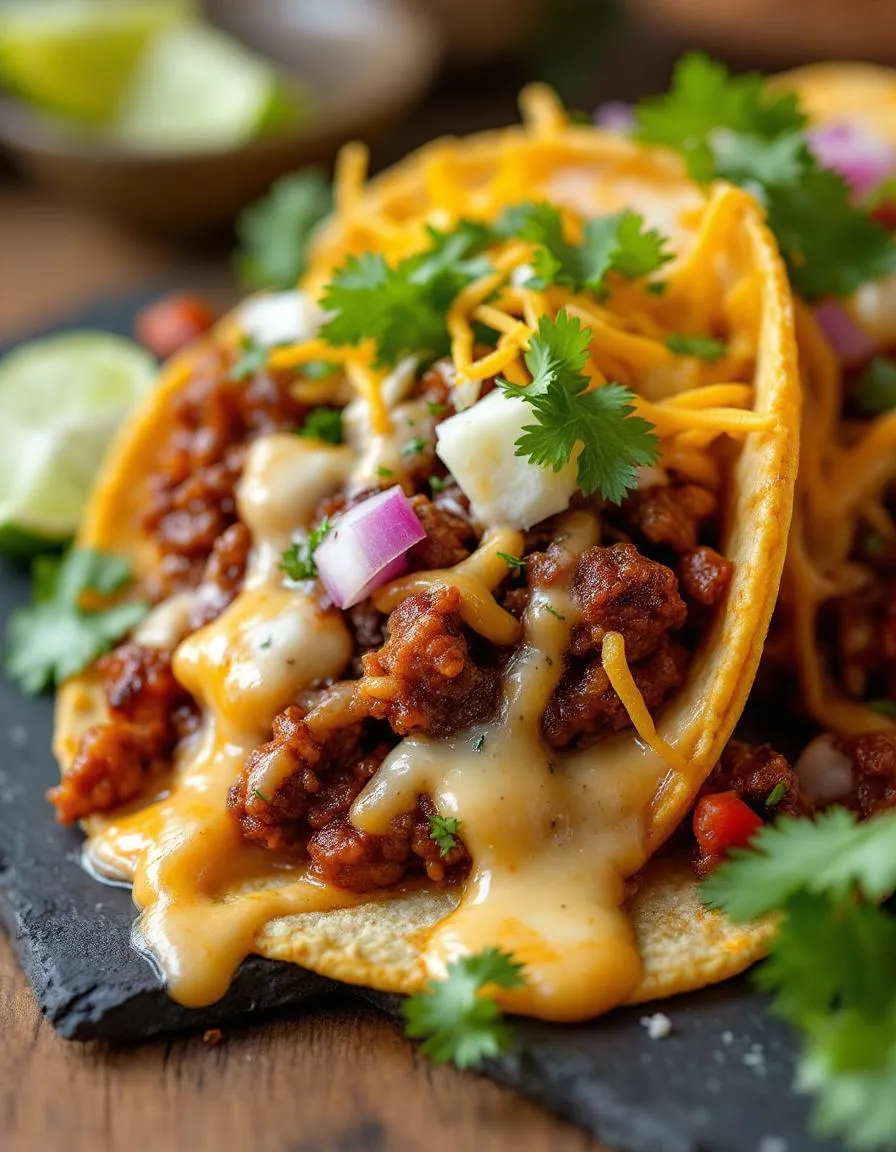
Imagine biting into a taco so rich and flavorful that it instantly transports you to a bustling street food market. The Smoked Quesa-Birria Taco Box: Flavorful Beef-Inspired Tacos delivers exactly that—a perfect blend of smoky, tender beef, melted cheese, and a deeply spiced consommé for dipping. Whether you’re hosting a game-day gathering or simply craving something extraordinary, these tacos promise to elevate your meal with every juicy, satisfying bite. Trust me, once you try them, you’ll never look at tacos the same way again.
The Smoked Quesa-Birria Taco Box: Flavorful Beef-Inspired Tacos combines two beloved culinary traditions: smoky barbecue and Mexican birria. Traditionally, birria features slow-cooked meat in a rich, aromatic broth, but this recipe takes it further by infusing the beef with smoky depth from low-and-slow cooking. The result? Tacos with layers of flavor—tender shredded beef, crispy cheese edges, and a consommé so good you’ll want to drink it. Plus, the interactive experience of dipping each taco adds a fun, communal element to any meal.
This dish fits perfectly with our blog’s mission to bring bold, globally inspired flavors to home cooks. If you love exploring unique twists on classics, you’ll adore how this recipe reinvents birria tacos with a smoky twist. For more taco inspiration, check out our Carnitas Tacos or dive into the world of homemade tortillas with our Flour Tortillas guide. Whether you’re a seasoned pitmaster or a weeknight warrior, these tacos offer a rewarding yet approachable project.
Why I Love This Recipe
I’ll never forget the first time I made Smoked Quesa-Birria Taco Box: Flavorful Beef-Inspired Tacos for friends. The moment they dipped their tacos into the consommé and took that first bite, the room fell silent—then erupted with praise. There’s something magical about how the smoky beef melds with the cheese and spicy broth, creating a harmony of textures and tastes. It’s more than a meal; it’s an experience that brings people together. Every time I make these, I’m reminded why cooking is my greatest joy—sharing unforgettable flavors with the people I love.
Health and Nutrition
Why it’s good for your body
The Smoked Quesa-Birria Taco Box: Flavorful Beef-Inspired Tacos packs a nutritious punch while delivering bold flavors. First, the protein-rich beef filling fuels muscle growth and keeps you full longer. Additionally, the slow-smoked cooking method locks in nutrients while enhancing taste. Moreover, the blend of spices like cumin and chili powder offers antioxidants that support immune health.
When you enjoy the Smoked Quesa-Birria Taco Box: Flavorful Beef-Inspired Tacos, you also benefit from collagen-rich broth. This key ingredient promotes joint health and gut wellness. Furthermore, the melted cheese provides calcium for strong bones. Since the tacos balance protein, healthy fats, and fiber-rich tortillas, they stabilize energy levels without spiking blood sugar.
Finally, the Smoked Quesa-Birria Taco Box: Flavorful Beef-Inspired Tacos includes fresh toppings like onions and cilantro. These add vitamins C and K, which boost skin health and circulation. Whether you savor them for lunch or dinner, these tacos turn flavor into nourishment.
How it fits in a healthy lifestyle
The Smoked Quesa-Birria Taco Box: Flavorful Beef-Inspired Tacos fits seamlessly into balanced eating. For high-protein diets, the beef and cheese deliver a satisfying macro boost. If you prefer gluten-free options, simply swap traditional tortillas for corn or almond flour versions. Heart-healthy eaters will appreciate the lean beef cuts and anti-inflammatory spices.
Pair these tacos with a side of roasted veggies or a light salad for a complete meal. For more gluten-free meal ideas, explore our gluten-free dessert guide. If you’re meal prepping, the Smoked Quesa-Birria Taco Box: Flavorful Beef-Inspired Tacos stores well for quick lunches. Check out our meal prep tips to keep flavors fresh all week. With smart choices, these tacos make healthy eating deliciously effortless.
A delicious fusion of smoky birria beef and melty cheese stuffed into crispy tortillas for the ultimate taco experience.
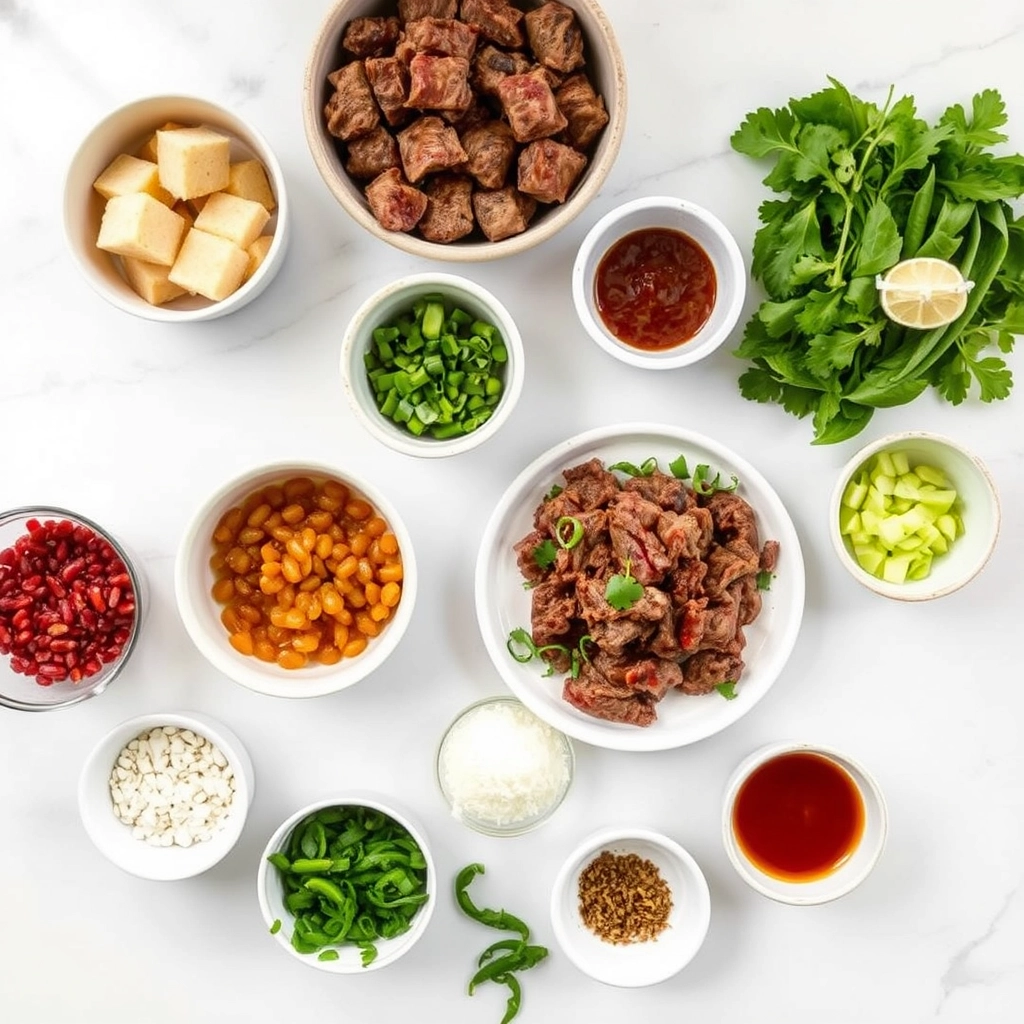
Ingredients
Scale
For the Crust:
2 lbs beef chuck roast
4 dried guajillo chilies
2 dried ancho chilies
1 onion, quartered
4 cloves garlic
1 tsp cumin
1 tsp oregano
1 tsp smoked paprika
2 cups beef broth
12 corn tortillas
2 cups shredded Oaxaca cheese
1/4 cup chopped cilantro
1 lime, cut into wedges
Instructions
1. Prepare the Crust:
Soak dried chilies in hot water for 20 minutes, then blend with onion, garlic, and spices to make adobo sauce.
Rub beef with adobo sauce and smoke at 225°F for 4 hours until tender.
Shred the smoked beef and mix with remaining adobo sauce.
Dip tortillas in rendered beef fat and crisp on a griddle.
Fill each tortilla with shredded beef and cheese, then fold and cook until crispy.
Serve with cilantro, lime wedges, and consommé for dipping.
Notes
You can customize the seasonings to taste.
How to Prepare This Dish
Steps and time-saving tips
Start by seasoning your beef generously with a blend of smoked paprika, cumin, and garlic powder for that deep, rich flavor. Meanwhile, heat a cast-iron skillet over medium-high heat to sear the meat until it develops a caramelized crust. While the beef cooks, blend dried chiles, tomatoes, and spices in a food processor to create the signature birria sauce. Next, layer the shredded beef and sauce into corn tortillas, then fold them into perfect half-moons. For a crispy finish, lightly fry the tacos in a hot skillet until golden and slightly charred. To save time, prep the birria sauce a day ahead and store it in the fridge. Also, consider doubling the beef batch for leftovers—it freezes beautifully for quick meals later. Finally, serve your Smoked Quesa-Birria Taco Box with a side of consommé for dipping and fresh cilantro for brightness.
and-learned-from">Mistakes I’ve made and learned from
Early on, I rushed the beef sear, leaving it pale and lacking depth. Now, I patiently let it develop that crust—it’s worth every extra minute. Another blunder? Overloading the tacos with filling, which made them impossible to flip without falling apart. A light hand keeps them intact, just like my go-to taco folding techniques guide suggests. I also once skipped straining the birria sauce, resulting in a gritty texture. Lesson learned: always strain for silky smoothness. If you’re new to birria, my perfect birria broth breakdown helps avoid these pitfalls. Trust me, a little patience and attention transform these tacos from good to unforgettable.
Cultural Connection and Variations
Where this recipe comes from
The Smoked Quesa-Birria Taco Box: Flavorful Beef-Inspired Tacos traces its roots to the vibrant streets of Jalisco, Mexico, where birria—a slow-cooked, spice-infused meat dish—first gained fame. Traditionally, locals simmered goat or lamb in a rich adobo sauce, but over time, beef became a popular alternative. Meanwhile, the quesabirria twist, which adds melted cheese and a crispy tortilla, emerged as a modern street food sensation. Today, this dish bridges generations, blending ancestral techniques with bold, contemporary flavors.
Across Mexico, cooks pr
epare birria differently. In Tijuana, for instance, they often serve it as a stew with consommé for dipping. In contrast, the Smoked Quesa-Birria Taco Box: Flavorful Beef-Inspired Tacos highlights the smoky, grilled notes that American BBQ lovers adore. Some families even add a splash of vinegar or swap in pork for a tangier twist. No matter the variation, the dish always celebrates community, whether at weekend gatherings or late-night food trucks.
How it fits in today’s cooking
The Smoked Quesa-Birria Taco Box: Flavorful Beef-Inspired Tacos thrives in modern kitchens because it’s both nostalgic and Instagram-worthy. Home cooks love its versatility—it works for game-day spreads, cozy family dinners, or even meal prep. Many also tweak the recipe, like using an Instant Pot to speed up cooking or adding a smoky chipotle kick. For those hosting a crowd, pairing it with easy party appetizers creates a festive, shareable feast.
Seasonal twists keep it fresh year-round. In winter, the rich consommé warms you up, while summer calls for grilling the meat outdoors. Some even repurpose leftovers into creative leftover ideas, like birria grilled cheese. Ultimately, this dish proves that tradition and innovation can deliciously coexist.
>Taste and Texture
What makes it delicious
The Smoked Quesa-Birria Taco Box: Flavorful Beef-Inspired Tacos delivers a bold, mouthwatering experience from the first bite. Rich, smoky beef simmers in a fragrant blend of dried chilies and spices, creating a deep, savory flavor that lingers. Meanwhile, the melted cheese adds a creamy contrast, while the crispy-edged tortillas provide the perfect crunch. Each component works together, making every bite a harmony of textures—tender, gooey, and crisp. The aroma alone, with its hints of garlic and cumin, will have you reaching for seconds before you finish your first taco. Whether dipped in the savory consommé or enjoyed straight from the box, the Smoked Quesa-Birria Taco Box: Flavorful Beef-Inspired Tacos is a feast for the senses.
Boosting the flavor
Elevate your Smoked Quesa-Birria Taco Box: Flavorful Beef-Inspired Tacos with a few easy tweaks. First, try adding pickled red onions for a tangy brightness that cuts through the richness. Alternatively, a drizzle of creamy chipotle sauce adds a smoky kick. For extra heat, sprinkle crushed chili flakes or serve with a side of salsa verde. Fresh cilantro and lime wedges also bring a zesty freshness that balances the deep flavors. With these simple additions, you can customize each taco to your taste while keeping the soul of the dish intact.
Tips for Success
Best practices for results
Always sear the beef first to lock in juices before slow-cooking it for the Smoked Quesa-Birria Taco Box: Flavorful Beef-Inspired Tacos. Meanwhile, toast the dried chilies lightly to deepen their flavor without burning them. For the best texture, shred the beef while it’s still warm, as it becomes easier to handle. Additionally, warm your tortillas right before assembling to prevent cracking. Finally, serve the consommé hot for dipping—this step elevates the entire dish.
Mistakes to avoid
One common mistake is rushing the cooking process, which results in tough meat. Instead, give the beef enough time to become tender, checking it periodically. Another error is skipping the fat skim from the consommé, which can make it overly greasy. For perfectly balanced tacos, learn how to master meat prep and avoid these pitfalls. Also, don’t overcrowd the tortillas when filling them, or they may tear. For more tips on handling delicate ingredients, check out this guide on perfect tortilla techniques.
Serving and Pairing Suggestions
How to serve this dish
Bring the vibrant flavors of Smoked Quesa-Birria Taco Box: Flavorful Beef-Inspired Tacos to life with a festive presentation. For a crowd-pleasing setup, arrange the tacos on a large wooden board or colorful platter, then drizzle them with extra consommé for a glossy finish. Meanwhile, pile fresh garnishes like diced onions, cilantro, and lime wedges in small bowls nearby so everyone can customize their plate. These tacos shine at casual gatherings, game day parties, or even as a fun twist on Taco Tuesday. To elevate the experience, serve them alongside warm tortillas for dipping into the rich broth.
h-it">What goes well with it
Pair your Smoked Quesa-Birria Taco Box: Flavorful Beef-Inspired Tacos with refreshing sides and drinks to balance the smoky depth. First, a crisp Mexican street corn salad adds brightness and texture, while a creamy avocado crema enhances every bite. For drinks, try a tangy agua fresca or an ice-cold Mexican lager to cut through the richness. If you love bold flavors, our zesty mango habanero salsa adds a sweet-heat kick. Finally, end the meal on a sweet note with our churro cupcakes for a dessert that echoes the warmth of Mexican spices.
What makes Smoked Quesa-Birria Taco Box tacos different from regular birria tacos?
Smoked Quesa-Birria Taco Box: Flavorful Beef-Inspired Tacos stand out because they combine traditional birria flavors with a smoky twist. The beef is slow-smoked before being simmered in the rich consommé, adding depth to every bite. The melted cheese and crispy tortillas create the perfect quesabirria texture.
ank-math-faq-item">
How do I reheat Smoked Quesa-Birria Taco Box leftovers?
For best results, reheat your Smoked Quesa-Birria Taco Box tacos in a skillet over medium heat to maintain crispiness. Add a splash of the leftover consommé to keep the beef moist. Avoid microwaving, as it can make the tortillas soggy.
What sides pair well with Smoked Quesa-Birria Taco Box?
These Flavorful Beef-Inspired Tacos go perfectly with Mexican street corn, cilantro lime rice, or a fresh avocado salad. The rich smokiness of the Smoked Quesa-Birria Taco Box balances well with bright, acidic sides like pickled onions or tangy slaw.
Can I make Smoked Quesa-Birria Taco Box vegetarian?
While traditional Smoked Quesa-Birria Taco Box features beef, you can substitute jackfruit or mushrooms for a vegetarian version. Use the same smoking technique and spices to mimic the depth of flavor. The consommé can be made with vegetable broth and smoked paprika.