Chocolate Chip Cookies: The Ultimate Comfort Dessert
Chocolate chip cookies are a classic dessert loved by many, and for good reason! The warm, gooey chocolate chips nestled in a sweet, buttery cookie base create an irresistible treat for cookie lovers everywhere. With each bite, you experience a delightful harmony of sweetness and a hint of vanilla that fills the air and your senses with joy. Whether you enjoy them fresh out of the oven or slightly cooled, these cookies bring comfort and nostalgia, evoking memories of home and togetherness.
The beauty of chocolate chip cookies lies not only in their taste but also in their simplicity. Made with just a handful of basic ingredients, they come together quickly and easily, making them a perfect treat for any occasion. From family gatherings to simple weeknight desserts, these cookies are sure to please everyone at the table with their delightful aroma and perfect texture.
Quick Recipe Highlights
- Flavor Profile: Buttery, sweet, and rich with dark, melted chocolate.
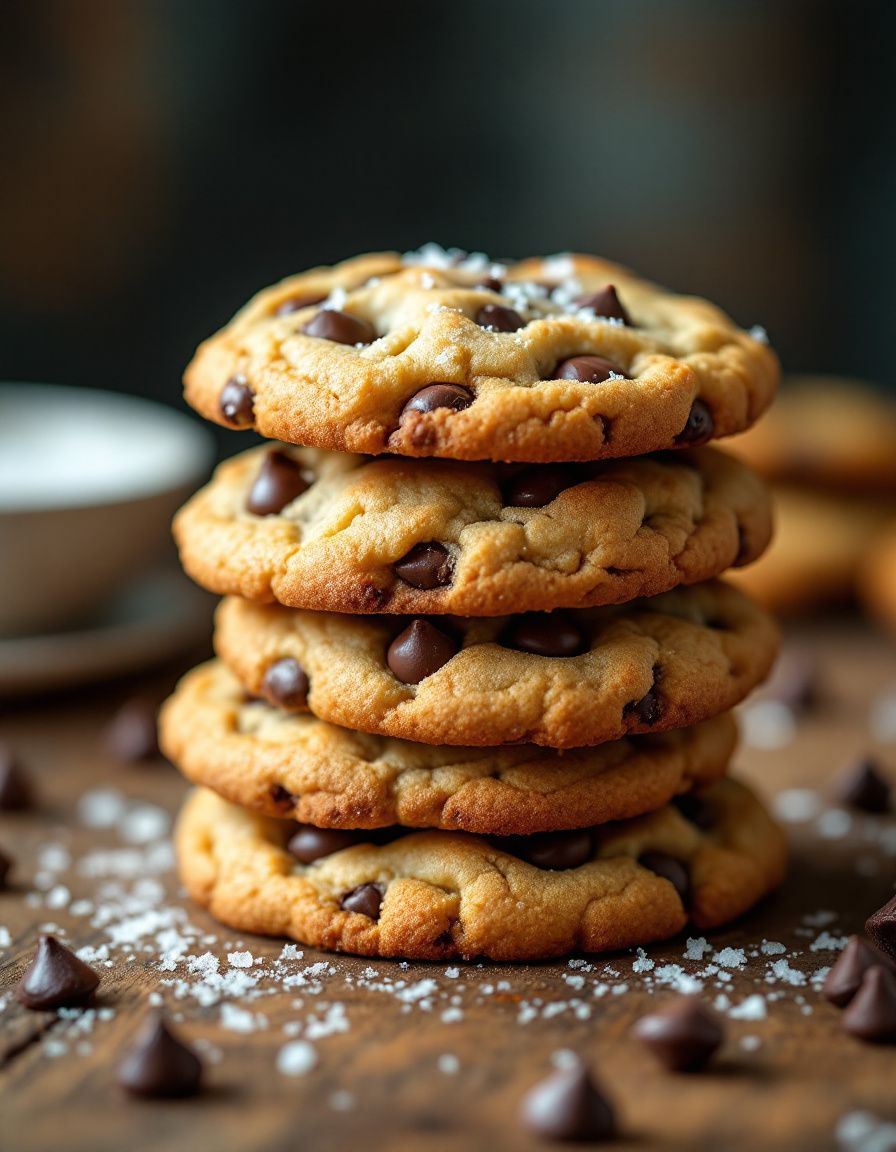
- Texture: Soft and chewy with a slightly crisp edge.
- Aroma: Sweet vanilla and warm chocolate wafting through the kitchen.
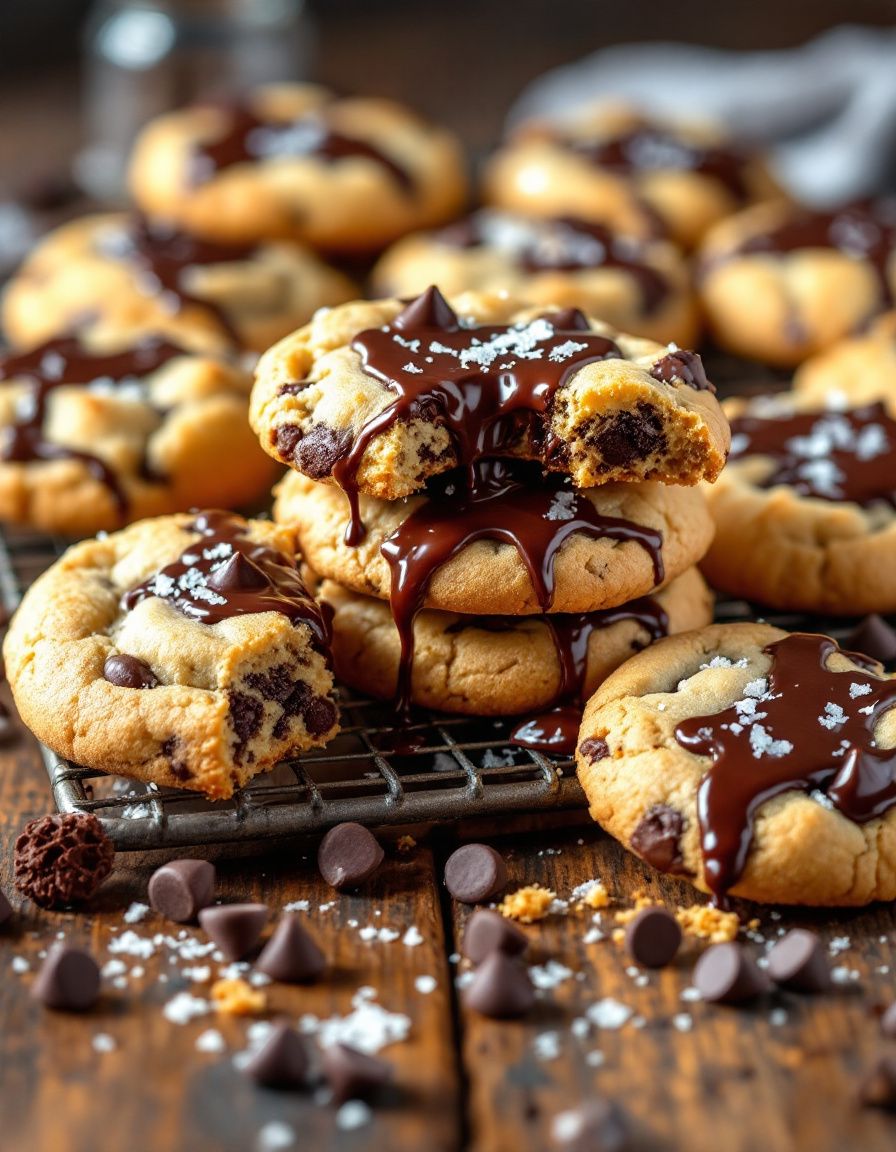
- Visual Appeal: Golden-brown cookies with melted chocolate chips generously studded.
- Skill Level Needed: Ideal for all skill levels, even beginners.
- Special Equipment: Standard baking sheets and mixing bowls, with optional parchment paper.
Recipe Overview
- Difficulty Level: This chocolate chip cookie recipe is easy to follow, making it accessible for novice bakers while allowing experienced cooks to refine their technique.
- Category: Perfect for desserts, snacks, or treats at any time of day.
- Cuisine: A staple of American baking traditions, inspired by classic recipes handed down through generations.
- Cost: With affordable ingredients, these cookies can be baked without a hefty price tag, averaging around $5-$10 for a full batch.
- Season: Enjoy year-round, but they particularly shine during the holiday season when shared with family and friends.
- Occasion: Ideal for birthdays, gatherings, or simply an afternoon pick-me-up treat.
Why You’ll Love This Recipe
The taste and texture of chocolate chip cookies are unmatched. The combination of buttery cookie dough and rich chocolate chips creates a heavenly mix that is both satisfying and nostalgic. You’ll savor each bite as the cookies melt in your mouth, providing a satisfying sweetness that hits just the right spot.
Convenience is another reason to love this recipe. It requires minimal prep time and just a few simple steps, making it a fantastic option for quick baking when cravings strike. With ingredients likely already in your pantry, you can whip up a batch without a trip to the store, making it a go-to treat.
Nutritionally, while cookies are a dessert, they can provide some quick energy with their carbohydrate content. Be mindful of portion sizes, and remember that sharing is caring, allowing you to enjoy treats without going overboard.
Socially, chocolate chip cookies are a definite crowd-pleaser. They evoke smiles and memories, offering warmth and joy when shared with loved ones. They’re perfect for gatherings or simply brightening someone’s day.
Lastly, the accessibility of this recipe means that anyone can enjoy the joy of homemade cookies without breaking the bank. With a low cost of ingredients and minimal specialized equipment needed, this classic treat is available to everyone.
Historical Background and Cultural Significance
The history of chocolate chip cookies dates back to the 1930s when Ruth Wakefield invented the recipe at her Toll House Inn. She originally intended to create a chocolate dessert but found that adding chopped chocolate bars yielded a delightful combination that became a hit.
Since then, these cookies have evolved into various forms but remain a symbol of American home baking. They are frequently associated with nostalgia and moments of comfort, representing the warmth of home and family traditions. This cookie is not just a treat; it’s a recipe that often tells a story of care and sharing.
Regional variations abound, with some incorporating nuts, oats, or alternative chocolates, reflecting local taste preferences. Despite these variations, the classic chocolate chip cookie continues to hold a special place in hearts and homes across the country.
As recipes spread and evolved, the chocolate chip cookie has found its way into international cuisines, serving as a beloved dessert in restaurants and homes worldwide. They embody a sense of creativity, inviting bakers to experiment and personalize according to their preferences.
Ingredient Deep Dive
The primary ingredients in chocolate chip cookies include flour, sugar, butter, eggs, baking soda, and chocolate chips.
**Flour** has a rich culinary history, serving as a fundamental building block in a variety of baked goods. Whole wheat flour is an excellent alternative for added nutrition, lending a nutty flavor. Proper storage in a cool, dry place can extend its shelf life.
**Sugar** contributes sweetness and assists in browning, which is crucial for developing that perfect golden color. Brown sugar adds moisture and a deeper flavor, while granulated sugar achieves that crispness. When selecting sugar, opt for freshness, and consider alternatives like coconut sugar for healthier versions.
**Butter** is beloved for its richness and flavor. Unsalted butter is often preferable for baking to better control salt content. It’s essential to store butter properly in the refrigerator and use it at room temperature for the best consistency in dough.
**Chocolate chips** bring indulgence, and the choices are vast. Dark chocolate offers health benefits with antioxidants; semi-sweet is most common, while white chocolate adds a different sweetness. Always choose high-quality chocolate for the richest flavor, and store any leftovers in a cool, dry place.
Common Mistakes to Avoid
- Overmixing the dough can lead to tough cookies. Mix just until combined.
- Not chilling the dough can result in flat cookies. Allow at least 30 minutes in the fridge.
- Using cold butter can prevent proper creaming. Always use room temperature butter for the ideal spread.
- Baking at incorrect temperatures can alter texture. Always preheat your oven accurately.
- Not measuring ingredients accurately can lead to imbalanced ratios. Use a scale for precision.
- Overbaking will dry out the cookies. Remove them when they begin to golden slightly around the edges.
- Using outdated baking soda or baking powder can affect rising. Always check expiration dates.
- Neglecting to line baking sheets can result in stuck cookies. Parchment paper helps release easily.
- Using low-quality chocolate chips can downgrade flavor. Invest in good chocolate for the best results.
- Skipping the cooling step can result in crumbled cookies. Allow them to set before transferring to wire racks.
Essential Techniques
Creaming butter and sugar is a key technique. This process aerates the butter, incorporating air for lightness. Begin with softened butter, and vigorously mix it with sugar to achieve a pale, fluffy texture. Avoid overbeating, as it can cause the cookies to spread too much.
Properly measuring flour is critical. Spoon flour into the measuring cup, then level it with a knife for an accurate measurement. Packing flour can lead to dense cookies. Aim for a light and fluffy consistency in your dough for the best cookie texture.
Chilling the dough is an invaluable step. It solidifies the fats, preventing excessive spreading during baking. If using a family recipe that skips this step, don’t hesitate to adapt for better results.
Knowing when the cookies are finished baking requires practice. Remove them from the oven when just set, as they will continue to cook on the baking sheet afterward. They should appear slightly pale in the center with golden edges for the perfect balance.
Pro Tips for Perfect Chocolate Chip Cookies
For the best chocolate chip cookies, always use high-quality chocolate chips to enhance flavor. Opting for a mix of dark and semi-sweet chocolates can create delightful variations in taste.
Chilling cookie dough not only improves texture but also deepens flavors as they meld. Aim for at least one hour of chilling time for optimal results.
Test a small baking trial if trying out a new ingredient or substitution. Baking is a science, and gradual adjustments can help refine your results.
Use a cookie scoop for uniform size and even baking. It helps in achieving consistent results across all cookies in the batch.
Experiment with add-ins like nuts, dried fruit, or various chocolates for added texture and flavor. These variations can give a personal touch to the classic recipe.
Consider sprinkling a pinch of sea salt on top before baking. It enhances the sweetness and offers a delightful contrast in flavor.
Store leftover cookies in an airtight container at room temperature to maintain their chewiness. If they begin to harden, placing a slice of bread in the container can help retain moisture.
Adjust baking times based on your oven’s personality. Every oven can be slightly different, so note that you may need extra minute adjustments for optimal baking conditions.
Variations and Adaptations
Chocolate chip cookies can be personalized to fit any palate. For a regional variation, try adding nuts like walnuts or pecans to incorporate a crunchy texture and nutty flavor, which also enhances nutritional value.
Seasonal adaptations can include holiday spices such as cinnamon or nutmeg, perfect for festive gatherings. You may also incorporate pumpkin during the fall for a warm, seasonal twist that combines well with chocolate.
Dietary modifications like making cookies gluten-free can be achieved with almond flour or a gluten-free all-purpose blend. These options allow cookie lovers to still indulge without compromising their dietary needs.
For a flavor variation, experiment with different chocolate types, such as white chocolate or even flavored chocolate bars. These imparts unique profiles that can surprise and delight.
Texture modifications may involve tweaking baking times or thickness to create cookies that are either chewier or crunchier based on personal preference.
Presentation alternatives can include drizzling cookies with melted chocolate or dusting them with confectioner’s sugar. These touches elevate their visual appeal, making them perfect for special occasions.
Serving and Presentation Guide
For an impressive presentation, stack cookies high on a decorative plate, garnished with fresh mint or sprinkled chocolate shavings. Adding a side of creamy milk or rich ice cream elevates their appeal.
Consider traditional accompaniments such as a glass of cold milk that pair perfectly, enhancing the cookie experience by balancing sweetness with creaminess.
Modern serving suggestions might include using them as a topping on ice cream sundaes or crumbling them on yogurt for a sweet breakfast option.
Serve cookies warm from the oven or slightly cooled, understanding that they continue to set as they rest. This knowledge will help control the final texture after baking.
Portion control is key when serving; consider offering single cookies or half cookies to allow guests to sample various flavors without overindulging.
Wine and Beverage Pairing
For decadent dessert pairings, consider a rich port or a dessert wine that complements the sweetness of the cookies. The fruity notes in these wines can enhance the chocolate flavors beautifully.
If looking for non-alcoholic alternatives, pair with a smooth vanilla bean milkshake that echoes the creamy aspects of the cookie’s flavor profile.
Coffee lovers should enjoy their cookies alongside a cup of freshly brewed coffee; the bitterness complements the sweetness, creating a balanced experience.
Ensure that all beverages are served at the optimal temperature to enhance the cookie experience: warm cookies should pair with warm beverages, while chilled cookies mix well with cold drinks.
Storage and Shelf Life
To maintain the freshness of your chocolate chip cookies, store them in an airtight container at room temperature. This will keep them soft and chewy for several days.
For longer storage, place cooled cookies in the freezer. They can be kept in a sealed container or a freezer bag for up to three months, making them easy to enjoy any time.
If you’re unsure about spoilage, look for changes in texture, color, or an off-odor. Always ensure that cookies are fully cooled before placing them into storage.
Reheating cookies is simple; pop them in a microwave for a few seconds or put them back in the oven at a low temperature to regain warmth and softness.
Freezing cookie dough is a great way to plan for emergencies. You can portion the dough and freeze it, allowing for ready-to-bake cookies at a moment’s notice!
Make Ahead Strategies
Preparation can start as early as the day before by mixing the dough and chilling it. This allows the flavors to meld perfectly overnight.
Store completed cookies in a container between baking steps, ensuring that each layer remains fresh until you’re ready to serve.
Quality can be maintained by ensuring that the cookies are fully cooled before sealing; this prevents moisture from making them soggy.
For assembly tricks, prepare your baking sheets with parchment paper so that they are ready to go, speeding up the process when the cravings hit.
Consider reintroducing freshness by adding a scoop of ice cream or drizzling warm chocolate over cookies just before serving. This adds an unexpectedly delightful twist to the classic dessert.
Scaling Instructions
To halve the recipe, simply divide all the ingredient measurements by two, ensuring you check bake times regularly as they may adjust.
For larger gatherings, doubling or tripling the recipe is straightforward; just ensure that you have ample mixing space. You might need to bake in batches to avoid overcrowding the oven.
When scaling recipes, always adjust equipment accordingly: larger batches may require multiple baking sheets or an additional oven if cooking a significant quantity at once.
Timing requires attention; always refer to the appearance of cookies rather than the clock, as these can vary dramatically between batches.
Consider storage aspects for the excess; label your containers properly to avoid confusion, and ensure that they are airtight for long-lasting flavor.
Nutritional Deep Dive
In terms of macro breakdown, chocolate chip cookies predominantly contain carbohydrates from flour and sugars, which provide energy. The butter and chocolate add fats, making them more calorie-dense.
Micronutrient analysis shows that while cookies are not a health food, quality chocolate provides iron, and butter includes fat-soluble vitamins. Enjoying in moderation can ensure satisfaction without excessive caloric intake.
Health benefits are minimal, but incorporating whole grains or using dark chocolate can offer some antioxidants and fiber, turning a classic treat into an occasionally healthier option.
Limited portions allow for enjoyment without excess. Consider serving one or two cookies alongside fresh fruit for a balanced and satisfying dessert option.
For weight management, factor in cookies as treats in your overall daily intake, enjoying them without guilt while being mindful of serving sizes.
Dietary Adaptations
Gluten-free chocolate chip cookies can be made using almond flour or a gluten-free baking blend. These variations retain texture and flavor without compromising quality.
Dairy-free alternatives can include coconut oil instead of butter and dairy-free chocolate. These swaps accommodate those with lactose intolerance or dietary restrictions.
For a vegan version, substituting flaxseed eggs for traditional eggs works well, and be sure to choose vegan chocolate chips to maintain the integrity of the recipe.
Low-carb chocolate chip cookies can be crafted using almond flour and sugar substitutes like erythritol to significantly reduce carbohydrate content.
Keto and paleo adaptations focus on natural sweeteners and nut flours, achieving a delicious result that aligns cohesively with those dietary lifestyles.
For low-FODMAP needs, adjustments like choosing dark chocolate in moderation may be appropriate, allowing more flexibility in enjoying treats without significant digestive concerns.
Troubleshooting Guide
If your cookies are too flat, ensure your butter was not too melty before mixing. Properly softened, room-temperature butter gives structure to your cookies.
For dry cookies, double-check your flour measurements and consider adding an additional egg or more fat to promote moisture.
Flavor imbalance can commonly arise from not incorporating enough vanilla or too much salt. Taste your dough and adjust accordingly to achieve a desired balance.
Keeping an eye on the oven temperature is crucial; oven thermometers can quickly resolve discrepancies between the dial and actual temperature.
For equipment challenges, line baking sheets with parchment to prevent sticking and to ensure even baking across all cookies during production.
If timing remains an issue, take a notepad to record adjustments, documenting how you can perfect your method for the next round of baking.
Recipe Success Stories
Community feedback showcases the joy this chocolate chip cookie recipe brings, with many bakers noting how it has become a family favorite across generations.
Variation successes highlight the creativity flourished through experimenting with different ingredients, leading to new adaptations loved by friends and family alike.
Adaptation stories reveal how this simple recipe accommodates numerous dietary needs, helping many find joy in baking without compromising health or preferences.
Readers have also suggested photography tips, sharing stunning images that highlight the cookies’ gooey, chocolatey goodness that incites cravings.
These recipes become shared heirlooms, circulating through social media and gatherings, enhancing connections and camaraderie as they are baked and enjoyed everywhere.
Frequently Asked Questions
A: Yes! Chocolate chip cookie dough freezes very well. Portion the dough into balls and freeze them on a baking sheet. Once frozen, transfer them to an airtight container or freezer bag for up to three months.
Q: How do I make gluten-free chocolate chip cookies?
A: Substitute all-purpose flour with a gluten-free baking blend or almond flour. Ensure that other ingredients, like chocolate chips, are also gluten-free.
Q: Why are my cookies spreading too much?
A: Overly warm butter or not chilling the dough can cause cookies to spread too thin. Make sure your butter is at room temperature, and chill the dough for at least 30 minutes before baking.
Q: Can I replace brown sugar with white sugar?
A: Yes, but this alters texture and flavor. Brown sugar adds moisture and depth; if you use white sugar, consider incorporating a little molasses for a similar effect.
Q: How can I make softer cookies?
A: To achieve softer cookies, reduce baking time slightly and ensure you are not overmixing the dough, which can lead to tougher cookies.
Q: Do I need to chill the dough?
A: While not strictly necessary, chilling the dough enhances flavor and texture. It also helps prevent the cookies from spreading too much during baking.
Q: What can I use instead of eggs?
A: Common substitutions include flaxseed meal mixed with water or applesauce, perfect for vegan or egg-free varieties.
Q: How do I know when my cookies are done?
A: Look for slightly golden edges while the center appears set but still soft. Cookies continue cooking after being removed from the oven, leading to the perfect texture.
Q: How should I store leftover cookies?
A: Store cookies in an airtight container at room temperature for up to one week. For longer shelf-life, consider freezing them as described above.
Q: Can I add nuts to my cookies?
A: Absolutely! Feel free to add chopped nuts like walnuts or pecans for added texture and flavor in your chocolate chip cookies.
Q: Why are my cookies too dry?
A: Overbaking is the primary reason for dry cookies. Keep an eye on the timer and remove them while they are still slightly soft in the center for perfect moisture.
Additional Resources
Explore related recipes for variations of your favorite cookies, such as oatmeal chocolate chip or peanut butter cookies. Each provides a fun twist on the classic treat.
Consider consulting technique guides for perfecting your baking skills, from mastering dough textures to perfecting frostings that complement your cookies.
Dive into ingredient information, learning about the benefits of selecting high-quality chocolates or how to incorporate superfoods to elevate your sweet treats.
For those looking to up their kitchen game, recommendations for essential equipment can help in creating flawless cookies every time, with items like silicone baking mats and cookie scoops.
With each season, new flavors and ingredients inspire creativity. Seasonal variations, like pumpkin spice cookies or peppermint versions for the holidays, can invigorate your baking routine.
Join the Conversation
Engage with your baking community on social media by sharing your chocolate chip cookie successes. Use dedicated hashtags and tags to showcase your delicious results and inspire others to try the recipe.
Consider sharing photography tips that enhance the visual appeal of your baked goods. Good lighting and composition can make all the difference in showcasing your culinary creations.
Recipe reviews are encouraged, allowing fellow bakers to understand the strengths and joys of this beloved chocolate chip cookie recipe better.
Participate in community engagement by exchanging ideas on variations or adaptations that have worked well for you. Your experiences can offer helpful insights to budding bakers looking to explore.
Recipe variations create a richer baking ecosystem, and sharing your adaptations can inspire others to continue the legacy of chocolate chip cookies across different methods and cultures.
The Recipe
Chocolate Chip Cookies
Serves: 24 cookies
Prep Time: 15 mins
Cook Time: 10 mins
Total Time: 25 mins
Kitchen Equipment Needed
- Baking sheet
- Mixing bowls
- Electric mixer or whisk
- Cookie scoop or spoons
- Parchment paper (optional)
Ingredients
- 2 1/4 cups all-purpose flour
- 1/2 cup granulated sugar
- 1 cup brown sugar, packed
- 1 cup unsalted butter, softened
- 2 large eggs
- 1 teaspoon vanilla extract
- 1 teaspoon baking soda
- 1/2 teaspoon salt
- 2 cups semi-sweet chocolate chips
Directions
- Preheat your oven to 350°F (175°C).
- In a large mixing bowl, beat the softened butter, granulated sugar, and brown sugar until light and fluffy.
- Add the eggs and vanilla extract, mixing until well combined.
- In another bowl, whisk together the flour, baking soda, and salt. Gradually add this dry mixture to the wet ingredients.
- Fold in the chocolate chips until evenly distributed.
- Using a cookie scoop, drop rounded balls of dough onto the prepared baking sheets, leaving space between each for spreading.
- Bake for 9-11 minutes or until golden brown around the edges but still soft in the center.
- Remove from the oven and allow to cool on the baking sheet for a few minutes before transferring to wire racks to cool completely.
Recipe Notes
- For an extra touch, sprinkle sea salt on top before baking.
- Store any leftover cookies in an airtight container to maintain softness.
- It’s great to mix in nuts for added texture.
- Chocolate chips can be replaced with chunks or different varieties for a unique twist.
- If you prefer chewier cookies, consider reducing bake time by one minute.