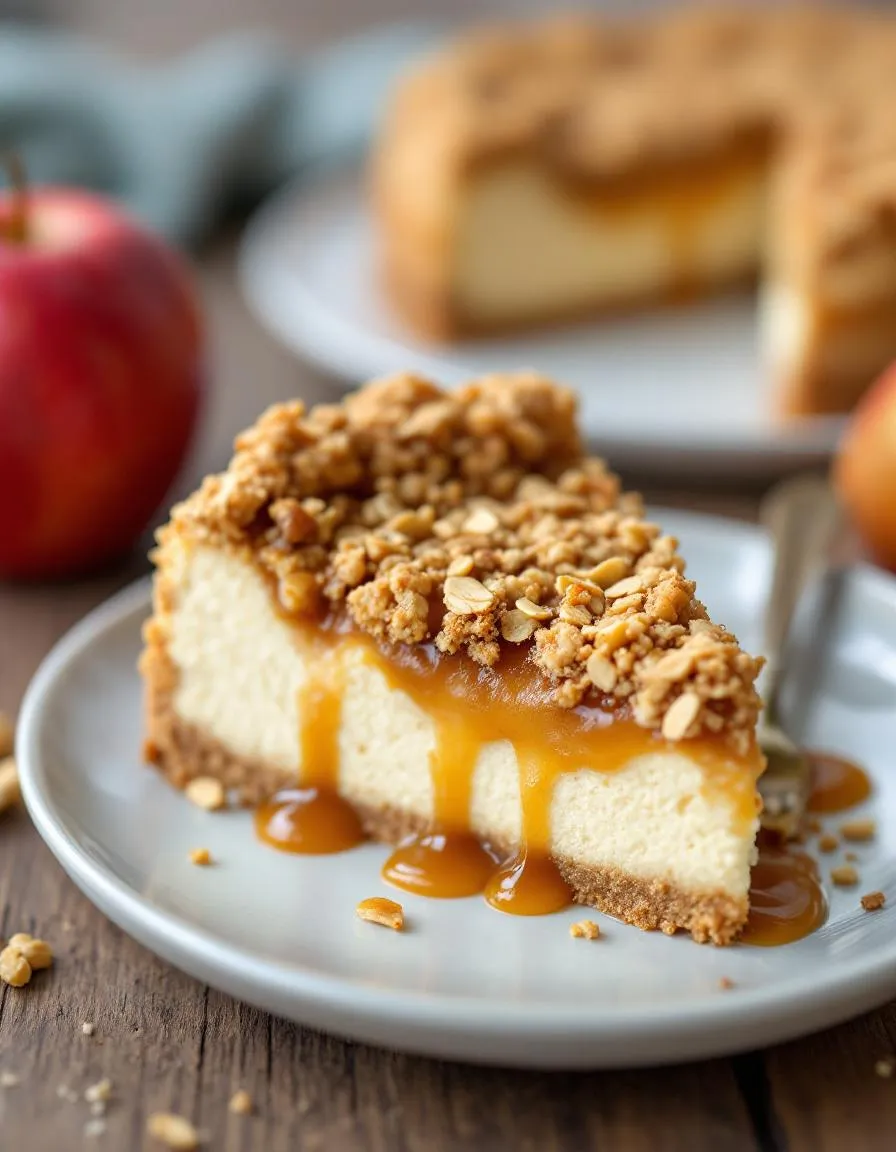
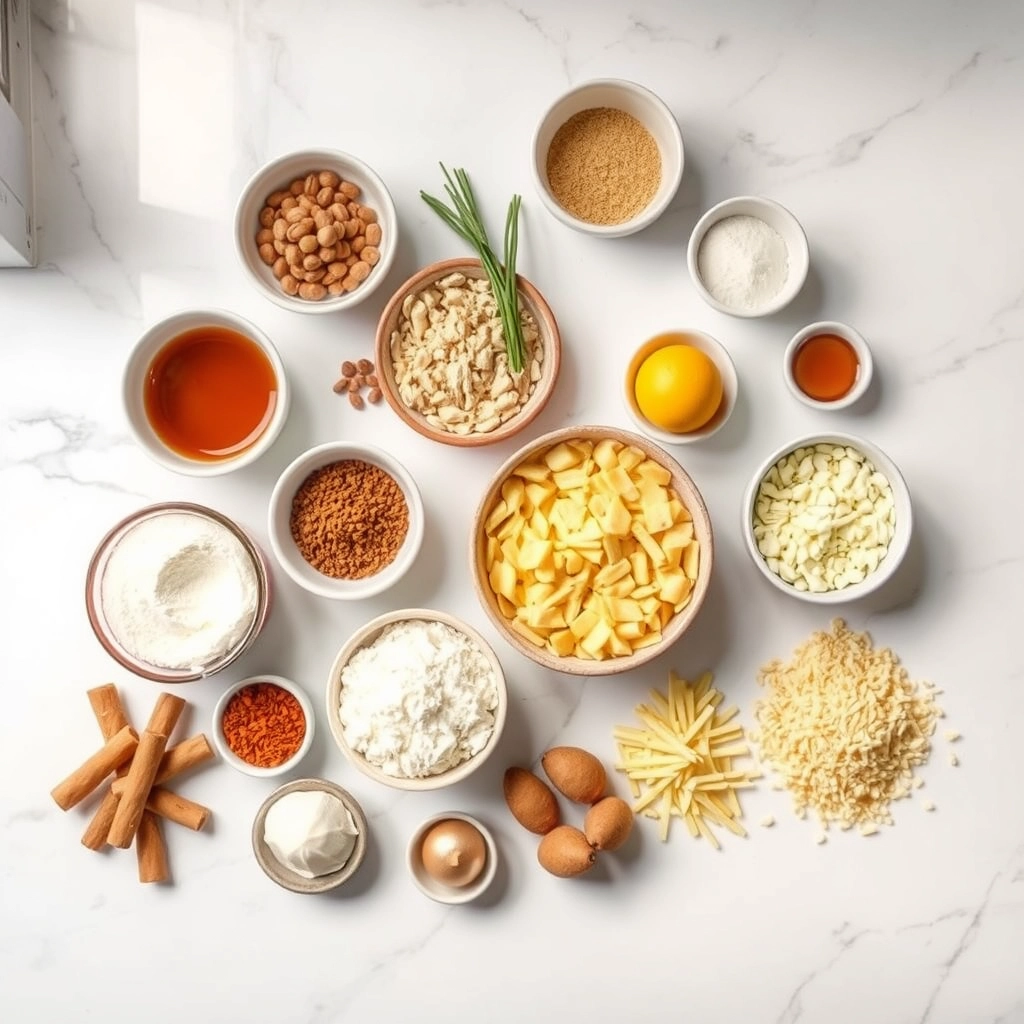
Is there anything more comforting than the smell of baked apples and cinnamon wafting through your kitchen? Honestly, this aroma instantly transports me to my happiest autumn memories. Now, imagine combining that cozy feeling with the rich, creamy indulgence of classic cheesecake. This Apple Crumble Cheesecake recipe does exactly that, creating the ultimate dessert mashup you never knew you needed. It promises to become the show-stopping centerpiece of your next gathering, delivering pure nostalgia and joy in every single bite.
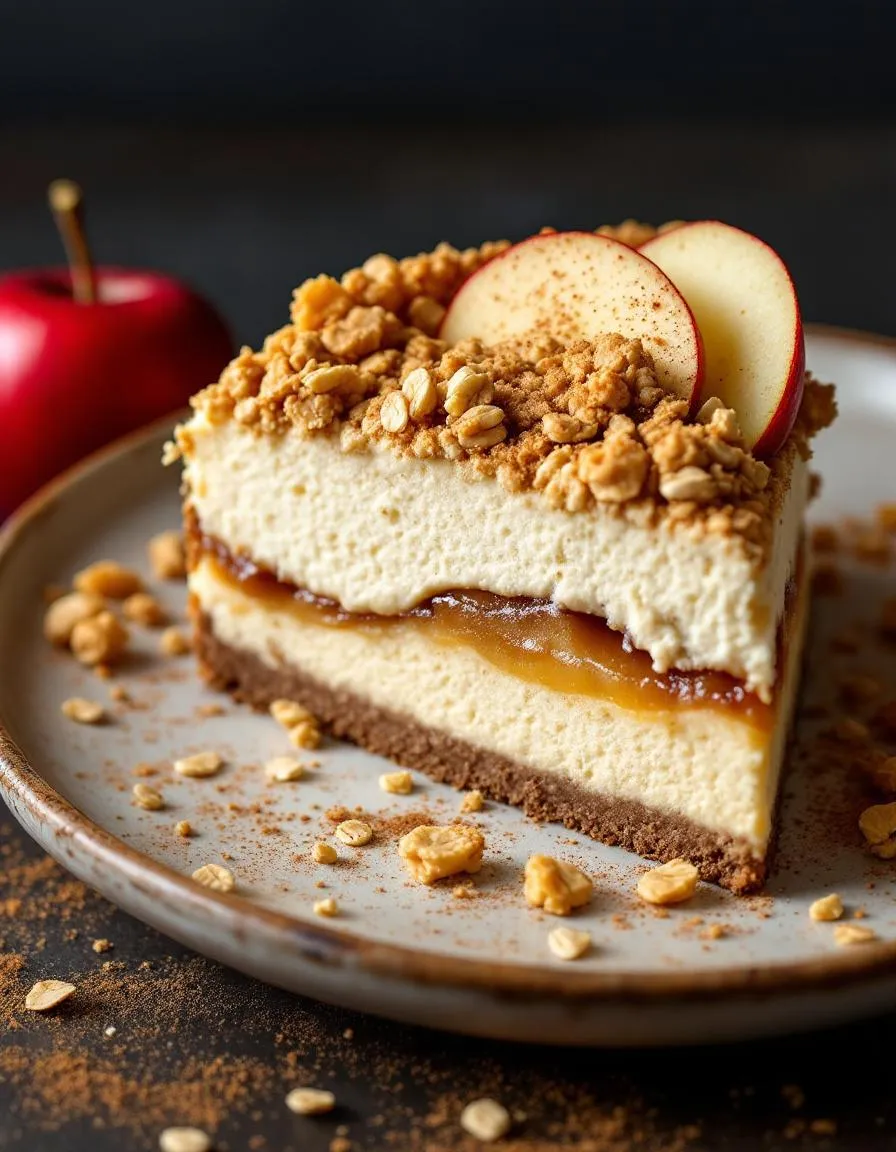
An Apple Crumble Cheesecake masterfully layers three distinct components into one spectacular dessert. Firstly, a buttery graham cracker crust provides a sturdy, sweet foundation. Next, a velvety smooth cheesecake filling, often with a hint of vanilla or caramel, offers a rich and tangy contrast. Finally, the crowning glory is a generous layer of spiced apple chunks and that iconic, irresistible crumble topping. This dessert matters because it transforms two beloved classics into something entirely new and exciting. It satisfies multiple cravings at once, making it a perfect choice for any occasion, from a casual family dinner to a festive holiday celebration. Furthermore, this recipe fits our blog’s mission perfectly. We specialize in approachable yet impressive recipes that deliver restaurant-quality results right in your own home. If you adore the flavors in this dessert, you must explore our ultimate guide to creating the perfect Classic Cheesecake. For another fantastic way to use seasonal fruit, our famous Apple Crisp is a reader favorite. Ultimately, this recipe balances simplicity with wow factor, ensuring you feel like a baking champion.
Why I Love This Recipe
This Apple Crumble Cheesecake holds a special place in my heart because it represents the best of both worlds from my childhood. My grandmother always made a legendary apple crumble, while my mom perfected a silky cheesecake. Blending these two family traditions into one dessert feels like a beautiful and delicious tribute to them. Every time I pull it out of the oven, the smell alone brings me right back to their kitchens, filling my home with the same warmth and love they always did. It is more than just a treat; it is a edible memory.
Health and Nutrition
Why it’s good for your body
This Apple Crumble Cheesecake offers more than just incredible flavor; it also provides some surprising nutritional perks. For instance, the apples deliver a powerful dose of fiber and vitamin C, which actively support your digestive health and immune system. Moreover, cinnamon, a key spice in the crumble, brings its own anti-inflammatory properties to the party. Consequently, each slice contributes beneficial compounds that your body genuinely appreciates.
Additionally, the creamy filling, primarily built from dairy, supplies a solid amount of calcium and protein. These nutrients are fundamental for maintaining strong bones and helping you feel full and satisfied. Therefore, enjoying this dessert does more than just please your palate. Ultimately, this Apple Crumble Cheesecake proves that mindful indulgence can be part of a wholesome approach to eating.
How it fits in a healthy lifestyle
You can absolutely enjoy this Apple Crumble Cheesecake while sticking to your wellness goals. Think of it as a celebratory treat within a pattern of balanced eating, not an everyday occurrence. Savoring a smaller portion mindfully after a nutritious meal is a perfect way to satisfy a sweet craving without overdoing it. For those managing specific dietary needs, you can easily adapt the recipe. Simply use a gluten-free flour blend for the crumble topping to make it celiac-friendly.
Furthermore, the protein from the cream cheese and eggs helps promote satiety, which can prevent overindulgence later. If you are looking for other ways to incorporate healthy fats into your desserts, exploring options like an avocado chocolate mousse can be a great alternative. This approach allows you to enjoy delicious food while still honoring your body’s needs.
A decadent dessert combining creamy cheesecake with spiced apple filling and a buttery crumble topping.
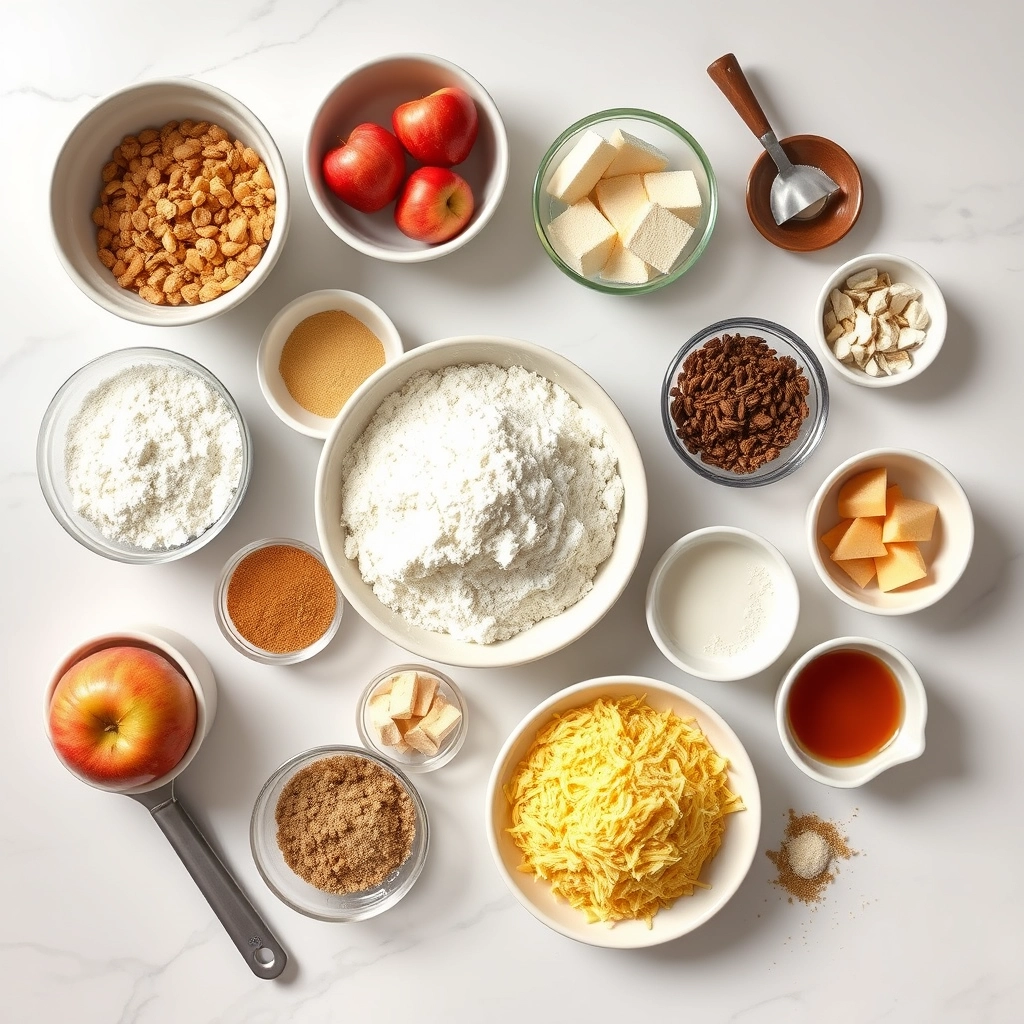
Ingredients
Scale
For the Crust:
2 cups graham cracker crumbs
1/2 cup melted butter
24 oz cream cheese, softened
1 cup granulated sugar
3 large eggs
1 tsp vanilla extract
2 large apples, peeled and diced
1/2 cup brown sugar
1 tsp cinnamon
1/4 tsp nutmeg
1 cup all-purpose flour
1/2 cup rolled oats
1/2 cup cold butter, cubed
Instructions
1. Prepare the Crust:
Preheat oven to 325°F. Mix graham cracker crumbs with melted butter and press into a 9-inch springform pan.
Beat cream cheese and granulated sugar until smooth. Add eggs one at a time, then vanilla. Pour over crust.
Toss apples with brown sugar, cinnamon, and nutmeg. Spoon over cheesecake layer.
Combine flour, oats, and cold butter until crumbly. Sprinkle over apple layer.
Bake for 60-70 minutes until set. Cool completely before refrigerating for 4 hours.
Notes
You can customize the seasonings to taste.
How to Prepare This Dish
Steps and time-saving tips
First, preheat your oven and grab a springform pan. Meanwhile, make the crust by crushing graham crackers with melted butter and a pinch of cinnamon. Firmly press this mixture into the pan bottom and slightly up the sides; then, simply bake it for about ten minutes until set. While that cools, tackle the apple filling. Sauté thinly sliced apples with butter, brown sugar, and warm spices until they turn tender and fragrant. This step truly builds the deep, autumnal flavor base for your Apple Crumble Cheesecake. For the cheesecake layer, beat room-temperature cream cheese until it’s completely smooth. Gradually add sugar and then the eggs, one at a time, mixing just until combined. Finally, gently fold in some sour cream and vanilla for that classic tang and richness. Pour this luxurious filling over your cooled crust. Now, scatter the prepared spiced apples evenly over the top. You will bake the whole creation in a water bath for the creamiest, crack-free results. After baking, let it cool gradually in the turned-off oven with the door slightly ajar. This patience prevents any shocking temperature changes. Finally, you must chill your Apple Crumble Cheesecake for several hours, or ideally overnight, to let everything set perfectly.
and-learned-from">Mistakes I’ve made and learned from
I once learned the hard way that using cold cream cheese is a recipe for lumps. No matter how long I beat it, those little bits just wouldn’t smooth out, resulting in a grainy texture for my Apple Crumble Cheesecake. Now, I always plan ahead and let my ingredients sit on the counter for a good hour. Another classic blunder of mine was impatience with the chilling process. I’d try to speed it up in the freezer, which caused the top to weep condensation and the layers to separate slightly. Trust me, the refrigerator is your best friend for a flawless set. For anyone struggling, my guide on achieving the perfect cheesecake texture covers these pitfalls in detail. Also, if your water bath ever leaks, don’t panic. I’ve found that wrapping the springform pan in a large piece of foil works, but using a special slow-roaster bag designed for this is a total game-changer and guarantees a dry oven floor.
Cultural Connection and Variations
Where this recipe comes from
This dessert feels like a warm hug from two different grandmothers. On one side, you have the rustic, homey charm of a British apple crumble. On the other, the rich, indulgent elegance of a New York style cheesecake. My own family’s story with it began on a chilly autumn day. My British aunt would always bake a classic apple crumble for Sunday roast. Meanwhile, my mom, who adored American desserts, would whip up a creamy cheesecake for special occasions. One Thanksgiving, we decided to merge them into one spectacular showstopper. The result was pure magic, a perfect fusion of old-world comfort and new-world decadence.
Around the globe, baker
s put their own spin on this concept. In Australia and New Zealand, they might add a handful of desiccated coconut to the crumble topping for extra texture. Some European bakers, particularly in Germany, often incorporate quark cheese instead of cream cheese for a slightly tangier filling. Many families, like mine, consider this the ultimate holiday dessert. However, its real beauty lies in its versatility. You can easily make a stunning Apple Crumble Cheesecake for any season or celebration.
How it fits in today’s cooking
Today, this dessert absolutely thrives because it satisfies our craving for both nostalgia and novelty. It’s the star of the show at holiday feasts, but it also fits perfectly into our modern routine of weekend baking projects. Furthermore, contemporary cooks love adapting it to their dietary needs. They might use gluten-free flour for the crumble or a plant-based cream cheese alternative to create a vegan masterpiece.
Its seasonal flexibility also keeps it relevant all year. In the summer, you can top it with fresh berries instead of stewed apples. Conversely, during the fall, it becomes the ultimate comfort food. Ultimately, this dessert proves that some classics only get better with a little creative fusion. For anyone looking to master the basics before getting creative, starting with a classic New York cheesecake recipe provides the perfect foundation. This approach ensures your Apple Crumble Cheesecake always has that flawless, creamy texture we all love.
>Taste and Texture
What makes it delicious
This Apple Crumble Cheesecake delivers a symphony of contrasting textures in every single bite. First, your spoon cracks through the crisp, buttery oat topping. Then, it glides into the impossibly cool and creamy cheesecake filling. Ultimately, you hit the warmly spiced, tender apple layer nestled at the bottom. Each component sings with flavor; the tangy cream cheese perfectly balances the sweet, fragrant apples and the toasty cinnamon crumble. The entire experience feels both decadently rich and comfortingly familiar. Serving this stunning Apple Crumble Cheesecake guarantees your kitchen will smell like a cozy autumn day.
Boosting the flavor
For an even more dynamic dessert, consider a few simple tweaks. A generous drizzle of warm caramel sauce right before serving introduces a wonderful buttery sweetness that complements the spiced apples. Alternatively, a scoop of vanilla bean ice cream melts into the warm crumble topping, creating an irresistible hot-and-cold sensation. If you adore warm spices, a pinch of freshly grated nutmeg or cardamom in the apple mixture will add a beautiful aromatic depth. For another fantastic way to enjoy a fruity dessert, explore our recipe for Strawberry Cheesecake Cookies. Furthermore, a dollop of freshly whipped cream or a sprinkle of toasted pecans provides a final touch of luxury and crunch. For more inspiration on creating the perfect creamy filling, our guide on How to Make Cheesecake is an invaluable resource.
Tips for Success
Best practices for results
Always use full-fat, room temperature cream cheese for your Apple Crumble Cheesecake to guarantee a luxuriously smooth and lump-free filling. Furthermore, press your crumble topping firmly into an even layer on the baking sheet before toasting it, which helps create those perfect, crunchy clusters. For the best texture and clean slices, you must then chill the assembled dessert for at least eight hours, or even overnight.
Mistakes to avoid
Avoid overmixing the batter after adding the eggs, as this incorporates too much air and can cause the cheesecake to crack during baking. Instead, mix on low speed just until the ingredients combine. Additionally, do not skip the water bath for your Apple Crumble Cheesecake, as the gentle steam is crucial for even cooking and that signature creamy texture; our guide on how to prevent cracks explains this in detail. Finally, ensure your apple filling is completely cool before layering it, otherwise the residual heat will start to melt your carefully prepared cheesecake base. For more on achieving the perfect fruit layer, read our tips for perfect fruit filling every time.
Serving and Pairing Suggestions
How to serve this dish
Present your Apple Crumble Cheesecake with style for a truly memorable dessert. For instance, serve each slice on a simple white plate to let its beautiful layers stand out. Additionally, a light dusting of powdered sugar or a drizzle of warm caramel sauce makes a gorgeous garnish. This dessert truly shines during holiday gatherings or as a special weekend treat. Finally, top it with a small scoop of vanilla bean ice cream for an extra touch of elegance.
h-it">What goes well with it
A hot cup of coffee perfectly cuts through the rich sweetness of this decadent cheesecake. Alternatively, a glass of chilled dessert wine, like a Riesling, beautifully highlights the warm apple and cinnamon notes. For a truly show-stopping spread, consider serving it alongside our creamy No Bake Vanilla Cheesecake. Moreover, a side of our quick Salted Caramel Sauce allows your guests to add an extra layer of buttery, salty goodness to their slice.
What is the best way to prevent a soggy crust on an apple crumble cheesecake?
The best way to prevent a soggy crust is to pre-bake your cheesecake crust before adding the filling. For an extra layer of protection, you can also brush the cooled crust with a thin layer of beaten egg white and bake it for an additional 2 minutes to seal it. This creates a barrier that keeps the moisture from the apple crumble cheesecake filling from seeping in.
ank-math-faq-item">
Can you make apple crumble cheesecake ahead of time?
Yes, apple crumble cheesecake is an excellent make-ahead dessert. You can prepare the entire cheesecake and store it, covered, in the refrigerator for up to 3 days. For the best texture and flavor, add the fresh apple crumble topping just before serving to maintain its delightful crunch.
What kind of apples are best for apple crumble cheesecake?
Firm, tart apples that hold their shape when baked are ideal. Granny Smith apples are the top choice for their bright, tangy flavor that balances the sweetness of the cheesecake and crumble. You can also mix in a sweeter, firm variety like Honeycrisp or Pink Lady for a more complex apple flavor in your dessert.
Do you serve apple crumble cheesecake warm or cold?
This dessert is best served slightly chilled or at room temperature. Serving it straight from the refrigerator can mute the flavors, so let it sit out for about 20-30 minutes before slicing. The contrast between the cool, creamy cheesecake and the warm, spiced apple crumble topping is absolutely heavenly.
div>
Easy Croissant Breakfast Sandwich Casserole
Introduction
Imagine a lazy Sunday morning where the most difficult decision you face is whether to pour another cup of coffee. Now, picture a warm, inviting aroma filling your kitchen, promising a breakfast that feels both decadent and effortless. This is the magic of a Croissant Breakfast Sandwich Casserole. It transforms the classic handheld favorite into a spectacular, shareable feast that guarantees happy faces around your table. Furthermore, it solves the biggest brunch dilemma: how to feed a crowd without being stuck at the stove.
A Croissant Breakfast Sandwich Casserole brilliantly deconstructs everything you love about a classic breakfast sandwich. Instead of assembling individual servings, you layer buttery, flaky croissants with savory breakfast staples like eggs, cheese, and your choice of protein. The entire dish bakes into a golden, puffed-up masterpiece that is simultaneously rich, satisfying, and incredibly easy to serve. This recipe matters because it embodies the perfect balance of indulgence and convenience. It feels special enough for holidays and celebratory brunches, yet its make-ahead nature makes it a practical solution for busy weekends. Moreover, it cleverly utilizes simple ingredients to create a truly impressive result. This approach to cooking aligns perfectly with our blog’s philosophy that fantastic food should bring people together without causing stress. For those who adore the classic flavors in a simpler form, our Classic Breakfast Sandwich remains a timeless option. This casserole, however, takes that concept to a whole new level of crowd-pleasing grandeur. It is the ultimate centerpiece for any gathering, ensuring you spend more time with your guests and less time fussing over the meal. The beauty of this Croissant Breakfast Sandwich Casserole lies in its versatility; you can easily customize it with different cheeses, vegetables, or meats to suit any palate. Consequently, it has become a requested favorite among my friends and family for every occasion. If you are looking for another incredible make-ahead breakfast idea, you must try our Overnight French Toast Casserole, which offers a similarly sweet and convenient solution.
Why I Love This Recipe
I genuinely love this Croissant Breakfast Sandwich Casserole because it creates a core memory around the breakfast table. It was the dish I nervously made for my in-laws during their first visit to our home, and their delighted reactions instantly eased all my anxiety. Now, it is our non-negotiable Christmas morning tradition. The process of layering the ingredients feels therapeutic, and the triumphant moment when I pull the golden, bubbling dish from the oven never gets old. It represents more than just a meal; it symbolizes warmth, togetherness, and the joy of sharing something made with love.
Health and Nutrition
Why it’s good for your body
This Croissant Breakfast Sandwich Casserole packs a powerful nutritional punch to start your day. For instance, the eggs provide a complete source of high-quality protein, which supports muscle repair and keeps you feeling full. Additionally, they deliver essential nutrients like choline for brain health.
Furthermore, the cheesy goodness contributes a significant amount of calcium for strong bones. Meanwhile, you can easily incorporate vegetables like spinach or bell peppers for a boost of vitamins and fiber. Consequently, this dish becomes a more balanced meal that supports digestion.
Moreover, the croissants offer carbohydrates that deliver immediate energy for your morning tasks. Ultimately, this Croissant Breakfast Sandwich Casserole combines macronutrients and micronutrients in one delicious package. Therefore, you get a meal that truly satisfies your body’s needs from the inside out.
How it fits in a healthy lifestyle
This casserole fits beautifully into a balanced approach to eating. You can absolutely enjoy richer dishes like this as part of a varied diet, especially when you pair it with a light salad or fresh fruit for lunch. It’s a fantastic make-ahead option for busy families, ensuring a wholesome, home-cooked breakfast is always within reach even on the most chaotic mornings.
For those focusing on specific goals, you can easily tailor the ingredients. Simply use whole-grain croissants for extra fiber or load it up with more veggies. If you’re exploring other make-ahead breakfast ideas that support a healthy routine, check out our favorite overnight oats recipes. And for more inspiration on building a nutritious morning meal plan, our guide on healthy breakfast meal prep is a great resource.
A decadent breakfast casserole featuring flaky croissants layered with eggs, cheese, bacon, and sausage for the ultimate morning comfort food.
Ingredients
Scale
For the Crust:
6 large croissants, torn into chunks
8 large eggs
1 cup whole milk
1/2 cup heavy cream
1 teaspoon Dijon mustard
1/2 teaspoon garlic powder
1/4 teaspoon black pepper
6 slices cooked bacon, crumbled
1/2 pound breakfast sausage, cooked and crumbled
1 1/2 cups shredded cheddar cheese
1/2 cup shredded mozzarella cheese
2 green onions, sliced
Instructions
1. Prepare the Crust:
Preheat oven to 350°F (175°C). Grease a 9×13 inch baking dish.
Arrange croissant pieces evenly in the prepared baking dish. Sprinkle bacon, sausage, and 1 cup of cheddar cheese over the croissants.
In a large bowl, whisk together eggs, milk, cream, Dijon mustard, garlic powder, and black pepper until well combined.
Pour the egg mixture evenly over the croissant layers. Press down gently to ensure all croissant pieces are soaked.
Top with remaining 1/2 cup cheddar cheese and mozzarella cheese.
Bake for 35-40 minutes until eggs are set and top is golden brown. Let stand 5 minutes before serving. Garnish with green onions.
Notes
You can customize the seasonings to taste.
s-dish">How to Prepare This Dish
Steps and time-saving tips
First, grab a large mixing bowl and whisk your eggs with the milk or cream until they are completely smooth and uniform. This step is crucial for a custardy, not eggy, texture in your final Croissant Breakfast Sandwich Casserole. Next, generously season this mixture with salt, pepper, and a pinch of your favorite herbs. Meanwhile, use your hands to tear the croissants into generous, bite-sized chunks. Don’t worry about making them perfect; rustic pieces create wonderful texture. Now, layer half of these buttery pieces into your greased baking dish. Then, evenly distribute your cooked breakfast meat and a good handful of cheese over the top. Scatter the remaining croissant chunks over this cheesy layer. Finally, slowly and evenly pour your egg custard over the entire assembly, making sure every piece gets a little love. Gently press everything down with a spatula to help the bread soak up that delicious liquid. For the best results, cover the dish and let it chill in the refrigerator for at least thirty minutes, or even overnight. This rest period allows the bread to fully absorb the custard, guaranteeing a melt-in-your-mouth experience. When you are ready, bake it until the top is golden brown and the center is perfectly set. Let it cool for just a few minutes before serving.
Mistakes I’ve made and learned from
I have absolutely learned the hard way that skipping the soak is a recipe for disappointment. I once rushed my Croissant Breakfast Sandwich Casserole straight into the oven, and the result was a dry top layer with a weirdly soggy bottom. Now, I never skip that crucial chilling time; it makes all the difference between good and great. Another classic error of mine was overloading the dish with too many fillings. I wanted everything in there, but the extra weight prevented the custard from cooking through evenly, leaving me with a sadly undercooked center. I finally found the perfect balance by checking out my guide on perfect breakfast casserole ratios. And if you are wondering about the best cheese to use that melts beautifully without making things greasy, my experiments are all detailed in this post on selecting cheese for breakfast casseroles. Trust me, learning from my mess-ups will save your brunch!
n-and-variations">Cultural Connection and Variations
Where this recipe comes from
We can trace the roots of this dish to a beautiful culinary crossroads. Essentially, it marries the flaky, buttery elegance of the French croissant with the hearty, feed-a-crowd spirit of an American breakfast casserole. My own family, for instance, always craved something special for holiday mornings. We wanted more than cold cereal but less fuss than cooking individual plates of eggs and bacon for a dozen relatives. Consequently, someone brilliantly decided to deconstruct our favorite breakfast sandwiches and bake them all together. The result was pure magic and a new tradition was born.
Different regions put their own spin on the concept, however. In the South, you might find a version with spicy andouille sausage and a generous pinch of cayenne pepper. Meanwhile, a West Coast adaptation could feature fresh spinach, sun-dried tomatoes, and goat cheese. Across the pond in England, they might incorporate back bacon and brown sauce right into the egg mixture. Ultimately, the beauty of a Croissant Breakfast Sandwich Casserole lies in its incredible flexibility. You can truly make it your own.
How it fits in today’s cooking
This casserole absolutely thrives in our modern cooking landscape. It perfectly solves the problem of feeding a brunch crowd without any last-minute stress. Furthermore, it elegantly bridges the gap between casual family breakfasts and special occasion feasts. Busy home cooks especially appreciate that they can assemble the entire Croissant Breakfast Sandwich Casserole the night before. Then, they simply pop it in the oven the next morning.
Today’s adaptati
ons often focus on dietary preferences and fresh, global flavors. For example, many now create a stunning vegetarian breakfast casserole by loading it with mushrooms, peppers, and plant-based sausage. Others might draw inspiration from our guide to the best breakfast casserole combinations for new ideas. Ultimately, this dish remains a beloved centerpiece because it delivers maximum comfort and flavor with minimal effort, fitting seamlessly into our fast-paced lives while still feeling indulgent.
Taste and Texture
What makes it delicious
This Croissant Breakfast Sandwich Casserole delivers a truly decadent experience. First, you smell the buttery, toasted croissants baking with savory sausage and sharp cheese. Then, you get a forkful of soft, egg-soaked bread that yields with a satisfying, custardy richness. Meanwhile, the crispy edges provide a delightful crunch against the creamy interior. Consequently, every single bite bursts with savory, salty, and cheesy notes, making it an unforgettable breakfast. Ultimately, the magic of this Croissant Breakfast Sandwich Casserole lies in its perfect balance of luxurious textures and deep, comforting flavors.
Boosting the flavor
For an even more incredible dish, consider a few simple tweaks. Immediately amp up the savory depth by swapping regular breakfast sausage for a spicy chorizo. Alternatively, stir a tablespoon of Dijon mustard or a dash of hot sauce into the egg mixture for a sharp, peppery kick. Furthermore, a drizzle of our creamy sriracha sauce right before serving adds a cool, tangy heat that cuts through the richness. Finally, top your finished casserole with fresh chopped chives or a handful of peppery arugula for a bright, fresh contrast. For a complete meal, serve it alongside our perfectly seasoned crispy breakfast potatoes.
Always use day-old croissants for your Croissant Breakfast Sandwich Casserole because they absorb the custard better without becoming soggy. Furthermore, thoroughly whisk your eggs and milk until the mixture is completely smooth and uniform. For the best flavor, let the assembled casserole rest in the refrigerator for at least thirty minutes before baking. Consequently, this allows the bread to fully soak up the custard. Finally, always check for doneness by ensuring the center is fully set and not jiggly.
Mistakes to avoid
Avoid using croissants that are too fresh or soft, as they can turn mushy in the bake. Instead, opt for slightly stale ones that hold their structure. Additionally, do not skip the resting step before baking your Croissant Breakfast Sandwich Casserole; otherwise, you risk a dry, uneven texture. Many bakers also forget to properly grease their baking dish, which leads to difficult serving. For a foolproof guide on prepping any pan, see our tips on how to grease a pan. Moreover, be careful not to overbake the casserole, as this is the primary cause of a rubbery egg texture. If you are unsure about your oven’s accuracy, our article on oven temperature calibration can help you achieve perfect results every time.
g-suggestions">Serving and Pairing Suggestions
How to serve this dish
Immediately present your Croissant Breakfast Sandwich Casserole straight from the oven in its baking dish for a wonderfully rustic and inviting family-style meal. For individual servings, however, use a large spoon to carefully lift out each portion, ensuring you get all the cheesy, eggy layers. Furthermore, a final flourish of fresh, chopped chives or a sprinkle of vibrant paprika just before serving adds a pop of color and a hint of freshness that beautifully contrasts the rich flavors. This stunning Croissant Breakfast Sandwich Casserole truly shines as the centerpiece of a holiday brunch or a special weekend gathering, effortlessly feeding a crowd with minimal fuss. Finally, remember to let it rest for about ten minutes after baking; this crucial step allows everything to set perfectly for clean slices.
What goes well with it
For a truly balanced brunch spread, start by pairing this rich casserole with something light and refreshing. A simple, crisp arugula salad with a lemon vinaigrette, for instance, cuts through the decadence beautifully. Additionally, a side of fresh fruit salad always complements the savory notes of your Croissant Breakfast Sandwich Casserole. If you adore morning sweets alongside your savories, you must try our incredibly popular Easy French Toast Casserole; it makes for an unforgettable duo. For your beverage, a classic mimosa or a cold glass of orange juice provides the necessary acidity to cleanse the palate between each delicious bite. Moreover, a warm cup of coffee is an essential pairing, but for a real treat, our creamy Homemade Vanilla Latte recipe elevates the entire experience.
math-faq-block">
Can you make croissant breakfast casserole the night before?
Absolutely! This Croissant Breakfast Sandwich Casserole is an excellent make-ahead dish. Simply assemble the entire casserole, cover it tightly with plastic wrap or foil, and refrigerate it overnight. In the morning, let it sit at room temperature for about 20-30 minutes before baking as directed.
What is breakfast casserole made of?
A breakfast casserole typically consists of a starchy base, protein, cheese, and a custard-like egg mixture. For this specific Croissant Breakfast Sandwich Casserole, the base is buttery croissants, layered with breakfast sausage or bacon, eggs, and cheese, all bound together with a creamy egg and milk mixture.
How do you keep croissants from getting soggy in casserole?
The key is to use slightly stale or day-old croissants, as they are less moist and will absorb the egg mixture without turning to mush. Toasting the cubed croissants lightly in the oven for 5-10 minutes before assembling your Croissant Breakfast Sandwich Casserole can also create a barrier that helps them stay fluffy.
ank-math-faq-item">
What to serve with breakfast casserole?
This rich and savory Croissant Breakfast Sandwich Casserole pairs beautifully with lighter, fresh sides. Consider serving it with a simple fruit salad, a green salad with a vinaigrette, or roasted breakfast potatoes for a heartier meal. A side of fresh orange juice or coffee completes the perfect brunch spread.
Best Crock Pot Beef Stew Recipe
Introduction
Is there anything more comforting than walking into a home filled with the incredible aroma of a slow-simmered meal? Honestly, after a long, hectic day, that savory scent feels like a warm hug. It promises a hearty, satisfying dinner that soothes the soul without any last-minute fuss. This incredible Crock Pot Beef Stew delivers exactly that kind of effortless comfort. It transforms simple, humble ingredients into a deeply flavorful and tender masterpiece with minimal effort on your part.
Crock Pot Beef Stew is the ultimate set-it-and-forget-it meal, a true hero for busy weeknights and cozy weekends alike. This classic dish features chunks of beef that become incredibly tender through hours of low, slow cooking in a rich, savory broth. Furthermore, hearty vegetables like potatoes, carrots, and celery soften perfectly, absorbing all the delicious flavors from the herbs and meat. This cooking method not only maximizes taste but also simplifies your entire day. You simply prepare the ingredients in the morning, and your slow cooker handles the rest, gifting you with a complete, home-cooked dinner. This recipe matters because it provides genuine nourishment and convenience without sacrificing an ounce of flavor. It fits our blog’s mission perfectly by offering a reliable, family-friendly dish that empowers anyone to create a memorable meal. For those who adore this hands-off approach, our guide to slow cooker pork chops offers another fantastic option for easy dinners. Ultimately, a great Crock Pot Beef Stew represents more than just food. It embodies warmth, care, and the simple joy of gathering around a table to share something made with love, much like the tradition behind a perfect classic meat lasagna.
Why I Love This Recipe
This Crock Pot Beef Stew recipe holds a special place in my heart because it was my grandmother’s go-to solution for feeding our large family during hectic holidays. I vividly remember the feeling of coming in from the cold to see her slow cooker bubbling away, the steam fogging up the kitchen window. She taught me that the best meals are not about complexity but about patience and love. Now, whenever I make it, that same sense of warmth and anticipation fills my own home. It consistently delivers rich, deep flavor and fall-apart tender beef every single time, creating its own wonderful memories around my table.
Health and Nutrition
Why it’s good for your body
Ultimately, a bowl of Crock Pot Beef Stew delivers a powerful nutritional punch. First, the lean beef provides a fantastic source of high-quality protein, which your body needs to build muscle and stay strong. Furthermore, this protein also helps you feel full and satisfied for hours, naturally curbing the urge for unhealthy snacking.
Meanwhile, the slow cooking process beautifully melds flavors while preserving nutrients from the colorful vegetables. As a result, you get a significant dose of vitamins A and C from the carrots and celery, which support your immune system and vision. Additionally, potatoes contribute valuable potassium, an essential mineral for maintaining healthy blood pressure.
Moreover, the collagen from the beef bones and connective tissues breaks down into gelatin during the long, gentle cook. Consequently, this supports joint health and promotes a healthy gut lining. Therefore, enjoying Crock Pot Beef Stew does more than just warm you up; it actively fuels your body with essential, wholesome goodness from the inside out.
How it fits in a healthy lifestyle
This stew fits perfectly into a balanced eating plan. It naturally aligns with a high-protein diet, giving your metabolism a solid boost and aiding in muscle recovery after a workout. For anyone following a gluten-free lifestyle, this recipe is a safe and delicious option, especially when you thicken it with a bit of cornstarch instead of flour.
Preparing a big batch of Crock Pot Beef Stew on a Sunday sets you up for a successful week of healthy eating. You can easily pack it for lunch, knowing you have a hearty, home-cooked meal ready to go. This kind of planning is a cornerstone of maintaining good habits. For more inspiration on building a nutritious weekly menu, check out our guide on easy meal prep ideas. The slow cooker does most of the work for you, making it simple to avoid less healthy convenience foods. If you love how hands-off this method is, you will definitely want to explore our complete list of favorite set-it-and-forget-it slow cooker recipes for more stress-free dinners.
A hearty and comforting beef stew slow-cooked to perfection with tender vegetables and rich flavors.
Ingredients
Scale
For the Crust:
2 lbs beef stew meat, cubed
4 cups beef broth
4 large carrots, sliced
3 potatoes, cubed
1 onion, chopped
2 cloves garlic, minced
1 cup frozen peas
2 tbsp tomato paste
1 tsp thyme
1 tsp rosemary
Salt and pepper to taste
2 tbsp flour
Instructions
1. Prepare the Crust:
Place beef, carrots, potatoes, onion, and garlic in the crock pot.
In a bowl, whisk together beef broth, tomato paste, thyme, rosemary, salt, and pepper. Pour over ingredients in crock pot.
Cover and cook on low for 7-8 hours or high for 4-5 hours, until beef is tender.
In the last 30 minutes, stir in frozen peas.
Mix flour with 2 tbsp water to create a slurry, stir into stew to thicken. Cook for additional 30 minutes.
Adjust seasoning if needed and serve hot.
Notes
You can customize the seasonings to taste.
s-dish">How to Prepare This Dish
Steps and time-saving tips
First, gather all your ingredients for the Crock Pot Beef Stew. This simple prep step, called mise en place, saves you so much time and stress later. Next, pat your beef chuck cubes completely dry with paper towels; this is the secret to getting a beautiful, brown sear. Then, heat a tablespoon of oil in a large skillet over medium-high heat. Now, sear the beef in batches, making sure not to crowd the pan. After that, transfer that beautifully browned meat directly into your slow cooker. Immediately, deglaze the hot skillet with a bit of your beef broth, scraping up all those flavorful browned bits, and pour this liquid gold over the meat.
Next, simply add your chopped onions, carrots, celery, and potatoes to the Crock Pot. Furthermore, sprinkle the flour and all your dried herbs right over the top. Finally, pour in the remaining broth and your tomato paste and Worcestershire sauce. Now, just give everything a good stir to combine, place the lid on securely, and let the magic happen. For the best Crock Pot Beef Stew, cook on low for 7-8 hours or on high for 3-4 hours. About 30 minutes before serving, stir in your frozen peas for a pop of color and freshness. Ultimately, this easy process delivers a deeply flavorful and comforting meal with minimal active effort.
Mistakes I’ve made and learned from
I used to think skipping the sear on the beef for my Crock Pot Beef Stew was a smart shortcut. Unfortunately, I learned the hard way that this step is non-negotiable for building a rich, deep flavor foundation; the stew always tasted bland and boiled without it. Another classic blunder was adding my potatoes and carrots at the very beginning. They would turn into complete mush after eight hours, which taught me that heartier root vegetables need that long cooking time, but if you prefer some texture, add them halfway through. I also once made the grave error of lifting the lid to stir and check on it constantly, which let out all the precious heat and drastically increased the cooking time. Now I trust the process, keep the lid on, and use the timer. For more on choosing the right cuts for long cooking, my guide on selecting beef for stew was a game-changer. And if you’re worried about timing, my tips for perfect vegetable chop ensure everything cooks evenly.
Every culture, frankly, has its own version of beef stew. The French slow-cook theirs with red wine for a rich Boeuf Bourguignon. Meanwhile, the Hungarians load theirs with paprika for a vibrant goulash. My own family’s version of Crock Pot Beef Stew, however, tells a simpler story of Midwestern practicality. My grandmother would start it in the morning before heading out to help on the farm. Consequently, the house would smell incredible by supper time. She used whatever root vegetables survived the winter in the cellar—potatoes, carrots, and sometimes parsnips. Her secret was a generous spoonful of Worcestershire sauce for a deep, savory kick. This humble Crock Pot Beef Stew wasn’t fancy, but it meant everyone ate a hot meal together after a long, cold day. It was a pot of comfort that waited patiently for you.
How it fits in today’s cooking
This classic dish absolutely thrives in our modern kitchens. For instance, busy families love it for its set-it-and-forget-it nature. Furthermore, it remains a cornerstone of cozy seasonal eating, especially when paired with a side that soaks up all that delicious gravy. Many cooks now adapt the recipe to fit dietary needs, swapping regular flour for a gluten-free thickener or adding more vegetables. It perfectly fits into a routine of make-ahead freezer meals, providing a comforting dinner on a hectic weeknight. You can even prepare a fantastic dessert like a simple cinnamon roll cake while the stew simmers away. Ultimately, a warm bowl of this stew feels like a hug. It’s the ideal meal to come home to after enjoying some fun fall activities for families, warming you up from the inside out.
>Taste and Texture
What makes it delicious
This Crock Pot Beef Stew delivers a deeply savory and soul-warming experience. Tender chunks of beef simply melt in your mouth while the carrots and potatoes soak up the rich, herb-infused broth. Ultimately, the slow cooking process coaxes out a remarkable sweetness from the onions and tomatoes, which perfectly balances the hearty umami base. Each spoonful of this Crock Pot Beef Stew feels like a comforting hug, with its thick, velvety texture and an aroma that will fill your entire home with anticipation.
Boosting the flavor
For an instant flavor boost, stir in a tablespoon of tomato paste or a splash of Worcestershire sauce at the end of cooking. Additionally, a sprinkle of fresh herbs like rosemary or thyme right before serving introduces a bright, fragrant note that cuts through the richness. If you want to explore more ways to build a foundational flavor, consider learning about how to make a roux to thicken your stew. Furthermore, a dollop of our easy herb compound butter melting on top just before serving adds a luxurious, creamy finish that elevates the entire dish beautifully.
Tips for Success
Best practices for results
Always sear your beef cubes before adding them to the slow cooker because this crucial step builds a rich, deep flavor foundation for your Crock Pot Beef Stew. Furthermore, cut all your vegetables into large, uniform chunks so they cook evenly and hold their texture. Use a good quality beef broth for the best results, and remember to layer your ingredients properly with the meat on the bottom. Finally, resist the urge to stir your stew too often, as lifting the lid releases heat and significantly increases the cooking time.
Mistakes to avoid
Avoid adding dairy too early; for instance, stirring in sour cream at the beginning will cause it to curdle. Instead, always add any dairy during the last 30 minutes of cooking. Furthermore, do not overlook the importance of properly thickening your stew at the end. You can create a smooth slurry with cornstarch and cold water, which you then whisk into the hot liquid. For more guidance on getting the perfect consistency for all your dishes, explore our guide on how to thicken soups and stews. Another common error is using the wrong cut of meat, as lean cuts will become tough and dry. Always choose a well-marbled, tough cut like chuck roast that becomes incredibly tender with long, slow cooking. For a deeper dive into selecting the perfect protein, check out our article on the best beef cuts for stew.
Serving and Pairing Suggestions
How to serve this dish
Ladle your Crock Pot Beef Stew into deep, pre-warmed bowls to keep it hot longer. For a rustic, inviting look, serve it right in the Crock Pot on a trivet for a family style dinner. Top each serving with a bright, fresh garnish like chopped parsley or a sprinkle of chives. This simple touch adds a pop of color and a burst of fresh flavor. Furthermore, a holiday gathering or a casual weeknight meal both become special occasions with this hearty centerpiece.
h-it">What goes well with it
For a classic pairing, you absolutely must serve a slice of crusty bread on the side. A thick slice of our easy No Knead Bread perfectly soaks up the rich, savory broth of your Crock Pot Beef Stew. Alternatively, a simple side salad offers a crisp, refreshing contrast. For instance, our popular Lemon Vinaigrette Salad provides a bright, tangy counterpoint to the stew’s deep, comforting flavors. Finally, a robust red wine like a Cabernet Sauvignon beautifully complements the tender beef and vegetables.
How long does it take to cook beef stew in a crock pot on low?
For the most tender and flavorful results, cook your Crock Pot Beef Stew on the low setting for 7 to 8 hours. This slow cooking time allows the tough cuts of beef to break down completely and the flavors to meld together perfectly. Cooking on high is faster, but low and slow is the secret to the best Crock Pot Beef Stew.
ank-math-faq-item">
Do you have to brown beef before slow cooking?
While not strictly mandatory, browning the beef first is highly recommended for a deeper, richer flavor. Searing the meat creates a flavorful crust through the Maillard reaction, which adds a complex savory note to the entire dish. Skipping this step can result in a Crock Pot Beef Stew that tastes good but lacks the deep, caramelized flavor foundation.
What is the best cut of beef to use for beef stew in a crock pot?
The best cuts are tough, marbled, and collagen-rich meats that become incredibly tender with long, slow cooking. Chuck roast is the top choice for Crock Pot Beef Stew because it’s well-marbled and breaks down beautifully. Other excellent options include beef brisket, round roast, or bottom round.
Why is my crock pot beef stew watery?
A watery stew is often caused by vegetables releasing too much liquid or a lack of thickening agents. To fix it, create a slurry by mixing one or two tablespoons of cornstarch with an equal amount of cold water and stir it into the stew during the last 30 minutes of cooking. Leaving the lid slightly ajar for the final hour can also help excess moisture evaporate and thicken your Crock Pot Beef Stew.
div>
Easy One Pot Chicken and Mushroom Orzo
Introduction
Are you ever just completely done with the day? You know the feeling. You crave something deeply comforting and delicious, but the thought of a mountain of dishes after cooking completely kills your motivation. I have been there more times than I can count. Thankfully, this incredible One Pot Chicken and Mushroom Orzo recipe swoops in to save the day. It delivers the rich, savory flavor of a slow-simmered meal without any of the fuss. Ultimately, it is the ultimate weeknight hero that feels like a warm hug in a bowl.
So what exactly is this magical dish? One Pot Chicken and Mushroom Orzo is a creamy, dreamy pasta dinner that you cook entirely in a single pot or Dutch oven. We start by searing juicy chicken thighs to golden perfection. Next, we sauté earthy mushrooms and aromatics in those delicious browned bits left behind. Then, we toast the orzo pasta briefly before simmering everything together in a rich, savory broth. The starches from the orzo release naturally, creating a luxuriously creamy sauce without any heavy cream. This cooking method is a total game-changer for busy home cooks because it maximizes flavor while minimizing cleanup. Furthermore, this recipe matters because it proves that a truly gourmet-tasting meal can be both accessible and incredibly simple to execute. It fits the ethos of our blog perfectly, as we always strive to share recipes that are as practical as they are impressive. For instance, if you love this streamlined approach, you will adore our classic Creamy Tuscan Chicken, which follows a similar, fuss-free principle. This One Pot Chicken and Mushroom Orzo is the epitome of comfort food that does not compromise on taste or your valuable time. It is a complete, balanced meal that brings everyone to the table with zero stress.
Why I Love This Recipe
This recipe holds a special place in my heart because it was my go-to dinner during a particularly chaotic period. I was juggling a demanding new job and often arrived home feeling drained. This One Pot Chicken and Mushroom Orzo became my reliable sanctuary. The entire process, from the sizzle of the chicken to the gentle simmer of the broth, felt therapeutic. Moreover, the incredible aroma that fills the kitchen is pure magic and never fails to bring my family wandering in, asking when dinner will be ready. It reminds me that the simplest meals, like our favorite Lemon Garlic Butter Salmon, often create the most cherished moments around the table. This dish is my definition of reliable, soul-satisfying comfort.
Health and Nutrition
Why it’s good for your body
This One Pot Chicken and Mushroom Orzo delivers a powerful nutritional punch in every single bite. First, lean chicken breast provides a fantastic source of high-quality protein, which actively supports muscle repair and keeps you feeling full and satisfied for hours. Furthermore, the inclusion of cremini mushrooms adds a hearty, earthy flavor and also contributes essential nutrients like B vitamins and selenium, which are crucial for energy production and a healthy immune system.
Moreover, the dish cleverly incorporates orzo, a pasta that offers comforting carbohydrates for sustainable energy. Consequently, you avoid the dreaded afternoon slump that often follows a heavy, processed meal. Additionally, the simple sauce, often built from broth and a touch of dairy, melds everything together without relying on excessive amounts of heavy cream or butter. Ultimately, this One Pot Chicken and Mushroom Orzo proves that wholesome ingredients can create a deeply flavorful and incredibly nourishing meal for your entire family.
How it fits in a healthy lifestyle
This recipe fits beautifully into a balanced eating plan. It offers a complete meal with protein, carbohydrates, and vegetables all cooked together, which makes portion control and clean-up a breeze on busy weeknights. For those focused on macronutrients, you can easily adjust the chicken-to-orzo ratio to align with your specific high-protein goals.
If you are exploring more wholesome, comfort-food style dinners, our Creamy Tuscan Chicken is another fantastic option that utilizes similar principles of lean protein and vibrant vegetables. And for nights when you need something even lighter, consider pairing this dish with a simple Easy Cucumber Tomato Salad to add a fresh, crunchy element and extra vitamins to your plate.
A creamy, comforting one-pot meal featuring tender chicken, earthy mushrooms, and orzo pasta cooked in a rich broth.
Ingredients
Scale
For the Crust:
1 lb boneless, skinless chicken thighs, cubed
8 oz cremini mushrooms, sliced
1 cup orzo pasta
1 small onion, diced
2 cloves garlic, minced
3 cups chicken broth
1/2 cup heavy cream
2 tbsp olive oil
1 tsp dried thyme
Salt and pepper to taste
1/4 cup grated Parmesan cheese
Fresh parsley for garnish
Instructions
1. Prepare the Crust:
Heat olive oil in a large skillet over medium-high heat. Season chicken with salt, pepper, and thyme, then brown for 5-6 minutes. Remove and set aside.
In the same skillet, add onions and mushrooms. Cook until softened, about 5 minutes. Add garlic and cook for 1 minute until fragrant.
Stir in orzo, then pour in chicken broth. Bring to a boil, reduce heat to low, cover, and simmer for 10 minutes.
Return chicken to the skillet. Stir in heavy cream and Parmesan cheese. Cook for another 5 minutes until creamy and heated through. Garnish with parsley before serving.
Notes
You can customize the seasonings to taste.
s-dish">How to Prepare This Dish
Steps and time-saving tips
First, gather all your ingredients near the stove for a seamless cooking flow. Pat your chicken thighs completely dry with paper towels; this step guarantees a beautiful golden sear instead of steaming. Heat your oil in a large, deep skillet or Dutch oven over medium-high heat. Then, carefully place the chicken in the pan skin-side down and resist the urge to move it for a good 5-7 minutes. Meanwhile, you can quickly slice your mushrooms and finely chop the onion. After you achieve that perfect crispiness, flip the chicken and cook for just another 3 minutes before removing it to a plate. Next, toss your mushrooms and onions into that same glorious, flavorful fat. Sauté them until they soften and release their moisture, which takes about 5 minutes. Consequently, this builds an incredible flavor foundation for your One Pot Chicken and Mushroom Orzo.
Now, stir in the orzo and let it toast for one minute until it smells slightly nutty. Immediately pour in your broth and scrape up all those delicious browned bits from the pan bottom. This deglazing step is crucial for maximum taste. Finally, nestle the seared chicken back into the skillet, bring everything to a simmer, then cover and reduce the heat. Let it cook for about 15-18 minutes until the orzo is tender and has absorbed most of the liquid. For a time-saving tip, use pre-sliced mushrooms and pre-minced garlic from the grocery store. Just before serving, stir in a generous handful of fresh parsley and a splash of cream for extra richness. Your incredible One Pot Chicken and Mushroom Orzo is ready to delight everyone with minimal cleanup.
Mistakes I’ve made and learned from
I learned the hard way that not all broths are created equal when making this dish. I once used an extremely salty canned broth and ended up with an inedible, salty One Pot Chicken and Mushroom Orzo. Now, I always taste my broth first or opt for a low-sodium version, which lets me control the final seasoning perfectly. This is a key part of my pantry essentials strategy now. Another classic blunder was lifting the lid too often to check on the orzo, which let all the precious steam escape and resulted in undercooked, crunchy pasta. Trust the process and keep that lid on! Learning these small adjustments transformed my results and is a lesson I apply to all my one pot wonders, ensuring perfectly cooked meals every single time.
My grandmother never followed a recipe for her chicken and mushroom dish. She simply used what her garden and the seasons offered. Consequently, her version of this comfort food changed throughout the year. In the spring, she would toss in fresh morels. Meanwhile, hearty cremini mushrooms anchored her autumn suppers. This rustic approach reflects a broader European tradition, particularly from Italy and Greece, where orzo pasta thickens soups and stews beautifully.
Families across the globe put their own spin on this concept. For instance, an Italian nonna might enrich her pot with a splash of white wine and a finishing touch of Parmesan. Conversely, a Greek cook may add a bright squeeze of lemon and a handful of dill at the very end. This beautiful flexibility makes the ultimate One Pot Chicken and Mushroom Orzo a deeply personal dish. Ultimately, it tells a story of resourcefulness and feeding a family with love from a single pot.
ays-cooking">How it fits in today’s cooking
This classic dish fits our modern lives perfectly. Busy weeknights demand minimal cleanup, and this recipe delivers incredible flavor with just one pot. Furthermore, it provides a wholesome, complete meal that comfortably feeds a crowd. Many home cooks now adapt it for their Instant Pots, slashing the cooking time without sacrificing any of the cozy, creamy goodness.
You can easily make this comforting One Pot Chicken and Mushroom Orzo the star of your weekly meal prep. It reheats wonderfully for lunches. For a lighter take, try using coconut milk and adding a pinch of turmeric. If you need a stunning side, our Roasted Garlic Herb Potatoes pair magnificently. Finally, complete the feast with a simple, fresh Easy Spring Mix Salad. This dish truly proves that timeless comfort food always has a place at our table.
Taste and Texture
What makes it delicious
This One Pot Chicken and Mushroom Orzo delivers a deeply savory and comforting experience. Earthy, umami-rich mushrooms meld with tender chicken and fragrant garlic, creating a robust aroma that fills your kitchen. Each spoonful offers a creamy, risotto-like texture from the orzo, which perfectly soaks up the rich, herb-infused broth. Ultimately, the dish provides a satisfyingly creamy yet hearty mouthfeel that is both elegant and utterly cozy.
r">Boosting the flavor
For an extra flavor kick, consider stirring in a tablespoon of miso paste or a splash of dry white wine with your aromatics. Additionally, a final sprinkle of gremolata or a generous handful of fresh parsley and lemon zest will introduce a bright, fresh contrast. If you want to explore more ways to build a savory base for your dishes, our guide on how to caramelize onions offers fantastic techniques. Furthermore, a simple easy side salad with a sharp vinaigrette makes the perfect crunchy, acidic companion to this creamy meal.
Tips for Success
Best practices for results
Always pat your chicken thighs completely dry with a paper towel before seasoning them; consequently, you will achieve a beautiful golden-brown sear instead of steaming them. Furthermore, make sure you thoroughly sauté the mushrooms until they release all their moisture and turn a deep brown color for the most intense, savory flavor in your One Pot Chicken and Mushroom Orzo. Use a wooden spoon to stir the orzo occasionally while it simmers; this simple step prevents it from sticking to the bottom of your pot and ensures perfectly al dente results every single time.
>Mistakes to avoid
Avoid rushing the initial step of browning the chicken; if you crowd the pan, the meat will steam and not develop the flavorful crust that is essential for a rich broth. Additionally, do not skip toasting the orzo for a minute in the pan drippings before adding your liquid, because this crucial step unlocks its nutty flavor and helps it maintain a perfect texture. Remember to use a low-sodium broth so you can control the final seasoning of your dish; otherwise, you might end up with a One Pot Chicken and Mushroom Orzo that is too salty. For more guidance on getting the most flavor from your ingredients, check out our guide on how to sauté mushrooms perfectly. Finally, always let the finished dish rest for five minutes off the heat before serving, as this allows the orzo to fully absorb the remaining liquid. If your pastas often turn out gummy or sticky, our tips for cooking pasta perfectly will help you master the technique.
Serving and Pairing Suggestions
How to serve this dish
Immediately serve this One Pot Chicken and Mushroom Orzo straight from the skillet for a rustic, family-style presentation. For a more elegant touch, transfer individual portions to shallow bowls. Furthermore, always garnish with a final flourish of fresh, chopped parsley or thyme. This simple step adds a vibrant pop of color and a burst of fresh flavor. Consequently, it transforms the dish into a visual and aromatic delight. This cozy meal truly shines on a busy weeknight, yet it also feels special enough for a casual weekend dinner party.
What goes well with it
First, a crisp, simple side salad provides the perfect textural contrast. Our classic Easy Arugula Salad with a lemon vinaigrette cuts through the richness beautifully. Next, consider a crusty piece of bread to complete the meal. For instance, you can use it to sop up every last bit of the creamy sauce from your One Pot Chicken and Mushroom Orzo. Finally, a glass of chilled white wine, like a Pinot Grigio or Sauvignon Blanc, complements the earthy mushrooms and herbs perfectly. Alternatively, for a non-alcoholic option, our refreshing Cucumber Mint Lemonade offers a cool, cleansing sip between bites.
Can I use a different type of pasta for One Pot Chicken and Mushroom Orzo?
While orzo is recommended for its rice-like shape and ability to absorb flavors beautifully, you can substitute it with other small pasta like ditalini or acini di pepe. Keep in mind that cooking times may vary slightly, so you should adjust the broth amount and check for doneness. The final texture of your One Pot Chicken and Mushroom Orzo dish might be slightly different with a substitution.
What kind of mushrooms are best for this recipe?
Cremini (baby bella) mushrooms are an excellent choice for their rich, earthy flavor that holds up well during cooking. You can also use a mix of cremini and shiitake mushrooms for a more complex umami taste. White button mushrooms will work in a pinch, though their flavor is more mild. Any variety will add a wonderful depth to your One Pot Chicken and Mushroom Orzo.
ank-math-faq-item">
How do I prevent the orzo from becoming mushy?
The key to preventing mushy orzo is to avoid overcooking it and to use the correct liquid-to-pasta ratio. Once you add the broth and orzo, bring it to a simmer and then immediately reduce the heat to low, covering the pot. Let it cook just until the liquid is absorbed and the orzo is al dente, then remove it from the heat to stop the cooking process for the perfect One Pot Chicken and Mushroom Orzo.
Can I make this recipe creamy?
Absolutely! For a creamy version, stir in a splash of heavy cream, half-and-half, or a dollop of cream cheese during the last few minutes of cooking. You can also add a generous handful of freshly grated Parmesan cheese at the end, which will melt into the sauce and create a rich, velvety texture. This simple addition transforms the dish into an extra indulgent One Pot Chicken and Mushroom Orzo.
Best Country Apple Fritter Bread Recipe
Introduction
Is there anything more comforting than the smell of warm apples and cinnamon wafting through your kitchen? Honestly, this aroma instantly transports me to my grandma’s cozy farmhouse every single autumn. Furthermore, it promises something incredibly delicious is moments away from coming out of the oven. Today, we are bringing that exact feeling to your home with our incredible Awesome Country Apple Fritter Bread. This recipe masterfully captures the heartwarming essence of a classic fairground treat but in a simple, foolproof loaf that fills your entire house with an irresistible, welcoming fragrance.
So what exactly is this Awesome Country Apple Fritter Bread? Essentially, it is a supremely moist and tender quick bread that we generously pack with fresh, sweet-tart apple chunks and a heavy dose of cozy cinnamon spice. However, the magic truly happens with a decadent cinnamon-sugar ribbon swirled through the middle and an irresistible brown sugar glaze drizzled over the top while it is still warm. This process creates a stunningly beautiful loaf with pockets of gooey cinnamon and a crackly, sweet crust. Consequently, this recipe matters because it delivers the complex, fried-dough flavor and texture of a perfect apple fritter without any of the fuss or mess of deep frying. Moreover, it fits our blog’s mission perfectly by transforming a beloved indulgence into an achievable, home-baked masterpiece. If you adore our Cinnamon Swirl Banana Bread, you will absolutely fall for this autumnal twist. Ultimately, this bread serves as the ultimate breakfast, snack, or dessert, especially when paired with a hot cup of coffee or tea for the ultimate cozy moment.
Why I Love This Recipe
This Awesome Country Apple Fritter Bread holds a special place in my heart because it is my go-to recipe for creating lasting memories. Every year, as soon as the leaves start to turn, my daughter and I make this loaf together. We have so much fun chopping the apples, creating the sugary swirl, and anxiously waiting for it to bake. The entire experience, from the messy countertops to the incredible smell, feels like a true celebration of the season. Honestly, sharing a warm slice straight from the pan with my family, watching their faces light up with that first bite, is my absolute favorite part of fall. It is more than just a recipe; it is our little tradition that marks the start of all the cozy, joyful moments to come. For another fantastic baking project, try our Classic Pumpkin Muffins next.
Health and Nutrition
Why it’s good for your body
Awesome Country Apple Fritter Bread offers more than just incredible flavor. For instance, the apples provide a solid dose of soluble fiber, which actively supports healthy digestion and helps you feel full. Furthermore, this fiber, specifically pectin, contributes to maintaining healthy cholesterol levels. Consequently, enjoying a slice can be a tasty part of your heart-healthy goals.
Additionally, apples bring essential vitamins like vitamin C to the table, a powerful antioxidant that protects your cells. Meanwhile, cinnamon does more than add warmth; it also possesses anti-inflammatory properties. Therefore, each bite of Awesome Country Apple Fritter Bread delivers a combination of beneficial nutrients. Ultimately, this treat proves that mindful indulgence can absolutely align with your wellness objectives.
Moreover, using whole eggs and milk in the recipe adds high-quality protein and calcium, which are crucial for muscle repair and bone strength. As a result, you get a more nutritionally complete snack compared to many empty-calorie options. Finally, the complex carbohydrates from the apples and flour supply sustained energy, preventing the sharp blood sugar spikes associated with more refined sweets. So, you can truly feel good about serving Awesome Country Apple Fritter Bread to your family.
How it fits in a healthy lifestyle
Awesome Country Apple Fritter Bread fits beautifully into a balanced diet when you enjoy it mindfully. Think of it as a satisfying snack or a special weekend breakfast that brings joy to your routine. Pairing a slice with a source of protein, like a glass of milk or a handful of nuts, can help create a more complete and sustaining meal. This approach helps manage cravings and keeps you energized throughout your morning.
If you are exploring specific dietary needs, you can easily adapt this recipe. For those interested in gluten-free baking, we have a fantastic guide on selecting the best gluten-free flour blends that would work perfectly here. You can also tweak the sugar content to your preference without sacrificing moisture, thanks to the natural sweetness from the apples. Remember, a healthy lifestyle is all about flexibility and finding recipes that you love.
Baking this bread at home puts you in control of the ingredients, allowing you to avoid the excessive preservatives and additives found in many store-bought pastries. For more inspiration on creating wholesome treats that support your goals, check out our tips for easy and healthy baking swaps. This way, you can enjoy the comforting taste of Awesome Country Apple Fritter Bread while confidently staying on track.
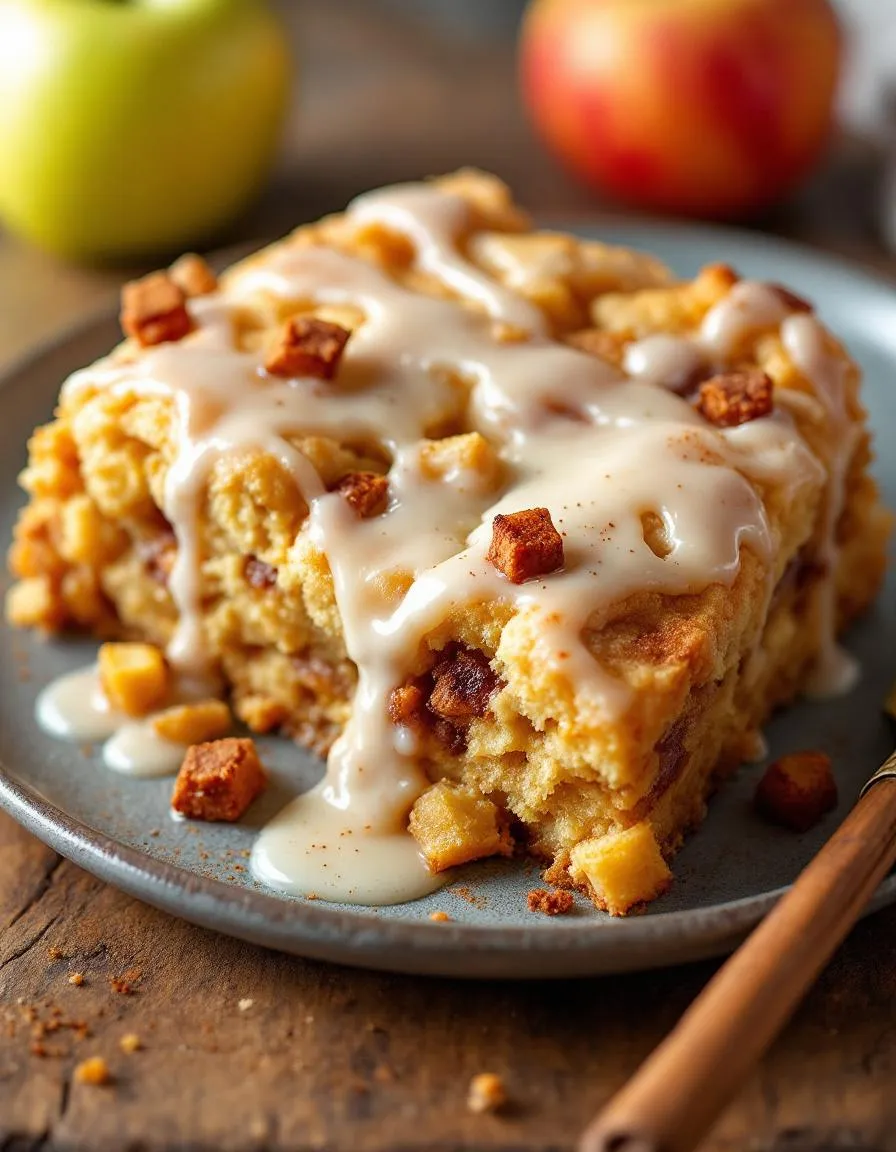
A moist, spiced quick bread swirled with cinnamon-sugar apple chunks and topped with a sweet glaze, reminiscent of classic apple fritters.
Ingredients
Scale
For the Crust:
2 cups all-purpose flour
1 1/2 teaspoons baking powder
1/2 teaspoon salt
1/2 cup unsalted butter, softened
2/3 cup granulated sugar
2 large eggs
1 teaspoon vanilla extract
1/2 cup milk
2 medium apples, peeled and diced
1/3 cup brown sugar
1 tablespoon ground cinnamon
1 cup powdered sugar
2 tablespoons milk or apple cider
Instructions
1. Prepare the Crust:
Preheat oven to 350°F (175°C). Grease a 9×5 inch loaf pan.
In a medium bowl, whisk together flour, baking powder, and salt. In a large bowl, cream butter and granulated sugar until light. Beat in eggs one at a time, then vanilla. Alternately add flour mixture and milk, mixing just until combined.
In a small bowl, toss diced apples with brown sugar and cinnamon. Fold half the apple mixture into the batter. Pour half the batter into the prepared pan. Sprinkle with remaining apples, then top with remaining batter.
Bake for 50-60 minutes, or until a toothpick inserted comes out clean. Cool in pan 10 minutes, then transfer to a wire rack.
Whisk powdered sugar and milk (or cider) until smooth to make glaze. Drizzle over cooled bread before slicing.
Notes
You can customize the seasonings to taste.
How to Prepare This Dish
Steps and time-saving tips
First, preheat your oven and generously grease a loaf pan. This initial step is crucial for ensuring your Awesome Country Apple Fritter Bread releases perfectly later. Next, whisk together all your dry ingredients in one large bowl. In a separate bowl, vigorously mix the wet ingredients until they are completely smooth and well-emulsified. Then, pour the wet mixture into the dry ingredients and gently fold them together. Remember, a few lumps in the batter are perfectly fine; overmixing is the real enemy of a tender crumb. Now, pour half of your batter into the prepared pan. Afterwards, spoon your spiced apple filling evenly over this first layer. Finally, carefully top it all with the remaining batter. Swirl everything gently with a knife for those beautiful marbled streaks. Bake until a tester comes out clean. Meanwhile, whisk the simple glaze. Immediately after pulling the bread from the oven, drizzle that sweet glaze over the top so it soaks in beautifully. Let it cool slightly before slicing. For a fantastic time-saving tip, use a box grater to quickly shred your apples. Alternatively, prepare your apple cinnamon swirl mixture the night before. This way, you can assemble your Awesome Country Apple Fritter Bread in minutes the next morning.
Mistakes I’ve made and learned from
I have definitely learned a few lessons the hard way with this Awesome Country Apple Fritter Bread. Initially, I would impatiently mix the batter until it was completely smooth, which resulted in a tough, dense loaf instead of the light, cake-like texture we all love. Now, I stop folding the moment the flour disappears. Another classic error involved my apples; I used to chop them too large, and they would sink straight to the bottom during baking. Thankfully, I found a solution on my own site about how to keep fruit from sinking in cakes. Tossing them in a little flour first makes all the difference, ensuring they stay suspended throughout the bread. Also, I once made the glaze far too thick and just dumped it all on top, creating an overly sweet shell. For a perfect drizzle that soaks in, your glaze should be thin enough to run off your spoon. If you’re ever unsure about doneness, my guide on testing cake doneness is a lifesaver to prevent under-baking. Trust me, these small adjustments lead to a flawless loaf every single time.
This Awesome Country Apple Fritter Bread recipe feels like a warm hug from my grandmother’s kitchen. However, its roots stretch back much further to the heart of European baking traditions. Essentially, we took the cozy, spiced essence of a classic German apple fritter and transformed it into a simple, no-fuss loaf. This brilliant twist lets you enjoy all that delicious flavor without standing over a pot of hot oil. Consequently, it became a staple for busy farm families who needed a hearty, satisfying treat to start their day.
Different regions, of course, put their own spin on it. For instance, in the American South, bakers often add a handful of pecans and a dash of bourbon to the glaze for a richer, deeper flavor. Meanwhile, in the UK, they might call it a “apple teacake” and serve it with a thick layer of clotted cream. My family, however, always insisted on using the tartest Granny Smith apples we could find. The sharp bite perfectly balanced the sweet cinnamon swirl, making our version of Awesome Country Apple Fritter Bread truly unforgettable.
ays-cooking">How it fits in today’s cooking
This bread absolutely thrives in modern kitchens. It seamlessly fits into our routines, whether as a special weekend project or a quick breakfast solution. Many home cooks now adapt it for dietary needs, easily creating a fantastic vegan apple cake version by using plant-based milk and a flax egg. Furthermore, its comforting aroma and taste make it a star for holiday mornings and autumn gatherings, effortlessly carrying on that tradition of warmth and hospitality.
Its versatility is its greatest strength. You can enjoy a slice with your afternoon coffee, pack it in a lunchbox, or even serve it as a simple dessert. For another fantastic way to use seasonal fruit, try our popular peach cobbler recipe. Ultimately, Awesome Country Apple Fritter Bread remains a beloved classic because it delivers homemade comfort with every single bite, connecting us to the past while fitting perfectly into today’s fast-paced life.
Taste and Texture
What makes it delicious
This Awesome Country Apple Fritter Bread greets you with a warm, cinnamon-spiced aroma that instantly feels like a cozy autumn morning. Each moist, tender slice delivers soft, baked apple pieces that practically melt in your mouth. Furthermore, the generous cinnamon-sugar swirl creates delightful pockets of sweet, gooey caramelization. Meanwhile, the optional vanilla glaze adds a final, creamy sweetness that perfectly complements the soft, spiced crumb. Ultimately, the experience of biting into this Awesome Country Apple Fritter Bread is a perfect harmony of comforting flavors and inviting textures.
r">Boosting the flavor
You can easily amplify this treat with a few creative twists. For instance, try folding a handful of toasted pecans or walnuts into the batter for a delightful crunch and nutty depth. Additionally, a simple caramel drizzle over the top just before serving introduces a rich, buttery flavor that pairs wonderfully with the apples. If you love extra spice, a pinch of cardamom or nutmeg alongside the cinnamon will create a more complex warmth. Consider serving a warm slice alongside a scoop of homemade vanilla ice cream for a truly decadent dessert. Finally, for another fantastic apple recipe, our apple cinnamon roll bake uses similar cozy flavors in a stunning breakfast casserole.
Tips for Success
Best practices for results
First, always use room temperature ingredients for your Awesome Country Apple Fritter Bread because they emulsify much more easily into a smooth, cohesive batter. Consequently, do not overmix after adding the flour; simply stir until the last streaks disappear for a tender crumb. Furthermore, generously grease your loaf pan and consider using parchment paper for foolproof removal every single time. Finally, allow the bread to cool in the pan for at least 15 minutes before transferring it to a wire rack, thereby preventing it from breaking apart.
>Mistakes to avoid
One common error involves packing the flour into the measuring cup, which ultimately adds too much and creates a dense bread. Instead, always spoon and level your flour for the most accurate measurement. Additionally, avoid slicing your apples too far in advance, as they will begin to oxidize and brown; however, a quick toss in lemon juice can prevent this if you must prep them early. Moreover, do not skip the step of tasting your apple cinnamon sugar mixture for seasoning, since apple sweetness can vary. For more guidance on getting measurements perfect, explore our baking conversion charts. Also, ensure your baking powder is fresh for proper rise; otherwise, your Awesome Country Apple Fritter Bread might fall flat, so check out our guide on essential pantry staples for baking to stay prepared.
Serving and Pairing Suggestions
How to serve this dish
Serve your Awesome Country Apple Fritter Bread warm for the ultimate cozy experience. Furthermore, dust the top with a light snowfall of powdered sugar just before presenting it. For a special brunch or holiday gathering, slice it thickly and arrange it on a rustic wooden board. You can also add a simple garnish of thinly sliced apple fanned beside each piece. This beautiful presentation makes your Awesome Country Apple Fritter Bread the undeniable star of the table.
Consider toasting individual slices the next day, consequently reviving that just-baked magic. Finally, a dollop of softly whipped cream transforms it into an effortless dessert.
h-it">What goes well with it
A hot mug of coffee perfectly cuts through the sweetness of this Awesome Country Apple Fritter Bread. Alternatively, a cold glass of milk provides a classic, comforting pairing that everyone loves. For a truly decadent brunch spread, serve it alongside a savory option like our hearty Sausage and Egg Breakfast Casserole.
If you want to lean into the dessert side, a scoop of vanilla bean ice cream melts wonderfully over a warm slice. Moreover, a drizzle of our simple 3-Ingredient Vanilla Glaze adds an extra layer of flavor and a professional bakery-style finish.
math-faq-block">
What is the best type of apple to use for apple fritter bread?
For the best Awesome Country Apple Fritter Bread, use firm, tart apples like Granny Smith or Honeycrisp. These varieties hold their shape during baking and provide a pleasant tangy contrast to the sweet cinnamon swirl and glaze. Avoid very soft apples like Red Delicious, as they can become mushy in the batter.
Can you make apple fritter bread ahead of time?
Absolutely! This Awesome Country Apple Fritter Bread actually tastes even better the next day as the flavors have more time to meld. You can bake it a day in advance, let it cool completely, and store it tightly wrapped at room temperature. The glaze is best added just before serving for optimal texture.
How do you keep apple bread from getting soggy?
The key to preventing a soggy loaf is to properly prepare your apples. Tossing the diced apple pieces in a little of the dry flour mixture helps to absorb excess moisture. Also, ensure your Awesome Country Apple Fritter Bread is baked through by testing with a toothpick; it should come out clean or with just a few moist crumbs attached.
ank-math-faq-item">
Can I freeze apple fritter bread?
Yes, this bread freezes beautifully for up to 3 months. For best results, freeze it without the glaze. Wrap the completely cooled loaf tightly in plastic wrap and then in aluminum foil. Thaw overnight at room temperature and add the simple powdered sugar glaze just before serving your delicious Awesome Country Apple Fritter Bread.