There’s something undeniably comforting about biting into a warm, cheesy sausage ball—crispy on the outside, tender on the inside, and packed with flavor. Whether you’re hosting a game-day party, need a quick appetizer, or simply crave a savory snack, this Cheesy Sausage Balls Recipe delivers every time. Plus, it’s so easy to make that even beginner cooks can whip up a batch with confidence. Let’s dive into why these little bites are a crowd-pleaser and how they’ve earned a permanent spot in my recipe rotation.
Cheesy Sausage Balls are a Southern classic, combining just a handful of ingredients—sausage, cheese, and baking mix—into irresistible bite-sized treats. They’re perfect for potlucks, holiday gatherings, or even as a quick weeknight snack. What makes this recipe stand out is its versatility. You can customize the spices, swap the cheese, or even add a kick of heat with jalapeños. Moreover, they freeze beautifully, so you can always have a batch ready to bake at a moment’s notice. If you love easy, make-ahead appetizers, you’ll also enjoy our Spinach Artichoke Dip or Buffalo Chicken Wings for another crowd-favorite option.
This blog celebrates fuss-free, flavorful recipes that bring people together, and the Cheesy Sausage Balls Recipe fits right in. They’re unpretentious yet utterly delicious, embodying the kind of food that sparks joy and nostalgia. Whether you grew up eating them or are discovering them for the first time, these sausage balls promise to become a staple in your home. Now, let me share why I adore this recipe so much.
Why I Love This Recipe
I’ll never forget the first time I tried Cheesy Sausage Balls at a friend’s holiday party. One bite, and I was hooked. Since then, I’ve made them for countless gatherings, and they always disappear within minutes. What I love most is how they bring people together—kids, grandparents, and everyone in between can’t resist them. They’re also my go-to when I need a last-minute appetizer because they come together in under 30 minutes. Simple, satisfying, and endlessly adaptable, this recipe feels like a warm hug in snack form.
Health and Nutrition
Why it’s good for your body
Cheesy Sausage Balls Recipe packs a flavorful punch while delivering key nutrients. First, the sausage provides a solid dose of protein, which helps build muscle and keeps you full longer. Additionally, the cheese adds calcium for strong bones and a satisfying richness. Together, these ingredients make Cheesy Sausage Balls Recipe a protein-rich snack or appetizer.
Moreover, this recipe includes almond flour, a gluten-free alternative that offers healthy fats and fiber. These nutrients support digestion and steady energy levels. Because of the balanced macronutrients, Cheesy Sausage Balls Recipe can curb cravings without spiking blood sugar. Plus, the savory flavors make it easy to enjoy a satisfying treat without overindulging.
Finally, the dish contains spices like garlic and onion powder, which add antioxidants. These compounds fight inflammation and boost immunity. Whether you serve them at parties or as a quick snack, Cheesy Sausage Balls Recipe delivers both taste and nutrition in every bite.
How it fits in a healthy lifestyle
Cheesy Sausage Balls Recipe fits seamlessly into a balanced diet. If you follow a gluten-free lifestyle, the almond flour base keeps it celiac-friendly. For those focusing on high-protein meals, the sausage and cheese combo makes it a smart choice. Pair it with a fresh salad or roasted veggies for a well-rounded plate.
This recipe also works great for meal prep. Make a batch ahead and store them for quick snacks during busy weeks. If you love flavorful, protein-packed dishes, explore our keto-friendly appetizers for more ideas. For heart-healthy tweaks, try using lean turkey sausage and reduced-fat cheese. You can even bake them instead of frying for a lighter option.
Craving more wholesome recipes? Check out our high-protein snacks collection for inspiration. With simple adjustments, Cheesy Sausage Balls Recipe becomes a versatile part of your healthy eating routine.
Delicious bite-sized sausage and cheese balls perfect for parties or snacks.
Ingredients
Scale
For the Crust:
1 lb ground sausage
2 cups shredded cheddar cheese
1 1/2 cups baking mix (like Bisquick)
1/4 cup grated Parmesan cheese
1/2 teaspoon garlic powder
1/2 teaspoon onion powder
Instructions
1. Prepare the Crust:
Preheat oven to 375°F (190°C) and line a baking sheet with parchment paper.
In a large bowl, combine all ingredients and mix well until fully incorporated.
Shape the mixture into 1-inch balls and place them on the baking sheet.
Bake for 20-25 minutes or until golden brown and cooked through.
Serve warm with dipping sauce if desired.
Notes
You can customize the seasonings to taste.
How to Prepare This Dish
Steps and time-saving tips
Start by preheating your oven to 375°F so it’s ready when you finish mixing the ingredients. Grab a large bowl and combine one pound of ground sausage, two cups of shredded cheddar cheese, and two cups of baking mix. Use your hands to mix everything thoroughly, but don’t overwork the dough—just blend until the ingredients hold together. If the mixture feels too dry, add a splash of milk to soften it. Roll the dough into one-inch balls and place them on a parchment-lined baking sheet, spacing them about an inch apart. Bake for 18-20 minutes until golden brown and crispy on the outside. For extra flavor, brush the tops with melted butter right after they come out of the oven. To save time, mix the dough the night before and refrigerate it overnight, then bake the next day. These cheesy sausage balls taste best warm, so serve them fresh from the oven with a side of marinara or ranch for dipping.
Mistakes I’ve made and learned from
When I first made this cheesy sausage balls recipe, I used cold sausage straight from the fridge, which made the dough crumbly and hard to shape. Now I let the sausage sit at room temperature for 10 minutes before mixing—it blends much smoother. Another mistake? Overbaking. I left them in too long, and they turned dry. A timer is your best friend here. If you’re new to working with baking mix, check out my baking mix guide for tips on getting the right consistency. And if your cheese clumps instead of shredding evenly, my cheese shredding hacks will save you time and frustration. Trust me, learning these small tweaks makes all the difference.
The Cheesy Sausage Balls Recipe has deep roots in Southern comfort food, where families often whip up these bite-sized delights for potlucks, game days, or holiday gatherings. Originally, cooks combined simple pantry staples like sausage, cheese, and biscuit mix to create a crowd-pleasing snack. Over time, the recipe spread beyond the South, with each region adding its own twist. For instance, some Midwest versions swap cheddar for pepper jack, while Texan cooks might toss in jalapeños for heat.
In my family, we’ve always made Cheesy Sausage Balls Recipe during Christmas mornings, pairing them with a spicy mustard dip. My grandma insisted on using sharp cheddar and homemade sausage, claiming it made all the difference. Meanwhile, friends from Louisiana shared their version with Cajun seasoning and a dash of hot sauce. Internationally, you’ll find similar concepts—like British sausage rolls or Italian polpette—but none quite capture the cozy, cheesy charm of this American classic.
ays-cooking">How it fits in today’s cooking
Today, the Cheesy Sausage Balls Recipe remains a go-to for busy home cooks and entertainers alike. Its versatility shines whether you’re serving it at a tailgate, bundling it into meal prep, or even sneaking it onto weeknight dinner menus. Modern twists include gluten-free flour blends, plant-based sausage, or even air-frying for a lighter crunch. Plus, it’s a star at holiday parties, often appearing alongside festive appetizers like spiced nuts or cranberry dip.
What keeps this recipe relevant? Its effortless adaptability. Whether you’re a traditionalist or an experimenter, the Cheesy Sausage Balls Recipe invites creativity. From keto-friendly tweaks to kid-approved mini versions, it’s a dish that evolves without losing its soul. No wonder it’s still a beloved staple in kitchens across the country.
Taste and Texture
What makes it delicious
Cheesy Sausage Balls Recipe delivers a mouthwatering blend of savory, cheesy, and slightly spicy flavors in every bite. The sharp cheddar cheese melts into the sausage, creating a rich, creamy texture with pockets of juicy, seasoned meat. Meanwhile, the biscuit mix adds a tender yet slightly crisp exterior, making each ball irresistible. As they bake, the aroma of garlic, paprika, and melted cheese fills the kitchen, teasing your taste buds before you even take a bite. Whether served warm or at room temperature, Cheesy Sausage Balls Recipe offers a satisfying contrast of soft, gooey centers and golden-brown edges.
r">Boosting the flavor
For an extra kick, swap mild cheddar for pepper jack cheese or add a pinch of cayenne to the mix. Dipping these savory bites in a tangy creamy ranch dressing or spicy homemade BBQ sauce elevates the flavor even further. Alternatively, sprinkle fresh herbs like chives or parsley on top for a bright, fresh finish. Experimenting with different sausage varieties, like spicy Italian or maple-infused, can also add exciting twists to this classic recipe.
Tips for Success
Best practices for results
Always chill the dough for at least 30 minutes before shaping your Cheesy Sausage Balls Recipe. This step prevents spreading and ensures a perfect texture. Additionally, use freshly grated cheese instead of pre-shredded varieties for better melting and flavor. For even baking, space the sausage balls evenly on the tray and rotate the pan halfway through cooking. Finally, let them cool slightly before serving so the cheese sets properly.
>Mistakes to avoid
One common mistake is overmixing the dough, which can make your Cheesy Sausage Balls Recipe dense. Instead, gently combine ingredients until just incorporated. Another error is skipping the parchment paper, leading to sticking or uneven browning. For more baking tips, check out our guide on perfect baking temperatures. Also, avoid using lean sausage, as the fat adds moisture and flavor. If you’re unsure about ingredient ratios, our ingredient substitutions article can help.
Serving and Pairing Suggestions
How to serve this dish
Bring out the best in your Cheesy Sausage Balls Recipe by serving them warm on a rustic wooden board or a colorful platter. For a festive touch, sprinkle fresh parsley or chives on top to add a pop of green. Meanwhile, these bite-sized delights shine at holiday gatherings, game-day parties, or even as a fun brunch appetizer. If you want to impress guests, arrange them around a small bowl of dipping sauce for an inviting, shareable setup. No matter the occasion, the Cheesy Sausage Balls Recipe always steals the spotlight with its golden-brown crust and gooey center.
What goes well with it
Pair your Cheesy Sausage Balls Recipe with a tangy homemade ranch dip or spicy marinara sauce for an extra flavor boost. Alternatively, serve them alongside a crisp, refreshing salad like our Avocado Ranch Salad to balance the richness. For drinks, a chilled glass of sweet tea or a hoppy IPA beer complements the savory notes perfectly. If you’re hosting a brunch, try pairing them with our Blueberry Muffins for a satisfying sweet-and-savory spread. Every bite of the Cheesy Sausage Balls Recipe tastes even better with these thoughtful pairings.
What’s the best cheese to use for Cheesy Sausage Balls?
Sharp cheddar cheese works best for Cheesy Sausage Balls Recipe because it melts well and adds rich flavor. You can also mix in Monterey Jack or pepper jack for extra creaminess or spice. Avoid pre-shredded cheese, as it contains anti-caking agents that affect texture.
Can I make Cheesy Sausage Balls ahead of time?
Yes! Prepare the Cheesy Sausage Balls Recipe mixture and shape the balls, then refrigerate for up to 24 hours before baking. For longer storage, freeze unbaked balls on a tray, then transfer to a bag—bake straight from frozen, adding a few extra minutes.
ank-math-faq-item">
Why are my sausage balls dry?
Dry Cheesy Sausage Balls often result from overmixing or using lean sausage. Stick to regular pork sausage (not “low-fat”) and handle the dough gently. Adding an extra tablespoon of milk or grated cheese can also improve moisture.
What dipping sauce goes well with Cheesy Sausage Balls?
Ranch dressing is a classic pairing for Cheesy Sausage Balls Recipe, but spicy mayo, honey mustard, or marinara also work great. For a twist, try a jalapeño-infused cheese dip to complement the savory flavors.
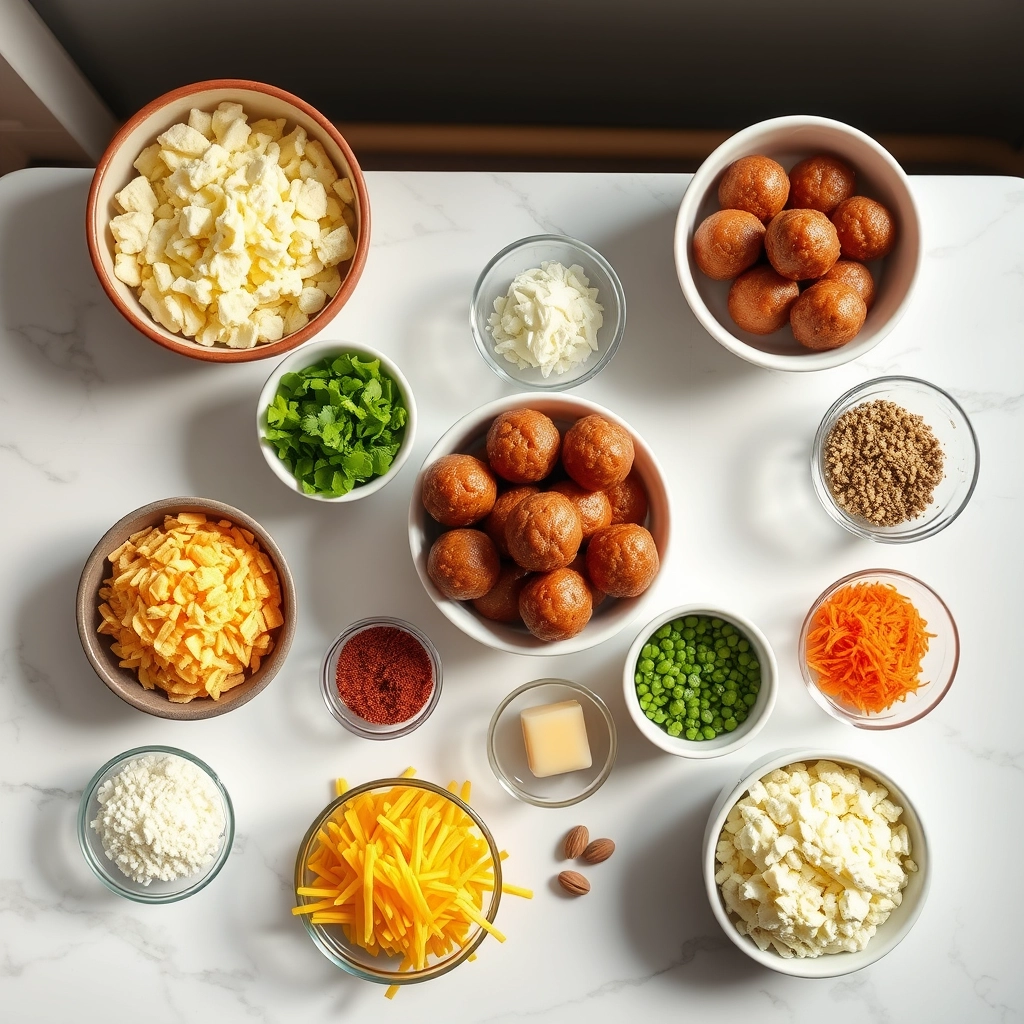
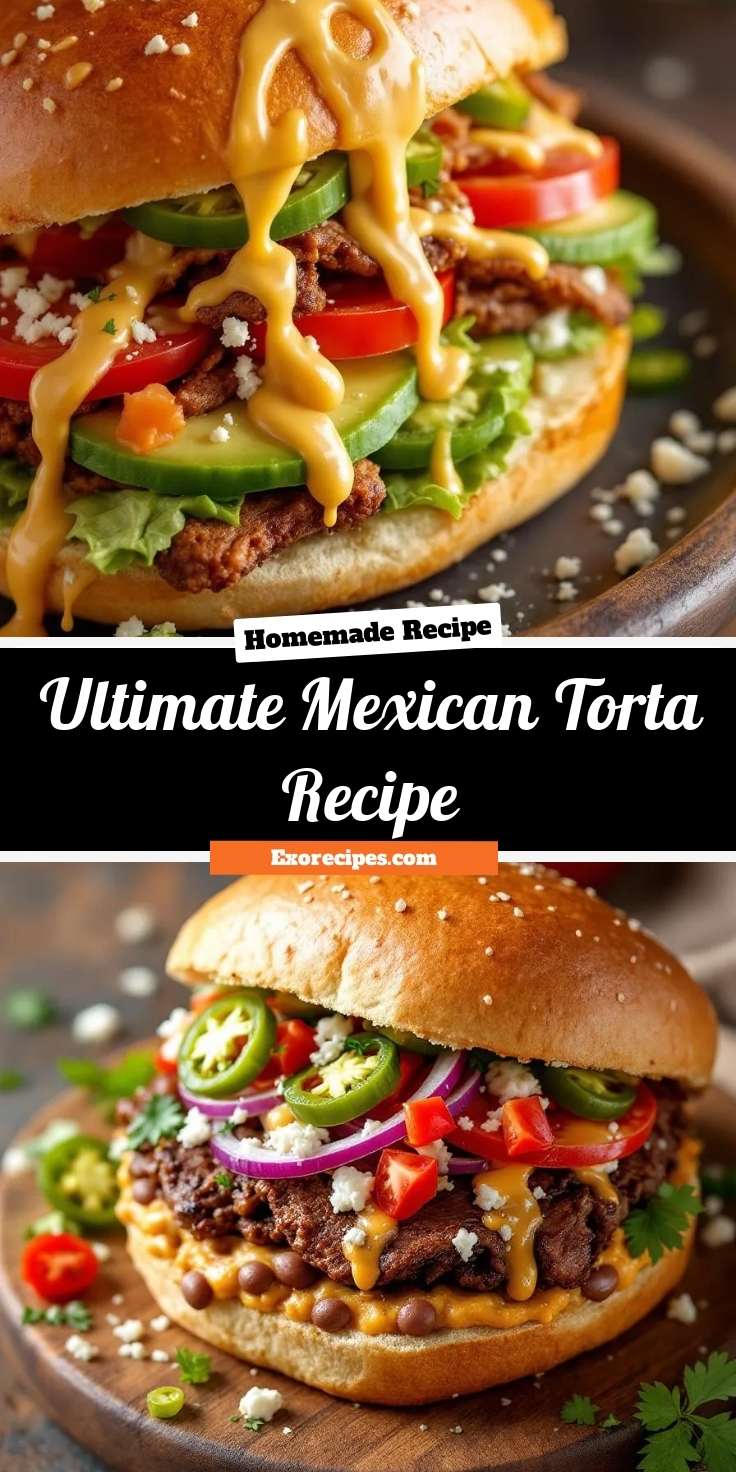
There’s something magical about biting into a perfectly layered Ultimate Mexican Torta Recipe—crusty bread hugging tender meats, creamy beans, and vibrant toppings that explode with flavor. Whether you’re craving a hearty lunch or a crowd-pleasing dinner, this sandwich delivers comfort and excitement in every bite. Even better, it’s customizable, so you can tailor it to your taste buds or whatever ingredients you have on hand. Let’s dive into why this iconic Mexican street food deserves a spot in your recipe rotation.
The Ultimate Mexican Torta Recipe is more than just a sandwich. It’s a celebration of textures and flavors, combining crispy bolillo rolls with layers of refried beans, savory meats like carnitas or milanesa, and toppings like avocado, jalapeños, and fresh crema. What sets it apart is its versatility. You can swap proteins, adjust spice levels, or even make it vegetarian without losing its soul. For anyone who loves bold, satisfying meals, this torta is a must-try. Plus, it’s a fantastic way to use leftovers creatively, making it practical for busy weeknights.
On Exorecipes, we specialize in recipes that balance authenticity with approachability, and the Ultimate Mexican Torta Recipe fits perfectly. It’s a dish that invites experimentation while staying true to its roots. If you’re new to Mexican cuisine, start with our guide to authentic Mexican salsas to pair with your torta. Or, if you’re meal-prepping, check out our tips for efficient meal prep to streamline the process. No matter how you build it, this torta promises a delicious adventure.
Why I Love This Recipe
I’ll never forget the first time I tried a Mexican torta at a tiny roadside stand in Guadalajara. The combination of warm bread, smoky chipotle, and creamy avocado hooked me instantly. Now, whenever I make the Ultimate Mexican Torta Recipe at home, it transports me back to that moment. It’s also become my go-to for feeding friends—everyone raves about the bold flavors, and I love how easily it adapts to different diets. Whether I’m craving nostalgia or need a quick, satisfying meal, this recipe never disappoints.
Health and Nutrition
Why it’s good for your body
The Ultimate Mexican Torta Recipe packs a nutritious punch while delivering bold flavors. First, it combines lean proteins like chicken or beans with fiber-rich avocado and fresh vegetables. These ingredients work together to keep you full longer and stabilize blood sugar levels. Additionally, the healthy fats from avocado and olive oil support heart health and reduce inflammation.
Moreover, the Ultimate Mexican Torta Recipe includes antioxidant-rich ingredients like tomatoes and peppers. These veggies boost immunity and protect cells from damage. Meanwhile, whole-grain bolillo rolls provide complex carbs for sustained energy. Unlike processed bread, they digest slowly and prevent energy crashes.
Finally, this dish offers versatility for different dietary needs. For instance, you can swap ingredients to fit low-carb or high-protein goals. Whether you choose grilled chicken or black beans, the Ultimate Mexican Torta Recipe adapts without sacrificing taste. With balanced macros and micronutrients, it’s a meal that fuels your body and satisfies cravings.
How it fits in a healthy lifestyle
The Ultimate Mexican Torta Recipe fits seamlessly into a balanced diet. For protein lovers, grilled chicken or lean beef adds muscle-building benefits. If you prefer plant-based options, black beans or tofu keep it hearty and gluten-free. Pair it with a side of roasted vegetables for extra fiber and vitamins.
Busy weeknights call for meals that are both quick and nutritious. This recipe delivers with minimal prep and maximum flavor. You can even prep ingredients ahead, making it ideal for meal prep. Whether you’re fueling workouts or feeding a family, the Ultimate Mexican Torta Recipe keeps health and taste in perfect harmony.
A hearty Mexican sandwich filled with flavorful ingredients, perfect for a satisfying meal.
Ingredients
Scale
For the Crust:
4 bolillo rolls or telera bread
1 lb thinly sliced steak or chicken
1 cup refried beans
1 avocado, sliced
1/2 cup pickled jalapeños
1/2 cup mayonnaise
1/2 cup crumbled queso fresco
1 tomato, sliced
1/2 onion, sliced
1 tbsp taco seasoning
2 tbsp vegetable oil
Salt and pepper to taste
Instructions
1. Prepare the Crust:
Heat oil in a pan over medium-high heat. Season the meat with taco seasoning, salt, and pepper. Cook until browned and fully cooked, about 5-7 minutes. Set aside.
Slice the bolillo rolls in half and lightly toast them on a griddle or in a pan.
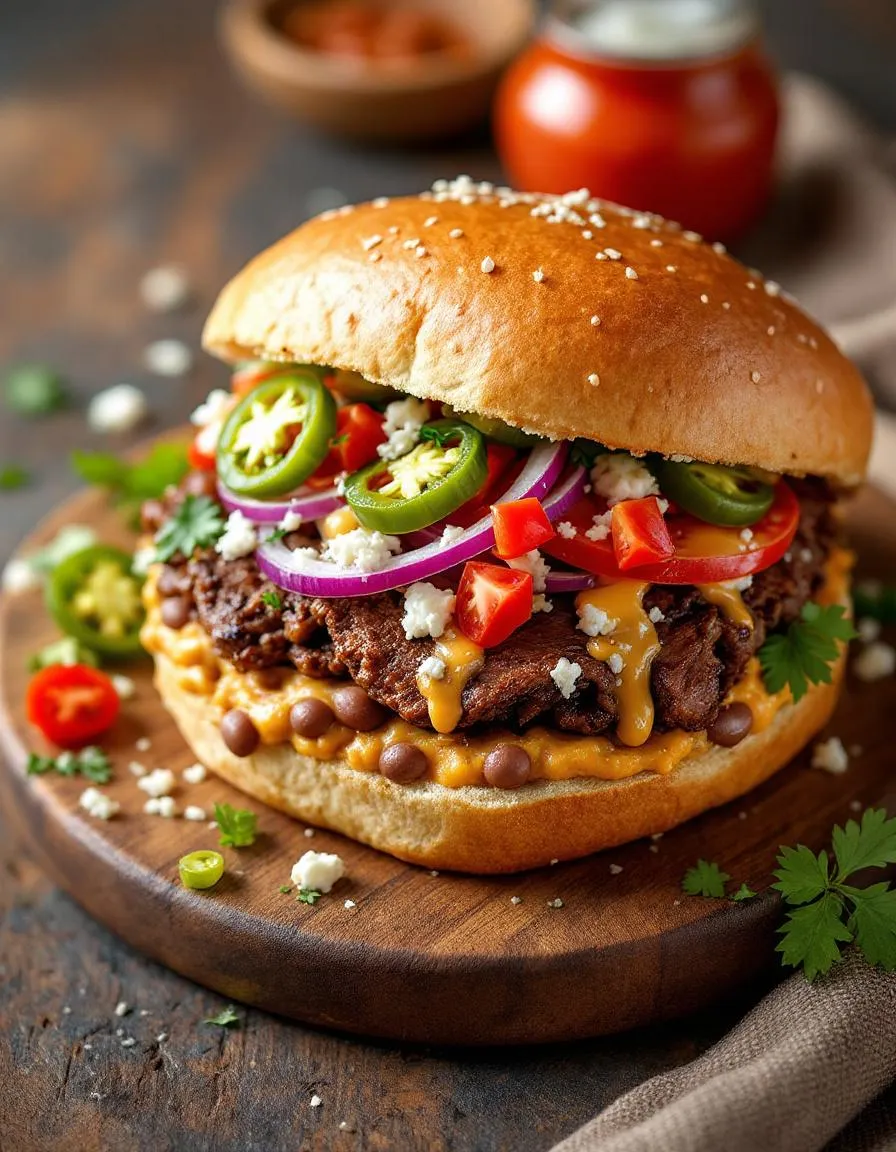
Spread refried beans on the bottom half of each roll. Layer with cooked meat, avocado slices, tomato, onion, pickled jalapeños, and queso fresco.
Spread mayonnaise on the top half of each roll and place it on top of the sandwich.
Press the torta lightly to compact the ingredients and serve immediately.
Notes
You can customize the seasonings to taste.
s-dish">How to Prepare This Dish
Steps and time-saving tips
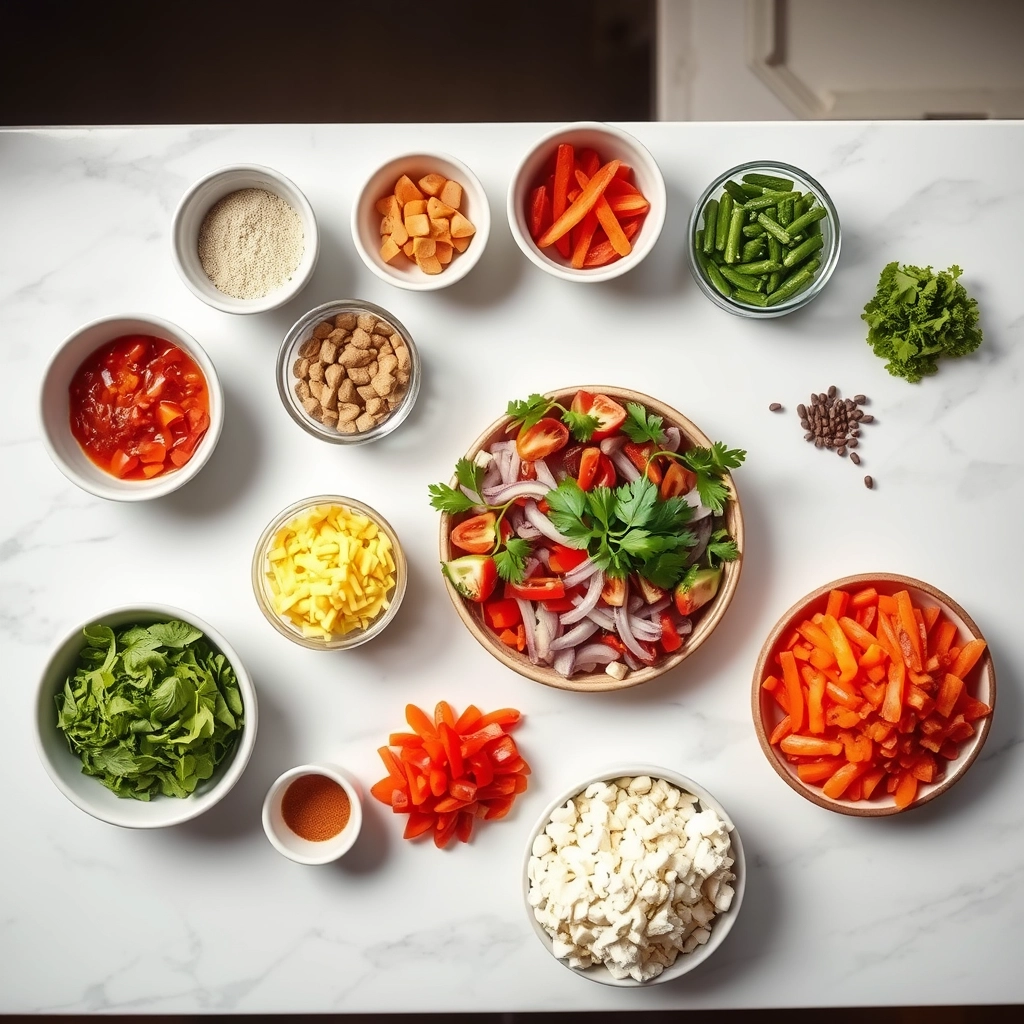
Start by gathering all your ingredients for the Ultimate Mexican Torta Recipe so everything is within reach. Slice the bolillo rolls in half lengthwise and lightly toast them in a skillet or oven until golden. Meanwhile, heat a drizzle of oil in a pan and cook your protein—whether it’s shredded chicken, carnitas, or beans—until warmed through. Layer the bottom half of each roll with refried beans, then pile on the protein, avocado slices, pickled jalapeños, and a sprinkle of queso fresco. Press the top half gently to hold everything together. For a time-saving hack, prep your fillings ahead and store them in airtight containers. If you’re short on time, use store-bought rotisserie chicken or canned beans. Just before serving, lightly grill the assembled tortas for a crispy exterior. Serve immediately with a side of salsa or crema for dipping.
Mistakes I’ve made and learned from
Early on, I made the mistake of overstuffing my Ultimate Mexican Torta Recipe, which led to messy, falling-apart sandwiches. Now, I layer ingredients evenly and press gently to keep everything intact. Another lesson? Skipping the toasting step—it’s crucial for texture. I once served soggy tortas because I rushed this part. For perfectly balanced flavors, I also learned to adjust the heat level by tasting my homemade salsa before adding it. If you’re new to Mexican cooking, check out my guide to essential spices to avoid bland results. Trust me, these small tweaks make all the difference.
n-and-variations">Cultural Connection and Variations
Where this recipe comes from
The Ultimate Mexican Torta Recipe traces its roots to Mexico’s vibrant street food culture, where bold flavors and hearty sandwiches reign supreme. Originally, vendors crafted these loaded tortas with crusty bolillo rolls, refried beans, and layers of meat, creating a portable feast for busy workers. Over time, families added their own twists—some piled on avocado or pickled jalapeños, while others swapped meats for regional favorites like carnitas or milanesa. In my own kitchen, the Ultimate Mexican Torta Recipe became a weekend tradition, with my abuela insisting on homemade chipotle mayo for an extra kick.
Across Mexico, you’ll find endless variations. In Mexico City, they often stuff tortas with pierna (slow-roasted pork), while coastal towns might feature seafood like breaded shrimp. Meanwhile, in the U.S., creative cooks fuse flavors, adding ingredients like sriracha or even swapping the bolillo for sourdough. No matter the version, the Ultimate Mexican Torta Recipe always delivers that satisfying crunch and explosion of flavors—a true tribute to its humble yet mighty origins.
How it fits in today’s cooking
Today, the Ultimate Mexican Torta Recipe holds its own as a go-to meal for busy weeknights or casual gatherings. Its versatility makes it a favorite—you can prep components ahead, like the easy meal-prep beans, or customize fillings for picky eaters. Modern cooks also lighten it up with grilled veggies or plant-based proteins, proving this classic adapts effortlessly to today’s trends.
Beyond everyday meals,
the torta shines at parties, especially when paired with crowd-pleasers like festive cocktails. Whether you’re craving comfort food or a taste of tradition, the Ultimate Mexican Torta Recipe fits right in. It’s proof that some dishes never go out of style—they just get better with time.
Taste and Texture
What makes it delicious
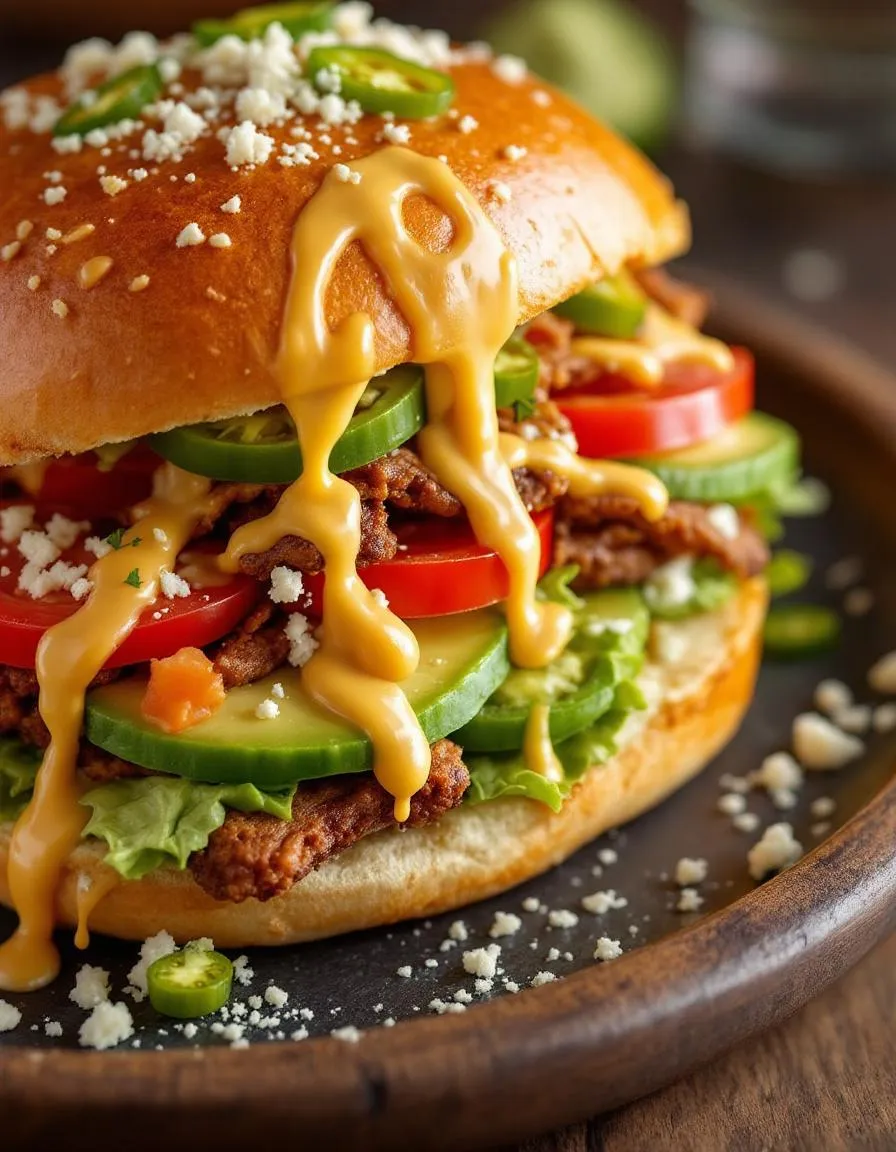
The Ultimate Mexican Torta Recipe delivers a bold, satisfying experience with every bite. First, the crusty bolillo roll crackles under gentle pressure, giving way to layers of tender, juicy meats like carnitas or milanesa. Meanwhile, creamy refried beans and ripe avocado spread add a rich, velvety contrast. Fresh jalapeños or pickled onions bring a bright, tangy kick, while melted Oaxaca cheese ties everything together with its stretchy, gooey goodness. The aroma alone—smoky, garlicky, and slightly citrusy—will make your mouth water before you even take a bite. Whether you savor it warm or at room temperature, the Ultimate Mexican Torta Recipe balances textures and flavors like no other sandwich.
Boosting the flavor
Elevate your Ultimate Mexican Torta Recipe with a few easy tweaks. For extra heat, toss sliced jalapeños in lime juice and salt for a quick pickle, or drizzle with homemade chipotle sauce for smoky depth. Swap refried beans for black bean spread blended with roasted garlic—it adds earthy sweetness. If you love crunch, top with shredded cabbage tossed in creamy cilantro lime dressing for freshness. Don’t forget a sprinkle of cotija cheese or a dash of hot sauce for a final flavor punch. With these small upgrades, your torta will taste even more irresistible.
For the best Ultimate Mexican Torta Recipe, always toast the bolillo rolls until golden. This step adds crunch and prevents sogginess. Meanwhile, spread refried beans evenly on both halves to lock in moisture. Additionally, layer ingredients in the right order—start with beans, then meat, followed by cheese and fresh toppings. Finally, press the torta gently but firmly to help it hold together without crushing the bread.
Mistakes to avoid
Avoid overloading your Ultimate Mexican Torta Recipe with too many fillings, as this can make it messy to eat. Instead, balance flavors and textures by sticking to the recommended portions. Also, don’t skip toasting the rolls—soft bread turns soggy fast. For more tips on perfecting bread texture, check out our guide on toasting bread perfectly. Another common mistake is using cold ingredients straight from the fridge. Let cheese and meats sit at room temperature for 10 minutes first—this helps flavors meld. Learn more about ingredient prep in our ingredient temperature guide.
g-suggestions">Serving and Pairing Suggestions
How to serve this dish
For a showstopping presentation, slice the Ultimate Mexican Torta Recipe into halves or quarters to reveal its colorful layers. Meanwhile, arrange it on a rustic wooden board with lime wedges and fresh cilantro sprigs for a vibrant touch. Since this dish packs bold flavors, serve it at casual gatherings like game nights or weekend brunches where guests can enjoy it hands-on. Alternatively, pair individual portions with a side of pickled jalapeños for an extra kick that elevates every bite.
What goes well with it
A chilled horchata or tangy mango margarita balances the richness of the Ultimate Mexican Torta Recipe perfectly. If you prefer something non-alcoholic, try a citrusy agua fresca. For sides, crispy air fryer tortilla chips with guacamole add crunch without overpowering the main dish. Finally, a light jicama salad with lime dressing cuts through the savory notes for a refreshing contrast.
math-faq-block">
What bread is best for an Ultimate Mexican Torta?
The best bread for an Ultimate Mexican Torta is a soft yet sturdy roll like telera or bolillo. These traditional Mexican rolls hold up well to the hearty fillings without falling apart. For an authentic touch, lightly toast the bread before assembling your Ultimate Mexican Torta Recipe.
Can I make a vegetarian version of the Ultimate Mexican Torta?
Absolutely! For a vegetarian Ultimate Mexican Torta Recipe, replace the meat with grilled portobello mushrooms, black beans, or soy chorizo. Load it up with avocado, Oaxaca cheese, and pickled jalapeños for that classic Mexican flavor profile.
What makes a torta different from a regular sandwich?
An Ultimate Mexican Torta stands out with its Mexican ingredients like refried beans, avocado, and queso fresco. Unlike regular sandwiches, tortas often feature a combination of warm and cold ingredients, plus a generous spread of mayo and spicy sauces. The bread and bold flavors make this Mexican street food unique.
ank-math-faq-item">
How do I keep my torta from getting soggy?
To prevent a soggy Ultimate Mexican Torta Recipe, toast the bread thoroughly and layer ingredients strategically. Place moisture barriers like cheese or refried beans against the bread, and add wet ingredients like tomatoes in the middle. Assemble just before eating for the best texture.
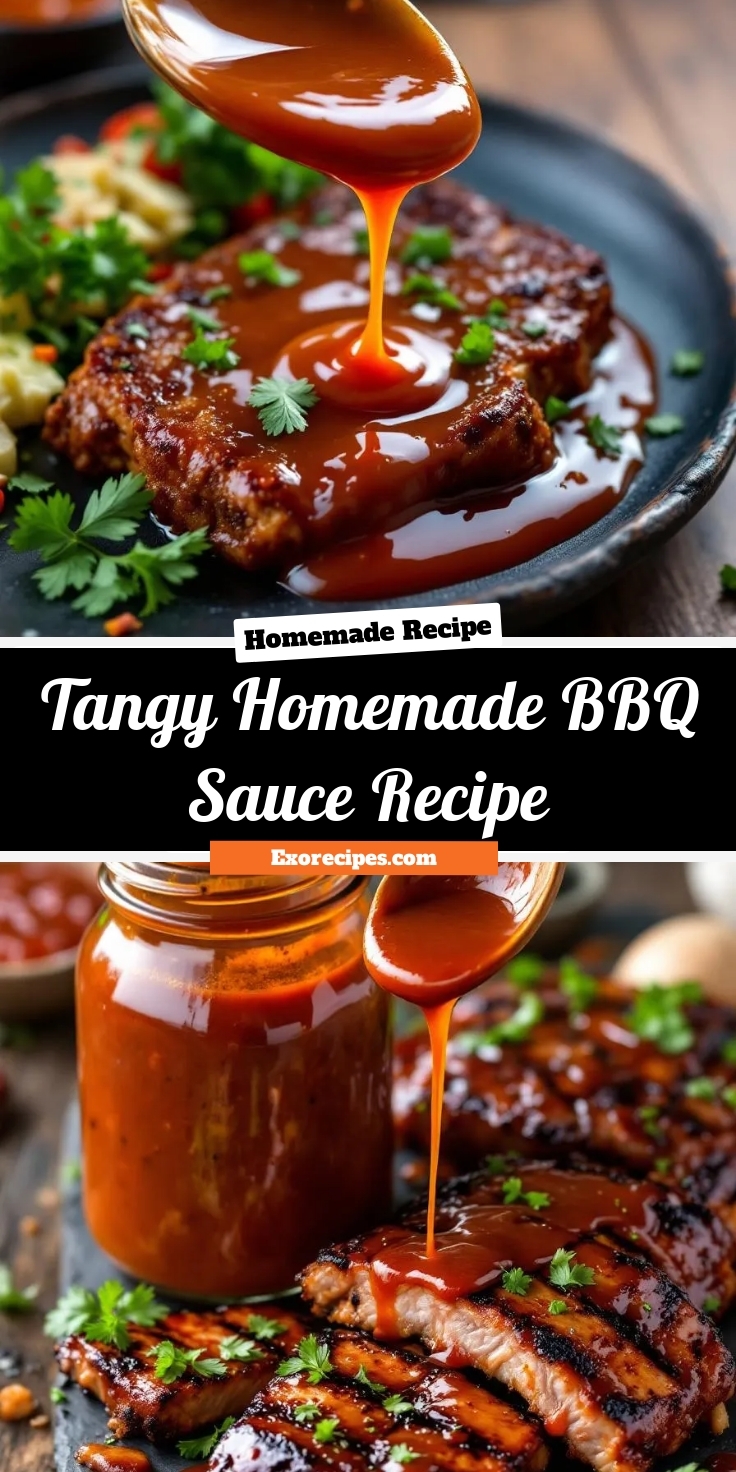
Best Homemade BBQ Sauce – Tangy and Easy Recipe
Introduction
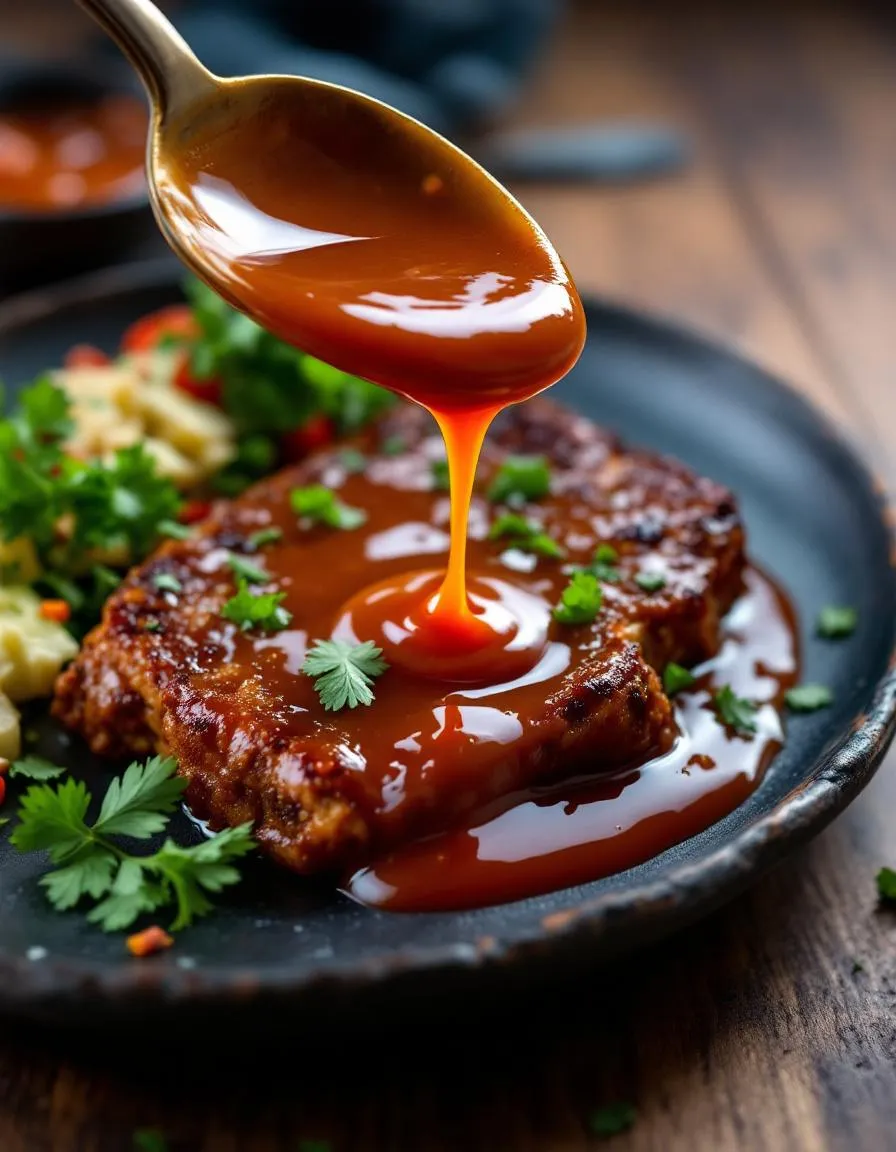
There’s something magical about slathering a rich, flavorful sauce over grilled meats, turning an ordinary meal into a mouthwatering masterpiece. If you’ve ever craved that perfect balance of sweet, smoky, and tangy, this Tangy Homemade BBQ Sauce Recipe is your answer. Unlike store-bought versions packed with preservatives, this sauce lets you control every ingredient, ensuring a fresh, bold taste that elevates everything from ribs to burgers. Best of all, it comes together in minutes with pantry staples, proving that great flavor doesn’t need to be complicated.
Tangy Homemade BBQ Sauce Recipe is more than just a condiment—it’s a game-changer for backyard cookouts and weeknight dinners alike. Crafted with a blend of ketchup, apple cider vinegar, brown sugar, and spices, it delivers a punch of flavor that clings perfectly to meat, creating a caramelized glaze when grilled. What sets it apart is its versatility. Whether you’re marinating chicken, basting pork chops, or dipping crispy fries, this sauce adapts effortlessly. Plus, making it from scratch means you can tweak the sweetness or heat to match your taste, something you’ll never get from a bottle. If you love experimenting with flavors, pair it with our Smoky Pulled Pork or use it as a glaze for our Grilled Chicken Thighs. Fitting right into our blog’s focus on simple, crowd-pleasing recipes, this sauce proves that homemade always wins.
Why I Love This Recipe
This Tangy Homemade BBQ Sauce Recipe holds a special place in my kitchen because it reminds me of summer evenings spent grilling with family. My dad always insisted on making his own sauce, claiming the bottled stuff couldn’t compare. After years of tweaking his recipe, I landed on this version—bold enough to stand out but balanced enough to keep everyone reaching for more. Now, it’s my go-to for potlucks and cookouts, and I love seeing friends’ faces light up after that first bite. It’s more than a recipe; it’s a little jar of memories.
Health and Nutrition
Why it’s good for your body
Tangy Homemade BBQ Sauce Recipe packs a flavorful punch while offering surprising health perks. First, it skips the artificial additives and excessive sugars found in store-bought versions. Instead, it relies on natural ingredients like tomatoes, apple cider vinegar, and spices to deliver its signature zing. These components not only enhance taste but also provide antioxidants and anti-inflammatory benefits.
Moreover, Tangy Homemade BBQ Sauce Recipe contains no high-fructose corn syrup, which often hides in commercial sauces. By using honey or maple syrup as a sweetener, you get a milder glycemic impact. Additionally, the garlic and onion in the recipe contribute immune-boosting properties, making it a smarter choice for your overall well-being.
Finally, this sauce lets you control the sodium levels, unlike pre-made options. You can adjust the salt to suit your dietary needs without sacrificing flavor. Whether you drizzle it over grilled chicken or use it as a marinade, Tangy Homemade BBQ Sauce Recipe adds vibrancy to meals while keeping nutrition in check.
How it fits in a healthy lifestyle
Tangy Homemade BBQ Sauce Recipe fits seamlessly into balanced eating habits. It works well with lean proteins like turkey or tofu, making it a versatile staple for meal prep. If you follow a gluten-free diet, this sauce naturally aligns with your needs since it contains no wheat-based thickeners.
For those focused on heart health, the absence of processed sugars and unhealthy fats makes it a better alternative to store-bought brands. Pair it with grilled vegetables or a nutritious side dish for a well-rounded meal. Even if you’re watching calories, a little goes a long way thanks to its bold flavor.
Busy home cooks will appreciate how Tangy Homemade BBQ Sauce Recipe simplifies healthy eating. Whip up a batch ahead of time and use it to elevate simple dishes like quick weeknight dinners. With its wholesome ingredients and customizable profile, this sauce supports your goals without compromising on taste.
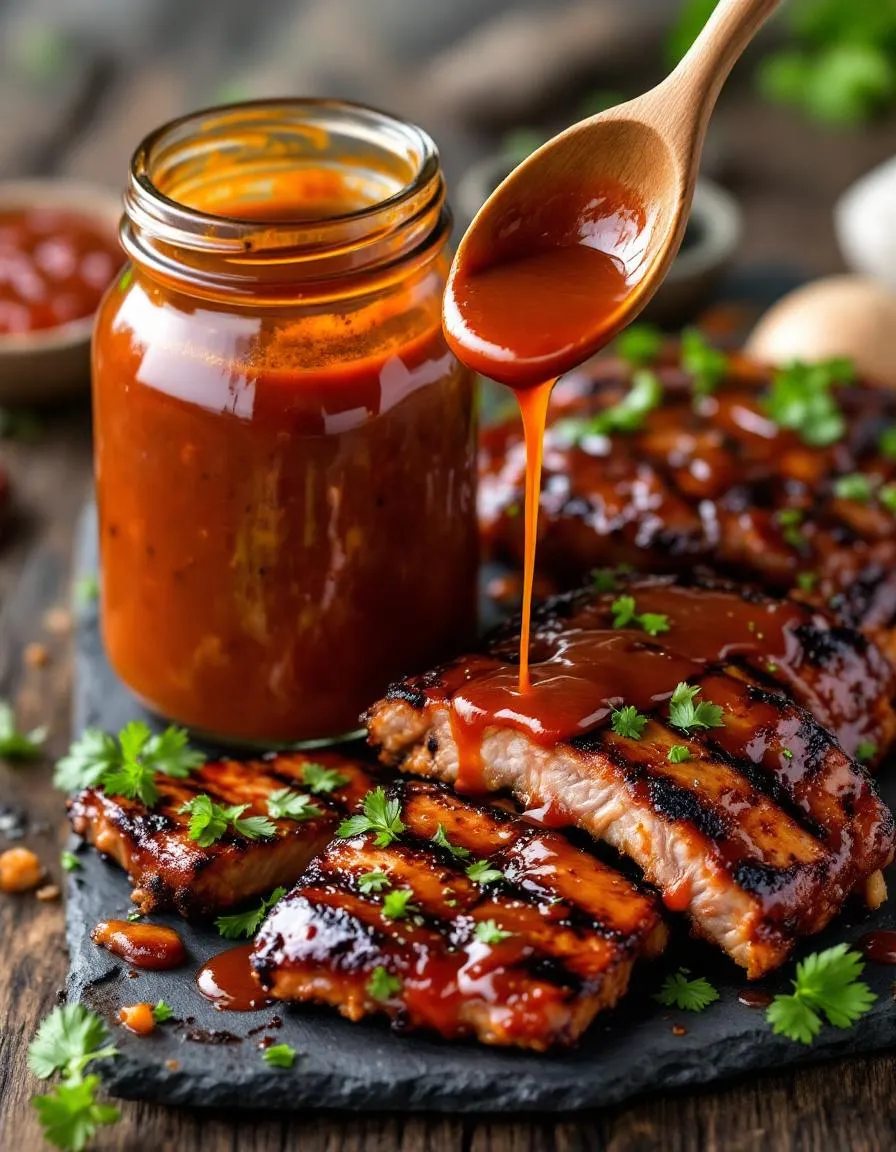
A deliciously tangy and sweet homemade BBQ sauce perfect for grilling or dipping.
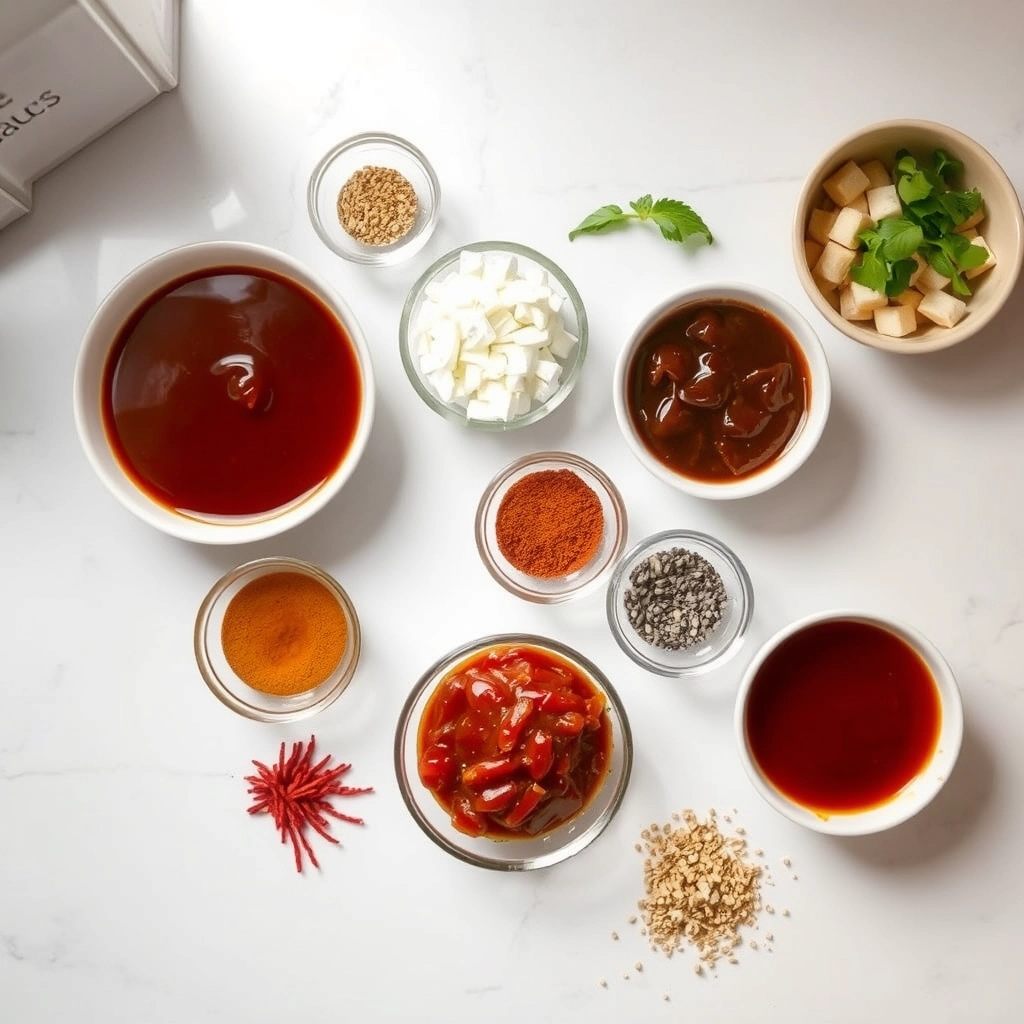
Ingredients
Scale
For the Crust:
1 cup ketchup
1/4 cup apple cider vinegar
1/4 cup brown sugar
2 tablespoons molasses
1 tablespoon Worcestershire sauce
1 teaspoon smoked paprika
1 teaspoon garlic powder
1/2 teaspoon onion powder
1/2 teaspoon black pepper
1/4 teaspoon cayenne pepper (optional)
Instructions
1. Prepare the Crust:
In a medium saucepan, combine all ingredients over medium heat.
Whisk until smooth and bring to a gentle simmer.
Reduce heat to low and let simmer for 20-25 minutes, stirring occasionally, until thickened.
Remove from heat and let cool before using or storing.
Notes
You can customize the seasonings to taste.
s-dish">How to Prepare This Dish
Steps and time-saving tips
Start by gathering all your ingredients for the Tangy Homemade BBQ Sauce Recipe to streamline the process. Combine ketchup, apple cider vinegar, brown sugar, and Worcestershire sauce in a medium saucepan over low heat. Whisk everything together until the sugar dissolves completely, then stir in smoked paprika, garlic powder, and a pinch of cayenne for that signature kick. Let the mixture simmer gently for 15-20 minutes, stirring occasionally to prevent sticking. Meanwhile, prep your storage jar or bottle so it’s ready when the sauce finishes. For a smoother texture, blend the sauce briefly with an immersion blender or let it cool and pulse in a regular blender. If you’re short on time, skip the simmering step and use the sauce immediately—though simmering deepens the flavors. Store leftovers in the fridge for up to two weeks, or freeze portions for future grilling sessions. Pro tip: Double the batch and freeze half to save time on your next BBQ night.
Mistakes I’ve made and learned from
Early on, I rushed the simmering step for my Tangy Homemade BBQ Sauce Recipe, resulting in a thin, overly acidic sauce. Now I know patience is key—letting it reduce properly thickens the consistency and balances the flavors. Another blunder? Skipping the taste test before bottling. Once, I added too much cayenne and ended up with a sauce that overpowered everything. Now I tweak seasonings gradually, especially heat levels, and let the sauce cool slightly before final adjustments. For more on balancing flavors, check out my guide to perfect spice blends. Storage matters too—I learned the hard way that using a non-airtight container leads to quicker spoilage. Glass jars with tight seals work best, as detailed in my kitchen storage hacks post. Small tweaks make all the difference!
n-and-variations">Cultural Connection and Variations
Where this recipe comes from
Tangy Homemade BBQ Sauce Recipe has deep roots in American barbecue culture, where regional flavors tell a story of tradition and creativity. In the South, cooks often balance sweetness with vinegar, while Kansas City swears by its thick, molasses-rich version. Meanwhile, Texas leans into smoky heat with extra chili powder. But this sauce isn’t just confined to the U.S. Across the globe, variations pop up—like Japan’s miso-infused BBQ or Jamaica’s fiery jerk-inspired twist.
In my family, Tangy Homemade BBQ Sauce Recipe became a summer staple, slathered on ribs during backyard gatherings. My grandma added orange zest for brightness, while my uncle insisted on a dash of bourbon for depth. These small tweaks made it ours. Whether you prefer it spicy, sweet, or tangy, the beauty lies in how easily it adapts to personal tastes and local ingredients.
How it fits in today’s cooking
Today, Tangy Homemade BBQ Sauce Recipe still shines as a versatile kitchen hero. It’s not just for grilling season—think glazes for air fryer chicken wings or a punchy dip for sweet potato fries. Health-conscious cooks swap sugar for honey or date syrup, while others amp up the heat with habaneros. It’s also a star in meal prep, adding flavor to Instant Pot pulled pork in minutes.
Beyond practicality, th
is sauce connects us to shared moments. Summer cookouts, game-day spreads, or even weeknight dinners feel special with a homemade touch. Whether you stick to tradition or experiment with global flavors, Tangy Homemade BBQ Sauce Recipe proves good food always brings people together.
Taste and Texture
What makes it delicious
The Tangy Homemade BBQ Sauce Recipe delivers a bold, mouthwatering experience with every bite. First, the rich, smoky aroma hits your senses, thanks to the deep caramelization of brown sugar and molasses. Then, the tangy punch of apple cider vinegar and Worcestershire sauce balances the sweetness, creating a crave-worthy harmony. As you taste it, the sauce coats your tongue with a velvety, slightly sticky texture that clings perfectly to grilled meats. Meanwhile, hints of garlic and onion powder add a savory depth, making the Tangy Homemade BBQ Sauce Recipe irresistible. Whether brushed on ribs or drizzled over pulled pork, its vibrant flavors and luscious consistency elevate any dish.
Boosting the flavor
For an extra kick, try stirring in a teaspoon of chipotle powder or smoked paprika to amplify the smokiness. Alternatively, a splash of pineapple juice can brighten the tanginess while adding a subtle tropical twist. If you love heat, a dash of cayenne pepper or a spoonful of homemade hot sauce will turn up the spice without overpowering the sauce. Pair it with smoked pork belly bites for a flavor explosion, or mix it into coleslaw for a zesty twist. With these easy tweaks, the Tangy Homemade BBQ Sauce Recipe becomes even more versatile and delicious.
Always simmer the Tangy Homemade BBQ Sauce Recipe on low heat to let the flavors meld perfectly. For a smoother consistency, blend the sauce briefly after cooking. Additionally, taste and adjust the sweetness or tanginess before serving, as preferences vary. Store leftovers in an airtight container to keep the sauce fresh for weeks. Finally, brush the sauce onto grilled meats during the last few minutes to prevent burning.
Mistakes to avoid
One common mistake is rushing the cooking process, which can result in a raw or unbalanced flavor. Instead, take your time to let the Tangy Homemade BBQ Sauce Recipe reduce properly. Another error is using expired spices, which dulls the taste—check your pantry for freshness before starting. For more on selecting quality ingredients, explore our guide to essential pantry staples. Also, avoid overheating the sauce, as it can thicken too much. If this happens, simply whisk in a splash of water or vinegar. For troubleshooting tips, check out our article on fixing sauce consistency.
g-suggestions">Serving and Pairing Suggestions
How to serve this dish
Turn your Tangy Homemade BBQ Sauce Recipe into a showstopper by drizzling it generously over grilled meats or using it as a dipping sauce in small mason jars. For backyard gatherings, serve it alongside skewers or sliders for easy sharing. Meanwhile, elevate weeknight dinners by brushing it onto roasted vegetables or glazing chicken wings for a sticky, finger-licking finish. Garnish with fresh herbs like cilantro or parsley to add a pop of color and freshness. Whether you’re hosting a summer cookout or prepping game day snacks, this versatile sauce brings bold flavor to every occasion.
What goes well with it
Pair your Tangy Homemade BBQ Sauce Recipe with smoky grilled ribs or pulled pork sandwiches for a classic combo that never disappoints. The sauce’s zesty kick also balances well with cool, creamy sides like creamy coleslaw, adding a refreshing crunch to each bite. For drinks, try an ice-cold citrus IPA or sweet tea to complement the tangy notes. If you’re serving it as a dip, offer crispy air-fryer onion rings or sweet potato fries for a satisfying contrast in textures.
math-faq-block">
What makes BBQ sauce tangy?
A tangy homemade BBQ sauce recipe typically gets its zing from acidic ingredients like apple cider vinegar, lemon juice, or Worcestershire sauce. Balancing these with sweeteners like brown sugar or molasses creates the perfect tangy flavor profile for your sauce.
How long does homemade BBQ sauce last in the fridge?
Your tangy homemade BBQ sauce recipe will stay fresh for about 2-3 weeks when stored in an airtight container in the refrigerator. Always check for signs of spoilage like mold or off odors before using leftover sauce.
Can I make BBQ sauce without ketchup?
Absolutely! Many tangy homemade BBQ sauce recipes use tomato paste or crushed tomatoes as a base instead of ketchup. This alternative often results in a richer, more customizable flavor that lets the tangy elements shine through.
ank-math-faq-item">
What’s the secret to thick BBQ sauce?
The key to thickening your tangy homemade BBQ sauce recipe is simmering it uncovered to reduce liquid, or adding natural thickeners like molasses or pureed fruit. For instant results, mix a cornstarch slurry (1 tsp cornstarch + 1 tbsp water) into the warm sauce.
Best Maple Bourbon Smash – Easy Cocktail Recipe
Introduction
Picture this: a chilly evening, the crackle of a fireplace, and a glass of something warm, sweet, and just a little bit bold in your hand. That’s the magic of a Maple Bourbon Smash. Whether you’re winding down after a long day or hosting friends for a cozy gathering, this cocktail wraps you in comfort with its rich, autumnal flavors. Best of all, it’s simple enough to whip up in minutes but impressive enough to feel like a special treat. If you love cocktails that balance sweetness and depth, this one’s for you.
The Maple Bourbon Smash is a modern twist on classic whiskey cocktails, blending the smoky warmth of bourbon with the earthy sweetness of maple syrup. Unlike overly sugary mixed drinks, it lets the quality of the ingredients shine, making it a favorite among both casual sippers and cocktail enthusiasts. The addition of fresh citrus and herbs brightens the drink, creating a harmonious balance that’s perfect for fall and winter. Plus, it pairs beautifully with hearty dishes like our garlic herb roasted chicken or a simple apple pecan salad for a full seasonal experience.
What makes the Maple Bourbon Smash stand out is its versatility. You can tweak the maple-to-bourbon ratio to suit your taste, swap in different herbs, or even add a spicy kick with a dash of ginger. It’s a recipe that invites creativity while staying reliably delicious. For a blog like ours, which celebrates approachable yet elevated home cooking, this cocktail fits right in—offering big flavor without complicated techniques. Whether you’re a bourbon novice or a seasoned mixer, the Maple Bourbon Smash is a must-try.
Why I Love This Recipe
I’ll never forget the first time I tried a Maple Bourbon Smash at a rustic Vermont inn during peak foliage season. The drink captured the essence of fall in a glass, and I knew I had to recreate it at home. Now, it’s my go-to for holiday parties and quiet nights alike. There’s something deeply satisfying about the way the maple syrup melds with the bourbon, creating a drink that feels both indulgent and wholesome. Every sip brings back memories of crisp air, golden leaves, and good company—proof that the best recipes aren’t just about taste, but the moments they inspire.
Health and Nutrition
Why it’s good for your body
Maple Bourbon Smash packs a flavorful punch while offering surprising health perks. First, the natural sweetness of maple syrup provides antioxidants that help combat inflammation. Unlike refined sugar, maple syrup also delivers minerals like zinc and manganese, which support immunity and metabolism. Meanwhile, bourbon, when enjoyed in moderation, may promote heart health by improving circulation.
Additionally, the citrus in Maple Bourbon Smash adds a dose of vitamin C, boosting collagen production and skin health. Fresh lemon or orange juice also aids digestion and alkalizes the body. Furthermore, the herbs often used in this cocktail, like mint or thyme, contain essential oils that reduce bloating and freshen breath.
Finally, Maple Bourbon Smash strikes a balanced profile. The maple syrup’s slow-releasing energy prevents sugar crashes, while the bourbon’s warmth relaxes muscles. Together, these ingredients create a drink that satisfies cravings without derailing wellness goals. Whether you sip it socially or unwind with it after a long day, Maple Bourbon Smash brings both flavor and function.
How it fits in a healthy lifestyle
Maple Bourbon Smash fits seamlessly into a mindful eating plan. For gluten-free diets, it’s a safe choice since bourbon distilled from corn or rye contains no gluten. If you’re watching sugar intake, opt for a lighter pour of maple syrup or try a low-sugar cocktail alternative for similar vibes.
This drink also pairs well with heart-healthy habits. The antioxidants in maple syrup and citrus support cardiovascular wellness, especially when balanced with nutrient-rich meals. For a satisfying evening treat, enjoy it alongside protein-packed snacks to keep energy steady. Remember, moderation is key—savor Maple Bourbon Smash as part of a varied diet, and it becomes a delightful way to toast to your health.
A refreshing and slightly sweet bourbon cocktail with maple syrup and citrus flavors.
Ingredients
Scale
For the Crust:
2 oz bourbon
1 oz fresh lemon juice
1/2 oz pure maple syrup
3–4 fresh mint leaves
Club soda
Ice cubes
Lemon wheel and mint sprig for garnish
Instructions
1. Prepare the Crust:
In a cocktail shaker, muddle the mint leaves with the maple syrup.
Add bourbon, lemon juice, and ice to the shaker. Shake well until chilled.
Strain into a glass filled with ice.
Top with a splash of club soda.
Garnish with a lemon wheel and mint sprig.
Notes
You can customize the seasonings to taste.
How to Prepare This Dish
Steps and time-saving tips
Start by gathering all your ingredients for the Maple Bourbon Smash to streamline the process. First, fill a cocktail shaker halfway with ice, then pour in two ounces of bourbon. Add one ounce of pure maple syrup for that rich, autumnal sweetness. Squeeze in half a lemon for brightness, and if you want a deeper citrus note, toss in a few dashes of orange bitters. Shake vigorously for about 15 seconds—this not only chills the drink but also ensures everything blends perfectly. Meanwhile, take a chilled glass and fill it with fresh ice. Strain the mixture into the glass, then top it off with a splash of club soda for a refreshing fizz. Garnish with a lemon wheel or a cinnamon stick for an elegant touch. To save time, prep your maple syrup and lemon juice ahead of time and store them in the fridge. If you’re hosting, batch the bourbon, maple syrup, and lemon juice in a pitcher, then add club soda just before serving to keep the bubbles lively.
Mistakes I’ve made and learned from
When I first made the Maple Bourbon Smash, I underestimated the importance of using pure maple syrup. The artificial stuff left a weird aftertaste and didn’t meld well with the bourbon. After switching to the real deal, the drink transformed—smooth, balanced, and utterly sippable. Another hiccup? Over-shaking. I once got overzealous and ended up with a watery cocktail. Now, I stick to 15 seconds max. If you’re new to bourbon cocktails, check out my guide on bourbon basics to pick the right bottle. And if you love this recipe, you’ll adore my fall cocktail roundup for more seasonal sips. Trust me, learning these lessons the hard way means you don’t have to!
The Maple Bourbon Smash whispers stories of cozy autumn evenings and winter gatherings, blending the warmth of bourbon with the earthy sweetness of maple. Originally inspired by classic whiskey smashes, this drink evolved in North America, where maple syrup became a natural pairing for bourbon’s rich caramel notes. In the South, bartenders might add a splash of peach liqueur, while New Englanders often lean into cranberry for a tart twist. Meanwhile, my family’s version always includes a cinnamon stick—because nothing says “holiday cheer” like that spicy aroma mingling with the Maple Bourbon Smash.
Across the pond, you’ll find British variations swapping maple for honey or black treacle, creating a deeper, molasses-like flavor. In Japan, some mixologists infuse the drink with yuzu for a citrusy kick. No matter where it’s served, the Maple Bourbon Smash adapts beautifully, reflecting local tastes while keeping its comforting soul. Whether you’re sipping it fireside or toasting at a summer BBQ, this drink carries a little piece of wherever—and whoever—made it.
ays-cooking">How it fits in today’s cooking
Today, the Maple Bourbon Smash shines as a versatile star, equally at home in holiday spreads and weeknight wind-downs. Modern cooks love it for its simplicity—just a few ingredients, yet endlessly customizable. Some swap bourbon for smoky mezcal, while others riff on the maple syrup with infused versions like vanilla or chili. It’s also a hit at brunch, especially when paired with fluffy pancakes or drizzled over cinnamon roll bakes.
Seasonal trends keep it fresh, too. In fall, apple cider joins the mix, and come summer, muddled berries steal the spotlight. Whether you’re hosting a party or just craving a nightcap, the Maple Bourbon Smash fits right in—proof that some classics only get better with time.
Taste and Texture
What makes it delicious
The Maple Bourbon Smash delights with a rich, smoky sweetness that lingers on the palate. First, the bourbon brings a warm, caramel-like depth, while real maple syrup adds a velvety smoothness. Fresh citrus juice brightens each sip, balancing the drink with a zesty tang. Meanwhile, muddled mint leaves release a cool, fragrant aroma that elevates every sip. The texture? Perfectly crisp yet slightly syrupy, making the Maple Bourbon Smash irresistibly refreshing. Whether served over ice or shaken, it’s a cocktail that feels as luxurious as it tastes.
r">Boosting the flavor
For an extra layer of complexity, try swapping maple syrup with a spiced version or adding a dash of cinnamon. A smoky salt rim enhances the bourbon’s depth, while a splash of ginger beer introduces a fizzy kick. If you love bold flavors, pair your Maple Bourbon Smash with smoked paprika honey glaze drizzled over appetizers. For a fruity twist, muddle in blackberries or top with a vanilla balsamic reduction. Small tweaks can transform this cocktail into a personalized masterpiece.
Tips for Success
Best practices for results
Always use fresh citrus for your Maple Bourbon Smash to ensure bright, vibrant flavors. Meanwhile, chill your glass beforehand to keep the drink refreshingly cold. For the best balance, measure the bourbon and maple syrup precisely—too much sweetness can overpower the cocktail. Additionally, gently muddle the mint leaves to release their aroma without bruising them too harshly. Finally, use large, clear ice cubes to slow dilution and maintain the Maple Bourbon Smash’s bold flavor.
>Mistakes to avoid
Avoid over-packing the mint when muddling, as this can make the Maple Bourbon Smash bitter. Instead, lightly press the leaves to extract just the right amount of flavor. Another common mistake is skipping the simple syrup—maple syrup alone may not blend smoothly, so check out our homemade simple syrup guide for a foolproof solution. Also, never use stale ice, as it can add freezer odors to your drink. For more cocktail-making essentials, explore our bar tools for beginners to elevate your mixing game.
Serving and Pairing Suggestions
How to serve this dish
Serve the Maple Bourbon Smash in a chilled copper mug or a rocks glass to keep it refreshingly cool. For a festive touch, rim the glass with maple sugar and garnish with a cinnamon stick or a twist of orange peel. Meanwhile, this cocktail shines at holiday gatherings, but it also makes a delightful brunch companion when paired with sweet or savory dishes. If you want to impress guests, layer the ingredients carefully to create a beautiful gradient effect before stirring.
What goes well with it
Pair the Maple Bourbon Smash with spiced nuts or a charcuterie board for a balanced mix of sweet and savory flavors. The smoky notes in the bourbon also complement our Smoked Gouda Mac and Cheese, creating a cozy, indulgent meal. For dessert, try it alongside our Cinnamon Roll Bundt Cake, as the warm spices echo the cocktail’s maple-cinnamon undertones. Finally, a crisp apple cider or cold brew coffee makes a great non-alcoholic alternative.
A Maple Bourbon Smash is a refreshing cocktail made with bourbon, fresh lemon juice, maple syrup, and muddled mint. It’s a sweet and tangy drink with a hint of herbal freshness, perfect for sipping year-round. The maple syrup adds a rich depth that pairs beautifully with the bourbon.
How do you make a Maple Bourbon Smash?
To make a Maple Bourbon Smash, muddle fresh mint and lemon slices in a shaker, then add bourbon, maple syrup, and ice. Shake well, strain into a glass over crushed ice, and garnish with a mint sprig. Adjust the maple syrup to taste for your preferred sweetness level.
ank-math-faq-item">
What type of bourbon works best for a Maple Bourbon Smash?
A mid-range bourbon with caramel or vanilla notes complements the Maple Bourbon Smash well. Brands like Buffalo Trace or Maker’s Mark work great, but avoid overly smoky or high-proof bourbons that might overpower the maple and citrus flavors. The goal is a balanced cocktail where all ingredients shine.
Can I make a non-alcoholic version of a Maple Bourbon Smash?
Yes! For a mocktail version, replace the bourbon with apple cider or a bourbon-flavored non-alcoholic spirit. Keep the maple syrup, lemon, and mint for that signature Maple Bourbon Smash flavor profile. You’ll still get the refreshing sweetness without the alcohol.
Best Hearty Vegan Stew – Comforting & Flavorful
Introduction
There’s something deeply comforting about a bowl of Hearty Vegan Stew—especially when the weather turns chilly or you simply crave a nourishing meal that hugs your soul. Whether you’re a longtime plant-based eater or just dipping your toes into vegan cooking, this stew delivers rich flavors, wholesome ingredients, and that unmistakable feeling of home. Plus, it’s incredibly forgiving, so you can tweak it to your taste without missing a beat. Let’s dive into why this dish deserves a spot in your recipe rotation.
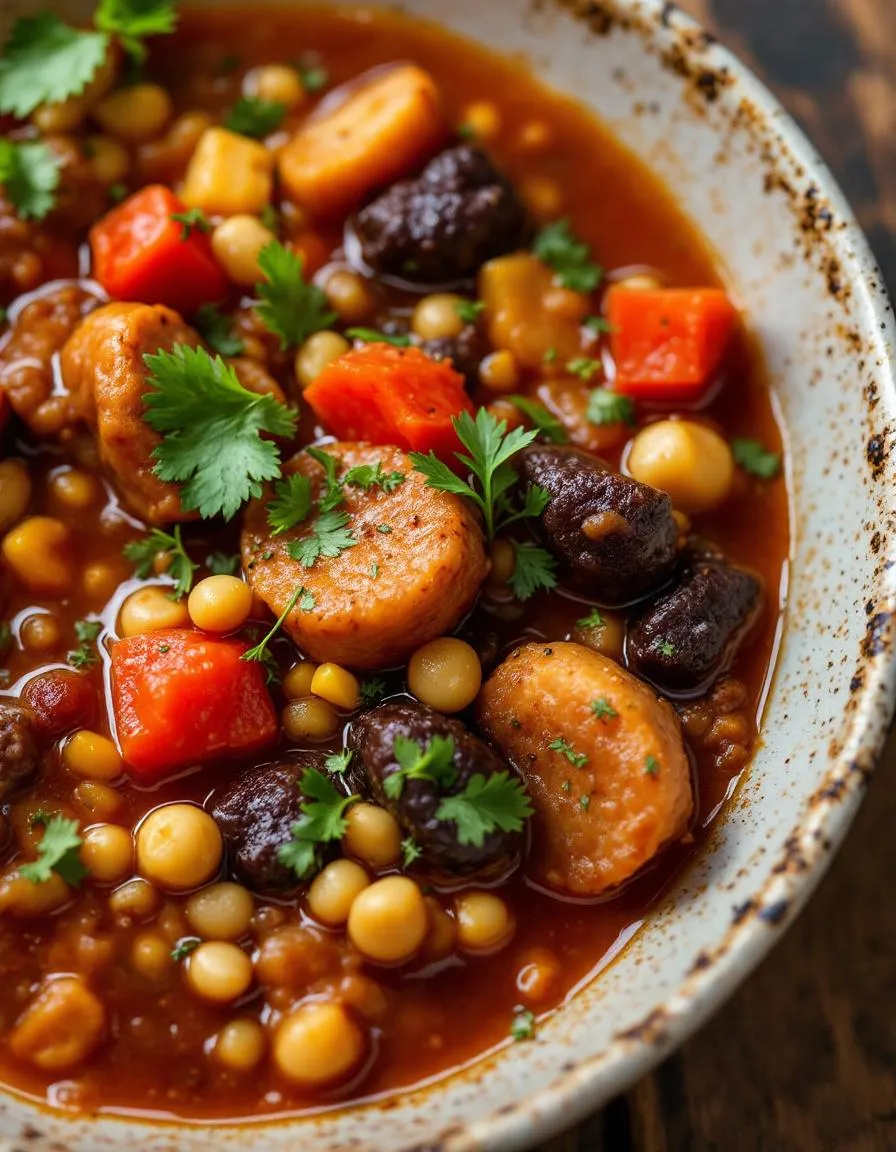
Hearty Vegan Stew is a robust, vegetable-packed dish that simmers tender chunks of potatoes, carrots, and legumes in a savory, herb-infused broth. Unlike many vegan recipes that rely on processed substitutes, this stew celebrates whole foods, making it both nutritious and satisfying. For busy weeknights or meal prep, it’s a lifesaver—just toss everything into one pot and let the flavors meld. If you love cozy meals, you’ll appreciate how it pairs perfectly with crusty bread or fluffy quinoa, like our Garlic Herb Quinoa. What sets it apart? It’s not just about skipping meat; it’s about building layers of taste with smoky paprika, umami-rich tomatoes, and hearty beans. Whether you’re cooking for a family or prepping lunches, this stew fits seamlessly into any plan. And if you’re exploring more plant-based comfort food, our Creamy Vegan Mushroom Soup is another must-try.
Why I Love This Recipe
This Hearty Vegan Stew holds a special place in my kitchen because it’s the dish that won over my skeptical carnivore friends. Years ago, I served it at a winter gathering, and no one even missed the meat—they just asked for seconds. The way the spices bloom in the pot, the tenderness of the veggies, and the sheer simplicity of it all remind me why cooking should be joyful, not complicated. Every time I make it, I tweak something new—a splash of balsamic, extra kale—but the soul of the stew always stays the same: warm, welcoming, and utterly delicious.
Health and Nutrition
Why it’s good for your body
Hearty Vegan Stew packs a nutritious punch with every spoonful. First, it’s loaded with fiber-rich vegetables like carrots, celery, and potatoes, which support digestion and keep you full longer. Additionally, the legumes in this stew provide plant-based protein, helping to maintain muscle health without relying on animal products. Because it’s vegan, Hearty Vegan Stew also naturally avoids cholesterol, making it a heart-smart choice.
Moreover, the tomatoes and leafy greens in this dish deliver a boost of antioxidants, which fight inflammation and protect your cells. Transitioning to a meal like Hearty Vegan Stew can also help you reduce saturated fat intake while still enjoying deep, satisfying flavors. Furthermore, the spices and herbs not only enhance taste but also offer anti-inflammatory benefits, like turmeric or garlic.
Finally, this stew is a fantastic source of vitamins and minerals, including iron from the lentils and vitamin C from the tomatoes. Whether you’re looking to improve your energy levels or simply eat more whole foods, Hearty Vegan Stew makes it easy. With its balanced ingredients, it’s a meal that truly nourishes from the inside out.
How it fits in a healthy lifestyle
Hearty Vegan Stew fits seamlessly into a balanced diet, whether you’re plant-based or just aiming to eat more veggies. It’s naturally gluten-free, making it a great option for those with sensitivities, and its low sodium content supports heart health. If you’re meal prepping, this stew stores well and reheats beautifully, so you can enjoy it throughout the week without sacrificing nutrition.
For anyone focusing on weight management, the high fiber and protein content help curb cravings and stabilize blood sugar. Pair it with a slice of gluten-free bread for a complete meal, or serve it alongside a fresh salad for extra crunch. If you’re exploring more plant-based recipes, check out our guide to vegan meal prep for easy ways to incorporate dishes like this into your routine. Hearty Vegan Stew proves that eating well doesn’t mean skipping flavor or satisfaction.
A rich and flavorful vegan stew packed with vegetables and plant-based protein.
Ingredients
Scale
For the Crust:
2 tbsp olive oil
1 large onion, diced
3 cloves garlic, minced
2 carrots, chopped
2 celery stalks, chopped
1 bell pepper, diced
1 cup mushrooms, sliced
1 can (15 oz) diced tomatoes
4 cups vegetable broth
1 can (15 oz) chickpeas, drained and rinsed
1 cup green lentils, rinsed
1 tsp smoked paprika
1 tsp dried thyme
Salt and pepper to taste
Instructions
1. Prepare the Crust:
Heat olive oil in a large pot over medium heat. Add onion and garlic, sauté until fragrant.
Add carrots, celery, bell pepper, and mushrooms. Cook until vegetables begin to soften.
Stir in diced tomatoes, vegetable broth, chickpeas, lentils, smoked paprika, and thyme.
Bring to a boil, then reduce heat to low. Cover and simmer for 25-30 minutes until lentils are tender.
Season with salt and pepper to taste before serving.
Notes
You can customize the seasonings to taste.
How to Prepare This Dish
Steps and time-saving tips
Start by heating a large pot over medium heat and drizzling in a tablespoon of olive oil. Once the oil shimmers, toss in diced onions, carrots, and celery, stirring frequently until they soften—about 5 minutes. Next, add minced garlic and cook for another minute until fragrant. Sprinkle in your favorite herbs, like thyme and rosemary, to layer flavor early. Then, pour in vegetable broth and toss in cubed potatoes, chopped tomatoes, and rinsed lentils. Bring everything to a gentle boil before reducing the heat to a simmer. Cover the pot and let the Hearty Vegan Stew cook for 25-30 minutes, stirring occasionally to prevent sticking. Meanwhile, whisk together a quick cornstarch slurry if you prefer a thicker broth, then stir it in during the last 5 minutes. For a time-saving hack, prep your veggies the night before or use pre-cut options from the store. Finally, taste and adjust the seasoning with salt and pepper before serving hot with crusty bread.
Mistakes I’ve made and learned from
I once rushed the sautéing step, thinking skipping a few minutes wouldn’t matter—big mistake! The onions and carrots didn’t caramelize properly, leaving the Hearty Vegan Stew lacking depth. Now, I patiently let them soften and brown slightly for richer flavor. Another blunder? Overcrowding the pot with lentils, which turned mushy. I’ve since learned to measure them precisely and rinse well to avoid excess starch. If you’re new to plant-based cooking, my guide on vegan pantry staples helps avoid last-minute scrambles. And if your stew turns out too thin, don’t panic! My thickening soups naturally post has easy fixes. Trust me, a little patience and prep go a long way.
Hearty Vegan Stew carries the warmth of generations, blending humble ingredients into a dish that feels like home. Originally, it drew inspiration from rustic European peasant cooking, where root vegetables and legumes stretched scarce resources into nourishing meals. Over time, cultures worldwide adapted it—think Moroccan tagines with chickpeas and apricots or West African peanut stews bursting with bold spices. Even in my family, we tweak the recipe depending on the season, adding smoky paprika in winter or fresh summer squash when the garden overflows.
What makes Hearty Vegan Stew so special is its flexibility. In the Mediterranean, cooks might stir in olives and sun-dried tomatoes, while in Japan, miso and seaweed add umami depth. Some versions keep it chunky and thick, while others simmer it longer for a silky, brothier consistency. No matter the variation, the soul of the dish remains the same: comfort in a bowl, meant to be shared.
ays-cooking">How it fits in today’s cooking
Today, Hearty Vegan Stew fits perfectly into modern kitchens, whether you’re meal-prepping for the week or hosting a cozy dinner party. It’s a star during fall and winter, but lightened-up versions with spring peas or zucchini make it year-round friendly. Busy cooks love that it’s freezer-friendly, and many adapt it for Instant Pots or slow cookers. Plus, it’s a hit at potlucks—pair it with fluffy vegan cornbread for the ultimate comfort combo.
Beyond practicality, this stew connects us to mindful eating. It’s a gateway for exploring plant-based cooking, much like our guide on easy vegan substitutes helps beginners transition smoothly. Whether you’re honoring tradition or experimenting with global flavors, Hearty Vegan Stew proves that simple ingredients can tell a delicious story.
Taste and Texture
What makes it delicious
Hearty Vegan Stew wraps you in warmth with its rich, savory depth and earthy aroma. Each spoonful bursts with umami from mushrooms, sweetness from caramelized onions, and a hint of smokiness from paprika. Tender chunks of potatoes and carrots melt in your mouth, while lentils add a satisfying, slightly chewy texture. Meanwhile, fresh herbs like thyme and rosemary infuse every bite with fragrant, garden-fresh notes. Hearty Vegan Stew isn’t just filling—it’s a cozy, flavor-packed hug in a bowl.
r">Boosting the flavor
Elevate your Hearty Vegan Stew by stirring in a spoonful of miso paste for extra umami or a splash of balsamic vinegar for tangy brightness. For a creamy twist, swirl in coconut milk or top with crunchy garlic croutons. If you love heat, add a pinch of red pepper flakes or serve with a drizzle of spicy cashew dressing. Experiment with smoked sea salt or a squeeze of lemon to wake up the flavors—every tweak makes this stew even more irresistible.
Tips for Success
Best practices for results
Always sauté your onions and garlic first to build flavor for your Hearty Vegan Stew. Use a heavy-bottomed pot to distribute heat evenly and prevent burning. Stir occasionally while simmering to ensure the ingredients cook uniformly. For the best texture, chop your vegetables into similar-sized pieces so they finish cooking at the same time. Finally, let the stew rest for 10 minutes before serving to allow the flavors to meld.
>Mistakes to avoid
Avoid rushing the cooking process by cranking up the heat, as this can make your Hearty Vegan Stew too watery or cause sticking. Instead, simmer it gently for the best consistency. Also, don’t skip deglazing the pot after sautéing—this step adds depth to the broth. For more on balancing flavors, check out our guide to vegan seasoning tips. Lastly, resist overloading the pot with ingredients, as overcrowding can lead to uneven cooking. Learn how to adjust portions properly with our vegan meal prep strategies.
Serving and Pairing Suggestions
How to serve this dish
For a cozy family dinner, ladle Hearty Vegan Stew into deep bowls and top it with fresh parsley or a sprinkle of smoked paprika. Meanwhile, if you’re hosting a casual gathering, serve it in rustic bread bowls for a fun, edible presentation. During colder months, this stew shines as the star of holiday potlucks or Sunday meal prep. To elevate its visual appeal, garnish with a swirl of coconut yogurt or a handful of toasted pumpkin seeds for extra texture.
What goes well with it
Pair Hearty Vegan Stew with crusty sourdough bread or fluffy vegan dinner rolls to soak up every last drop of its rich broth. For a refreshing contrast, serve it alongside a crisp green salad with lemon-tahini dressing. Additionally, a glass of earthy red wine or spiced apple cider enhances the stew’s warm flavors. If you love dipping sauces, try our creamy avocado dip for a cool, tangy twist.
What are the best vegetables to use in a hearty vegan stew?
Root vegetables like carrots, potatoes, and parsnips work wonderfully in a hearty vegan stew, as they hold their shape and add texture. For extra depth, include mushrooms, celery, and onions—they create a rich umami flavor that complements the stew’s heartiness.
Can I make a hearty vegan stew in a slow cooker?
Absolutely! A slow cooker is perfect for a hearty vegan stew—just add all ingredients and cook on low for 6-8 hours. The long simmering time helps meld flavors and tenderize vegetables, resulting in a deeply satisfying dish.
ank-math-faq-item">
How do I thicken my hearty vegan stew without flour?
For a gluten-free option, mash some of the cooked potatoes or blend a portion of the stew to create natural thickness. Alternatively, add lentils or a spoonful of tomato paste to enhance the hearty vegan stew’s texture.
Is hearty vegan stew freezer-friendly?
Yes! Hearty vegan stew freezes exceptionally well—just cool it completely before transferring to airtight containers. It keeps for up to 3 months, making it a great meal-prep option for busy weeks.