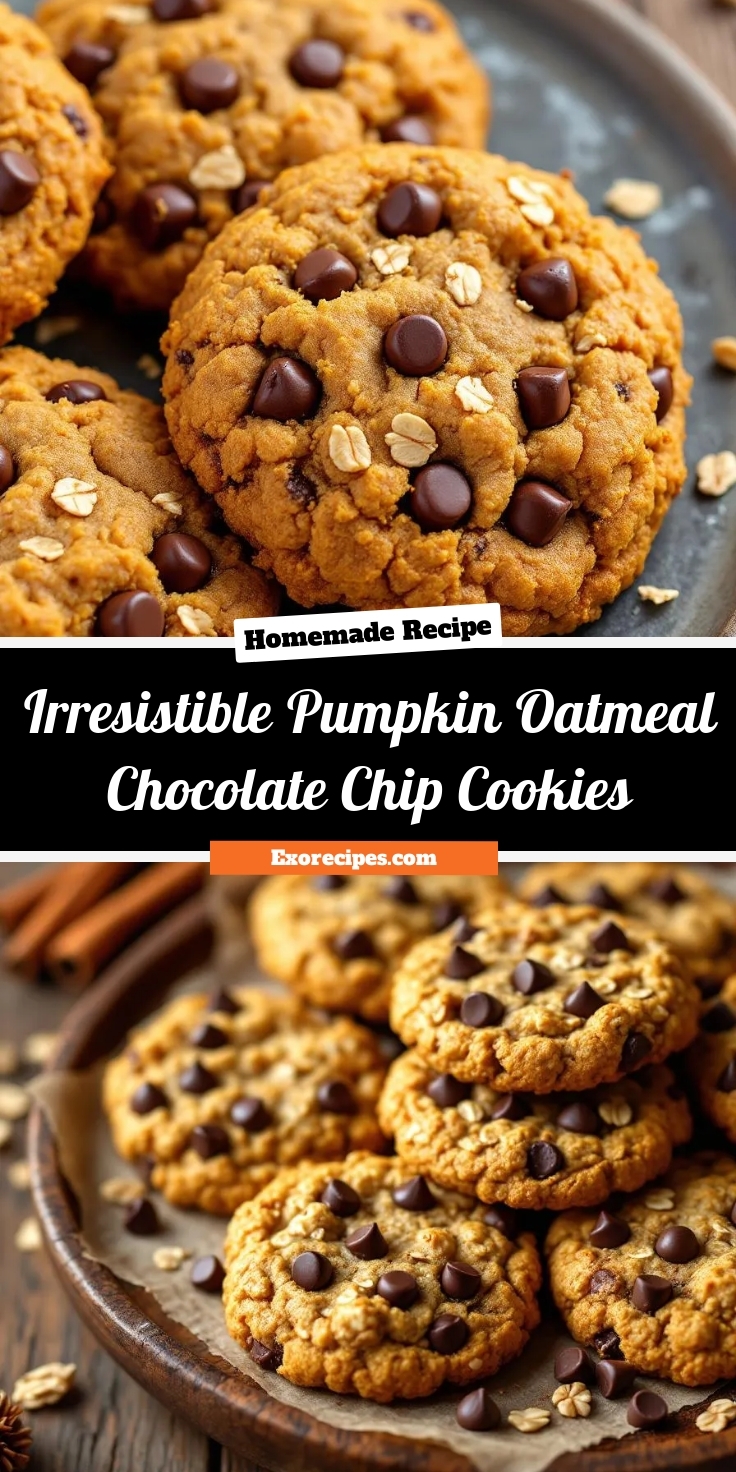
Best Pumpkin Oatmeal Chocolate Chip Cookies Recipe
Introduction
There’s something magical about the smell of warm spices and pumpkin wafting through the kitchen, especially when it leads to a batch of freshly baked Irresistible Pumpkin Oatmeal Chocolate Chip Cookies. Whether you’re craving a cozy fall treat or a wholesome snack that satisfies your sweet tooth, these cookies deliver every time. Soft, chewy, and packed with flavor, they’re the perfect blend of comfort and indulgence. Plus, they’re easy enough for bakers of all levels to master. So, grab your mixing bowl and let’s dive into why these cookies deserve a spot in your recipe rotation.
Irresistible Pumpkin Oatmeal Chocolate Chip Cookies combine the best of three worlds: the warmth of pumpkin spice, the heartiness of oats, and the decadence of chocolate chips. These cookies aren’t just delicious—they’re also versatile. You can enjoy them as an afternoon pick-me-up, pack them for lunchboxes, or even serve them as a crowd-pleasing dessert at gatherings. What sets them apart is their perfect texture—soft yet slightly chewy, with just the right amount of sweetness. Unlike traditional pumpkin recipes that lean heavily on pie fillings or breads, these cookies offer a portable, bite-sized way to enjoy seasonal flavors. If you love easy, flavorful recipes like our Classic Chocolate Chip Cookies, you’ll appreciate how this twist keeps things fresh and festive. And for more pumpkin inspiration, check out our Pumpkin Spice Latte—because fall deserves all the cozy vibes.
Why I Love This Recipe
These cookies hold a special place in my heart because they remind me of baking with my mom during crisp autumn weekends. She always added extra chocolate chips, claiming life was too short for skimping on the good stuff. Now, whenever I make Irresistible Pumpkin Oatmeal Chocolate Chip Cookies, I channel that same joy—mixing, tasting, and sharing them with loved ones. They’re more than just a recipe; they’re a little edible hug. Trust me, one bite and you’ll understand why I keep coming back to them year after year.
Health and Nutrition
Why it’s good for your body
Irresistible Pumpkin Oatmeal Chocolate Chip Cookies pack a nutritious punch while satisfying your sweet tooth. First, pumpkin puree delivers a hefty dose of vitamin A, which supports vision and immune health. Additionally, oats provide soluble fiber to keep you full longer and promote digestive wellness. Meanwhile, dark chocolate chips offer antioxidants that combat inflammation.
Moreover, these cookies contain less refined sugar than traditional desserts, thanks to the natural sweetness of pumpkin and oats. Transitioning to healthier ingredients doesn’t mean sacrificing flavor. In fact, Irresistible Pumpkin Oatmeal Chocolate Chip Cookies prove you can enjoy a treat without guilt. The combination of whole grains and healthy fats also helps stabilize blood sugar levels.
Finally, pumpkin adds moisture, reducing the need for excess butter or oil. Consequently, each bite feels indulgent while remaining balanced. Whether you need an energy boost or a mindful dessert, Irresistible Pumpkin Oatmeal Chocolate Chip Cookies deliver both taste and nourishment.
How it fits in a healthy lifestyle
Irresistible Pumpkin Oatmeal Chocolate Chip Cookies fit seamlessly into a balanced diet. For gluten-free eaters, simply swap regular flour for a gluten-free blend. The oats and pumpkin also make these cookies heart-healthy by supporting cholesterol management. Pair them with a protein-rich snack like Greek yogurt for a satisfying afternoon treat.
If you’re meal prepping, bake a batch and store them for quick, portion-controlled snacks. For more ideas on healthy baking, check out our guide to smart ingredient swaps. Alternatively, if you’re exploring plant-based diets, these cookies easily adapt to vegan preferences with a few tweaks. Discover more tips in our plant-based desserts roundup. With wholesome ingredients and flexible options, these cookies help you stay on track without feeling deprived.
Soft and chewy cookies packed with pumpkin flavor, hearty oats, and melty chocolate chips.
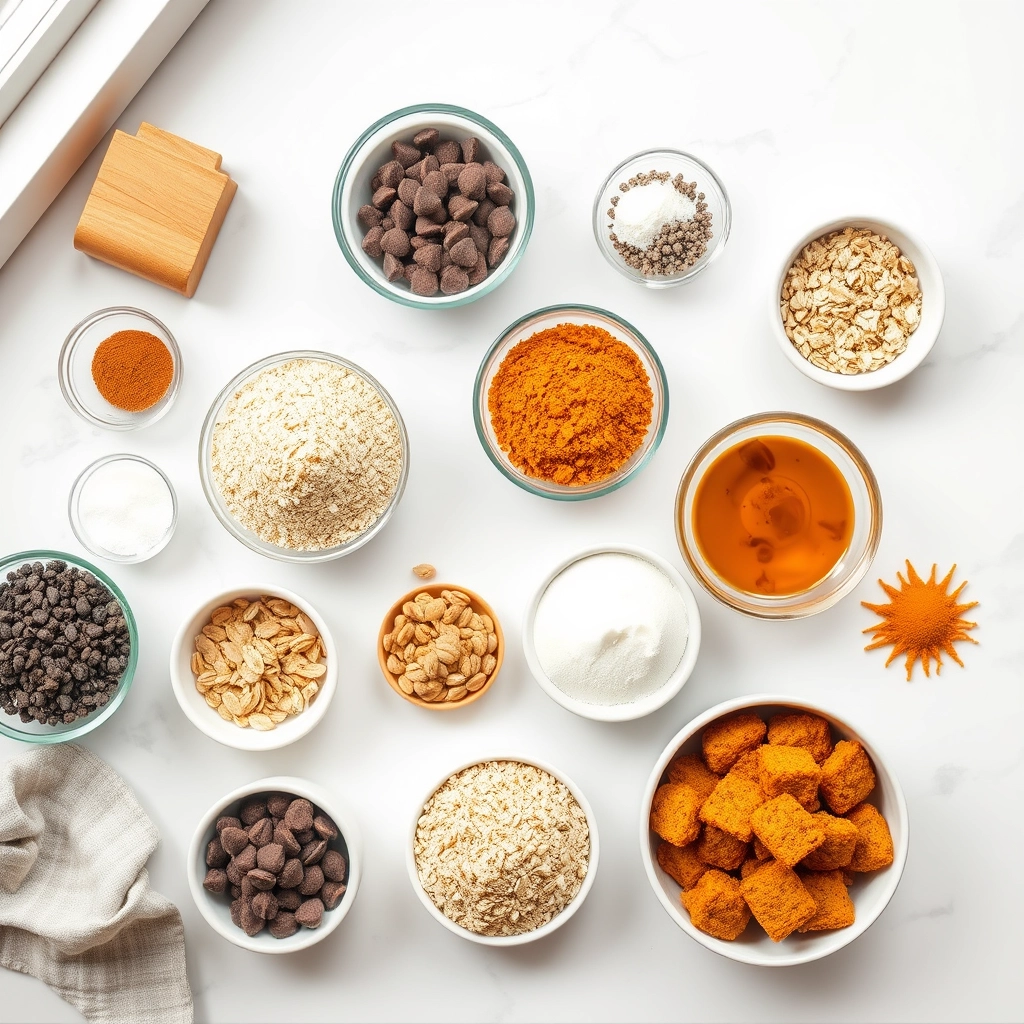
Ingredients
Scale
For the Crust:
1 cup canned pumpkin puree
1 cup granulated sugar
1/2 cup brown sugar
1/2 cup unsalted butter, softened
1 large egg
1 tsp vanilla extract
1 1/2 cups all-purpose flour
1 1/2 cups rolled oats
1 tsp baking soda
1 tsp cinnamon
1/2 tsp nutmeg
1/4 tsp salt
1 cup semi-sweet chocolate chips
Instructions
1. Prepare the Crust:
Preheat oven to 350°F (175°C) and line baking sheets with parchment paper.
In a large bowl, cream together pumpkin puree, sugars, and butter until smooth.
Beat in egg and vanilla extract until well combined.
In a separate bowl, whisk together flour, oats, baking soda, cinnamon, nutmeg, and salt.
Gradually stir dry ingredients into wet ingredients until just combined.
Fold in chocolate chips.
Drop rounded tablespoons of dough onto prepared baking sheets, spacing 2 inches apart.
Bake for 12-14 minutes until edges are lightly golden.
Let cool on baking sheets for 5 minutes before transferring to wire racks.
Notes
You can customize the seasonings to taste.
“`html
How to Prepare This Dish
Steps and time-saving tips
Start by preheating your oven to 350°F and lining your baking sheets with parchment paper for easy cleanup. In a large bowl, whisk together the flour, oats, baking soda, cinnamon, and pumpkin pie spice until evenly combined. Next, grab another bowl and beat the softened butter with brown sugar and granulated sugar until creamy. Then, mix in the pumpkin puree, egg, and vanilla extract until smooth. Gradually fold the dry ingredients into the wet mixture, stirring just until no flour streaks remain. Finally, gently fold in the chocolate chips for that irresistible touch. Scoop tablespoon-sized portions of dough onto your prepared sheets, spacing them about two inches apart. Bake for 12-14 minutes until the edges turn golden but the centers stay soft. Let the Irresistible Pumpkin Oatmeal Chocolate Chip Cookies cool on the pan for five minutes before transferring them to a wire rack. For a time-saving trick, chill the dough for 30 minutes beforehand to prevent spreading. If you’re short on time, use a cookie scoop for uniform sizing and faster portioning.
and-learned-from">Mistakes I’ve made and learned from
I once rushed the mixing process and ended up with dense Irresistible Pumpkin Oatmeal Chocolate Chip Cookies—lesson learned! Overworking the dough activates too much gluten, so now I stir just until combined. Another blunder? Skipping the parchment paper. The cookies stuck stubbornly, and I spent ages scrubbing pans. Now I never skip it, just like I never skip checking my oven temperature for accuracy. A too-hot oven turned my first batch into crispy discs instead of soft, chewy delights. If your cookies spread too thin, try my trick from this texture troubleshooting guide: chill the dough longer or add an extra tablespoon of flour. Trust me, these small tweaks make all the difference between good and truly irresistible cookies.
“`
n-and-variations">Cultural Connection and Variations
Where this recipe comes from
Irresistible Pumpkin Oatmeal Chocolate Chip Cookies blend cozy fall flavors with a touch of nostalgia. Pumpkin, a staple in Native American cuisine, became a beloved ingredient in colonial baking, while oats traveled from Europe to America, finding their way into hearty cookies. Together, they create a treat that feels like a warm hug on a crisp autumn day. Some families add extra spices like nutmeg or cardamom, while others swap chocolate chips for raisins or walnuts for a different twist.
In the South, bakers might use pecans for a buttery crunch, whereas Midwestern versions often keep it simple with just pumpkin and cinnamon. Meanwhile, in other parts of the world, similar cookies might skip the pumpkin entirely, using sweet potato or squash instead. No matter the variation, Irresistible Pumpkin Oatmeal Chocolate Chip Cookies always carry that unmistakable comfort—whether served at harvest festivals, Thanksgiving gatherings, or just as an after-school snack.
How it fits in today’s cooking
Today, these cookies bridge tradition and modern convenience. Busy bakers love them because they’re easy to whip up yet feel special enough for holiday cookie swaps. Many adapt the recipe to fit dietary needs, like using gluten-free oats or dairy-free chocolate chips. Some even sneak in a handful of flaxseeds for extra nutrition, proving that Irresistible Pumpkin Oatmeal Chocolate Chip Cookies can evolve without losing their charm.
They’ve also fou
nd a place in meal prep routines, pairing perfectly with a morning coffee or as a lunchbox treat. For more cozy baking ideas, check out our fall desserts roundup. And if you’re craving other seasonal twists, our pumpkin recipe collection has plenty of inspiration. Whether you stick to the classic or experiment with new flavors, these cookies remain a timeless favorite.
Taste and Texture
What makes it delicious
Irresistible Pumpkin Oatmeal Chocolate Chip Cookies deliver a warm, spiced aroma that fills the kitchen with cozy autumn vibes. The first bite reveals a perfect balance of chewy oats, creamy chocolate chips, and tender pumpkin-spiced dough. Each mouthful bursts with rich cinnamon and nutmeg, while the melty chocolate adds a smooth contrast to the hearty oatmeal texture. Meanwhile, the pumpkin keeps the cookies moist and slightly dense, making them utterly satisfying. Whether enjoyed fresh from the oven or cooled, Irresistible Pumpkin Oatmeal Chocolate Chip Cookies offer a comforting treat that feels like a hug in every bite.
Boosting the flavor
For an extra flavor boost, try swapping semi-sweet chocolate chips for dark chocolate chunks—their deep richness pairs beautifully with the pumpkin spice. Alternatively, sprinkle a pinch of sea salt on top before baking to enhance the sweetness. If you love warm spices, a dash of cardamom or clove will elevate the autumnal notes. For added crunch, fold in toasted pecans or walnuts. Craving more inspiration? Check out our guide to perfect spice blends or explore creative cookie toppings to take these cookies to the next level. A drizzle of caramel or a scoop of vanilla ice cream turns them into an unforgettable dessert.
Always chill the dough for at least 30 minutes before baking to prevent spreading and ensure thick, chewy Irresistible Pumpkin Oatmeal Chocolate Chip Cookies. Meanwhile, use parchment paper or a silicone baking mat for even browning and easy cleanup. For the best texture, measure your flour correctly by spooning it into the measuring cup and leveling it off. Additionally, slightly underbake the cookies by 1-2 minutes since they’ll continue to firm up on the baking sheet. Finally, let them cool completely before storing to maintain their softness.
Mistakes to avoid
Avoid overmixing the dough after adding the dry ingredients, as this can make your Irresistible Pumpkin Oatmeal Chocolate Chip Cookies tough instead of tender. Instead, gently fold until just combined. Another common mistake is using cold butter, which won’t cream properly with the sugar. For perfect results, soften your butter to room temperature first. If you’re unsure about your oven’s accuracy, check out our guide on oven temperature tips to avoid over- or underbaking. Also, don’t skip the spices—they’re key for that warm pumpkin flavor. For more flavor-balancing tricks, explore our baking spice guide.
g-suggestions">Serving and Pairing Suggestions
How to serve this dish
Serve Irresistible Pumpkin Oatmeal Chocolate Chip Cookies warm for a cozy, melt-in-your-mouth experience. For a festive touch, arrange them on a rustic wooden board with a drizzle of caramel sauce and a sprinkle of cinnamon. Alternatively, stack them high on a cake stand for holiday gatherings or brunch spreads. These cookies also make charming edible gifts when wrapped in parchment paper and tied with twine. Whether you enjoy them fresh from the oven or at room temperature, their inviting aroma and soft texture will delight every bite.
What goes well with it
Pair Irresistible Pumpkin Oatmeal Chocolate Chip Cookies with a steaming mug of spiced chai latte for a comforting autumn treat. The warm spices in both the cookies and the drink create a harmonious flavor blend. For a refreshing contrast, try them alongside a glass of cold vanilla almond milk. If you love dessert pairings, serve these cookies with a scoop of our creamy Homemade Vanilla Bean Ice Cream. For a brunch-friendly combo, enjoy them with our Cinnamon Honey Latte, which highlights the cookies’ warm pumpkin and oatmeal notes.
math-faq-block">
What makes pumpkin oatmeal chocolate chip cookies irresistible?
Irresistible Pumpkin Oatmeal Chocolate Chip Cookies combine the warm spices of pumpkin pie with chewy oats and melty chocolate chips for a perfect texture and flavor balance. The pumpkin adds moisture, while the chocolate chips provide a rich contrast, making them hard to resist.
Can I use fresh pumpkin instead of canned for these cookies?
Yes, you can use fresh pumpkin puree, but make sure it’s thick and well-drained to avoid soggy cookies. Canned pumpkin is convenient and consistent, but homemade puree works just as well for Irresistible Pumpkin Oatmeal Chocolate Chip Cookies.
How do I store pumpkin oatmeal chocolate chip cookies to keep them fresh?
Store Irresistible Pumpkin Oatmeal Chocolate Chip Cookies in an airtight container at room temperature for up to 5 days. For longer freshness, freeze them in a sealed bag for up to 3 months—just thaw and enjoy!
ank-math-faq-item">
Can I make these cookies gluten-free?
Absolutely! Substitute the all-purpose flour with a 1:1 gluten-free blend and ensure your oats are certified gluten-free. Irresistible Pumpkin Oatmeal Chocolate Chip Cookies will still have the same delicious taste and texture.
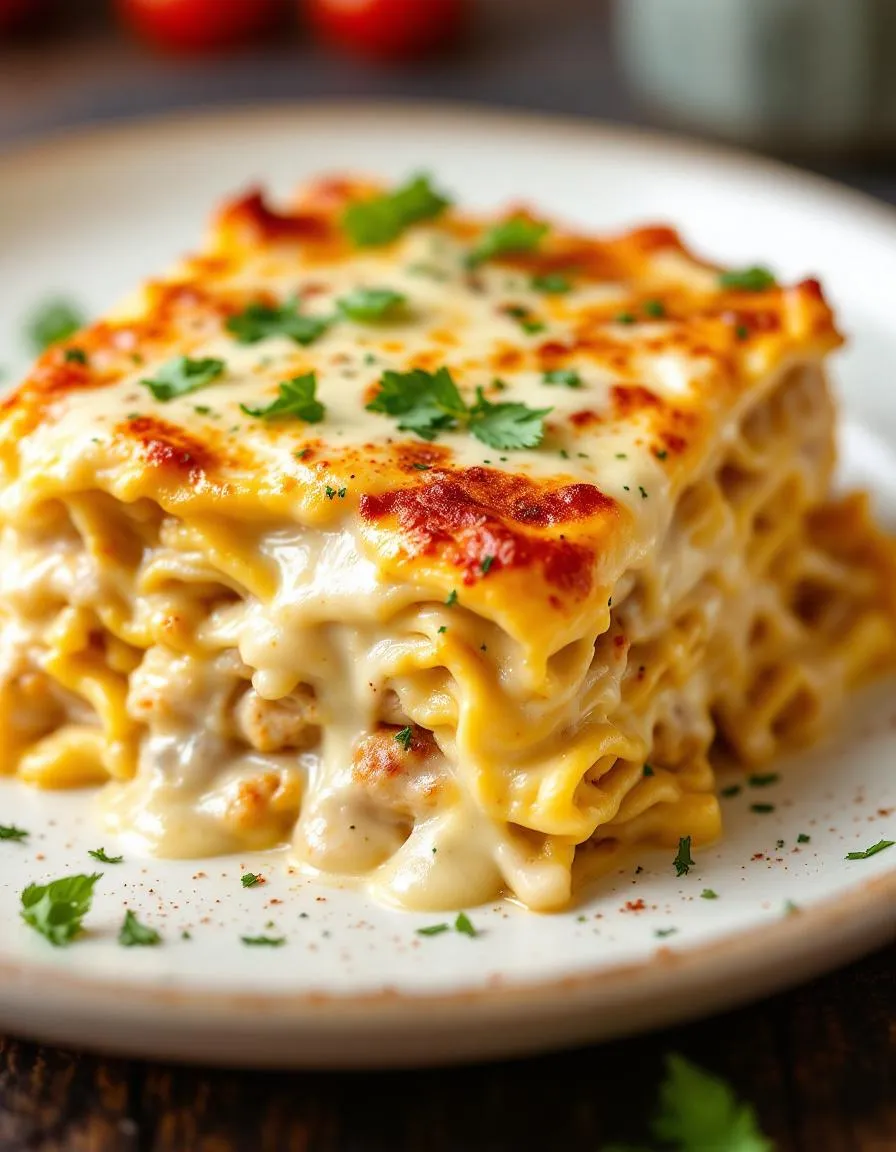
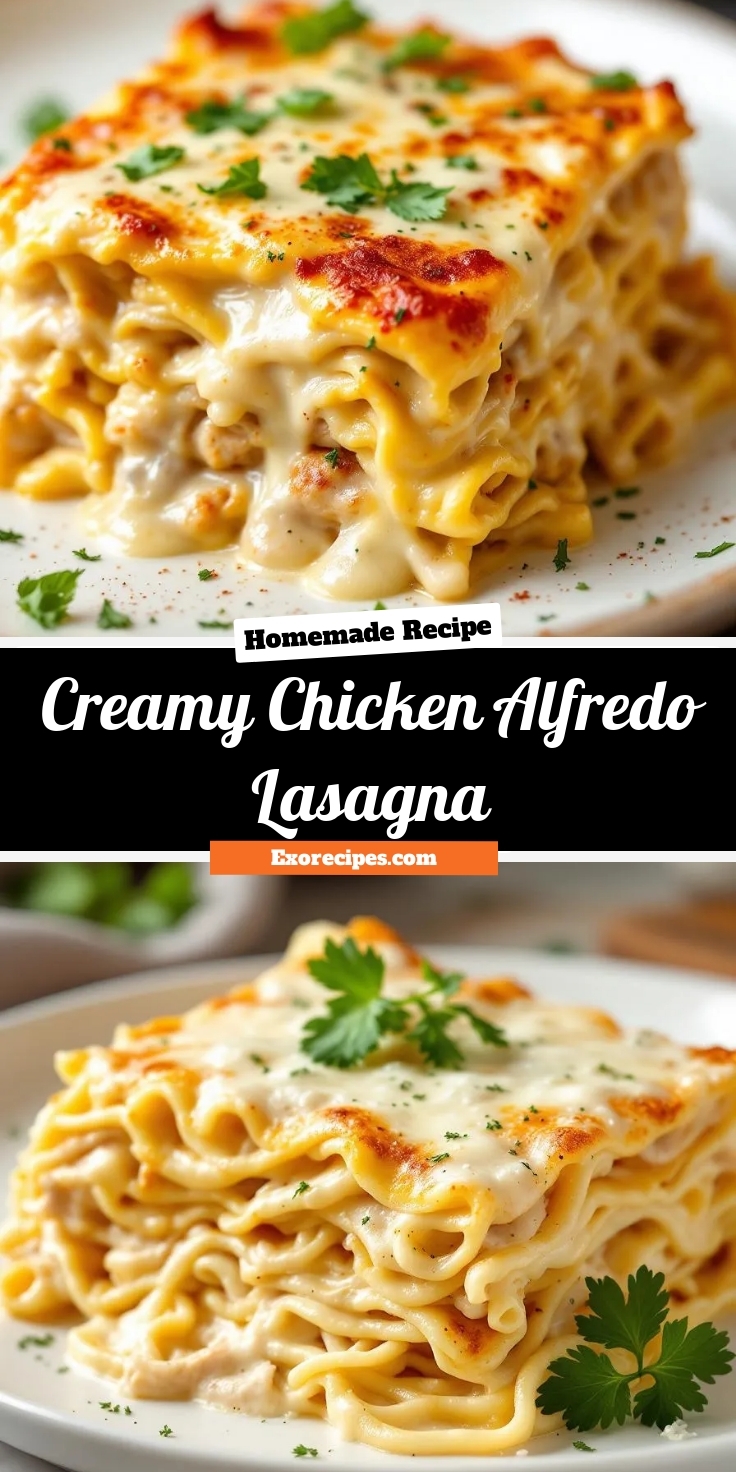
Best Creamy Chicken Alfredo Lasagna Recipe
Introduction
There’s something magical about comfort food that wraps you in warmth with every bite. If you love the rich creaminess of Alfredo sauce and the hearty layers of lasagna, you’ll adore this twist on a classic. Creamy Chicken Alfredo Lasagna combines the best of both worlds, delivering a dish that feels indulgent yet approachable. Whether you’re cooking for a cozy family dinner or impressing guests at a gathering, this recipe promises to become a fast favorite. Plus, it’s easier to make than you might think, proving that decadent flavors don’t always require complicated steps.
Creamy Chicken Alfredo Lasagna is a luxurious take on traditional lasagna, swapping tomato sauce for velvety Alfredo and adding tender chicken for extra protein. Unlike classic versions, this dish leans into rich, savory flavors with a silky texture that melts in your mouth. It’s perfect for those nights when you crave something comforting but still want a meal that feels special. The blog’s tone celebrates accessible gourmet cooking, and this recipe fits right in—offering restaurant-quality results without fussy techniques. If you’re a fan of our Easy Chicken Alfredo Pasta, you’ll appreciate how this lasagna elevates the same flavors into a layered masterpiece. And for those who love make-ahead meals, it reheats beautifully, just like our Freezer-Friendly Lasagna.
Why I Love This Recipe
This dish holds a special place in my heart because it reminds me of Sunday dinners at my grandma’s house. She always believed the best meals brought people together, and her version of Creamy Chicken Alfredo Lasagna was the star of the table. Now, whenever I make it, the aroma of garlic and Parmesan takes me right back to those moments. It’s more than just food—it’s a reminder of laughter, shared stories, and the joy of cooking for loved ones. That’s why I’m so excited to share this recipe with you, hoping it creates your own cherished memories.
Health and Nutrition
Why it’s good for your body
Creamy Chicken Alfredo Lasagna packs a nutritious punch while satisfying your comfort food cravings. First, the lean chicken provides high-quality protein, which helps build and repair muscles. Additionally, the dairy-rich Alfredo sauce delivers calcium and vitamin D, supporting strong bones and immune function. Since this dish includes layers of pasta, it also offers energizing carbohydrates to fuel your day.
Moreover, Creamy Chicken Alfredo Lasagna balances indulgence with nourishment. For example, the cheese and cream add healthy fats that keep you full longer. Meanwhile, you can easily boost the fiber content by using whole-grain noodles or adding veggies like spinach. Furthermore, the dish contains essential nutrients like phosphorus and B vitamins, which aid metabolism and energy production.
Finally, this lasagna brings versatility to the table. Whether you tweak the ingredients for a lighter version or enjoy it as-is, Creamy Chicken Alfredo Lasagna fits various dietary preferences. By combining protein, carbs, and fats in one dish, it delivers a well-rounded meal that keeps you satisfied and nourished.
How it fits in a healthy lifestyle
Creamy Chicken Alfredo Lasagna can easily adapt to your wellness goals. For a high-protein twist, increase the chicken or swap in Greek yogurt for part of the sauce. If you prefer gluten-free options, try using gluten-free pasta or zucchini noodles. The dish also pairs well with a fresh salad, making it a balanced part of your weekly meal plan.
For those watching portion sizes, divide the lasagna into single servings and freeze extras for busy days. You can also explore our healthy meal prep guide for more time-saving tips. If you love creamy dishes but want lighter alternatives, check out our low-calorie comfort food recipes. With simple adjustments, Creamy Chicken Alfredo Lasagna becomes a delicious and practical choice for any healthy lifestyle.
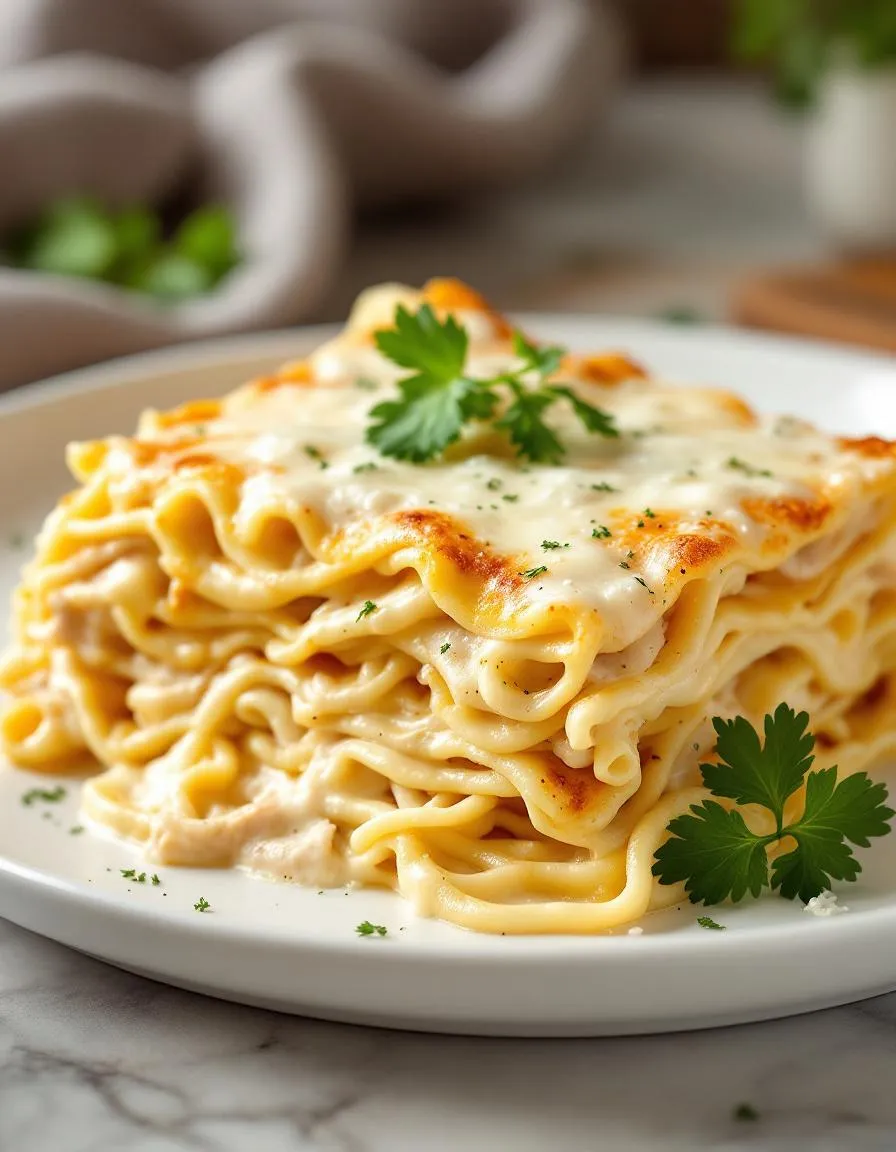
A rich and comforting twist on classic lasagna, featuring layers of tender chicken, creamy Alfredo sauce, and melted cheese.
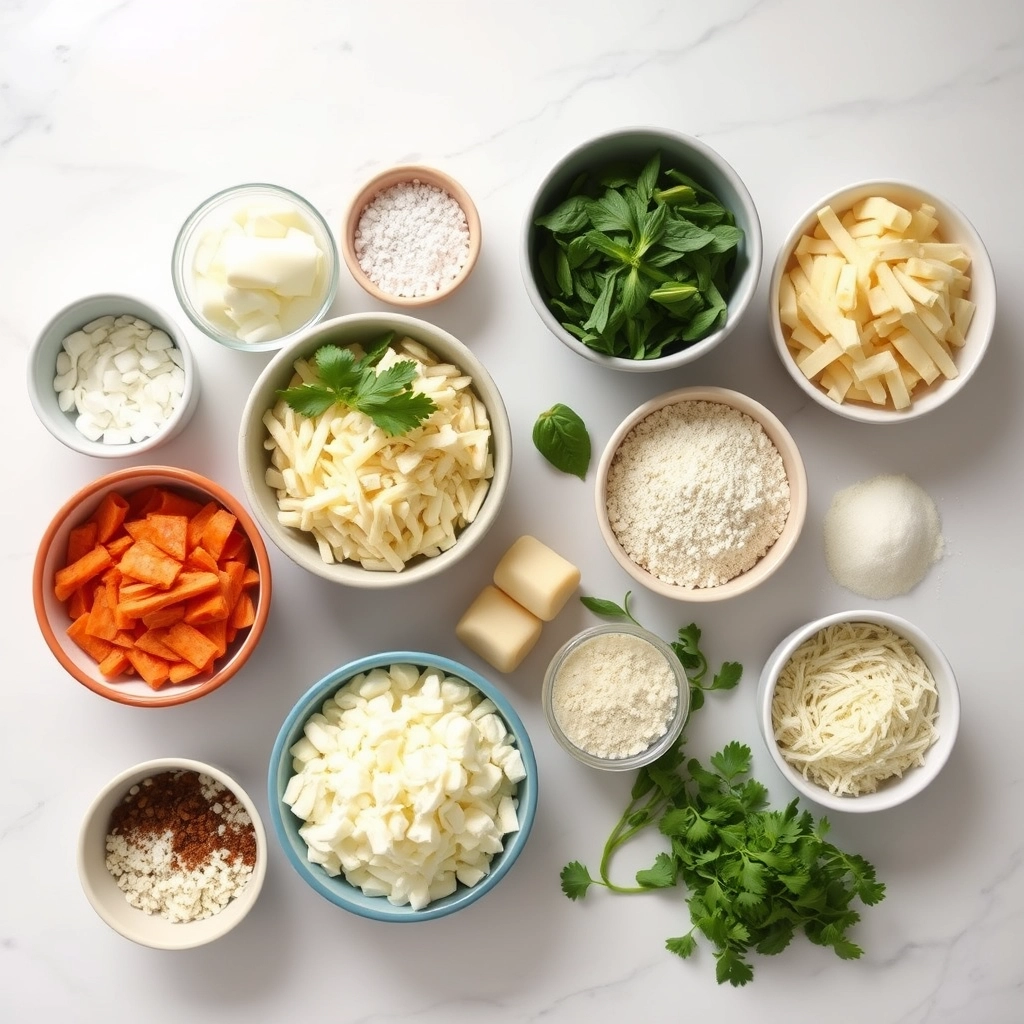
Ingredients
Scale
For the Crust:
9 lasagna noodles, cooked al dente
2 cups cooked chicken, shredded
2 cups Alfredo sauce (homemade or store-bought)
1 1/2 cups ricotta cheese
1 cup mozzarella cheese, shredded
1/2 cup Parmesan cheese, grated
1 tsp garlic powder
1 tsp Italian seasoning
Salt and pepper to taste
Instructions
1. Prepare the Crust:
Preheat oven to 375°F (190°C). Grease a 9×13-inch baking dish.
In a bowl, mix ricotta cheese, garlic powder, Italian seasoning, salt, and pepper.
Spread a thin layer of Alfredo sauce on the bottom of the baking dish. Place 3 lasagna noodles over the sauce.
Layer half the ricotta mixture, half the chicken, and a third of the mozzarella and Parmesan cheeses. Repeat layers, ending with noodles.
Top with remaining Alfredo sauce and cheeses. Cover with foil and bake for 25 minutes.
Remove foil and bake for an additional 5-10 minutes until bubbly and golden. Let rest 10 minutes before serving.
Notes
You can customize the seasonings to taste.
s-dish">How to Prepare This Dish
Steps and time-saving tips
Start by preheating your oven to 375°F so it’s ready when you finish assembling your Creamy Chicken Alfredo Lasagna. While it heats, grab a large skillet and cook your chicken over medium heat until it’s no longer pink, then shred it into bite-sized pieces. In a separate bowl, whisk together the Alfredo sauce, ricotta, and a pinch of garlic powder for extra flavor. Now, spread a thin layer of sauce at the bottom of your baking dish to prevent sticking. Next, layer lasagna noodles evenly, followed by half the chicken, a drizzle of sauce, and a sprinkle of mozzarella. Repeat the layers once more, then finish with a final noodle layer topped generously with sauce and cheese. Cover the dish with foil and bake for 25 minutes before removing the foil and baking another 10 minutes for a golden top. Let it rest for 5 minutes before slicing—this helps the layers set. For a time-saving hack, use no-boil lasagna noodles or leftover rotisserie chicken to cut prep work in half.
Mistakes I’ve made and learned from
I once rushed the layering process for my Creamy Chicken Alfredo Lasagna and ended up with uneven, sloppy slices. Now, I take my time to spread each component evenly, especially the sauce, so every bite is perfect. Another blunder? Overbaking. I learned the hard way that dry lasagna is a mood-killer, so I stick to the timer and check for bubbly edges rather than waiting for the top to brown too much. If you’re new to lasagna, my guide on layering pasta like a pro breaks it down simply. Also, don’t skip resting time—my early attempts turned into a saucy mess because I dug in too soon. For more troubleshooting, check out my tips on fixing soggy lasagna. Trust me, patience pays off here.
n-and-variations">Cultural Connection and Variations
Where this recipe comes from
Creamy Chicken Alfredo Lasagna marries two Italian classics—Alfredo sauce and lasagna—into one indulgent dish. While traditional lasagna hails from Naples, Alfredo sauce traces back to Rome, where butter and Parmesan created a simple yet rich pasta coating. Over time, home cooks blended these concepts, adding chicken for protein and cream for extra decadence. Today, you’ll find regional twists, like using smoked mozzarella in the American South or layering in roasted mushrooms for an earthy touch.
In my family, Creamy Chicken Alfredo Lasagna became a Sunday supper staple because it fed a crowd without fuss. My aunt swapped in turkey after Thanksgiving, while my cousin added spinach for color. Across Italy, though, purists might balk at the fusion—their lasagna leans on ragù and béchamel. Still, food evolves, and this dish proves how comfort knows no borders. Whether you bake it with gluten-free noodles or spike the sauce with garlic, the heart of the recipe remains: layers of warmth meant for sharing.
How it fits in today’s cooking
Creamy Chicken Alfredo Lasagna still shines as a versatile crowd-pleaser. Busy parents love make-ahead versions for weeknight dinners, while food bloggers riff on it with keto-friendly zucchini layers. During holidays, it’s a hearty alternative to turkey, especially when paired with a crisp fall salad. Even meal-prep enthusiasts embrace it, freezing portions for quick lunches.
Modern cooks also light
en it up—using Greek yogurt instead of heavy cream or adding sun-dried tomatoes for brightness. Others lean into indulgence, topping it with crispy bacon or serving it alongside garlic bread twists. No matter the twist, Creamy Chicken Alfredo Lasagna endures because it balances nostalgia with adaptability. It’s a dish that feels both familiar and fresh, perfect for today’s kitchens.
Taste and Texture
What makes it delicious
Creamy Chicken Alfredo Lasagna wraps you in layers of rich, velvety comfort. The alfredo sauce melts into tender pasta sheets, while shredded chicken adds a savory depth that balances the dish. Each bite delivers a luscious creaminess, punctuated by the sharp tang of Parmesan and the subtle garlicky aroma. Meanwhile, the golden, bubbly cheese topping offers a satisfying crispness against the soft layers beneath. Whether you savor it fresh from the oven or as leftovers, Creamy Chicken Alfredo Lasagna feels indulgent yet familiar—like a cozy twist on two classic favorites.
Boosting the flavor
Elevate your Creamy Chicken Alfredo Lasagna with a handful of easy upgrades. For extra richness, swap regular Alfredo sauce for a homemade garlic Alfredo infused with fresh herbs. If you love a smoky kick, sprinkle crispy bacon or sun-dried tomatoes between the layers. A dash of nutmeg or red pepper flakes can also deepen the flavors without overpowering them. For a finishing touch, serve with a side of garlic breadsticks to soak up every last bite. Small tweaks make this dish even more memorable!
First, always cook your lasagna noodles al dente so they hold their shape in the Creamy Chicken Alfredo Lasagna. Additionally, shred your chicken finely for even distribution in every bite. For the creamiest texture, warm your Alfredo sauce slightly before layering it. Finally, let the lasagna rest for 10 minutes after baking to set perfectly.
Mistakes to avoid
Avoid overloading the layers, as too much filling can make the Creamy Chicken Alfredo Lasagna soggy. Instead, spread ingredients evenly for balanced flavor. Also, don’t skip covering the dish with foil while baking—this prevents the top from drying out. For more layering tips, check out our guide on perfect pasta layering. If your sauce separates, try reheating it gently as shown in our sauce consistency fixes tutorial.
g-suggestions">Serving and Pairing Suggestions
How to serve this dish
For a stunning presentation, slice your Creamy Chicken Alfredo Lasagna into generous portions and plate them on warm dishes. Meanwhile, garnish each serving with fresh parsley or basil to add a pop of color. Alternatively, serve it family-style on a large platter for gatherings, letting everyone dig in. Since this dish feels indulgent, it works perfectly for holiday dinners or cozy weekend meals. To make it extra special, pair it with candlelight and soft music for a romantic dinner at home.
What goes well with it
A crisp Caesar salad balances the richness of Creamy Chicken Alfredo Lasagna beautifully. The crunchy romaine and tangy dressing cut through the creamy layers. For a heartier option, try roasted garlic breadsticks, which soak up every last bit of sauce. If you love wine, a chilled glass of Pinot Grigio or buttery Chardonnay enhances the flavors. Craving something sweet afterward? Our lemon blueberry cake or chocolate lava cake makes the perfect finale.
math-faq-block">
What’s the best way to layer Creamy Chicken Alfredo Lasagna?
Start with a thin layer of Alfredo sauce at the bottom, followed by lasagna noodles, shredded chicken, more sauce, and a blend of cheeses. Repeat the layers, finishing with a generous topping of mozzarella and Parmesan for a golden crust. This method ensures every bite of your Creamy Chicken Alfredo Lasagna is perfectly balanced.
Can I make Creamy Chicken Alfredo Lasagna ahead of time?
Yes! Assemble the lasagna up to 24 hours in advance, cover it tightly, and refrigerate until ready to bake. For best results, let it sit at room temperature for 30 minutes before baking. Creamy Chicken Alfredo Lasagna also freezes well for up to 3 months—just thaw overnight before cooking.
What sides pair well with Creamy Chicken Alfredo Lasagna?
A crisp Caesar salad or garlic bread complements the rich flavors of Creamy Chicken Alfredo Lasagna perfectly. For a lighter option, try steamed broccoli or a fresh arugula salad. These sides balance the dish’s creaminess without overpowering it.
ank-math-faq-item">
How do I prevent my Creamy Chicken Alfredo Lasagna from being too watery?
Use no-boil lasagna noodles and ensure your Alfredo sauce is thick before assembling. Pat the chicken dry and avoid overloading with watery ingredients like fresh tomatoes. Let the Creamy Chicken Alfredo Lasagna rest for 10–15 minutes after baking to set properly.
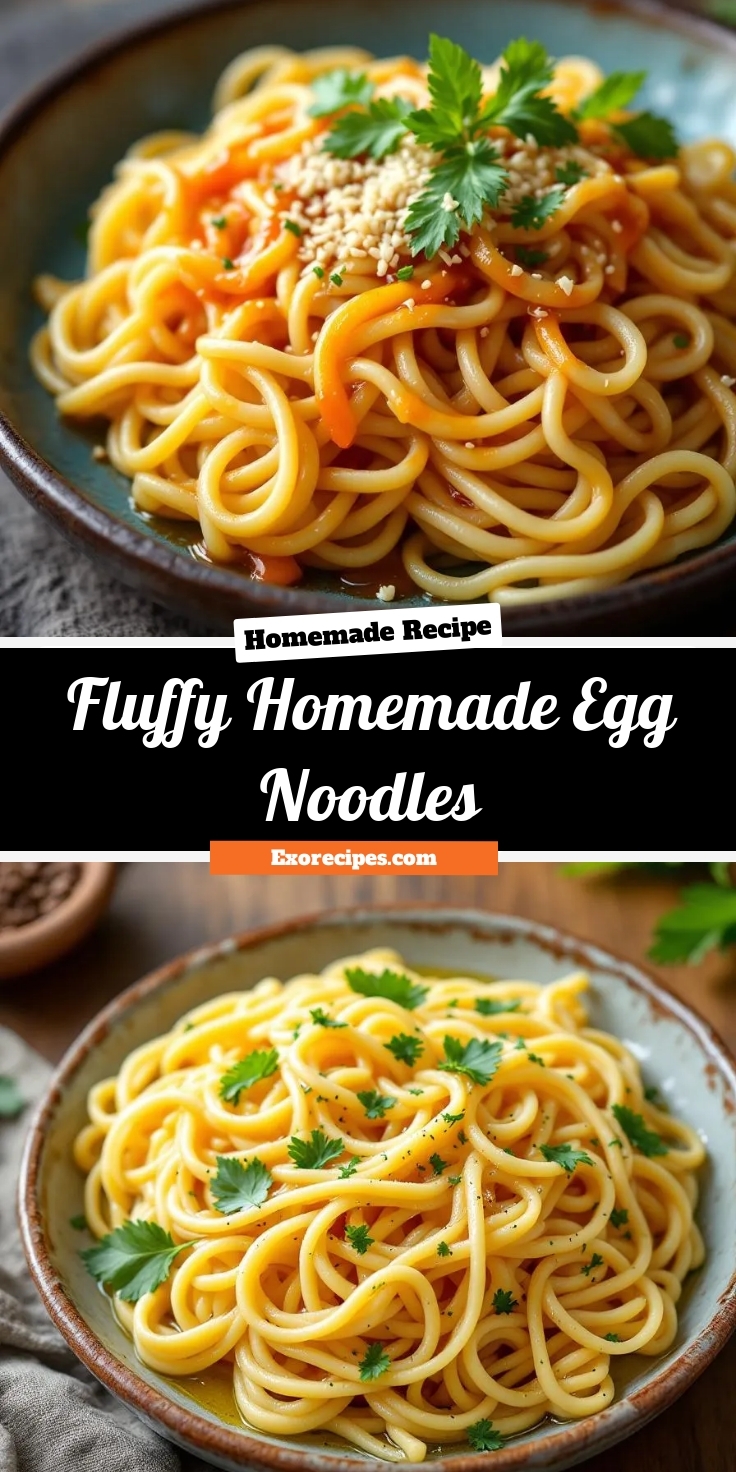
Best Homemade Egg Noodles – Fluffy and Easy
Introduction
There’s something magical about the aroma of fresh pasta filling your kitchen, isn’t there? If you’ve ever longed for tender, pillowy noodles that melt in your mouth, you’re in the right place. Today, we’re diving into the art of making Fluffy Homemade Egg Noodles—a recipe that turns simple ingredients into a comforting, soul-warming dish. Whether you’re craving a cozy bowl of chicken noodle soup or a buttery side to pair with your favorite roast, these noodles deliver every time. Let’s roll up our sleeves and create something truly special together.
Fluffy Homemade Egg Noodles are a timeless staple, blending just a handful of pantry ingredients into a dough that transforms into silky, delicate strands. Unlike store-bought versions, these noodles boast a rich, eggy flavor and a texture that’s both light and satisfying. What makes them stand out? First, they’re incredibly versatile. You can toss them in soups, stir them into creamy sauces, or even layer them in a hearty casserole. Second, they’re a labor of love—kneading the dough by hand and rolling it out connects you to generations of home cooks who’ve cherished this ritual. If you’ve tried our Classic Chicken Noodle Soup, you know how much better it tastes with fresh noodles. And if you’re new to pasta-making, don’t worry. This recipe breaks down every step, from mixing to cutting, so you’ll feel confident. Plus, it’s a fantastic way to involve the whole family, just like our Kid-Friendly Cooking Projects guide suggests. At its heart, this dish embodies the joy of slowing down and savoring the process—something we could all use more of these days.
Why I Love This Recipe
Fluffy Homemade Egg Noodles hold a special place in my heart because they remind me of my grandmother’s kitchen. Every Sunday, she’d whip up a batch, her hands moving with practiced ease as she rolled and sliced the dough. I’d perch on a stool, watching in awe as the flour-dusted strands piled up. Now, whenever I make them, the rhythm of kneading and the scent of eggs and flour transport me back to those cherished moments. More than nostalgia, though, I love how this recipe turns ordinary meals into something extraordinary. There’s no substitute for the pride of serving noodles you made from scratch—especially when they’re this delicious.
Health and Nutrition
Why it’s good for your body
Fluffy Homemade Egg Noodles pack a nutritious punch while delivering comfort in every bite. First, they provide a solid source of protein thanks to the eggs, which help repair muscles and keep you full longer. Additionally, when you make them at home, you control the ingredients, avoiding unnecessary additives found in store-bought versions.
Moreover, Fluffy Homemade Egg Noodles offer energy-boosting carbohydrates, perfect for fueling your day. Unlike refined pasta, these noodles balance simplicity with wholesomeness. Pair them with vegetables or lean proteins, and you create a meal that’s both satisfying and nutrient-dense.
Finally, eggs enrich the noodles with essential vitamins like B12, which supports brain function, and selenium, a powerful antioxidant. Because you prepare Fluffy Homemade Egg Noodles from scratch, you also skip excess sodium and preservatives. Whether you enjoy them in soups or as a side, they contribute to a well-rounded diet without sacrificing flavor.
How it fits in a healthy lifestyle
Fluffy Homemade Egg Noodles fit seamlessly into a balanced diet. For those focusing on portion control, they work well as a base for veggie-packed stir-fries or lighter sauces. If you’re aiming for higher protein intake, pair them with grilled chicken or tofu for a muscle-friendly meal.
These noodles also adapt to heart-healthy eating when combined with olive oil and fresh herbs instead of heavy creams. For gluten-free alternatives, consider swapping traditional flour with a blend like almond or chickpea flour. Check out our guide on gluten-free baking tips for easy adjustments.
Busy weeknights? Fluffy Homemade Egg Noodles freeze beautifully, making meal prep a breeze. Explore our meal prep ideas to keep healthy eating simple. Whether you prioritize convenience, nutrition, or flavor, these noodles help you stay on track without compromise.
Simple and delicious homemade egg noodles that are light and fluffy, perfect for soups or as a side dish.
Ingredients
Scale
For the Crust:
2 cups all-purpose flour
3 large eggs
1 teaspoon salt
1 tablespoon water
1 tablespoon olive oil
Instructions
1. Prepare the Crust:
In a large bowl, mix the flour and salt together.
Create a well in the center of the flour and add the eggs, water, and olive oil.
Gradually mix the wet ingredients into the flour until a dough forms.
Knead the dough on a floured surface for about 5 minutes until smooth and elastic.
Cover the dough with a damp cloth and let it rest for 30 minutes.
Roll out the dough to your desired thickness and cut into strips or shapes.
Cook the noodles in boiling salted water for 3-5 minutes until tender.
Notes
You can customize the seasonings to taste.
“`html
How to Prepare This Dish
Steps and time-saving tips
Start by whisking together the flour and salt in a large bowl. Make a well in the center and crack in the eggs, then drizzle in the water. Use a fork to gently mix the wet ingredients before gradually incorporating the flour. Once the dough starts to come together, switch to kneading by hand for about 5 minutes until smooth and elastic. If the dough feels too sticky, sprinkle in a bit more flour, but avoid adding too much or your Fluffy Homemade Egg Noodles will turn out tough.
Let the dough rest unde
r a damp towel for 30 minutes to relax the gluten. Meanwhile, dust your work surface and rolling pin with flour to prevent sticking. Roll the dough out thinly, about 1/8-inch thick, then cut into strips using a sharp knife or pizza cutter. For extra efficiency, stack a few sheets of dough before slicing to save time. Separate the noodles gently and let them dry for 10-15 minutes before cooking.
Bring a large pot of salted water to a rolling boil and cook the Fluffy Homemade Egg Noodles in batches for 2-3 minutes until they float to the top. Drain immediately and toss with butter or sauce to prevent sticking. For meal prep, you can freeze uncooked noodles on a baking sheet before transferring to a bag—they’ll keep for months and cook straight from frozen.
Mistakes I’ve made and learned from
Early on, I rushed the kneading process and ended up with dense Fluffy Homemade Egg Noodles that tasted more like cardboard than comfort food. Now I set a timer for the full 5 minutes and check for that smooth, springy texture. Another blunder? Skipping the drying step before cooking, which caused my noodles to clump together. Letting them air-dry briefly makes all the difference. If you’re new to pasta-making, my guide on avoiding common pasta mistakes covers these pitfalls in detail. And if your dough feels unmanageable, don’t panic—my tips for rescuing overworked dough can help you adjust the hydration without starting over.
Fluffy Homemade Egg Noodles carry a rich history, often tied to comfort and tradition. Many cultures have their own spin on this simple yet satisfying dish. In Germany, they call it “spätzle,” rolling the dough by hand and serving it with hearty gravies. Meanwhile, in Hungary, “nokedli” pairs perfectly with stews like goulash. Even in the U.S., regional twists pop up—some families add a pinch of nutmeg, while others keep it plain but serve it with buttered breadcrumbs.
My grandmother made Flu
ffy Homemade Egg Noodles every Sunday, rolling the dough thin and cutting it into uneven strips. She swore the imperfections gave them character. Over time, I learned that this dish isn’t just about technique—it’s about connection. Whether you’re in Italy enjoying “pasta alla nonna” or in Poland savoring “kluski,” the love woven into each bite stays the same.
How it fits in today’s cooking
Today, Fluffy Homemade Egg Noodles still hold a special place in kitchens worldwide. They’re a staple for holiday feasts, like Thanksgiving or Christmas, where they soak up rich broths in dishes like grandma’s chicken soup. But they’re also versatile enough for weeknight dinners—toss them with pesto or stir them into a creamy mushroom sauce for a quick upgrade.
Modern cooks love adapting this classic, too. Some swap all-purpose flour for whole wheat or gluten-free blends, while others add herbs like thyme or rosemary for extra flavor. And let’s not forget the convenience factor—batch-making and freezing means you can enjoy homemade noodles anytime. Whether you’re honoring tradition or experimenting, this dish proves that simple ingredients can always find a place at the table.
>Taste and Texture
What makes it delicious
Fluffy Homemade Egg Noodles deliver a comforting, melt-in-your-mouth experience with their tender yet slightly chewy texture. Each bite offers a rich, buttery flavor, thanks to the fresh eggs and a touch of salt in the dough. The noodles soak up broths and sauces beautifully, becoming silky smooth while still holding their shape. Meanwhile, their subtle eggy aroma adds warmth to every dish. Whether you serve them in soup or toss them with a creamy sauce, Fluffy Homemade Egg Noodles bring a satisfying, homemade taste that store-bought versions just can’t match.
Boosting the flavor
Elevate your Fluffy Homemade Egg Noodles with a sprinkle of freshly grated Parmesan or a drizzle of garlic-infused olive oil for a savory kick. For a touch of heat, toss them with chili flakes or a spoonful of homemade pesto to brighten the dish. If you prefer a richer taste, simmer them in a creamy mushroom sauce for extra depth. Experiment with fresh herbs like thyme or parsley to add a burst of freshness. The possibilities are endless, so don’t hesitate to get creative!
Tips for Success
Best practices for results
Always measure your flour accurately by spooning it into the cup and leveling it off—this prevents dense Fluffy Homemade Egg Noodles. Additionally, let the dough rest for at least 30 minutes before rolling it out, as this relaxes the gluten for a tender texture. If the dough feels sticky, lightly dust your work surface with flour, but avoid adding too much to keep the noodles light. For extra fluffiness, roll the dough thin and cut even strips so they cook uniformly.
Mistakes to avoid
Overworking the dough is a common mistake that makes Fluffy Homemade Egg Noodles tough. Instead, knead just until the dough comes together, then stop. Another error is boiling the noodles too long, which turns them mushy. For perfectly cooked noodles, check them a minute early and taste for doneness. If you struggle with rolling consistency, try our homemade pasta guide for pro techniques. Also, never skip salting the cooking water—it’s key for flavor, as explained in our pasta water tips.
Serving and Pairing Suggestions
How to serve this dish
Fluffy Homemade Egg Noodles shine when served fresh and warm, ideally right after cooking. For a cozy family dinner, pile them high in a wide, shallow bowl and drizzle with melted butter or olive oil. Alternatively, layer them elegantly on a platter for holiday gatherings, garnished with fresh herbs like parsley or chives for a pop of color. These noodles also make a fantastic brunch dish when paired with a creamy sauce or topped with a perfectly poached egg. To impress guests, serve them alongside a colorful vegetable medley for contrast.
h-it">What goes well with it
For a comforting meal, pair Fluffy Homemade Egg Noodles with a rich, slow-cooked beef stew—the tender noodles soak up the savory flavors beautifully. If you prefer something lighter, try them with a crisp garden salad and a tangy vinaigrette to balance the dish. Meanwhile, a glass of chilled white wine or sparkling lemonade enhances the meal without overpowering the noodles’ delicate texture. For dessert, consider serving our Classic Vanilla Cupcakes or a slice of our Decadent Chocolate Cake to round out the experience.
What’s the secret to making fluffy homemade egg noodles?
The key to fluffy homemade egg noodles lies in using fresh eggs and kneading the dough just enough to develop gluten without overworking it. Letting the dough rest for 30 minutes before rolling also helps create a lighter texture. Fluffy homemade egg noodles should puff slightly when cooked in simmering broth or water.
ank-math-faq-item">
Can I make fluffy homemade egg noodles without a pasta machine?
Absolutely! Fluffy homemade egg noodles can be rolled by hand with a rolling pin—just aim for an even 1/8-inch thickness. Dust the dough with flour to prevent sticking, and cut into strips using a sharp knife or pizza cutter. Hand-rolled noodles often have a rustic charm that enhances their fluffy texture.
How long do fluffy homemade egg noodles take to cook?
Fresh fluffy homemade egg noodles cook in just 3–5 minutes in boiling water or broth, depending on thickness. They’re done when they float to the surface and have a tender-but-firm bite. Unlike dried pasta, fluffy homemade egg noodles absorb liquid quickly, so avoid overcooking.
Why are my homemade egg noodles tough instead of fluffy?
Tough noodles usually result from over-kneading the dough or using too much flour during rolling. For fluffy homemade egg noodles, mix until just combined and roll gently. Adding an extra egg yolk or a splash of milk can also improve tenderness while keeping them light.
div>
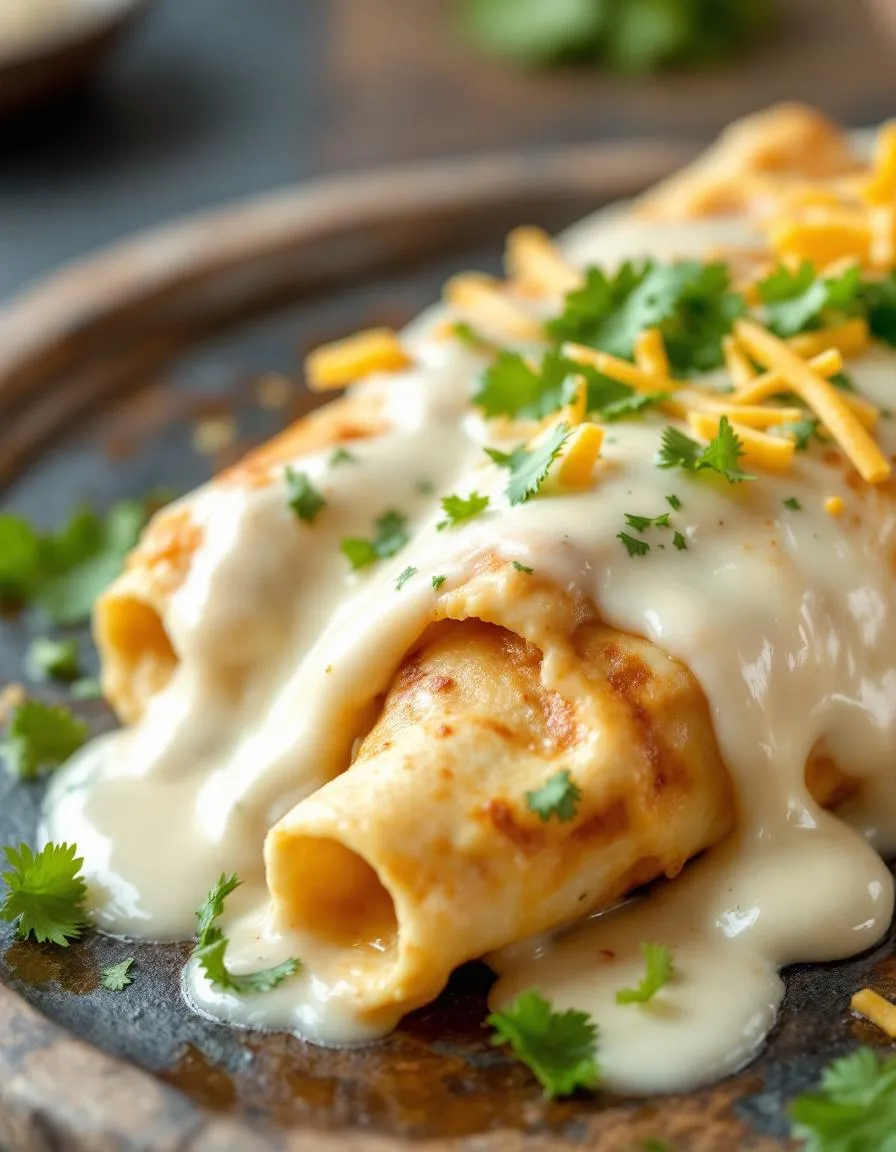
Best Creamy White Chicken Enchiladas – Cheesy Delight
Introduction
There’s something magical about digging into a warm, cheesy dish that feels like a hug on a plate. If you’re craving comfort food with a twist, you’ll adore Creamy White Chicken Enchiladas – A Cheesy Delight! This recipe combines tender chicken, a velvety sauce, and melted cheese for a meal that’s both cozy and exciting. Whether you’re cooking for family or impressing guests, these enchiladas deliver flavor and satisfaction in every bite. Plus, they’re easier to make than you might think, so you can enjoy restaurant-quality food without leaving your kitchen.
Creamy White Chicken Enchiladas – A Cheesy Delight! is a modern take on a classic favorite, blending rich flavors with simple techniques. The dish features shredded chicken wrapped in soft tortillas, smothered in a creamy white sauce, and baked until bubbly. What sets it apart is the balance of tangy green chiles, aromatic spices, and gooey cheese, creating a harmony of textures and tastes. For busy home cooks, this recipe offers a delicious solution for weeknight dinners or weekend gatherings. It also fits perfectly with our blog’s mission to share approachable, crowd-pleasing meals, like our Easy Weeknight Dinners collection. If you love Mexican-inspired dishes, you’ll appreciate how this recipe complements favorites like our Authentic Guacamole, making it a versatile addition to your menu.
Why I Love This Recipe
Creamy White Chicken Enchiladas – A Cheesy Delight! holds a special place in my heart because it reminds me of family dinners growing up. My mom used to make a similar version, and the first bite always transported me back to those cozy evenings. Now, I love recreating that nostalgia while adding my own twist. The recipe’s flexibility lets me experiment with extra veggies or a hint of heat, making it feel new every time. Most importantly, seeing my own family’s smiles as they take that first cheesy bite makes all the effort worthwhile.
Health and Nutrition
Why it’s good for your body
Creamy White Chicken Enchiladas – A Cheesy Delight! packs a nutritious punch while satisfying your cravings. First, the lean chicken breast delivers high-quality protein to support muscle repair and energy levels. Additionally, the dish includes calcium-rich cheese, which strengthens bones and teeth. Moreover, the creamy sauce often contains Greek yogurt or light sour cream, offering gut-friendly probiotics.
Furthermore, Creamy White Chicken Enchiladas – A Cheesy Delight! balances indulgence with nourishment. For example, whole wheat or low-carb tortillas can boost fiber intake, aiding digestion. Meanwhile, spices like cumin and garlic add antioxidants that fight inflammation. On top of that, you can easily load the dish with veggies like spinach or bell peppers for extra vitamins.
Finally, this meal keeps you full longer thanks to its protein and healthy fats. Because it combines complex carbs, lean protein, and dairy, Creamy White Chicken Enchiladas – A Cheesy Delight! stabilizes blood sugar levels. Whether you need a post-workout meal or a comforting dinner, it fuels your body without sacrificing flavor.
How it fits in a healthy lifestyle
Creamy White Chicken Enchiladas – A Cheesy Delight! fits seamlessly into a balanced diet. If you follow a high-protein plan, the chicken and cheese help you meet daily goals. For gluten-free eaters, simply swap in corn tortillas and check sauce ingredients. Even better, you can lighten the dish with reduced-fat cheese or a yogurt-based sauce.
This recipe also works well for meal prep, saving time on busy weeknights. Pair it with a crisp salad or roasted veggies for a complete, nutrient-dense meal. If you love flavorful yet wholesome dinners, explore our healthy dinner ideas for more inspiration. And if you’re tracking macros, our nutrition guides make portion control simple. With smart tweaks, Creamy White Chicken Enchiladas – A Cheesy Delight! becomes a guilt-free staple in any eating plan.
Tender chicken wrapped in soft tortillas and smothered in a creamy white sauce, topped with melted cheese for the ultimate comfort food.
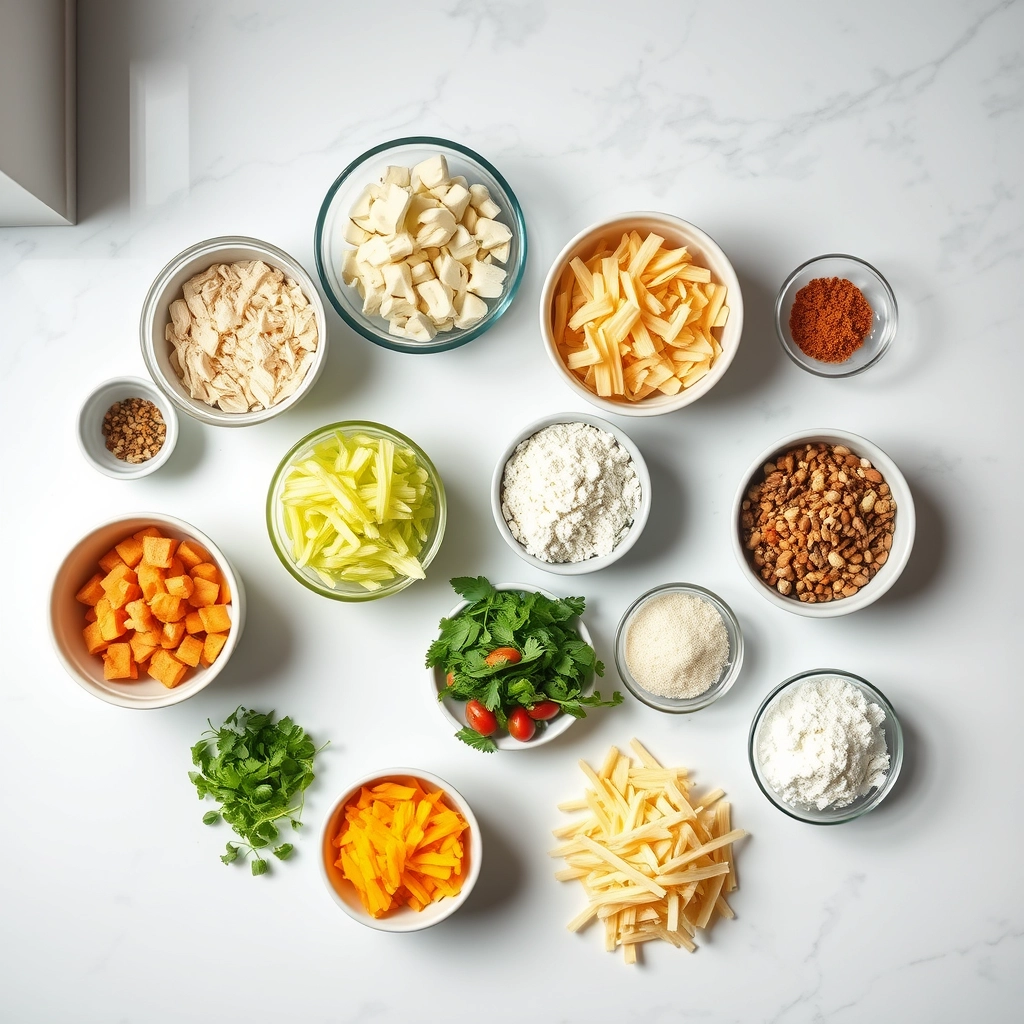
Ingredients
Scale
For the Crust:
2 cups cooked shredded chicken
8 flour tortillas
2 cups shredded Monterey Jack cheese
3 tbsp butter
3 tbsp all-purpose flour
2 cups chicken broth
1 cup sour cream
1 (4 oz) can diced green chilies
1 tsp garlic powder
1 tsp cumin
Salt and pepper to taste
Instructions
1. Prepare the Crust:
Preheat oven to 350°F (175°C).
In a saucepan, melt butter over medium heat. Whisk in flour and cook for 1 minute.
Gradually whisk in chicken broth until smooth. Cook until thickened, about 5 minutes.
Remove from heat and stir in sour cream, green chilies, garlic powder, cumin, salt, and pepper.
Mix 1 cup of the sauce with the shredded chicken. Fill each tortilla with chicken mixture and roll up.
Place enchiladas seam-side down in a baking dish. Pour remaining sauce over the top and sprinkle with cheese.
Bake for 20-25 minutes until bubbly and golden.
Notes
You can customize the seasonings to taste.
s-dish">How to Prepare This Dish
Steps and time-saving tips
Start by preheating your oven to 375°F so it’s ready when you finish assembling the Creamy White Chicken Enchiladas – A Cheesy Delight!. While the oven heats, shred your cooked chicken and set it aside. In a large bowl, whisk together the sour cream, cream of chicken soup, and green chiles until smooth. Next, fold in half the shredded cheese and all the chicken, coating everything evenly. Warm your tortillas for 10 seconds in the microwave to make them pliable, then spoon the filling down the center of each one. Roll them tightly and place them seam-side down in a greased baking dish. Drizzle the remaining sauce over the top and sprinkle with the rest of the cheese. Bake for 20-25 minutes until bubbly and golden. For a time-saving hack, use rotisserie chicken or prep the filling a day ahead. Let the enchiladas rest for 5 minutes before serving so the cheese sets perfectly.
Mistakes I’ve made and learned from
I once rushed the tortilla step and ended up with cracked enchiladas—lesson learned! Warming them first makes rolling effortless. Another time, I overbaked the dish, drying out the creamy sauce. Now I set a timer and check at 20 minutes. If you’re new to cheesy bakes, my guide on perfect melting cheeses helps avoid clumpy textures. Also, don’t skip resting time like I did; slicing too soon turns the filling runny. For more make-ahead strategies, my meal prep tips save busy cooks stress. Trust me, these small tweaks make all the difference!
n-and-variations">Cultural Connection and Variations
Where this recipe comes from
Creamy White Chicken Enchiladas – A Cheesy Delight! traces its roots to the heart of Mexican cuisine, where enchiladas have been a staple for centuries. However, this version swaps the traditional red sauce for a velvety white cream, blending Mexican flavors with a modern twist. Families in northern Mexico often prepare it with locally sourced queso fresco, while others add a touch of green chiles for extra kick. Meanwhile, in Texas, cooks might fold in Monterey Jack cheese for a richer, meltier texture.
In my own kitchen, Creamy White Chicken Enchiladas – A Cheesy Delight! became a Sunday dinner favorite after my aunt shared her recipe, tweaked with a splash of lime juice for brightness. Across borders, variations pop up—some use rotisserie chicken for convenience, while others slow-cook the filling with cumin and garlic. No matter the method, the dish always brings people together, whether at festive gatherings or cozy weeknight meals.
How it fits in today’s cooking
Today, Creamy White Chicken Enchiladas – A Cheesy Delight! fits perfectly into busy lives and foodie trends. Meal preppers love assembling it ahead, while gluten-free cooks swap flour tortillas for corn. It’s also a star at potlucks, especially when paired with refreshing sides like mango salsa or avocado lime dressing.
Moreover, the dish brid
ges tradition and innovation. Some home chefs lighten it up with Greek yogurt instead of sour cream, while others lean into indulgence with extra cheese. Whether you’re craving comfort food or hosting a fiesta, this recipe adapts effortlessly—proving that some classics only get better with time.
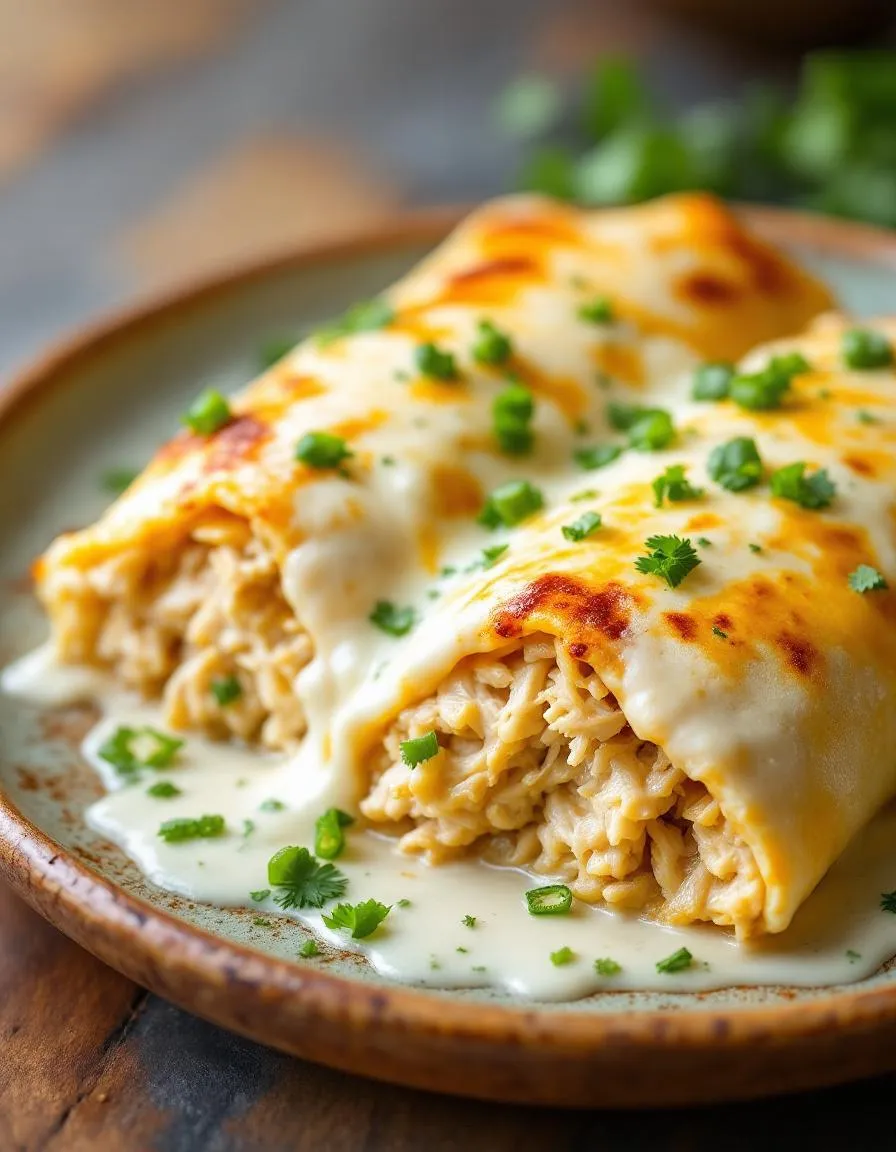
Taste and Texture
What makes it delicious
Creamy White Chicken Enchiladas – A Cheesy Delight! delivers a rich, comforting experience with every bite. The tender shredded chicken melts in your mouth, while the velvety white sauce wraps each tortilla in a luscious, creamy embrace. Fresh green chiles add a subtle kick, balancing the mild sweetness of Monterey Jack cheese. Meanwhile, the golden-baked topping offers a satisfying contrast—crisp on the edges yet gooey underneath. Aromatic cumin and garlic infuse the dish with warmth, making every forkful fragrant and irresistible. Whether you savor it fresh from the oven or as leftovers, Creamy White Chicken Enchiladas – A Cheesy Delight! never fails to delight with its harmonious blend of textures and flavors.
Boosting the flavor
Elevate your Creamy White Chicken Enchiladas – A Cheesy Delight! with a few easy tweaks. For extra depth, swap the Monterey Jack for pepper jack cheese or stir a spoonful of sour cream into the sauce. Top with fresh cilantro, diced avocado, or a squeeze of lime for a bright finish. If you love heat, layer in roasted poblano peppers or serve with a drizzle of chipotle sauce. Pair it with a side of cilantro lime rice to round out the meal. With these simple upgrades, you’ll transform an already delicious dish into something truly unforgettable.
First, warm your tortillas slightly before rolling to prevent cracking. Next, shred the chicken finely so it blends smoothly into the creamy filling. For the best flavor, use freshly grated cheese instead of pre-shredded varieties. Additionally, spread a thin layer of sauce on the bottom of your baking dish to keep the enchiladas moist. Finally, let the Creamy White Chicken Enchiladas – A Cheesy Delight! rest for 5 minutes after baking so the sauce thickens perfectly.
Mistakes to avoid
Avoid overfilling the tortillas, as this can cause them to burst open during baking. Instead, aim for a moderate amount of filling and roll them snugly. Also, don’t skip broiling the dish for the last 2 minutes—this step adds a golden finish to the cheese. If your sauce seems too thick, gradually whisk in a splash of broth or milk. For more troubleshooting tips, check out our guide on fixing saucy mishaps. And if you’re unsure about cheese selection, our cheese buying guide will help you pick the best option.
g-suggestions">Serving and Pairing Suggestions
How to serve this dish
For a stunning presentation, arrange your Creamy White Chicken Enchiladas – A Cheesy Delight! on a colorful platter with fresh cilantro and a drizzle of sour cream. Alternatively, serve them individually on warm plates with a sprinkle of cotija cheese for extra flair. Since this dish shines at gatherings, consider it for potlucks or cozy family dinners. To make it even more inviting, pair it with a crisp side salad or warm tortilla chips.
What goes well with it
First, a refreshing mango avocado salad balances the richness of Creamy White Chicken Enchiladas – A Cheesy Delight! with its bright, tangy flavors. Next, try a zesty lime margarita or an icy horchata to cut through the creaminess. For a heartier meal, serve it alongside our cilantro lime rice or black bean soup, both of which enhance the dish’s Southwestern vibes. Whether you choose light sides or bold drinks, each pairing elevates the dining experience.
math-faq-block">
What makes Creamy White Chicken Enchiladas – A Cheesy Delight! different from regular enchiladas?
Creamy White Chicken Enchiladas – A Cheesy Delight! stand out with their rich, velvety white sauce made from sour cream, cheese, and green chiles, unlike traditional red sauce enchiladas. The filling combines tender shredded chicken with melty cheeses for an extra indulgent twist that keeps people coming back for more.
Can I make Creamy White Chicken Enchiladas – A Cheesy Delight! ahead of time?
Absolutely! Assemble Creamy White Chicken Enchiladas – A Cheesy Delight! up to 24 hours in advance—just cover and refrigerate until ready to bake. For best results, let the dish sit at room temperature for 30 minutes before baking to ensure even heating.
What sides pair well with Creamy White Chicken Enchiladas – A Cheesy Delight!?
Light, fresh sides balance the richness of Creamy White Chicken Enchiladas – A Cheesy Delight! perfectly. Try Mexican rice, black beans, or a crisp jicama slaw. For something simple, warm tortilla chips and guacamole make great accompaniments.
ank-math-faq-item">
How do I prevent my Creamy White Chicken Enchiladas – A Cheesy Delight! from getting soggy?
To avoid soggy Creamy White Chicken Enchiladas – A Cheesy Delight!, lightly fry your tortillas for 10 seconds per side before assembling. Also, drain excess liquid from your chicken filling and avoid over-saucing—the enchiladas will absorb moisture as they bake.
Best Cheesy French Onion Potatoes Recipe
Introduction
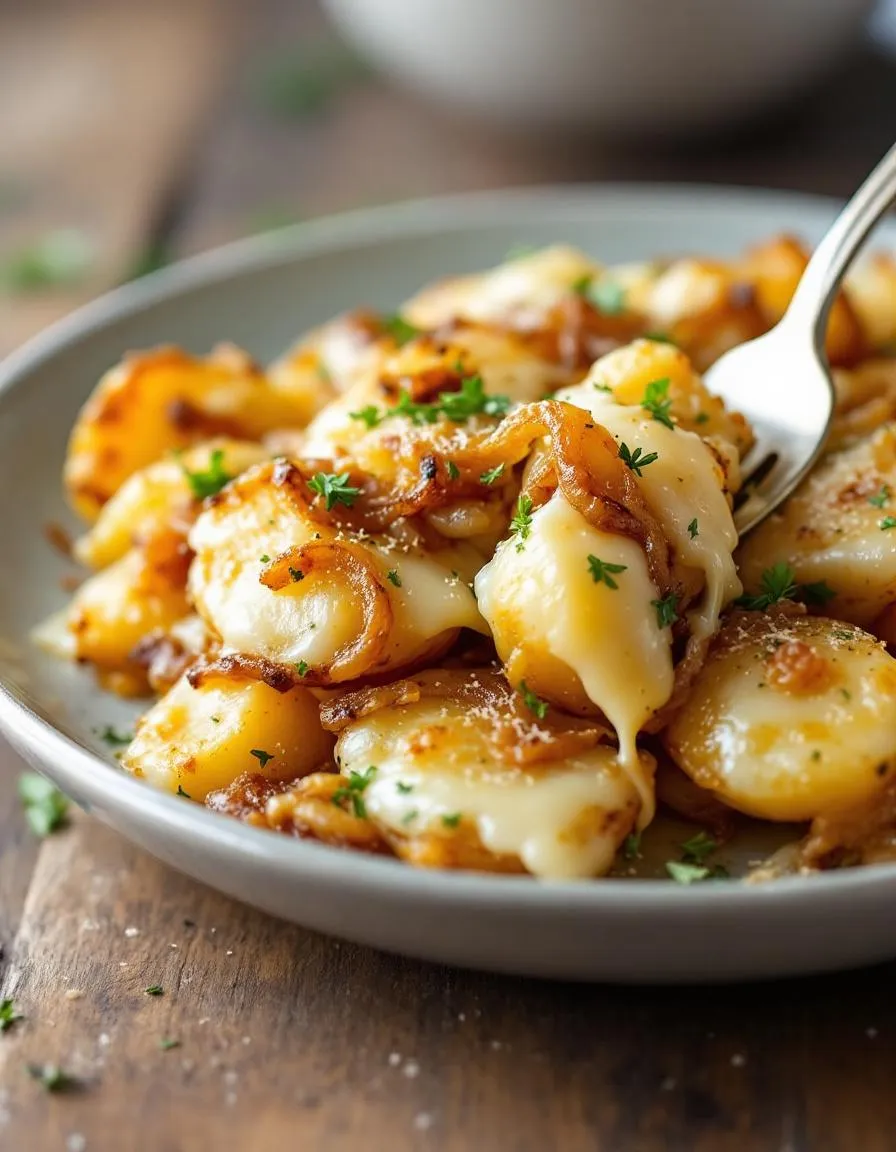
There’s something undeniably comforting about a dish that combines creamy cheese, caramelized onions, and tender potatoes. If you’re craving a side that feels like a warm hug, Cheesy French Onion Potatoes will hit the spot every time. Whether you’re serving them at a family dinner or bringing them to a potluck, this recipe delivers rich flavors and gooey goodness that everyone loves. Plus, it’s surprisingly easy to make, so you can enjoy restaurant-quality comfort food without the fuss.
Cheesy French Onion Potatoes take the best elements of French onion soup—sweet, slow-cooked onions and melted cheese—and pair them with crispy, golden potatoes for a dish that’s irresistible. The caramelized onions add depth, while the blend of Gruyère and Parmesan creates a luxurious finish. This recipe matters because it transforms simple ingredients into something extraordinary, perfect for weeknight dinners or holiday feasts. If you love our Garlic Herb Roasted Potatoes, you’ll adore this twist. It fits our blog’s tone by offering approachable yet elevated recipes that deliver big flavor without complicated steps. And if you’re looking for more cheesy inspiration, our Creamy Mac and Cheese proves that comfort food never goes out of style.
Why I Love This Recipe
Cheesy French Onion Potatoes hold a special place in my heart because they remind me of snowy evenings spent with family. My grandmother used to make a similar dish, and the smell of onions sizzling in butter instantly takes me back to her kitchen. What I love most is how the recipe balances simplicity and indulgence—every bite feels like a celebration, yet it’s effortless enough to make on a busy night. Whether I’m craving nostalgia or just need a hearty side, this dish never disappoints.
Health and Nutrition
Why it’s good for your body
Cheesy French Onion Potatoes pack a surprising nutritional punch while delivering rich, comforting flavors. First, potatoes provide a solid dose of vitamin C, which supports immune health, and potassium, which helps regulate blood pressure. Additionally, the caramelized onions add antioxidants like quercetin, known for its anti-inflammatory properties. Together, these ingredients make Cheesy French Onion Potatoes a dish that satisfies cravings while nourishing your body.
Moreover, the cheese in this recipe offers calcium and protein, essential for strong bones and muscle repair. Since the dish balances carbs, fats, and protein, it keeps you full longer, preventing unnecessary snacking. Of course, moderation is key, but when enjoyed as part of a varied diet, Cheesy French Onion Potatoes can be both indulgent and nutritious. The fiber from the onions and potatoes also aids digestion, making this dish a win for gut health.
Finally, the slow-cooked onions release natural sweetness, reducing the need for excess salt or sugar. This means Cheesy French Onion Potatoes deliver big flavor without compromising on health. Whether you’re fueling up after a workout or enjoying a cozy family dinner, this dish offers a tasty way to meet your nutritional needs.
How it fits in a healthy lifestyle
Cheesy French Onion Potatoes can easily fit into a balanced diet with a few smart tweaks. For a heart-healthy version, try using low-fat cheese or swapping butter for olive oil. If you’re following a gluten-free diet, this dish is naturally compliant, making it a safe choice for those with sensitivities. Pair it with a lean protein like grilled chicken or a crisp salad to round out the meal.
For those tracking macros, the potatoes provide energy-boosting carbs, while the cheese adds protein and healthy fats. You can even customize the recipe by adding Greek yogurt for extra creaminess and protein. If you’re looking for more ways to enjoy nutritious comfort food, check out our guide to healthy comfort food swaps. And if you’re meal prepping, Cheesy French Onion Potatoes reheat beautifully, so you can enjoy them throughout the week without sacrificing flavor or nutrition. For more tips on balancing indulgence with wellness, explore our balanced eating tips.
A comforting dish combining crispy potatoes with caramelized onions and melted cheese, inspired by French onion soup flavors.
Ingredients
Scale
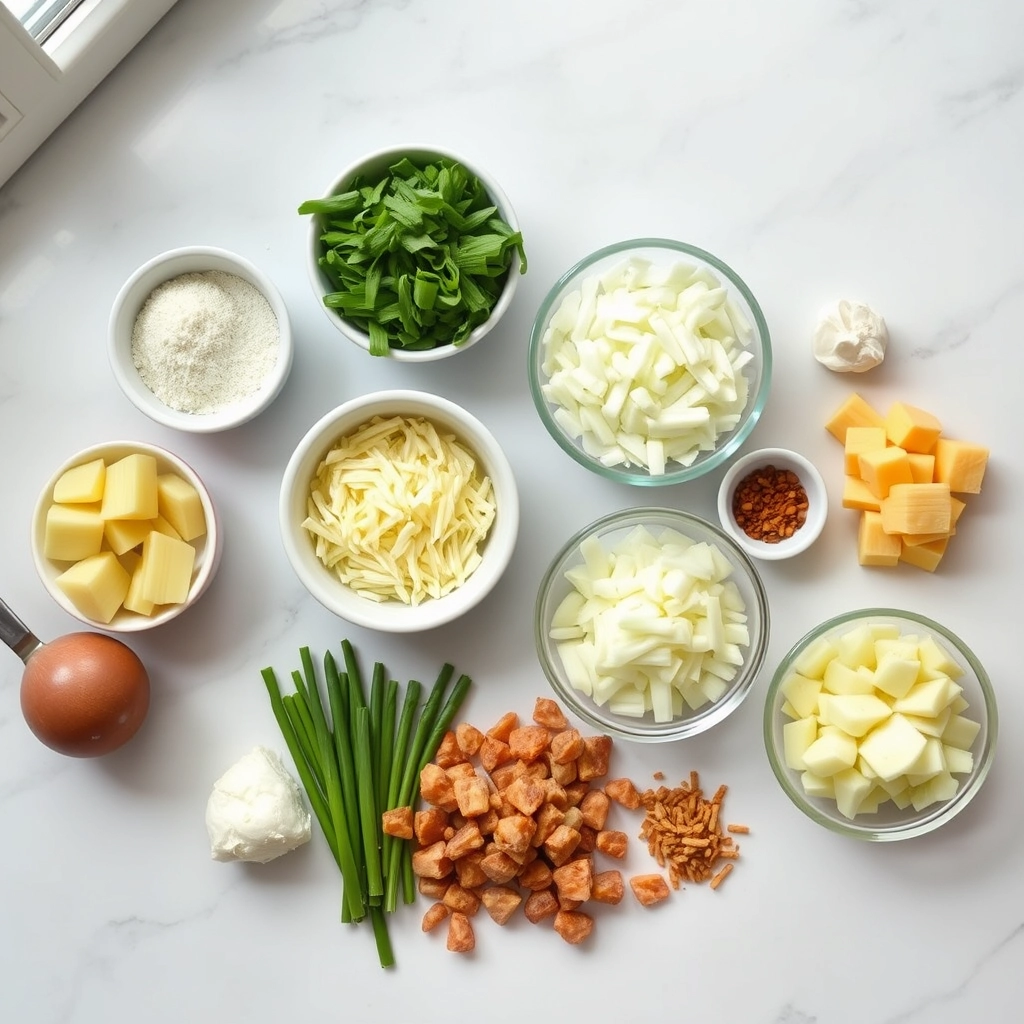
For the Crust:
2 lbs Yukon Gold potatoes, sliced into 1/4-inch rounds
2 large yellow onions, thinly sliced
2 tbsp olive oil
1 tbsp butter
1 tsp salt
1/2 tsp black pepper
1 tsp dried thyme
1 cup shredded Gruyère cheese
1/2 cup shredded mozzarella cheese
1/4 cup grated Parmesan cheese
Instructions
1. Prepare the Crust:
Preheat oven to 400°F (200°C). Grease a 9×13 baking dish.
In a large skillet, heat olive oil and butter over medium heat. Add onions and cook for 15-20 minutes until caramelized, stirring occasionally.
Add thyme, salt, and pepper to the caramelized onions, then remove from heat.
Layer half the potato slices in the baking dish. Top with half the onion mixture and half the cheeses. Repeat layers.
Cover with foil and bake for 30 minutes. Remove foil and bake 10 more minutes until golden and bubbly.
Let rest 5 minutes before serving.
Notes
You can customize the seasonings to taste.
How to Prepare This Dish
Steps and time-saving tips
Start by preheating your oven to 375°F so it’s ready when you are. While it heats, thinly slice your potatoes—a mandoline speeds this up, but a sharp knife works too. Next, whisk together sour cream, French onion soup mix, and a splash of milk until smooth. This creamy mixture will coat every layer of your Cheesy French Onion Potatoes, so take a moment to blend it well. Now, layer half the potatoes in a greased baking dish, drizzle with half the sauce, and sprinkle shredded cheese generously. Repeat with the remaining potatoes, sauce, and another cheesy layer. Cover with foil and bake for 45 minutes, then uncover and bake another 15 minutes until golden and bubbly. For a crispy top, broil for 2-3 minutes at the end. Let it rest 10 minutes before serving—this helps the layers set. To save time, slice potatoes ahead or use pre-shredded cheese. If you’re short on oven space, this dish also works in a slow cooker on low for 4-5 hours.
Mistakes I’ve made and learned from
My first attempt at Cheesy French Onion Potatoes was a salty disaster—I didn’t account for how the soup mix seasons the whole dish. Now, I use low-sodium versions or cut the mix by half and add fresh herbs instead. Another lesson? Skipping the foil led to dried-out edges. Always cover the dish for the first bake, like I do with my Perfect Scalloped Potatoes. And don’t rush the resting time! I once served it straight from the oven, and the layers slid apart. Letting it settle makes all the difference, just like with my Creamy Garlic Mashed Potatoes. Trust me, patience pays off here.
Cheesy French Onion Potatoes blend two beloved comfort foods into one irresistible dish. The recipe draws inspiration from French onion soup, a classic that dates back to 18th-century France, where caramelized onions and rich broth became a staple. Meanwhile, potatoes take center stage in many European cuisines, from creamy German kartoffelgratin to rustic British bakes. Over time, home cooks merged these traditions, adding gooey cheese for extra indulgence.
In my family, Cheesy French Onion Potatoes became a holiday must-have after my aunt tweaked her mother’s scalloped potatoes recipe. She swapped the usual white sauce for caramelized onions and Gruyère, creating a richer flavor. Across the U.S., you’ll find regional twists too. Some Southern versions add a dash of hot sauce, while Midwestern cooks often layer in extra bacon. In France, chefs might use Comté cheese instead, proving how versatile this dish truly is.
ays-cooking">How it fits in today’s cooking
Today, Cheesy French Onion Potatoes still win hearts as the ultimate comfort food. Busy home cooks love it because it pairs perfectly with weeknight dinners, yet feels special enough for holidays. Many modern versions save time by using slow cookers or pre-sliced potatoes, like those in our easy meal prep guide. Others lighten it up with Greek yogurt or vegan cheese, proving it adapts to any diet.
Seasonal cooks also embrace this dish. In fall, it complements roasted meats, while winter gatherings call for its warm, cheesy goodness. For more cozy recipes, check out our comfort food classics collection. Whether you stick to tradition or experiment, Cheesy French Onion Potatoes always deliver that nostalgic, crowd-pleasing magic.
Taste and Texture
What makes it delicious
Cheesy French Onion Potatoes deliver a mouthwatering blend of savory, creamy, and caramelized flavors. Each bite starts with tender, buttery potatoes that melt in your mouth, followed by the rich, gooey pull of melted cheese. The deep, sweet aroma of caramelized onions fills the air, while crispy edges add a satisfying crunch. Meanwhile, fresh herbs like thyme or chives brighten the dish, balancing the decadence. Whether you serve it as a side or a main, Cheesy French Onion Potatoes wrap you in comfort with every forkful.
r">Boosting the flavor
For an extra flavor kick, try swapping regular cheddar for smoked gouda or sharp gruyère—both add a nutty depth that pairs perfectly with caramelized onions. Alternatively, top your Cheesy French Onion Potatoes with crispy bacon bits or a drizzle of truffle oil for a gourmet twist. If you love heat, a pinch of red pepper flakes or a spoonful of spicy aioli will elevate the dish. Finally, fresh herbs like rosemary or parsley add a pop of color and freshness, making every bite even more irresistible.
Tips for Success
Best practices for results
Slice the potatoes evenly so they cook uniformly in your Cheesy French Onion Potatoes. Additionally, caramelize the onions slowly over low heat to deepen their flavor. For the best texture, always shred your own cheese instead of using pre-shredded varieties. Finally, cover the dish tightly with foil during baking to lock in moisture and prevent drying out.
>Mistakes to avoid
Avoid overcrowding the pan when caramelizing onions, as this steams them instead of browning. Instead, cook them in batches if needed. Also, don’t skip the step of parboiling the potatoes, or they may turn out undercooked. For more on perfecting caramelized onions, check out our guide on how to caramelize onions. If your cheese topping isn’t browning evenly, try broiling for the last few minutes—just watch it closely. Learn more about balancing flavors in cheesy dishes with our cheese pairing guide.
Serving and Pairing Suggestions
How to serve this dish
For a stunning presentation, serve Cheesy French Onion Potatoes in a rustic cast-iron skillet or a colorful ceramic dish to highlight their golden-brown crust. Top them with a sprinkle of fresh chives or parsley for a pop of color. Meanwhile, these potatoes shine at family gatherings, whether you’re hosting a cozy brunch or a holiday feast. If you want to elevate the experience, pair them with a side of tangy sour cream or a drizzle of truffle oil for extra richness.
What goes well with it
Cheesy French Onion Potatoes pair beautifully with crisp, refreshing salads like our Spring Mix Salad, which balances the dish’s richness with light, vibrant flavors. Alternatively, serve them alongside juicy grilled meats such as our Garlic Herb Chicken for a hearty, satisfying meal. For drinks, try a chilled glass of white wine or sparkling cider to cut through the savory depth of the potatoes.
What potatoes are best for Cheesy French Onion Potatoes?
Russet or Yukon Gold potatoes work best for Cheesy French Onion Potatoes because they hold their shape while baking and absorb flavors well. Russets offer a fluffy texture, while Yukon Golds add a buttery richness that complements the caramelized onions and melted cheese.
Can I make Cheesy French Onion Potatoes ahead of time?
Yes! Assemble Cheesy French Onion Potatoes up to 24 hours in advance and refrigerate them covered. Add 5-10 extra minutes to the baking time if cooking straight from the fridge. For best results, top with fresh cheese just before baking to prevent sogginess.
ank-math-faq-item">
What cheese goes well with French Onion Potatoes?
Gruyère is the classic choice for Cheesy French Onion Potatoes because it melts beautifully and echoes traditional French onion soup flavors. For extra richness, combine it with sharp cheddar or Parmesan. Mozzarella works too for maximum gooeyness.
How do you keep Cheesy French Onion Potatoes from getting soggy?
To prevent soggy Cheesy French Onion Potatoes, slice potatoes evenly (about 1/4″ thick) and pat them dry before layering. Bake uncovered at 375°F-400°F until golden brown. Let rest 5 minutes before serving so the cheese sets slightly.