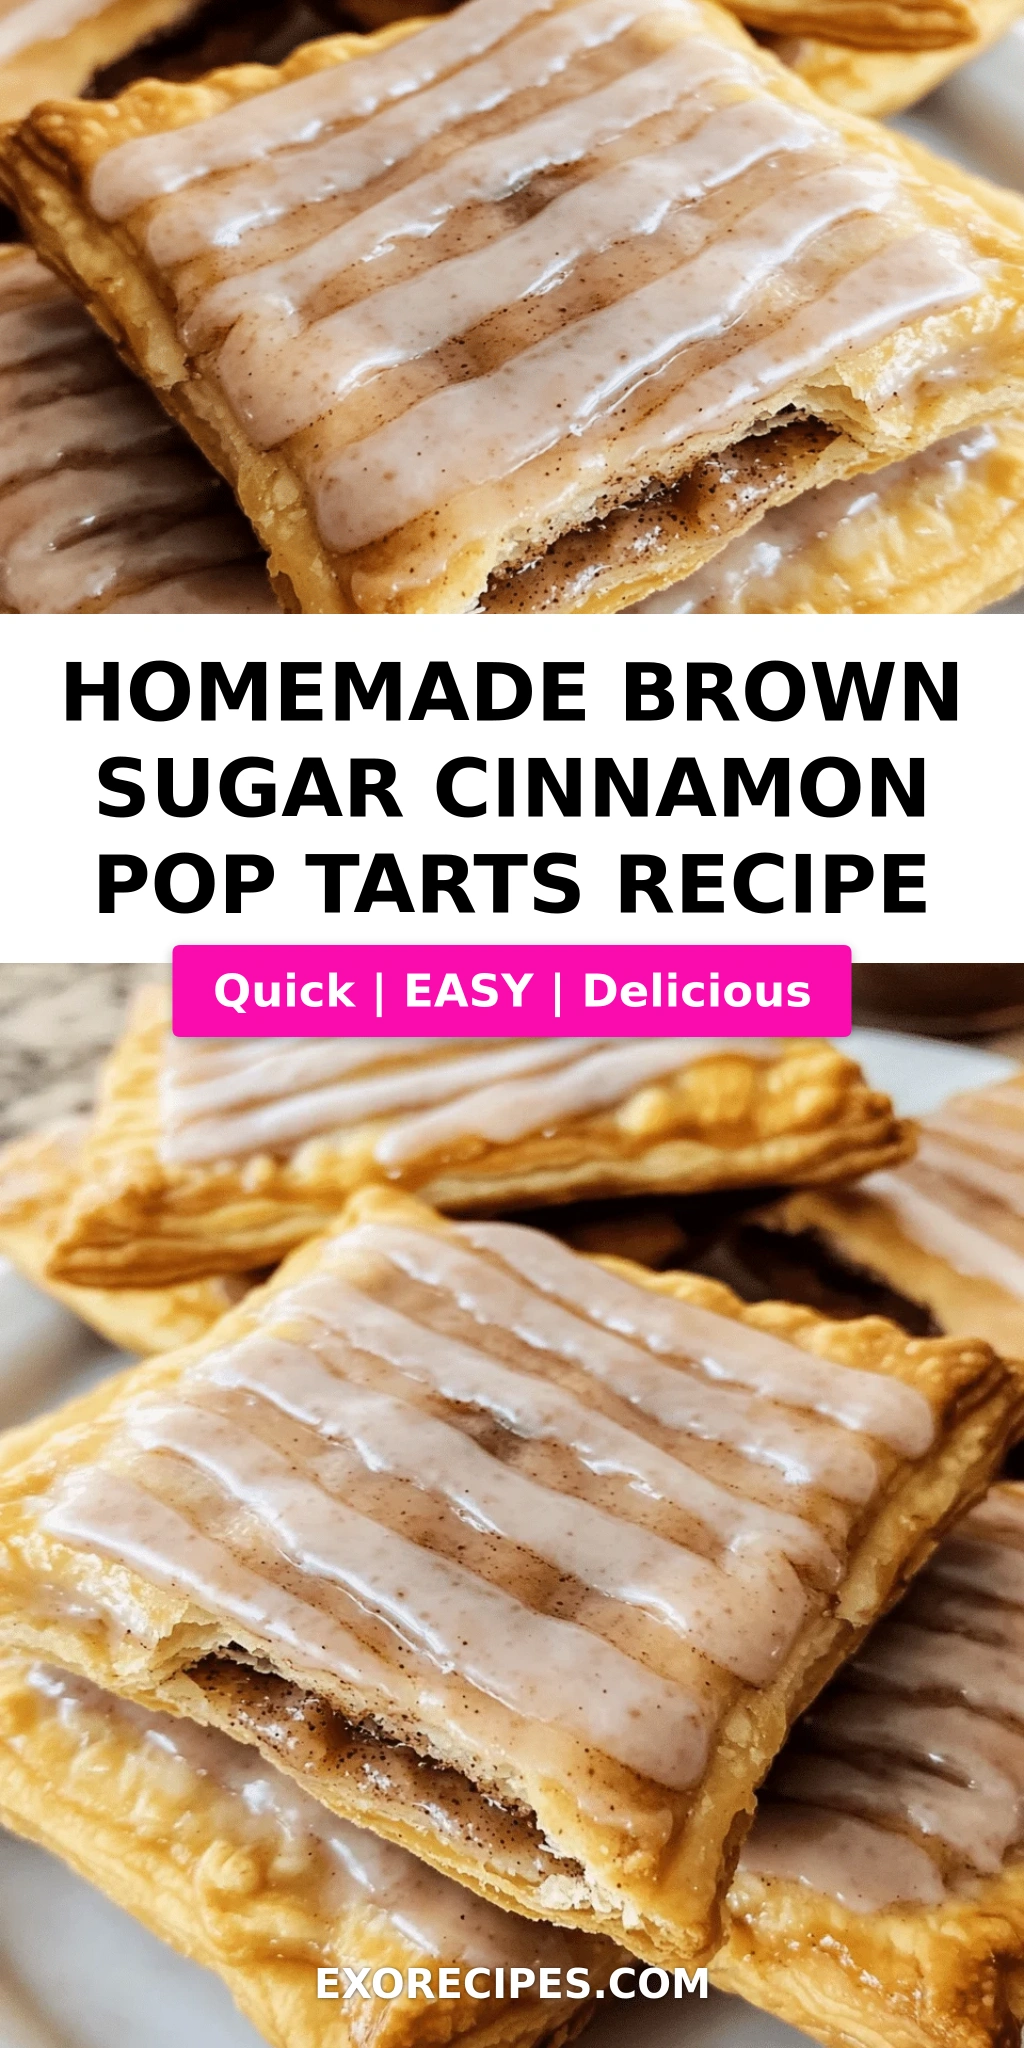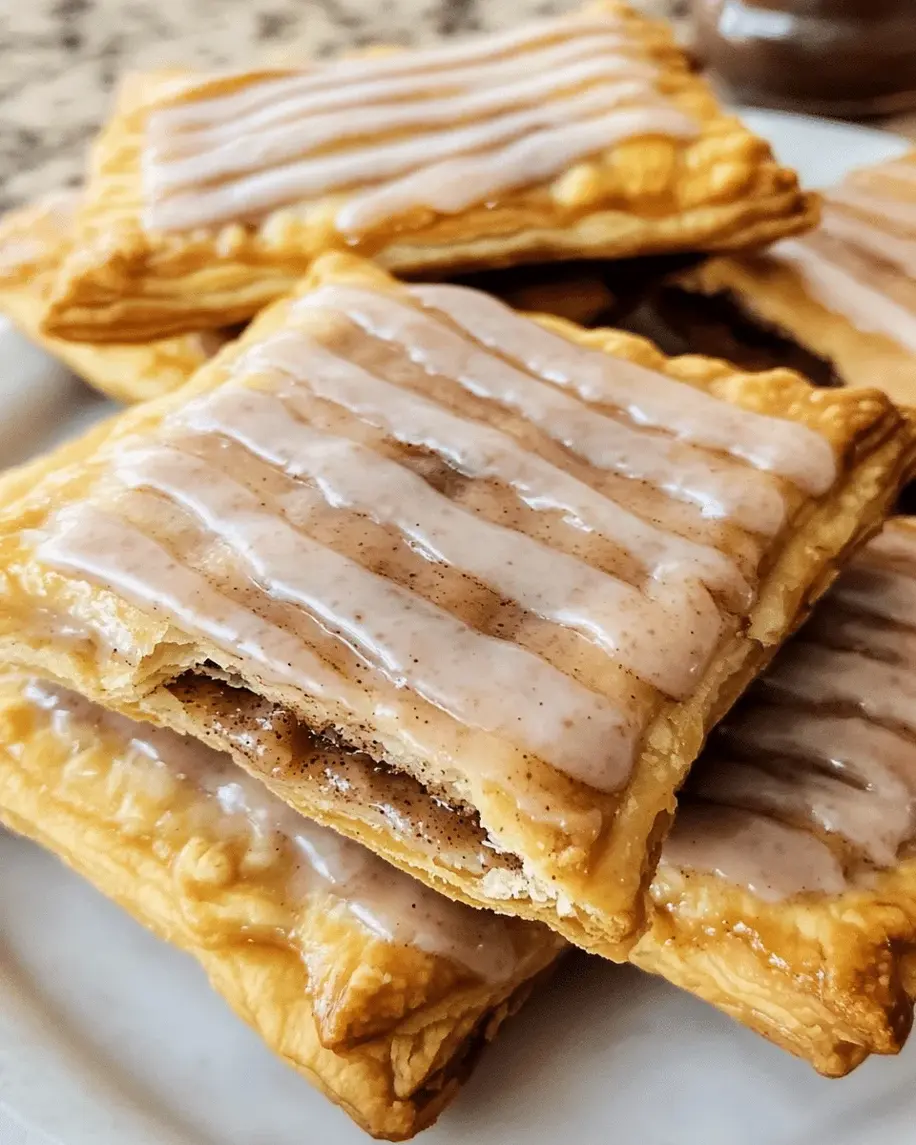
Brown Sugar Cinnamon Pop Tarts with Sweet Glaze: A Homemade Comfort Classic – Flaky, Buttery Pastry & Warm Spiced Filling

⚖️
Difficulty
Medium
⏲️
Prep Time
20 mins
🕒
Cook Time
20 mins
⏱️
Total Time
100 mins
🍽️
Servings
8 pop tarts

I still remember the first time I bit into a homemade pop tart that wasn’t from a foil packet. It was a rainy Sunday in my tiny NYC apartment, and I had just pulled a tray of my own homemade brown sugar cinnamon pop tarts from the oven. The smell of butter, cinnamon, and caramelized brown sugar filled every corner of my kitchen, and I knew I’d cracked the code. These aren’t just any toaster pastries — they’re a buttery, flaky pastry with a warm, spiced filling and a glossy sweet glaze that puts store-bought to shame. Growing up in Morocco, my mother made pastries with patience and love; later in Paris, my chef instructors drilled into me the importance of cold butter and proper resting. This recipe brings all that wisdom together in one perfect, comforting treat.

Imagine pulling apart two golden layers of crisp, tender pastry. The filling is a rich, buttery blend of dark brown sugar and cinnamon — not too sweet, but deeply aromatic. The glaze sets just enough to crackle when you bite into it, and each pop tart tastes like a warm hug on a cold morning. I love to make these for weekend brunch or pack them for a nostalgic lunchbox surprise. The dough comes together quickly, and the chilling time is your secret weapon for that ultra-flaky texture. Whether you’re a seasoned baker or a beginner, these pop tarts are a rewarding project that will make you feel like a pro.

What sets my version apart? First, I use a classic French pastry technique — cutting ice-cold butter into the flour until it resembles coarse meal, then adding just enough ice water to bring it together. The resting period in the fridge lets the gluten relax and the butter firm up, ensuring flaky layers instead of a tough crust. Second, I add a touch of vanilla to both the dough and glaze, lifting the flavors from good to great. And finally, I share a simple trick to keep the glaze intact when you reheat them. I’ve tested this recipe a dozen times so you don’t have to. Let me guide you through every step.

Why This Homemade Brown Sugar Cinnamon Pop Tarts Recipe Is the Best

The Flavor Secret: The filling uses a classic brown sugar and cinnamon ratio, but I boost it with a tiny pinch of salt and melted butter. This creates a caramel-like, gooey center that doesn’t ooze out during baking. The dough itself is lightly sweetened, balancing the rich filling. The vanilla in both dough and glaze adds a layer of warmth that rounds out the spice.

Perfected Texture: Here’s where my French pastry training shines. By keeping the butter cold and handling the dough as little as possible, we create layers that separate into tender, flaky sheets. The overnight rest (or at least one hour) is non‑negotiable for the best texture. I also show you how to roll and cut the dough without overworking it — a common pitfall.

Foolproof & Fast: Despite the elegant result, this recipe is genuinely beginner-friendly. I’ve broken down each step with visual cues and pro tips. You don’t need a stand mixer or any special equipment—just a bowl, a pastry blender (or your hands), and a rolling pin. The active time is about 30 minutes, and the payoff is a batch of eight bakery‑worthy pop tarts.

Homemade Brown Sugar Cinnamon Pop Tarts Ingredients

Every time I walk through the Union Square farmers market, I pick up fresh butter from a local dairy — it makes a real difference. For the spices, I visit a small middle‑eastern shop in Brooklyn that sells the most fragrant cinnamon. But don’t worry: you can find everything you need at your regular grocery store. Here’s what you’ll need.

Ingredients List

  • For the Dough:
  • 2 cups all-purpose flour
  • 1 tablespoon granulated sugar
  • 1 teaspoon salt
  • 1 cup (2 sticks) cold unsalted butter, cut into small pieces
  • 1/2 cup cold water
  • 1 teaspoon vanilla extract
  • For the Filling:
  • 1/2 cup packed brown sugar
  • 1 tablespoon ground cinnamon
  • 2 tablespoons all-purpose flour
  • 2 tablespoons unsalted butter, melted
  • For the Glaze:
  • 1 cup powdered sugar
  • 2 tablespoons milk
  • 1/2 teaspoon vanilla extract

Ingredient Spotlight

Butter: The cornerstone of flaky pastry. Use unsalted butter so you control the salt. It must be very cold; I even freeze the pieces for 10 minutes before starting. If you only have salted butter, reduce the added salt to 1/2 teaspoon.

Brown Sugar: Light or dark brown sugar both work, but dark yields a deeper, more molasses‑rich flavor. You can substitute coconut sugar for a less refined option, but the texture will be slightly grainier.

Cinnamon: I prefer Ceylon cinnamon for its mild, sweet warmth. Cassia cinnamon is stronger and more common; either works. For a twist, try adding a pinch of cardamom or nutmeg.

All‑Purpose Flour: Do not use bread flour or cake flour. AP flour gives the perfect balance of tenderness and structure. For a gluten‑free version, use a 1:1 GF blend and add 1/4 teaspoon xanthan gum.

Vanilla Extract: Pure vanilla extract adds floral notes that lift the entire pastry. Avoid imitation vanilla if possible.

Original IngredientBest SubstitutionFlavor / Texture Impact
Butter (dough)Vegan butter (cold)Slightly less flaky, still tender
Brown sugar (filling)Coconut sugarLess molasses flavor, grainier texture
CinnamonPumpkin pie spiceMore complex, warmer spice
All-purpose flourGluten-free 1:1 blendMore fragile dough, add xanthan gum
Milk (glaze)Almond milkSlightly thinner consistency, works fine

How to Make Homemade Brown Sugar Cinnamon Pop Tarts — Step-by-Step

Trust me, the process is easier than you think. Just take it step by step and keep everything cold. Let’s bake!

Step 1: Make the Dough

In a large bowl, whisk together 2 cups flour, 1 tablespoon sugar, and 1 teaspoon salt. Add the cold butter pieces and use a pastry blender or your fingertips to cut the butter into the flour until the mixture looks like coarse meal with some pea‑sized butter lumps. Drizzle in 1/2 cup cold water and 1 teaspoon vanilla, then stir with a fork until the dough just comes together. Do not overmix. Turn out onto a floured surface, gather into a ball, divide in half, flatten into discs, wrap in plastic, and refrigerate for at least 1 hour (or overnight).

💡 mia’s Pro Tip: For extra flaky layers, freeze the grated butter for 15 minutes before adding to the flour. The cold butter creates steam pockets as it melts.

Step 2: Make the Filling

In a small bowl, combine 1/2 cup packed brown sugar, 1 tablespoon cinnamon, 2 tablespoons flour, and 2 tablespoons melted butter. Mix with a fork until crumbly and uniform. Set aside.

⚠️ Common Mistake to Avoid: Using too much flour in the filling will make it dry. Stick to the 2 tablespoons — it helps prevent blowouts without sacrificing moisture.

Step 3: Preheat and Prepare

Preheat your oven to 375°F (190°C). Line a baking sheet with parchment paper or a silicone mat.

Step 4: Roll and Cut

Lightly flour your work surface. Roll out one disc of dough to 1/8‑inch thickness. Use a sharp knife or pastry wheel to cut rectangles about 3×4 inches. Repeat with the second disc. You should have 16 rectangles total — 8 bottoms and 8 tops. Gather and re‑roll scraps if needed.

💡 mia’s Pro Tip: If the dough gets too soft while rolling, slide it onto a baking sheet and chill for 10 minutes. Warm dough sticks and loses flakiness.

Step 5: Fill and Seal

Place about 1 tablespoon of filling in the center of 8 rectangles, leaving a 1/2‑inch border. Top with the remaining rectangles, press edges to seal, then crimp with a fork. Prick the tops 3‑4 times with the fork to allow steam to escape.

⚠️ Common Mistake to Avoid: Don’t overfill! Too much filling will burst through the seams and make a mess (though it still tastes delicious). Stick to a heaping tablespoon.

Step 6: Bake

Arrange the pop tarts on the prepared baking sheet, spacing them 1 inch apart. Bake for 18‑22 minutes, until the edges are golden brown and the tops are lightly colored. Let cool on the baking sheet for 5 minutes, then transfer to a wire rack to cool completely before glazing.

💡 mia’s Pro Tip: For an even golden color, brush the tops with a little milk or cream before baking. Skip the egg wash to keep the crust tender.

Step 7: Make and Apply Glaze

While the pop tarts cool, whisk together 1 cup powdered sugar, 2 tablespoons milk, and 1/2 teaspoon vanilla until smooth. The glaze should be thick but pour‑able. Drizzle or spread over the fully cooled pop tarts. Let the glaze set for about 15 minutes before serving.

⚠️ Common Mistake to Avoid: Glazing warm pop tarts will cause the glaze to melt and soak in, leaving a sticky mess. Wait until they are completely cool to the touch.

StepActionDurationKey Visual Cue
1Make dough10 min active + 1 hr chillCrumbly, holds together when squeezed
2Make filling5 minCrumbly, dark brown
3Preheat oven10 minOven reaches 375°F
4Roll & cut15 min1/8″ thick, clean rectangles
5Fill & seal10 minEdges pressed, fork marks
6Bake18‑22 minGolden edges, light brown tops
7Glaze5 min + 15 min setSmooth, white glaze dries opaque

Serving & Presentation

I love serving these pop tarts slightly warm, with the glaze just set. The contrast of the crisp, flaky crust and the soft, sweet cinnamon filling is pure magic. For a nostalgic touch, I sometimes serve them with a glass of cold milk, just like I did as a kid watching my mom bake in our Moroccan kitchen. In Paris, I learned to plate them with a light dusting of powdered sugar and a few fresh berries on the side for color.

If you’re hosting a brunch, arrange the pop tarts on a wooden board with small bowls of extra glaze for dipping and a pot of strong coffee. They also make wonderful lunchbox treats — pack them in a single layer with parchment between to keep the glaze perfect. For a special occasion, drizzle a little melted white chocolate over the top and sprinkle with crushed toasted nuts or a pinch of flaky salt.

Pairing TypeSuggestionsWhy It Works
Side DishFresh berries, sliced bananas, yogurt parfaitAdds freshness and acidity to balance sweetness
Sauce / DipExtra vanilla glaze, caramel sauce, chocolate ganacheEnhances the decadence
BeverageCold milk, hot coffee, chai latte, spiced teaClassic comfort combos
GarnishPowdered sugar, cinnamon dust, fresh mint, edible flowersElevates visual appeal

Make-Ahead, Storage & Reheating

As a busy NYC cook, I rely on make‑ahead strategies. You can prepare the dough and filling a day before, then assemble and bake when ready. The baked pop tarts also freeze beautifully — perfect for a quick breakfast or snack. Here’s how to store them so the glaze stays pristine.

MethodContainerDurationReheating Tip
RefrigeratorAirtight container, single layerUp to 3 daysToaster oven at 300°F for 5‑7 minutes
FreezerFreezer bag, separated by parchmentUp to 3 monthsBake straight from frozen at 350°F for 10‑12 minutes
Make-AheadUnbaked assembled tarts on parchmentUp to 2 days in fridgeBake directly from fridge, add 2‑3 minutes

To reheat without damaging the glaze, use a toaster oven on low heat (around 300°F) for a few minutes. The microwave will make the pastry soggy and melt the glaze. If you prefer a warm pop tart, remove the glaze before freezing and add fresh glaze after reheating. But I find the glaze stays intact if you reheat gently — just don’t overdo it!

Variations & Easy Swaps

One of the best things about this recipe is how easy it is to adapt. Whether you need a gluten‑free option or want to try a new flavor, these swaps work beautifully. I’ve tested each one in my own kitchen.

VariationKey ChangeBest ForDifficulty Impact
Apple CinnamonAdd 1/2 cup finely chopped apple to filling + 1 tbsp brown sugarFall breakfast, kids’ lunchesEasy
Gluten-FreeUse 1:1 GF flour + 1/4 tsp xanthan gumGluten-sensitive guestsMedium (dough more delicate)
Chocolate HazelnutSubstitute filling with 1/3 cup Nutella + 1 tbsp cocoa powderDecadent dessertEasy

Apple Cinnamon Variation

Finely dice one small apple (about 1/2 cup) and toss with the brown sugar cinnamon filling plus 1 extra tablespoon of brown sugar. The apple releases a little juice during baking, creating a soft, almost jam‑like center. This variation reminds me of the apple pastries my grandmother made with fresh orchard fruit back in Morocco.

Gluten‑Free Variation

I’ve made these with a high‑quality 1:1 gluten‑free flour blend (like King Arthur Measure for Measure). Add 1/4 teaspoon xanthan gum to help bind the dough. The dough will be a bit more fragile, so roll it between parchment paper and chill thoroughly. The texture is still flaky and tender — my gluten‑free friends can’t tell the difference.

Chocolate Hazelnut Variation

For a decadent twist, substitute the brown sugar filling with a mixture of 1/3 cup Nutella and 1 tablespoon cocoa powder (to thicken). Dollop about 1 teaspoon per pop tart, then seal and bake. The glaze can stay the same, or use a chocolate ganache glaze instead. This is my go‑to when I want something extra indulgent after a long day in the city.

What’s the best way to make homemade pop tart dough flaky and tender?

Start with very cold butter and handle the dough as little as possible. I cut the butter into small cubes, freeze them for 10 minutes, then work them into the flour quickly with a pastry blender or your fingertips until the mixture looks like coarse crumbs with a few pea‑sized pieces. Use ice‑cold water and add just enough to bring the dough together — over‑hydrating makes it tough. Refrigerate the dough for at least an hour to relax the gluten and firm up the butter. Rolling to an even 1/8‑inch thickness also ensures all pieces bake evenly.

Can I substitute the brown sugar with another sweetener in the filling?

Yes, but the flavor and texture will change. You can use coconut sugar, date sugar, or even a granulated sugar substitute like Swerve Brown. Coconut sugar gives a similar molasses note but is less sweet and slightly grainier. If you use a non‑sugar substitute, the filling may not caramelize the same way, so I recommend adding a tablespoon of maple syrup or honey to keep it moist. For a sugar‑free option, try a blend of monk fruit sweetener with a touch of cinnamon, but expect a slightly dryer filling.

How long do you bake brown sugar cinnamon pop tarts and at what temperature?

Bake at 375°F (190°C) for 18‑22 minutes. The exact time depends on your oven and thickness of the dough. You’ll know they’re done when the edges are golden brown and the top is lightly colored. If you want extra crispy tops, you can brush them with a little milk before baking. Always let them cool completely on a wire rack before glazing — about 20‑30 minutes — to prevent the glaze from melting and soaking in.

How do you store homemade pop tarts and reheat them so the glaze stays intact?

Store baked, glazed pop tarts in an airtight container at room temperature for up to 3 days. To reheat without ruining the glaze, use a toaster oven at 300°F for 5‑7 minutes. Avoid the microwave — it makes the pastry soggy and melts the glaze into a sticky puddle. For longer storage, freeze the unglazed baked pop tarts in a freezer bag for up to 3 months. Thaw at room temperature, then warm in the toaster oven and add fresh glaze.

Can I make the dough a day ahead?

Absolutely! In fact, I prefer to make the dough the day before. After dividing and flattening the discs, wrap them tightly in plastic wrap and refrigerate overnight. The extra resting time further relaxes the gluten and deepens the flavor. When you’re ready to use, let the dough sit at room temperature for about 5‑10 minutes to soften slightly for easier rolling.

Why did my pop tarts leak filling during baking?

Leaking usually happens for two reasons: too much filling or a weak seal. Use no more than 1 tablespoon of filling per pop tart. After placing the top rectangle, press the edges firmly with your fingers, then go over them with a fork to create a tight crimp. Also, make sure to prick the tops with a fork — these vents let steam escape without bursting the sides. If your dough was too warm, the butter melts prematurely and the seal weakens — chill the assembled tarts for 10 minutes before baking.

Can I use store‑bought pie crust instead of making dough from scratch?

Yes, and it’s a great time‑saver. Choose a good quality refrigerated pie crust (like Pillsbury or a frozen roll‑out crust). Thaw if frozen, roll it slightly thinner if needed, and cut into rectangles. The texture will be less flaky and more tender than my butter‑loaded homemade version, but it still tastes delicious. You might need to adjust baking time by a couple of minutes, so keep an eye on them.

How can I make the glaze shiny and crackly?

For a glossy, crackly glaze, use a simple ratio of 1 cup powdered sugar to 2 tablespoons liquid (milk, cream, or even water). Add a touch of corn syrup (about 1 teaspoon) for extra shine, or use a mixture of milk and a splash of lemon juice for a thin, crisp glaze. Whisk until smooth and lump‑free. Apply only to completely cool pop tarts, then let them set uncovered for at least 15 minutes. The glaze should feel firm to the touch but not hard.

Can I double the recipe to make a bigger batch?

Absolutely. This recipe doubles perfectly. Simply multiply all ingredients by two. Keep the dough in separate batches to avoid overworking — making one batch at a time is easier on your hands and keeps the butter cold. The baking time may increase slightly (20‑24 minutes) if your oven is crowded, so rotate the sheets halfway through for even browning.

What can I do with leftover dough scraps?

Don’t throw them away! Gather the scraps, press them together gently (don’t knead), re‑roll and cut more rectangles. You can also make mini pop tarts or free‑form shapes. Brush with butter, sprinkle with cinnamon sugar, and bake alongside the large ones for a quick snack. The scraps bake a little faster, so start checking at 12‑15 minutes.

Share Your Version!

Nothing makes me happier than seeing you bring this recipe to life in your own kitchen. Whether you made the classic version, tried the apple cinnamon variation, or added your own twist — I want to hear about it! Drop a star rating and a comment below telling me how they turned out. Did you find the dough tricky? Was the glaze perfectly sweet? Your feedback helps other home bakers and inspires me to create more recipes.

If you share a photo on Instagram or Pinterest, please tag @exorecipes so I can see your beautiful pop tarts. I’m always scrolling for new ideas and love featuring my readers’ creations. And here’s a question for you: What’s your ultimate comfort breakfast pastry — is it these brown sugar cinnamon pop tarts, or something else from your childhood? Let me know in the comments!

From my NYC kitchen to yours — I hope this recipe brings as much warmth to your table as it does to mine. — mia 🧡

📌

Love This Recipe? Save It to Pinterest!

If you enjoyed this Brown Sugar Cinnamon Pop Tarts recipe, don’t let it get lost in your browser tabs! 😄 Pin it now so you can find it again anytime — and explore hundreds more tried-and-tested recipes waiting for you on my Pinterest boards.

👉 Follow mia on Pinterest @exorecipe

📌 Pin this recipe · 🔁 Re-pin your favorites · 💬 Tag me when you make it — I love seeing your creations!

Print

clock clock iconcutlery cutlery iconflag flag iconfolder folder iconinstagram instagram iconpinterest pinterest iconfacebook facebook iconprint print iconsquares squares iconheart heart iconheart solid heart solid icon

Brown Sugar Cinnamon Pop Tarts with Sweet Glaze: A Homemade Comfort Classic

  • Author: Chef Mia
  • Prep Time: 20 minutes
  • Cook Time: 20 minutes
  • Total Time: 1 hour 40 minutes (includes chilling)
  • Yield: 8 pop tarts 1x
  • Method: Breakfast, Dessert
  • Cuisine: American

Description

Homemade brown sugar cinnamon pop tarts with a sweet glaze, a comforting classic.


Ingredients

Scale
  • For the Dough:
  • 2 cups all-purpose flour
  • 1 tablespoon granulated sugar
  • 1 teaspoon salt
  • 1 cup (2 sticks) cold unsalted butter, cut into small pieces
  • 1/2 cup cold water
  • 1 teaspoon vanilla extract
  • For the Filling:
  • 1/2 cup packed brown sugar
  • 1 tablespoon ground cinnamon
  • 2 tablespoons all-purpose flour
  • 2 tablespoons unsalted butter, melted
  • For the Glaze:
  • 1 cup powdered sugar
  • 2 tablespoons milk
  • 1/2 teaspoon vanilla extract

Instructions

  1. Make the dough: In a large bowl, whisk together flour, granulated sugar, and salt. Cut in cold butter using a pastry blender or your fingers until mixture resembles coarse crumbs. Add cold water and vanilla; stir until dough comes together. Divide dough in half, flatten into discs, wrap in plastic, and refrigerate for at least 1 hour.
  2. Make the filling: In a small bowl, combine brown sugar, cinnamon, flour, and melted butter. Mix until crumbly.
  3. Preheat oven to 375°F (190°C). Line a baking sheet with parchment paper.
  4. On a lightly floured surface, roll out one disc of dough to 1/8-inch thickness. Cut into rectangles (about 3×4 inches). Repeat with remaining dough.
  5. Spoon about 1 tablespoon of filling onto half of the rectangles, leaving a small border. Top with the remaining rectangles, pressing edges to seal. Use a fork to crimp edges. Prick tops with a fork to vent.
  6. Bake for 18-22 minutes, until golden brown. Let cool on a wire rack.
  7. Make the glaze: Whisk together powdered sugar, milk, and vanilla until smooth. Drizzle over cooled pop tarts.

Notes

Store in an airtight container at room temperature for up to 3 days. Reheat in a toaster oven if desired.


Nutrition

  • Calories: 350
  • Sugar: 20g
  • Fat: 18g
  • Carbohydrates: 45g
  • Protein: 3g


Brown Sugar Cinnamon Pop Tarts with Sweet Glaze: A Homemade Comfort Classic

ph">For more delicious inspiration, follow me on Pinterest!

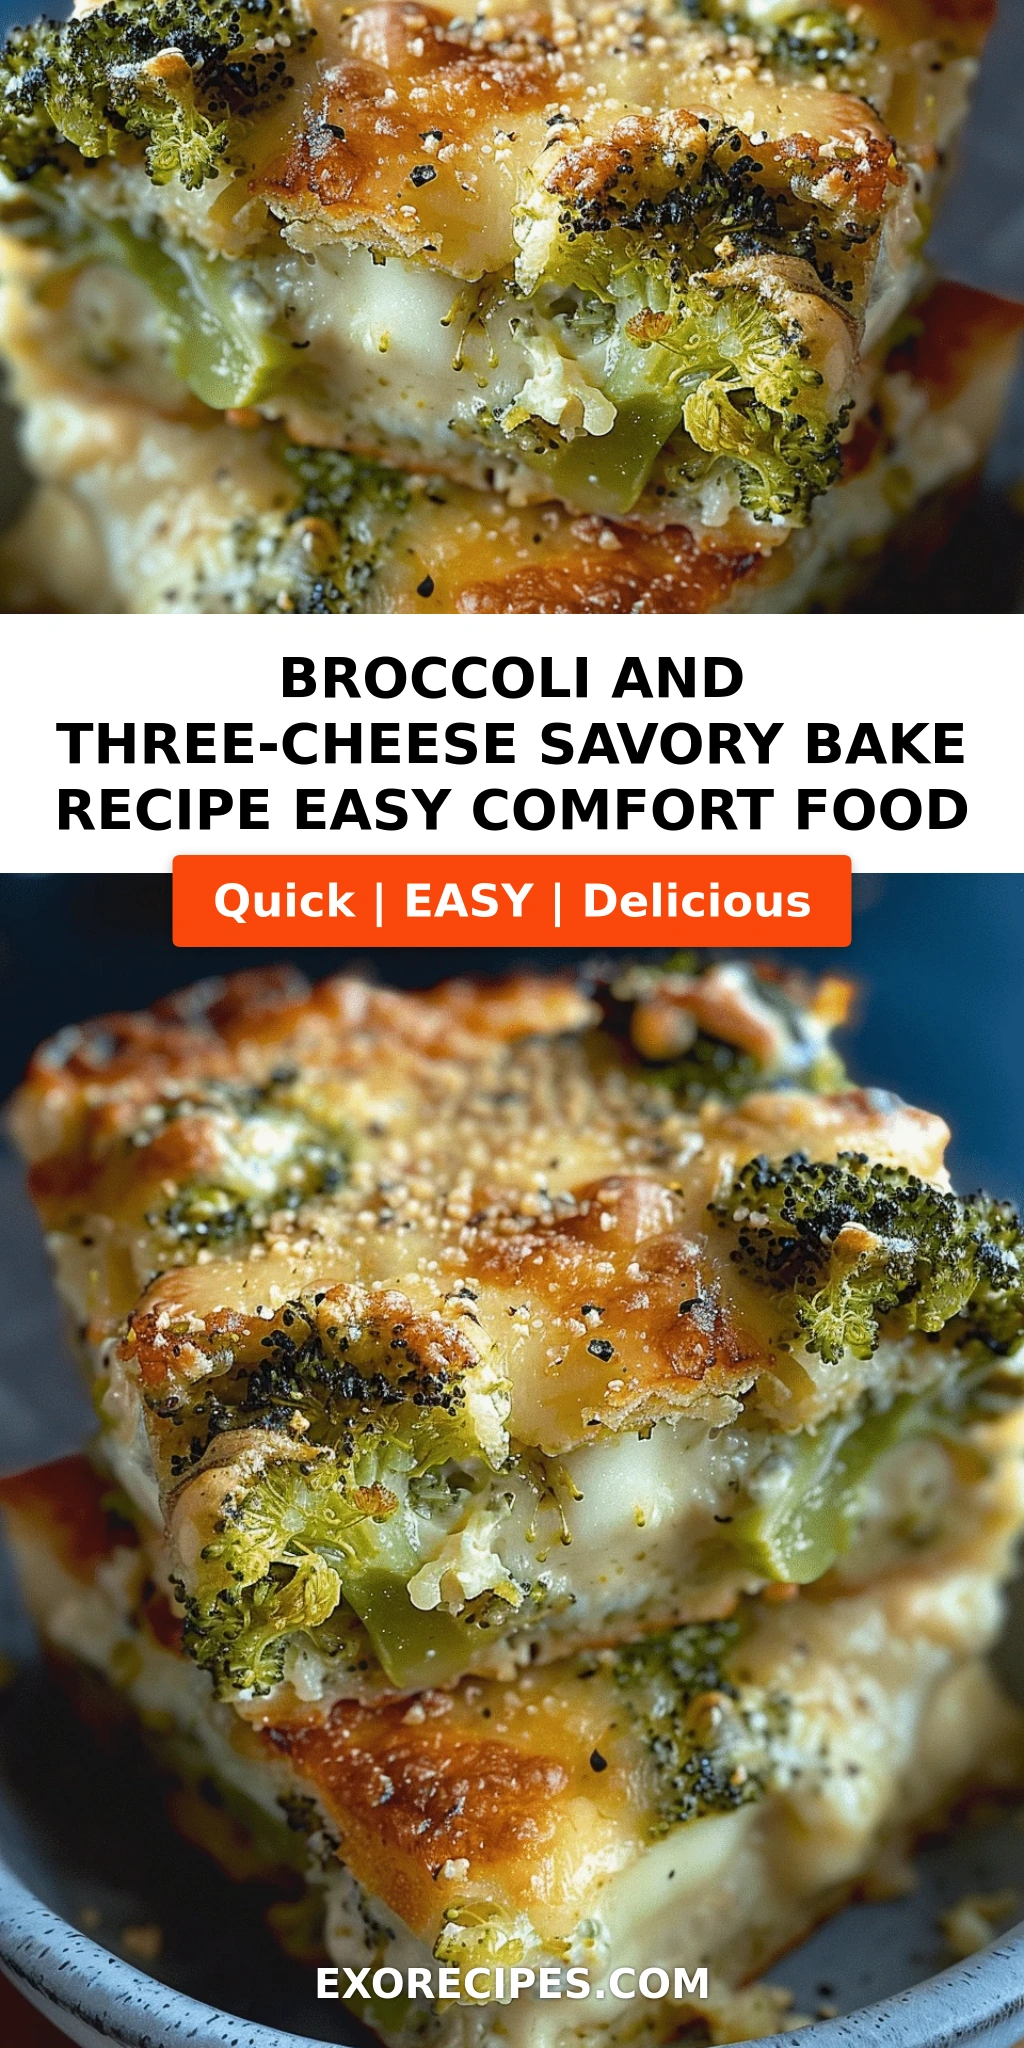
Broccoli and Three-Cheese Savory Bake Recipe – A Cheesy, Golden Comfort Dish

⚖️
Difficulty
Easy
⏲️
Prep Time
15 mins
🕒
Cook Time
35 mins
⏱️
Total Time
50 mins
🍽️
Servings
8

Growing up in Morocco, my mother’s kitchen was a place of warm spices and slow-cooked tagines, where every dish felt like a hug. But when I moved to New York City after my classic French training in Paris, I found myself craving something that bridged both worlds — something creamy, comforting, and deeply satisfying. That’s how this Broccoli and Three-Cheese Savory Bake was born. It’s the kind of easy broccoli cheese bake recipe that fits right into a busy weeknight, yet feels special enough to bring to a holiday table. The key is my three-cheese blend: sharp cheddar for punch, creamy Gruyère for that perfect melt, and nutty Parmesan for a golden, bubbly crust. It’s a cheesy broccoli casserole that actually tastes like home — my home, right here in NYC.

Imagine this: tender broccoli florets nestled in a velvety, from-scratch cheese sauce that’s rich but not heavy, with a golden, slightly crisp topping that crackles as you scoop into it. The aroma alone — garlic sizzling in butter, nutmeg warming the cream, and three cheeses melting together — will pull everyone into the kitchen. Each bite delivers a little crunch from the broccoli, a luscious creaminess from the sauce, and that irresistible browned-cheese finish on top. I finish it with a whisper of smoked paprika, a trick I picked up at a spice stall in the Marrakech souk, which adds a subtle warmth that takes this three cheese broccoli bake to another level. It’s comfort food casserole perfection, through and through.

What sets my version apart is the attention to texture. I spent years perfecting a no-soggy-broccoli technique — blanching the florets just long enough to take the raw edge off, then shocking them in ice water to lock in that vibrant green and crisp-tender bite. From my Paris training, I brought the French mother sauce approach: a proper béchamel base that guarantees a silky, lump-free sauce every time. And from my Moroccan roots, I added a pinch of warmth — a tiny bit of smoked paprika and a hint of cumin that you won’t quite identify but will absolutely miss once it’s gone. In this post, I’ll walk you through every step, share my pro tips, and help you avoid the most common mistakes so your bake turns out perfect on the first try. Let’s get cooking!

Why This Broccoli Three-Cheese Bake Recipe Is the Best

The Flavor Secret — Most broccoli cheese bakes rely on a single cheese, which can be one-dimensional. My three-cheese blend creates layers of flavor: cheddar brings sharpness, Gruyère adds a nutty sweetness and exceptional melt, and Parmesan contributes a salty, umami-rich finish. I learned the power of blending cheeses during my time in a Paris fromagerie, and it’s a technique I use constantly in my NYC kitchen. This isn’t just a cheesy broccoli casserole — it’s a flavor experience.

Perfected Texture — The number one problem with broccoli bakes is waterlogged, mushy broccoli. My solution is twofold: a quick blanch-and-shock treatment for the broccoli, and a slightly thicker béchamel that doesn’t release excess moisture during baking. The result is a three cheese broccoli bake where every floret retains its structure and the sauce stays creamy, not watery. I also add a light panko topping tossed with melted butter and Parmesan — it creates that golden, crunchy crust that makes comfort food casserole so irresistible.

Foolproof & Fast — Despite its elegant result, this easy broccoli cheese bake recipe comes together in under an hour with just 15 minutes of active prep. The sauce comes together in one pot, the broccoli is prepped while the water boils, and the entire dish bakes in 25 minutes. I’ve tested this for weeknight dinners, potlucks, and even Thanksgiving, and it consistently delivers. Whether you’re a seasoned cook or just starting out, you’ll feel confident with this recipe.

Broccoli and Three-Cheese Savory Bake Ingredients

I pick up my broccoli and cheese at the Union Square Greenmarket on Saturday mornings, where the quality is unmatched. The cheddar I use is a sharp New York State farmhouse cheddar, and the Gruyère I source from a little cheese shop in Chelsea Market that imports it directly from Switzerland. That touch of smoked paprika in the topping? I still buy it from a Moroccan spice merchant who ships to me — it’s that important. Here’s everything you’ll need for this easy broccoli cheese bake recipe.

Ingredients List

  • 2 lbs fresh broccoli florets (about 2 medium heads)
  • 4 tbsp unsalted butter
  • 1 medium yellow onion, finely diced
  • 3 cloves garlic, minced
  • 1/4 cup all-purpose flour
  • 2 1/2 cups whole milk, warmed
  • 1/2 cup heavy cream
  • 6 oz sharp cheddar cheese, shredded (about 1 1/2 cups)
  • 4 oz Gruyère cheese, shredded (about 1 cup)
  • 2 oz Parmesan cheese, finely grated (about 1/2 cup)
  • 1/2 tsp smoked paprika
  • 1/4 tsp ground nutmeg
  • 1/2 tsp salt, plus more for blanching water
  • 1/4 tsp black pepper
  • 1/3 cup panko breadcrumbs
  • 1 tbsp olive oil
  • Optional: pinch of cayenne pepper or Aleppo pepper for heat
  • Optional: 1 tsp cumin — a nod to my Moroccan roots

Ingredient Spotlight

Broccoli: Fresh broccoli is non-negotiable here. Look for heads with tight, dark green florets and firm stalks — avoid any with yellowing or limp stems. The stalks are delicious too; peel the outer layer and dice them small so they cook at the same rate as the florets. If you must use frozen broccoli, thaw and pat it very dry, and add it to the sauce without blanching — but the texture won’t be quite as good.

Cheddar Cheese: Sharp or extra-sharp cheddar gives this easy broccoli cheese bake recipe its backbone. I use a New York-style white cheddar from Argyle Cheese Farmer in the Hudson Valley. Pre-shredded cheese won’t melt as smoothly because of the anti-caking agents, so please shred your own — it only takes 2 minutes and makes a real difference.

Gruyère: This Swiss cheese is my secret weapon for this cheesy broccoli casserole. It has a nutty, slightly sweet flavor that pairs beautifully with broccoli, and it melts into the creamiest texture imaginable. If you can’t find Gruyère, Emmental or Jarlsberg are excellent substitutes. Avoid using Swiss cheese from the deli counter — it doesn’t melt the same.

Parmesan: Always use real Parmigiano-Reggiano for this three cheese broccoli bake. The granular texture and salty, umami flavor are essential for the topping and for enriching the sauce. Pre-grated Parmesan in a can won’t melt properly and will make the sauce gritty. Spring for the real thing — a small wedge goes a long way.

Original IngredientBest SubstitutionFlavor / Texture Impact
Sharp CheddarMonterey Jack or GoudaMilder, less tangy; slightly softer melt
GruyèreEmmental, Jarlsberg, or FontinaSimilar nuttiness; slightly different melt
ParmesanPecorino Romano or Grana PadanoMore salty/sharp; similar granular texture
Whole Milk2% milk + 1 tbsp extra butterSlightly thinner sauce; add butter for richness
Panko BreadcrumbsCrushed Ritz crackers or fresh breadcrumbsButtery, richer topping; less crispy

How to Make Broccoli Three-Cheese Bake — Step-by-Step

This easy broccoli cheese bake recipe comes together in a few simple steps. I’ll walk you through each one with my chef-tested tips so you get a perfect, creamy, golden result every time.

Step 1: Blanch the Broccoli

Bring a large pot of salted water to a rolling boil. Fill a large bowl with ice water. Add the broccoli florets and diced stalks to the boiling water and cook for exactly 2 minutes. Drain immediately and transfer the broccoli to the ice water bath to stop the cooking. Let it sit for 2 minutes, then drain well and pat dry with a clean kitchen towel or paper towels. This step is the secret to a casserole where the broccoli stays green and tender-crisp, not mushy.

💡 mia’s Pro Tip: Don’t skip the ice water bath — it locks in the bright green color and stops the broccoli from continuing to cook. Pat the broccoli very dry afterward; excess water will thin out your cheese sauce.

Step 2: Start the Sauce

In a large saucepan or Dutch oven, melt 4 tablespoons of butter over medium heat. Add the finely diced onion and cook, stirring occasionally, for 5 minutes until soft and translucent. Add the minced garlic and cook for 30 seconds until fragrant. Sprinkle in the flour and whisk constantly for 1 full minute — this cooks out the raw flour taste and creates a roux that will thicken your sauce evenly.

⚠️ Common Mistake to Avoid: Don’t let the garlic burn — it turns bitter. Add it after the onion is soft, and only cook it for 30 seconds before adding the flour. Also, whisk the flour into the butter-onion mixture thoroughly to avoid lumps.

Step 3: Finish the Cheese Sauce

Slowly pour in the warmed milk and heavy cream while whisking constantly. Continue whisking until the mixture comes to a gentle simmer and thickens, about 3 to 4 minutes. Reduce the heat to low. Add the shredded cheddar, shredded Gruyère, and half of the grated Parmesan, reserving the rest for the topping. Stir until all the cheese is completely melted and the sauce is smooth. Season with smoked paprika, nutmeg, salt, and pepper. Taste and adjust — this is your moment to get the seasoning right.

💡 mia’s Pro Tip: Warm your milk and cream before adding them to the roux — cold liquid will seize the sauce and create lumps. I microwave mine for 60 seconds. Also, add the cheese off the heat or on very low heat to prevent it from separating.

Step 4: Assemble the Bake

Preheat your oven to 375°F. Grease a 9×13-inch baking dish (or a 3-quart casserole dish). Spread the blanched and dried broccoli evenly in the dish. Pour the cheese sauce over the broccoli, making sure it coats every floret. Gently stir to combine, then spread it into an even layer. In a small bowl, mix the remaining Parmesan with the panko breadcrumbs, olive oil, and a pinch of smoked paprika. Sprinkle this topping evenly over the casserole.

⚠️ Common Mistake to Avoid: Don’t crowd the broccoli — leave a little space between florets so the sauce can flow through. A 9×13 dish gives the perfect ratio. Also, don’t press the topping into the sauce; keep it light and scattered so it stays crisp.

Step 5: Bake and Rest

Place the dish on a baking sheet (to catch any drips) and bake for 22 to 25 minutes, until the sauce is bubbly and the topping is golden brown. If you want an extra-crispy crust, switch the oven to broil for the last 2 minutes — watch it closely so it doesn’t burn. Let the bake rest on the counter for 8 to 10 minutes before serving. This resting time allows the sauce to settle so it doesn’t run across your plate.

💡 mia’s Pro Tip: For the perfect golden crust, rotate the dish halfway through baking. Every oven has hot spots, and this ensures even browning. Letting it rest is non-negotiable — it’s the difference between a saucy bake and a soupy one.

StepActionDurationKey Visual Cue
1Blanch broccoli2 min boil, 2 min ice bathBright green, tender-crisp
2Cook onion + garlic + roux5 min + 30 sec + 1 minOnion translucent, roux bubbly and golden
3Make cheese sauce4 min simmer + 2 min meltThick, smooth, coats a spoon
4Assemble + top5 minSauce evenly distributed, topping scattered
5Bake + rest22–25 min + 8 min restBubbly edges, golden top, set center

Serving & Presentation

This cheesy broccoli casserole is generous enough to be a main dish but also works beautifully as a showstopping side. I love serving it family-style right out of the baking dish — place it on the table with a large spoon and let everyone dig in. For a prettier presentation, you can scoop portions onto individual plates using a large ice cream scoop or a ring mold. Garnish with a sprinkle of fresh parsley or chives, a crack of black pepper, and a light dusting of extra smoked paprika. It adds color and a subtle smoky note that echoes the dish.

In my NYC apartment, I often serve this broccoli and three-cheese savory bake with a simple roasted chicken or pan-seared salmon for a complete meal. But it’s also hearty enough to stand alone with a crisp green salad on the side. I love pairing it with a glass of unoaked Chardonnay or a light Pinot Noir — the creaminess of the cheese sauce loves a wine with bright acidity. For a truly comforting dinner, serve it alongside crusty bread to soak up every last drop of sauce. My Moroccan side would never forgive me if I didn’t also suggest serving it with a dollop of harissa on the side — the spicy-sweet heat cuts through the richness beautifully.

Pairing TypeSuggestionsWhy It Works
Side DishRoasted chicken, seared salmon, grilled steakThe creamy bake balances lean proteins with richness
Sauce / DipHarissa, sriracha mayo, or a squeeze of lemonAdds brightness or heat to cut the creamy richness
BeverageUnoaked Chardonnay, light Pinot Noir, sparkling water with lemonAcidity cuts through the cheese; bubbles refresh the palate
GarnishFresh parsley, chives, smoked paprika, Aleppo pepper flakesAdds color, freshness, and a final flavor boost

Make-Ahead, Storage & Reheating

This easy broccoli cheese bake recipe is one of my favorite meal prep dishes for busy NYC weeks. I often assemble it on a Sunday evening, pop it in the fridge, and bake it on Monday after work. The flavors actually meld and deepen overnight, making it even more delicious. Here’s exactly how to store and reheat it so every bite tastes just as good as the first one.

MethodContainerDurationReheating Tip
RefrigeratorAirtight container or covered baking dishUp to 4 daysOven at 350°F for 15 min, covered, then 5 min uncovered
FreezerFreezer-safe dish, tightly wrapped in foil + plastic wrapUp to 3 monthsThaw overnight in fridge; bake at 350°F for 25 min covered, 10 min uncovered
Make-AheadAssembled dish, unbaked, covered in fridgeUp to 24 hours in advanceAdd 5 extra min to bake time; top with extra panko before baking

When reheating, the key is to retain moisture while restoring the crispy topping. I prefer the oven over the microwave — it’s worth the extra 15 minutes. Cover the dish with foil for the first part of reheating to keep the sauce creamy, then uncover to crisp up the topping. If you’re reheating a single portion, an air fryer at 350°F for 5 to 7 minutes works brilliantly. The microwave works in a pinch (2 minutes on high), but the topping will be soft rather than crispy. From my experience, this easy broccoli cheese bake recipe tastes even better on day two — the flavors really settle in.

Variations & Easy Swaps

One of the things I love most about this three cheese broccoli bake is how easily it adapts to different cravings, dietary needs, and what’s in your fridge. These are my favorite variations, each tested in my own kitchen.

VariationKey ChangeBest ForDifficulty Impact
Moroccan SpicedAdd 1 tsp cumin, 1/2 tsp cinnamon, pinch of cayenneWarm, aromatic twist — pairs with lamb or roast chickenEasy
Gluten-FreeSubstitute flour with 1:1 gluten-free flour blend; use GF pankoCeliac or gluten-sensitive guestsEasy
Protein-PackedAdd 2 cups shredded rotisserie chicken or cubed hamA complete one-dish dinnerEasy

Moroccan Spiced Variation

This is my personal favorite — a nod to my roots. Add 1 teaspoon of ground cumin and 1/2 teaspoon of cinnamon to the roux along with the flour. The cumin brings warmth and the cinnamon adds a sweet, floral depth that’s absolutely magical with the Gruyère and broccoli. Finish with a pinch of cayenne or Aleppo pepper in the panko topping. This version is spectacular alongside a Moroccan-style roast chicken or a spiced lamb chop. The spices don’t overwhelm the cheese — they just make it more interesting.

Gluten-Free / Dairy-Free Variation

To make this easy broccoli cheese bake recipe gluten-free, swap the all-purpose flour for a 1:1 gluten-free flour blend (I like King Arthur Measure for Measure). The roux will look slightly different — it won’t get as thick immediately — but it will thicken as it simmers. Use certified gluten-free panko for the topping. For a dairy-free version, substitute the butter with plant-based butter, use unsweetened oat milk or cashew milk, and replace the cheeses with your favorite dairy-free shreds. I’ve tested this with Violife cheddar-style shreds and Follow Your Heart Parmesan, and the result is surprisingly creamy and satisfying.

Protein-Packed Version

For a heartier meal that works as a complete one-dish dinner, fold 2 cups of shredded rotisserie chicken or diced ham into the casserole along with the cheese sauce. I do this all the time after a busy day — I pick up a rotisserie chicken from the market, shred it while the broccoli blanches, and the whole thing comes together in no time. The protein makes this cheesy broccoli casserole substantial enough to serve on its own with no sides needed. It’s also a great way to use leftover holiday ham or turkey.

What types of cheese work best in a broccoli and three-cheese savory bake?

The best cheeses for a broccoli and three-cheese savory bake are those that bring different qualities to the table. Sharp cheddar provides a bold, tangy base flavor. Gruyère melts exceptionally well and adds a nutty, sweet note that complements broccoli beautifully. Parmesan contributes a salty, umami-rich finish and helps create a golden crust. Other excellent options include Gouda for a smoky touch, Fontina for exceptional creaminess, or Monterey Jack for a milder, melty option. Avoid using pre-shredded cheeses as the anti-caking agents can make the sauce gritty. Always shred your own for the smoothest, creamiest result.

How do you prevent the broccoli from getting soggy in a cheese bake?

The key to preventing soggy broccoli in a cheese bake is a quick blanch-and-shock technique. Boil the broccoli florets in salted water for exactly 2 minutes, then immediately transfer them to a bowl of ice water. This stops the cooking process and locks in the bright green color and crisp-tender texture. Drain the broccoli well and pat it thoroughly dry with a clean kitchen towel before adding it to the casserole. Excess water on the broccoli will thin out your cheese sauce and make the bake watery. Additionally, use a slightly thicker béchamel as the base of your sauce to help it hold up during baking.

Can I make a broccoli and three-cheese savory bake ahead of time and reheat it?

Absolutely — this is one of the best make-ahead dishes! You can assemble the entire casserole up to 24 hours in advance, cover it tightly, and refrigerate it unbaked. When ready to serve, simply bake as directed, adding 5 extra minutes to the cooking time. You can also bake the casserole fully and reheat it later. To reheat, cover the dish with foil and warm it in a 350°F oven for 15 minutes, then uncover for 5 minutes to re-crisp the topping. Individual portions reheat beautifully in an air fryer at 350°F for 5 to 7 minutes. The flavors actually deepen overnight, making it even more delicious.

What can I serve with a broccoli and three-cheese savory bake for a complete meal?

This cheesy broccoli casserole is wonderfully versatile. As a main dish, serve it with a simple green salad dressed with lemon vinaigrette and crusty bread to soak up the sauce. It also pairs beautifully with roasted chicken, pan-seared salmon, or a seared steak. For a vegetarian feast, serve it alongside a grain salad with quinoa or farro and roasted vegetables. The creamy, rich bake is balanced by bright, acidic sides — think a crisp apple-fennel slaw or tomatoes with fresh basil. A glass of unoaked Chardonnay or a light Pinot Noir complements the creaminess perfectly.

Can I use frozen broccoli instead of fresh in this recipe?

Yes, you can use frozen broccoli, but fresh is strongly recommended for the best texture and flavor. Frozen broccoli has already been blanched during processing, so it’s more prone to becoming waterlogged in the bake. If using frozen, do not thaw it first — add it directly to the sauce without blanching. Increase the initial bake time by about 5 minutes to account for the extra moisture. Pat the frozen broccoli with paper towels to remove any surface ice crystals before adding it to the dish. The overall texture will be softer than with fresh broccoli, but the flavor will still be delicious.

How do I make the cheese sauce smooth and lump-free?

A smooth, lump-free cheese sauce starts with a proper roux. Whisk the flour into the melted butter and cook for 1 minute until it’s bubbly and golden — this removes the raw flour taste. Then add your milk and cream slowly while whisking constantly. The milk should be warm, not cold, to prevent the roux from seizing. Once the sauce comes to a gentle simmer, it will thicken naturally. Remove the pan from the heat before adding the shredded cheese, and stir until fully melted. If you do get lumps, use an immersion blender to smooth them out right in the pot.

Can I add other vegetables to this broccoli cheese bake?

Absolutely — this easy broccoli cheese bake recipe is very adaptable. Cauliflower pairs beautifully with broccoli and the three-cheese sauce, making a broccoli-cauliflower combo that’s lovely. Sautéed mushrooms add an earthy, savory note that complements the Gruyère. Roasted red peppers or sun-dried tomatoes bring sweetness and a pop of color. If adding vegetables with high water content like zucchini or bell peppers, sauté them first to remove excess moisture, then pat them dry before adding to the casserole. Keep the total vegetable volume similar to the original recipe so the cheese sauce ratio stays balanced.

How do I get a crispy, golden topping on my cheese bake?

The secret to a perfect crispy topping is a combination of panko breadcrumbs, finely grated Parmesan, and a little olive oil or melted butter. Panko is coarser than regular breadcrumbs, so it stays crunchier during baking. Mix the panko with the Parmesan and olive oil until the crumbs are evenly coated — this helps them brown instead of burn. Sprinkle the topping lightly over the casserole without pressing it into the sauce. Bake at 375°F until golden and bubbly, then switch the oven to broil for the last 2 minutes if you want extra crunch. Watch closely so it doesn’t burn.

Is this broccoli and three-cheese savory bake freezer-friendly?

Yes, this casserole freezes beautifully for up to 3 months. For best results, assemble the casserole completely but do not bake it. Wrap the dish tightly in a layer of plastic wrap, then a layer of aluminum foil, and freeze. When ready to serve, thaw overnight in the refrigerator, then bake as directed, adding 10 to 15 minutes to the baking time since you’re starting from cold. You can also freeze a baked casserole — let it cool completely, then wrap and freeze. Reheat directly from frozen in a 350°F oven, covered, for about 40 minutes, then uncover for 10 minutes to crisp the topping.

What can I use instead of heavy cream in this recipe?

If you don’t have heavy cream, you can substitute it with equal parts whole milk and melted butter (1/2 cup milk + 1 1/2 tbsp butter replaces 1/2 cup cream). Half-and-half is an even easier substitute and will produce a very similar richness and texture. For a lighter version, use evaporated milk — it has a concentrated, creamy consistency that works well in cheese sauces. Avoid using low-fat or skim milk as a straight substitute without adding extra butter or flour, or the sauce will be thin. The cream adds a velvety richness that’s part of what makes this comfort food casserole so indulgent.

Share Your Version!

Now it’s your turn to bring this Broccoli and Three-Cheese Savory Bake to your table. I’d love to hear how it turns out — did you try the Moroccan spice twist, or add chicken to make it a one-dish dinner? Maybe you discovered a new cheese combination that worked beautifully? Drop a comment and a star rating below to let this food blogger know what you think. Your feedback helps other home cooks discover the best version of this easy broccoli cheese bake recipe too.

Snap a photo of your golden, bubbly creation and share it on Instagram or Pinterest — tag @exorecipes so I can see and share your masterpiece. I read every comment and love hearing about the little tweaks you make that turn a recipe into your own. And if you have a question about getting the perfect texture or a substitution you’re considering, just ask — I’m here to help you make this cheesy broccoli casserole your new favorite comfort food. From my NYC kitchen to yours — I hope this recipe brings as much warmth to your table as it does to mine. — mia 🧡

📌

Love This Recipe? Save It to Pinterest!

If you enjoyed this Broccoli and Three-Cheese Savory Bake recipe, don’t let it get lost in your browser tabs! 😄 Pin it now so you can find it again anytime — and explore hundreds more tried-and-tested recipes waiting for you on my Pinterest boards.

👉 Follow mia on Pinterest @exorecipe

📌 Pin this recipe · 🔁 Re-pin your favorites · 💬 Tag me when you make it — I love seeing your creations!

Print

clock clock iconcutlery cutlery iconflag flag iconfolder folder iconinstagram instagram iconpinterest pinterest iconfacebook facebook iconprint print iconsquares squares iconheart heart iconheart solid heart solid icon

Broccoli and Three-Cheese Savory Bake Recipe: A Delicious and Easy Comfort Food

  • Author: Chef Mia

Instructions


    Broccoli and Three-Cheese Savory Bake Recipe: A Delicious and Easy Comfort Food

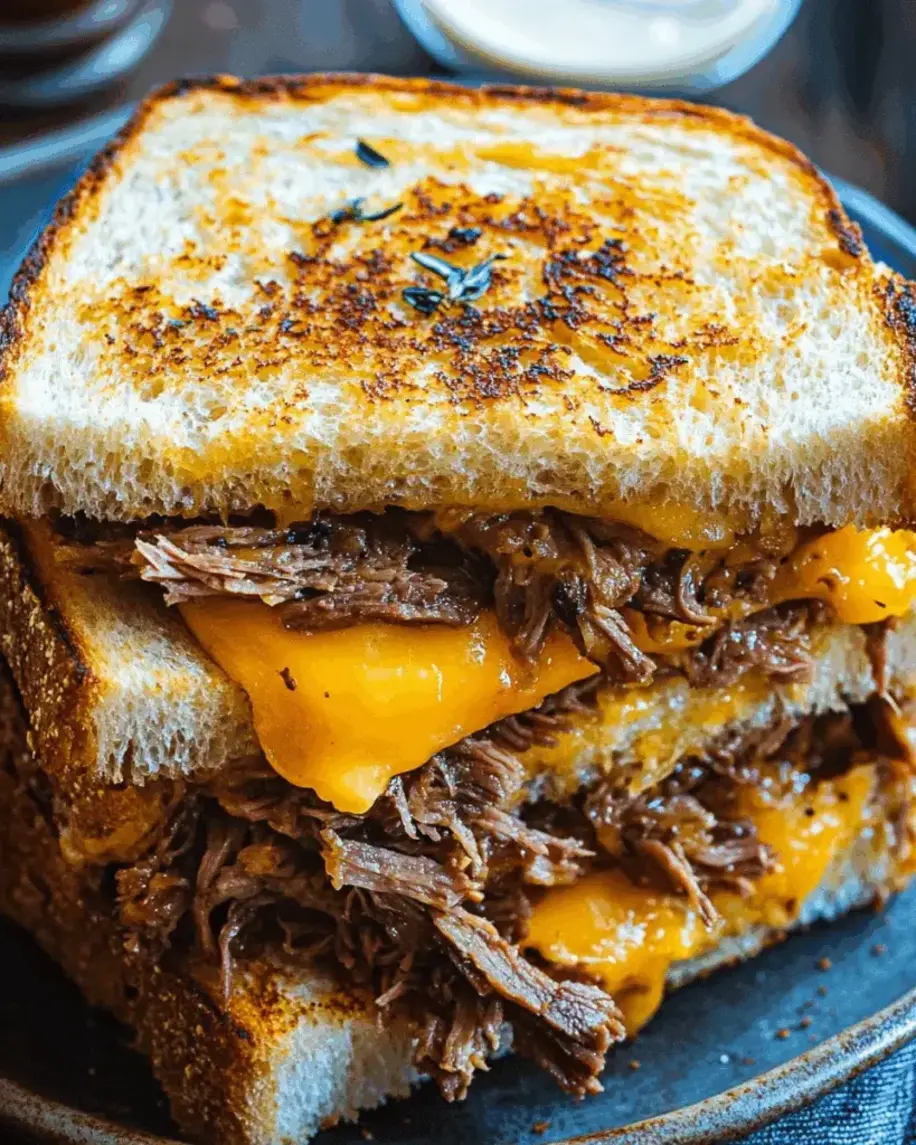
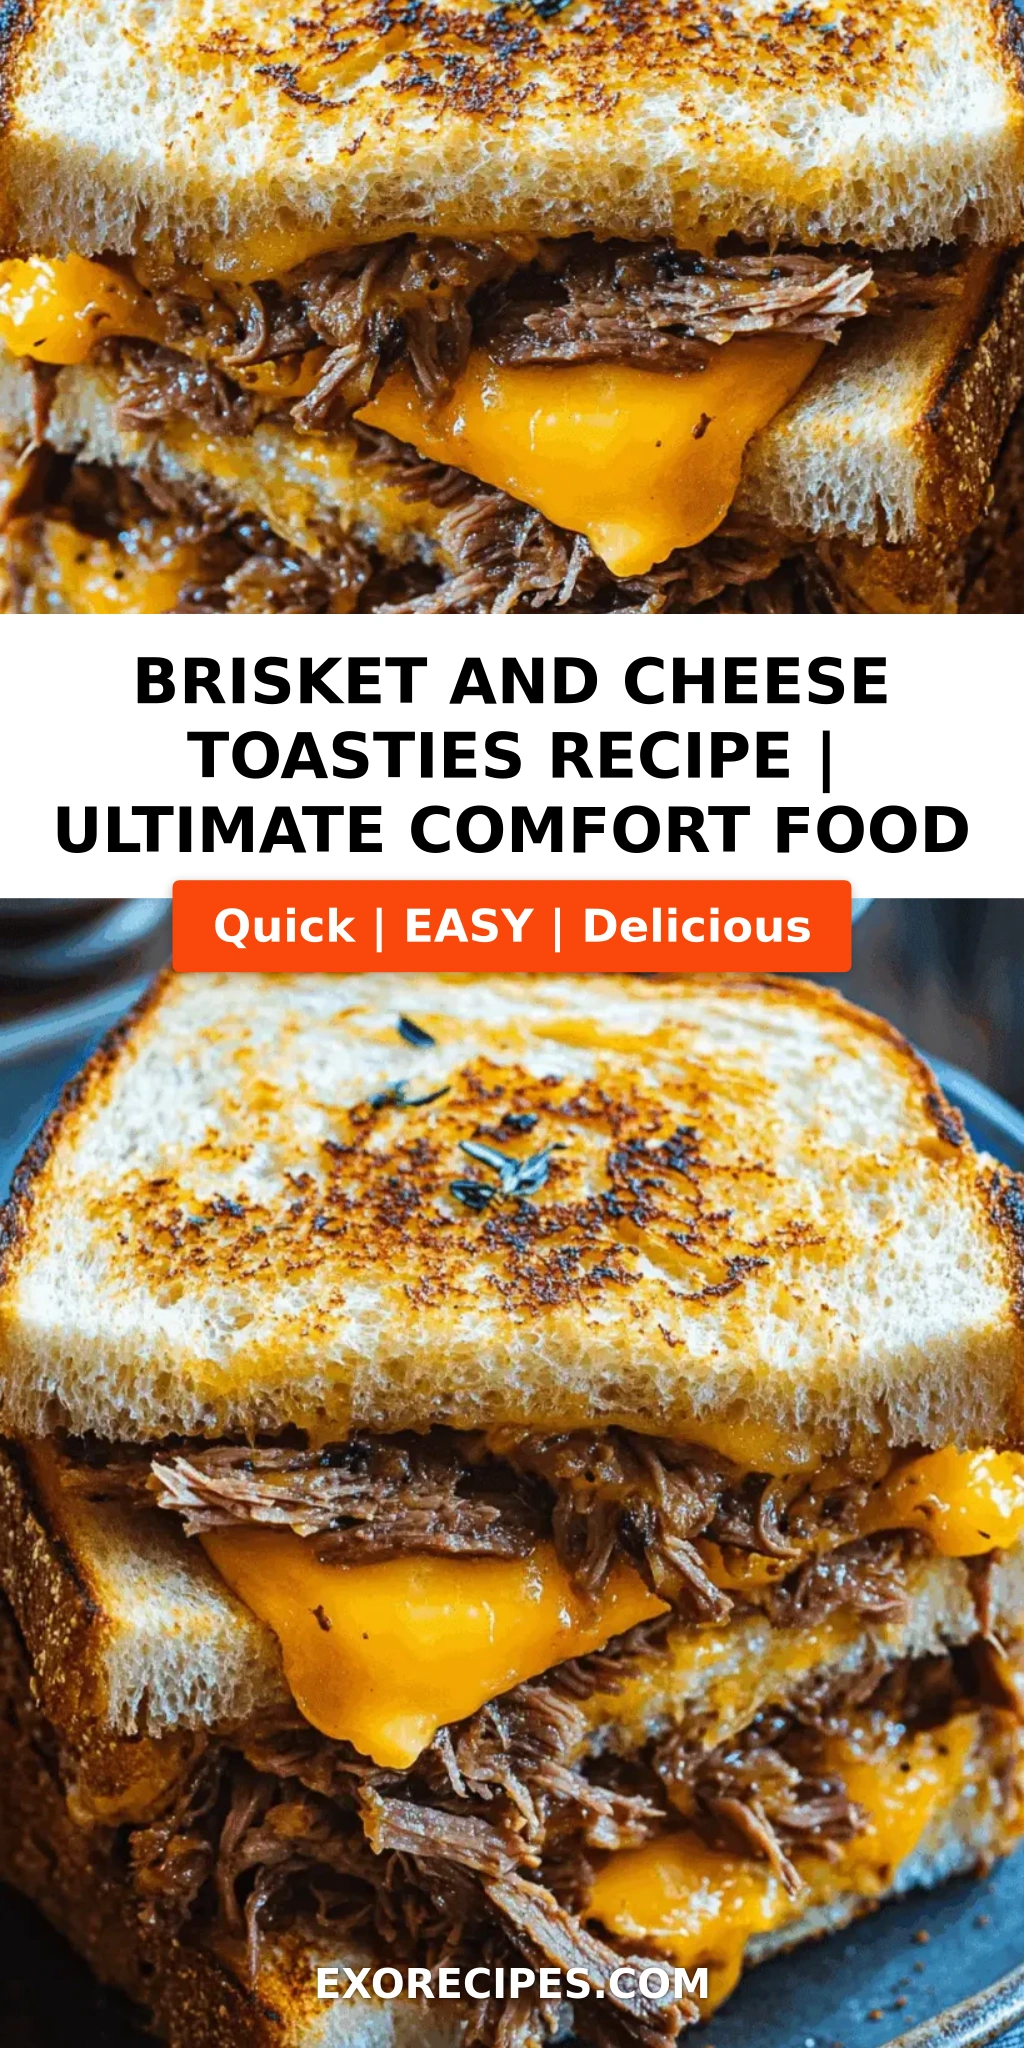
    Brisket and Cheese Toasties – The Ultimate Comfort Food

    ⚖️
    Difficulty
    Easy
    ⏲️
    Prep Time
    15 mins
    🕒
    Cook Time
    20 mins
    ⏱️
    Total Time
    35 mins
    🍽️
    Servings
    4

    I still remember the first time I had a brisket and cheese toastie — it was a gray, drizzly afternoon in New York City, and I ducked into a tiny deli in the East Village. The woman behind the counter handed me a golden, griddled sandwich wrapped in wax paper, and the moment I bit through that shatteringly crisp bread into the tender, smoky brisket and molten cheese, I knew I had found something special. Growing up in Morocco, my mother would make warm, spiced meat-filled breads called msemen for our family — and that same soul-warming feeling came flooding back. This brisket toastie recipe is my love letter to both worlds: the rustic comfort of North African street food and the bold, no-nonsense spirit of NYC. It’s the ultimate comfort food toastie, and I can’t wait to share my version with you.

    Imagine this: thick slices of sourdough bread, buttered until golden, toasted to a shattering crunch that gives way to a luscious, creamy filling. The brisket is slow-cooked until it falls apart — tender, smoky, and seasoned with a whisper of Moroccan spices that I learned in my mother’s kitchen. A generous blanket of aged Gruyère melts into every nook and cranny, binding the meat into a glorious, stringy, decadent bite. The aroma alone — toasty bread, rich beef, and nutty cheese — will draw everyone into the kitchen before you even call them to the table. This isn’t just a sandwich; it’s a full-sensory experience.

    As a professionally trained chef who studied in Paris and now feeds the vibrant streets of New York, I’ve learned that a truly exceptional cheesy brisket sandwich comes down to three things: perfectly cooked brisket, the right cheese melt, and a flawless crunchy exterior. In this post, I’ll share my chef-tested technique for each — including a secret brisket prep step that keeps the meat extra juicy, and a butter-spreading trick that ensures an evenly golden crust every time. Whether you’re new to making toasties or a seasoned pro, this recipe will give you the confidence to create something truly memorable. So grab your skillet, and let’s make the best baked brisket sandwich of your life.

    Why This Brisket and Cheese Toasties Recipe Is the Best

    The Flavor Secret — My time training in Paris taught me to build layers of flavor with patience and precision. For this brisket and cheese toasties, I take the leftover or pre-cooked brisket and toss it in a pan with a touch of butter, a pinch of smoked paprika, and a tiny amount of honey. That brief caramelization brings out the natural sweetness of the meat and adds a subtle smokiness that pairs beautifully with the cheese. It’s a step most recipes skip, but it makes all the difference. The result is a flavor profile that’s both deeply familiar and quietly sophisticated — like a classic New York deli sandwich got a secret Parisian upgrade.

    Perfected Texture — The hallmark of a great comfort food toastie is contrast: a crust that shatters and a center that oozes. My technique is inspired by the French croque-monsieur, where the bread is buttered on the outside and lightly toasted before adding the filling. This double-step ensures the bread stays sturdy enough to hold the juicy brisket without becoming soggy, while the cheese on the inside melts into a creamy, stretchy blanket. I use a combination of Gruyère for its nutty melt and a sharp white cheddar for its bold tang — a blend I perfected during my first kitchen job in the 9th arrondissement of Paris.

    Foolproof & Fast — If you can butter bread and stir a pan, you can make this brisket toastie recipe. I’ve designed every step to be accessible for home cooks of any skill level. The most time-consuming part is slow-cooking the brisket, but I’ll also share my shortcut using pre-cooked brisket from your local deli or barbecue joint — a trick I rely on often in my own NYC kitchen. With just 15 minutes of active prep and about 20 minutes on the stovetop or in the oven, you’ll have a baked brisket sandwich that tastes like it spent hours over a fire. Trust me — this one is destined to become a weekly staple.

    Brisket and Cheese Toasties Ingredients

    I buy my brisket from a butcher in Chelsea Market — they dry-age it in-house, which gives it incredible depth. But on busy weeks, I pick up pre-smoked brisket from a local barbecue spot in Brooklyn. The cheese I source from a small dairy stand at the Union Square Greenmarket, where they still make Gruyère the old-fashioned way. Every ingredient here has been chosen for its ability to melt, crisp, and satisfy. Here’s exactly what you’ll need.

    Ingredients List

    • 8 slices of sourdough bread (or thick country loaf, about 1-inch thick)
    • 1 lb cooked brisket (leftover or pre-cooked, shredded or sliced thin)
    • 4 tbsp unsalted butter, softened
    • 6 oz Gruyère cheese, grated
    • 4 oz sharp white cheddar, grated
    • 1 tbsp Dijon mustard (optional, for spreading)
    • 1 tsp smoked paprika
    • 1/2 tsp garlic powder
    • 1 tbsp honey
    • Salt and freshly ground black pepper, to taste
    • Fresh parsley or chives for garnish (optional)

    Ingredient Spotlight

    Brisket: The heart of this cheesy brisket sandwich. For the best texture, choose a brisket that’s been braised or slow-smoked until it’s tender enough to pull apart with a fork. Look for meat with visible marbling — that fat is what keeps the sandwich moist and flavorful. If using pre-cooked brisket, look for a piece that isn’t too dry; check the label or ask your butcher for a sample. Substitution: Leftover pot roast or shredded short ribs work beautifully, though the flavor will be slightly different.

    Gruyère: This Swiss-style cheese is my non-negotiable for the perfect melt. It has a nutty, slightly sweet flavor that complements the smoky brisket without overpowering it. Gruyère also melts into a silky, stretchy layer that clings to the meat. Substitution: Emmental, Comté, or a good-quality Swiss cheese will give a similar melt and mild nuttiness. Avoid pre-shredded cheese — it contains anti-caking agents that prevent smooth melting.

    Sourdough Bread: The structural backbone of the brisket toastie recipe. Sourdough has a tight crumb that holds up to the heavy filling and a sturdy crust that crisps beautifully in butter. Its tangy flavor also cuts through the richness of the cheese and brisket. Substitution: A thick-cut country loaf, brioche (for a sweeter, softer bite), or even gluten-free bread will work. Just avoid anything too airy or thinly sliced — the sandwich won’t hold together.

    Original IngredientBest SubstitutionFlavor / Texture Impact
    BrisketLeftover pot roast or short ribsLess smoky but equally tender; adjust seasoning
    GruyèreEmmental or ComtéVery similar melt and nutty flavor; slightly milder
    Sourdough breadThick country loaf or briocheBrioche adds sweetness; country loaf gives sturdier crunch
    Sharp white cheddarExtra-sharp yellow cheddar or GoudaYellow cheddar is tangier; Gouda adds smoky sweetness

    How to Make Brisket and Cheese Toasties — Step-by-Step

    Making the ultimate brisket and cheese toasties is easier than you think. Follow these steps, and you’ll have a golden, oozing sandwich that rivals any deli in New York. I’ve included my best pro tips and common mistakes to avoid along the way.

    Step 1: Prepare the Brisket

    Shred or thinly slice the cooked brisket into bite-sized pieces. In a medium skillet over medium heat, melt 1 tablespoon of butter. Add the brisket along with the smoked paprika, garlic powder, and a pinch of salt and pepper. Cook for 2–3 minutes, stirring occasionally, until the meat is warmed through and slightly caramelized on the edges. Drizzle the honey over the top and stir for another 30 seconds. Remove from heat and set aside. This brief pan-fry deepens the flavor and adds a subtle caramelization that makes the cheesy brisket sandwich truly next-level.

    💡 mia’s Pro Tip: Don’t skip the honey — it’s the secret to a glossy, slightly sweet crust on the brisket that balances the savory cheese. A little goes a long way!

    Step 2: Assemble the Toasties

    Lay 4 slices of sourdough bread on a clean work surface. Spread a thin layer of Dijon mustard on each slice if using (I love the subtle heat it adds). Divide the brisket evenly among the 4 slices. Top with a generous handful of the grated Gruyère and cheddar, making sure to cover the meat completely. Place the remaining bread slices on top to form 4 sandwiches. Spread the softened butter generously on the outside of each sandwich — this is what gives the bread that signature golden crunch.

    ⚠️ Common Mistake to Avoid: Don’t skimp on the butter! A thin layer won’t brown evenly. Use a full tablespoon per sandwich, spread all the way to the edges.

    Step 3: Cook the Toasties

    Heat a large non-stick skillet or cast-iron pan over medium-low heat. Place 1–2 sandwiches in the pan (don’t overcrowd). Cook for 3–4 minutes on the first side, until the bread is deep golden brown and the cheese starts to melt. Use a spatula to gently press down on the sandwich halfway through — this ensures even browning and helps the cheese fuse with the brisket. Flip carefully and cook for another 3–4 minutes on the second side. If the bread is browning too quickly, lower the heat. For an even melt, you can cover the pan with a lid for the last 2 minutes of cooking.

    💡 mia’s Pro Tip: For the ultimate baked brisket sandwich experience, after flipping, transfer the pan to a preheated 375°F oven for 5 minutes. This guarantees the inside is piping hot and the cheese is completely melted without burning the bread.

    Step 4: Serve Immediately

    Remove the toasties from the pan and let them rest for 30 seconds on a cutting board. This brief rest prevents the cheese from sliding out when you cut. Use a serrated knife to slice each sandwich diagonally in half — the clean line through the crispy crust is pure satisfaction. Sprinkle with fresh parsley or chives if desired, and serve hot.

    ⚠️ Common Mistake to Avoid: Cutting too soon! If you slice while the cheese is still lava-hot, it will ooze out and you’ll lose half the filling. Patience is key.

    StepActionDurationKey Visual Cue
    1Pan-fry brisket with spices and honey3 minutesBrisket edges are caramelized and glossy
    2Assemble sandwiches and butter exteriors5 minutesButter coats all the way to the edges
    3Pan-fry or bake toasties6–8 minutesBread is deep golden brown; cheese is bubbling at edges
    4Rest and slice diagonally30 secondsCheese is set but still stretchy; no spillage

    Serving & Presentation

    These brisket and cheese toasties are a meal in themselves, but pairing them with the right sides elevates the whole experience. I love serving them with a crisp green salad dressed with a simple lemon vinaigrette — the acidity cuts through the richness of the cheese and brisket. Or, if I’m feeling nostalgic for my NYC deli days, I add a handful of dill pickle spears on the side and a small dish of spicy brown mustard for dipping. For a heartier spread, a bowl of warm tomato soup or a roasted sweet potato wedge salad makes the perfect companion.

    When I’m entertaining, I’ll cut each toastie into three finger-sized strips and serve them on a wooden board with a trio of dipping sauces: a creamy sriracha mayo, a tangy chimichurri, and a classic honey mustard. This tapas-style presentation is always a hit at parties and lets guests customize each bite. For a touch of nostalgia from my mother’s kitchen in Morocco, I sometimes serve these with a side of harissa-spiced yogurt for dipping — the smoky heat is an incredible contrast to the melted cheese.

    What to Serve with Brisket and Cheese Toasties

    Pairing TypeSuggestionsWhy It Works
    Side DishGreen salad, sweet potato wedges, picklesCrisp and tangy sides balance the rich, cheesy sandwich
    Sauce / DipSriracha mayo, chimichurri, honey mustardAdds heat, freshness, or sweetness — your choice
    BeverageDark lager, iced tea, lemonadeRefreshing and crisp; cuts through the richness
    GarnishFresh parsley, chives, flaky sea saltAdds color and a fresh finish

    Make-Ahead, Storage & Reheating

    In my bustling New York City life, meal-prepping is a survival skill. This brisket toastie recipe lends itself beautifully to make-ahead strategies. I often cook a big batch of brisket over the weekend, then store the components separately so I can assemble toasties in minutes on busy weeknights. Here’s my tested system for storing and reheating so every toastie tastes as fresh as the first one.

    MethodContainerDurationReheating Tip
    RefrigeratorAirtight container, brisket and cheese separateUp to 4 daysReheat brisket in a pan; assemble and toast fresh bread
    FreezerVacuum-seal or freezer-safe bag, brisket onlyUp to 3 monthsThaw overnight in fridge; reheat in pan with a splash of broth
    Make-AheadAssemble sandwiches, wrap in parchment1 day in advanceCook directly from fridge; add 1–2 mins to cook time

    If you have leftover cooked toasties that have gone cold, the oven is your best friend. Place them on a baking sheet at 350°F for 8–10 minutes, flipping halfway through. This re-crisps the exterior while melting the cheese back to its luscious state. Avoid the microwave — it turns the bread rubbery and the cheese heats unevenly. Trust me, I learned this the hard way during a late-night snack session after a long shift. The extra few minutes in the oven are absolutely worth it.

    Variations & Easy Swaps

    One of the things I love most about this comfort food toastie is how adaptable it is. Whether you’re cooking for dietary needs or simply craving a different flavor profile, there’s a version here for you. I’ve tested each of these variations in my own kitchen, so you can try them with confidence.

    VariationKey ChangeBest ForDifficulty Impact
    Moroccan SpicedAdd cumin, coriander, and harissaAdventurous eaters, spice loversEasy — same method, just add spices
    Veggie SmashReplace brisket with roasted mushrooms + caramelized onionsMeatless Monday, vegetariansEasy — mushrooms cook in the same pan
    Spicy BBQToss brisket with BBQ sauce + pickled jalapeñosBBQ lovers, game-day snackingEasy — just mix and assemble

    Moroccan Spiced Toastie

    This variation is a nod to my childhood in Morocco. When I pan-fry the brisket, I add 1 teaspoon each of ground cumin and coriander, plus a pinch of cayenne. After assembling the toastie, I spread a thin layer of harissa paste on the inside of the top slice of bread before cooking. The result is a warm, aromatic cheesy brisket sandwich with layers of spice that build slowly — earthy, floral, and gently hot. A dollop of minted yogurt on the side completes the experience.

    Veggie Smash Toastie (Meatless)

    For a vegetarian take that still delivers on heartiness, I swap the brisket for a mixture of roasted cremini mushrooms and deeply caramelized onions. The mushrooms are sliced thick and cooked until they release their liquid and start to brown, creating that same savory depth. The caramelized onions add sweetness and body. This version is every bit as satisfying as the original, and the cheese still takes center stage with its gooey, stretchy glory. I often serve this to my meat-eating friends and they never miss the brisket.

    Spicy BBQ Toastie

    When I’m craving a taste of a New York summer barbecue, this is my go-to. After warming the brisket in the pan, I stir in 2 tablespoons of your favorite smoky BBQ sauce and a handful of pickled jalapeño slices (drained). The tangy, smoky-sweet sauce clings to the meat, and the pickled jalapeños cut through the richness with bright acidity. I finish the sandwich with a sprinkle of crispy fried onions on top of the cheese before closing the sandwich — it adds an incredible crunchy texture that contrasts with the soft brisket and gooey cheese.

    What is the best type of cheese to use for a brisket and cheese toastie?

    For the ultimate brisket and cheese toastie, I recommend a combination of Gruyère and sharp white cheddar. Gruyère melts beautifully into a silky, nutty layer that coats the brisket without overwhelming it, while sharp white cheddar adds a bold, tangy kick that cuts through the richness of the meat. Together, they create a creamy, stretchy, deeply savory cheese blend that’s far more complex than using just one cheese. If you can’t find Gruyère, good substitutes include Emmental, Comté, or a high-quality Swiss cheese. Avoid pre-shredded cheeses — they contain anti-caking agents that prevent smooth melting and can make the toastie grainy.

    How do you keep the brisket tender and juicy when making a toastie?

    The key to keeping brisket tender and juicy in a toastie is to warm it gently with a bit of fat and moisture before assembling. I pan-fry the shredded brisket in butter with a touch of honey and smoked paprika over medium-low heat for just 2–3 minutes. The honey adds a subtle glaze that locks in moisture, while the butter provides richness. If your brisket feels dry, add a tablespoon of beef broth or barbecue sauce while warming it. Also, avoid overcooking the brisket during reheating — it should be just warmed through, not sizzled to a crisp. Let the cheese do the heavy lifting for moisture inside the sandwich.

    Can I make brisket and cheese toasties in an air fryer instead of a pan?

    Absolutely, you can make brisket and cheese toasties in an air fryer, and it works wonderfully for achieving a crispy exterior without standing over a stove. Preheat your air fryer to 375°F. Assemble the sandwiches as directed, then place them in the air fryer basket in a single layer — do not overcrowd. Cook for 5–6 minutes, flip carefully with a spatula, and cook for another 4–5 minutes, until the bread is golden brown and the cheese is melted. Keep an eye on the toasties during the last few minutes, as air fryers can vary in intensity. I recommend lightly spraying the bread with oil before cooking for an even more golden crust.

    What sides go well with a brisket and cheese toastie for a full meal?

    Brisket and cheese toasties are rich and hearty, so I love pairing them with sides that bring balance. A crisp green salad with a tangy lemon vinaigrette or an apple cider dressing cuts through the richness beautifully. For something warm and comforting, a bowl of roasted tomato soup or creamy sweet potato bisque is a classic match. If you’re serving a crowd, roasted seasoned fries, sweet potato wedges, or a tangy coleslaw with a vinegar-based dressing are all excellent choices. For a lighter option, I serve pickled vegetables or a crunchy fennel and apple slaw. And don’t forget a dollop of spicy mustard or sriracha mayo on the side for dipping.

    Can I use leftover brisket from a barbecue for this toastie recipe?

    Yes, leftover barbecue brisket is one of the best starting points for this brisket toastie recipe. The smoked flavor from the barbecue adds an incredible depth that complements the cheese beautifully. Simply shred or thinly slice the leftover brisket and warm it gently in a pan with a little butter or a splash of barbecue sauce to rehydrate it, as leftover brisket can sometimes be a bit dry. If your brisket is heavily sauced, you may want to adjust the seasoning and skip the honey called for in the recipe to avoid the toastie becoming too sweet. This is a fantastic way to reinvent leftovers into a whole new meal.

    What bread is best for a brisket and cheese toastie to make it crispy?

    For the crispiest brisket and cheese toastie, I strongly recommend thick-cut sourdough bread. Its tight crumb and sturdy crust hold up to the heavy filling without becoming soggy, and it develops a beautiful golden crunch when buttered and toasted correctly. The tangy flavor of sourdough also balances the richness of the cheese and brisket. Other good options include a thick country loaf, ciabatta (for a lighter, airier texture), or brioche (for a sweeter, softer bite). Whatever bread you choose, make sure the slices are at least 1-inch thick and spread butter generously on the outside before cooking — that’s the secret to achieving that shatteringly crisp crust.

    Is this brisket and cheese toastie recipe gluten-free friendly?

    Yes, this comfort food toastie can easily be made gluten-free. Simply substitute the sourdough bread with a high-quality gluten-free bread — look for a sturdy, thick-sliced variety that can hold up to the filling without falling apart. I’ve tested this with several gluten-free breads and find that those made with a blend of rice flour, tapioca starch, and sorghum flour work best for toasting. The rest of the ingredients — brisket, cheese, butter, and seasonings — are naturally gluten-free, so no other adjustments are needed. Just be sure to check the labels on any condiments, especially Dijon mustard or barbecue sauce, to confirm they are certified gluten-free.

    What is the best way to reheat a leftover brisket and cheese toastie?

    The best way to reheat a leftover brisket and cheese toastie is in the oven at 350°F for 8–10 minutes, flipping halfway through. This method re-crisps the bread and thoroughly melts the cheese without making the bread soggy. Place the toastie directly on the oven rack or on a wire rack set over a baking sheet for the crispiest results. Avoid the microwave at all costs — it will turn the bread rubbery and the cheese will heat unevenly, resulting in a sad, limp sandwich. If you’re in a hurry, a toaster oven works beautifully too; just use the same temperature and check after 6 minutes. Let the toastie rest for 1 minute before cutting.

    Can I add vegetables to my brisket and cheese toastie?

    Absolutely, adding vegetables is a wonderful way to introduce freshness and texture to your cheesy brisket sandwich. I often add caramelized onions for sweetness and depth, or sautéed mushrooms for an earthy, savory boost. Thinly sliced bell peppers, roasted red peppers, or even a handful of fresh arugula added just before serving can brighten up the richness. If you like pickled flavors, pickled jalapeños or tangy pickled red onions add a brilliant acidic contrast. Just be careful not to overload the toastie with too many wet vegetables, as excess moisture can make the bread soggy. Pat any roasted or sautéed vegetables dry before assembling.

    How many calories are in a brisket and cheese toastie?

    This brisket and cheese toastie is an indulgent treat, so calorie counts vary depending on the specific ingredients and portion sizes you use. On average, one toastie made with 4 oz of brisket, 1.5 oz of Gruyère, 1 oz of cheddar, two slices of sourdough bread, and 1 tablespoon of butter contains approximately 550–650 calories. The exact count can go up or down based on the fat content of your brisket and the type of cheese. For a lighter version, you can reduce the butter by half, use a reduced-fat cheese, or opt for a lighter bread. The recipe is naturally high in protein thanks to the brisket, making it a hearty and satisfying meal.

    Share Your Version!

    I truly believe that the best recipes are the ones we share and make our own. Whether you stick to my original or try one of the variations — or invent your own twist — I want to hear about it! Drop a star rating and a comment below to let me know how your brisket and cheese toasties turned out. Did you add extra spice? Swap the cheese? Discover a new favorite dipping sauce? Your experience might inspire the next person who lands on this page.

    And if you snap a photo of your creation — and I hope you do — please share it on Instagram or Pinterest and tag @exorecipes. I love scrolling through my feed and seeing your beautiful, golden, cheese-pull moments. It’s the closest thing to having you over for dinner in my NYC kitchen. So go ahead, make a mess, melt some cheese, and enjoy every bite. I can’t wait to see what you create!

    From my NYC kitchen to yours — I hope this recipe brings as much warmth to your table as it does to mine. — mia 🧡

    📌

    Love This Recipe? Save It to Pinterest!

    If you enjoyed this Brisket and Cheese Toasties recipe, don’t let it get lost in your browser tabs! 😄 Pin it now so you can find it again anytime — and explore hundreds more tried-and-tested recipes waiting for you on my Pinterest boards.

    👉 Follow mia on Pinterest @exorecipe

    📌 Pin this recipe · 🔁 Re-pin your favorites · 💬 Tag me when you make it — I love seeing your creations!

    Print

    clock clock iconcutlery cutlery iconflag flag iconfolder folder iconinstagram instagram iconpinterest pinterest iconfacebook facebook iconprint print iconsquares squares iconheart heart iconheart solid heart solid icon

    Brisket and Cheese Toasties The Ultimate Comfort Food Recipe

    • Author: Chef Mia

    Instructions


      Brisket and Cheese Toasties The Ultimate Comfort Food Recipe

      “`html

      Bright Citrus Jalapeño Salad: A Zesty, Fresh Burst of Flavor – The No-Cook Salad That Wakes Up Every Meal

      ⚖️
      Difficulty
      Easy
      ⏲️
      Prep Time
      15 mins
      🕒
      Cook Time
      0 mins
      ⏱️
      Total Time
      15 mins
      🍽️
      Servings
      4

      I still remember the first time I made this bright citrus jalapeño salad. It was a sweltering August afternoon in my little New York City apartment — the kind of day where turning on the stove felt like a punishment. I had just come back from the Union Square Greenmarket with a bag of gorgeous oranges and a single grapefruit, and I could hear my mother’s voice in my head from our kitchen in Morocco: “When the heat is high, let the fruit do the work.” That’s the spirit behind this recipe. This citrus jalapeño salad recipe is a love letter to the no-cook, high-flavor meals that define my summers — a fusion of the bright, sun-drenched citrus I grew up with and the spicy kick that makes every bite exciting.

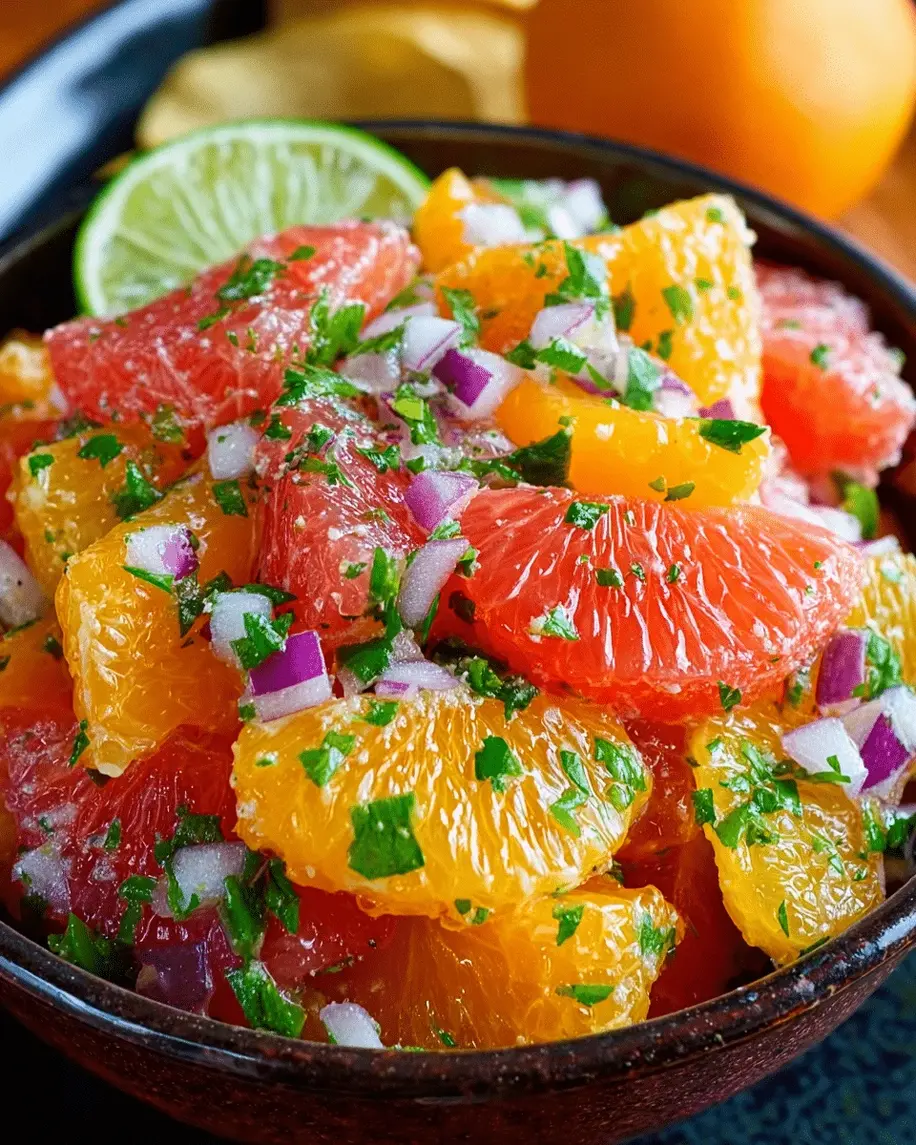
      Let me paint you a picture: juicy orange slices and grapefruit segments, their ruby and gold juices pooling on the plate, interwoven with thin, verdant slices of jalapeño that bring a gentle, building warmth. Fresh cilantro adds an herby, almost floral note, while slivers of red onion lend a sharp, sweet crunch. The dressing is a simple, elegant emulsion of olive oil and lime juice — a technique I refined during my pastry training in Paris, where we learned that the best dressings are the ones that don’t compete with the ingredients. Every forkful is a balance of sweet, tart, spicy, and savory — a zesty salad recipe that feels both exotic and instantly familiar.

      As a professional cook and food blogger based in NYC, I’ve tested this salad more times than I can count — for casual weeknight dinners, for weekend brunches with friends, and even as a bright, palate-cleansing side for heavy holiday meals. What I love most is how the citrus and jalapeño dance together: the fruit’s natural sugars tame the pepper’s fire, while the heat lingers just enough to keep things interesting. This fresh jalapeño salad is proof that the simplest ideas — a few quality ingredients, a thoughtful technique, and a pinch of confidence — can produce something truly memorable. And trust me: if you’ve ever been intimidated by balancing heat and acid, I’ve got you covered with a pro tip that makes it foolproof.

      Why This Bright Citrus Jalapeño Salad Recipe Is the Best

      The secret to this bright citrus salad lies in the way I build the layers. In my mother’s kitchen in Morocco, we’d often dress sliced oranges with a whisper of cinnamon and orange blossom water. In Paris, I learned the discipline of a proper vinaigrette — the precise ratio of acid to oil, the importance of good salt, the power of letting ingredients rest before serving. This recipe brings those two worlds together: the bold, sunny flavors of North African citrus salads meet the refined simplicity of French technique. The result is a spicy citrus salad that feels both rustic and elegant, familiar and surprising. I don’t just throw everything in a bowl — I arrange the fruit on a platter, scatter the aromatics by hand, and dress it right before serving so every component stays bright and distinct.

      Texture is where this salad truly shines. The oranges and grapefruit are sliced and segmented to maximize their tender, juicy bite, while the jalapeño and red onion are sliced paper-thin so they integrate without overwhelming. The cilantro is chopped coarsely — not minced — so each leaf retains its structure and fragrance. This is a technique I picked up in Paris: respect each ingredient’s geometry, and the final dish will reward you with a more complex, satisfying mouthfeel. There’s no wilting, no sogginess, no sad, weeping fruit — just vibrant, pristine layers that taste as beautiful as they look.

      Best of all, this recipe is foolproof. Fifteen minutes from start to finish, no cooking required, and it’s nearly impossible to mess up. The hardest part is peeling the citrus — and I’ll show you exactly how to do that without any pith. Whether you’re a seasoned home cook or someone who’s just getting comfortable in the kitchen, this bright citrus jalapeño salad recipe will make you look like a pro. It’s the kind of dish that travels well, scales easily for a crowd, and works as a side, a starter, or even a light lunch with some crusty bread and grilled fish.

      Citrus Jalapeño Salad Recipe Ingredients

      I source my citrus from the farmers market in Union Square whenever I can — there’s a vendor from upstate New York who brings the most incredible honeybells and winter grapefruits. But honestly, even the oranges from my corner bodega in Brooklyn work beautifully here. The key is choosing fruit that feels heavy for its size and yields slightly to gentle pressure at the stem end. Here’s everything you’ll need for this fresh jalapeño salad.

      Ingredients List

      • 2 large oranges, peeled and sliced into rounds
      • 1 grapefruit, peeled and segmented
      • 1 jalapeño, thinly sliced into rings (seeds removed for less heat)
      • 1/4 cup fresh cilantro, coarsely chopped
      • 1/4 cup red onion, thinly sliced into half-moons
      • 2 tablespoons extra-virgin olive oil
      • 1 tablespoon fresh lime juice
      • Flaky sea salt, to taste

      Ingredient Spotlight

      Each ingredient in this bright citrus salad plays a specific role, and knowing a little about them will help you choose wisely and cook with confidence.

      Oranges are the sweet backbone of this dish. I prefer navel oranges for their seedless ease and reliable sweetness, but blood oranges in season add a stunning ruby hue and a slightly more complex, berry-like flavor. When shopping, look for oranges that feel heavy for their size — that weight means they’re full of juice. Aromatic, thin-skinned oranges are a sign of freshness. If you can only find thick-skinned ones, that’s fine too — just be sure to slice off all the pith, as it can be bitter. For a tangier twist, try substituting one of the oranges with a tangerine or clementine.

      Grapefruit brings the tart, slightly bitter edge that makes this spicy citrus salad so dynamic. I use one large grapefruit — either white or pink — and segment it so each piece is clean and easy to eat. White grapefruit is more tart and astringent, while pink or ruby red grapefruit is sweeter and milder. Both work beautifully; just taste your grapefruit first and adjust the salt and lime juice in the dressing accordingly. If grapefruit isn’t your thing, you can substitute it with a second orange and a splash more lime juice, but you’ll lose some of the complexity.

      Jalapeño is the heat source, but it’s also a flavor carrier. The pepper’s vegetal, grassy notes are a perfect foil for the sweet citrus. Leaving the seeds in gives the salad a moderate, lingering heat; removing them yields a milder, more approachable warmth. For even more heat, substitute a serrano pepper. For less, use half a jalapeño or swap in a few thin slices of bell pepper. I recommend wearing gloves when slicing the jalapeño — trust me, I’ve learned the hard way that capsaicin lingers on your fingers for hours.

      Original IngredientBest SubstitutionFlavor / Texture Impact
      OrangeBlood orange or tangerineSweeter, more floral; deeper color
      GrapefruitNavel orange + extra lime juiceLess tart, simpler flavor profile
      JalapeñoSerrano (hotter) or bell pepper (mild)Adjusts heat level significantly
      Olive oilAvocado oil or grapeseed oilNeutral flavor; lighter mouthfeel

      How to Make Bright Citrus Jalapeño Salad — Step-by-Step

      This bright citrus salad comes together in four simple steps. I’ll walk you through each one with the same detail I use in my own kitchen — including the little tricks that make the difference between a good salad and a great one.

      Step 1: Arrange the Citrus

      Start by peeling your oranges and grapefruit. Use a sharp knife to slice off the top and bottom of each fruit, then stand it upright and cut away the peel in wide strips, following the curve of the fruit. Try to remove all the white pith — any leftover will add bitterness. Once peeled, slice the oranges into rounds about 1/4-inch thick. For the grapefruit, work over a bowl to catch the juice: hold the fruit in one hand and use a paring knife to cut along each membrane, releasing clean segments. Arrange the orange slices and grapefruit segments in a single layer on a large serving platter, overlapping them slightly for a beautiful, abundant look.

      💡 mia’s Pro Tip: Catch all the juice from the grapefruit as you segment it. Drizzle that juice over the arranged citrus before adding the other ingredients — it intensifies the citrus flavor and creates a natural base for the dressing.

      Step 2: Add the Jalapeño and Aromatics

      Now it’s time to build the savory layer. Scatter the thinly sliced jalapeño rings evenly over the citrus, followed by the chopped cilantro and the red onion half-moons. I like to scatter rather than pile — you want every forkful to get a little bit of everything. If you’re using the jalapeño seeds for extra heat, distribute them evenly so one person doesn’t end up with a mouthful of fire. For a milder salad, remove the seeds and ribs with a small spoon before slicing.

      ⚠️ Common Mistake to Avoid: Don’t add the jalapeño and onion too far in advance. If they sit on the citrus for more than 15 minutes before serving, the acid from the fruit will start to “cook” them, making them limp and muted in flavor. Add them right before you dress and serve.

      Step 3: Whisk the Dressing

      In a small bowl, combine the olive oil, fresh lime juice, and a generous pinch of flaky sea salt. Whisk vigorously with a fork until the mixture is emulsified and slightly thickened — this should take about 30 seconds of steady whisking. The emulsion is important: it helps the dressing cling to the citrus rather than pooling at the bottom of the platter. Taste the dressing on a small piece of orange to check the balance. It should be bright and slightly assertive — the salt and acid should make your mouth water, not pucker.

      💡 mia’s Pro Tip: Use a microplane to grate a tiny amount of lime zest into the dressing before whisking. That burst of fragrant lime oil elevates the whole salad and makes it taste even fresher. This is a trick I learned from a pastry chef in Paris who used it in fruit tart glazes.

      Step 4: Drizzle and Serve

      Drizzle the dressing evenly over the salad, using a spoon to distribute it across all the fruit and aromatics. Don’t toss the salad — you want the layers to remain intact. Serve immediately, while the citrus is still cool and the herbs are perky. This salad is best enjoyed within 15 minutes of dressing, though it will hold up for about an hour at room temperature if you’re serving it buffet-style.

      ⚠️ Common Mistake to Avoid: Don’t overdress! Two tablespoons of oil and one tablespoon of lime juice is exactly right for this amount of fruit. Too much dressing will drown the delicate citrus flavors and make the salad soggy. When in doubt, drizzle less — you can always add more at the table.

      StepActionDurationKey Visual Cue
      1Arrange citrus on platter8 minutesNo white pith visible; slices overlap slightly
      2Scatter jalapeño, cilantro, onion3 minutesEven distribution; no clumps of any one ingredient
      3Whisk dressing30 secondsEmulsified and slightly thickened; salt fully dissolved
      4Drizzle and serve1 minuteDressing glistens on fruit; no pools at platter bottom

      Serving & Presentation

      I love serving this bright citrus salad on a large, shallow white platter — the colors really pop against a neutral background. For a casual weeknight, I’ll bring it straight to the table on the platter with a pair of tongs and let everyone help themselves. For a more polished presentation, I arrange the citrus in concentric circles, with the jalapeño and cilantro scattered like confetti over the top. A final sprinkle of flaky sea salt and a few extra cilantro leaves make it look restaurant-ready.

      This zesty salad recipe is incredibly versatile. I serve it alongside grilled fish or chicken for a bright, acidic counterpoint. It’s also wonderful with rich, fatty meats like lamb chops or pork belly — the citrus cuts through the richness beautifully. For a vegetarian meal, I pile it onto a bed of arugula with some crumbled feta or goat cheese and a handful of toasted almonds.

      In my NYC kitchen, I often make a double batch for brunch and serve it next to a platter of smoked salmon, bagels, and cream cheese. The bright, spicy citrus is a revelation with cured fish. And if I’m feeling nostalgic for North African flavors, I’ll sprinkle a pinch of cumin and a dash of cinnamon over the finished salad — a trick my mother taught me that adds warmth without overwhelming the citrus.

      Pairing TypeSuggestionsWhy It Works
      Side DishGrilled salmon, roasted chicken, lamb chopsAcid cuts richness; spice adds complexity
      Sauce / DipTahini yogurt, harissa vinaigrette, balsamic glazeCreamy or tangy elements balance the heat
      BeverageDry rosé, crisp Sauvignon Blanc, mint iced teaLight, acidic drinks mirror and enhance citrus notes
      GarnishToasted cumin seeds, pomegranate arils, chopped mintAdds texture, color, and aromatic depth

      Make-Ahead, Storage & Reheating

      Let’s be real: this salad is at its absolute best within 30 minutes of making it. But I know life in NYC is busy, and sometimes you need to prep ahead. Here’s how I handle it when I’m meal-prepping for a busy week or making a dish for a potluck.

      MethodContainerDurationReheating Tip
      RefrigeratorAirtight containerUp to 1 dayServe cold or at room temp; do not heat
      FreezerNot recommendedCitrus texture breaks down when frozen
      Make-AheadPrep components separatelyUp to 2 days in advanceAssemble and dress just before serving

      If you’re making this ahead for a party, here’s my tested plan: slice all the citrus and store it in an airtight container in the fridge for up to two days. Slice the jalapeño and onion and store them separately in a small bag or container — the onion can be kept in a bowl of cold water to keep it crisp. Chop the cilantro and store it between damp paper towels in a resealable bag. Whisk the dressing and keep it at room temperature (the oil will solidify in the fridge). When you’re ready to serve, arrange the fruit, scatter the aromatics, drizzle the dressing, and you’re done. This component-prep approach is how I handle every catering job and holiday dinner — it takes the stress out of last-minute cooking while still delivering a salad that tastes freshly made.

      Variations & Easy Swaps

      VariationKey ChangeBest ForDifficulty Impact
      Moroccan SpicedAdd 1/2 tsp cumin + 1/4 tsp cinnamonWarming, aromatic flavor profileEasy — just add spices
      Creamy AvocadoAdd 1 sliced avocado + 2 tbsp toasted pepitasExtra creaminess and healthy fatsEasy — slice and add
      Tropical TwistSwap grapefruit for mango + use lime zestSweeter, summer-ready variationEasy — fruit swap

      Moroccan Spiced Variation

      This is the version I grew up with in Morocco. Sprinkle 1/2 teaspoon of ground cumin and 1/4 teaspoon of cinnamon over the arranged citrus before adding the jalapeño and cilantro. The cumin adds an earthy, nutty warmth that makes the citrus taste even sweeter, while the cinnamon brings a subtle floral note that’s completely unexpected in a savory salad. This variation is particularly wonderful alongside lamb or roasted root vegetables.

      Creamy Avocado Variation

      For a more substantial salad that can stand alone as a lunch, add one ripe, sliced avocado and a handful of toasted pepitas (pumpkin seeds) right before serving. The avocado’s creamy richness is a perfect foil for the bright citrus and spicy jalapeño, and the pepitas add a satisfying crunch. This version is naturally gluten-free and dairy-free, and it’s one of my most popular requests from readers who want a heartier bright citrus salad.

      Tropical Twist Variation

      When I find beautiful mangoes at the farmers market, I swap the grapefruit for one large, ripe mango. Cut it into bite-sized cubes and arrange them with the orange slices. The mango adds a lush, tropical sweetness that pairs beautifully with the jalapeño’s heat. I also add a generous pinch of lime zest to the dressing to reinforce the citrus notes. This variation feels like a vacation on a plate — perfect for summer barbecues or a quick, sunny meal in the middle of a busy week.

      How do you balance the heat of the jalapeño with the citrus in this salad?

      The heat of the jalapeño is balanced by the natural sugars and acidity of the citrus in two key ways. First, the sweetness of the oranges and grapefruit directly counteracts the capsaicin in the jalapeño, creating a pleasant sweet-heat dynamic on your palate. Second, the lime juice in the dressing adds a bright, tart note that cleanses your palate between bites, preventing the heat from building up too intensely. If you’re sensitive to spice, I recommend removing the seeds and white ribs from the jalapeño before slicing — that’s where most of the heat lives. You can also start with half a jalapeño and taste as you go, adding more if you’d like a bolder kick. The goal is a background warmth that enhances the citrus, not a fire that overpowers it.

      What type of citrus fruits work best in a Bright Citrus Jalapeño Salad?

      I recommend a combination of sweet and tart citrus for the most interesting flavor profile. Navel oranges are my go-to for sweetness — they’re reliable, seedless, and widely available in US grocery stores year-round. For the tart, slightly bitter note, grapefruit is ideal: pink or ruby red grapefruit are sweeter and milder, while white grapefruit is more astringent and complex. If you want to experiment, blood oranges add a stunning ruby color and a raspberry-like floral note, and tangerines or clementines bring a honeyed sweetness. Meyer lemons, sliced paper-thin and seeded, can also be layered in for a fragrant, less acidic lemon flavor. The key is to use fruit that is ripe but still firm — overripe citrus will be mushy and won’t hold its shape on the platter.

      Can you make this salad ahead of time without it getting soggy?

      You can absolutely prep components ahead, but I don’t recommend assembling the fully dressed salad more than 15 minutes before serving. Here’s what works: slice the citrus and store it in an airtight container in the refrigerator for up to two days. Slice the jalapeño and red onion and store them separately (the onion stays crisp in a bowl of cold water). Chop the cilantro and keep it between damp paper towels in a sealed bag. Whisk the dressing and leave it at room temperature. When you’re ready to serve, simply arrange, scatter, drizzle, and go. This component-prep method is how I handle catering and holiday cooking — you get the fresh, vibrant result of a just-made salad with the convenience of ahead-of-time prep.

      What can you substitute for jalapeño if you want less heat?

      If you want the flavor of jalapeño without the heat, simply remove the seeds and white ribs before slicing — that alone removes about 80% of the capsaicin. For a completely mild salad, substitute the jalapeño with thinly sliced green bell pepper, which has a similar vegetal crunch and color but zero heat. Another excellent option is a Cubanelle pepper, which is very mild with a slightly sweeter, more delicate flavor. For a completely different direction, try using thinly sliced cucumber or jicama for crunch, or a few slices of radish for a peppery bite that’s nothing like jalapeño but still adds brightness. Each substitution will change the character of the salad, but they all keep it fresh, crunchy, and delicious.

      Is this salad suitable for a gluten-free or dairy-free diet?

      Yes, this bright citrus jalapeño salad is naturally both gluten-free and dairy-free. There are no grains, flours, or gluten-containing ingredients in the recipe, and the dressing is made with olive oil and lime juice — no dairy whatsoever. As always, if you’re serving it to someone with celiac disease or a severe gluten sensitivity, make sure your ingredients are certified gluten-free, as cross-contamination can sometimes occur with spices or pre-packaged items. This salad is also vegan and paleo-friendly, making it a wonderful option for a wide range of dietary preferences.

      Can I use bottled lime juice instead of fresh lime juice?

      I strongly recommend fresh lime juice for this recipe. Bottled lime juice often contains preservatives and has a flat, metallic flavor that lacks the bright, zesty character that makes this salad sing. Fresh lime juice brings a floral aroma and a clean acidity that brightens every other ingredient. To get the most juice out of your lime, roll it firmly on the countertop under your palm for a few seconds before cutting — this breaks down the membranes inside and releases more juice. One medium lime typically yields about 2 tablespoons of juice, so one lime is plenty for this recipe. If you have extra, a squeeze over the finished salad just before serving adds an extra pop of freshness.

      What protein would you recommend serving with this salad?

      This bright citrus salad pairs beautifully with a wide range of proteins. For seafood, grilled salmon or seared scallops are my top picks — the citrus cuts through the richness of the fish. Grilled chicken with a simple salt-and-pepper rub is another excellent choice; the bright, spicy notes of the salad elevate a simple breast into something special. For red meat, I love serving this alongside lamb chops or a grilled flank steak — the acidity and heat are a perfect counterpoint to the savory, fatty flavors. For a vegetarian meal, I pile the salad onto a bed of arugula with sliced avocado and a handful of toasted almonds, or serve it next to a frittata or crustless quiche. The versatility of this salad is one of its greatest strengths.

      How do I properly segment a grapefruit for this salad?

      Segmenting a grapefruit (also called supreming) is easier than it sounds. Start by slicing off the top and bottom of the fruit so it sits flat on your cutting board. Stand the grapefruit upright and use a sharp paring knife to cut away the peel and white pith in wide strips, following the curve of the fruit from top to bottom. Once all the pith is removed, hold the fruit over a bowl to catch the juice. Working carefully, slide the knife along each membrane line toward the center of the fruit, releasing each segment cleanly. The segments should pop out easily. Remove any seeds with the tip of the knife. You’ll be left with beautiful, clean wedges that are perfect for arranging on a platter. Reserve the juice in the bowl — it’s wonderful in the dressing or just as a drink!

      Can I add other herbs to this salad?

      Absolutely! While cilantro is my first choice for its bright, grassy notes that complement both the citrus and the jalapeño, other herbs can be wonderful here. Fresh mint adds a cool, refreshing quality that’s lovely in the summer. Chopped flat-leaf parsley brings a clean, slightly peppery flavor that works well if you’re not a cilantro fan. A few leaves of fresh basil — torn, not chopped — add a sweet, almost anise-like note that pairs surprisingly well with grapefruit. I sometimes add a combination of cilantro and mint for a more complex herbaceous layer. If you’re using tender herbs like basil or mint, add them right before serving so they don’t wilt. The herb-to-salad ratio is flexible — start with 1/4 cup total and adjust to your taste.

      What’s the best way to slice the jalapeño for this salad?

      For this bright citrus salad, I recommend slicing the jalapeño into thin, even rings — about 1/8-inch thick. Using a sharp knife, slice across the pepper perpendicular to the stem. The rings are visually appealing and distribute evenly across the salad, so each forkful gets a consistent amount of heat. If you want a milder flavor, slice the jalapeño in half lengthwise first and use a small spoon to scrape out the seeds and white membranes before slicing the halves into thin half-moons. I recommend wearing gloves when handling jalapeños, especially if you’re removing seeds — the capsaicin can linger on your skin and cause irritation if you later touch your eyes or face. If you don’t have gloves, wash your hands thoroughly with soap and warm water after handling, and avoid touching your face for at least 30 minutes.

      Share Your Version!

      I truly believe that cooking is meant to be shared — and I’d love to see how this bright citrus jalapeño salad turns out in your kitchen! Every time one of you tags me in a photo, I feel like I’m back in my mother’s kitchen in Morocco, watching her beam with pride as someone asked for the recipe. So please, leave a star rating and a comment below — tell me which variation you tried, what you served it with, or how you made it your own.

      And here’s a question for you: did you keep the jalapeño seeds in, or did you remove them? I’m always curious how different palates approach the heat. Snap a photo of your creation and share it on Pinterest or Instagram — tag @exorecipes so I can see it and share your version with our community. There’s nothing I love more than seeing a recipe I created find a new life in someone else’s home. From my NYC kitchen to yours — I hope this recipe brings as much warmth to your table as it does to mine. — mia 🧡

      📌

      Love This Recipe? Save It to Pinterest!

      If you enjoyed this Bright Citrus Jalapeño Salad recipe, don’t let it get lost in your browser tabs! 😄 Pin it now so you can find it again anytime — and explore hundreds more tried-and-tested recipes waiting for you on my Pinterest boards.

      👉 Follow mia on Pinterest @exorecipe

      📌 Pin this recipe · 🔁 Re-pin your favorites · 💬 Tag me when you make it — I love seeing your creations!

      “`

      Print

      clock clock iconcutlery cutlery iconflag flag iconfolder folder iconinstagram instagram iconpinterest pinterest iconfacebook facebook iconprint print iconsquares squares iconheart heart iconheart solid heart solid icon

      Bright Citrus Jalapeño Salad A Zesty, Fresh Burst of Flavor

      • Author: Chef Mia
      • Prep Time: 15 minutes
      • Cook Time: 0 minutes
      • Total Time: 15 minutes
      • Yield: 4 1x
      • Method: Salad
      • Cuisine: American

      Description

      A vibrant and refreshing salad with bright citrus notes and a spicy kick from jalapeño.


      Ingredients

      Scale
      • 2 large oranges, peeled and sliced
      • 1 grapefruit, peeled and segmented
      • 1 jalapeño, thinly sliced
      • 1/4 cup fresh cilantro, chopped
      • 1/4 cup red onion, thinly sliced
      • 2 tablespoons olive oil
      • 1 tablespoon lime juice
      • Salt to taste

      Instructions

      1. Arrange the orange slices and grapefruit segments on a serving platter.
      2. Scatter the jalapeño slices, cilantro, and red onion over the citrus.
      3. In a small bowl, whisk together olive oil, lime juice, and salt.
      4. Drizzle the dressing over the salad and serve immediately.

      Notes

      For a milder salad, remove the seeds from the jalapeño before slicing.


      Nutrition

      • Calories: 120
      • Sugar: 12 g
      • Fat: 5 g
      • Carbohydrates: 18 g
      • Protein: 2 g


      Bright Citrus Jalapeño Salad A Zesty, Fresh Burst of Flavor

      k">

      Tried This Recipe? Leave a Comment!

      Did you make this recipe? I’d love to hear how it turned out! Please leave a comment and a rating below. Your feedback helps other home cooks and supports cheerychop.com!
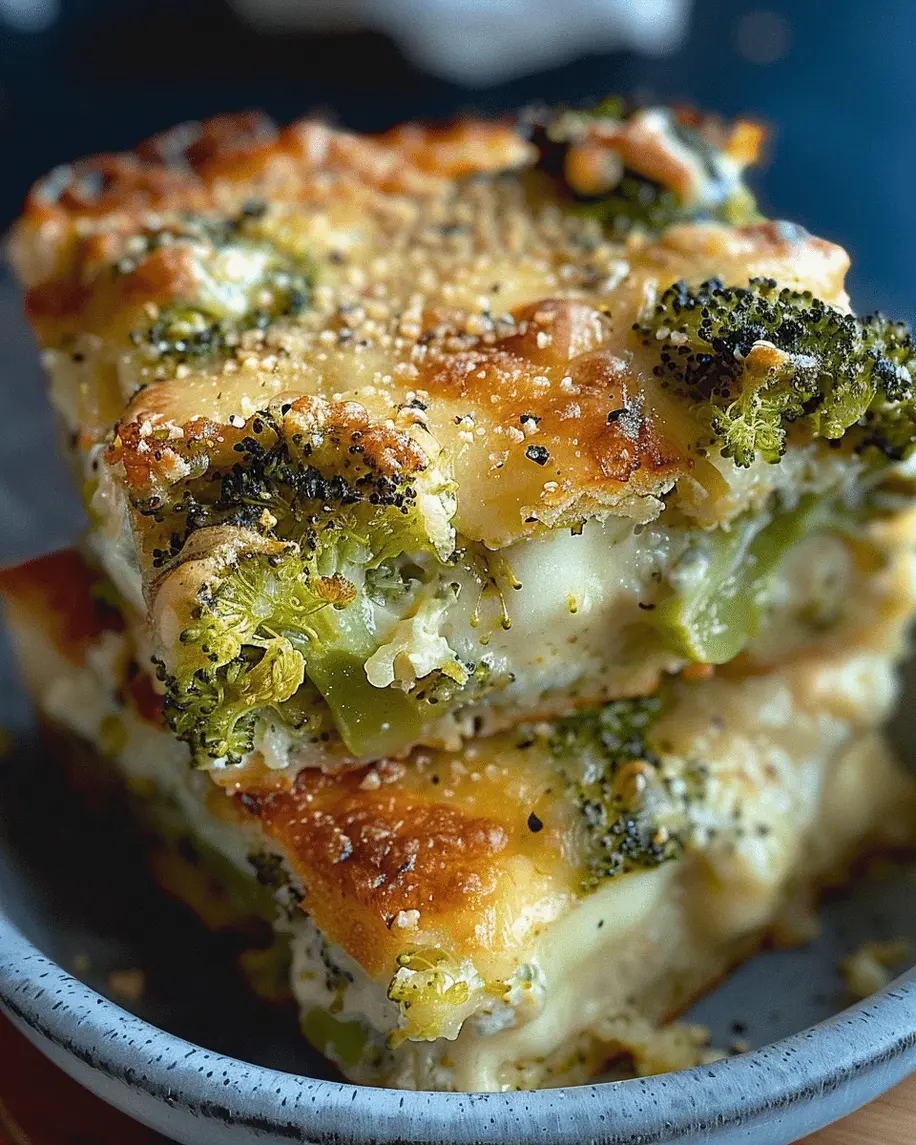
      For more delicious inspiration, follow me on Pinterest!

      Brie Phyllo Cups with Blackberry and Thyme – Easy Elegant Appetizer

      ⚖️
      Difficulty
      Easy
      ⏲️
      Prep Time
      10 mins
      🕒
      Cook Time
      10 mins
      ⏱️
      Total Time
      20 mins
      🍽️
      Servings
      15 cups (5 servings)

      When I first moved from my mother’s kitchen in Morocco to a pastry school in Paris, I never imagined that a tiny phyllo cup would become one of my most-requested party bites. These brie phyllo cups with blackberry and thyme are everything I love about cooking: the crisp, buttery layers remind me of Moroccan briouats, the creamy brie echoes the velvety French cheeses I learned to love, and the sweet-tart blackberry compote with fresh thyme nods to the bold flavors of my baked brie cups recipe. This elegant appetizer with brie comes together in just 20 minutes, yet tastes like you spent an hour. The secret? Frozen phyllo cups and a quick stovetop compote—anyone can pull this off.

      Picture this: a golden, flaky shell cradling molten brie that stretches ever so slightly when you lift the cup. On top, a jewel-toned blackberry compote—deep purple, speckled with tiny seeds, sweetened just enough with honey and brightened with lemon. Fresh thyme leaves add an herbal, almost piney finish, while a pinch of flaky sea salt makes every flavor pop. The contrast of temperatures—warm, gooey cheese against room-temperature compote—and the mix of creamy, crunchy, and fruity textures is pure magic. It’s the kind of bite that makes guests close their eyes and say “wow.”

      Over the years, I’ve made these blackberry thyme appetizers for everything from rooftop parties in Brooklyn to intimate dinners in my tiny Upper West Side kitchen. They’re my go-to when I need a easy party finger food that looks fancy but doesn’t require a second oven. In this post, I’ll share my tested tips for keeping the phyllo cups crisp, the best way to remove brie rind without wasting a speck, and one common mistake that can turn your cups soggy. Trust me—after one bite, you’ll be making these on repeat.

      Why This Brie Phyllo Cups Recipe Is the Best

      The Flavor Secret: This recipe isn’t just about brie and blackberries—it’s about balance. I learned in Paris that great cooking is about layering flavors: the mild, buttery brie needs the acidity of lemon and the floral sweetness of honey. The thyme adds an unexpected savory note that cuts through the richness. It’s the same instinct I learned from my mother, who always added a pinch of cinnamon to her tagines—a small touch that makes everything sing.

      Perfected Texture: Most baked brie recipes end up with a soggy bottom. Not here. By using pre-made mini phyllo cups and baking them just long enough to melt the cheese (5–7 minutes at 350°F), the cups stay crisp and flaky. I also arrange the compote after baking, so the moisture never touches the phyllo until serving. It’s a simple chef’s trick that makes all the difference.

      Foolproof & Fast: Twenty minutes, six ingredients, zero stress. Whether you’re a seasoned cook or hosting your first dinner party, these cups come together without a fuss. No tempering, no blind baking—just thaw, fill, bake, top, serve. I’ve tested this version dozens of times to make sure every bite is as perfect as the last.

      Brie Phyllo Cups with Blackberry and Thyme – Ingredients

      I pick up my brie from a little cheese shop in Chelsea Market, but any good supermarket will do. For blackberries, I love the ones from the Union Square Greenmarket in summer; in winter, frozen organic berries work beautifully. The thyme comes from a pot on my fire escape—a tiny herb garden that survives NYC winters by miracle.

      Ingredients List

      • For the phyllo cups:
      • 1 package (15 count) frozen mini phyllo cups (such as Athens or Pepperidge Farm), thawed
      • 4 oz Brie cheese, rind removed and cut into 15 small pieces
      • For the blackberry compote:
      • 1 cup fresh or frozen blackberries
      • 2 tablespoons honey
      • 1 teaspoon fresh lemon juice
      • For garnish:
      • Fresh thyme leaves
      • Flaky sea salt (optional)

      Ingredient Spotlight

      Brie: Look for a double-cream brie with a white, bloomy rind—the creamier the better. I always buy from a refrigerated case and let it come to room temperature for easier rind removal. Substitution: Camembert works beautifully, though it’s slightly more pungent. Avoid inexpensive “brie-style” wedges that can be waxy.

      Phyllo Cups: Store-bought mini cups are a lifesaver. I recommend Athens or Pepperidge Farm—they hold their shape perfectly. You can also use frozen phyllo sheets and cut your own circles, but that adds 20 minutes. For a gluten-free option, use mini won ton wrappers (they crisp up even more).

      Blackberries: Fresh in season are plump and juicy; frozen work anytime. If using frozen, don’t thaw first—just add them straight to the pan. Substitution: Raspberries, cherries, or sliced figs all make wonderful swaps. See the table below for more ideas.

      Original IngredientBest SubstitutionFlavor / Texture Impact
      Brie cheeseCamembert, triple-cream brie, or goat cheeseGoat cheese will be tangier; triple-cream is even richer.
      Mini phyllo cupsPuff pastry mini shells, wonton wrappers, or homemade phylloPuff pastry will be puffier and richer; wontons become extra crispy.
      BlackberriesRaspberries, blueberries, diced figs, or cherriesRaspberries are tarter; figs add sweetness and a jammy texture.
      HoneyMaple syrup, agave, or brown sugarMaple adds a woodsy note; brown sugar deepens caramel flavor.
      Fresh thymeRosemary (finely chopped), oregano, or lemon zestRosemary is stronger; lemon zest brightens without herbal notes.

      How to Make Brie Phyllo Cups with Blackberry and Thyme – Step-by-Step

      This recipe moves fast, so I like to have everything ready before I start. Thaw the phyllo cups on the counter for about 15 minutes, cube the brie, and measure the berries. Let’s go!

      Step 1: Preheat and Prep

      Preheat your oven to 350°F (175°C). Place the mini phyllo cups on a baking sheet—no need to grease. If you’re using frozen cups straight from the freezer, let them sit at room temperature for 10 minutes first so they don’t crack.

      💡 mia’s Pro Tip: To prevent the phyllo cups from sticking, you can brush the baking sheet with a tiny bit of melted butter, but I find they release easily without it.

      Step 2: Fill with Brie

      Remove the rind from the brie by cutting it off with a sharp knife. I like to slice the brie into 15 equal cubes—about ¼ ounce each. Place one cube into each phyllo cup, pressing it gently into the bottom.

      ⚠️ Common Mistake to Avoid: Don’t overfill! Too much brie will overflow and make the cups soggy. Stick to a ¼-ounce piece per cup.

      Step 3: Bake the Cups

      Bake for 5–7 minutes, until the brie is melted and bubbly. Watch closely—oven temperatures vary. The edges of the phyllo should be golden brown and the cheese should look molten but not browned.

      💡 mia’s Pro Tip: If the phyllo edges start browning before the cheese melts, tent the tray loosely with foil. This protects the delicate pastry.

      Step 4: Make the Compote

      While the cups bake, make the blackberry compote. In a small saucepan over medium heat, combine blackberries, honey, and lemon juice. Cook, stirring occasionally, for 3–5 minutes until the berries release their juices and the mixture thickens slightly. You want it syrupy but not jammy—it should still have some whole berries visible.

      ⚠️ Common Mistake to Avoid: Overcooking the compote will turn it into a stiff jam. Remove from heat as soon as the mixture coats the back of a spoon.

      Step 5: Assemble and Garnish

      Remove the phyllo cups from the oven. Immediately top each with a small spoonful of the blackberry compote (about 1 teaspoon per cup). Garnish with fresh thyme leaves and a pinch of flaky sea salt if desired. Serve warm—the contrast between hot brie and warm compote is divine.

      💡 mia’s Pro Tip: For the prettiest presentation, arrange the cups on a platter and sprinkle a few extra thyme leaves and blackberries around the board. It makes a stunning serving idea for brunch or cocktail hour.

      StepActionDurationKey Visual Cue
      1Preheat oven, thaw phyllo cups10 minPhyllo cups are pliable, not frozen
      2Fill cups with brie cubes2 minEach cup has a neat cube of cheese
      3Bake cups5–7 minEdges golden, cheese bubbly and melted
      4Cook blackberry compote3–5 minBerries soften, juices thicken slightly
      5Top cups with compote and garnish2 minShiny compote on melted brie, fresh thyme leaves

      Serving & Presentation

      These brie phyllo cups are wonderful as a passed appetizer during a cocktail party, or arranged on a platter for a brunch table. I love serving them on a rustic wooden board scattered with fresh blackberries, a few sprigs of thyme, and a small bowl of extra flaky sea salt. For a Moroccan touch, sometimes I add a drizzle of orange flower water to the compote—a trick from my mother.

      In NYC, I often pair these cups with a crisp Sauvignon Blanc or a dry sparkling wine. The acidity cuts through the richness of the brie. For a non-alcoholic option, try a tart hibiscus iced tea. They also work beautifully alongside a salad of bitter greens and a simple lemon vinaigrette.

      Pairing TypeSuggestionsWhy It Works
      Side DishMixed greens with lemon vinaigrette, roasted asparagus, or a fruit saladLight sides balance the richness of the brie.
      Sauce / DipExtra compote, honey drizzle, or a balsamic reductionAdds moisture and another layer of sweet-savory flavor.
      BeverageSauvignon Blanc, dry rosé, or a sparkling water with lemonAcid and bubbles cut through the creamy cheese.
      GarnishThyme sprigs, extra blackberries, edible flowers, flaky saltMakes the dish look restaurant-worthy and adds freshness.

      Make-Ahead, Storage & Reheating

      Life in New York is fast, so I often prep the compote a day in advance and keep it in the fridge. The phyllo cups are best served immediately after baking, but you can assemble them up to an hour before and store them at room temperature. Here’s my tested storage guide:

      MethodContainerDurationReheating Tip
      RefrigeratorAirtight container (cups separated)Up to 2 daysReheat on a baking sheet at 350°F for 3–4 minutes until warm.
      FreezerFreezer-safe bag, cups arranged in a single layerUp to 1 monthBake from frozen at 350°F for 8–10 minutes. Do not thaw first or they’ll become soggy.
      Make-Ahead (Compote)Jar or bowl, coveredUp to 5 days in advanceReheat compote gently in a pan or microwave before topping cups.

      If you have leftover baked cups, reheat them in the oven (not microwave) to revive the crispness. The compote can be made up to a week ahead and stored in the fridge. I often double the compote recipe and use it over yogurt or ice cream the next day.

      Variations & Easy Swaps

      One of the things I love most about this recipe is how versatile it is. Over the years, I’ve played with different fruits, cheeses, and herbs. Here are my three favorite variations:

      VariationKey ChangeBest ForDifficulty Impact
      Fig & RosemarySubstitute blackberries with dried figs (soaked) + honey; use rosemary instead of thymeFall entertaining, holiday partiesSame difficulty
      Goat Cheese & CherryReplace brie with soft goat cheese; use cherry compoteLighter, tangier appetizerSame difficulty
      Savory Sundried Tomato & BasilSkip fruit compote; top with sundried tomato pesto and basilSavory lovers, bruschetta fansSame difficulty

      Fig & Rosemary Variation

      In autumn, I swap blackberries for dried Mission figs. Soak them in warm water for 20 minutes, then dice and simmer with honey, a splash of balsamic, and fresh rosemary. The deep sweetness pairs beautifully with the brie. It reminds me of the fig trees I climbed as a girl in Morocco.

      Gluten-Free / Dairy-Free Variation

      For gluten-free friends, use mini wonton wrappers (most are rice-based) and bake them in a mini muffin tin. For dairy-free, substitute the brie with a cashew-based soft cheese or a vegan brie alternative. The compote remains the same—just be sure to check the labels on your phyllo cups, as some contain wheat.

      Seasonal Flavor Twist

      When I find perfect raspberries at the Union Square market, I use them instead of blackberries. Add a pinch of cracked black pepper to the compote—it sounds odd but the heat really wakes up the fruit and cheese. In winter, try a cranberry-orange compote with a dash of cinnamon. Every season brings a new excuse to make these cups.

      Can I use frozen phyllo cups instead of making them from scratch for this recipe?

      Yes, absolutely! In fact, I recommend frozen mini phyllo cups for this recipe. They save so much time and deliver consistently crisp, flaky results. I use Athens or Pepperidge Farm brand—each package contains 15 pre-formed cups that are ready to fill after a quick thaw (about 15 minutes at room temperature). Making your own phyllo cups from scratch is possible, but it requires thawing whole phyllo sheets, brushing with butter, cutting rounds, and pressing them into mini muffin tins. That process easily adds 20–30 minutes. For a quick party appetizer, frozen cups are the way to go. Just be sure not to overbake them; 5–7 minutes at 350°F is perfect.

      How do I prevent the phyllo cups from getting soggy when adding the brie and blackberry topping?

      The best way to prevent soggy phyllo cups is to add the blackberry compote only after the cups have baked and the cheese is melted. The compote contains moisture from the berries, and if you add it before baking, the liquid will seep into the phyllo and turn it soft. I always bake the cups with just the brie, then spoon the compote on top immediately before serving. Another tip: don’t overfill the cups with compote—about 1 teaspoon per cup is enough. If you want to make ahead, store the compote separately and assemble just before serving. Also, avoid using overly watery berries; if using frozen blackberries, don’t thaw them first, as they release extra liquid when cooked.

      What can I substitute for blackberries in these brie phyllo cups if they are out of season?

      You have plenty of delicious options! Frozen blackberries work wonderfully year-round—just use them straight from the freezer without thawing. If you want a different flavor, try raspberries (they’re tarter), blueberries (milder and sweeter), or diced strawberries. For a more autumnal twist, use sliced figs or a cherry compote. I’ve also made this with diced mango and a touch of lime for a tropical version. The key is to adjust the sweetness: if your fruit is very tart, add an extra teaspoon of honey; if it’s very sweet, reduce the honey slightly. The cooking time stays the same—3–5 minutes on the stove until the fruit softens and the juices thicken.

      Can I prepare these brie phyllo cups with blackberry and thyme ahead of time for a party?

      Yes, with a few smart strategies. The blackberry compote can be made up to 5 days ahead and stored in the fridge—just reheat it gently before serving. You can also assemble the cups completely (with brie and compote) up to 2 hours before your party, but keep them at room temperature and don’t bake until just before serving. If you need to bake them earlier, the cups can be baked, topped with compote, and held at room temperature for up to 1 hour. After that, the phyllo may start to soften. For a larger party, I recommend baking the cups in batches so guests always get warm, crispy cups. Freezing is also an option: assemble unbaked cups (with brie only, no compote) on a tray, freeze until solid, then transfer to a freezer bag. Bake from frozen at 350°F for 8–10 minutes, then add the compote.

      What is the best way to remove the rind from brie cheese?

      Removing the rind from brie is easy if you use the right technique. First, make sure the cheese is slightly chilled—it’s much easier to cut when firm. Place the wedge of brie on a cutting board and use a sharp knife to slice off the top and bottom rind layers, then trim the sides. Alternatively, you can slice the brie into cubes first, then cut the rind off each cube individually. I find this method faster and less wasteful. Don’t throw away the rind—it’s edible and can be added to soups or sauces for flavor. For this recipe, the rind needs to be removed because it won’t melt smoothly inside the phyllo cups. The creamy interior is what you want for that oozy, molten texture.

      Can I use a different type of cheese instead of brie?

      Absolutely! Camembert is the closest substitute—it has a similar creamy texture and mild flavor, though it’s slightly earthier. For a tangier twist, try soft goat cheese (chèvre) or a triple-cream cheese like Brillat-Savarin. If you want something a bit sharper, a young gouda or fontina will melt well, though they have a different flavor profile. Vegan alternatives exist too, like cashew-based soft cheeses that melt nicely. Just keep in mind that cheeses with lower fat content may not become as oozy. Whichever cheese you choose, cut it into small cubes so it melts evenly within the 5–7 minute baking time. Avoid hard cheeses like cheddar or parmesan—they won’t melt to the same luscious consistency.

      Is there a way to make this recipe vegan?

      Yes, you can easily veganize these brie phyllo cups. Start with mini phyllo cups—most are accidentally vegan (just check the label for butter or eggs). For the cheese, use a vegan brie-style cheese made from cashews or coconut oil; brands like Miyoko’s Creamery make a wonderful cultured nut cheese that melts beautifully. The blackberry compote is already vegan as written (blackberries, honey, lemon juice)—but to keep it fully vegan, swap the honey for maple syrup or agave. The garnish remains the same: fresh thyme and flaky salt. Everything else in the recipe—baking time, assembly—works exactly the same way. These vegan versions are always a hit at my holiday parties!

      Can I make these brie phyllo cups in an air fryer?

      Yes, an air fryer works beautifully for this recipe. Preheat your air fryer to 320°F (160°C). Place the filled phyllo cups in the air fryer basket in a single layer—don’t overcrowd. Cook for 4–5 minutes, checking at the 4-minute mark. The cheese should be melted and bubbly, and the edges of the phyllo will be golden. Air fryers circulate heat more intensely, so the cups may brown a bit faster than in a conventional oven. I like to add the compote after air-frying, same as the oven method. This is a great option for small batches or when you don’t want to heat up your whole kitchen. Just work in batches if you’re making all 15 cups at once.

      What wine pairs best with brie phyllo cups and blackberry compote?

      I love pairing these brie phyllo cups with a crisp, acidic white wine that can cut through the richness of the cheese and complement the sweet-tart compote. A Sauvignon Blanc from the Loire Valley or New Zealand is a top choice—its herbaceous notes echo the thyme beautifully. A dry rosé works wonderfully too, especially for summer parties. If you prefer red, choose a light-bodied, fruit-forward option like a Beaujolais or a Pinot Noir. For sparkling fans, a dry Prosecco or Champagne is always a winner—the bubbles refresh the palate between bites. Non-alcoholic: try a sparkling water with a splash of elderflower cordial or a tart lemonade. The acidity in any of these drinks balances the creamy brie perfectly.

      How many phyllo cups come in a standard package, and can I easily double this recipe?

      Most standard packages of frozen mini phyllo cups contain 15 cups per box (brands like Athens and Pepperidge Farm both follow this count). This recipe uses exactly one package, making 15 individual appetizers. To double the recipe, simply buy two boxes and double all ingredient quantities. You may need to use two baking sheets or work in batches depending on your oven size. The baking time won’t change if you bake both sheets at once—just rotate the pans halfway through for even browning. For the compote, double the berries, honey, and lemon juice; the cooking time might increase slightly (5–7 minutes instead of 3–5) because of the larger volume. Leftover compote keeps well in the fridge for a week and is delicious on yogurt or pancakes.

      Share Your Version!

      I hope you fall in love with these brie phyllo cups with blackberry and thyme as much as I have. They’ve become a staple in my New York kitchen—whether I’m hosting a book club, a holiday gathering, or just treating myself to something special on a rainy Sunday. I’d love to see how yours turn out! Leave a star rating and a comment below to let me know if you tried any substitutions. Tag me on Instagram or Pinterest @exorecipes when you share your photos—I personally love seeing your creative touches.

      From my NYC kitchen to yours — I hope this recipe brings as much warmth to your table as it does to mine. — mia 🧡

      📌

      Love This Recipe? Save It to Pinterest!

      If you enjoyed this Brie Phyllo Cups with Blackberry and Thyme recipe, don’t let it get lost in your browser tabs! 😄 Pin it now so you can find it again anytime — and explore hundreds more tried-and-tested recipes waiting for you on my Pinterest boards.

      👉 Follow mia on Pinterest @chefrecipes2

      📌 Pin this recipe · 🔁 Re-pin your favorites · 💬 Tag me when you make it — I love seeing your creations!

      Print

      clock clock iconcutlery cutlery iconflag flag iconfolder folder iconinstagram instagram iconpinterest pinterest iconfacebook facebook iconprint print iconsquares squares iconheart heart iconheart solid heart solid icon

      Brie Phyllo Cups with Blackberry and Thyme

      • Author: Chef Mia
      • Prep Time: 10 minutes
      • Cook Time: 10 minutes
      • Total Time: 20 minutes
      • Yield: 15 cups (5 servings) 1x
      • Method: Appetizer
      • Cuisine: American

      Description

      These elegant and easy appetizers feature creamy brie baked in crispy phyllo cups, topped with a sweet-tart blackberry compote and fresh thyme. Perfect for parties or a sophisticated snack.


      Ingredients

      Scale
      • For the phyllo cups:
      • 1 package (15 count) frozen mini phyllo cups (such as Athens or Pepperidge Farm), thawed
      • 4 oz Brie cheese, rind removed and cut into 15 small pieces
      • For the blackberry compote:
      • 1 cup fresh or frozen blackberries
      • 2 tablespoons honey
      • 1 teaspoon fresh lemon juice
      • For garnish:
      • Fresh thyme leaves
      • Flaky sea salt (optional)

      Instructions

      1. Preheat oven to 350°F (175°C).
      2. Place the mini phyllo cups on a baking sheet.
      3. Place one piece of Brie cheese into each phyllo cup.
      4. Bake for 5-7 minutes, until the Brie is melted and bubbly.
      5. While the cups bake, make the compote: In a small saucepan over medium heat, combine blackberries, honey, and lemon juice. Cook, stirring occasionally, for 3-5 minutes until the berries release their juices and the mixture thickens slightly.
      6. Remove the phyllo cups from the oven. Top each with a small spoonful of the blackberry compote.
      7. Garnish with fresh thyme leaves and a pinch of flaky sea salt if desired. Serve warm.

      Notes

      You can also use frozen phyllo sheets and cut them into rounds, but mini phyllo cups save time. For a less sweet compote, reduce honey to 1 tablespoon. The compote can be made ahead and refrigerated.


      Nutrition

      • Calories: 98
      • Sugar: 6g
      • Fat: 5g
      • Carbohydrates: 12g
      • Protein: 2g


      Brie Phyllo Cups with Blackberry and Thyme

      ph">For more delicious inspiration, follow me on Pinterest!