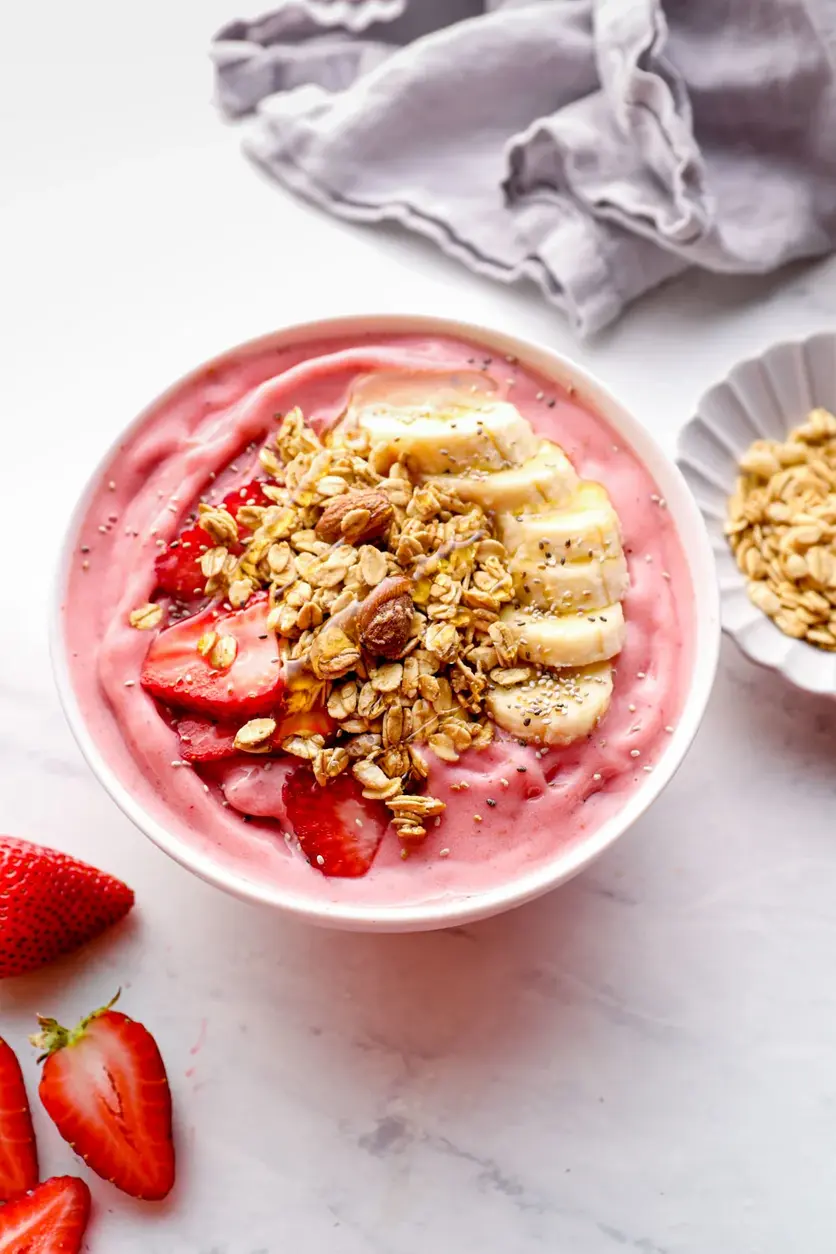
This easy smoothie bowl recipe with Greek yogurt is thick, creamy, and ready in just 5 minutes. A perfect single-serve breakfast or snack.
Ingredients
Scale
1 banana
1 cup frozen strawberries
cup frozen pineapple chunks
½ cup vanilla Greek yogurt whole milk or low-fat
Instructions
Chop banana into 1-inch pieces and freeze for at least 1-2 hours if possible (or overnight).1 banana
Add all ingredients to food processor fitted with a standard S blade and process for 2-4 minutes, stopping to scrape the sides down with a plastic spatula as needed.1 cup frozen strawberries, cup frozen pineapple chunks, ½ cup vanilla Greek yogurt
Once everything is incorporated and smooth, scoop out mixture into individual bowls. Add any desired toppings, and enjoy immediately.
Notes
Food processor: If you don’t have a food processor, a high-speed or regular blender will work too. Just choose a lower blend speed and use a plunger as necessary to push everything down towards the blade.
Storage: Best eaten right away. If needed, refrigerate up to 24 hours, but texture will soften. Stir before eating.
Nutrition
Calories:269kcal
Sugar:40g
Protein:12g
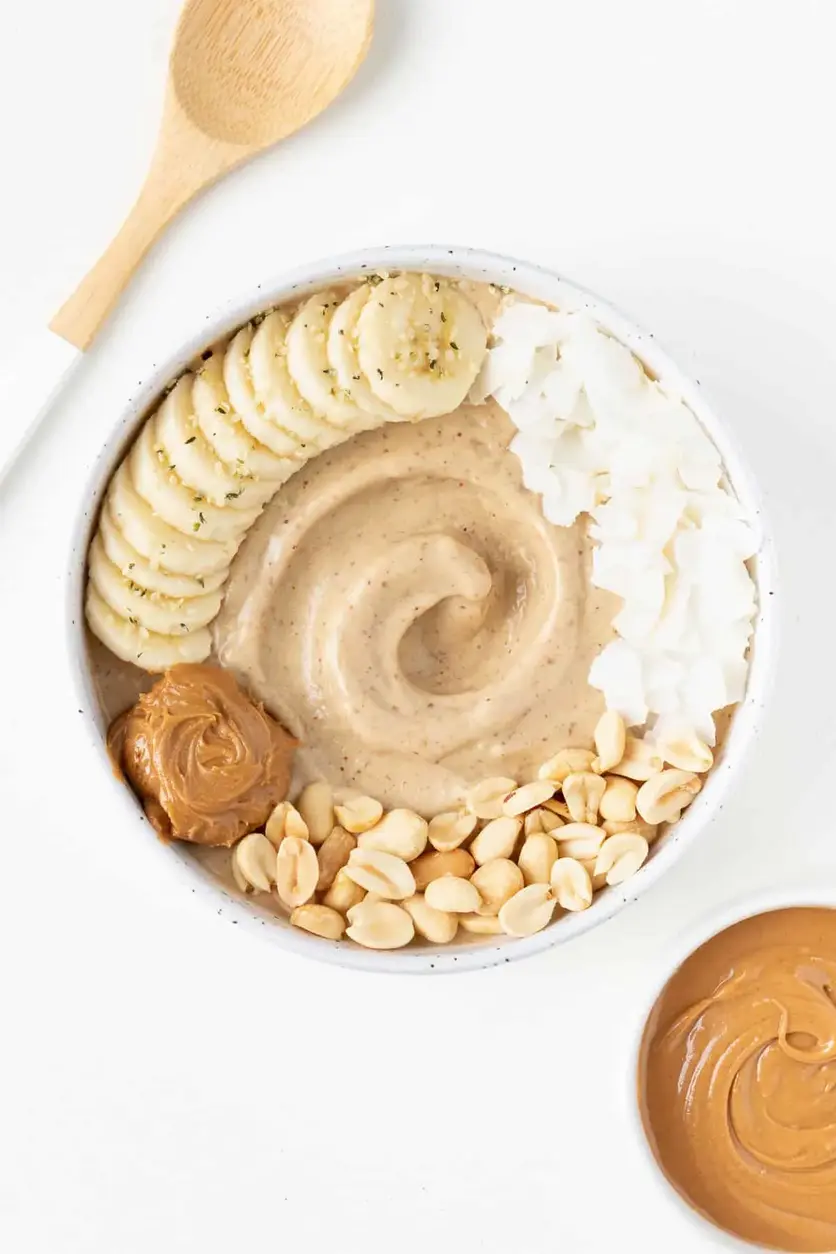
Peanut Butter Banana Smoothie Bowl
This peanut butter banana smoothie bowl recipe is healthy, easy, and packed with protein! Made with 5 ingredients and no yogurt needed. Combine bananas, peanut butter, flaxseed, vanilla, and almond milk to make this breakfast. #smoothie #bananasmoothie #peanutbuttersmoothie #smoothiebowl #vegan #dairyfree #breakfast #healthybreakfast
This peanut butter banana smoothie bowl is creamy, nutty, and so easy to make! It’s a healthy recipe that tastes just like soft serve ice cream. Enjoy it for breakfast or as a nutritious dessert!
Ingredients
Scale
2 ripe bananas, peeled and frozen
2 tbsp creamy peanut butter
2 tbsp flaxseed meal (optional)
1/2 tsp vanilla extract (optional)
1/4 cup nondairy milk (such as almond or coconut)
Instructions
Add ingredients to the blender.
Blend until smooth and creamy. Note: Adjust the amount of liquid as needed, but I highly suggest keeping it to 1/4 cup or less. Remember more liquid creates a thinner smoothie while less liquid creates a thicker smoothie. If you want it to be super thick and creamy, try to use the least amount of liquid as possible. If you have a high-powered blender (like a Vitamix blender), you can get by with no liquid at all.
Transfer smoothie to a bowl. Add any desired toppings and enjoy with a spoon.
Notes
Be sure to use frozen ripe bananas. Wait for the bananas to ripen (the peel should be yellow with brown specks), then remove the peel and place in a ziplock bag or container in the freezer. Bananas will keep fresh for at least 1 month in the freezer.
Nutrition
Calories:465
Sugar:29g
Protein:14g
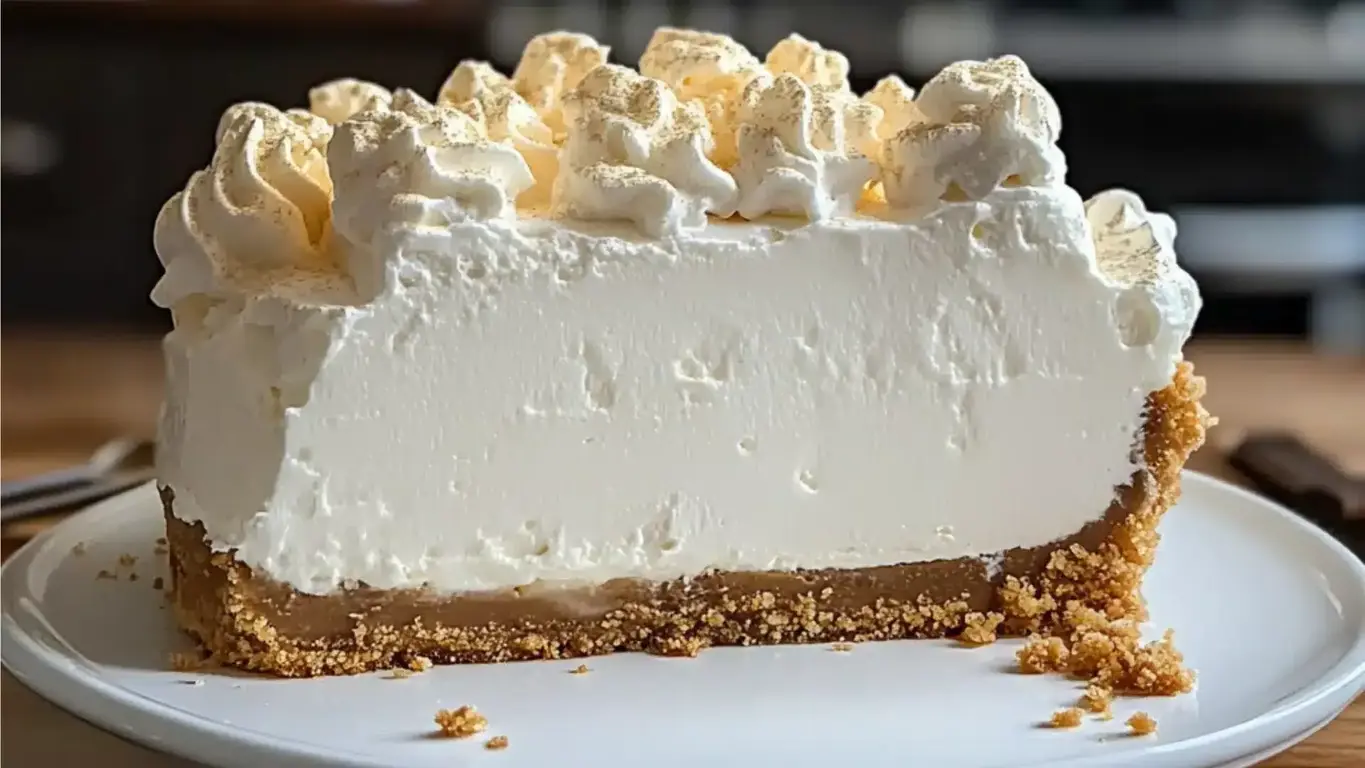
Easy Marshmallow Cheesecake – A Whipped Cream Cheese Delight
This whipped marshmallow cheesecake is a perfect dessert for no bake pies lovers and anyone who craves light, sweet indulgence. #MarshmallowWhipCheesecake #CreamCheeseDesserts #DeliciousPies #EasyCheesecakeRecipes
Crust swaps: Try chocolate wafer cookies or crushed Oreos for a different base Flavor twists: Add lemon zest to the filling for a citrusy note, or swirl in raspberry jam before chilling Make it mini: Use a muffin tin and cupcake liners to create individual cheesecakes
Nutrition
Calories:310 kcal
Protein:1g
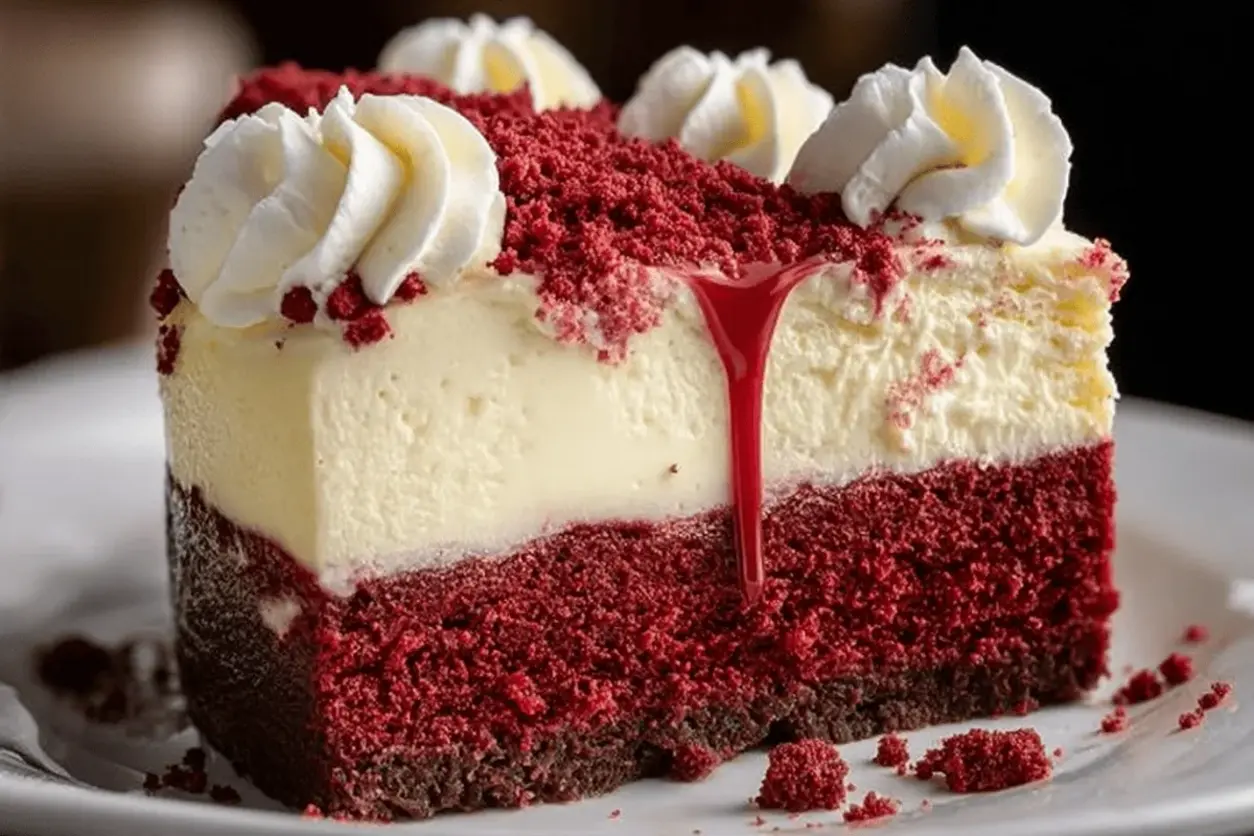
Knock You Naked Red Velvet Cheesecake 🍰❤️ | A Bold, Beautiful Layered Dessert That Turns Heads
Bold in color and unforgettable in flavor, this Knock You Naked Red Velvet Cheesecake combines the richness of red velvet cake with a silky vanilla cheesecake layer and fluffy whipped topping. With dramatic presentation and decadent texture, this showstopping dessert is perfect for holidays, birthdays, or any occasion that calls for a wow-worthy sweet. Ingredients For the Red Velvet Cake Base: • 1 box red velvet cake mix (plus eggs, oil, and water as directed) • 9″ springform pan, greased For the Cheesecake Layer: • 16 oz cream cheese, softened • ⅔ cup granulated sugar For the Whipped Topping: • 2 cups heavy whipping cream • 4 tbsp powdered sugar 📌 Save this ultra-decadent layered cheesecake for celebrations, date nights, or pure indulgence! #RedVelvetCheesecake #KnockYouNakedDessert
A luscious red velvet cake base topped with silky smooth cheesecake and finished with clouds of whipped vanilla cream this layered dessert is everything rich, romantic, and irresistible. Whether youre impressing dinner guests or treating yourself, this is the kind of cheesecake that truly lives up to its name.
Ingredients
For the Red Velvet Cake Base: 1 box red velvet cake mix (plus eggs, oil, and water as directed) 9 springform pan, greased
For the Cheesecake Layer: 16 oz cream cheese, softened cup granulated sugar 2 large eggs cup sour cream 1 tbsp all-purpose flour 1 tsp vanilla extract ¼ tsp salt
For the Whipped Topping: 2 cups heavy whipping cream 4 tbsp powdered sugar 2 tsp vanilla extract Optional: red velvet cake crumbs for garnish
Instructions
Notes
Make Ahead: This dessert is ideal for preparing the day before. It needs at least 4 hours to chill, but overnight chilling makes it even easier to slice and enhances flavor fusion.
Cake Mix Tip: Dont overmix your red velvet cake batter; blend just until combined to keep the crumb light and tender.
Clean Slicing Trick: Dip your knife in hot water and wipe it clean between cuts to achieve bakery-style slices.
Mini Cheesecake Variation: Use a muffin tin lined with cupcake papers to create individual servingsgreat for parties and portion control.
Flavor Twist: Add a teaspoon of espresso powder to the cake mix to deepen the chocolate flavor, or fold in crushed Oreos for added texture.