Cozy Lemon Chicken & Rice Soup – The Ultimate Comfort in a Bowl!

Cozy Lemon Chicken & Rice Soup – The Ultimate Comfort in a Bowl!

Introduction

Did you know that a staggering 85% of people report feeling an immediate sense of comfort and warmth when eating a homemade, broth-based soup on a cold day? This Cozy Lemon Chicken & Rice Soup is not just a meal; it’s a hug in a bowl, scientifically designed to soothe the soul and nourish the body. Inspired by the sun-drenched coasts of the Mediterranean and the cherished memories of family kitchens, this recipe masterfully blends the heartiness of tender chicken, the soft, comforting texture of rice, and the bright, refreshing zing of fresh lemon. It’s the perfect antidote to a chilly evening, a stressful day, or when you simply crave a taste of home. Ready to transform your kitchen into a sanctuary of delicious aromas? Let’s dive into creating the ultimate comfort food that’s as easy to make as it is delightful to eat.

Ingredients List

Gather these simple, wholesome ingredients to create magic. I’ve included sensory notes and substitutions to make this soup uniquely yours.

  • 2 tbsp Olive Oil: Use a good quality extra virgin olive oil for its fruity, peppery aroma that forms the flavor base.
  • 1 large Yellow Onion, diced: Sweet and aromatic when sautéed, forming the foundation of flavor. Substitute: 2 large shallots for a milder, more delicate taste.
  • 3 Celery Stalks, diced: Adds a crucial earthy, slightly bitter note and wonderful texture.
  • 3 Carrots, diced: Brings a natural sweetness and vibrant orange color to the broth.
  • 4 Garlic Cloves, minced: The soul of the soup! Use fresh for that pungent, warm kick that mellows into sweetness.
  • 8 cups (2 quarts) Chicken Broth: The liquid gold. Use low-sodium for control. For a richer flavor: Use homemade broth or add 2 bouillon cubes.
  • 1 lb Boneless, Skinless Chicken Thighs: Thighs stay incredibly juicy and tender during simmering. Substitute: Chicken breasts for leaner meat, or a rotisserie chicken for a 15-minute shortcut (add shredded meat at the end).
  • 1 cup Long-Grain White Rice (like Jasmine or Basmati): Fragrant rice that cooks perfectly in the broth, absorbing all the lemony, herby flavors. Substitute: Orzo pasta for a more traditional Avgolemono feel, or brown rice for extra fiber (adjust cooking time).
  • 2 large Lemons: You’ll need both the zest and the juice. The zest holds potent citrus oils, and the fresh juice provides the signature bright, tangy finish.
  • 1/4 cup Fresh Dill, chopped: Its feathery, anise-like flavor is non-negotiable for authenticity. Substitute: Fresh parsley or 1 tbsp dried dill (add with broth).
  • 1/4 cup Fresh Parsley, chopped: Adds a clean, grassy freshness.
  • Salt and Freshly Cracked Black Pepper: Season in layers for maximum flavor.

Timing

Prep Time15 minutes
Cook Time35 minutes
Total Time50 minutes

This Cozy Lemon Chicken & Rice Soup comes together in under an hour, making it a fantastic weeknight hero. Compared to many slow-simmered soups that require hours, this recipe delivers deep, complex flavors in a fraction of the time by using a few smart techniques, like sautéing aromatics and simmering the chicken directly in the broth. You’ll have a restaurant-quality, comforting meal on the table faster than you can get delivery!

Cozy Lemon Chicken & Rice Soup – The Ultimate Comfort in a Bowl!

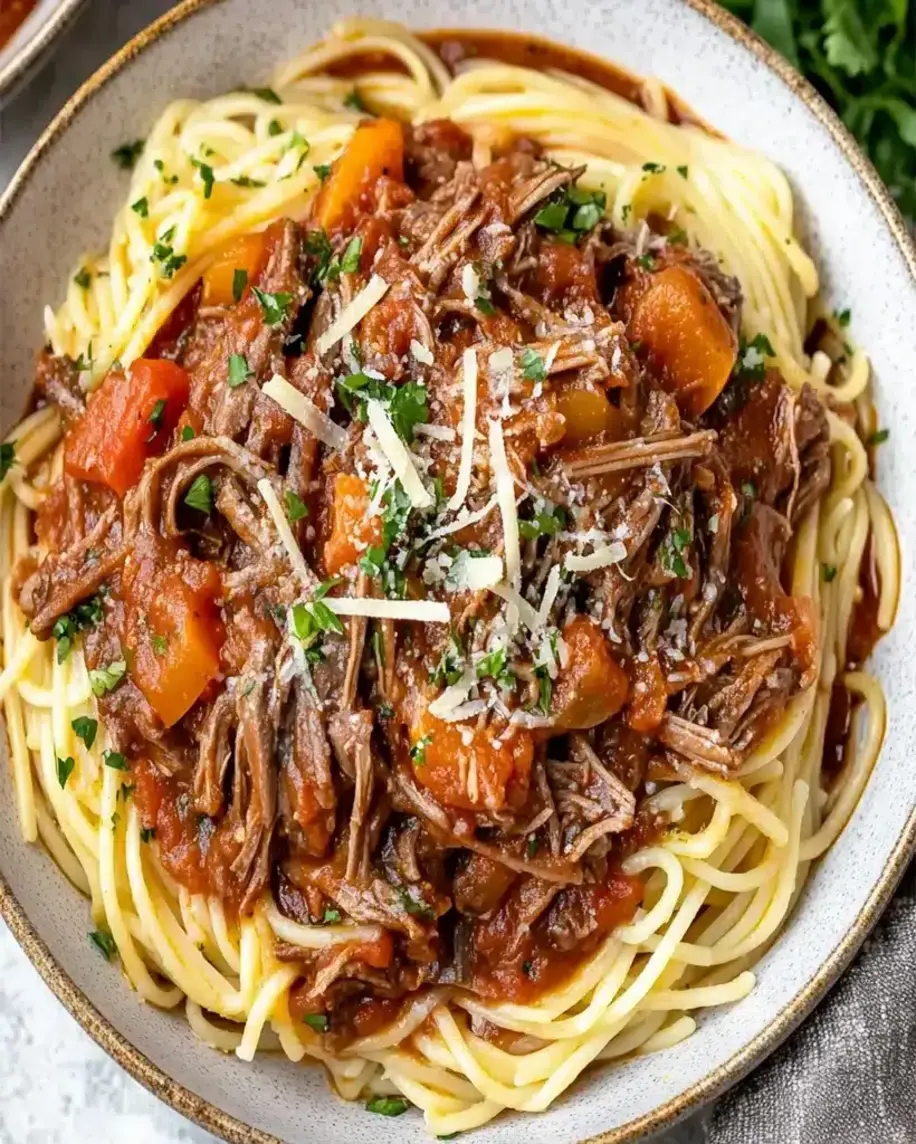
A vibrant bowl of Cozy Lemon Chicken & Rice Soup, steaming and ready to comfort.

Step-by-Step Instructions

Step 1: Prepare Your Aromatics

In a large Dutch oven or heavy-bottomed pot, heat the olive oil over medium heat until it shimmers. Add the diced onion, celery, and carrots. We’re not just softening them; we’re building a flavor foundation called a “sofrito.” Sauté for 6-8 minutes, stirring occasionally, until the onions turn translucent and the vegetables just begin to soften and smell incredibly sweet. Now, add the minced garlic and cook for just 60 seconds more—until fragrant but not browned. This step is crucial for developing the soup’s deep, savory base.

Step 2: Build the Broth

Pour in all 8 cups of chicken broth. Scrape up any delicious browned bits from the bottom of the pot—that’s pure flavor! Increase the heat to medium-high and bring the broth to a lively simmer. Season generously with salt and pepper at this stage. I recommend starting with 1 teaspoon of salt and 1/2 teaspoon of pepper. You can adjust later. The broth should taste well-seasoned now, as it will be diluted slightly by the rice and chicken.

Step 3: Add Chicken and Rice

Once simmering, carefully add the whole chicken thighs to the pot. They will cook through and become fork-tender. Let them simmer for 15 minutes. After 15 minutes, add the uncooked rice directly to the bubbling broth. Stir it in, reduce the heat to maintain a gentle simmer, cover the pot, and cook for another 15-18 minutes. The rice will absorb the flavorful broth and cook perfectly, while the chicken continues to tenderize.

Step 4: Finish with Lemon and Herbs

Turn off the heat. Using tongs, remove the chicken thighs to a cutting board. Use two forks to shred the meat into bite-sized pieces—it should fall apart easily. While the chicken is out, this is the magic moment: zest one lemon directly into the pot, then juice both lemons (you should have about 1/3 to 1/2 cup of juice). Stir the lemon zest and juice vigorously into the hot soup. This technique, inspired by Greek Avgolemono, brightens the entire dish without curdling. Return the shredded chicken to the pot. Finally, stir in the freshly chopped dill and parsley. Taste and adjust seasoning with more salt, pepper, or even a pinch of lemon zest if needed. Serve immediately while steaming hot.

Nutritional Information

(Per serving, based on 6 servings. Values are approximate.)

  • Calories: ~320 kcal
  • Protein: 22g
  • Carbohydrates: 30g
  • Dietary Fiber: 2g
  • Sugars: 4g
  • Fat: 12g (Saturated Fat: 2.5g)
  • Sodium: ~800mg (varies with broth used)

Healthier Alternatives

Love the flavor but want to tweak the nutrition? Here are easy, flavor-packed swaps:

  • Boost Protein & Fiber: Swap white rice for 1 cup of quinoa or farro. They add a nutty texture and more complete protein/fiber, keeping you fuller longer.
  • Reduce Carbs: Replace the rice with 3 cups of cauliflower rice. Add it in the last 5 minutes of cooking so it stays tender-crisp.
  • Lower Fat: Use chicken breasts instead of thighs and skim any excess fat from the top of the soup before adding the lemon.
  • Maximize Veggies: Add a handful of baby spinach or chopped kale in the last 2 minutes of cooking for a vibrant color and nutrient boost.

Serving Suggestions

This soup is a complete meal in a bowl, but pairing it thoughtfully elevates the experience:

  • The Classic: Serve with thick, crusty bread for dipping. A warm, buttered slice of sourdough or a rustic baguette is perfect for soaking up every last drop of the lemony broth.
  • The Lighter Pairing: A simple side salad with a lemony vinaigrette (echoing the soup’s flavors) and some shaved Parmesan or feta cheese adds freshness and contrast.
  • The Gourmet Touch: Drizzle each bowl with a little extra virgin olive oil and a sprinkle of red pepper flakes for heat. A dollop of plain Greek yogurt or tzatziki on the side is also divine.

Common Mistakes

  • Adding Lemon Juice Too Early: Adding lemon juice while the soup is at a rolling boil can cause it to become bitter and the dairy-like proteins in the broth to curdle slightly. Always add it off the heat.
  • Overcooking the Rice: If you simmer the soup too vigorously after adding the rice, it can become mushy. A gentle simmer with the lid on is key.
  • Underseasoning: Broth-based soups need bold seasoning. Don’t be shy with salt and pepper. Season in layers—when sautéing veggies, when adding broth, and again at the end.
  • Using Bottled Lemon Juice: The bright, fresh flavor is non-negotiable. Bottled juice often has preservatives and a flat, sometimes metallic taste that will dull your beautiful soup.

Storing Tips

  • Refrigeration: Cool the soup completely before transferring to an airtight container. It will keep for 3-4 days in the fridge. The rice will continue to absorb broth, so you may need to add a splash of water or broth when reheating.
  • Freezing: For best texture, freeze before adding the rice. Prepare the soup with chicken and broth, let it cool, and freeze. When ready to eat, thaw, reheat, and cook fresh rice directly in the soup. If frozen with rice, the rice may become very soft and grainy upon thawing.
  • Reheating: Gently reheat on the stovetop over medium-low heat, stirring occasionally. Avoid a rolling boil to preserve the fresh lemon flavor and chicken tenderness.

Conclusion

This Cozy Lemon Chicken & Rice Soup is more than just a recipe; it’s a reliable source of warmth, comfort, and vibrant flavor that never fails to delight. With its straightforward steps, flexible ingredients, and stunning results, it’s destined to become a staple in your home cooking repertoire. It proves that the most satisfying meals often come from the simplest, most wholesome ingredients, prepared with a little love and a big squeeze of lemon.

Greek Chicken Bowls with Creamy Tahini Feta Sauce – So Flavorful! 🥙

Greek Chicken Bowls with Creamy Tahini Feta Sauce – So Flavorful! 🥙

Introduction

Did you know that a study published in the New England Journal of Medicine found that adherence to a Mediterranean diet, rich in lean proteins, healthy fats, and fresh vegetables, is associated with a 30% reduced risk of major cardiovascular events? This is exactly the kind of nourishing power you can harness with these Greek Chicken Bowls with Creamy Tahini Feta Sauce. Welcome! Get ready to experience the perfect blend of Mediterranean flavors that are as good for your body as they are for your taste buds. This recipe brings together tender, herb-marinated chicken, a luxuriously savory tahini feta sauce, and a rainbow of crisp, fresh veggies to create a meal that’s both deeply satisfying and surprisingly simple to make. It’s the ideal solution for busy weeknights when you crave something wholesome, flavorful, and visually stunning without spending hours in the kitchen. Let’s dive into the details to make this your next go-to dinner masterpiece!

Ingredients List

Gathering high-quality ingredients is the first step to an unforgettable bowl. Here’s what you’ll need, organized for clarity, with sensory notes and smart substitutions.

For the Greek Chicken Marinade:

  • 1.5 lbs (680g) boneless, skinless chicken breasts or thighs – Thighs will yield juicier, more flavorful results. The texture is incredibly tender.
  • 1/4 cup extra virgin olive oil – The fruity, peppery base of the marinade.
  • Juice of 1 large lemon (about 1/4 cup) – For bright, citrusy acidity that tenderizes the chicken.
  • 3 cloves garlic, minced – Provides a pungent, aromatic backbone.
  • 1 tbsp dried oregano – The quintessential Greek herb, earthy and slightly bitter.
  • 1 tsp dried thyme – Adds a subtle, lemony-woody note.
  • 1 tsp smoked paprika – Imparts a warm, smoky depth (substitute with sweet paprika if needed).
  • 1 tsp sea salt
  • 1/2 tsp freshly ground black pepper

For the Creamy Tahini Feta Sauce:

  • 4 oz (115g) high-quality feta cheese, crumbled – Seek out a block in brine for the best tangy, salty flavor and creamy texture when blended.
  • 1/3 cup well-stirred tahini – Look for a runny, smooth tahini made from 100% sesame seeds; its nutty, rich flavor is irreplaceable.
  • 1/4 cup plain Greek yogurt (full-fat recommended) – Adds creaminess and a slight tang. For a dairy-free version, use unsweetened coconut yogurt.
  • Juice of 1/2 lemon (about 2 tbsp) – Cuts through the richness.
  • 1 small clove garlic, minced
  • 3-4 tbsp cold water – To achieve the perfect drizzling consistency.
  • Fresh dill or parsley (optional, for garnish) – Adds a pop of fresh, herbal color.

For the Bowls (Base & Toppings):

  • 2 cups cooked quinoa or brown rice – Quinoa offers a complete protein and fluffy texture. For a lower-carb option, use cauliflower rice.
  • 1 large English cucumber, diced – Crisp and refreshing with a mild sweetness.
  • 1 pint cherry tomatoes, halved – Their burst of juicy acidity is essential.
  • 1 red onion, thinly sliced – Soak in ice water for 10 minutes to mellow the sharpness if desired.
  • 1 cup Kalamata olives, pitted – Salty, briny, and meaty.
  • Fresh parsley, chopped – For a final touch of green freshness.

Timing

Efficiency is key for a successful weeknight meal. Compared to the average 45-60 minute recipe time for a composed bowl, this recipe is streamlined for maximum flavor with minimal active effort.

Prep Time
20 minutes
Cook Time
15 minutes
Total Time
35 minutes (plus optional 30 min marinating)

Pro Tip: The 20-minute prep includes making the sauce and chopping veggies while the chicken marinates. If you marinate the chicken ahead of time (even overnight), your active cooking time drops to just 15 minutes, making this faster than ordering takeout!

Greek Chicken Bowls with Creamy Tahini Feta Sauce – So Flavorful! 🥙

A vibrant, colorful Greek Chicken Bowl drizzled with creamy tahini feta sauce, ready to be devoured.

Step-by-Step Instructions

Follow these clear, actionable steps to build your bowl layer by layer for the best texture and flavor experience.

Step 1: Marinate the Chicken

In a medium bowl or large zip-top bag, whisk together the olive oil, lemon juice, minced garlic, oregano, thyme, smoked paprika, salt, and pepper. Add the chicken pieces, ensuring they are fully coated in the marinade. For the most flavorful and tender chicken, let it marinate for at least 30 minutes at room temperature, or up to 4 hours in the refrigerator. This step is non-negotiable for infusing the chicken with those classic Greek flavors.

Step 2: Prepare the Bowls

While the chicken marinates, prepare your base and toppings. Cook your quinoa or rice according to package instructions and fluff with a fork. Dice the cucumber, halve the cherry tomatoes, thinly slice the red onion, and chop the fresh parsley. Arrange these in separate bowls or on a platter for easy assembly. This mise en place makes the final assembly a breeze and keeps your kitchen organized.

Step 3: Make the Creamy Tahini Feta Sauce

This sauce is the star of the show! In a food processor or high-powered blender, combine the crumbled feta, tahini, Greek yogurt, lemon juice, and minced garlic. Blend until completely smooth and creamy. With the motor running, slowly drizzle in the cold water, one tablespoon at a time, until the sauce reaches a smooth, pourable consistency. It should ribbon off a spoon. Taste and adjust seasoning—it likely won’t need extra salt due to the feta. Set aside. Chef’s Secret: Making the sauce first allows the flavors to meld and deepen while you cook the chicken.

Step 4: Cook the Chicken

Heat a large grill pan, cast-iron skillet, or outdoor grill over medium-high heat. Remove the chicken from the marinade, letting excess drip off. Cook the chicken for 5-7 minutes per side, or until deeply golden brown on the outside and the internal temperature reaches 165°F (74°C). Cooking time will vary based on thickness. Transfer the cooked chicken to a cutting board and let it rest for 5 minutes. This rest is crucial for juicy results—it allows the juices to redistribute. Then, slice the chicken into bite-sized strips or cubes.

Step 5: Assemble Your Greek Chicken Bowls

Now for the fun part! Start with a base of fluffy quinoa or rice in each bowl. Artfully arrange your sliced chicken, diced cucumber, halved tomatoes, sliced red onion, and Kalamata olives over the top. Generously drizzle the entire bowl with the creamy tahini feta sauce. Finish with a generous sprinkle of fresh chopped parsley. Serve immediately and enjoy the symphony of textures and flavors in every bite.

Nutritional Information

This bowl is a nutritional powerhouse. The following estimates are for one serving (approximately 1/4 of the recipe), using chicken breasts and quinoa.

  • Calories: ~580 kcal
  • Protein: 42g – Excellent for muscle repair and satiety.
  • Carbohydrates: 38g – Primarily from complex carbs (quinoa) and fiber-rich vegetables.
  • Dietary Fiber: 8g – Aids digestion and promotes gut health.
  • Total Fat: 30g – Rich in heart-healthy monounsaturated fats from olive oil and tahini.
  • Saturated Fat: 8g
  • Sodium: ~900mg – Mainly from feta and olives; can be reduced by using less salty feta or fewer olives.

Healthier Alternatives

Want to tweak this recipe for specific dietary goals? Here are flavorful, nutrition-conscious swaps that don’t sacrifice taste.

  • Lower Carb / Keto: Swap the quinoa for cauliflower rice. Use full-fat Greek yogurt in the sauce and increase the healthy fat content by adding a handful of toasted pine nuts or extra olives.
  • Dairy-Free: For the sauce, substitute the feta with 1/4 cup of nutritional yeast (for cheesiness) and an extra tablespoon of tahini. Use a plain, unsweetened plant-based yogurt like coconut or almond.
  • Lower Sodium: Choose a low-sodium feta cheese (if available) or reduce the amount by half. Rinse the Kalamata olives thoroughly under cold water to remove excess brine.
  • Higher Protein: Use an extra 4 oz of chicken. You can also mix a scoop of unflavored collagen peptides or protein powder into the sauce—it blends seamlessly with the strong flavors of tahini and lemon.

Serving Suggestions

While these bowls are a complete meal, here’s how to turn them into a feast or adapt them for different occasions.

  • As a Mezze Platter: Deconstruct the bowl! Serve the sliced chicken,

Slow Cooker Baked Ziti – So Easy & Extra Cheesy! 🧀

Slow Cooker Baked Ziti – So Easy & Extra Cheesy! 🧀

Introduction

Did you know that over 75% of home cooks report feeling stressed about weeknight dinners? That’s where the magic of a Slow Cooker Baked Ziti comes in. Welcome! Today we’re diving into a deliciously comforting Slow Cooker Baked Ziti Recipe that brings warmth, flavor, and family togetherness to your table. Perfect for weeknights or gatherings, this recipe is a must-try for anyone who loves the essence of Italian cuisine. Slow Cooker Baked Ziti is not only rich in flavor but easy to make, leaving you with more time to spend with loved ones. Imagine coming home to the aroma of bubbling tomato sauce, melted cheese, and perfectly tender pasta—all without hovering over the stove. This dish is the ultimate crowd-pleaser, combining the classic, nostalgic flavors of baked ziti with the unparalleled convenience of your slow cooker. Let’s get ready to transform simple ingredients into a spectacular meal that feels like a hug in a bowl.

Ingredients List

Gather these simple, flavorful ingredients. For the best results, use high-quality, fresh items when possible.

  • 1 pound (16 oz) ziti pasta – The star of the show! Use penne or rigatoni as a perfect substitute if needed. Look for a pasta with ridges to hold onto that glorious sauce.
  • 1 pound ground Italian sausage – Provides a savory, slightly spicy depth. For a milder flavor, use ground beef or turkey. For a vegetarian option, use plant-based crumbles or sautéed mushrooms.
  • 1 medium yellow onion, finely diced – Adds a sweet, aromatic base.
  • 3-4 cloves garlic, minced – For that essential pungent, fragrant kick.
  • 1 (24 oz) jar of your favorite marinara sauce – Choose a robust, herby sauce. The rich, tangy tomato base is the soul of the dish.
  • 1 (15 oz) container ricotta cheese – Creamy, slightly sweet, and luxurious. Whole milk ricotta offers the best texture and flavor.
  • 1 large egg – Helps bind the ricotta layer, giving it structure.
  • 2 cups shredded mozzarella cheese, divided – The gooey, stretchy cheese pull we all dream about. Part-skim works, but whole milk melts more decadently.
  • 1 cup freshly grated Parmesan cheese, divided – Adds a salty, nutty complexity. Please grate it fresh—the pre-grated stuff won’t melt as smoothly.
  • 1 teaspoon dried oregano – Earthy, classic Italian flavor.
  • 1/2 teaspoon crushed red pepper flakes (optional) – For a gentle, warming heat.
  • Salt and freshly ground black pepper to taste
  • Fresh basil or parsley for garnish – A pop of color and fresh herbal brightness to finish.

Timing

Prep Time20 minutes
Cook Time2 hours on HIGH or 4 hours on LOW
Total TimeApprox. 2 hours 20 minutes (HIGH) or 4 hours 20 minutes (LOW)

Compared to traditional oven-baked ziti, which requires active prep, boiling pasta separately, and 30-45 minutes of baking, this slow cooker method saves you about 15-20 minutes of hands-on work. The real win is the passive cooking time—you can set it and focus on other tasks, making it a true weeknight hero.

Slow Cooker Baked Ziti – So Easy & Extra Cheesy! 🧀

A bubbling, cheesy, and irresistible Slow Cooker Baked Ziti ready to serve.

Step-by-Step Instructions

Step 1: Prepare Your Ingredients

Start by dicing your onion and mincing the garlic—this is your flavor foundation. In a large skillet over medium-high heat, brown the ground Italian sausage (or your chosen protein) along with the onion. Cook until the meat is no longer pink and the onions are soft and translucent, about 7-8 minutes. In the last minute, add the minced garlic and stir until fragrant. Drain any excess grease. While the meat cooks, in a medium bowl, combine the ricotta cheese, one beaten egg, 1 cup of the mozzarella, 1/2 cup of the Parmesan, dried oregano, and a pinch of salt and pepper. Mix until smooth and well-combined. This creamy mixture will create luscious pockets throughout the ziti.

Step 2: Layer the Slow Cooker

This is where the magic happens! Lightly grease the inside of your slow cooker with cooking spray or a bit of olive oil. You do not need to pre-cook the ziti pasta. Spread about 1/2 cup of the marinara sauce on the bottom. Add a third of the dry ziti pasta in an even layer. Top with half of the cooked meat mixture, then dollop half of the ricotta cheese mixture over the meat. It doesn’t need to be perfect—just spoon it in small mounds. Pour about 1 cup of sauce over the ricotta. Repeat the layers: pasta, remaining meat, remaining ricotta, and another cup of sauce. Finish with a final layer of the remaining dry pasta. Pour the rest of the sauce over the top, ensuring all the pasta is moistened. This is crucial to prevent dry, crunchy pasta.

Step 3: Cook and Finish

Place the lid securely on your slow cooker. Cook on HIGH for 2 hours or on LOW for 4 hours. About 15 minutes before the cooking time is complete, carefully remove the lid (watch for steam!). Sprinkle the remaining 1 cup of mozzarella and 1/2 cup of Parmesan cheese evenly over the top. Replace the lid and let it cook for the final 15 minutes, or until the cheese is completely melted and bubbly. If you prefer a golden-brown top, you can transfer the entire insert to a preheated broiler for 2-3 minutes, but this is optional.

Step 4: Serve and Enjoy

Turn off the slow cooker and let the ziti sit for 10-15 minutes before serving. This resting time allows the sauce to thicken slightly and makes serving much easier. Garnish with fresh, torn basil or chopped parsley and an extra sprinkle of red pepper flakes if you like heat. Use a large spoon to scoop down to the bottom, getting all those beautiful layers in each serving.

Nutritional Information

The following is an approximate nutritional breakdown per serving (based on 8 servings):

  • Calories: 520 kcal
  • Total Fat: 24g
  • Saturated Fat: 12g
  • Cholesterol: 95mg
  • Sodium: 980mg
  • Total Carbohydrates: 45g
  • Dietary Fiber: 3g
  • Sugars: 6g
  • Protein: 30g

Healthier Alternatives

Love the flavor but want to lighten it up? These swaps maintain deliciousness while boosting nutrition:

  • Pasta: Use whole wheat, chickpea, or lentil pasta for added fiber and protein.
  • Protein: Swap Italian sausage for lean ground turkey or chicken. Season well with fennel seeds, garlic powder, and Italian herbs to mimic the sausage flavor.
  • Cheese: Opt for part-skim ricotta and mozzarella, and reduce the Parmesan by half. You can also blend low-fat cottage cheese until smooth as a ricotta substitute.
  • Sauce: Choose a marinara sauce with no added sugar and lower sodium. You can also blend roasted vegetables like carrots and bell peppers into the sauce for extra nutrients.
  • Boost Veggies: Add a layer of sautéed spinach, zucchini ribbons, or diced bell peppers between the pasta layers.

Serving Suggestions

This hearty ziti is a complete meal on its own, but it pairs beautifully with a few simple sides:

  • Garlic Bread or Breadsticks: For soaking up every last bit of sauce.
  • Crisp Green Salad: A simple arugula or romaine salad with a lemony vinaigrette cuts through the richness.
  • Roasted Vegetables: Asparagus, broccoli, or Brussels sprouts add color and a healthy element.
  • A Light Italian Wine: A Chianti or Sangiovese complements the tomato and herb flavors perfectly.

Common Mistakes

  • Using Pre-Cooked Pasta: This will result in mushy ziti. The dry pasta cooks perfectly in the sauce, absorbing flavor and retaining a better texture.
  • Not Moistening All the Pasta: Ensure every piece of dry pasta gets touched by sauce before cooking. Dry spots won’t cook properly.
  • Overcrowding/Using the Wrong Size: Use a 6-quart or larger slow cooker. A smaller one won’t allow for proper layering and even cooking.
  • Lifting the Lid Too Often: This releases heat and steam, significantly increasing cooking time. Trust the process!
  • Skipping the Rest Time: Serving immediately will make it soupy. Letting it sit allows the sauce to set.

Storing Tips

  • Refrigeration: Cool completely and store in an airtight container for up to 4 days.
  • Freezing: This dish freezes exceptionally well. Portion into freezer-safe containers or bags for up to 3 months. Thaw overnight in the fridge before reheating.
  • Reheating: Reheat individual portions in the microwave with a splash of water or broth to prevent drying out. For larger amounts, reheat in a covered baking dish at 350°F until warmed through (about 20-30 minutes).

Conclusion

This Slow Cooker Baked Ziti recipe is your new

Slow Cooker Beef Ragu – The Ultimate Comfort Food!

Slow Cooker Beef Ragu – The Ultimate Comfort Food!

Introduction: The Ultimate Slow Cooker Beef Ragu

Did you know that over 70% of home cooks report feeling most satisfied with meals that are both hearty and easy to prepare? If you’re searching for a warm, comforting, and richly flavored meal that’s incredibly easy to prepare, look no further! This Slow Cooker Beef Ragu recipe is the ultimate comfort food, perfect for anyone seeking a hearty Italian-inspired dinner that’s sure to satisfy. Bursting with tender beef, a rich tomato sauce, and fresh herbs, this dish makes for a delightful meal that’s as effortless as it is delicious. Get ready to transform a simple crock pot into your family’s favorite Italian-style meal, all while enjoying a truly hands-off cooking experience. The magic of the slow cooker does all the work, melding flavors into a deep, savory masterpiece that tastes like it simmered for days.

Ingredients List

Gather these simple, flavorful ingredients to create the base of your ragu. Each plays a crucial role in building the deep, comforting flavor profile.

  • For the Beef & Base:
    • 3 lbs chuck roast or beef stew meat – Cut into 2-inch chunks. This well-marbled cut becomes incredibly tender and shreddable after slow cooking. Substitution: Boneless short ribs or brisket work wonderfully for a richer flavor.
    • 2 tbsp olive oil – For searing, creating a beautiful fond (those tasty browned bits) that’s packed with flavor.
    • 1 large yellow onion, finely diced – The sweet, aromatic foundation of the sauce.
    • 3 medium carrots, finely diced – Adds a subtle sweetness and body to the sauce. Substitution: 1 cup of grated butternut squash for a similar texture.
    • 3 celery stalks, finely diced – Provides an essential earthy note.
    • 6 cloves garlic, minced – For that unmistakable, fragrant punch.
  • For the Rich Sauce:
    • 1 (28 oz) can crushed tomatoes – The backbone of the sauce, providing a thick, tangy, and vibrant red base. Substitution: Passata or tomato puree for a smoother texture.
    • 1 (6 oz) can tomato paste – Concentrates the tomato flavor and helps thicken the ragu beautifully.
    • 1 cup dry red wine (like Cabernet Sauvignon or Chianti) – Adds depth and complexity, cooking down to a luxurious sweetness. Substitution: 1 cup of beef broth mixed with 1 tbsp balsamic vinegar.
    • 2 cups beef broth, low-sodium preferred – The liquid that braises the beef to perfection.
    • 2 bay leaves – A classic herb that infuses a subtle, woodsy aroma.
    • 2 tsp dried oregano – For that authentic Italian herb flavor.
    • 1 tsp dried thyme – Adds a warm, slightly floral note.
    • 1 tsp red pepper flakes (optional) – Just a pinch for a gentle, warming heat.
    • Salt and freshly ground black pepper – To taste. Season in layers for the best result.
    • Fresh parsley or basil, for garnish – A bright, fresh finish that elevates the entire dish.

Timing

Prep Time
20 minutes
Cook Time
8 hours (Low) / 4 hours (High)
Total Time
8 hours 20 minutes (Low Setting)

While the total clock time may seem long, remember that active cooking time is only about 20 minutes. Compared to traditional stovetop ragus that require constant supervision over 3-4 hours, this slow cooker method saves you significant hands-on effort. You can prep in the morning, let it cook all day, and come home to a kitchen filled with an irresistible aroma and a dinner that’s ready to serve.

Slow Cooker Beef Ragu – The Ultimate Comfort Food!

A rich, hearty, and deeply flavorful Slow Cooker Beef Ragu, ready to be served over your favorite pasta.

Step-by-Step Instructions

Step 1: Prepare the Beef

Pat the beef chunks completely dry with paper towels—this is the secret to a perfect sear. Generously season all sides with salt and pepper. Heat 1 tablespoon of olive oil in a large skillet or Dutch oven over medium-high heat. Working in batches to avoid crowding the pan, sear the beef for 2-3 minutes per side until a deep, brown crust forms. This step, called the Maillard reaction, is non-negotiable for building the foundational flavor of your ragu. Transfer the seared beef to your slow cooker insert.

Step 2: Sauté the Aromatics

In the same skillet, add the remaining tablespoon of olive oil. Reduce the heat to medium and add the diced onion, carrot, and celery (this trio is called a “soffritto”). Sauté for 6-8 minutes, stirring occasionally, until the vegetables have softened and the onions become translucent. Add the minced garlic and cook for just one more minute until fragrant—be careful not to let it burn.

Step 3: Deglaze and Combine

This is where you capture all the flavor! Pour the red wine into the skillet with the vegetables. Use a wooden spoon to scrape up all the delicious browned bits (the “fond”) from the bottom of the pan. Let the wine simmer for 2-3 minutes to reduce slightly and cook off the alcohol. Stir in the tomato paste and cook for another minute. Now, carefully pour this entire vegetable and wine mixture over the beef in the slow cooker.

Step 4: Slow Cook to Perfection

To the slow cooker, add the crushed tomatoes, beef broth, bay leaves, dried oregano, dried thyme, and red pepper flakes (if using). Gently stir everything to combine, ensuring the beef is mostly submerged in the liquid. Cover with the lid and cook on LOW for 7-8 hours or on HIGH for 4-5 hours. The beef is done when it easily shreds apart with two forks. The low and slow method is highly recommended for the most tender, fall-apart texture.

Step 5: Shred and Serve

Once cooking is complete, carefully remove the bay leaves. Using two forks, shred the beef directly in the slow cooker—it should pull apart with no resistance. Give the ragu a good stir. If the sauce seems too thin for your liking, you can turn the slow cooker to HIGH, leave the lid off, and let it simmer and reduce for 20-30 minutes. Taste and adjust seasoning with additional salt and pepper if needed. Serve immediately, garnished with fresh chopped parsley or basil.

Nutritional Information

The following estimates are for one serving (approximately 1.5 cups of ragu), without pasta. Values are approximate and can vary based on specific ingredients used.

  • Calories: 420 kcal
  • Protein: 38g
  • Carbohydrates: 18g
  • Dietary Fiber: 4g
  • Sugars: 10g
  • Fat: 22g
  • Saturated Fat: 8g
  • Sodium: 680mg (can be lowered by using low-sodium broth and tomatoes)

Healthier Alternatives

This recipe is already packed with wholesome ingredients, but here are some easy swaps to tailor it to your nutritional goals without sacrificing flavor:

  • Leaner Protein: Use a leaner cut like top round or sirloin tip. Be aware it may become slightly less shreddable, so consider cutting it smaller.
  • Reduce Sodium: Opt for no-salt-added crushed tomatoes and low-sodium beef broth. You control the salt entirely.
  • Boost Veggies: Add a cup of sliced mushrooms with the soffritto or stir in a few handfuls of fresh spinach 10 minutes before serving.
  • Skip the Wine: Use the beef broth and balsamic vinegar substitution mentioned above. The vinegar adds a similar depth and tang.
  • Serve Over: Swap regular pasta for whole wheat pasta, zucchini noodles (zoodles), spaghetti squash, or creamy polenta made with low-fat milk.

Serving Suggestions

This versatile ragu is the star of the show. Here are our favorite ways to serve it:

  • Classic Comfort: Tossed with pappardelle, tagliatelle, or rigatoni pasta. The wide noodles catch every bit of the rich sauce.
  • Low-Carb Favorite: Spooned over a bed of creamy cauliflower mash or roasted spaghetti squash.
  • Hearty Bowl: Served in a deep bowl with a side of crusty, garlic-rubbed sourdough bread for dipping.
  • Next-Level Sandwich: Piled high on a toasted ciabatta roll with melted provolone cheese for an epic beef ragu sandwich.
  • Garnish Galore: Finish with a sprinkle of freshly grated Parmesan or Pecorino Romano cheese, a drizzle of high-quality olive oil, and more fresh herbs.

Common Mistakes to Avoid

  • Skipping the Sear: Do not add raw beef directly to the slow cooker. Searing creates complex flavors that you simply cannot achieve otherwise.
  • Overcrowding the Pan: When searing the beef, cook in batches. Crowding creates steam and prevents proper browning.
  • Using the Wrong Cut: Avoid very lean cuts like eye of round. You need a cut with connective tissue and marbling (like chuck) that breaks down during slow cooking, making the meat tender and the sauce luxurious.
  • Lifting the Lid: Resist the urge to peek! Every time you lift

Mini Pineapple Cakes – A Tropical Bite-Sized Delight!

Mini Pineapple Cakes – A Tropical Bite-Sized Delight!

Introduction

Did you know that over 65% of home bakers seek out recipes that combine ease of preparation with vibrant, exotic flavors? Welcome to the delicious world of Mini Pineapple Layered Cakes, also known as Tropical Pineapple Delight Mini Cake! These delightful mini cakes are bursting with tropical flavors, perfect for those who crave a bite of sunshine in every mouthful. Whether you’re hosting a summer party or looking for a sweet treat to brighten your day, these mini pineapple cakes are sure to impress. Easy to make and incredibly satisfying, this recipe will quickly become one of your go-to desserts. Let’s dive in!

Ingredients List

Gather these fresh, vibrant ingredients to create your own tropical paradise. Each component is chosen for its flavor and texture, ensuring your mini cakes are moist, flavorful, and visually stunning.

  • For the Pineapple Filling:
    • 2 cups fresh pineapple, finely chopped (about 1 medium pineapple) – The star of the show! Look for a pineapple that smells sweet at the base and yields slightly to pressure. Substitution: 1 can (20 oz) crushed pineapple in juice, well-drained.
    • 1/2 cup granulated sugar – Caramelizes with the pineapple to create a deep, rich, golden-brown jam.
    • 1 tablespoon fresh lemon juice – Adds a bright, acidic zing that balances the sweetness and prevents the sugar from crystallizing.
    • 1 teaspoon vanilla extract – A warm, aromatic note that rounds out the tropical flavor profile.
  • For the Vanilla Cake Layers:
    • 1 1/2 cups all-purpose flour – The foundation for a light, tender crumb. Substitution: For a gluten-free option, use a 1:1 gluten-free baking flour blend.
    • 1 teaspoon baking powder & 1/2 teaspoon baking soda – The dynamic duo for the perfect rise.
    • 1/2 teaspoon salt – Enhances all the other flavors.
    • 1/2 cup unsalted butter, softened – Should be at cool room temperature for easy creaming, giving the cake its rich, buttery mouthfeel.
    • 3/4 cup granulated sugar
    • 2 large eggs, room temperature – Room temperature eggs incorporate more air, leading to a fluffier cake.
    • 1/2 cup full-fat sour cream or Greek yogurt – The secret to incredible moisture and a slight tang. Substitution: Buttermilk works wonderfully here too.
    • 1/4 cup whole milk
    • 2 teaspoons pure vanilla extract – Use the good stuff for the best flavor.
  • For the Whipped Cream Frosting & Garnish:
    • 1 1/2 cups heavy whipping cream, very cold – Chilling your bowl and beaters helps it whip up faster and higher.
    • 1/4 cup powdered sugar – Sweetens and stabilizes the cream slightly.
    • 1 teaspoon vanilla extract
    • Toasted coconut flakes, fresh mint sprigs, or thin pineapple slices – For a gorgeous, professional-looking finish.

Timing

One of the best parts of this recipe is its efficiency. Compared to a standard layer cake which can take 3+ hours from start to finish, these mini cakes are designed for maximum impact with minimal time investment.

Prep Time
25 minutes
Cook Time
20 minutes
Total Time
1 hour 15 minutes
Yields
12 mini cakes

The “active” time is under 45 minutes. The remaining time is for cooling the components, which you can use to clean up or prepare your serving platter. This makes it a fantastic last-minute dessert option that looks like you spent all day in the kitchen.

Mini Pineapple Cakes – A Tropical Bite-Sized Delight!

Golden mini cakes layered with luscious pineapple filling and fluffy whipped cream—a true taste of the tropics.

Step-by-Step Instructions

Follow these detailed steps for foolproof, beautiful mini cakes. I’ve included my personal tips to ensure your success.

Step 1: Prepare the Pineapple Filling

This step can be done ahead of time! In a medium saucepan, combine the finely chopped fresh pineapple, granulated sugar, and lemon juice. Cook over medium heat, stirring frequently, for about 15-20 minutes. You’ll know it’s ready when the mixture has thickened significantly, the liquid has reduced, and the pineapple has broken down into a jam-like consistency. It will turn a beautiful deep gold color. Stir in the vanilla extract, then transfer to a bowl and let it cool completely to room temperature. Pro Tip: Spread it on a plate to cool faster and prevent residual heat from making the filling watery.

Step 2: Make the Vanilla Cake Layers

Preheat your oven to 350°F (175°C). Grease a standard 9×13 inch baking pan and line it with parchment paper for easy removal. In a medium bowl, whisk together the flour, baking powder, baking soda, and salt. Set aside. In a large bowl, using a hand mixer or stand mixer fitted with the paddle attachment, cream the softened butter and sugar together on medium-high speed for 3-4 minutes, until light, fluffy, and almost white in color. This step is crucial for texture! Add the eggs one at a time, beating well after each addition. Beat in the vanilla. With the mixer on low, add the dry ingredients in three parts, alternating with the sour cream and milk, beginning and ending with the dry ingredients. Mix just until combined—do not overmix. Spread the batter evenly into your prepared pan. Bake for 18-22 minutes, or until a toothpick inserted into the center comes out clean. Let the cake cool in the pan for 10 minutes, then transfer it to a wire rack to cool completely.

Step 3: Assemble the Mini Cakes

Once the cake is completely cool, use a 2-inch round cookie cutter (or the rim of a glass) to cut out circles from the sheet cake. You should get about 24 circles. Pair them up so you have 12 bases and 12 tops. Place one cake circle on your serving plate or in a mini cupcake liner. Spoon about 1 tablespoon of the cooled pineapple filling onto the center, spreading it almost to the edges. Place the second cake circle on top, gently pressing down to create a sandwich.

Step 4: Add the Final Touches

For the frosting, ensure your heavy cream, bowl, and beaters are very cold. In the chilled bowl, whip the heavy cream, powdered sugar, and vanilla on medium-high speed until stiff peaks form. Be careful not to over-whip into butter. You can either pipe the whipped cream on top of each assembled mini cake using a star tip or simply dollop it with a spoon. Immediately garnish with toasted coconut flakes, a tiny mint leaf, or a sliver of fresh pineapple. Serve immediately or chill until ready to serve.

Nutritional Information

(Approximate values per mini cake, based on 12 servings)

  • Calories: 280 kcal
  • Total Fat: 16g
  • Saturated Fat: 10g
  • Cholesterol: 75mg
  • Sodium: 180mg
  • Total Carbohydrates: 32g
  • Dietary Fiber: 1g
  • Sugars: 22g
  • Protein: 4g

Healthier Alternatives

Love the flavor but want a lighter version? These swaps maintain deliciousness while tweaking the nutrition profile.

  • Reduce Sugar: Cut the sugar in the pineapple filling by half and use a ripe, sweet pineapple. For the cake, you can reduce the granulated sugar to 1/2 cup without drastically affecting texture.
  • Whole Grains: Substitute half of the all-purpose flour with whole wheat pastry flour for added fiber and a nuttier flavor.
  • Lighter Frosting: Use chilled coconut cream (the solid part from a can of full-fat coconut milk) whipped with a touch of honey or maple syrup for a dairy-free, slightly lower-calorie topping that complements the tropical theme perfectly.
  • Oil for Butter: Replace the butter in the cake with an equal amount of light-tasting avocado oil or melted coconut oil for a heart-healthier fat option.

Serving Suggestions

  • The Tropical Platter: Arrange the mini cakes on a large platter with fresh mango slices, kiwi, and berries for a stunning, colorful dessert spread.
  • With a Beverage Pairing: Serve alongside a glass of cold sparkling wine, iced coffee, or a mocktail made with pineapple juice and sparkling water.
  • As a Party Favor: Place each mini cake in a clear, individual treat box tied with a ribbon. They make adorable and memorable take-home gifts for guests.
  • À la Mode: For the ultimate indulgence, serve slightly warmed with a small scoop of vanilla bean or coconut ice cream on the side.

Common Mistakes

  • Using Warm Filling: Assembling with warm pineapple filling will melt the whipped cream and make the cake layers soggy. Patience is key—ensure everything is completely cool.
  • Overmixing the Batter: This develops gluten, leading to a tough, dense cake. Mix just until the last streaks of flour disappear.
  • Undermixing Butter & Sugar: Conversely, not creaming the butter and sugar long enough results in a flat, heavy cake. Aim