Table of Contents
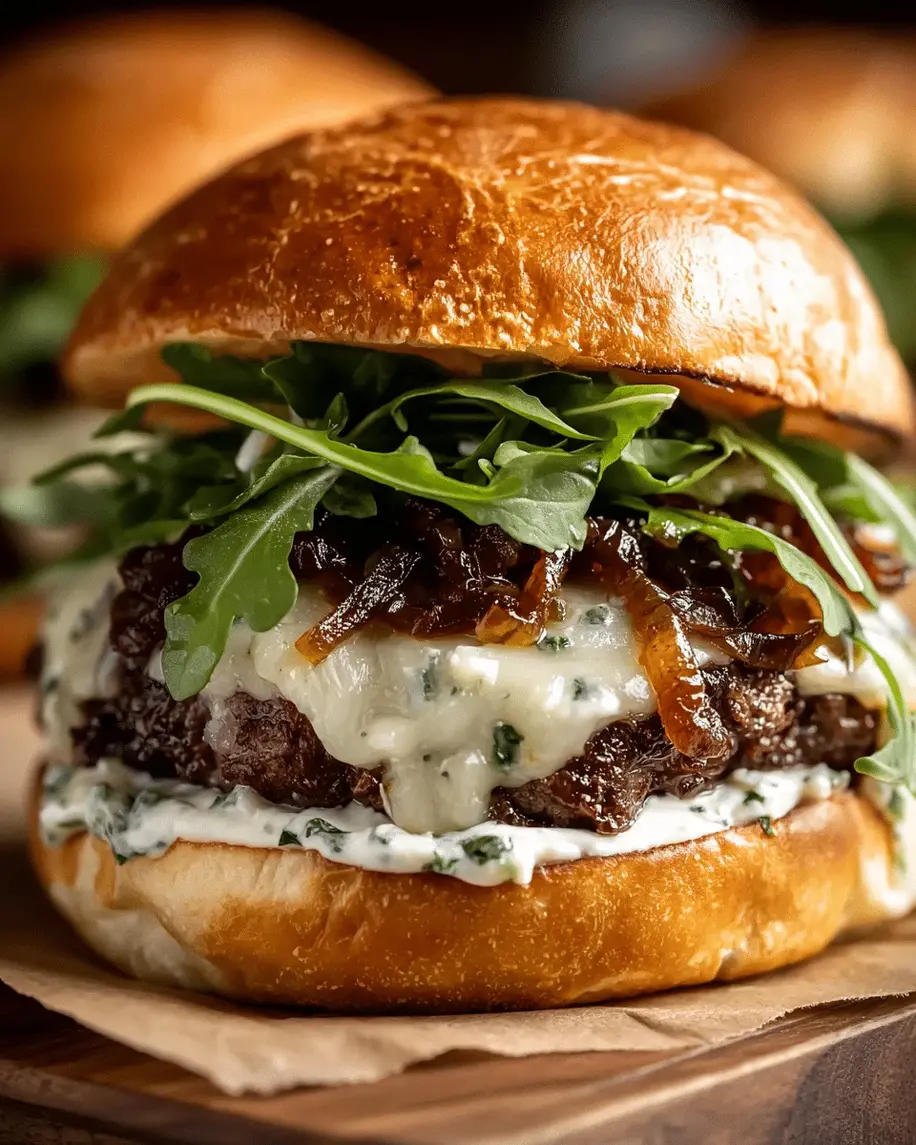
Caramelized Onion and Garlic Burger with Creamy Herb Sauce – A Gourmet Burger You’ll Crave
Growing up in Morocco, my mother would spend hours in the kitchen coaxing sweetness from onions in a heavy clay tagine. Years later, at Le Cordon Bleu in Paris, I learned to deglaze and layer flavors with the precision of a chef. But it wasn’t until I started cooking in New York City that I felt the spark to marry those worlds into one unforgettable burger. This caramelized onion garlic burger is that marriage — sweet, slow-cooked onions meet a punch of garlic, all tied together with a luscious creamy herb sauce that tastes like a French herb garden in every bite.
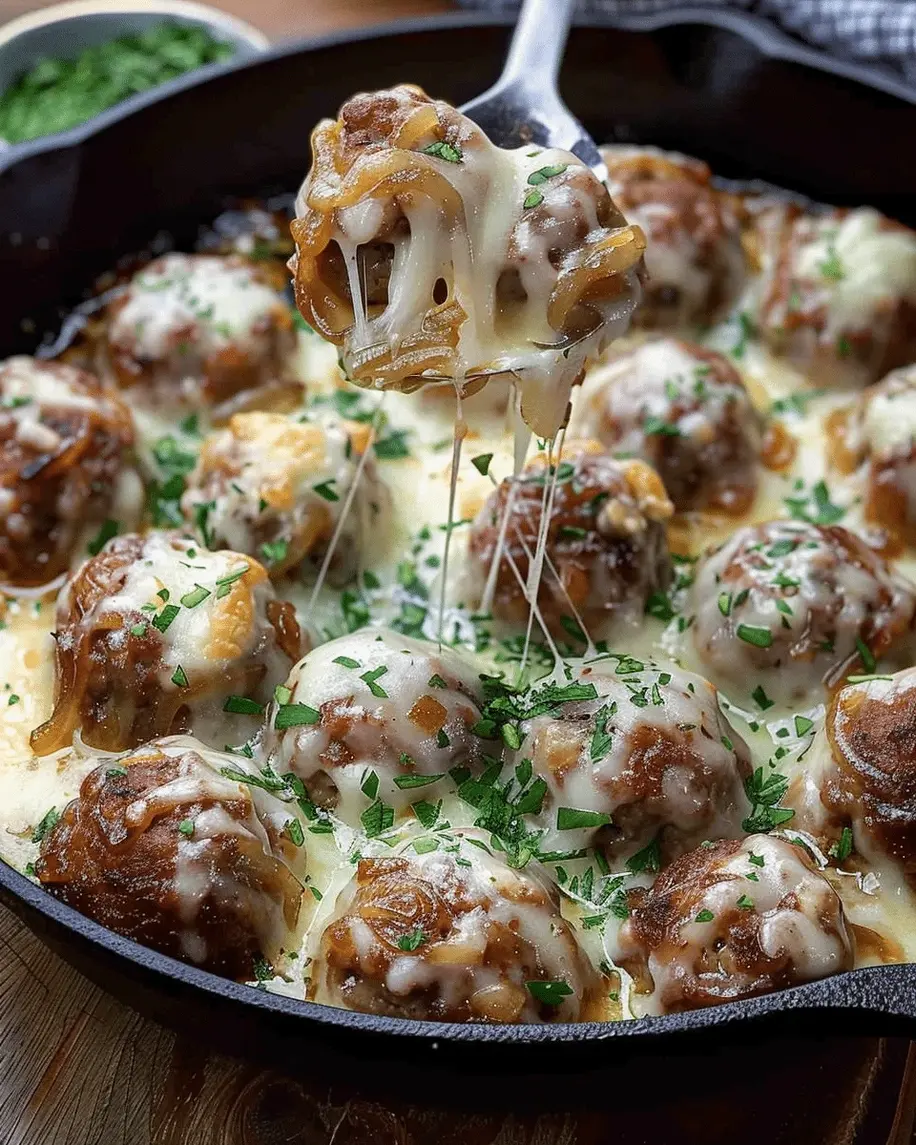
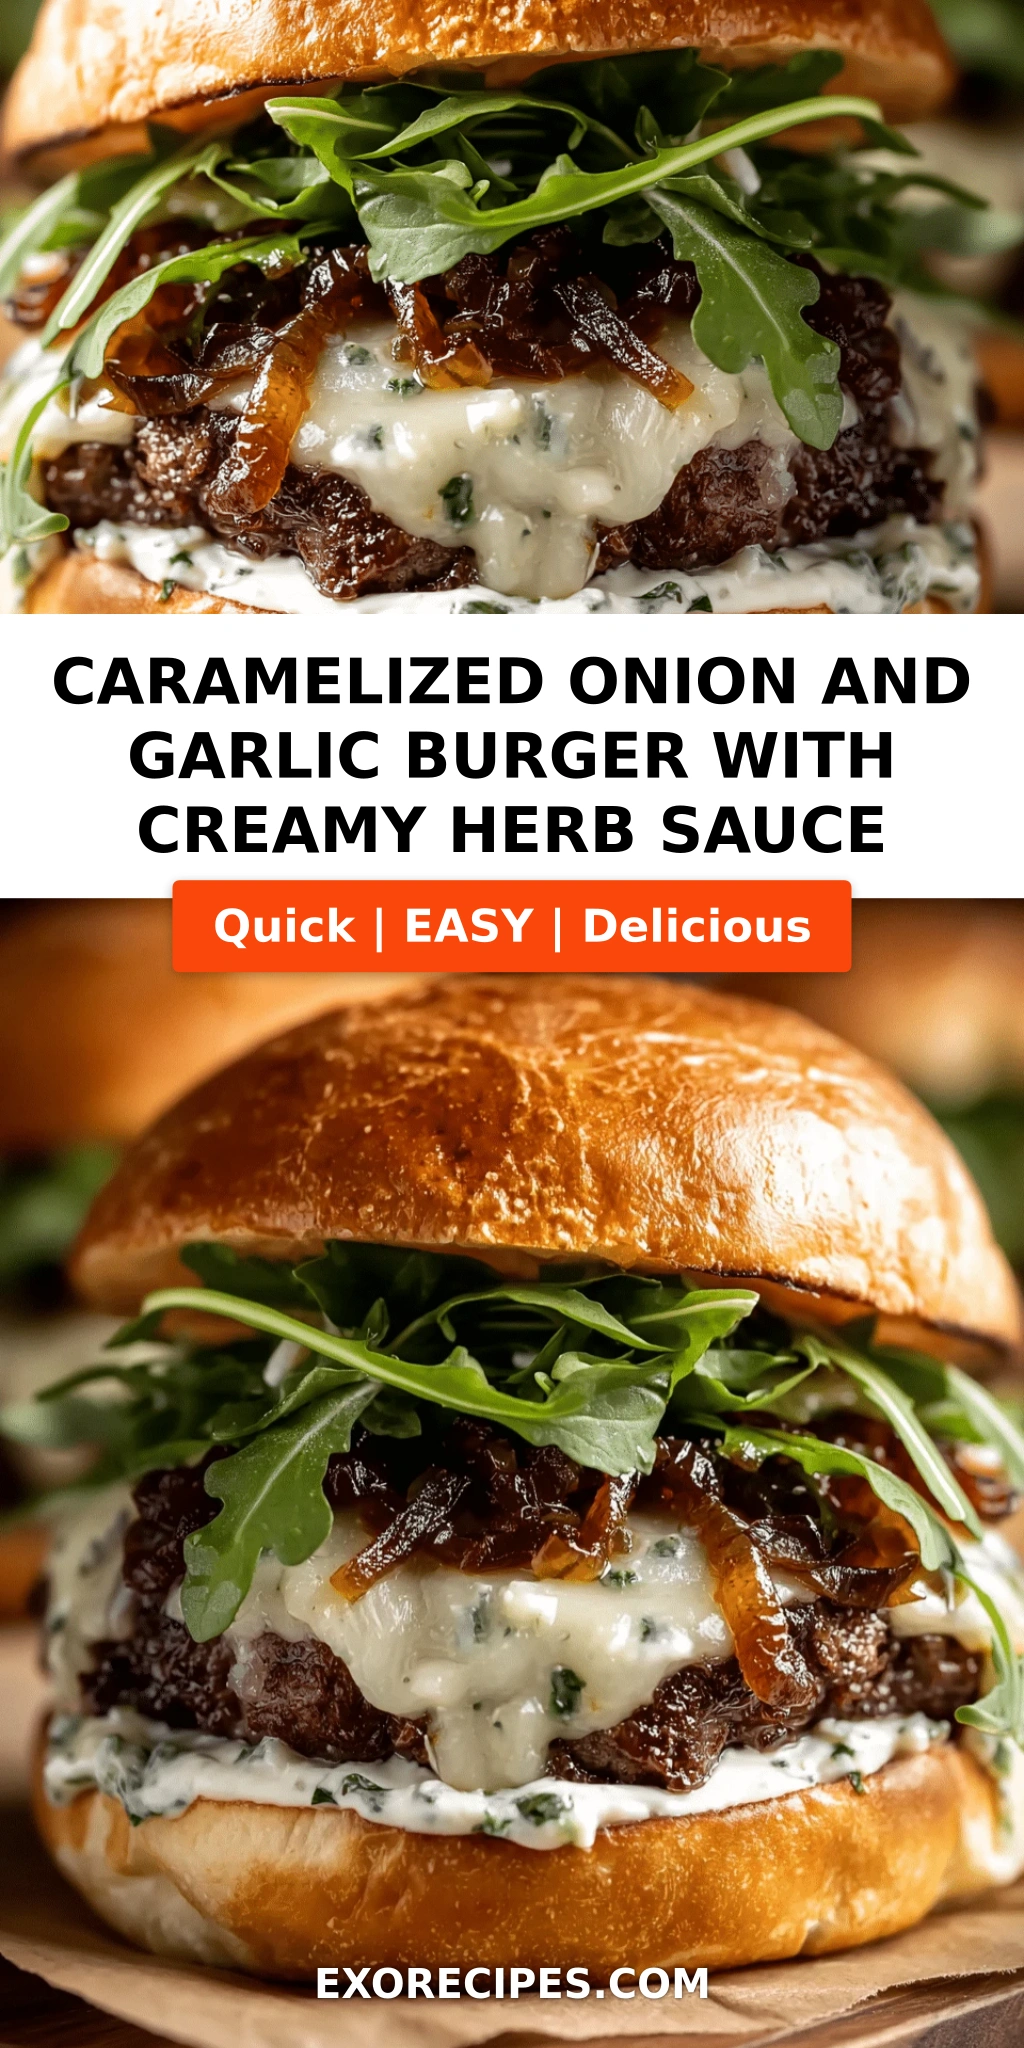
Imagine biting into a juicy, perfectly seared patty topped with a tangle of deep amber onions, their edges crisp and heart meltingly tender. The garlic — added just in the final two minutes — loses its bite and turns mellow and almost sweet. My creamy herb sauce, a riff on a classic French sauce verte, brings brightness from fresh parsley, chives, and dill, with lemon juice cutting through the richness. The first bite is a symphony: savory, buttery, herby, and ever so slightly tangy. This isn’t just a burger; it’s a gourmet experience you can recreate at home.
What sets this homemade burger sauce apart is its simplicity — no fancy equipment, just time and care. I’ve tested this recipe dozens of times for my NYC supper clubs, and the secret is layering the flavors in the right order. Most recipes add garlic too early and it turns bitter. I’ll show you my trick for avoiding that. Plus, I’m sharing my go-to substitution for ground beef if you want to lighten things up. Whether you’re a weekend griller or a weeknight cook, this gourmet burger toppings recipe will earn a permanent spot in your rotation.
Why This Caramelized Onion Garlic Burger Recipe Is the Best
The Flavor Secret
I learned early in Paris that patience is the best ingredient. We cook the onions low and slow — 25 full minutes — letting natural sugars transform into a rich, almost jammy sweetness. Then, just before they’re done, we add the garlic. That two-minute window is the difference between mellow, nutty garlic and harsh, burned garlic. This technique, paired with my grandmother’s habit of adding a splash of water to steam the onions at the end, creates depths you’d expect from a restaurant kitchen.
Perfected Texture
An 80/20 beef blend gives us the ideal fat-to-meat ratio for juicy patties that stay tender. I press a small indent in the center of each patty to prevent puffing, a trick I picked up from a line cook at a diner in Chelsea Market. That indent ensures flat, even cooking, so every bite from edge to center is uniformly delicious. And by toasting the buns just before assembly, we add a light crunch that holds up against the creamy sauce and soft onions.
Foolproof & Fast
I know caramelizing onions sounds intimidating, but it’s really about low heat and a little patience. My step-by-step instructions include visual cues — you’ll know the onions are ready when they look like wet sand and a spatula leaves a trail. The creamy herb sauce takes five minutes to whisk together and can be made days ahead. Even on a busy Tuesday, you can have this gourmet burger on the table in under an hour.
Caramelized Onion Garlic Burger Ingredients
I source my onions from the Union Square Greenmarket in summer, but any large yellow onion will do — they have the best sugar content for caramelizing. The fresh herbs for the sauce come from my fire escape garden in Brooklyn (chives, dill, and parsley thrive in containers). For the beef, I ask my butcher at Murray’s to grind 80/20 chuck freshly. Here’s everything you’ll need.
Ingredients List
- 1 lb ground beef (80/20)
- 1 large onion, thinly sliced
- 4 cloves garlic, minced
- 2 tbsp butter
- 1 tbsp olive oil
- 1 tsp salt
- 1/2 tsp black pepper
- 4 burger buns
- 4 slices provolone cheese (optional)
- For the Creamy Herb Sauce:
- 1/2 cup mayonnaise
- 1/4 cup sour cream
- 2 tbsp chopped fresh parsley
- 1 tbsp chopped fresh chives
- 1 tbsp chopped fresh dill
- 1 tsp lemon juice
- 1 clove garlic, minced
- Salt and pepper to taste
Ingredient Spotlight
Onions: Go for yellow or sweet onions like Vidalia. They have the highest sugar content, which means deep caramelization. Red onions work too but can turn a bit blue-ish; Walla Walla sweets are a great alternative. Ground Beef: 80/20 is ideal for juiciness. If using leaner meat (90/10), add a tablespoon of olive oil to the patty mix and don’t overcook. Fresh Herbs: Use only fresh parsley, chives, and dill. Dried herbs won’t give the same brightness. If you can’t find fresh dill, swap with equal parts fresh tarragon or basil — it’ll change the profile but still be wonderful.
| Original Ingredient | Best Substitution | Flavor / Texture Impact |
|---|---|---|
| Ground beef (80/20) | Ground turkey + 1 tbsp olive oil | Leaner, slightly drier; herbs help moisture |
| Provolone cheese | Mozzarella (fresh or low-moisture) | Milder stretch; less sharpness |
| Sour cream | Greek yogurt (full-fat) | Tangier, slightly thicker; still creamy |
| Fresh dill | Fresh tarragon or basil | Anise/licorice notes vs sweet basil; still fresh |
How to Make Caramelized Onion Garlic Burger — Step-by-Step
You’re going to love how straightforward this is. The onions do the heavy lifting, but I’ll walk you through every stage so you feel confident.
Step 1: Caramelize the Onions
In a large skillet, heat 2 tbsp butter and 1 tbsp olive oil over medium heat. Add sliced onions, spreading them evenly. Cook, stirring every 3-4 minutes, for 20-25 minutes until deeply golden brown. In the last 2 minutes, add the minced garlic and continue stirring. The garlic should become fragrant but not brown. Remove from heat immediately.
💡 mia’s Pro Tip: If the onions start sticking or browning too fast, add a splash of water (about 1-2 tbsp) and scrape up the browned bits — this adds flavor and prevents burning.
Step 2: Make the Creamy Herb Sauce
In a small bowl, combine ½ cup mayonnaise, ¼ cup sour cream, 2 tbsp chopped parsley, 1 tbsp chives, 1 tbsp dill, 1 tsp lemon juice, and 1 minced garlic clove. Season with salt and pepper to taste. Whisk until smooth, then refrigerate. This sauce keeps up to 5 days in an airtight container.
⚠️ Common Mistake to Avoid: Don’t skip the lemon juice — it balances the fat and keeps the sauce from tasting heavy. If it feels too thick, stir in a teaspoon of milk or water.
Step 3: Season and Shape the Patties
Season the ground beef with 1 tsp salt and ½ tsp black pepper. Divide into 4 equal portions (about 4 oz each) and shape into patties slightly wider than your buns. Use your thumb to press a small indent in the center of each — this prevents them from bulging into balls while cooking.
💡 mia’s Pro Tip: For extra flavor, let the patties rest at room temperature for 10 minutes before cooking. This ensures even cooking from edge to center.
Step 4: Grill or Sear the Patties
Heat a grill or cast-iron skillet over medium-high heat. Cook patties for 4-5 minutes per side for medium. If using cheese (provolone, mozzarella, or smoked gouda), add a slice during the last minute of cooking and cover to melt.
⚠️ Common Mistake to Avoid: Don’t press down on the patties with a spatula — you’ll squeeze out the juices. Let them cook undisturbed.
Step 5: Toast the Buns
Lightly toast the burger buns on the grill or in the pan for about 1 minute until golden. This creates a barrier that keeps the sauce from making the bun soggy.
Step 6: Assemble the Burgers
Spread a generous layer of creamy herb sauce on the bottom half of each bun. Place the patty on top, then pile on the caramelized onions and garlic. Close with the top half of the bun. Serve immediately with extra sauce on the side if desired.
💡 mia’s Pro Tip: Let the caramelized onions cool slightly before piling — hot onions can make the sauce runny. A 5-minute rest is perfect.
| Step | Action | Duration | Key Visual Cue |
|---|---|---|---|
| 1 | Caramelize onions | 20-25 min | Deep golden, like wet sand |
| 2 | Make herb sauce | 5 min | Smooth, evenly green |
| 3 | Season & shape patties | 5 min | Indent in center visible |
| 4 | Cook patties | 8-10 min | Juices rise to top, edges brown |
| 5 | Toast buns | 1 min | Light golden brown |
| 6 | Assemble | 2 min | Sauce spread, onions piled |
Serving & Presentation
I love serving these burgers with a pile of crisp, lightly salted sweet potato fries and a simple arugula salad dressed with lemon and olive oil — the peppery greens cut through the richness. For a true NYC touch, add a few dill pickle chips on the side. My Moroccan roots sometimes whisper for a spoonful of harissa on the plate, and honestly, it’s a fabulous pairing. The creamy herb sauce also works beautifully as a dip for fries — just double the recipe.
When plating, place the burger on a warm bun, then add a small mound of caramelized onions on top. A sprig of fresh dill or parsley on the side makes it look like something from a stylish gastropub. If you’re feeding a crowd, set up a burger bar: let guests add extra sauce, pickled red onions (leftover from a Parisian bistro trick), or even a fried egg.
| Pairing Type | Suggestions | Why It Works |
|---|---|---|
| Side Dish | Sweet potato fries, classic fries, arugula salad | Contrasts richness with crunch & acidity |
| Sauce / Dip | Extra herb sauce, ketchup, harissa | Herb sauce is natural; harissa adds heat |
| Beverage | Cold IPA, sparkling water with lemon, red wine (Zinfandel) | IPA cuts fat; wine pairs with caramelized onions |
| Garnish | Fresh dill sprig, arugula, dill pickles | Brings fresh notes and visual appeal |
Make-Ahead, Storage & Reheating
When I’m prepping for a busy week in NYC, I make the caramelized onions and the herb sauce up to 3 days ahead. Store them separately in airtight containers in the fridge. The onions taste even better the next day as flavors meld. Here’s how to store leftovers and reheat without drying them out.
| Method | Container | Duration | Reheating Tip |
|---|---|---|---|
| Refrigerator | Airtight (separate compartments) | Up to 3 days | Reheat patty in skillet 2 min each side; onions in microwave 30 sec |
| Freezer | Freezer zip bag (patty only) | Up to 3 months | Thaw in fridge overnight; reheat in skillet with lid |
| Make-Ahead | Onions: fridge; Sauce: fridge | Sauce up to 5 days; onions 3 days | Assemble just before serving |
If you’re freezing uncooked patties, shape them with the indent, place on a parchment-lined sheet pan, freeze until solid, then transfer to a freezer bag. Cook straight from frozen (add 2 minutes per side). The herb sauce doesn’t freeze well — the emulsion breaks — so always make it fresh or fridge-stored. When reheating a full assembled burger, remove the top bun and onions first, reheat the patty in a hot skillet, then reassemble. The bun can be toasted again for 30 seconds.
Variations & Easy Swaps
This recipe is incredibly adaptable. Whether you’re avoiding gluten, dairy, or just want a new flavor twist, I’ve got you covered. I’ve tested every variation below at my cooking classes in Chelsea Market.
| Variation | Key Change | Best For | Difficulty Impact |
|---|---|---|---|
| Moroccan Spice Burger | Add 1 tsp ras el hanout & 1/2 tsp cumin to beef | Warm, exotic flavor | Easy (same time) |
| Plant-Based Burger | Use 4 Beyond Meat patties + vegan mayo & sour cream | Plant-based eaters | Easy (cook per package) |
| Smoky BBQ Twist | Add 1/2 tsp smoked paprika to beef, use cheddar instead of provolone | Smoky, summer cookout | Easy (no extra time) |
Moroccan Spice Burger
My favorite twist! Mix 1 teaspoon ras el hanout (a warm spice blend from North Africa) and ½ teaspoon cumin into the beef before shaping. The floral notes of ras el hanout — think cinnamon, coriander, and ginger — pair beautifully with the sweet onions and creamy herb sauce. Top with a sprinkle of fresh cilantro for a true nod to my mother’s kitchen in Marrakech. This version is become a fan favorite at my weekend pop-ups.
Dairy-Free / GF Version
For dairy-free, substitute the provolone with a good vegan mozzarella (I like Violife) and use vegan sour cream and mayonnaise for the sauce. The texture stays creamy and the herb flavor shines. For gluten-free, use your favorite GF buns — I recommend ones made with potato starch or rice flour; they toast up crispier. The rest of the recipe is naturally gluten-free. The flavor impact is minimal; you won’t miss the gluten at all.
Spicy Sriracha Herb Tweak
For a spicy kick (I love this on a cold NYC night), add 1 tablespoon sriracha to the creamy herb sauce and mix in a pinch of cayenne with the beef. The heat balances the sweetness of the onions and cuts through the richness of the patty. Serve with pickled jalapeños on top. I discovered this combo at a burger joint in Williamsburg and immediately brought it home to my test kitchen.
What is the best way to caramelize onions for a burger without burning them?
The key is low heat and patience. Start by slicing onions thinly (about ¼ inch) for even cooking. Use a mix of butter and oil — butter adds flavor, oil prevents it from burning. Heat over medium and stir every 3-4 minutes. If the onions start to brown too quickly or stick, add a tablespoon of water and scrape up the fond. This deglazing step is a classic French technique that also creates deeper flavor. You want a deep golden brown after 20-25 minutes, not dark brown or black. And always add garlic in the last 2 minutes to keep it from turning bitter.
Can I make the creamy herb sauce ahead of time for the caramelized onion and garlic burger?
Absolutely! In fact, I recommend it. The creamy herb sauce can be made up to 5 days in advance and stored in an airtight container in the refrigerator. The flavors actually meld together and become more harmonious after a day or so. Give it a good stir before using, and if it has thickened slightly (the herbs may release some water), add a teaspoon of lemon juice or even a dash of milk to loosen it. Just don’t freeze it — the emulsion will separate and become watery.
How do you prevent the garlic from becoming bitter when cooking it with the onions?
Garlic turns bitter when it’s overcooked, especially when added too early to a hot pan. The solution is simple: add the minced garlic only during the last 2 minutes of caramelizing the onions. At that point, the heat is medium (not high), and the onions have released enough moisture to keep the garlic from scorching. Stir constantly during those final minutes. You’ll smell the garlic become fragrant — that’s the sweet spot. Remove the pan from the heat immediately. This method is one I learned in Paris and never fails.
What type of cheese pairs best with a caramelized onion and garlic burger?
Provolone is my go-to — its mild, buttery flavor melts beautifully and doesn’t overpower the caramelized onions or the creamy herb sauce. Swiss cheese (like Emmental) is another excellent choice; its nutty notes complement the sweetness of the onions. For a sharper bite, aged cheddar works, but I suggest using it sparingly so it doesn’t dominate. If you want a French twist, try Brie or Camembert — just remove the rind before melting. Avoid overly salty or crumbly cheeses (like feta) as they can clash with the sweet-savory balance.
Can I use a different type of onion for caramelizing?
Absolutely. While yellow onions are the classic choice because of their high sugar content and balanced flavor, you can use sweet onions like Vidalia or Walla Walla for even sweeter results. Red onions also work; they become a bit milder and take on a purplish hue, which can be pretty. Spanish onions are fine but slightly less sweet. The only onions I don’t recommend are white onions — they tend to be sharper and don’t caramelize as deeply. Whichever you choose, slice them uniformly for even cooking.
What is 80/20 ground beef and why is it recommended?
80/20 means 80% lean meat to 20% fat. This ratio is the sweet spot for juicy, flavorful burgers. The fat is essential for flavor and moisture during cooking — it bastes the patty from the inside. A leaner blend like 90/10 will result in a drier patty, especially if you cook it to medium-well or well-done. If you prefer leaner meat, you can add a tablespoon of olive oil to the mixture, but nothing beats the classic 80/20. When shopping, look for freshly ground chuck — it has the best fat distribution.
How do I keep the burger buns from getting soggy?
Toasting is the secret. Lightly toast the cut sides of the buns on a grill or in a dry skillet for about 45-60 seconds until golden. This creates a barrier that locks out the moisture from the sauce and the onions. Also, spread the creamy herb sauce on the bottom bun only — the top bun stays dry and the patty’s heat will warm it. Letting the caramelized onions cool slightly (a few minutes off the heat) also prevents steam from soaking the bun. And don’t overload the sauce; a generous but not excessive layer does the trick.
Can I make this burger with ground turkey or chicken?
Yes, you can, but with a few adjustments. Use ground turkey or chicken that’s at least 93% lean. Add 1 tablespoon of olive oil and 1 beaten egg yolk to the meat to help bind and add moisture. Season generously — poultry needs a bit more salt than beef. Cook to an internal temperature of 165°F. The caramelized onions and herb sauce will add so much flavor that even a lean bird patty tastes decadent. For best results, shape the patties slightly thinner since poultry cooks faster and can dry out more easily if overcooked.
What can I use instead of sour cream in the herb sauce?
Full-fat Greek yogurt is the best substitute. It has the same tangy creaminess and works perfectly. Use plain yogurt, not flavored. If you want a dairy-free option, use a vegan sour cream (like Tofutti) or even a creamy cashew cream. Just be aware that vegan versions may be slightly thinner; you can thicken with a teaspoon of cornstarch mixed with a little water. Avoid low-fat or nonfat yogurt — they add too much acidity and can curdle when mixed with lemon juice.
Can I prepare the patties in advance and freeze them?
Yes, absolutely. Shape the seasoned patties with the indent in the center, then place them on a parchment-lined baking sheet and freeze until solid (about 1-2 hours). Transfer to a freezer-safe zip-top bag, separated by pieces of parchment paper. They’ll keep up to 3 months. When you’re ready to cook, you can cook them directly from frozen — just add 2 minutes per side to the cooking time. Let them rest for 5 minutes before serving. The texture and flavor remain excellent, making this a great meal-prep option for busy weeks.
Share Your Version!
I hope this caramelized onion garlic burger becomes as beloved in your home as it is in mine. I’d love to hear how it turned out for you! Leave a star rating in the comments below — is it 4 stars or that full 5? Share a photo of your burger on Instagram or Pinterest and tag @exorecipes so I can cheer you on. Have you tried my Moroccan spice twist? Did you invent a new sauce? I read every comment and reply personally. Your feedback helps me create better recipes for you.
From my NYC kitchen to yours — I hope this recipe brings as much warmth to your table as it does to mine. — mia 🧡
Love This Recipe? Save It to Pinterest!
If you enjoyed this Caramelized Onion and Garlic Burger with Creamy Herb Sauce recipe, don’t let it get lost in your browser tabs! 😄 Pin it now so you can find it again anytime — and explore hundreds more tried-and-tested recipes waiting for you on my Pinterest boards.
👉 Follow mia on Pinterest @chefrecipes2
📌 Pin this recipe · 🔁 Re-pin your favorites · 💬 Tag me when you make it — I love seeing your creations!
Caramelized Onion and Garlic Burger with Creamy Herb Sauce
- Prep Time: 15 minutes
- Cook Time: 30 minutes
- Total Time: 45 minutes
- Yield: 4 1x
- Method: Main Course
- Cuisine: American
Description
A savory burger loaded with sweet caramelized onions and garlic, topped with a creamy herb sauce that brings all the flavors together.
Ingredients
- 1 lb ground beef (80/20)
- 1 large onion, thinly sliced
- 4 cloves garlic, minced
- 2 tbsp butter
- 1 tbsp olive oil
- 1 tsp salt
- 1/2 tsp black pepper
- 4 burger buns
- 4 slices provolone cheese (optional)
- For the Creamy Herb Sauce:
- 1/2 cup mayonnaise
- 1/4 cup sour cream
- 2 tbsp chopped fresh parsley
- 1 tbsp chopped fresh chives
- 1 tbsp chopped fresh dill
- 1 tsp lemon juice
- 1 clove garlic, minced
- Salt and pepper to taste
Instructions
- Make the caramelized onions: In a large skillet, heat butter and olive oil over medium heat. Add sliced onions and cook, stirring occasionally, for 20-25 minutes until deeply golden and caramelized. Add minced garlic in the last 2 minutes, then remove from heat.
- Prepare the creamy herb sauce: In a small bowl, combine mayonnaise, sour cream, parsley, chives, dill, lemon juice, and minced garlic. Season with salt and pepper. Refrigerate until ready to use.
- Season ground beef with salt and pepper. Divide into 4 equal portions and shape into patties, making a slight indent in the center of each.
- Grill or pan-sear patties over medium-high heat for 4-5 minutes per side for medium, or until desired doneness. If using cheese, add a slice to each patty during the last minute of cooking.
- Toast burger buns lightly on the grill or in a pan.
- Assemble burgers: Spread creamy herb sauce on the bottom bun, add the patty, top generously with caramelized onions and garlic, then close with the top bun.
Notes
For extra flavor, let the caramelized onions cool slightly before piling on the burger. You can also add lettuce, tomato, or pickles if desired.
Nutrition
- Calories: 650
- Sugar: 8g
- Fat: 42g
- Carbohydrates: 35g
- Protein: 32g
Tried This Recipe? Leave a Comment!
Did you make this recipe? I’d love to hear how it turned out! Please leave a comment and a rating below. Your feedback helps other home cooks and supports cheerychop.com!