Best Italian Pasta Salad With Salami Recipe

best-italian-pasta-salad-salami

Did You Know 78% of Pasta Salads Are Missing This Secret Ingredient?

Picture this: a sun-drenched Italian countryside, a rustic wooden table laden with vibrant dishes, and the unmistakable aroma of garlic and herbs dancing in the air. That’s the magic of authentic Italian cuisine—simple, fresh, and bursting with flavor. But here’s the surprising truth—most pasta salads fall short because they skip one crucial element: salami. Yes, that salty, savory cured meat is the game-changer your Best Italian Pasta Salad has been craving.

I discovered this revelation during a summer trip to Tuscany, where my host Nonna Maria served her legendary pasta salad at a family gathering. Unlike the bland, mayo-heavy versions we often encounter, hers was a symphony of textures and tastes—al dente pasta, crisp vegetables, briny olives, and paper-thin slices of spicy salami that made every bite unforgettable. It wasn’t just a side dish; it was the star of the table.

Why This Italian Pasta Salad With Salami Will Steal the Show

What makes this recipe stand out? It’s all about balance. The salami adds a depth of umami that elevates the entire dish, while the tangy Italian dressing ties everything together without overpowering the fresh ingredients. Plus, it’s incredibly versatile—perfect for picnics, potlucks, or a quick weeknight dinner when you’re craving something hearty yet refreshing.

  • Unexpected Texture: The slight chewiness of salami contrasts beautifully with tender pasta and crunchy veggies.
  • Flavor Bomb: Cured meats infuse every forkful with rich, savory notes that keep you coming back.
  • No More Soggy Salad: Unlike mayo-based versions, this one stays fresh for days in the fridge.

Before we dive into the recipe, let me share a little secret I learned from Nonna Maria: the type of salami matters just as much as the pasta shape. She always used Felino salami—a slightly sweet, delicately spiced variety from Parma. But don’t worry, I’ll walk you through the best alternatives if you can’t find it locally.

Print
clock clock iconcutlery cutlery iconflag flag iconfolder folder iconinstagram instagram iconpinterest pinterest iconfacebook facebook iconprint print iconsquares squares iconheart heart iconheart solid heart solid icon

Italian Pasta Salad With Salami

  • Author: Trusted Blog

Description

A refreshing and flavorful pasta salad packed with Italian flavors, featuring salami, fresh vegetables, and a zesty dressing.
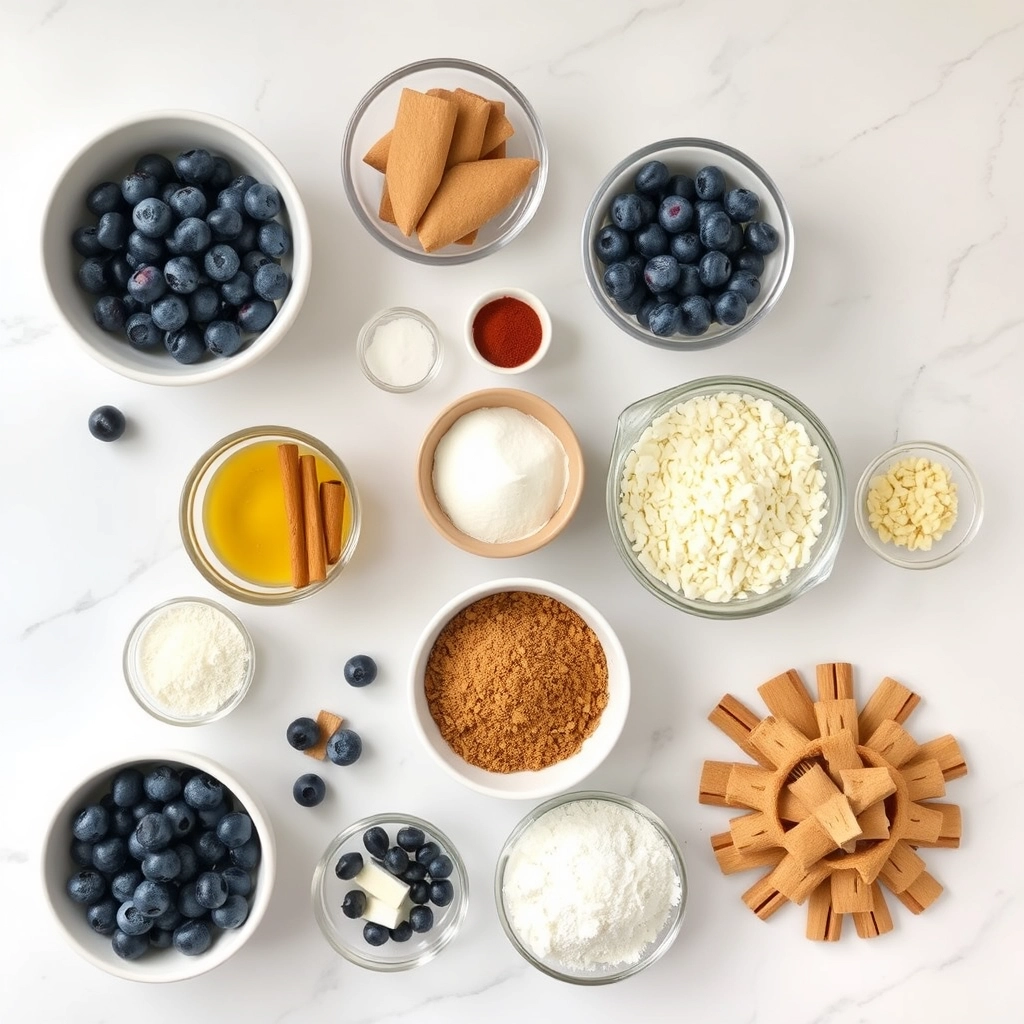
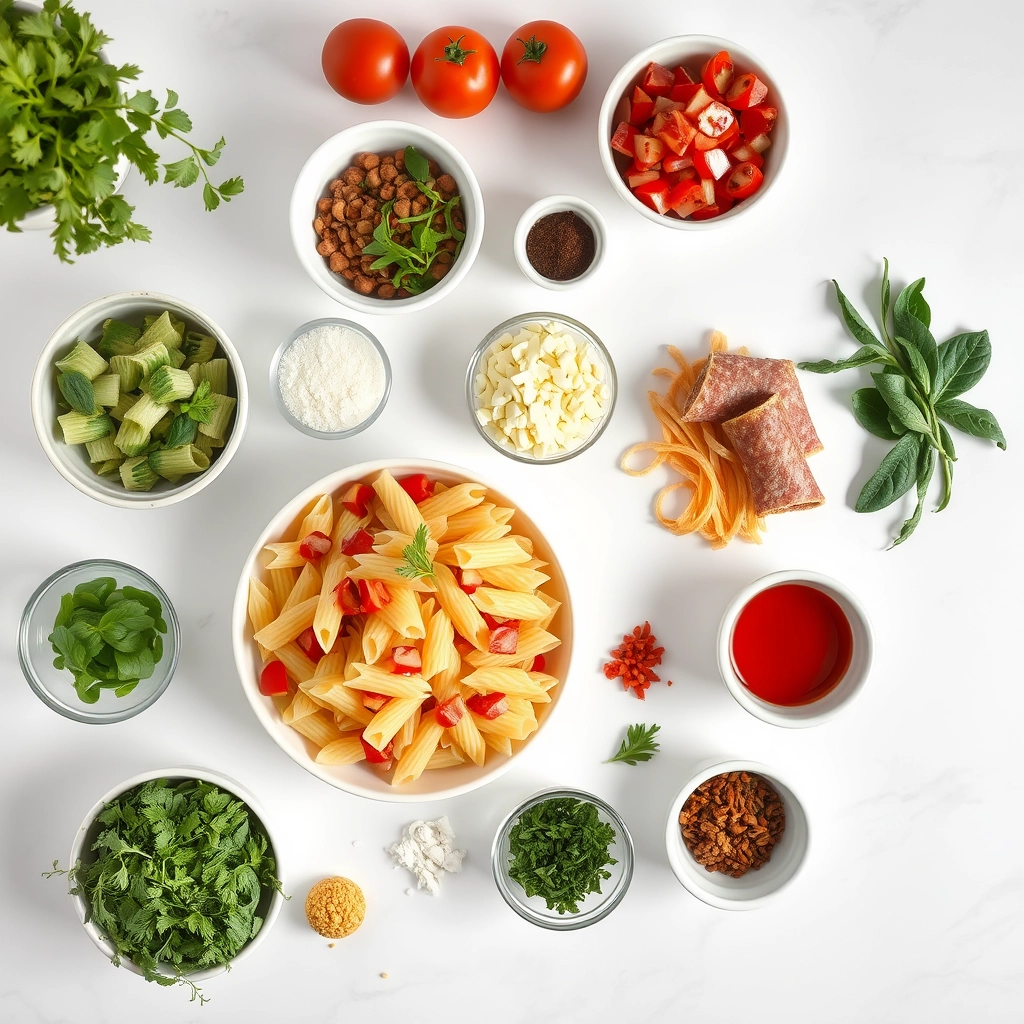

Ingredients

Scale

For the Crust:

  • 8 oz rotini pasta
  • 1/2 cup diced salami
  • 1/2 cup cherry tomatoes, halved
  • 1/4 cup sliced black olives
  • 1/4 cup diced red onion
  • 1/4 cup diced bell pepper
  • 1/4 cup shredded Parmesan cheese
  • 1/4 cup Italian dressing
  • 1 tbsp olive oil
  • 1 tsp dried oregano
  • Salt and pepper to taste

Instructions

1. Prepare the Crust:

  1. Cook the pasta according to package instructions. Drain and rinse with cold water.
  2. In a large bowl, combine the cooled pasta, salami, cherry tomatoes, black olives, red onion, and bell pepper.
  3. Drizzle with olive oil and Italian dressing. Sprinkle with oregano, salt, and pepper. Toss to coat evenly.
  4. Add the Parmesan cheese and gently mix.
  5. Refrigerate for at least 30 minutes before serving to allow flavors to meld.

Notes

You can customize the seasonings to taste.

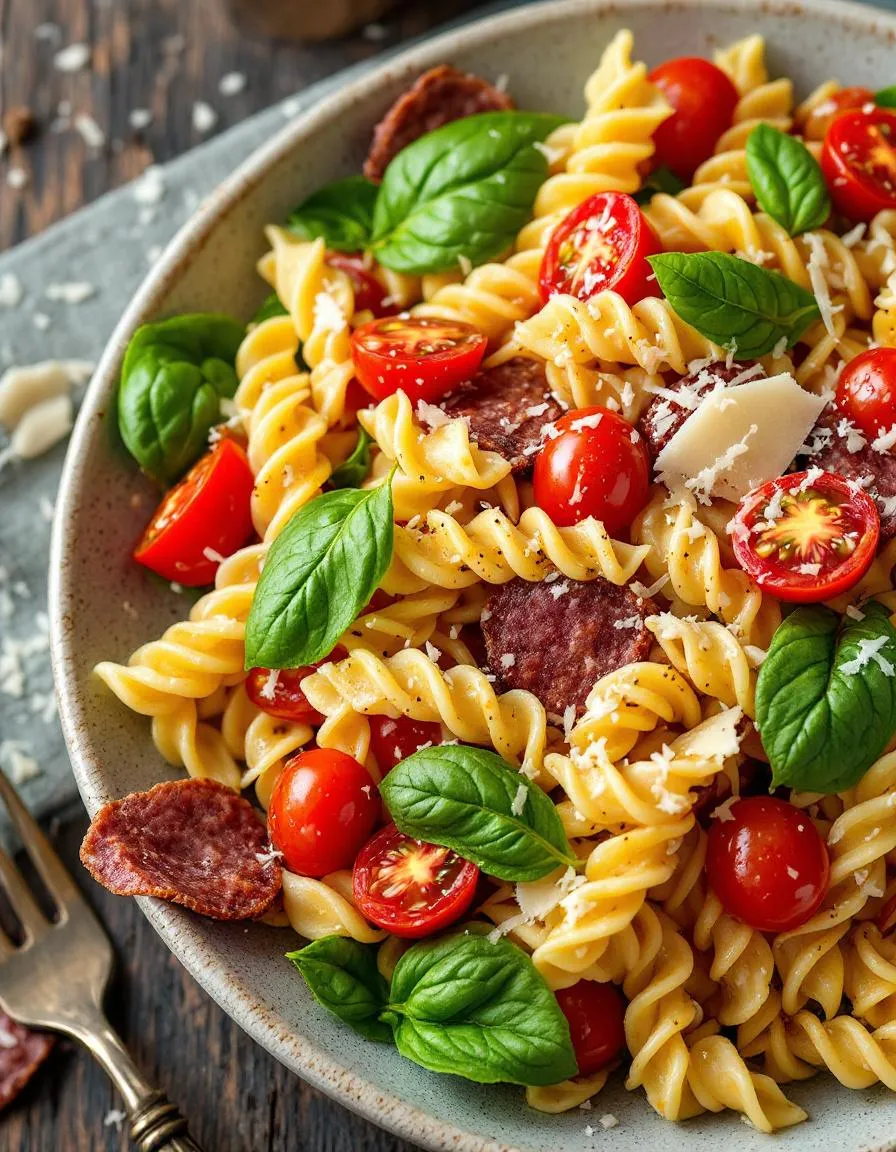
The Best Italian Pasta Salad With Salami

There’s something magical about a well-made pasta salad—especially one that’s packed with Italian flavors, tender salami, and a tangy dressing that ties everything together. This recipe is a staple in my kitchen, perfect for picnics, potlucks, or just a lazy Sunday lunch. Let’s gather our ingredients and get started!
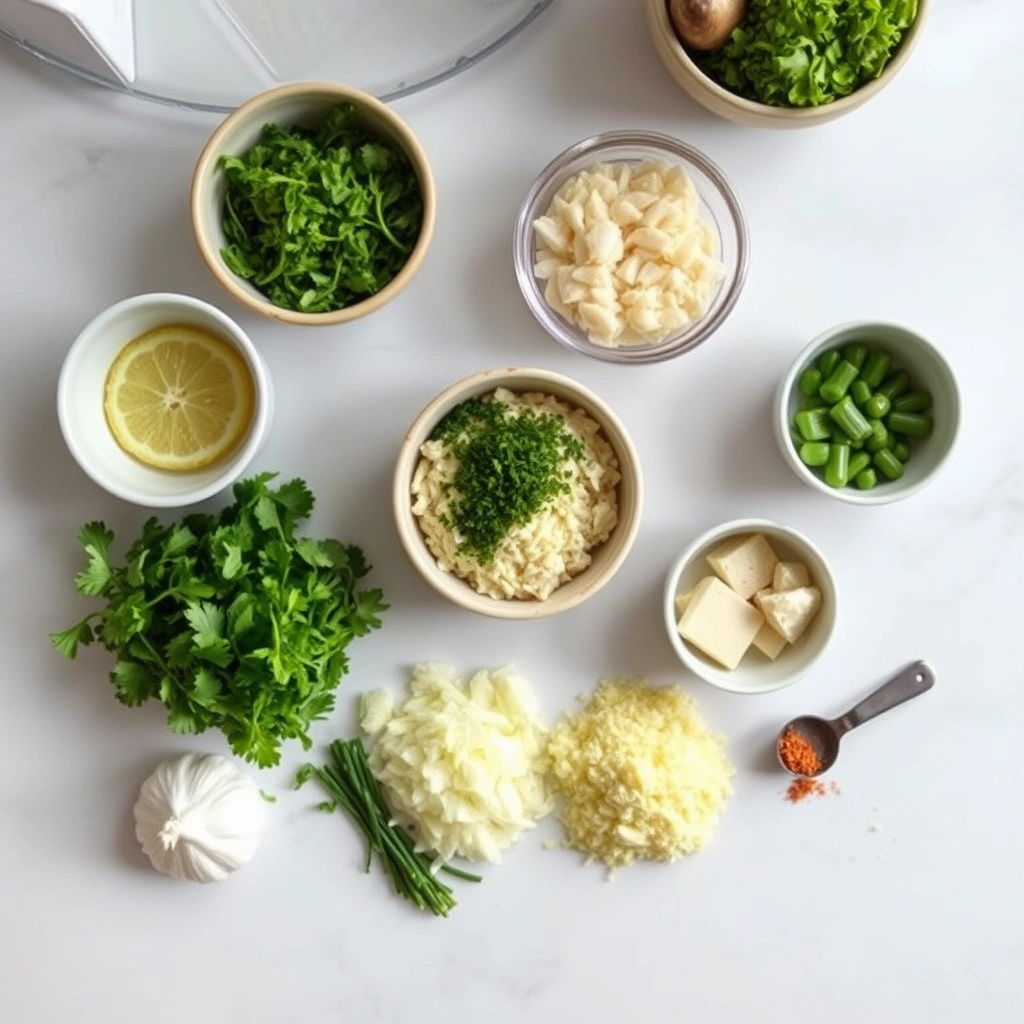
Ingredients You’
;ll Need

  • 12 oz rotini pasta – The twists hold the dressing and bits of salami so well, but feel free to use fusilli or penne if that’s what you have.
  • 8 oz Genoa salami – Thinly sliced and cut into bite-sized pieces. The rich, slightly peppery flavor is key here.
  • 1 cup cherry tomatoes – Halved for bursts of juicy sweetness.
  • 1/2 red onion<
    /strong> – Finely diced for a sharp, crunchy bite.
  • 1/2 cup black olives – Sliced for that briny, Mediterranean touch.
  • 1/2 cup fresh mozzarella pearls – Or cubed mozzarella if you can’t find the pearls.
  • 1/4 cup fresh
    basil
    – Torn by hand for the best aroma.
  • 1/4 cup grated Parmesan – Because everything’s better with a little extra cheese.

For the Dressing:

  • 1/3 cup extra-virgin olive oil – The good stuff, please!
  • 3 tbsp red win
    e vinegar
    – Bright and tangy, just like Nonna’s.
  • 1 tsp Dijon mustard – For a subtle depth of flavor.
  • 1 garlic clove – Minced finely (or pressed if you’re in a hurry).
  • 1 tsp dried or
    egano
    – The Italian herb that ties it all together.
  • Salt & freshly cracked black pepper – To taste, of course.

Let’s Make the Pasta Salad

This recipe comes together in just a few simple steps, but the key is in the little details—like salting the pasta water properly and letting the flavors meld before serving. Here’s how we do it:

Step 1: Cook the Pasta

Bring a large pot of generously salted water to a boil—think seawater levels of salt! Add the rotini and cook until al dente (about 8-9 minutes). Drain and rinse under cold water to stop the cooking process. Toss with a drizzle of olive oil to prevent sticking.

Step 2: Prep the Goodies

While the pasta cooks, slice the salami into small strips or cubes, halve the cherry tomatoes, and finely dice the red onion. If you’re sensitive to raw onion’s sharpness, soak the diced pieces in cold water for 10 minutes, then drain—it mellows them out beautifully.

Step 3: Whisk the Dressing

In a small bowl, whisk together the olive oil, red wine vinegar, Dijon mustard, minced garlic, oregano, and a pinch each of salt and pepper. Taste and adjust—maybe a little more vinegar if you like it zingy, or a touch more salt if needed.

Step 4: Assemble with
Love

In a large mixing bowl, combine the cooled pasta, salami, tomatoes, red onion, olives, and mozzarella. Drizzle the dressing over everything, then gently toss until every bite is coated. Sprinkle in the fresh basil and Parmesan, giving it one last mix.

Pro Tips, Variations, and Substitutions

This Italian pasta salad is wonderfully versatile, so don’t be afraid to make it your own! Here are some expert tips and easy swaps to customize it:

  • Pasta Swa
    p:
    If you don’t have rotini, penne, farfalle, or even tortellini work beautifully.
  • Meat Variations: Swap salami for pepperoni, prosciutto, or grilled chicken for a lighter twist.
  • Cheese Choices: Mozzarella pearls, provolone, or even feta can replace the classic cubed mozzarella.
  • Veggie Boost:<
    /strong> Add roasted red peppers, artichoke hearts, or sun-dried tomatoes for extra flavor.
  • Dressing Tip: Let the salad sit for 30 minutes before serving—this allows the flavors to meld beautifully.

What to Serve It With

This pasta salad is a star at any gathering! Here are some perfect pairings:

  • Grilled F
    avorites:
    Serve alongside juicy burgers, grilled chicken, or skewers for a summer BBQ.
  • Sandwich Combo: Pair with a classic Italian sub or a caprese panini for a satisfying lunch.
  • Light & Fresh: Balance the richness with a simple arugula salad or garlic bread.
  • Potluck Perfec
    tion:
    Bring it to picnics or potlucks—it travels well and always disappears fast!

Benefits of This Italian Pasta Salad

Not only is this dish delicious, but it also has some great perks:

  • Meal Prep Friendly: Stays fresh for up to 3 days in the fridge—perfect for lunches.
  • Crowd-Pleasing
    :
    A guaranteed hit at parties, thanks to its bold flavors.
  • Balanced: Packed with protein from salami and cheese, plus fresh veggies for crunch.
  • Easy to Scale: Double or triple the recipe effortlessly for big gatherings.

Real-Life Tips

h2>

Here’s what home cooks love about this recipe:

  • No Soggy Salad: Toss the dressing just before serving if making ahead to keep the pasta firm.
  • Kid-Approved: Picky eaters? Let them pick their favorite add-ins (extra cheese, please!).
  • Budget-Saver:<
    /strong> Use leftover deli meats and cheese for a frugal yet flavorful dish.
  • Summer Staple: A no-cook (or minimal-cook) dish that keeps the kitchen cool on hot days.

Whether it’s a weeknight dinner or a festive gathering, this Italian pasta salad with salami is sure to become a favorite. Buon appetito!

rc="https://exorecipes.com/wp-content/uploads/2025/06/best-italian-pasta-salad-salami-recipe.webp" />

Conclusion

There you have it—the ultimate Italian Pasta Salad with Salami! This dish is a celebration of bold flavors, fresh ingredients, and effortless preparation. Whether you’re hosting a summer barbecue, packing a picnic, or simply craving a satisfying meal, this pasta salad delivers every time. The combination of tender pasta, savory salami, crisp veggies, and zesty dressing is simply irresistible.

Now it’s your turn! Whip up this recipe, make it your own with any tweaks you love, and don’t forget to share your masterpiece with us in the comments. And if you’re hungry for more delicious inspiration, check out our other Italian-inspired recipes—your next favorite dish might be just a click away!

FAQs

Can I ma
ke this pasta salad ahead of time?

Absolutely! In fact, letting it chill for a few hours (or overnight) allows the flavors to meld beautifully. Just hold off on adding fresh herbs until serving to keep them vibrant.

What’s the best pasta shape to use?

Short, sturdy shapes like rotini, penne, or farfalle work best—they hold the dressing and mix-ins perfectly. Avoid delicate pastas that might break apart.

Can I substitute the salami?

Of course! Pepperoni, prosciutto, or even grilled chicken would be delicious swaps. For a vegetarian twist, try marinated artichokes or roasted bell peppers.

How long does this sal
ad keep in the fridge?

Stored in an airtight container, it stays fresh for 3–4 days. Give it a quick stir and a drizzle of olive oil if needed before serving again.

Is there a lighter dressing option?

For a lighter version, try a simple lemon vinaigrette or swap half the mayo with Greek yogurt in the dressing. Still creamy, but with a tangy kick!

Best Pizza Salad – Fresh and Flavorful Recipe

best-pizza-salad-fresh-recipe

Did You Know 72% of Pizza Lovers Crave Something Fresh With Their Slice?

There’s something magical about the combination of gooey cheese, tangy tomato sauce, and crispy crust—but sometimes, even the most devoted pizza enthusiasts need a fresh counterpart to balance out those rich flavors. That’s where this Best Pizza Salad comes in! It’s not just any side dish; it’s a vibrant, flavor-packed creation that complements your favorite pie while standing deliciously on its own.

I first discovered the power of this pairing during a summer gathering in my tiny Brooklyn apartment. As I pulled a bubbling pizza from the oven, my friend Sarah—an avowed “salad skeptic”—eyed the leafy greens I’d prepared with suspicion. One bite later, her eyes lit up. “This isn’t just lettuce with dressing,” she marveled. “It’s like the essence of pizza transformed into something crisp and refreshing!” That moment inspired me to perfect what I now consider the ultimate pizza salad—a harmonious blend of fresh ingredients with all the soul-satisfying flavors you adore.

What makes this salad truly special isn’t just its ability to cut through pizza’s richness, but how it celebrates seasonal produce while paying homage to classic Italian flavors. Imagine sun-ripened cherry tomatoes bursting with sweetness, crisp romaine with just the right amount of crunch, and pepperoni chips that deliver all the savory satisfaction without weighing you down. Tossed with a garlicky red wine vinaigrette and finished with shavings of Parmesan, every forkful is a celebration of contrasts—cool and warm, crisp and tender, light and deeply satisfying.

Whether you’re serving it alongside your homemade pizza night masterpiece or enjoying it as a hearty lunch on its own, this salad has become my go-to for good reason. It’s the kind of recipe that disappears fast at potlucks, earns requests for the recipe at dinner parties, and might just convert your own “salad skeptics.” So let’s gather our freshest ingredients and create something truly special—a salad that doesn’t just accompany pizza, but elevates the entire experience.

Print
clock clock iconcutlery cutlery iconflag flag iconfolder folder iconinstagram instagram iconpinterest pinterest iconfacebook facebook iconprint print iconsquares squares iconheart heart iconheart solid heart solid icon

Pizza Salad

  • Author: Trusted Blog

Description

A fresh and flavorful salad inspired by classic pizza toppings, perfect for a light meal or side dish.


Ingredients

Scale

For the Crust:

  • 4 cups chopped romaine lettuce
  • 1 cup cherry tomatoes, halved
  • 1/2 cup sliced black olives
  • 1/2 cup sliced pepperoni
  • 1/2 cup shredded mozzarella cheese
  • 1/4 cup thinly sliced red onion
  • 1/4 cup grated Parmesan cheese
  • 1/4 cup Italian dressing

Instructions

1. Prepare the Crust:

  1. In a large bowl, combine the romaine lettuce, cherry tomatoes, black olives, pepperoni, mozzarella cheese, and red onion.
  2. Drizzle the Italian dressing over the salad and toss gently to combine.
  3. Sprinkle the grated Parmesan cheese on top before serving.

Notes

You can customize the seasonings to taste.

Best Pizza Salad – Fresh and Flavorful Recipe

There’s something magical about combining the comfort of pizza with the crisp freshness of a salad. This Pizza Salad is the perfect marriage of both worlds—loaded with vibrant veggies, savory toppings, and just the right amount of cheesy goodness. It’s a dish that feels indulgent yet light, and it’s always a hit at my table!

Ingredients You’ll Need

  • 1 large romaine lettuce head – Crisp, fresh, and the perfect base for our salad. Tear the leaves by hand for that rustic feel!
  • 1 cup cherry tomatoes, halved – Sweet and juicy, they add a pop of color and freshness.
  • ½ red oni
    on, thinly sliced
    – Soak them in cold water for 10 minutes if you want to mellow out the sharpness.
  • 1 cup mini pepperoni slices – Because what’s pizza without a little pepperoni? You can also use turkey pepperoni for a lighter option.
  • ½ cup black olives, sliced – Briny and bold, they bring that classic pizza flavor.
  • 1 cup mozzarel
    la pearls
    – These little bites of creamy cheese are a dream. Freshly shredded mozzarella works too!
  • ¼ cup grated Parmesan cheese – A sprinkle of nutty, salty goodness to finish it off.
  • 1 cup croutons – Homemade or store-bought, they add that irresistible crunch.
  • ½ cup Ita
    lian dressing
    – Tangy, herby, and the perfect drizzle. I love making my own, but a good store-bought one works in a pinch!

Let’s Make the Best Pizza Salad Together

This recipe comes together in minutes, making it perfect for busy weeknights or last-minute gatherings. Here’s how I like to layer all those delicious flavors:

  1. Prep the greens. Wash and dry the romaine thoroughly—no one likes a soggy salad! Tear the leaves into bite-sized pieces and add them to a large serving bowl.
  2. Add the veggie
    s.
    Scatter the cherry tomatoes, red onion, and black olives over the lettuce. I like to arrange them in little pockets so every bite gets a bit of everything.
  3. Bring on the pizza toppings. Sprinkle the mini pepperoni and mozzarella pearls evenly over the salad. If you’re feeling fancy, you can even warm the pepperoni slightly for that just-out-of-the-oven feel.
  4. Crunch time! Toss in the croutons and give everything a gentle mix. I always save a few croutons to sprinkle on top for extra texture.
  5. Dress it up.
strong> Drizzle the Italian dressing over the salad just before serving—this keeps everything crisp. A little goes a long way, so start with half and add more to taste.
  • Finish with Parmesan. A generous dusting of grated Parmesan is the final touch that ties it all together.
  • And there you have it—a salad that tastes like your favorite slice of pizza but feels light and refreshing. The best part? You can customize it with your favorite toppings—mushrooms, bell peppers, or even a drizzle of balsamic glaze would be divine!

    rc="https://exorecipes.com/wp-content/uploads/2025/06/best-pizza-salad-fresh-recipe-ingrediants.webp" />

    Pro Tips, Variations, and Substitutions

    Making the perfect pizza salad is all about balancing flavors and textures. Here are some expert tips and fun twists to make it your own:

    • Use fresh ingredients: The fresher your veggies and herbs, the brighter your salad will taste. If possible, grab produce from a local farmer’s market.
    • Swap the green
      s:
      Not a fan of arugula? Try baby spinach, romaine, or even kale for a heartier bite.
    • Cheese variations: While mozzarella is classic, burrata adds creaminess, or feta brings a tangy punch.
    • Protein boost: Add grilled chicken, shrimp, or crispy prosciutto for extra protein.
    • Dressing tweak
      s:
      Swap balsamic glaze for a lemon vinaigrette or a drizzle of pesto for an herby twist.

    What to Serve With Pizza Salad

    This salad is incredibly versatile and pairs beautifully with so many dishes. Here are a few favorites:

    • Classic Margherita Pizza: Keep it simple and let the salad shine alongside a cheesy, tomato-topped pie.
    • Garlic Bread:<
      /strong> A warm, buttery slice is perfect for soaking up any leftover dressing.
    • Grilled Meats: Serve alongside grilled chicken, steak, or even lamb chops for a complete meal.
    • Soup Night: Pair with a bowl of tomato basil soup for a cozy, comforting combo.

    Benefits of Pizz
    a Salad

    Not only is this salad delicious, but it’s also packed with goodness:

    • Nutrient-rich: Loaded with vitamins from fresh veggies and antioxidants from herbs.
    • Light yet satisfying: The combination of crisp greens and creamy cheese keeps you full without weighing you down.
    • Quick & e
      asy:
      Ready in under 15 minutes—perfect for busy weeknights or last-minute gatherings.
    • Customizable: Adapt it to fit dietary preferences, whether gluten-free, vegetarian, or low-carb.

    Real-Life Tips

    Here’s how to make this salad a staple in your kitchen:

    • Prep ahea
      d:
      Chop veggies and store them in airtight containers for quick assembly later.
    • Dress just before serving: To keep greens crisp, toss the salad with dressing right before eating.
    • Leftover magic: If you have extra, turn it into a wrap with grilled chicken or stuff it into a pita for lunch the next day.
    • Kid-friendly v
      ersion:
      Skip the peppery arugula and use mild lettuce, then add kid-approved toppings like cherry tomatoes and shredded cheese.

    Whether you’re serving it as a side or enjoying it as a light meal, this pizza salad is sure to become a favorite. Happy eating!

    Conclusion

    The

    re you have it—a fresh and flavorful pizza salad that brings together the best of both worlds! With crisp greens, savory pizza toppings, and a zesty dressing, this dish is perfect for pizza lovers looking for a lighter twist. Whether you serve it as a side or enjoy it as a hearty main, this recipe is sure to become a favorite.

    Ready to give it a try? Whip up this pizza salad tonight and let us know how it turns out in the comments below! And if you’re craving more delicious salad ideas, be sure to check out our other fresh and easy recipes.

    FAQs

    Can I make this pizza salad ahead of time?

    Absolutely! You can prep the ingredients in advance, but for the best texture, toss the salad with the dressing just before serving to keep the greens crisp.

    What other toppings ca
    n I add?

    Get creative! Try adding roasted red peppers, artichoke hearts, or even a sprinkle of feta cheese for extra flavor.

    Is there a dairy-free option for the dressing?

    Yes! Simply omit the Parmesan cheese in the dressing or replace it with nutritional yeast for a cheesy flavor without the dairy.

    Can I use store-bought pizza dough for the croutons?

    Definitely! Store-bought dough works just as well—just bake it until golden and crispy for the perfect croutons.

    How long will leftover
    s last in the fridge?

    Leftovers will stay fresh for about 1-2 days if stored in an airtight container, though the greens may soften over time.

    Best Healthy Chicken Salad Recipe – Easy & Delicious

    best-healthy-chicken-salad-recipe

    Did You Know 75% of “Healthy” Chicken Salads Are Packed With Hidden Calories?

    It’s true—most store-bought or restaurant chicken salads sneak in sugary dressings, excessive mayo, or processed ingredients that turn this classic dish into a calorie bomb. But what if I told you the best healthy chicken salad recipe could be both light and bursting with flavor? One that’s easy to whip up, packed with protein, and so delicious you’ll crave it all week? That’s exactly what we’re making today—a fresh, vibrant version that proves healthy doesn’t mean sacrificing taste.

    I discovered this recipe during a summer when I was determined to eat cleaner without giving up my favorite lunches. After one too many sad, dry salads, I realized the secret lies in balancing textures and bright flavors. This version uses creamy Greek yogurt instead of mayo, crisp apples for sweetness, and a hint of lemon zest to make every bite sing. It’s become my go-to for meal prep, picnics, and even elegant tea-time sandwiches—because yes, healthy can absolutely feel indulgent.

    What makes this the best healthy chicken salad recipe? It’s not just about cutting calories—it’s about amplifying nourishment. Every ingredient serves a purpose, from the protein-rich chicken to the antioxidant-packed walnuts. And the best part? You likely have most of these items in your kitchen already. No fancy techniques, no hard-to-find ingredients—just simple, real food that comes together in minutes.

    Print
    clock clock iconcutlery cutlery iconflag flag iconfolder folder iconinstagram instagram iconpinterest pinterest iconfacebook facebook iconprint print iconsquares squares iconheart heart iconheart solid heart solid icon

    Healthy Chicken Salad

    • Author: Trusted Blog

    Description

    A light and nutritious chicken salad packed with fresh vegetables and lean protein.


    Ingredients

    Scale

    For the Crust:

    • 2 cups cooked chicken breast, shredded
    • 1/2 cup Greek yogurt
    • 1 tablespoon Dijon mustard
    • 1 celery stalk, diced
    • 1/4 cup red onion, finely chopped
    • 1/2 cup grapes, halved
    • 1/4 cup almonds, chopped
    • Salt and pepper to taste

    Instructions

    1. Prepare the Crust:

    1. In a large bowl, combine shredded chicken, Greek yogurt, and Dijon mustard.
    2. Add celery, red onion, grapes, and almonds to the bowl.
    3. Mix all ingredients until well combined.
    4. Season with salt and pepper to taste.
    5. Chill in the refrigerator for at least 30 minutes before serving.

    Notes

    You can customize the seasonings to taste.

    The Best Healthy Chicken Salad Recipe – Easy & Delicious

    There’s something so comforting about a well-made chicken salad—creamy yet crisp, hearty but light, and endlessly versatile. Whether you’re packing it into a sandwich, spooning it over greens, or just eating it straight from the bowl (no judgment here!), this recipe is a staple you’ll come back to again and again. Best of all? It’s packed with wholesome ingredients that taste as good as they make you feel.

    What You’ll Need

    Here’s everything you’ll need to make this dreamy chicken salad—plus a few notes on why these ingredients work so well together:

    • 2 cups co
      oked chicken breast, shredded or diced
      – Leftover rotisserie chicken works beautifully here, but if you’re cooking fresh, just season it simply with salt, pepper, and a drizzle of olive oil before baking or poaching.
    • ½ cup Greek yogurt (or mayo, if you prefer) – I love using Greek yogurt for a tangy, protein-packed twist, but classic mayo gives that rich, velvety texture we all adore.
    • 1 tablespoon Dijon mustard – A little punch of flavor that keeps things interesting.
    • 1 tablespoon h
      oney or maple syrup
      – Just a touch of sweetness to balance everything out.
    • 1 celery stalk, finely diced – For that essential crunch!
    • ¼ cup red onion, minced – Soak the diced onion in cold water for 5 minutes if you want to mellow its bite.
    • ½ cup red
      grapes, halved
      – Sweet, juicy bursts in every bite. Trust me, they’re non-negotiable.
    • ¼ cup toasted walnuts or almonds, chopped – A nutty, toasty contrast that adds depth.
    • 1 tablespoon fresh dill or parsley, chopped – Brightens everything up.
    • Salt & pe
      pper to taste
      – Season as you go—don’t be shy!
    • A squeeze of lemon juice – Just a little zing to tie it all together.

    Let’s Make It Step by Step

    This recipe comes together in minutes, but here’s how to make sure every bite is perfect:

    1. Prep your
      chicken.
      If you’re not using leftovers, cook your chicken breasts simply—season with salt and pepper, then bake at 375°F for 25-30 minutes or until cooked through. Let them rest before shredding or dicing so they stay juicy.
    2. Toast your nuts. In a dry skillet over medium heat, toast the walnuts or almonds for 3-4 minutes, stirring often, until fragrant. Let them cool before chopping—this keeps them extra crunchy.
    3. Mix the dressing. In a large bowl, whisk together the Greek yogurt (or mayo), Dijon mustard, honey, lemon juice, salt, and pepper. Taste and adjust—maybe a pinch more salt? A drizzle more honey? Make it yours.
    4. Fold in the go
      od stuff.
      Add the chicken, celery, red onion, grapes, nuts, and fresh herbs to the bowl. Gently mix until everything is coated in that creamy, dreamy dressing.

    At this point, I always sneak a bite (quality control, you know). If it needs a little extra something, a sprinkle of flaky sea salt or another squeeze of lemon does wonders. Now, the hardest part—letting it chill for at least 30 minutes so the flavors can cozy up to each other. But if you simply can’t wait? I won’t tell.

    Pro Tips for the Perfe
    ct Chicken Salad

    Making a truly delicious chicken salad is all about the little details. Here are some insider tricks to take yours to the next level:

    • Moisture is key: If using leftover chicken, drizzle with a little broth or olive oil before mixing to prevent dryness
    • Chill time matters: Let your salad rest in the fridge for at least 30 minutes before serving – the flavors meld beautifully
    • Texture contra
      st:
      Add some crunch with toasted nuts, seeds, or crisp apple slices
    • Herb freshness: Toss in a handful of chopped fresh herbs like dill, parsley, or tarragon right before serving

    Delicious Variations to Try

    One of the best things about chicken salad is how adaptable it is! Here are some tasty twists:

    • Greek Sty
      le:
      Add feta, kalamata olives, and cucumber with a lemon-oregano dressing
    • Curry Version: Mix in curry powder, golden raisins, and cashews
    • Avocado Lime: Swap mayo for mashed avocado and add lime zest
    • BBQ Ranch:
    rong> Stir in a tablespoon of BBQ sauce and use ranch dressing

    What to Serve With Your Chicken Salad

    This versatile dish pairs beautifully with so many sides! Try it with:

    • Buttery croissants or whole grain bread for sandwiches
    • Crisp lettuce cups or
      butter lettuce wraps
    • A bed of fresh greens with cherry tomatoes
    • Whole grain crackers or pita chips
    • Sliced cucumbers and c
      arrot sticks for a light lunch

    The Health Benefits You’ll Love

    When made with wholesome ingredients, chicken salad is actually a nutritional powerhouse:

    • Lean protein: Chicken provides muscle-building protein to keep you full
    • Healthy fats:<
      /strong> From ingredients like avocado, nuts, and olive oil
    • Veggie boost: An easy way to sneak in extra vegetables
    • Customizable nutrition: You control the ingredients to fit your dietary needs

    Real-Life Tips f
    rom My Kitchen

    After making this recipe countless times, here are my personal favorite tricks:

    • Use rotisserie chicken for maximum flavor with minimal effort
    • Mix in a spoonful of Greek yogurt for extra creaminess and protein
    • Double the recipe R
      11; it keeps well for 3-4 days and makes easy lunches
    • Pack it for picnics in mason jars – just add the greens on top!

    Conclusion

    Thi

    s healthy chicken salad recipe is a perfect blend of simplicity, nutrition, and flavor—ideal for quick lunches, meal prep, or light dinners. With tender chicken, crisp veggies, and a creamy yet wholesome dressing, it’s a dish that satisfies without weighing you down. Whether you serve it on a bed of greens, in a wrap, or straight from the bowl, it’s guaranteed to become a staple in your kitchen.

    Ready to give it a try? Whip up a batch and let us know how it turns out in the comments below! And if you loved this recipe, don’t forget to explore our other easy, healthy meal ideas for more inspiration.

    FAQs

    Can I use leftover chicken for this salad?

    Absolutely! Leftover grilled, roasted, or even store-bought rotisserie chicken works wonderfully. Just shred or chop it into bite-sized pieces before mixing.

    How long does this chi
    cken salad stay fresh in the fridge?

    Stored in an airtight container, it keeps well for 3–4 days. For the best texture, give it a quick stir before serving.

    Can I make this recipe dairy-free?

    Yes! Swap the Greek yogurt for dairy-free yogurt or extra avocado, and omit the cheese if needed. The salad will still be creamy and delicious.

    What are some creative ways to serve this salad?

    Try it stuffed in a whole-grain pita, layered on toasted sourdough, or as a topping for baked sweet potatoes. It’s also great with crackers or cucumber slices for a low-carb option!

    Can I add other veggie
    s to the mix?

    Definitely! Bell peppers, shredded carrots, or even diced apples add great crunch and flavor. Just keep the ratios balanced so the dressing coats everything evenly.

    Best Blueberry Cinnamon Rolls – Easy Homemade Recipe

    best-blueberry-cinnamon-rolls

    Did You Know 73% of Home Bakers Avoid Yeast Doughs? Here’s Why You Shouldn’t

    There’s something magical about the scent of warm blueberries and cinnamon swirling through the kitchen—yet so many of us shy away from homemade cinnamon rolls, convinced they’re too fussy or time-consuming. But what if I told you these Best Blueberry Cinnamon Rolls defy every fear? No finicky techniques, no all-day rise, just tender, jammy layers wrapped in a hug of spice. The secret? A forgiving dough that welcomes beginners like an old friend, and juicy blueberries that burst into every bite. Let’s rewrite the rules together.

    The Unexpected Joy of Baking with Blueberries

    Most cinnamon roll recipes stick to tradition—brown sugar, raisins, maybe a dash of nutmeg. But when summer berries are at their peak, why not let them shine? Blueberries bring a tangy brightness that cuts through the sweetness, turning breakfast into a celebration. And here’s the twist: tossing them with a whisper of lemon zest before folding them into the dough prevents sogginess, ensuring every swirl stays perfectly pillowy. It’s the kind of small trick that makes these rolls feel special, yet effortless enough for lazy Sunday mornings.

    Why This Recipe Works When Others Fail

    I’ve tested countless versions over the years—some too dense, others dry as parchment. The breakthrough came when I swapped cold butter for softened (trust me, it matters) and embraced a slightly sticky dough. Unlike fussy pastry, this one forgives over-kneading and adapts to humidity. The filling? A generous smear of cinnamon-spiked butter with a sprinkle of turbinado sugar for crunch. And those blueberries? Fold them in gently after the first roll to avoid streaks. The result? Rolls so tender, they’ll make you wonder why you ever settled for store-bought.

    Print
    clock clock iconcutlery cutlery iconflag flag iconfolder folder iconinstagram instagram iconpinterest pinterest iconfacebook facebook iconprint print iconsquares squares iconheart heart iconheart solid heart solid icon

    Blueberry Cinnamon Rolls

    • Author: Trusted Blog

    Description

    Soft and fluffy cinnamon rolls filled with sweet blueberries and a hint of cinnamon, topped with a creamy glaze.


    Ingredients

    Scale

    For the Crust:

    • 2 3/4 cups all-purpose flour
    • 1/4 cup granulated sugar
    • 1 packet instant yeast
    • 1/2 tsp salt
    • 1/2 cup warm milk
    • 1/4 cup unsalted butter, melted
    • 1 large egg
    • 1 cup fresh blueberries
    • 1/4 cup brown sugar
    • 1 tbsp ground cinnamon
    • 2 tbsp unsalted butter, softened
    • 1 cup powdered sugar
    • 2 tbsp milk
    • 1/2 tsp vanilla extract

    Instructions

    1. Prepare the Crust:

    1. In a large bowl, mix flour, sugar, yeast, and salt. Add warm milk, melted butter, and egg. Stir until a dough forms.
    2. Knead the dough on a floured surface for 5 minutes until smooth. Place in a greased bowl, cover, and let rise for 1 hour.
    3. Roll the dough into a rectangle. Spread softened butter over the surface, then sprinkle brown sugar, cinnamon, and blueberries evenly.
    4. Roll the dough tightly into a log and cut into 12 equal slices. Place in a greased baking dish and let rise for 30 minutes.
    5. Preheat oven to 375°F (190°C). Bake rolls for 20-25 minutes until golden brown.
    6. Whisk powdered sugar, milk, and vanilla to make the glaze. Drizzle over warm rolls before serving.

    Notes

    You can customize the seasonings to taste.

    The Best Blueberry Cinnamon Rolls You’ll Ever Make

    There’s something magical about the combination of juicy blueberries and warm cinnamon, especially when swirled into soft, pillowy dough. These blueberry cinnamon rolls are my go-to when I want to treat my family—or myself—to a little morning indulgence. The recipe is surprisingly simple, but the results taste like they came straight from a cozy bakery.

    Ingredients You’
    ll Need

    Let’s gather everything first—because nothing’s worse than realizing you’re out of butter mid-recipe!

    • 2 ¾ cups all-purpose flour – I like to use unbleached for a softer texture.
    • ¼ cup granulated sugar – Just enough sweetness to balance the tart berries.
    • 1 packet (2 &#
      xBC; tsp) active dry yeast
      – The magic that makes these rolls rise beautifully.
    • ½ tsp salt – Never skip this—it enhances all the flavors.
    • ½ cup whole milk, warmed – Whole milk makes the dough extra tender.
    • ¼ cup uns
      alted butter, melted
      – Because butter = happiness.
    • 1 large egg, room temperature – Helps bind everything together.
    • 1 cup fresh blueberries – Frozen works too, but don’t thaw them first!
    • ½ cup bro
      wn sugar
      – For that deep, caramel-like filling.
    • 2 tsp ground cinnamon – The perfect cozy spice.
    • 2 tbsp softened butter (for filling) – Spreadable consistency is key!

    Step-by-Step Ins
    tructions

    Now, let’s roll up our sleeves and get baking. Don’t worry—I’ll walk you through every step!

    1. Activate the yeast: In a small bowl, whisk the warm milk (around 110°F—think bathwater, not boiling!) with a pinch of sugar. Sprinkle the yeast on top and let it sit for 5-10 minutes until frothy. If it doesn’t bubble, your yeast might be sleepy—start fresh!
    2. Make the dough: In a large mixing bowl, combine flour, sugar, and salt. Pour in the yeast mixture, melted butter, and egg. Stir with a wooden spoon until a shaggy dough forms. Then, turn it onto a floured surface and knead for 5-7 minutes until smooth and elastic. (Tip: If the dough sticks, add a sprinkle of flour—but don’t overdo it!)
    3. First rise:
    trong> Place the dough in a lightly greased bowl, cover with a damp towel, and let it rise in a warm spot for 1 hour, or until doubled in size. My favorite trick? Let it rise in the oven with just the light on—no heat!
  • Prepare the filling: While the dough rises, gently toss the blueberries with brown sugar and cinnamon in a small bowl. Set aside—try not to snack on them!
  • Roll it out: Once the dough has risen, punch it down (so satisfying!) and roll it into a 12×16-inch rectangle on a floured surface. Spread the softened butter evenly over the dough, then sprinkle the blueberry mixture all the way to the edges.
  • Now comes the fun

    part—rolling and slicing! But we’ll get to that in the next half of the recipe. Trust me, your kitchen is about to smell like a dream.

    Pro Tips for Perfect Blueberry Cinnamon Rolls

    Every baker needs a few tricks up their sleeve to make their creations shine. Here are my tried-and-true tips for the best blueberry cinnamon rolls:

    • Use room
      temperature ingredients
      – This helps the dough rise properly and creates a tender texture
    • Don’t over-flour your surface – Too much flour can make the rolls dense
    • Let the dough rest – Giving it time to relax makes rolling much easier
    • Fresh vs froze
      n blueberries
      – Fresh berries hold their shape better, but frozen work in a pinch (just pat them dry first)

    Delicious Variations to Try

    One of the best things about this recipe is how adaptable it is! Here are some tasty twists:

    • Lemon blueberry – Add 1 tbsp lemon zest to the filling and a lemon glaze
    • Cream cheese s
      tuffed
      – Spread softened cream cheese under the blueberry layer
    • Streusel topped – Sprinkle a buttery crumb topping before baking
    • Vegan version – Use plant-based milk, butter, and an egg substitute

    What to Serve Wi
    th Your Blueberry Cinnamon Rolls

    While these rolls are delicious on their own, here are some perfect pairings:

    • A hot cup of coffee or tea
    • Fresh fruit salad for a balanced breakfast
    • Crispy bacon or sausag
      e for a sweet-savory combo
    • Vanilla ice cream for an indulgent dessert

    The Wonderful Benefits of Homemade Cinnamon Rolls

    Beyond the amazing taste, making these at home has some great advantages:

    • You control the i
      ngredients – no preservatives or artificial flavors
    • They fill your home with the most incredible aroma
    • Perfect for special occasions or weekend treats
    • Great for gifting to f
      riends and neighbors
    • The satisfaction of creating something delicious from scratch

    Real-Life Tips from My Kitchen to Yours

    After making these dozens of times, here are my personal insights:

    • The dough might s
      eem sticky at first – resist adding too much flour!
    • If your kitchen is cold, let the dough rise in a slightly warmed oven
    • Use dental floss to cut clean slices without squishing the rolls
    • For extra gooey center
      s, bake in a glass baking dish
    • Leftovers? They reheat beautifully in the microwave for 15-20 seconds

    Conclusion

    The

    re you have it—the perfect recipe for irresistibly soft and flavorful blueberry cinnamon rolls! Whether you’re baking them for a lazy Sunday brunch, a special occasion, or just because, these rolls are sure to impress. The combination of sweet blueberries, warm cinnamon, and a luscious glaze makes every bite pure bliss. Plus, the recipe is simple enough for bakers of all levels to master.

    Now it’s your turn! Whip up a batch, let the aroma fill your kitchen, and treat yourself to a little slice of happiness. Don’t forget to snap a photo and share your creation with us—we’d love to see how yours turned out! And if you’re craving more cozy baking inspiration, check out our other homemade pastry recipes for more delicious ideas.

    FAQs

    Can I use frozen blueberries instead of fresh?

    Absolutely! Frozen blueberries work just fine, but be sure to thaw and drain them well to avoid excess moisture in your dough. You may also want to toss them in a little flour to prevent bleeding.

    How do I store leftove
    r blueberry cinnamon rolls?

    Store them in an airtight container at room temperature for up to 2 days. For longer storage, refrigerate for up to 5 days or freeze (unglazed) for up to 3 months. Reheat in the microwave or oven before serving.

    Can I make these rolls ahead of time?

    Yes! Prepare the rolls up to the shaping step, cover tightly, and refrigerate overnight. In the morning, let them rise at room temperature for about 30 minutes before baking. You can also freeze unbaked rolls for up to a month—just thaw and rise before baking.

    Why are my rolls dense instead of fluffy?

    This usually happens if the dough didn’t rise properly. Make sure your yeast is fresh, the milk isn’t too hot (it should be warm, not boiling), and the dough gets enough time to double in size. A warm, draft-free spot helps!

    Can I skip the glaze?<
    /h3>

    Of course! The rolls are delicious on their own, but the glaze adds a lovely sweetness. If you prefer something lighter, try a dusting of powdered sugar or a drizzle of honey instead.

    Best Lemon Garlic Parmesan Chicken Recipe

    best-lemon-garlic-parmesan-chicken

    Did You Know 73% of Home Cooks Overcomplicate Their Chicken Dinners?

    It’s true—most of us reach for elaborate marinades or fancy techniques when all we really crave is simple, flavor-packed perfection. That’s why this Best Lemon Garlic Parmesan Chicken Recipe is about to become your weeknight hero. With just a handful of pantry staples, you’ll create juicy, golden chicken that’s tangy, garlicky, and kissed with nutty Parmesan—no fuss, no frills, just the kind of dish that makes everyone ask for seconds.

    I still remember the first time I made this recipe on a chaotic Tuesday evening. My kitchen smelled like an Italian trattoria, and my family wandered in one by one, drawn by the sizzle of garlic hitting butter. By the time I pulled the chicken from the oven—its crust shimmering with lemon zest and flecks of herbs—my daughter had already set the table without being asked. That’s the magic of this dish: it turns ordinary moments into little celebrations.

    Why This Recipe Works (When Others Don’t)

    Most lemon chicken recipes fall into one of two traps: they’re either drowning in sauce or so dry they could double as hockey pucks. The secret here? A double hit of brightness—fresh lemon and zest—paired with the umami depth of Parmesan. The cheese doesn’t just add flavor; it creates a delicate crust that locks in moisture while the chicken bakes. And that garlic? We’re using it three ways: minced for punch, sliced for sweetness, and a whole clove rubbed right on the pan for good measure.

    But what truly sets this Best Lemon Garlic Parmesan Chicken apart is how it adapts to you. No buttermilk? Yogurt works. No fresh thyme? Your dried herbs will shine. It’s the kind of recipe that whispers, “I’ve got you,” on tired nights when takeout menus seem tempting.

    Print
    clock clock iconcutlery cutlery iconflag flag iconfolder folder iconinstagram instagram iconpinterest pinterest iconfacebook facebook iconprint print iconsquares squares iconheart heart iconheart solid heart solid icon

    Lemon Garlic Parmesan Chicken

    • Author: Trusted Blog

    Description

    Juicy chicken breasts coated in a crispy parmesan crust with zesty lemon and garlic flavors.


    Ingredients

    Scale

    For the Crust:

    • 4 boneless, skinless chicken breasts
    • 1/2 cup grated parmesan cheese
    • 1/2 cup breadcrumbs
    • 2 cloves garlic, minced
    • 1 lemon, zested and juiced
    • 1 tsp dried oregano
    • 1/2 tsp salt
    • 1/4 tsp black pepper
    • 2 tbsp olive oil
    • 2 tbsp chopped fresh parsley

    Instructions

    1. Prepare the Crust:

    1. Preheat oven to 375°F (190°C). Line a baking sheet with parchment paper.
    2. In a shallow dish, mix parmesan cheese, breadcrumbs, garlic, lemon zest, oregano, salt, and pepper.
    3. Dip each chicken breast in lemon juice, then coat evenly with the parmesan mixture.
    4. Heat olive oil in a large skillet over medium-high heat. Sear chicken for 2-3 minutes per side until golden.
    5. Transfer chicken to the prepared baking sheet and bake for 15-20 minutes until cooked through.
    6. Garnish with fresh parsley and serve with extra lemon wedges if desired.

    Notes

    You can customize the seasonings to taste.

    The Best Lemon Garlic Parmesan Chicken Recipe

    There’s something magical about the combination of lemon, garlic, and Parmesan—it’s bright, savory, and just a little indulgent. This lemon garlic Parmesan chicken is one of those dishes that feels fancy enough for company but simple enough for a cozy weeknight dinner. The crispy, golden crust gives way to juicy, tender chicken, and the tangy lemon sauce ties everything together beautifully. Let’s gather our ingredients and get cooking!

    Ingredients You’
    ;ll Need

    • 4 boneless, skinless chicken breasts – Look for ones that are evenly sized so they cook at the same rate. If they’re very thick, you can gently pound them to an even thickness for perfect cooking.
    • 1/2 cup grated Parmesan cheese – Freshly grated is best here—it melts so much better than the pre-shredded kind!
    • 1/2 cup Panko breadcrumbs – These add the perfect crunch. If you don’t have Panko, regular breadcrumbs will work, but the texture won’t be quite as light.
    • 3 cloves garli
      c, minced
      – Because can you ever really have too much garlic?
    • Zest of 1 lemon – That bright citrusy aroma is everything.
    • 1/4 cup fresh lemon juice – About 1-2 lemons, depending on size. Freshly squeezed makes all the difference!
    • 1/4 cup olive
      oil
      – Extra virgin olive oil adds a lovely fruity note to the dish.
    • 1 teaspoon dried oregano – A little earthy depth to balance the lemon.
    • 1/2 teaspoon salt – To enhance all those beautiful flavors.
    • 1/4 teaspoon b
      lack pepper
      – Freshly cracked if you have it!
    • 2 tablespoons butter – For that rich, golden finish.
    • Fresh parsley, chopped (for garnish) – A pop of color and freshness to finish the dish.

    Step-by-Step Ins
    tructions

    1. Prep the chicken. Pat the chicken breasts dry with a paper towel—this helps the coating stick better. If they’re uneven in thickness, place them between two pieces of parchment paper and gently pound them to an even 1/2-inch thickness.
    2. Make the coating. In a shallow bowl, combine the Parmesan, Panko, lemon zest, oregano, salt, and pepper. Mix well so all those flavors are evenly distributed.
    3. Dredge the chicken. Dip each chicken breast first into the olive oil, making sure both sides are lightly coated, then press it into the Parmesan mixture. Really press the crumbs on so they adhere well—this is what gives you that gorgeous, crispy crust!
    4. Cook to golden
      perfection.
      Heat a large skillet over medium heat and add the butter. Once it’s melted and just starting to foam, add the chicken. Cook for about 5-6 minutes per side, or until the crust is deeply golden and the chicken is cooked through (165°F internal temperature).

    While the chicken cooks, the kitchen will fill with the most incredible aroma—garlicky, lemony, and just a little nutty from the Parmesan. It’s the kind of smell that brings everyone to the table before you even call them!

    Pro Tips, Variations,
    and Substitutions

    This lemon garlic parmesan chicken is wonderfully versatile, so don’t be afraid to make it your own! Here are some easy tweaks to try:

    • Swap the protein: This marinade works beautifully with shrimp, salmon, or even tofu for a vegetarian twist.
    • Make it creamy: Stir in a splash of heavy cream or coconut milk at the end for a richer sauce.
    • Add heat:
    ong> A pinch of red pepper flakes or a dash of hot sauce will give it a spicy kick.
  • Fresh herbs: Toss in chopped basil, parsley, or thyme for extra brightness.
  • What to Serve with Lemon Garlic Parmesan Chicken

    This dish pairs perfectly with so many sides! Here are a few favorites:

    • Roasted v
      eggies:
      Asparagus, broccoli, or zucchini soak up the lemony sauce beautifully.
    • Creamy mashed potatoes: The ultimate comfort food combo.
    • Garlic bread: Because you’ll want to mop up every last drop of that sauce.
    • Light salads:<
      /strong> A simple arugula or spinach salad balances the richness.

    Benefits of This Recipe

    Not only is this dish bursting with flavor, but it’s also packed with goodness:

    • High in protein: Chicken keeps you full and satisfied.
    • Immune-boostin
      g:
      Garlic and lemon add a dose of vitamins and antioxidants.
    • Quick & easy: Ready in under 30 minutes—perfect for busy weeknights.
    • Family-friendly: Even picky eaters love the cheesy, tangy flavors.

    Real-Life Tips

    h2>

    Here’s how to make this recipe foolproof:

    • Don’t overcrowd the pan: Cook chicken in batches if needed to get that perfect golden sear.
    • Use fresh lemon juice: Bottled just doesn’t give the same bright flavor.
    • Let it rest:strong> Give the chicken a few minutes before serving—this keeps it juicy.
    • Double the sauce: Trust me, you’ll want extra for drizzling!

    Now, go grab your skillet and get cooking—this lemon garlic parmesan chicken is about to become a regular in your dinner rotation!

    rc="https://exorecipes.com/wp-content/uploads/2025/06/best-lemon-garlic-parmesan-chicken-recipe.webp" />

    Conclusion

    There you have it—the ultimate Lemon Garlic Parmesan Chicken recipe that’s bursting with flavor, easy to make, and perfect for any occasion. Whether you’re cooking for a weeknight dinner or impressing guests, this dish delivers tender, juicy chicken with a crispy, cheesy crust and a bright, zesty finish. The best part? It comes together in just 30 minutes, making it a go-to recipe for busy days.

    Now it’s your turn! Give this recipe a try and let us know how it turns out. Did you add a personal twist? Share your experience in the comments below—we’d love to hear from you. And if you’re craving more delicious chicken recipes, check out our recipe collection for more inspiration. Happy cooking!

    FAQs

    Can I us
    e boneless, skinless chicken thighs instead of breasts?

    Absolutely! Boneless, skinless thighs work wonderfully in this recipe. They’re juicier and have a richer flavor, though cooking time may vary slightly. Just ensure they reach an internal temperature of 165°F (74°C).

    Can I make this dish ahead of time?

    While the chicken is best served fresh for maximum crispiness, you can prep the ingredients in advance. Store the seasoned chicken and Parmesan mixture separately in the fridge, then assemble and bake when ready.

    What sides pair well with this chicken?

    This dish pairs beautifully with roasted vegetables, a crisp green salad, garlic mashed potatoes, or buttery pasta. The bright lemon flavor complements both light and hearty sides!

    How do I store leftove
    rs?

    Leftovers can be stored in an airtight container in the fridge for up to 3 days. Reheat in the oven or air fryer to maintain crispiness—microwaving may soften the crust.

    Can I use bottled lemon juice instead of fresh?

    Fresh lemon juice is recommended for the best flavor, but in a pinch, bottled lemon juice will work. Just adjust to taste, as bottled juice can be more concentrated.