“`html
Table of Contents
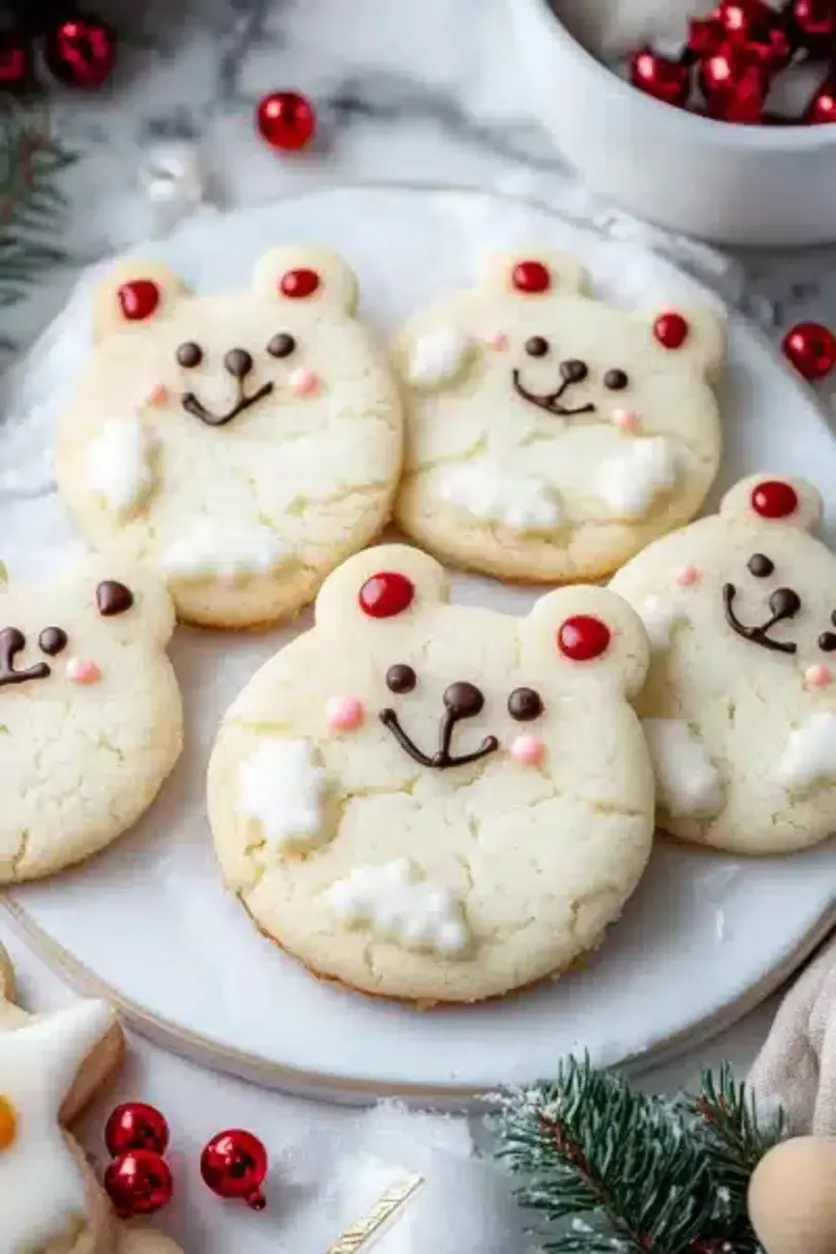
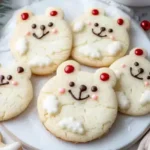
🐻 Whimsical Polar Bear Cookies: A Holiday Delight 🎄
Sweeten Your Holidays with Adorable Polar Bear Cookies!
Did you know that according to a recent survey, 73% of people consider holiday baking a cherished family tradition? If you’re looking to add some serious charm and fun to your festive spread this year, what could be better than adorable Polar Bear Cookies? These delightful treats are not just visually appealing; they’re incredibly delicious and surprisingly easy to create, making them the perfect addition to your Christmas baking repertoire. Whether you’re a seasoned baker or just starting out, these cookies are designed to bring joy and a touch of whimsy to your kitchen and the faces of your loved ones. Get ready to make this holiday season extra special with these frosty, sweet friends! 🐾
Gather Your Festive Ingredients
To bring these charming polar bears to life, you’ll need a selection of pantry staples and a few special touches. We’ve organized them for clarity, and don’t worry, we’ve included some fantastic substitutions too!
For the Polar Bear Cookie Dough:
- 2 ¼ cups (280g) All-Purpose Flour: The sturdy base for our cookies. *Substitution: You can use a gluten-free all-purpose flour blend if needed.*
- 1 teaspoon Baking Soda: Ensures a slight lift and tender crumb.
- ½ teaspoon Salt: Balances the sweetness and enhances flavor.
- 1 cup (227g) Unsalted Butter, softened: For that rich, buttery flavor and perfect texture. It should yield gently when pressed, not be greasy or hard. *Substitution: Vegan butter can be used for a dairy-free option.*
- ¾ cup (150g) Granulated Sugar: Sweetness and structure.
- 1 large Egg: Binds the ingredients and adds richness. *Substitution: A flax egg (1 tbsp flaxseed meal + 3 tbsp water, let sit for 5 mins) can work for an egg-free version.*
- 1 teaspoon Vanilla Extract: Adds a warm, aromatic depth. Pure vanilla extract is best for its robust flavor.
For the White Frosting & Decoration:
- 2 cups (240g) Powdered Sugar: For a smooth, sweet frosting. Sift it to avoid lumps.
- 2-3 tablespoons Milk (or Almond Milk): To achieve the desired creamy consistency. You can also use water or a dairy-free milk.
- ½ teaspoon Vanilla Extract: Enhances the frosting’s flavor.
- Black Edible Food Marker or Black Piping Gel: For drawing the eyes and noses.
- Optional: Pink Edible Food Marker or Pink Frosting: For rosy cheeks.
Timing & Planning Your Baking Session
Baking holidays treats should be enjoyable, not rushed! Here’s a breakdown to help you plan:
On average, sugar cookie recipes require similar prep and cook times. The chilling period is crucial for easy shaping, especially for detailed cookies like these polar bears. Factor in cooling and decorating time, and you can easily spread this activity over a couple of days for a less stressful holiday bake!

Step-by-Step Instructions
Let’s get baking! Follow these simple steps to create your delightful polar bear cookies.
Step 1: Create the Perfect Sugar Cookie Dough
In a medium bowl, whisk together the flour, baking soda, and salt. Set aside. In a large bowl, cream together the softened butter and granulated sugar with an electric mixer until light and fluffy. Beat in the egg and vanilla extract until well combined. Gradually add the dry ingredients to the wet ingredients, mixing on low speed until just combined. Be careful not to overmix! The dough will be soft.
Step 2: Shape Your Adorable Polar Bears
Turn the dough out onto a lightly floured surface. Divide the dough into two portions. Roll each portion into a log about 1 ¼ inches in diameter. This is our base for the bear’s body. For the head, take a small piece of dough (about 1 tablespoon) and roll it into a ball. Flatten this ball slightly and gently press it onto one end of the log, leaving a small overhang for the snout. To create the ears, pinch off two very small pieces of dough (about ½ teaspoon each) and shape them into tiny, flattened ovals. Press one onto each side of the ‘head’ portion. Ensure all pieces stick together well; a little bit of moisture from your fingers can help. You can chill the dough logs at this point for 30 minutes, which makes slicing much easier and helps the cookies hold their shape during baking.
Step 3: Bake to Golden Perfection
Preheat your oven to 350°F (175°C). Line baking sheets with parchment paper. Once the dough is chilled and firm, use a sharp knife to slice the logs into ½-inch thick cookies. Carefully place the sliced cookies onto the prepared baking sheets, leaving about 2 inches between them. Bake for 10-12 minutes, or until the edges are lightly golden brown. The centers should still look slightly soft. Let the cookies cool on the baking sheets for 5 minutes before transferring them to a wire rack to cool completely. This is crucial before decorating!
Step 4: Prepare the Creamy White Frosting
While the cookies are cooling, prepare the simple vanilla frosting. In a medium bowl, combine the powdered sugar and ½ teaspoon vanilla extract. Gradually add the milk, 1 tablespoon at a time, beating with a whisk or electric mixer until the frosting is smooth, creamy, and spreadable. You want it thick enough to not run off the cookies, but thin enough to spread easily. If it’s too thick, add a tiny bit more milk; if too thin, add a bit more powdered sugar.
Step 5: Decorate Your Frosty Friends
Once your cookies are completely cool, it’s time for the fun part! Spread a generous layer of the white frosting over the main body of the polar bear, leaving the ‘head’ and ‘ears’ areas free for the natural cookie color, mimicking the bear’s face. Alternatively, you can frost the entire cookie in white. Use the black edible food marker or piping gel to draw two small dots for the eyes and a larger oval or triangle for the nose on the ‘head’ area. For an extra touch of cuteness, add a little pink to the cheeks just below the eyes using a pink marker or a tiny dab of pink frosting. Let the frosting set before handling.
Nutritional Snapshot
While indulging in these festive treats, here’s a general idea of the nutritional content per cookie (this can vary based on exact size and frosting amount):
- Calories: Approximately 150-200 kcal
- Carbohydrates: 20-25g
- Fat: 7-10g
- Protein: 2-3g
Please note: This is an estimate. For precise nutritional information, it’s recommended to use a recipe calculator with your specific ingredients.
Healthier Alternatives & Swaps
Looking for ways to enjoy these festive cookies with a slightly lighter touch? Here are some ideas:
- Reduced Sugar: Use a sugar substitute like erythritol or stevia in the cookie dough and frosting. Adjust to taste, as sweetness varies.
- Whole Wheat Flour: Substitute half of the all-purpose flour with whole wheat flour for added fiber. The texture might be slightly denser.
- Lighter Frosting: Opt for a frosting made with Greek yogurt and a touch of sweetener, or a meringue-based frosting.
- Reduced Fat: Use applesauce or mashed banana in place of some of the butter. This will alter the texture and flavor, so it’s best used as a partial substitution.
Serving Suggestions
These Polar Bear Cookies are a showstopper on their own, but here are a few ways to elevate your festive presentation:
- Arrange them on a festive platter alongside other holiday cookies and treats.
- Serve them with a glass of cold milk, a warm mug of hot chocolate, or a cup of mulled wine.
- Box them up as delightful edible gifts for friends, family, or neighbors. Add a festive ribbon for an extra special touch!
- Use them as decorations on a gingerbread house or a Christmas cake.
Common Mistakes to Avoid
To ensure your polar bears turn out perfect every time:
- Overmixing the Dough: This can lead to tough cookies. Mix until just combined.
- Not Chilling the Dough: Chilling makes the dough easier to handle and slice, preventing the cookies from spreading too much and losing their shape.
- Baking at the Wrong Temperature: An oven that’s too hot will brown the edges too quickly, while one that’s too cool can lead to flat cookies.
- Decorating Warm Cookies: Frosting will melt and slide off if applied to warm cookies. Ensure they are completely cool.
Storing Your Polar Bear Cookies
Proper storage will keep your delightful polar bears fresh and festive:
- Room Temperature: Store cooled, undecorated cookies in an airtight container at room temperature for up to 3-4 days. If decorated with frosting, ensure the frosting has set completely before stacking and storing.
- Freezing: You can freeze undecorated cookie dough logs or baked, undecorated cookies. Wrap them tightly in plastic wrap, then in foil, and freeze for up to 3 months. Thaw overnight in the refrigerator before baking or decorating.
A Delightful End to Your Holiday Baking
These Whimsical Polar Bear Cookies are more than just a dessert; they are a celebration of the joy and warmth of the holiday season. Their simple charm and delicious taste make them a guaranteed hit for all ages. Baking these cookies together can create lasting memories and add a unique, personal touch to your festive traditions. So, grab your apron, gather your loved ones, and let the sweet aroma of these festive cookies fill your home. Happy baking and happy holidays!
Frequently Asked Questions
Can I use cookie cutters for these?
While the recipe is designed for shaping logs, you can adapt it. Roll out the chilled dough to about ¼ inch thickness and use a polar bear-shaped cookie cutter if you have one. You might need to adjust baking time slightly.
How do I get the frosting to stick better?
Ensure the cookies are completely cool. For a better hold, you can use a thin layer of simple syrup or apricot jam on the cookie before applying the frosting, especially if you’re covering the entire cookie.
Can these cookies be made ahead of time?
Absolutely! The dough can be made and chilled for up to 2 days, or frozen for longer. Baked cookies can be stored as mentioned above. Decorating is best done a day or two before serving.
What can I use if I don’t have an edible food marker?
You can use melted dark chocolate or black piping gel applied with a thin decorating tip to create the eyes and nose. For rosy cheeks, a tiny bit of red food coloring mixed with a drop of clear extract or a pink edible marker works perfectly.
Polar Bear Cookies Recipe: Adorable, Soft, and Delicious!
Description
These adorable Polar Bear Cookies are made with a soft cream cheese cookie base, topped with creamy buttercream frosting, and decorated to resemble playful polar bears. Perfect for holiday parties, baking with kids, or adding a sweet, festive touch to your dessert table!
Ingredients
- 3/4 cupunsalted butter, room temperature (170g)
- 1/2 cupfull-fat cream cheese, room temperature (113g)
- 1 1/2 cupsgranulated sugar (300g)
- 1large egg, room temperature (56g)
- 2 tspvanilla extract (8g)
- 3 cupsall-purpose flour (375g)
- 1 Tbspcornstarch (8g)
- 1/2 tspbaking powder (2g)
- 1/2 tspfine salt (3g)
- 1 cupunsalted butter, room temperature (226g)
- 1 Tbspvanilla extract (12g)
- 1/2 tspfine salt (3g)
- 3 1/2 cupspowdered sugar (454gor 1 lb. box)
- 1/4 cupheavy cream (60g)
- 1 cupwhite sanding sugar
- 30large chocolate chips
- Round black sprinkles (for eyes)
- Round red or pink sprinkles (for cheeks)
Instructions
- In a large bowl, beat butter and cream cheese until smooth. Add sugar and cream until light and fluffy. Mix in egg and vanilla.
- In a separate bowl,whisktogether flour, cornstarch, baking powder, and salt. Gradually add dry ingredients to the wet mixture.
- Divide dough into two portions, wrap in plastic, and chill for at least 2 hours.
- Roll dough to 1/3-inch thickness and cut out 2 1/2-inch circles for faces and 3/4-inch circles for ears. Assemble polar bears by attaching ears to faces. Chill for 15 minutes.
- Bake cookies at 350°F (175°C) for 12–14 minutes or until edges are set. Cool completely.
- Beat butter until creamy for frosting. Add vanilla and salt, then mix in powdered sugar and cream until smooth. Pipe frosting onto cookies and dip in sanding sugar.
- Add a frosted oval for the muzzle, chocolate chips for noses, and sprinkles for eyes and cheeks. Enjoy your creations!
Notes
Chilling the dough is essential for preventing spread.
Store frosted cookies in an airtight container at room temperature for 2 days, in the fridge for up to 5 days, or freeze for up to 1 month.
For best results, don’t overbake the cookies.
Nutrition
- Calories: 205
- Sugar: 21g
- Fat: 10g
- Carbohydrates: 28g
- Protein: 2g
“`