Table of Contents
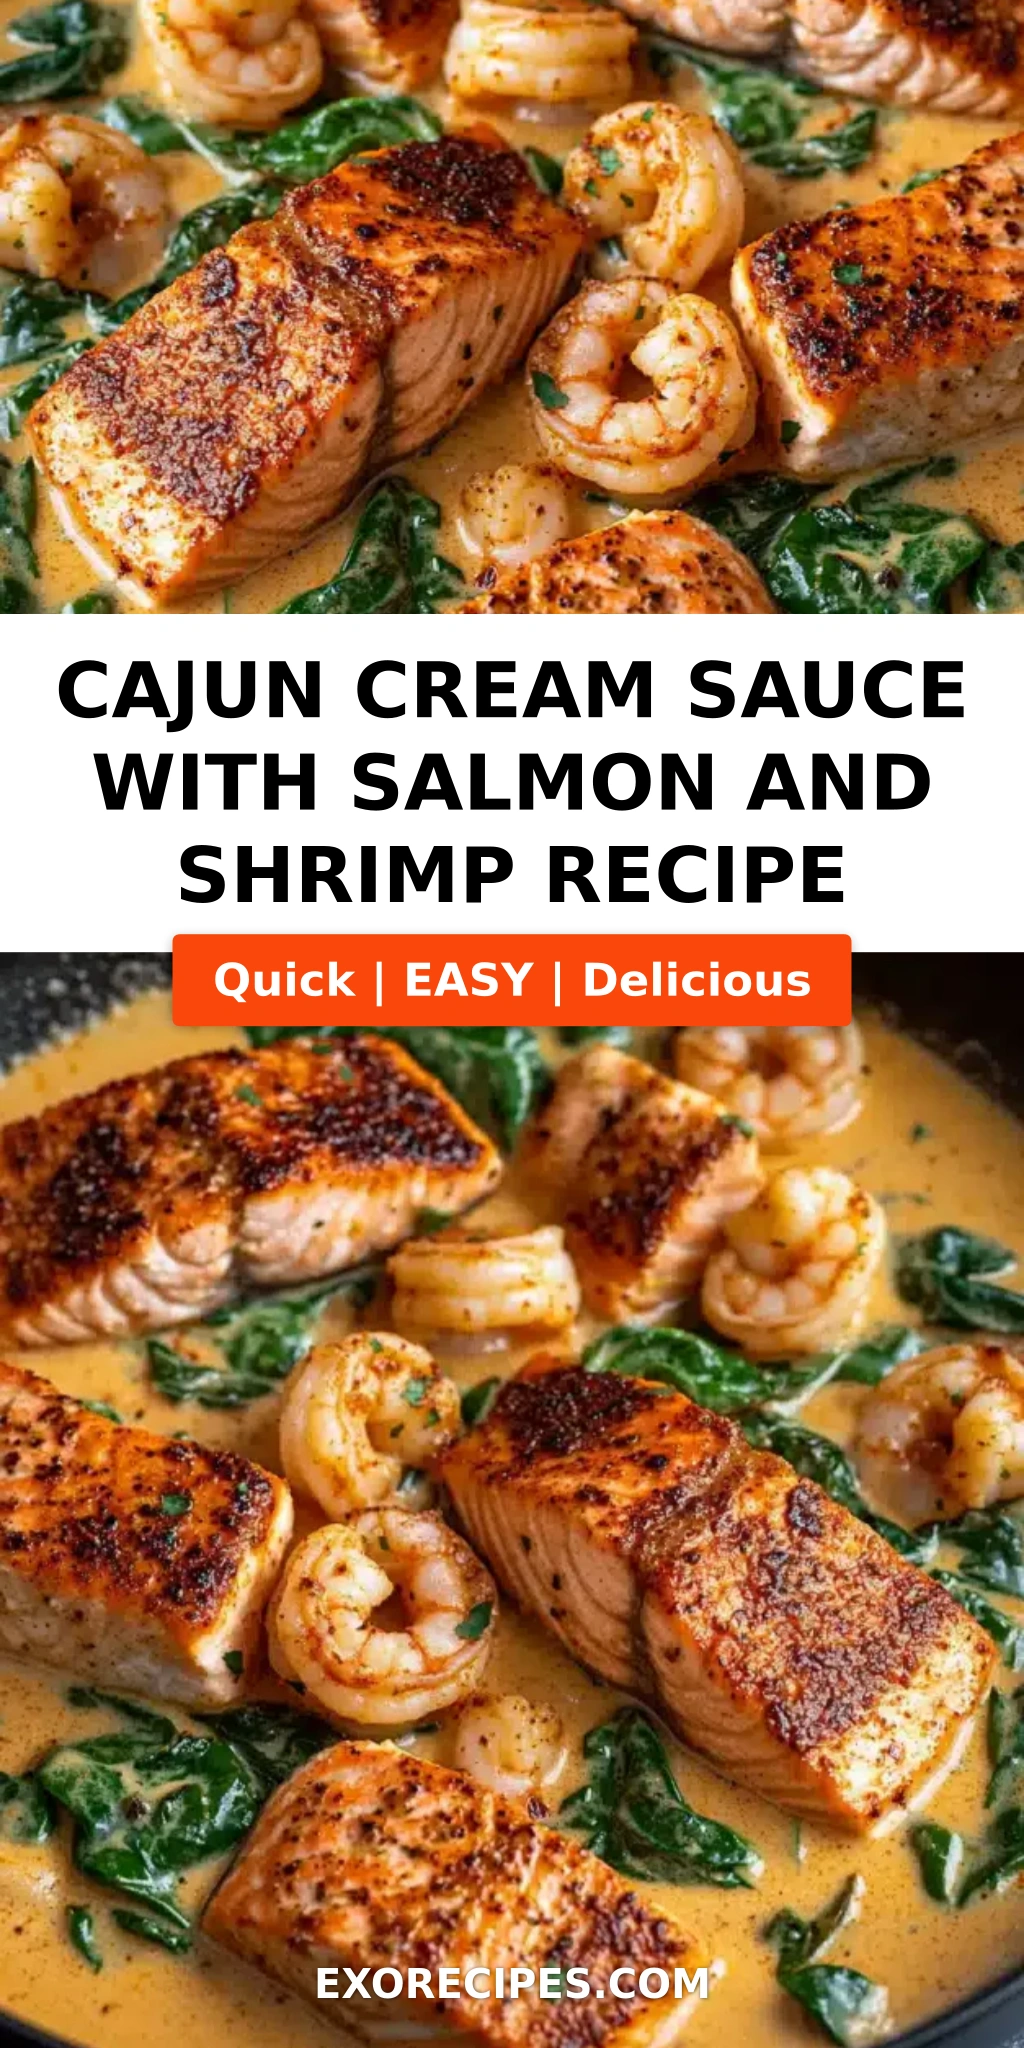
Cajun Cream Sauce with Salmon and Shrimp – A Flavorful Seafood Delight
I still remember the first time I made this Cajun cream sauce with salmon and shrimp. It was a chilly evening in my tiny New York City apartment, and I was craving the bold, smoky heat of my mother’s Moroccan chermoula but wanted something creamier, more indulgent. That night, I reached for my bottle of Cajun seasoning—a gift from a friend who’d just come back from New Orleans—and I knew I had to marry its earthy kick with the silky French cream sauces I’d mastered at Le Cordon Bleu in Paris. The result? A luxurious, one-skillet dinner that’s become my go-to for impressing guests or treating myself after a long week. This Cajun cream sauce salmon shrimp recipe is everything I love about cooking: it’s fast, forgiving, and full of love.
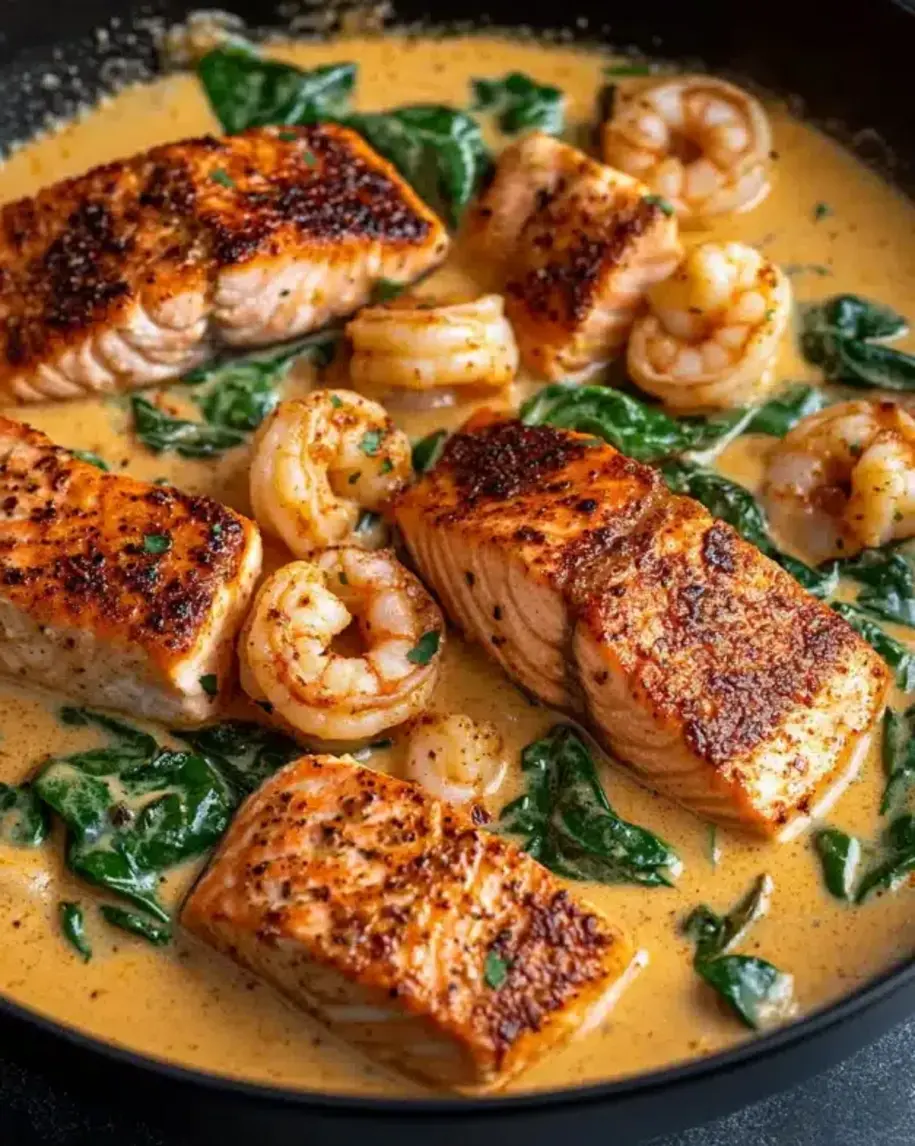
Picture this: perfectly seared salmon fillets with a golden, crispy crust, tender pink shrimp, all swimming in a velvety cream sauce kissed with paprika, garlic, and a whisper of cayenne. The sauce clings to every bite, carrying the deep umami of Parmesan and the bright tang of tomato paste. The aroma alone—smoky, buttery, slightly spicy—will fill your kitchen and make everyone wander in asking, “What’s for dinner?” It’s comfort food with a kick, the kind of dish that makes you slow down and savor every spoonful.
What sets my version apart? I don’t just dump everything into the pan. First, I sear the salmon and shrimp separately to build deep caramelized flavor. Then I deglaze with broth and cream, scraping up all those tasty browned bits—a classic French technique I learned in Paris. The sauce comes together in minutes, but it tastes like it simmered for hours. I’ll share my pro tip to keep the cream from curdling, and the number-one mistake home cooks make when cooking seafood in a creamy sauce. Trust me, once you try this easy Cajun seafood dinner, you’ll never go back to plain old salmon again.
Why This Cajun Cream Sauce with Salmon and Shrimp Recipe Is the Best
The Flavor Secret – Growing up in Morocco, I learned that a great spice blend can transform simple ingredients. Cajun seasoning is my adopted treasure: it’s smoky, garlicky, and just peppery enough. I pair it with the French technique of “fond” – the browned bits left in the pan after searing. Those bits hold concentrated flavor that the cream sauce soaks up, giving it layers of depth you can’t get from just sprinkling spices into liquid. This is the magic behind the best Cajun salmon shrimp recipe you’ll find.
Perfected Texture – Many recipes end up with overcooked, rubbery seafood or a separated, greasy sauce. Not here. I cook the salmon and shrimp in stages, then return them to the finished sauce just long enough to reheat. The result is flaky salmon that melts in your mouth and shrimp that still have a satisfying snap. The heavy cream, when added after the pan has cooled slightly, stays smooth and luscious. Every forkful is a study in contrasts: crisp edges, tender interiors, and a blanket of creamy richness.
Foolproof & Fast – This dish goes from your fridge to the table in 35 minutes flat. I’ve streamlined the steps so that even a beginner cook can nail it on the first try. I’ve tested it with frozen seafood, different cream substitutes, and even dairy-free options—and it works every time. That’s why I call it my “busy weeknight showstopper.” You don’t need a culinary degree to make this creamy Cajun seafood pasta. You just need a skillet and a little confidence.
Cajun Cream Sauce with Salmon and Shrimp Ingredients
I love sourcing my seafood from the Union Square greenmarket in NYC, but good-quality supermarket fish works perfectly too. When I was in Paris, I learned to always ask my fishmonger for the freshest catch of the day. Here, I do the same—look for vibrant color and a clean, briny smell. The rest of the ingredients are pantry staples I keep on hand for quick, impressive dinners. Let’s gather everything.
Ingredients List
- 1 lb salmon fillet, skinless, cut into 4 portions
- 1 lb large shrimp, peeled and deveined
- 2 tbsp olive oil
- 1 tbsp Cajun seasoning
- Salt and black pepper to taste
- 3 cloves garlic, minced
- 1 cup heavy cream
- 1/2 cup chicken broth
- 1/2 cup grated Parmesan cheese
- 1 tbsp tomato paste
- 1 tsp paprika
- 1/2 tsp cayenne pepper (optional, for extra heat)
- 2 tbsp unsalted butter
- Fresh parsley, chopped (for garnish)
Ingredient Spotlight
Salmon – I prefer skinless fillets cut into equal portions so they cook evenly. Look for wild-caught if possible—it has a firmer texture and richer flavor. If you can only find skin-on, just remove the skin before cooking or sear skin-side down first and then peel it off. Substitution: boneless chicken thighs (adjust cooking time).
Shrimp – Large shrimp (16–20 count per pound) are easiest to handle. Peel and devein them yourself or buy prepped. Avoid “extra-colossal” because they take longer to cook and might overwhelm the sauce. Substitution: scallops (cut in half if large).
Cajun Seasoning – Store-bought is fine (I like Tony Chachere’s or Zatarain’s), but you can make your own by mixing paprika, garlic powder, onion powder, oregano, thyme, cayenne, and black pepper. The key is a balance of heat and herbaceousness. Substitution: blackened seasoning or a mix of smoked paprika + celery salt + garlic powder.
Heavy Cream – This gives the sauce its luxurious body. For a lighter version, half-and-half works but won’t be as thick (see FAQ below). Avoid milk—it will curdle under heat. Substitution: full-fat coconut milk for dairy-free.
Parmesan Cheese – Use freshly grated Parmigiano-Reggiano for the best melt and flavor. Pre-shredded cheese contains anti-caking agents that can make the sauce grainy. Substitution: Pecorino Romano (saltier) or nutritional yeast for dairy-free.
| Original Ingredient | Best Substitution | Flavor / Texture Impact |
|---|---|---|
| Salmon fillet | Boneless chicken thighs | Less rich, but holds up well in sauce |
| Shrimp | Scallops (bay or sea) | Sweeter, more delicate; cook faster |
| Cajun seasoning | Homemade blend (paprika + garlic + cayenne) | Control heat level; more complex if you toast spices |
| Heavy cream | Half-and-half + 1 tbsp butter | Lighter but still creamy; sauce may be thinner |
| Parmesan cheese | Pecorino Romano or nutritional yeast | Saltier or nutty; yeast adds “cheesy” flavor |
How to Make Cajun Cream Sauce with Salmon and Shrimp – Step-by-Step
Making this dish is easier than you think. I’ve broken it into clear, manageable steps. As a chef, I want you to feel confident and enjoy the process. Let’s get started!
Step 1: Sear the Salmon
Pat the salmon fillets dry with paper towels. Season both sides with half the Cajun seasoning, salt, and black pepper. Heat 1 tablespoon of olive oil in a large skillet over medium-high heat until shimmering. Carefully place the salmon flesh-side down (if using skinless) and cook without moving for 3–4 minutes, until the bottom is deep golden brown. Flip and cook another 2–3 minutes for medium doneness. Transfer to a plate.
💡 mia’s Pro Tip: To get that perfect crust, make sure your salmon is very dry before seasoning. Moisture is the enemy of browning. Also, don’t overcrowd the pan – cook in batches if needed.
Step 2: Cook the Shrimp
In the same skillet, add the remaining 1 tablespoon olive oil if needed. Add the shrimp in a single layer. Cook for 1–2 minutes per side until pink and slightly curled. They should feel firm to the touch. Remove and set aside with the salmon.
⚠️ Common Mistake to Avoid: Overcooking shrimp! They only need a couple of minutes. As soon as they turn pink and just start to curl, take them out. They will finish heating in the sauce later.
Step 3: Sauté Aromatics
Reduce heat to medium. Add the 2 tablespoons of butter to the skillet. Once melted, add the minced garlic and sauté for about 1 minute until fragrant but not brown. Stir in the tomato paste, paprika, remaining Cajun seasoning, and cayenne (if using). Cook for 30 seconds, stirring constantly. This blooms the spices and deepens the flavor.
💡 mia’s Pro Tip: Cooking the tomato paste for a short time removes its raw, tinny taste and adds a concentrated sweetness that balances the heat. Don’t skip this step!
Step 4: Build the Sauce
Pour in the chicken broth and scrape up any browned bits from the bottom of the skillet with a wooden spoon. This is called deglazing and it’s the secret to a flavorful sauce. Let it simmer for 1 minute, then add the heavy cream. Stir and bring to a gentle simmer. Add the grated Parmesan cheese and stir until melted and the sauce thickens slightly, about 2–3 minutes. Taste and adjust salt and pepper.
⚠️ Common Mistake to Avoid: Boiling the cream too hard can cause it to curdle or separate. Keep the heat at medium-low to low once you add the cream. Gentle bubbles, not a rolling boil.
Step 5: Combine and Simmer
Return the salmon and shrimp to the skillet, nestling them into the sauce. Spoon some sauce over the tops. Let them simmer together on low heat for 1–2 minutes, just enough to reheat everything without overcooking the seafood. Garnish with fresh parsley and serve immediately.
💡 mia’s Pro Tip: If the sauce seems too thick, thin it with a splash of broth or water. If it’s too thin, let it simmer uncovered a minute or two longer. The sauce will thicken as it rests.
| Step | Action | Duration | Key Visual Cue |
|---|---|---|---|
| 1 | Sear salmon | 3–4 min per side | Deep golden brown crust |
| 2 | Cook shrimp | 1–2 min per side | Pink, lightly curled |
| 3 | Sauté garlic + spices | 1.5 min total | Fragrant, deepened color |
| 4 | Build sauce | 4–5 min | Sauce thickens and coats spoon |
| 5 | Combine and simmer | 1–2 min | Seafood coated in glossy sauce |
Serving & Presentation
I love serving this Cajun cream sauce salmon and shrimp over a bed of fluffy white rice or al dente pasta—the sauce soaks in and makes every bite heavenly. For a low-carb option, try cauliflower rice or zucchini noodles (add them at the very end to warm through). A side of steamed broccoli or roasted asparagus completes the meal with a fresh crunch.
When plating, I like to arrange the salmon fillets in the center of the bowl, then scatter the shrimp around and spoon extra sauce over the top. A generous sprinkle of fresh parsley adds color and a hint of freshness. This dish is also beautiful served family-style on a large platter.
Growing up in Morocco, we always had a small bowl of harissa on the table for extra heat. Here, I sometimes offer extra cayenne or a dash of hot sauce for those who like it fiery. For a French-inspired touch, a side of crusty sourdough for sopping up every last drop of sauce is non-negotiable!
| Pairing Type | Suggestions | Why It Works |
|---|---|---|
| Side Dish | White rice, linguine, cauliflower rice | Absorbs the creamy, spicy sauce perfectly |
| Vegetable | Steamed broccoli, roasted asparagus, green beans | Adds color, texture, and balances richness |
| Beverage | Chardonnay, Sauvignon Blanc, iced tea with lemon | Crisp acidity cuts through the cream and spice |
| Garnish | Fresh parsley, lemon wedges, extra cayenne | Brightness and visual appeal |
Make-Ahead, Storage & Reheating
Living in NYC, meal prep is my survival strategy. This dish is great for batch cooking—I make the sauce and cook the seafood ahead, then assemble quickly on busy nights. Here’s how to store everything properly so it stays just as delicious the next day.
| Method | Container | Duration | Reheating Tip |
|---|---|---|---|
| Refrigerator | Airtight container | Up to 3 days | Reheat gently on stovetop over low heat, adding a splash of broth or cream to loosen sauce |
| Freezer | Freezer-safe container or bag | Up to 2 months | Thaw overnight in fridge; reheat in skillet, adding cream if needed. Seafood may be slightly softer |
| Make-Ahead | Separate containers for sauce and seafood | Up to 2 days in advance | Combine sauce and seafood just before serving; reheat together for 2–3 minutes |
When reheating leftovers, I always add a tablespoon of chicken broth or cream to restore the silky consistency. Avoid the microwave if possible—it can make the seafood rubbery and the sauce separate. A gentle stovetop reheat over medium-low, stirring occasionally, keeps everything as good as new.
One more thing: if you’re meal-prepping, cook the pasta or rice separately and store it separately. Otherwise, the grains absorb the sauce and become mushy. I learned that the hard way during my first year in New York!
Variations & Easy Swaps
This recipe is incredibly versatile. Over the years, I’ve adapted it for different diets, seasons, and cravings. Here are three of my favorite twists:
| Variation | Key Change | Best For | Difficulty Impact |
|---|---|---|---|
| Creamy Cajun Seafood Pasta | Add 8 oz cooked linguine or fettuccine | Heartier meal, crowd-pleaser | No change |
| Dairy-Free Cajun Cream Sauce | Use coconut milk + nutritional yeast | Vegan or lactose-intolerant | Easy (use full-fat canned coconut milk) |
| Blackened Salmon + Extra Heat | Double the Cajun seasoning + extra cayenne | Spice lovers | No change (reduce salt if seasoning is salty) |
Creamy Cajun Seafood Pasta
To turn this into a pasta feast, cook 8 ounces of linguine or fettuccine until al dente. Reserve 1/2 cup of pasta water, then toss the drained pasta with the finished sauce and seafood. If the sauce is too thick, stir in the reserved pasta water a tablespoon at a time until it coats the noodles beautifully. This is my go-to when I want to impress friends with minimal effort. The Moroccan in me sometimes adds a pinch of saffron to the pasta water for an extra layer of aroma.
Dairy-Free Cajun Cream Sauce
For a dairy-free version, replace the heavy cream with full-fat canned coconut milk. Use nutritional yeast instead of Parmesan for that cheesy, savory note. Reduce the broth to 1/4 cup since coconut milk is thinner than cream. The sauce will be slightly less thick but still luscious. I tested this for a friend with lactose intolerance, and she couldn’t stop raving. The coconut flavor is subtle—if you’re worried, add a pinch of garlic powder to mask it.
Blackened Salmon with Extra Heat
If you’re a heat seeker like my husband, double the Cajun seasoning and add an extra 1/2 teaspoon of cayenne to the spice mix for the seafood. You can also replace the tomato paste with a teaspoon of harissa (a nod to my Moroccan roots) for a smoky, spicy kick. The sauce will take on a deeper red color and a fiercer flavor. Serve with a dollop of sour cream or Greek yogurt to balance the heat.
Frequently Asked Questions
What’s the best way to keep the cream sauce from curdling when cooking with salmon and shrimp?
The key is temperature control. Always add the cream after the pan has cooled slightly from high heat—I remove the skillet from the burner for about 30 seconds before pouring it in. Also, never let the sauce boil vigorously after adding cream; keep it at a gentle simmer. A tiny pinch of baking soda (about 1/8 teaspoon) can also stabilize the cream. Finally, use full-fat heavy cream—lower-fat dairy is more prone to curdling. If you do see tiny curds, whisk in a tablespoon of cold cream or broth to smooth it out.
Can I use frozen shrimp and salmon for this Cajun cream sauce recipe?
Absolutely! Frozen seafood works beautifully if you thaw it properly. Place the frozen shrimp and salmon in a bowl of cold water for 15–20 minutes, or thaw overnight in the fridge. Pat them very dry with paper towels before seasoning—this is crucial for browning. Frozen seafood often releases more water, so you may need to cook it a minute longer, but the flavor will be just as good. I’ve used frozen wild-caught salmon from Trader Joe’s many times with perfect results.
What can I substitute for heavy cream in a Cajun cream sauce to make it lighter?
For a lighter sauce, substitute half-and-half with 1 tablespoon of unsalted butter added for richness. This combination has about half the fat of heavy cream but still gives a creamy texture. Alternatively, use evaporated milk (not sweetened) – it’s surprisingly creamy and won’t curdle as easily as regular milk. For a dairy-free option, full-fat coconut milk is my top choice; it adds a subtle sweetness that complements the Cajun spices. Avoid skim milk or almond milk—they will curdle and produce a watery sauce.
How long should I cook the salmon and shrimp so they don’t become overcooked in the sauce?
Cook the salmon and shrimp separately first, as described in the recipe. Salmon fillets (1-inch thick) need about 3–4 minutes per side on medium-high heat for medium doneness. Shrimp only need 1–2 minutes per side until pink. Then, when you return them to the finished sauce, simmer for just 1–2 minutes on low heat—just enough to warm them through. Overcooking at this stage is the number one mistake. If your seafood is already cooked through, simply turn off the heat and let the residual warmth do the job.
Can I make this Cajun cream sauce ahead of time for a party?
Yes! The sauce can be made up to 2 days in advance. Prepare it through step 4, let it cool, and store in an airtight container in the fridge. When you’re ready to serve, reheat the sauce gently on the stovetop, adding a splash of broth to loosen it. Meanwhile, sear the salmon and shrimp fresh—they only take 10 minutes. Then combine and serve. This method ensures the seafood stays perfectly tender and the sauce stays silky. It’s my secret to hosting without stress.
Is this Cajun cream sauce recipe spicy? How can I adjust the heat level?
The recipe has a mild-to-medium heat, depending on your Cajun seasoning. Most store-bought blends are not extremely hot—they’re more about flavor. The optional 1/2 teaspoon cayenne adds noticeable warmth. To make it mild, omit the cayenne and use a mild Cajun seasoning (or reduce to 2 teaspoons). For extra heat, double the cayenne or add a chopped jalapeño with the garlic. I always say start with less—you can always add more heat at the end with a dash of hot sauce.
What’s the best type of pan to use for this dish?
I recommend a large 12-inch skillet or sauté pan with a heavy bottom—stainless steel or cast iron works best. Nonstick is fine but won’t give you those delicious browned bits as well. The heavy bottom ensures even heat distribution and prevents the cream from scorching. A deep skillet is helpful to avoid splattering when you add the cream. If you only have a smaller pan, cook the seafood in two batches so you don’t overcrowd it.
Can I use only shrimp or only salmon in this recipe?
Absolutely! This recipe is flexible. For all shrimp, use 2 pounds of large shrimp—cook them in two batches to avoid overcrowding. For all salmon, use 1.5 pounds of fillets and cook in batches if needed. The rest of the ingredients remain the same. The cooking times are nearly identical. I often make an all-shrimp version when salmon isn’t on sale. It’s still a delicious creamy Cajun seafood dinner that your family will love.
What can I serve with this Cajun cream sauce salmon and shrimp besides pasta or rice?
Great question! Besides rice and pasta, I love serving this with creamy polenta, mashed potatoes, or crusty bread to soak up the sauce. For a lighter option, try zucchini noodles (zoodles) or steamed cauliflower florets. In spring, I pair it with roasted asparagus and a simple green salad. In winter, creamy grits are a comforting southern-style base. The sauce is so versatile that it elevates almost any starch or vegetable.
How do I know when the salmon and shrimp are fully cooked?
For salmon, the flesh should be opaque and flake easily with a fork when gently pressed. A meat thermometer inserted into the thickest part should read 130–135°F for medium, or 145°F for well-done (but I recommend medium to keep it moist). For shrimp, look for a C-shape—when they curl into a loose circle, they’re done. If they curl into a tight O, they’re overcooked. Also, the shrimp should turn pink all over, with no gray areas. Trust your eyes and fingers!
Share Your Version!
I hope this Cajun cream sauce with salmon and shrimp becomes a favorite in your kitchen the way it has in mine. Whether you serve it over pasta, rice, or with a side of crusty bread, I’d love to hear how it turns out for you. Did you add extra spice? Try the dairy-free version? Maybe you threw in some fresh okra from the farmers market? Tell me all about it!
Leave a star rating and a comment below—your feedback helps other home cooks decide if this recipe is right for them. And if you share a photo on Instagram or Pinterest, be sure to tag @exorecipes so I can see and feature my favorites. My favorite question is: what’s your go-to weeknight seafood dish? I’m always looking for new inspiration!
From my NYC kitchen to yours — I hope this recipe brings as much warmth to your table as it does to mine. — mia 🧡
Love This Recipe? Save It to Pinterest!
If you enjoyed this Cajun Cream Sauce with Salmon and Shrimp recipe, don’t let it get lost in your browser tabs! 😄 Pin it now so you can find it again anytime — and explore hundreds more tried-and-tested recipes waiting for you on my Pinterest boards.
👉 Follow mia on Pinterest @exorecipe
📌 Pin this recipe · 🔁 Re-pin your favorites · 💬 Tag me when you make it — I love seeing your creations!
⭐ Loved this recipe? Leave a 5-star rating below! Share your photo on Instagram with #exorecipes and tag @exorecipes for a chance to be featured. 💬
Cajun Cream Sauce with Salmon and Shrimp A Flavorful Seafood Delight
- Prep Time: 15 minutes
- Cook Time: 20 minutes
- Total Time: 35 minutes
- Yield: 4 1x
- Method: Main Course
- Cuisine: Cajun
Description
A rich and creamy Cajun-spiced sauce with tender salmon and succulent shrimp, perfect for a special dinner.
Ingredients
- 1 lb salmon fillet, skinless, cut into 4 portions
- 1 lb large shrimp, peeled and deveined
- 2 tbsp olive oil
- 1 tbsp Cajun seasoning
- Salt and black pepper to taste
- 3 cloves garlic, minced
- 1 cup heavy cream
- 1/2 cup chicken broth
- 1/2 cup grated Parmesan cheese
- 1 tbsp tomato paste
- 1 tsp paprika
- 1/2 tsp cayenne pepper (optional, for extra heat)
- 2 tbsp unsalted butter
- Fresh parsley, chopped (for garnish)
Instructions
- Pat the salmon and shrimp dry with paper towels. Season both with half the Cajun seasoning, salt, and black pepper.
- Heat olive oil in a large skillet over medium-high heat. Sear the salmon fillets for 3-4 minutes per side until golden and cooked through. Remove and set aside.
- In the same skillet, add the shrimp and cook for 2-3 minutes until pink. Remove and set aside with the salmon.
- Reduce heat to medium. Add butter and garlic to the skillet, sauté for 1 minute until fragrant.
- Stir in tomato paste, paprika, remaining Cajun seasoning, and cayenne (if using). Cook for 30 seconds.
- Pour in chicken broth and heavy cream, scraping up any browned bits from the bottom. Bring to a simmer.
- Add Parmesan cheese and stir until melted and the sauce thickens slightly, about 2-3 minutes.
- Return the salmon and shrimp to the skillet, spooning the sauce over them. Simmer for 1-2 minutes to reheat.
- Serve immediately, garnished with fresh parsley.
Notes
For a lighter version, substitute half-and-half for heavy cream. Serve over rice or pasta with a side of steamed vegetables.
Nutrition
- Calories: 620
- Sugar: 2g
- Fat: 42g
- Carbohydrates: 6g
- Protein: 48g
Tried This Recipe? Leave a Comment!
Did you make this recipe? I’d love to hear how it turned out! Please leave a comment and a rating below. Your feedback helps other home cooks and supports cheerychop.com!
For more delicious inspiration, follow me on Pinterest!