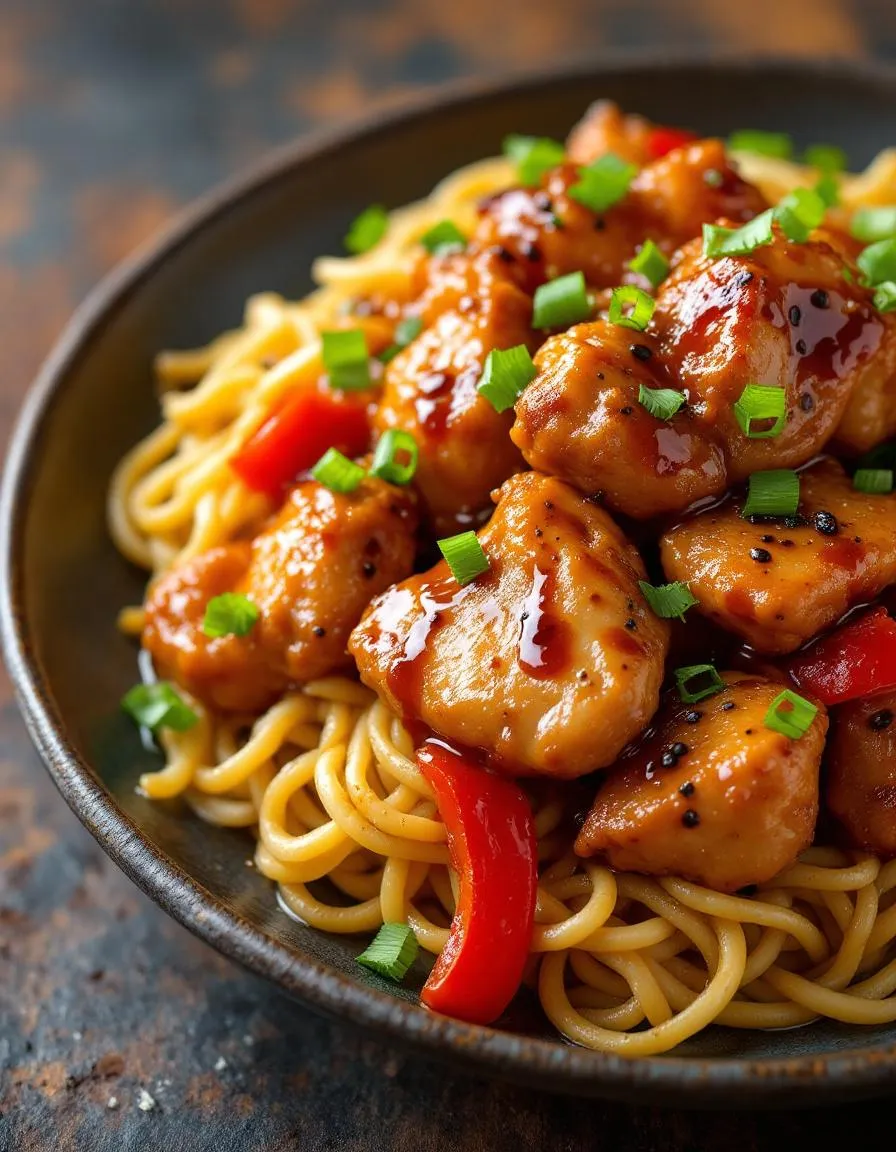
If you’re craving something bold, flavorful, and effortlessly satisfying, you’re in the right place. Today, I’m sharing my take on Black Pepper Chicken—a dish that packs a punch with its aromatic spices and tender bites. Whether you’re a busy parent needing a quick weeknight dinner or a food lover exploring global flavors, this recipe delivers comfort and excitement in every bite. Plus, it’s versatile enough to pair with your favorite sides, like my garlic butter rice or a crisp Asian cucumber salad.
Black Pepper Chicken is a stir-fry dish that balances heat, sweetness, and umami in perfect harmony. Unlike heavy takeout versions, this recipe keeps things light yet deeply flavorful, thanks to a marinade of soy sauce, garlic, and, of course, freshly cracked black pepper. It’s a staple in many Asian cuisines, but I’ve adapted it to fit modern kitchens without sacrificing authenticity. What makes it special? The simplicity. You likely have most ingredients on hand, and it cooks in under 30 minutes. For a blog like mine, which celebrates approachable yet exciting cooking, Black Pepper Chicken embodies the spirit of making everyday meals feel extraordinary. It’s a crowd-pleaser that suits casual dinners or impromptu gatherings, proving that great food doesn’t need complexity—just heart.
Why I Love This Recipe
Black Pepper Chicken holds a special place in my kitchen because it reminds me of my first attempt at recreating takeout favorites at home. Years ago, I stumbled upon a version at a tiny restaurant and became obsessed with cracking its code. After countless tweaks, I landed on this recipe—a tribute to those early culinary adventures. Now, it’s my go-to when I need a meal that feels indulgent yet wholesome. The aroma alone transports me back to those moments of discovery, and I hope it brings the same joy to your table.
Health and Nutrition
Why it’s good for your body
Black Pepper Chicken packs a nutritious punch while delivering bold flavor. First, the lean chicken breast provides high-quality protein to support muscle growth and repair. Additionally, black pepper contains piperine, a compound that may boost digestion and nutrient absorption. Together, these ingredients make Black Pepper Chicken a smart choice for anyone looking to fuel their body efficiently.
Beyond protein, this dish offers a balanced mix of vitamins and minerals. For example, garlic and onions add antioxidants that help fight inflammation. Meanwhile, the black pepper not only enhances taste but may also improve circulation and metabolism. As a result, Black Pepper Chicken becomes more than just a meal—it’s a health-boosting dish.
Finally, this recipe keeps added sugars and unhealthy fats to a minimum. Instead, it relies on fresh ingredients and spices for depth. Whether you’re aiming for weight management or simply better eating habits, Black Pepper Chicken fits seamlessly into your goals. With every bite, you’re nourishing your body without sacrificing flavor.
How it fits in a healthy lifestyle
Black Pepper Chicken aligns perfectly with a balanced diet. If you’re focusing on high-protein meals, this dish delivers without excessive calories. It’s also naturally gluten-free, making it a great option for those with dietary restrictions. Pair it with steamed vegetables or a fiber-rich side like quinoa for a complete, nutrient-dense meal.
For heart-healthy eating, the lean protein and anti-inflammatory spices in Black Pepper Chicken support cardiovascular wellness. If you’re meal prepping, it stores well and reheats easily, so you can enjoy it throughout the week. For more gluten-free meal ideas, check out our gluten-free dinner guide. And if you’re curious about other high-protein recipes, our protein-packed meals roundup has plenty of inspiration. With its versatility and health benefits, Black Pepper Chicken makes eating well simple and satisfying.
Start by marinating the chicken to lock in flavor and tenderness. Whisk together soy sauce, minced garlic, and a generous amount of freshly cracked black pepper in a bowl. Toss the chicken pieces in this mixture and let them sit for at least 15 minutes—or up to an hour if you have time. Meanwhile, heat oil in a large skillet or wok over medium-high heat. Once hot, add the chicken and stir-fry until it turns golden brown, about 5-6 minutes. Remove the chicken and set it aside. In the same pan, sauté sliced onions and bell peppers until they soften slightly, then toss the chicken back in. Drizzle with a splash of oyster sauce and a pinch of sugar for balance. Stir everything together until the sauce coats the chicken evenly. For a time-saving hack, prep your veggies while the chicken marinates or use pre-cut stir-fry mixes from the store. Serve your Black Pepper Chicken hot over steamed rice or noodles for a satisfying meal.
Mistakes I’ve made and learned from
I used to overcrowd the pan when stir-frying, which steamed the chicken instead of giving it that perfect sear. Now, I cook in batches to ensure each piece gets crispy edges. Another lesson? Don’t skip the marinating step—it makes all the difference in flavor. If you’re short on time, even a quick 10-minute soak helps. I also learned the hard way that overcooking the veggies turns them mushy. For crisp-tender results, add them just before the final toss. If you’re new to stir-frying, check out my guide on perfect stir-fry techniques or my tips for marinating like a pro. Trust me, a little patience pays off with this Black Pepper Chicken!
Black Pepper Chicken traces its roots to the vibrant flavors of Chinese cuisine, where bold spices and quick stir-frying techniques reign supreme. Originally from Fujian and Guangdong provinces, this dish gained popularity for its fiery kick and aromatic depth. Families often tweak the recipe, though. Some add extra veggies like bell peppers or mushrooms, while others dial up the heat with chili oil. In Malaysia and Singapore, cooks might toss in a splash of soy sauce or oyster sauce for a richer umami punch.
My grandmother used to make Black Pepper Chicken on special weekends, pairing it with steaming jasmine rice. She swore the secret was freshly cracked peppercorns, never pre-ground. Across the globe, variations pop up. In India, chefs might use garam masala for warmth, while Thai versions could include lemongrass or coconut milk. No matter the twist, Black Pepper Chicken always delivers that comforting, peppery zing we crave.
ays-cooking">How it fits in today’s cooking
Today, Black Pepper Chicken shines as a weeknight hero. Busy cooks love it for its 30-minute prep time and crowd-pleasing flavor. Meal preppers often double the batch, storing leftovers for quick lunches. During colder months, it becomes a cozy staple, especially when paired with hearty comfort sides like garlic noodles or roasted veggies.
Modern twists keep it fresh too. Some swap chicken for tofu or shrimp, while air fryer fans adapt it for crispier results. It even stars in fusion dishes, like Black Pepper Chicken tacos or rice bowls. For those exploring global flavors, it’s a gateway dish—simple enough for beginners but rich in tradition. Want more inspiration? Check out these fast dinner ideas to pair with your next peppery masterpiece.
Taste and Texture
What makes it delicious
Black Pepper Chicken delivers a bold, savory punch with every bite. The star of the dish—freshly cracked black pepper—brings a warm, earthy heat that lingers pleasantly on the palate. Juicy, tender chicken soaks up the rich, umami-packed sauce, while crisp bell peppers and onions add a satisfying crunch. Garlic and soy sauce deepen the flavor, creating a fragrant aroma that fills the kitchen. Each forkful of Black Pepper Chicken balances spicy, salty, and slightly sweet notes, making it irresistibly craveable. The sauce clings to the chicken just right, offering a glossy, velvety texture that coats your mouth without feeling heavy.
r">Boosting the flavor
For an extra kick, try tossing in a handful of sliced jalapeños or a drizzle of chili oil. If you love bold flavors, swap regular soy sauce for dark soy sauce to add depth and a caramelized richness. A squeeze of lime brightens the dish, while toasted sesame seeds lend a nutty finish. Pair your Black Pepper Chicken with a side of garlic fried rice to soak up every last drop of the peppery sauce. Experiment with a dash of honey or brown sugar if you prefer a touch of sweetness to round out the spice.
Tips for Success
Best practices for results
Always slice the chicken evenly so it cooks uniformly in your Black Pepper Chicken. For maximum flavor, toast the black pepper lightly before grinding it. Additionally, marinate the chicken for at least 30 minutes to let the spices penetrate deeply. Use high heat when stir-frying to lock in juices and achieve that perfect sear. Finally, taste and adjust the seasoning just before serving for a balanced dish every time.
>Mistakes to avoid
Avoid overcrowding the pan when cooking Black Pepper Chicken, as this steams the meat instead of browning it. Instead, work in batches if needed. Many home cooks also skip the marinating step, but this results in less flavorful chicken. For more tips on perfect marinades, check out our guide on marinade secrets. Lastly, don’t substitute pre-ground black pepper for freshly cracked—it lacks the same bold aroma. Learn how to elevate your spices with our spice hacks for better results.
Serving and Pairing Suggestions
How to serve this dish
Black Pepper Chicken shines when you plate it with vibrant colors and thoughtful garnishes. For a restaurant-worthy presentation, serve it over a bed of steamed jasmine rice and top it with thinly sliced green onions or a sprinkle of toasted sesame seeds. Alternatively, pack it into lettuce cups for a fun, hands-on meal that’s perfect for casual gatherings. Whether you’re hosting a weeknight dinner or a festive holiday spread, this dish adapts effortlessly. To elevate the visual appeal, pair it with bright side dishes like stir-fried bok choy or pickled vegetables.
What goes well with it
For a refreshing contrast, pair Black Pepper Chicken with a crisp cucumber salad or a tangy mango slaw. The cool crunch balances the bold, peppery flavors beautifully. If you’re craving something heartier, try serving it alongside garlic butter noodles or fluffy coconut rice. For drinks, a citrusy iced green tea or a light lager enhances the dish without overpowering it. Don’t forget to check out our garlic butter noodles recipe for an easy side, or whip up a batch of our mango slaw to add a tropical twist. Each pairing brings out the best in this flavorful main dish.
Black Pepper Chicken typically consists of tender chicken pieces stir-fried with a bold sauce made from black pepper, soy sauce, garlic, and onions. Some recipes include bell peppers or broccoli for extra texture and flavor. The dish gets its signature spicy kick from freshly ground black pepper, making it a favorite for those who enjoy robust flavors.
Is Black Pepper Chicken spicy?
Black Pepper Chicken has a mild to moderate spice level, primarily from the black pepper rather than chili peppers. The heat can be adjusted by reducing or increasing the amount of black pepper in the recipe. It’s less fiery than dishes like Szechuan chicken but still packs a flavorful punch.
rank-math-faq-item">
How do you make Black Pepper Chicken less dry?
To keep Black Pepper Chicken juicy, marinate the chicken in a mixture of soy sauce and cornstarch before cooking. Cook it quickly over high heat to seal in moisture, and avoid overcooking. Adding a splash of chicken broth or water to the sauce also helps prevent dryness.
What sides go well with Black Pepper Chicken?
Black Pepper Chicken pairs perfectly with steamed jasmine rice or fried rice to balance its bold flavors. For a lighter option, try it with stir-fried vegetables or a simple cucumber salad. The dish also works well with noodles or bao buns for a fun twist.
Best Cauliflower Pizza Crust – Easy Homemade Recipe
Introduction
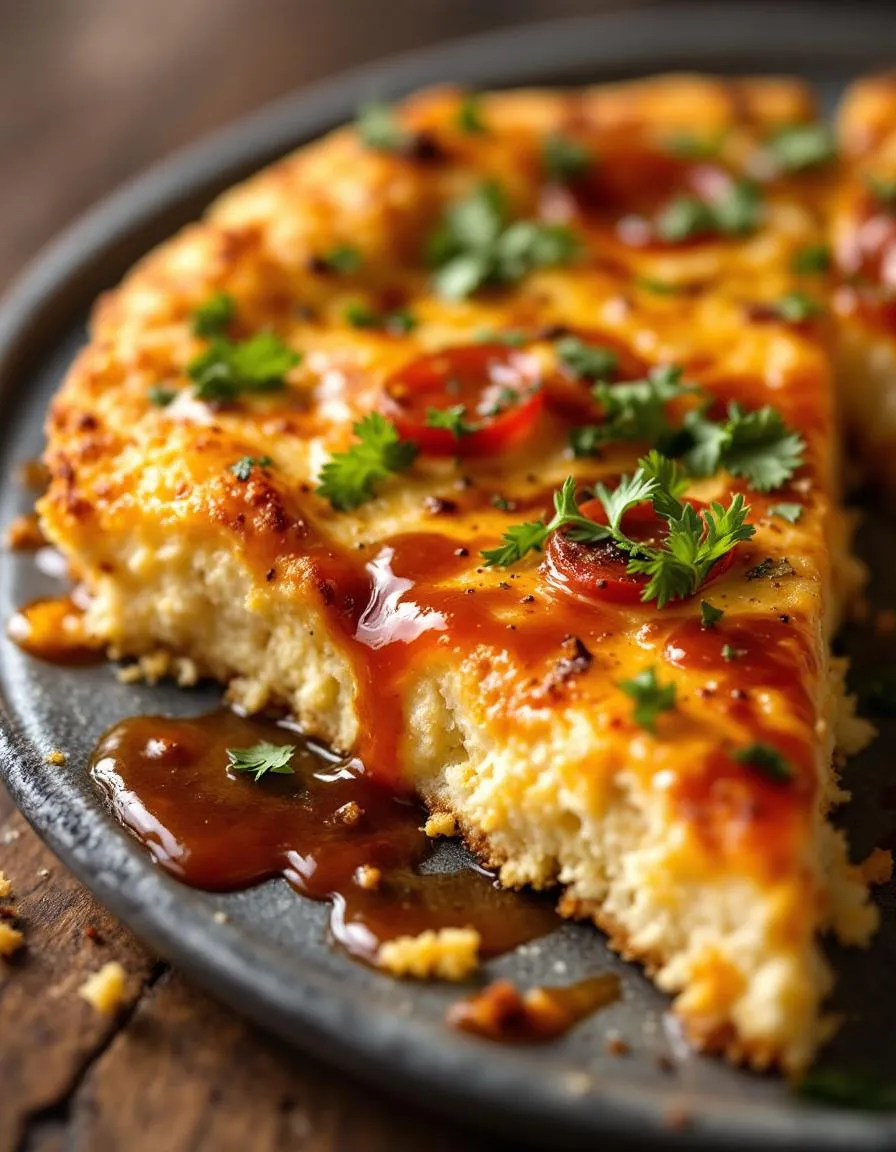
If you’ve ever craved pizza but wanted a lighter, veggie-packed alternative, you’re in the right place. Today, I’m sharing my go-to Cauliflower Pizza Crust recipe—a game-changer for anyone looking to enjoy pizza guilt-free. Whether you’re gluten-free, keto-friendly, or simply love experimenting with wholesome ingredients, this crust delivers crispy perfection without sacrificing flavor. Plus, it’s a fantastic way to sneak more veggies into your meals, especially if you’re cooking for picky eaters.
Cauliflower Pizza Crust might sound trendy, but it’s more than just a health fad. By swapping traditional dough for finely riced cauliflower, you create a nutrient-dense base that’s surprisingly versatile. Unlike heavy flour crusts, this version bakes up light yet sturdy enough to hold all your favorite toppings. What makes it special? For starters, cauliflower packs fiber, vitamins, and antioxidants while keeping carbs low. It’s also naturally gluten-free, making it ideal for dietary restrictions. At brekcakes.com, we celebrate recipes that balance indulgence and nourishment, and this crust fits perfectly. If you’re new to veggie-based alternatives, don’t worry—our gluten-free baking guide breaks down the basics. And if you love creative twists on classics, try pairing this crust with our homemade marinara sauce for a full flavor experience.
Why I Love This Recipe
This Cauliflower Pizza Crust holds a special place in my kitchen because it transformed my family’s pizza nights. My youngest used to turn up her nose at vegetables, but when she tried this crust topped with melty cheese, she didn’t even notice the cauliflower. Now, it’s our Friday night staple—proof that healthy eating can still feel like a celebration. Every bite reminds me that good food doesn’t have to be complicated; it just needs heart (and maybe a little cheese).
Health and Nutrition
Why it’s good for your body
Cauliflower Pizza Crust packs a nutritious punch while keeping your meals delicious. First, it’s loaded with fiber, which supports digestion and keeps you feeling full longer. Unlike traditional crusts, Cauliflower Pizza Crust also cuts down on refined carbs, helping you avoid energy crashes. Additionally, cauliflower delivers vitamins C and K, boosting immunity and bone health.
Moreover, Cauliflower Pizza Crust is naturally low in calories, making it a smart choice for weight management. It also contains antioxidants that fight inflammation, promoting overall wellness. Because cauliflower replaces flour, you’ll enjoy a gluten-free option that’s easier on your gut. Plus, the versatility of Cauliflower Pizza Crust means you can top it with nutrient-rich ingredients like veggies and lean proteins.
Finally, this crust fits seamlessly into balanced eating habits. Whether you’re watching carbs or simply craving a lighter meal, Cauliflower Pizza Crust delivers flavor without compromise. Its wholesome profile makes it a standout alternative to traditional pizza bases.
How it fits in a healthy lifestyle
Cauliflower Pizza Crust effortlessly aligns with various dietary goals. For gluten-free eaters, it’s a game-changer, offering a satisfying base without wheat. If you’re focusing on heart health, the crust’s low saturated fat content supports better cholesterol levels. Pair it with toppings like spinach and turkey for a protein-packed meal that fuels your day.
This crust also fits into meal prep routines, saving time without sacrificing nutrition. Try pairing it with our healthy meal prep ideas for a week of balanced eating. For those exploring plant-based diets, Cauliflower Pizza Crust works beautifully with vegan cheeses and roasted veggies. Discover more ways to enjoy it in our gluten-free dinner options roundup.
Whether you’re managing macros or just want a lighter pizza night, Cauliflower Pizza Crust keeps your goals on track. It’s a simple swap with big benefits for everyday wellness.
A healthy and gluten-free alternative to traditional pizza crust made with cauliflower.
Ingredients
Scale
For the Crust:
1 medium head cauliflower, riced
1 large egg
1/2 cup shredded mozzarella cheese
1/4 cup grated Parmesan cheese
1/2 teaspoon dried oregano
1/2 teaspoon garlic powder
1/4 teaspoon salt
1/4 teaspoon black pepper
Instructions
1. Prepare the Crust:
Preheat oven to 400°F (200°C) and line a baking sheet with parchment paper.
Place riced cauliflower in a microwave-safe bowl and microwave for 5 minutes. Let cool slightly, then transfer to a clean kitchen towel and squeeze out excess moisture.
In a large bowl, mix the cauliflower, egg, mozzarella, Parmesan, oregano, garlic powder, salt, and pepper until well combined.
Spread the mixture onto the prepared baking sheet, shaping it into a 10-inch round crust about 1/4-inch thick.
Bake for 20-25 minutes until golden and firm. Remove from oven, add desired toppings, and bake for an additional 10 minutes.
Start by preheating your oven to 400°F and lining a baking sheet with parchment paper. Next, pulse fresh cauliflower florets in a food processor until they resemble fine crumbs. If you’re short on time, grab pre-riced cauliflower from the freezer aisle—just thaw and squeeze out excess moisture with a clean kitchen towel. Transfer the cauliflower to a large bowl, then whisk in two eggs, shredded mozzarella, and a pinch of garlic powder. Stir everything until the mixture holds together like dough. Press the mixture onto your baking sheet, shaping it into a thin, even circle. Bake for 20 minutes until golden and firm. Meanwhile, prep your toppings so they’re ready to go. Once the crust cools slightly, layer on sauce, cheese, and veggies before returning it to the oven for another 10 minutes. For extra crispiness, broil the cauliflower pizza crust for the final two minutes. Let it rest a few minutes before slicing to prevent toppings from sliding off.
Mistakes I’ve made and learned from
My first few attempts at cauliflower pizza crust ended in disaster because I skipped a crucial step: squeezing out every drop of moisture. Soggy crusts fell apart no matter how long I baked them. Now, I wrap the riced cauliflower in a towel and twist it tightly over the sink—it makes all the difference. Another lesson? Don’t overload the toppings. Too many veggies release water during baking, turning the crust mushy. Stick to lighter options like arugula or prosciutto added after baking, as I learned from my guide to perfect pizza toppings. If your crust sticks to the pan, try my trick from this non-stick baking hacks post: a light spray of olive oil under the parchment paper. Trust me, these small fixes save so much frustration!
Cauliflower pizza crust might feel like a modern invention, but its roots stretch back to creative home cooks looking for lighter, gluten-free alternatives. While traditional pizza hails from Italy, this veggie-packed twist likely emerged in health-conscious American kitchens during the low-carb craze of the early 2000s. Families and chefs worldwide now put their own spin on it, blending local flavors with the versatile base.
In Mediterranean households, for example, cooks often mix roasted garlic and olive oil into the cauliflower dough for a richer taste. Meanwhile, in India, some versions incorporate turmeric and cumin, turning the crust into a vibrant, spiced canvas for toppings like paneer or tandoori chicken. Even within families, you’ll find quirks—like my aunt’s secret trick of adding nutritional yeast for a cheesy depth without dairy. Whether you’re making Cauliflower Pizza Crust for dietary needs or just to sneak in extra veggies, it’s a dish that adapts to any table.
ays-cooking">How it fits in today’s cooking
Today, Cauliflower Pizza Crust shines as a staple for gluten-free diets, keto meal plans, and veggie-loaded weeknights. It’s not just a trend anymore—it’s a practical way to enjoy comfort food without the guilt. Busy parents swap it into their meal prep rotations, while fitness fans top it with lean proteins and greens for a post-workout boost.
Seasonal twists keep it fresh year-round, too. Think pumpkin puree blended into the crust for fall or a summery zucchini-and-basil version. And let’s not forget how easily it pairs with other modern favorites, like air-fryer appetizers for a full spread. However you slice it, this crust proves that eating well doesn’t mean sacrificing flavor or tradition.
Taste and Texture
What makes it delicious
Cauliflower pizza crust delivers a surprisingly satisfying bite with its golden, crisp edges and tender center. Unlike traditional dough, it has a subtly nutty, earthy flavor that pairs perfectly with rich tomato sauce and melted cheese. The crust stays sturdy yet light, offering a delicate crunch without feeling heavy. Fresh cauliflower blends with Parmesan and herbs, creating a fragrant, savory base that’s anything but bland. Whether you’re gluten-free or just craving something different, cauliflower pizza crust brings a fresh twist to pizza night.
r">Boosting the flavor
Elevate your cauliflower pizza crust by brushing it with garlic-infused olive oil before baking for an aromatic depth. Try topping it with roasted veggies or spicy pepperoni for extra texture and zest. A sprinkle of smoked paprika or red pepper flakes adds warmth, while a drizzle of homemade pesto brightens every bite. For a creamy finish, swap traditional marinara for a creamy avocado dressing as the base. Small tweaks make this crust even more irresistible.
Tips for Success
Best practices for results
Always squeeze excess moisture from your cauliflower rice before mixing it with other ingredients. This step ensures your Cauliflower Pizza Crust holds together perfectly. Additionally, use parchment paper to prevent sticking and achieve an even bake. For extra crispiness, preheat your baking sheet before placing the crust on it. Finally, let the crust cool slightly before adding toppings to maintain its structure.
>Mistakes to avoid
Avoid overloading your Cauliflower Pizza Crust with wet toppings, as this can make it soggy. Instead, lightly pre-cook vegetables or pat them dry before adding. Many cooks also skip the egg, but this binder is essential for stability. If you need egg-free options, check out our vegan binder alternatives. Lastly, don’t rush the baking time—low and slow ensures a golden, sturdy crust. For more troubleshooting, explore our gluten-free baking guide.
Serving and Pairing Suggestions
How to serve this dish
Elevate your Cauliflower Pizza Crust by slicing it into shareable wedges for a fun, party-friendly appetizer. Alternatively, serve it whole for a hearty main course, topping it with fresh basil or microgreens for a pop of color. For a cozy night in, pair it with a side salad and arrange it on a wooden board for rustic charm. Meanwhile, if you’re hosting a brunch, cut it into smaller squares and layer it with avocado or smoked salmon for an elegant twist.
What goes well with it
A crisp white wine or sparkling water with lemon complements the lightness of Cauliflower Pizza Crust perfectly. For a heartier meal, try pairing it with a tangy garlic parmesan wings or a refreshing kale Caesar salad. The wings add a savory crunch, while the salad balances the dish with fresh, zesty flavors. Finally, a drizzle of balsamic glaze or spicy ranch dip ties everything together for a memorable meal.
Is cauliflower pizza crust healthier than regular crust?
Yes, cauliflower pizza crust is generally healthier because it’s lower in carbs and calories compared to traditional flour crust. It’s also packed with nutrients like fiber and vitamins from the cauliflower. However, toppings still play a big role in the overall healthiness of your pizza.
How do you keep cauliflower pizza crust from getting soggy?
To prevent a soggy cauliflower pizza crust, squeeze out as much moisture as possible from the cauliflower rice before mixing it with other ingredients. Pre-baking the crust for 15–20 minutes at a high temperature (around 400°F) also helps create a crispier base for your toppings.
rank-math-faq-item">
Can you buy pre-made cauliflower pizza crust?
Yes, many grocery stores now sell pre-made cauliflower pizza crust in the frozen or refrigerated section. Brands like Caulipower and Outer Aisle offer convenient options, though homemade cauliflower pizza crust often tastes fresher and lets you control the ingredients.
Does cauliflower pizza crust taste like cauliflower?
Cauliflower pizza crust has a mild, neutral flavor that doesn’t overpower the taste of your toppings. When seasoned well with herbs or cheese, it tastes similar to a thin whole-wheat crust. The cauliflower flavor becomes even less noticeable once you add sauce and toppings.
Best Lemon Puppy Chow – Easy Sweet & Tangy Snack
Introduction
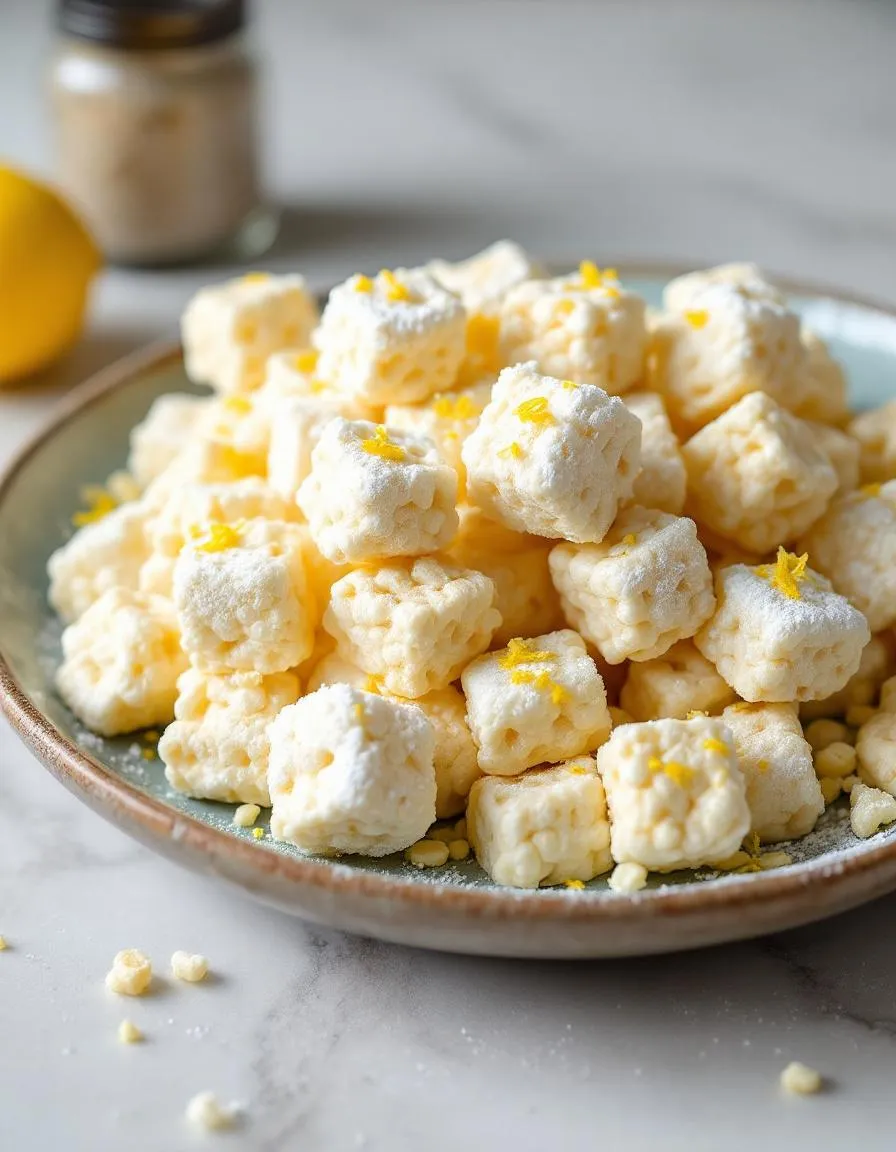
If you’re craving a snack that’s equal parts zesty, sweet, and downright addictive, you’ve come to the right place. Lemon Puppy Chow delivers a burst of sunshine in every bite, making it the perfect treat for sunny afternoons, potlucks, or even just a little self-care moment. Whether you’re a longtime fan of classic puppy chow or new to the world of no-bake delights, this recipe will quickly become a staple in your snack rotation.
Lemon Puppy Chow is a playful twist on the beloved Midwest snack, combining crispy cereal, creamy white chocolate, and a tangy lemon punch. Unlike traditional versions, this recipe skips the peanut butter and cocoa powder, instead embracing bright citrus flavors that feel fresh and unexpected. It’s ideal for spring gatherings, Easter brunches, or anytime you want a cheerful pick-me-up. Plus, it’s incredibly easy to whip up—no oven required! If you love simple yet showstopping recipes, you’ll adore this one as much as my No-Bake Cookies or Lemon Bars. The balance of sweet and tart makes it irresistible, and the powdered sugar coating ensures each piece melts in your mouth. Trust me, one handful and you’ll be hooked.
Why I Love This Recipe
Lemon Puppy Chow holds a special place in my heart because it reminds me of lazy summer days spent with my grandma. She always had a knack for turning simple pantry staples into something magical, and this recipe captures that same spirit. Every time I make it, I’m transported back to her kitchen, where laughter and lemon zest filled the air. It’s more than just a snack—it’s a little jar of happiness, and I can’t wait for you to experience it too.
“`html
Health and Nutrition
Why it’s good for your body
Lemon Puppy Chow packs a surprising nutritional punch while satisfying your sweet cravings. First, the lemon zest delivers a burst of vitamin C, which supports immune health and helps your body absorb iron. Meanwhile, the whole grain cereal base provides fiber to keep digestion smooth and energy levels steady. Additionally, the dark chocolate coating offers antioxidants that combat inflammation and promote heart health.
Because Lemon Puppy Chow uses natural ingredients, you avoid the artificial additives found in many processed snacks. The combination of citrus and dark chocolate also creates a balanced flavor profile, reducing the need for excessive sugar. Furthermore, the protein from nut butter or yogurt chips (depending on your recipe) helps curb hunger between meals.
When you enjoy Lemon Puppy Chow in moderation, you treat yourself to a snack that fuels your body. The bright lemon flavor even boosts mood, making it a feel-good choice. Ultimately, this snack proves that wholesome ingredients can still taste indulgent.
How it fits in a healthy lifestyle
Lemon Puppy Chow fits perfectly into balanced eating habits when enjoyed mindfully. For gluten-free diets, simply swap the cereal for a gluten-free alternative like our gluten-free snack mix base. If you prioritize heart health, the dark chocolate and nuts in the recipe align with cholesterol-friendly choices.
Pair Lemon Puppy Chow with protein-rich foods like Greek yogurt or a handful of almonds to create a satisfying mini-meal. It also makes a great post-workout treat when combined with a recovery smoothie for balanced carbs and protein. Since portion control matters, pre-portion servings to avoid overindulging while still enjoying the zesty crunch.
A zesty twist on the classic puppy chow snack, featuring bright lemon flavor and a dusting of powdered sugar.
Ingredients
Scale
For the Crust:
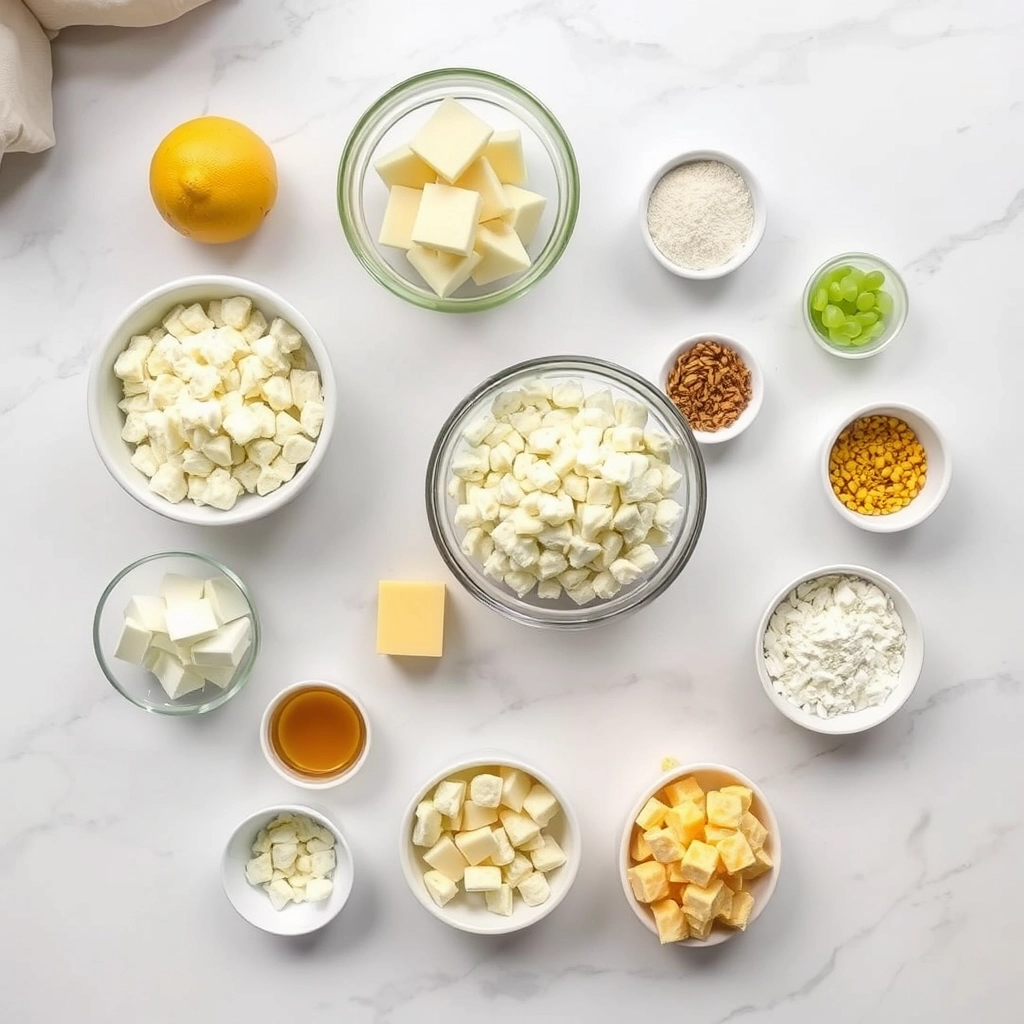
6 cups rice cereal squares
1 cup white chocolate chips
1/4 cup unsalted butter
1/4 cup fresh lemon juice
2 tsp lemon zest
1 1/2 cups powdered sugar
Instructions
1. Prepare the Crust:
Melt white chocolate chips and butter together in a microwave-safe bowl, stirring every 30 seconds until smooth.
Whisk in lemon juice and lemon zest until fully combined.
Pour mixture over rice cereal in a large bowl and gently toss until evenly coated.
Transfer coated cereal to a large resealable bag, add powdered sugar, and shake until well coated.
Spread on parchment paper to cool and set for 15 minutes before serving.
Notes
You can customize the seasonings to taste.
s-dish">How to Prepare This Dish
Steps and time-saving tips
Start by gathering all your ingredients for Lemon Puppy Chow so everything is within reach. Measure out the cereal, white chocolate chips, and powdered sugar first to streamline the process. Melt the white chocolate chips in a microwave-safe bowl using 30-second intervals, stirring between each one to prevent burning. Meanwhile, zest and juice fresh lemons for that bright, tangy flavor. Once the chocolate is smooth, whisk in the lemon zest and juice until fully combined. Pour the mixture over the cereal in a large bowl, then gently fold it with a spatula to coat every piece evenly. For quicker cleanup, line your counter with parchment paper before transferring the coated cereal to a gallon-sized bag. Add the powdered sugar, seal the bag, and shake vigorously until the Lemon Puppy Chow is fully dusted. Spread it out on the parchment to cool and set for about 15 minutes. If you’re short on time, pop it in the fridge for 5 minutes instead. Store any leftovers in an airtight container to keep it crunchy.
Mistakes I’ve made and learned from
When I first made Lemon Puppy Chow, I rushed melting the chocolate and ended up with a grainy texture. Now I always melt it slowly and stir frequently for a silky consistency. Another blunder? Skipping the parchment paper—powdered sugar went everywhere! Trust me, that extra step saves so much hassle. If your mixture feels too sticky, check out my guide on fixing sticky desserts for easy solutions. Also, don’t skimp on the lemon zest—it’s the flavor powerhouse. For more tips on balancing citrus in sweets, my citrus baking guide breaks it down perfectly. Learn from my slip-ups, and your Lemon Puppy Chow will turn out flawless every time.
n-and-variations">Cultural Connection and Variations
Where this recipe comes from
Lemon Puppy Chow might sound like a modern twist on a classic snack, but its roots stretch back to the Midwest’s love for easy, shareable treats. Originally, puppy chow (or muddy buddies) gained fame as a sweet, chocolate-peanut butter cereal mix. However, the bright, zesty version we know today likely emerged from creative home cooks who craved a refreshing alternative. Some families swear by Lemon Puppy Chow as a springtime staple, while others serve it at summer picnics for a tangy crunch.
Across different regions, you’ll find playful variations. In the South, cooks might add a dash of cayenne for heat, while coastal communities sometimes toss in coconut flakes for a tropical vibe. My grandma’s version? She swapped vanilla extract for almond, giving it a subtle nutty depth. Whether you enjoy it dusted with powdered sugar or drizzled with white chocolate, Lemon Puppy Chow adapts to whatever flavors feel like home.
How it fits in today’s cooking
Today, Lemon Puppy Chow shines as a versatile crowd-pleaser. It’s perfect for potlucks, baby showers, or even as a sunny addition to holiday cookie boxes. Busy parents love it because kids devour it, and it pairs wonderfully with afternoon tea or a lemon-blueberry loaf for a citrusy duo. Plus, gluten-free and vegan tweaks make it inclusive for modern diets.
Social media has also g
iven this snack new life. Food bloggers experiment with matcha or lavender-infused versions, proving Lemon Puppy Chow can keep up with trends. For a cozy twist, try serving it alongside honey-lavender lattes during brunch. No matter how you spin it, this recipe stays timeless because it’s simple, customizable, and packed with nostalgia.
Taste and Texture
What makes it delicious
Lemon Puppy Chow delivers a burst of bright, zesty flavor with every bite. The tangy lemon coating clings to crispy cereal squares, creating a perfect balance of sweet and citrusy. Meanwhile, powdered sugar adds a delicate sweetness that mellows the sharpness, while vanilla extract lends a warm, fragrant depth. As you chew, the texture shifts from crunchy to melt-in-your-mouth, thanks to the creamy white chocolate binding everything together. Lemon Puppy Chow also carries a refreshing aroma—like a sunny lemonade stand—that makes it irresistible even before the first handful.
Boosting the flavor
For an extra flavor kick, try swapping white chocolate with homemade lemon curd for a richer, tangier twist. Alternatively, sprinkle toasted coconut flakes on top to add nutty crunch, or drizzle melted dark chocolate for a bittersweet contrast. If you love bold citrus notes, a pinch of lemon zest or a splash of citrus-infused simple syrup will intensify the freshness. Experiment with these tweaks to make your Lemon Puppy Chow even more addictive.
Always measure your powdered sugar precisely to prevent clumping in your Lemon Puppy Chow. Additionally, use fresh lemon zest for the brightest flavor, and toss the mixture gently to coat evenly without crushing the cereal. For the best texture, let the coated pieces sit for 10 minutes before serving, allowing the flavors to meld. Finally, store leftovers in an airtight container to keep them crisp.
Mistakes to avoid
Avoid overheating the white chocolate, as it can seize and create lumps in your Lemon Puppy Chow. Instead, melt it slowly in short bursts, stirring frequently. Also, skip the bottled lemon juice—it lacks the fresh, vibrant taste of real zest and juice. If your mixture seems too sticky, check out our guide on fixing sticky treats for easy solutions. For more tips on balancing citrus flavors, explore our citrus baking tips to perfect every batch.
g-suggestions">Serving and Pairing Suggestions
How to serve this dish
Brighten up any gathering by serving Lemon Puppy Chow in a colorful ceramic bowl or mason jar for a rustic touch. For special occasions, sprinkle extra powdered sugar on top and add thin lemon slices as a fresh garnish. Meanwhile, this zesty snack shines at summer picnics, baby showers, or even as a playful dessert after a family dinner. To make it extra inviting, layer it with fresh berries in a trifle dish or pack individual portions into cellophane bags tied with ribbon for party favors.
What goes well with it
Pair Lemon Puppy Chow with a chilled glass of homemade lavender lemonade for a refreshing contrast to its sweet-tart flavor. Alternatively, serve it alongside a creamy vanilla bean dip to balance the citrusy crunch. If you’re planning a brunch spread, try adding our fluffy blueberry pancakes or crispy air fryer bacon for a satisfying sweet-and-savory combo. Each pairing enhances the lively taste of Lemon Puppy Chow while keeping the meal light and fun.
math-faq-block">
What is Lemon Puppy Chow made of?
Lemon Puppy Chow typically includes Chex cereal, white chocolate, lemon zest, powdered sugar, and sometimes lemon extract for extra flavor. This sweet and tangy snack is a fun twist on classic Puppy Chow, perfect for spring or summer gatherings.
How do you store Lemon Puppy Chow to keep it fresh?
Store Lemon Puppy Chow in an airtight container at room temperature for up to 1 week. For longer freshness, you can refrigerate it for 2-3 weeks, but let it come to room temperature before serving for the best texture.
Can you make Lemon Puppy Chow gluten-free?
Yes! Simply use gluten-free Chex cereal and ensure all other ingredients (like white chocolate and powdered sugar) are certified gluten-free. Lemon Puppy Chow adapts easily to dietary needs without sacrificing its delicious citrus flavor.
rank-math-faq-item">
Why is my Lemon Puppy Chow soggy?
Soggy Lemon Puppy Chow usually happens when the white chocolate coating isn’t fully set before adding powdered sugar. Make sure to let the coated cereal cool completely on parchment paper before tossing with sugar to maintain that signature crunchy texture.
Best Olive Garden Pasta e Fagioli Recipe
Introduction
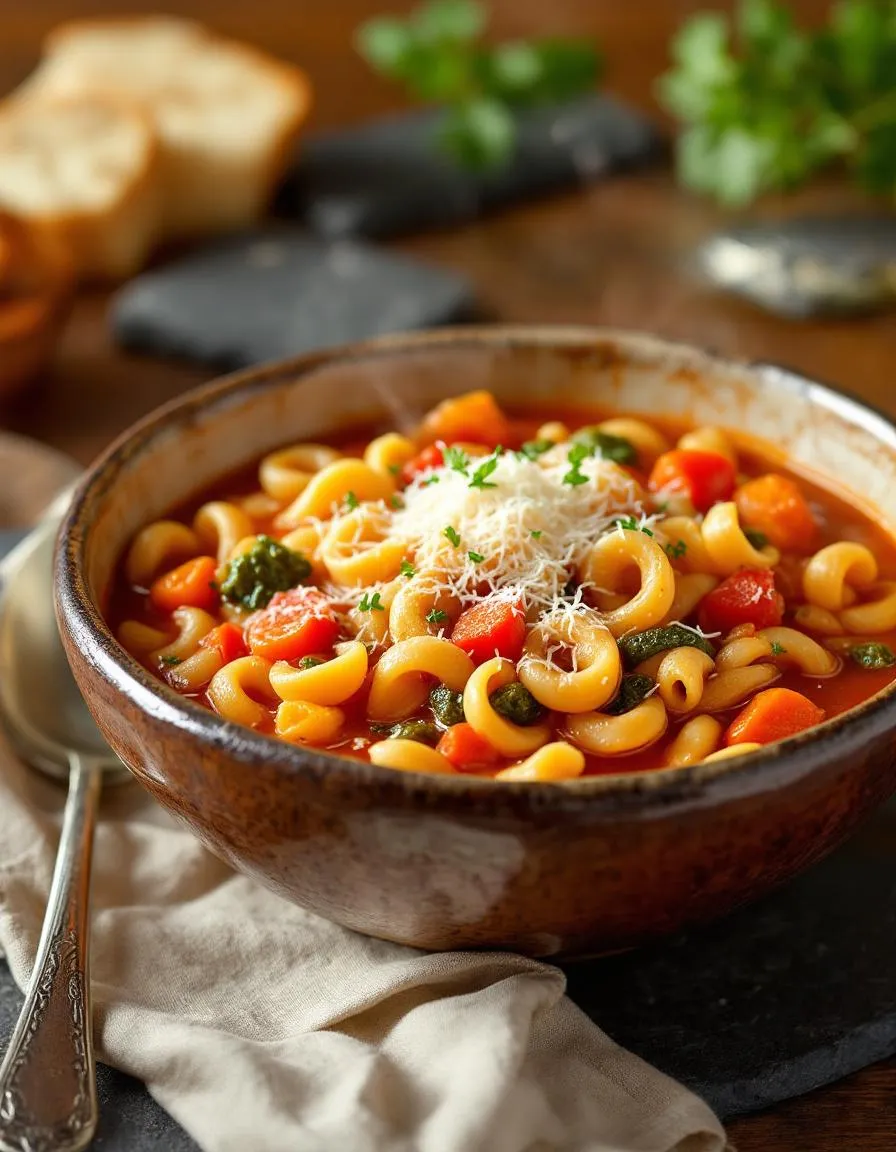
There’s something deeply comforting about a bowl of soup that feels like a hug from the inside, especially when it’s as hearty and flavorful as Olive Garden Pasta e Fagioli. Whether you’re craving a taste of nostalgia or simply need a cozy meal to warm your soul, this classic Italian-inspired dish delivers every time. Plus, with simple ingredients and straightforward steps, you’ll find it’s easier to make at home than you might think.
Olive Garden Pasta e Fagioli is a rich, savory soup that combines tender pasta, creamy beans, and a robust tomato broth infused with herbs and spices. While Olive Garden made it famous, this dish actually has humble roots in Italian home cooking, where families relied on pantry staples to create satisfying meals. What makes it special is its balance of textures and flavors—every spoonful offers a little bit of everything. Here at brekcakes.com, we celebrate recipes that bring people together, and this one fits perfectly. It’s a crowd-pleaser that works for weeknight dinners or weekend gatherings, much like our homemade chicken pot pie or classic beef stew.
Why I Love This Recipe
Olive Garden Pasta e Fagioli holds a special place in my heart because it reminds me of family dinners where everyone lingered at the table just a little longer. The first time I recreated it at home, I realized how much joy comes from sharing a dish that’s both familiar and full of flavor. It’s the kind of meal that sparks conversation and leaves everyone feeling nourished—not just by the food, but by the connection it fosters. Every time I make it, I’m reminded why cooking is so much more than following a recipe.
Health and Nutrition
Why it’s good for your body
Olive Garden Pasta e Fagioli packs a nutritious punch while delivering classic comfort. First, the dish combines protein-rich beans and fiber-filled pasta, which helps keep you full longer. Additionally, the tomatoes provide a dose of antioxidants like lycopene, known for supporting heart health. Because the soup includes vegetables like carrots and celery, you also get essential vitamins such as vitamin A and K.
Moreover, Olive Garden Pasta e Fagioli offers a balanced macronutrient profile. The beans contribute plant-based protein, while the pasta supplies energizing carbohydrates. Since the broth is light yet flavorful, you enjoy a satisfying meal without excessive calories. Furthermore, the olive oil used in the recipe adds healthy monounsaturated fats, which promote better cholesterol levels.
Finally, this dish is a great way to incorporate more legumes into your diet. Beans not only boost protein intake but also aid digestion thanks to their high fiber content. Whether you crave warmth or nourishment, Olive Garden Pasta e Fagioli delivers both taste and wellness benefits in every bowl.
How it fits in a healthy lifestyle
Olive Garden Pasta e Fagioli fits seamlessly into a balanced diet. If you follow a heart-healthy eating plan, the soup’s lean protein and fiber content make it a smart choice. Pair it with a side salad for added greens, or enjoy it as a light lunch to stay on track with your goals.
For those focusing on plant-based meals, this dish offers a satisfying alternative to meat-heavy options. The beans provide ample protein, while the vegetables add essential micronutrients. If you’re exploring gluten-free adaptations, consider swapping regular pasta for a gluten-free variety. Check out our gluten-free pasta guide for easy substitutions.
Busy weeknights call for nourishing yet simple meals, and this soup delivers. It reheats well, making it perfect for meal prep. For more tips on balancing convenience and nutrition, explore our quick healthy meals roundup. With its versatility and wholesome ingredients, Olive Garden Pasta e Fagioli helps you eat well without sacrificing flavor.
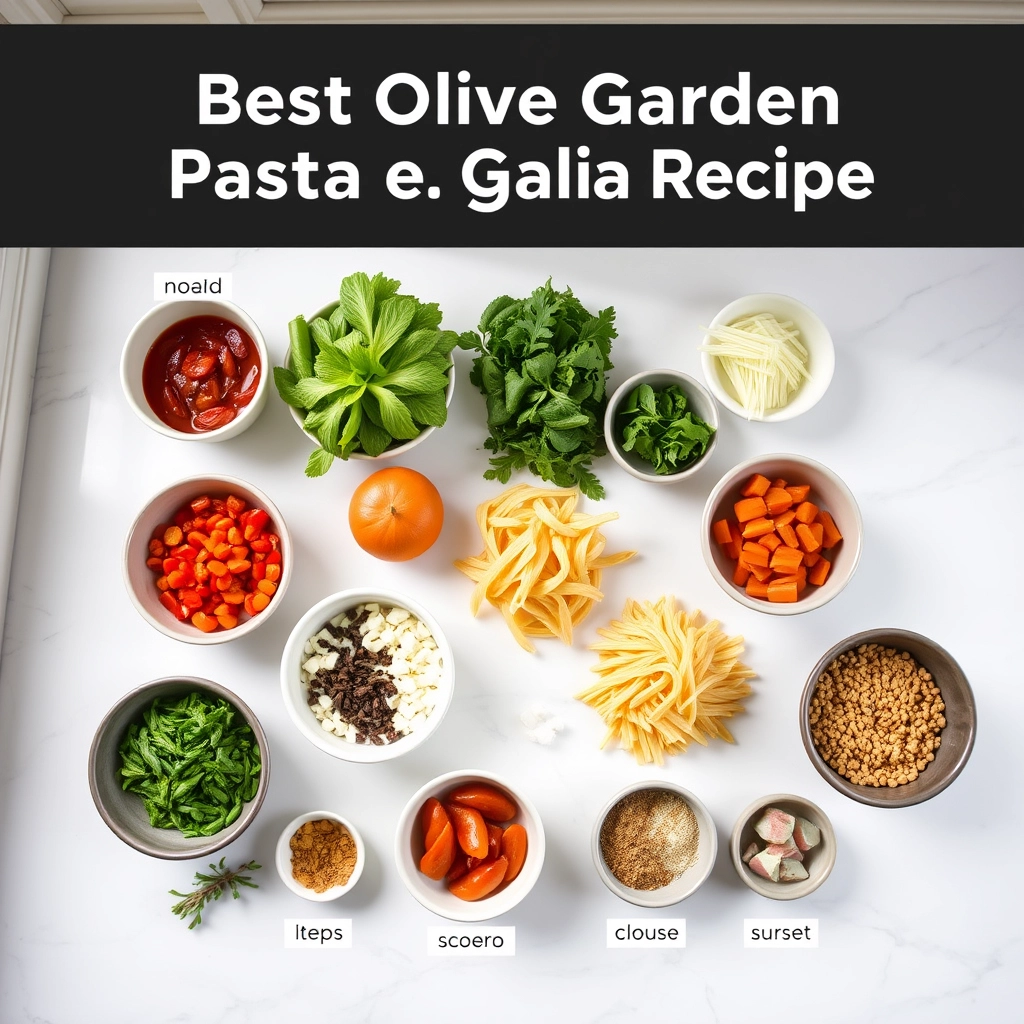
A hearty Italian soup with pasta, beans, and vegetables, inspired by Olive Garden’s classic dish.
Ingredients
Scale
For the Crust:
1 lb ground beef
1 small onion, diced
3 cloves garlic, minced
2 carrots, diced
2 stalks celery, diced
1 (15 oz) can diced tomatoes
1 (15 oz) can red kidney beans, drained and rinsed
1 (15 oz) can white cannellini beans, drained and rinsed
4 cups beef broth
1 (15 oz) can tomato sauce
1 tsp dried oregano
1 tsp dried basil
1/2 tsp dried thyme
1/2 tsp salt
1/4 tsp black pepper
1 cup ditalini pasta, uncooked
2 tbsp olive oil
Grated Parmesan cheese for garnish
Instructions
1. Prepare the Crust:
In a large pot, heat olive oil over medium heat. Add ground beef and cook until browned, breaking it into small pieces. Drain excess fat.
Add onion, garlic, carrots, and celery to the pot. Cook for 5 minutes until vegetables begin to soften.
Stir in diced tomatoes, kidney beans, cannellini beans, beef broth, tomato sauce, oregano, basil, thyme, salt, and pepper. Bring to a boil.
Reduce heat to low and simmer for 20 minutes, stirring occasionally.
Add ditalini pasta and cook for an additional 10 minutes or until pasta is tender.
Serve hot, garnished with grated Parmesan cheese.
Notes
You can customize the seasonings to taste.
s-dish">How to Prepare This Dish
Steps and time-saving tips
Start by heating olive oil in a large pot over medium heat, then sauté diced onions, carrots, and celery until they soften. Add minced garlic and cook for another minute until fragrant. Next, stir in ground beef, breaking it apart with a wooden spoon until browned. Drain any excess fat, then pour in diced tomatoes, tomato sauce, and beef broth for a rich base. Sprinkle in Italian seasoning, salt, and pepper to layer the flavors. Meanwhile, cook ditalini pasta separately until al dente—this prevents it from becoming mushy in the soup. Once the broth simmers, fold in drained and rinsed kidney beans along with the cooked pasta. Let everything simmer together for 10 minutes so the flavors meld. For a time-saving shortcut, use pre-chopped veggies or canned beans. Right before serving, drizzle with extra virgin olive oil and top with grated Parmesan for a restaurant-worthy finish.
Mistakes I’ve made and learned from
I once rushed the sautéing step, leaving the veggies undercooked and crunchy, which threw off the texture of the entire Olive Garden Pasta e Fagioli. Now I take my time to soften them properly—it’s worth the extra few minutes. Another blunder? Overcooking the pasta directly in the soup, which turned it into a starchy mess. That’s why I always cook it separately now, just like I do with my perfect al dente pasta. And if you’ve ever ended up with a bland broth, I’ve been there too. A pro tip: taste and adjust the seasoning gradually, as I learned from my soup flavor balancing guide. Trust me, these small tweaks make all the difference.
n-and-variations">Cultural Connection and Variations
Where this recipe comes from
Olive Garden Pasta e Fagioli carries the heartwarming legacy of Italian peasant cooking, where simple ingredients like beans, pasta, and tomatoes transformed into something magical. Originally from Northern Italy, this dish was a way for families to stretch their resources while still enjoying a hearty, flavorful meal. Interestingly, each region in Italy puts its own spin on it—some add pancetta for richness, while others keep it vegetarian with extra herbs.
When Olive Garden introduced their version of Pasta e Fagioli to American diners, they blended tradition with accessibility. Their recipe leans into the comforting flavors of the original but simplifies the process for home cooks. In my family, we tweak it by adding a splash of red wine for depth, a trick my nonna swore by. Meanwhile, in Tuscany, they might use cannellini beans instead of kidney beans, proving how versatile this dish truly is.
Across the globe, similar dishes pop up under different names. In Greece, you’ll find “fasolada,” a bean soup with a lemony twist. Even in Brazil, feijoada borrows the same soul-warming concept. Yet, Olive Garden Pasta e Fagioli remains a standout because it bridges nostalgia with everyday ease.
ays-cooking">How it fits in today’s cooking
Today, Olive Garden Pasta e Fagioli thrives as the ultimate comfort food, perfect for chilly nights or busy weeknights. Modern cooks love how adaptable it is—swap in gluten-free pasta or add kale for a nutrient boost. It’s also a star during holidays, often served alongside classics like garlic bread for a cozy family feast.
Meal preppers appreciate its freezer-friendly nature, while instant pot fans cut the cooking time in half. Plus, it pairs beautifully with a crisp salad, like this Italian salad, for a balanced dinner. Whether you stick to the traditional recipe or experiment with new twists, Olive Garden Pasta e Fagioli proves that some dishes never go out of style.
Taste and Texture
What makes it delicious
Olive Garden Pasta e Fagioli wraps you in warmth with its rich, savory broth and tender pasta. The tomatoes add a bright tang, while the beans lend a creamy, velvety texture that melts in your mouth. Fragrant garlic and herbs like oregano and basil deepen the flavor, making each spoonful aromatic and comforting. Meanwhile, the ground beef or Italian sausage brings a hearty, meaty bite that balances the dish perfectly. Whether you crave something cozy or crave-worthy, Olive Garden Pasta e Fagioli delivers a satisfying, restaurant-quality experience at home.
r">Boosting the flavor
For an extra kick, try stirring in a spoonful of homemade pesto just before serving—its fresh basil and garlic will elevate the herb notes. Alternatively, a sprinkle of grated Parmesan or a dash of red pepper flakes adds depth and heat. If you love a smoky twist, swap the ground beef for crispy pancetta or top with toasted garlic bread crumbs for crunch. Small tweaks like these keep Olive Garden Pasta e Fagioli exciting while honoring its classic roots.
Tips for Success
Best practices for results
For the best Olive Garden Pasta e Fagioli, always sauté your onions, carrots, and celery until they soften completely. This builds a flavorful base. Additionally, use high-quality canned tomatoes and rinse your beans thoroughly to avoid a gritty texture. Simmer the soup gently to let the flavors meld without overcooking the pasta. Finally, stir in fresh parsley just before serving for a bright finish.
>Mistakes to avoid
Avoid adding the pasta too early, or it will turn mushy. Instead, cook it separately and combine it with the soup just before serving. Also, don’t skip the step of deglazing the pot with broth after sautéing the vegetables—this adds depth. For more on balancing flavors, check out our guide to soup seasoning secrets. If your soup thickens too much, thin it with a splash of broth, as explained in our fixing thick soups tutorial.
Serving and Pairing Suggestions
How to serve this dish
Serve Olive Garden Pasta e Fagioli in rustic bowls to highlight its hearty, comforting appeal. For a restaurant-style touch, drizzle a swirl of extra virgin olive oil on top and sprinkle fresh parsley or grated Parmesan cheese. Meanwhile, warm crusty bread on the side lets guests soak up every last drop of the rich broth. This dish shines at casual gatherings, family dinners, or even cozy holiday meals when you want a crowd-pleaser. If you’re hosting a themed night, pair it with other Italian favorites for a full Olive Garden-inspired experience.
What goes well with it
A crisp Caesar salad balances the warmth of Olive Garden Pasta e Fagioli with its crunchy romaine and tangy dressing. Alternatively, try garlic knots or our easy homemade focaccia for a carb-loaded feast. For drinks, a light red wine like Chianti enhances the soup’s savory notes, while sparkling water with lemon keeps things refreshing. If you’re craving more Italian flavors, our creamy Tuscan chicken or lemon ricotta cookies make delightful additions to the meal.
Olive Garden’s Pasta e Fagioli is a hearty Italian soup made with ground beef, beans, pasta, tomatoes, and a blend of herbs. The dish features a rich broth with onions, carrots, and celery, giving it a classic Italian flavor. It’s one of Olive Garden’s most popular soups, known for its comforting taste.
Is Olive Garden Pasta e Fagioli gluten-free?
No, Olive Garden’s Pasta e Fagioli is not gluten-free because it contains pasta made from wheat. If you’re looking for gluten-free options, Olive Garden offers other soups like the Zuppa Toscana without pasta. Always check with the restaurant for the latest ingredient information.
rank-math-faq-item">
How many calories are in Olive Garden’s Pasta e Fagioli?
A serving of Olive Garden Pasta e Fagioli contains around 220 calories per cup, making it a lighter option compared to some of their other dishes. The soup is packed with protein and fiber from the beans and ground beef. It’s a satisfying choice for those watching their calorie intake.
Can I make Olive Garden Pasta e Fagioli at home?
Yes! Many copycat recipes recreate Olive Garden’s Pasta e Fagioli using ingredients like ground beef, kidney beans, ditalini pasta, and Italian seasoning. Simmering the soup slowly helps blend the flavors just like the restaurant version. It’s a great way to enjoy this classic dish at home.
Best Peach Iced Tea – Refreshing Homemade Recipe
Introduction
Nothing captures the essence of summer quite like a refreshing glass of Peach Iced Tea. Whether you’re lounging on the porch or hosting a backyard barbecue, this drink brings a sweet, sun-kissed flavor that instantly lifts your mood. Moreover, it’s incredibly easy to make, requiring just a handful of ingredients you likely already have. If you’re looking for a way to beat the heat while savoring the season’s best flavors, this Peach Iced Tea recipe is your perfect companion.
Peach Iced Tea is more than just a beverage—it’s a celebration of simplicity and nostalgia. Combining the boldness of black tea with the natural sweetness of ripe peaches creates a balanced, invigorating drink that appeals to everyone. Unlike store-bought versions packed with artificial flavors, homemade Peach Iced Tea lets you control the ingredients, ensuring a fresher, healthier sip every time. Additionally, it pairs wonderfully with light summer dishes, making it a staple for picnics and gatherings. If you love experimenting with flavors, you can even tweak the recipe to match your taste, whether you prefer it extra peachy or lightly sweetened. For more refreshing drink ideas, check out our summer drinks collection, or if you’re craving something fruity, our homemade lemonade is another crowd-pleaser.
Why I Love This Recipe
Peach Iced Tea holds a special place in my heart because it reminds me of lazy afternoons spent with my grandmother. She always had a pitcher chilling in the fridge, ready to share with anyone who stopped by. Now, every time I make it, I feel that same sense of hospitality and joy. The aroma of fresh peaches steeping in tea takes me back to those moments, and I hope this recipe brings you just as much happiness. It’s not just a drink—it’s a little taste of home.
Health and Nutrition
Why it’s good for your body
Peach iced tea delivers a refreshing way to stay hydrated while offering subtle health perks. Since it combines tea and natural peach flavors, you get antioxidants like polyphenols, which help combat oxidative stress. Additionally, the caffeine in black tea provides a gentle energy boost without the crash of sugary sodas.
Moreover, peach iced tea contains flavonoids that support heart health by improving circulation and reducing inflammation. If you opt for unsweetened versions, you also avoid excess sugar, making it a smarter choice than many store-bought drinks. The natural sweetness of peaches adds flavor without relying on artificial additives.
Finally, peach iced tea contributes to daily fluid intake, which is essential for digestion and skin health. Whether you enjoy it cold or lightly sweetened, this beverage fits seamlessly into a mindful diet. With every sip, you hydrate your body while savoring a delicious, low-calorie treat.
How it fits in a healthy lifestyle
Peach iced tea effortlessly complements balanced eating habits, especially when you prioritize hydration and natural ingredients. For those following gluten-free or low-calorie diets, it’s a safe and satisfying option. Pair it with a wholesome gluten-free snack for a guilt-free refreshment break.
If you’re focused on heart health, unsweetened peach iced tea aligns perfectly with anti-inflammatory eating patterns. The tea’s antioxidants work synergistically with nutrient-dense meals, like those featured in our heart-healthy recipe collection. Whether you sip it post-workout or alongside lunch, it’s a versatile drink that supports wellness without compromise.
Start by brewing your favorite black tea—stronger batches hold up better against the peach flavor. While the tea steeps, peel and dice fresh peaches, then blend them into a smooth puree. If you’re short on time, swap fresh peaches for high-quality peach nectar, but adjust the sweetness later. Once the tea cools, stir in the peach puree and a squeeze of lemon juice for brightness. For extra depth, add a cinnamon stick or a splash of vanilla extract while the tea chills. Pour the Peach Iced Tea over ice, garnish with peach slices, and serve immediately. To save time, make a big batch the night before and refrigerate it—just give it a quick stir before serving.
If you prefer a fizzy twist, top your Peach Iced Tea with club soda right before drinking. For a quicker chill, freeze brewed tea in ice cube trays so your drink won’t dilute. Always taste as you go; peaches vary in sweetness, so you might need less sugar than expected. A handheld strainer helps remove pulp if you prefer a smoother texture. And if your peaches aren’t ripe enough, a short microwave burst softens them for easier blending.
and-learned-from">Mistakes I’ve made and learned from
I once rushed the cooling step and poured hot tea over ice—resulting in a watery, weak Peach Iced Tea. Now, I let it cool completely or use my fast chilling tricks to speed things up without sacrificing flavor. Another time, I over-sweetened the batch, masking the peach’s natural taste. Fixing it taught me to sweeten in stages, especially when using syrups or nectar. If you’re unsure, start with half the sugar and adjust after mixing. And don’t skip the acid! Without lemon juice, the flavors can taste flat. For more balancing tips, check out my flavor balancing guide—it’s a game-changer for drinks like this.
Cultural Connection and Variations
Where this recipe comes from
Peach Iced Tea whispers of lazy Southern afternoons, where porch swings creak and the air hums with humidity. Born in the American South, this refreshing drink blends sweet peach syrup with brisk black tea, creating a balance that cools you down even on the hottest days. Some say it started as a way to use up summer’s peach harvest, while others credit creative home cooks who wanted to jazz up plain iced tea. Either way, Peach Iced Tea quickly became a staple at picnics, barbecues, and family reunions.
Travel beyond the South
, and you’ll find twists on this classic. In Asia, some versions use green tea or oolong for a lighter, floral note. Meanwhile, Middle Eastern adaptations might infuse the tea with spices like cardamom or cinnamon. Even within the U.S., families pass down their own secrets—maybe a splash of bourbon for grown-up gatherings or a handful of fresh mint for extra brightness. No matter the variation, Peach Iced Tea always carries that same promise of sweetness and relief.
How it fits in today’s cooking
Today, Peach Iced Tea bridges tradition and modern convenience. Busy home cooks might skip the stovetop and use cold brew tea bags, while others experiment with honey or agave instead of sugar. It’s a star at summer parties, but also shines as a year-round treat—just try it with vanilla sugar cookies for a cozy afternoon pick-me-up.
Social media fuels new trends, too. Some blend Peach Iced Tea into smoothies or freeze it into popsicles. Others pair it with lemon blueberry cake for a dessert that’s equal parts tart and sweet. Whether you stick to the classic or put your own spin on it, this drink proves that some traditions only get better with time.
>Taste and Texture
What makes it delicious
Peach Iced Tea delivers a refreshing burst of sweet and tangy flavors, perfectly balanced for a thirst-quenching sip. The ripe peaches infuse every drop with a juicy, sun-kissed sweetness, while the black tea adds a subtle earthy depth. As you take a sip, the drink feels crisp and light on your tongue, with a silky smoothness from just the right amount of honey or sugar. Meanwhile, the aroma swirls with floral peach notes and a hint of citrus if you add a squeeze of lemon. Whether served over ice or blended, Peach Iced Tea is a summery delight that cools you down with every fizzy or still sip.
Boosting the flavor
For an even bolder twist, try muddling fresh peaches with a splash of ginger syrup to amplify the natural fruitiness. Alternatively, swap regular tea for a floral jasmine or hibiscus blend to add layers of fragrance. A sprinkle of cinnamon or a dash of vanilla extract can also warm up the flavor profile beautifully. If you love fruity pairings, consider serving Peach Iced Tea alongside a slice of peach cobbler or a scoop of honey vanilla ice cream for a match made in dessert heaven. The possibilities are endless when you play with textures and tastes.
Tips for Success
Best practices for results
Always use fresh, ripe peaches for the best flavor in your Peach Iced Tea. Meanwhile, steep the tea bags for exactly 5 minutes to avoid bitterness. Furthermore, chill the brewed tea completely before adding ice to prevent dilution. For a smoother texture, strain the peach puree before mixing it into the tea. Finally, garnish with a peach slice and fresh mint to elevate the presentation.
Mistakes to avoid
Avoid over-steeping the tea, as it can make your Peach Iced Tea taste harsh. Instead, set a timer for precision. Additionally, skip using canned peach syrup if possible, since fresh peaches deliver brighter flavor. If you need sweetener alternatives, try our guide on healthy sweeteners for balanced results. Lastly, don’t pour hot tea directly over ice—cool it first to avoid a watery drink. For more refreshing ideas, explore our summer drinks collection.
Serving and Pairing Suggestions
How to serve this dish
Serve Peach Iced Tea in tall, frosty glasses to keep it refreshingly cold. For a festive touch, rim the glasses with a sprinkle of sugar or add a peach slice and fresh mint sprig as garnish. Meanwhile, this drink shines at summer picnics, backyard barbecues, or even as a brunch companion. To elevate the presentation, use clear pitchers so the golden hue of Peach Iced Tea catches the light beautifully. If you’re hosting, consider adding a DIY flavor station with extra peach syrup or lemon wedges for guests to customize their sips.
h-it">What goes well with it
Pair Peach Iced Tea with light, fresh dishes to balance its sweet-tart flavor. For example, try it alongside a crisp summer berry salad, where the juicy berries mirror the tea’s fruity notes. Alternatively, serve it with savory bites like herbed chicken sliders, as the tea’s brightness cuts through rich flavors. Finally, for a sweet finish, match it with a slice of lemon poppyseed cake, where the citrusy tang complements the peach perfectly.
How do you make peach iced tea from scratch?
To make peach iced tea from scratch, brew black tea and let it cool. Blend fresh peaches with a bit of sugar or honey, then mix the puree with the tea. Serve over ice for a refreshing peach iced tea.
rank-math-faq-item">
Can you use canned peaches for peach iced tea?
Yes, canned peaches work well for peach iced tea. Drain the syrup and blend the peaches before adding them to your tea. Adjust sweetness since canned peaches often come in syrup.
What type of tea is best for peach iced tea?
Black tea is the classic choice for peach iced tea, but green tea or herbal teas like hibiscus also pair well. The bold flavor of black tea balances the sweetness of peaches.
How long does homemade peach iced tea last in the fridge?
Homemade peach iced tea stays fresh for 3–4 days in the fridge. Store it in a sealed pitcher, and stir before serving as the peach puree may settle.