Best Cucumber Feta Salad – Refreshing & Easy Recipe
Introduction
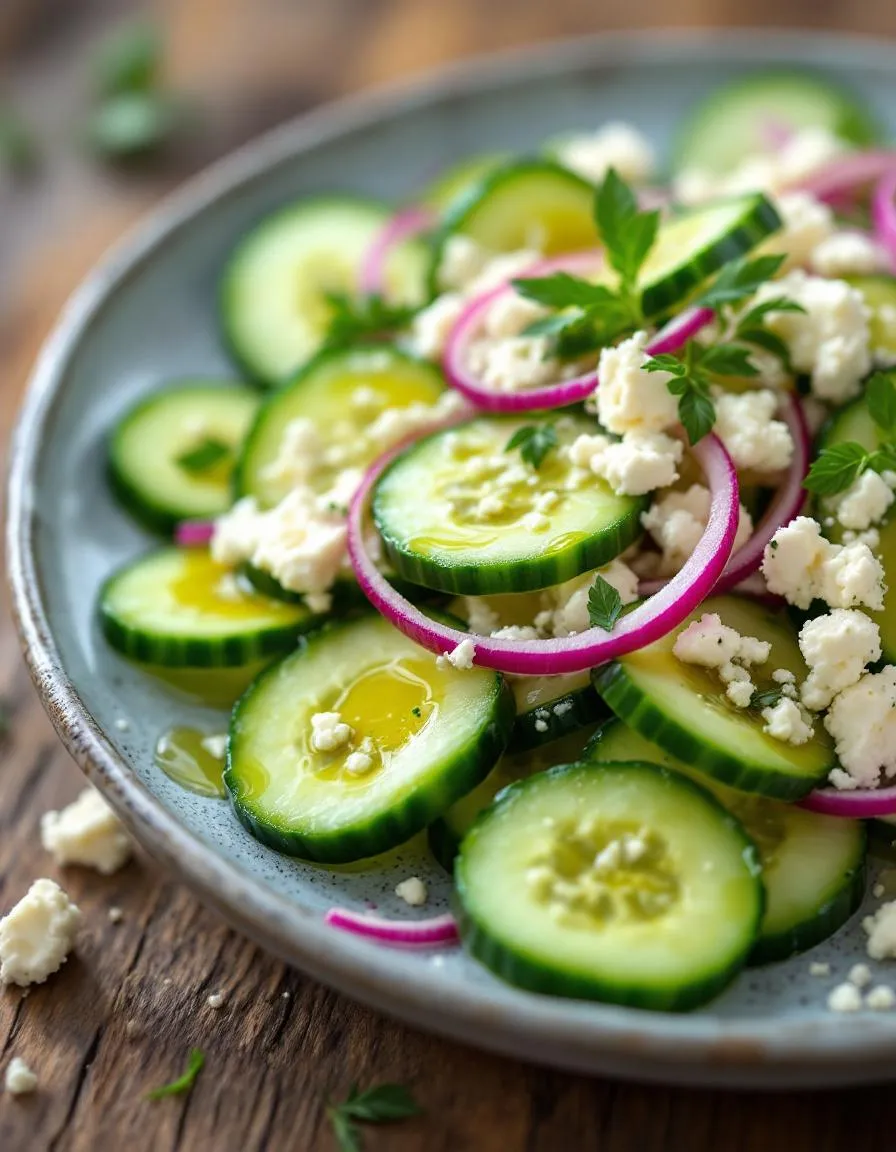
There’s something undeniably refreshing about a dish that balances crispness, creaminess, and tang in every bite. That’s exactly why I adore this Cucumber Feta Salad—it’s a vibrant, no-fuss recipe that brings joy to any table. Whether you’re prepping for a summer picnic or just craving a light yet satisfying side, this salad delivers. Plus, it’s a fantastic way to celebrate fresh produce, something I always emphasize in my seasonal cooking guides.
Cucumber Feta Salad is a Mediterranean-inspired dish that combines crunchy cucumbers, creamy feta cheese, and a zesty dressing for a burst of flavor in every forkful. Unlike heavy, complicated recipes, this salad shines in its simplicity, making it perfect for busy weeknights or last-minute gatherings. It’s also incredibly versatile—you can toss in olives, red onions, or even a handful of fresh herbs from your garden. For those who love meal prep, it keeps well in the fridge, so you can enjoy it throughout the week. If you’re looking for more easy, crowd-pleasing dishes, check out my quick dinner ideas for inspiration. Above all, this salad embodies the breezy, approachable vibe of brekcakes.com, where good food doesn’t have to be fussy to feel special.
Why I Love This Recipe
This Cucumber Feta Salad holds a special place in my heart because it reminds me of lazy Sunday lunches with my family. My mom used to whip it up with garden-fresh cucumbers, and I’d sneak extra feta when she wasn’t looking. Now, whenever I make it, the crisp crunch and salty-sweet flavors transport me right back to those sunny afternoons. It’s more than just a recipe—it’s a little edible memory, and I hope it becomes one for you too.
Health and Nutrition
Why it’s good for your body
Cucumber Feta Salad packs a refreshing punch while delivering impressive health benefits. First, cucumbers hydrate your body thanks to their high water content, which keeps you feeling full and energized. Additionally, they provide vitamins like K and C, supporting bone health and immunity. Meanwhile, feta cheese adds a protein boost and healthy fats, helping you stay satisfied longer.
Moreover, this salad includes heart-healthy olive oil, rich in monounsaturated fats that may lower bad cholesterol. The combination of crisp cucumbers and creamy feta also offers a balanced texture and flavor, making it easy to enjoy nutrient-dense ingredients. Since cucumbers are low in calories but high in fiber, Cucumber Feta Salad promotes digestion without weighing you down.
Finally, the dish contains antioxidants from fresh herbs like dill or mint, which fight inflammation. Whether you need a light lunch or a side dish, Cucumber Feta Salad nourishes your body without compromising taste. Its simplicity ensures you get wholesome nutrients in every bite.
How it fits in a healthy lifestyle
Cucumber Feta Salad fits seamlessly into a balanced diet, whether you’re aiming for weight management or heart health. Because it’s naturally gluten-free and low-carb, it pairs well with gluten-free meal plans. The protein from feta and healthy fats from olive oil also make it a smart choice for those focusing on satiety and muscle maintenance.
For busy weeknights, this salad comes together quickly, encouraging healthier eating habits without extra effort. You can even meal-prep it ahead of time, just like our easy meal-prep strategies suggest. Whether served as a side or a main with grilled chicken, Cucumber Feta Salad keeps your meals fresh, flavorful, and full of nutrients.
Start by washing and drying two large cucumbers thoroughly, then slice them into thin rounds or half-moons for a crisp bite. Toss the cucumber pieces into a large mixing bowl and sprinkle with a pinch of salt to draw out excess moisture—this keeps your Cucumber Feta Salad from getting watery. While the cucumbers rest, crumble a block of high-quality feta cheese into small chunks and set aside. In a separate bowl, whisk together olive oil, lemon juice, minced garlic, and a dash of dried oregano until smooth. Drain any liquid from the cucumbers, then gently fold in the feta, halved cherry tomatoes, and thinly sliced red onion. Drizzle the dressing over the salad and toss lightly to coat everything evenly. For the best flavor, let the salad chill in the fridge for at least 15 minutes before serving. If you’re short on time, skip the salting step but pat the cucumbers dry with a paper towel to prevent sogginess. For extra crunch, add toasted pine nuts or sunflower seeds right before serving.
Mistakes I’ve made and learned from
Early on, I made the mistake of overdressing my Cucumber Feta Salad, which turned it into a soggy mess. Now, I always add the dressing in stages, tasting as I go, to avoid drowning the fresh ingredients. Another lesson? Not all feta is created equal. I once used pre-crumbled feta, and the salad lacked the creamy texture I wanted. Now, I buy a solid block and crumble it myself—it makes all the difference. If you’re new to working with feta, check out my guide on choosing the right cheese for tips. Also, don’t skip the salting step unless you enjoy a watery salad. Trust me, I learned that the hard way! For more tricks on keeping salads crisp, read my salad hacks post—it’s a game-changer.
Cucumber Feta Salad traces its roots to the sunny Mediterranean, where crisp cucumbers and tangy feta cheese thrive under the warm coastal breeze. Greeks often serve it as a refreshing side dish, drizzled with olive oil and sprinkled with oregano. Meanwhile, in Turkey, they might add a splash of pomegranate molasses for a sweet-tart twist. Even within my family, we’ve put our own spin on it—tossing in juicy cherry tomatoes or swapping fresh mint for dill depending on the season.
Travel further east, and you’ll find Middle Eastern versions studded with sumac or za’atar for an earthy kick. Some regions even fold in creamy yogurt to make it heartier. No matter where you go, Cucumber Feta Salad adapts beautifully, reflecting local flavors while keeping its crisp, cooling essence. Whether it’s a picnic staple or a meze platter star, this dish carries stories of shared tables and sunny afternoons.
ays-cooking">How it fits in today’s cooking
Today, Cucumber Feta Salad shines as a go-to for busy cooks and health-conscious eaters alike. It’s a breeze to whip up for weeknight dinners, yet elegant enough for summer barbecues or holiday spreads. Modern twists include adding quinoa for extra protein or tossing in avocado for creaminess. Many even pair it with grilled meats from our easy grilling recipes collection for a balanced meal.
Seasonal eating also keeps this salad relevant. When cucumbers peak in summer, it’s a crisp, hydrating treat. In cooler months, some roast the cucumbers lightly for a warmer variation. And for those meal-prepping? It’s a perfect make-ahead dish, just like the meal prep ideas we love for busy weeks. No matter how you serve it, Cucumber Feta Salad remains a timeless, versatile favorite.
Taste and Texture
What makes it delicious
Cucumber Feta Salad bursts with refreshing, vibrant flavors that dance on your tongue. Crisp cucumbers deliver a juicy crunch, while creamy feta cheese adds a tangy, salty richness. Fresh herbs like mint or dill bring a fragrant brightness, and a drizzle of olive oil ties everything together with a smooth, velvety finish. Every bite of Cucumber Feta Salad feels light yet satisfying, making it perfect for warm days or as a zesty side dish. The contrast between the cool cucumbers and the bold feta creates a harmony that keeps you reaching for more.
r">Boosting the flavor
Elevate your Cucumber Feta Salad with a handful of toasted walnuts or pine nuts for a nutty crunch. Alternatively, toss in some Kalamata olives for a briny depth that pairs beautifully with the feta. A squeeze of lemon juice or a sprinkle of sumac can brighten the flavors even further. For a creamy twist, try adding a dollop of Greek yogurt dressing to balance the tanginess. If you love heat, a pinch of red pepper flakes or a dash of homemade harissa will add a spicy kick. Experimenting with these small tweaks keeps the salad exciting and tailored to your taste.
Tips for Success
Best practices for results
Always slice cucumbers evenly so they marinate uniformly in your Cucumber Feta Salad. For the best flavor, chill the salad for at least 30 minutes before serving. Meanwhile, use fresh, high-quality feta cheese—it makes a noticeable difference in texture and taste. If you prefer a creamier dressing, gently fold in Greek yogurt for extra richness. Finally, toss the salad just before serving to keep the cucumbers crisp and refreshing.
>Mistakes to avoid
Avoid oversalting the salad early on, since feta cheese already adds plenty of saltiness. Instead, season in stages and taste as you go. Also, don’t let the salad sit too long before serving, or the cucumbers may lose their crunch. For more tips on balancing flavors, check out our guide on salad dressing ratios. Another common mistake is using watery cucumbers—pat them dry first to prevent a soggy salad. Learn how to prep vegetables properly in our vegetable prep guide.
Serving and Pairing Suggestions
How to serve this dish
For a refreshing presentation, serve Cucumber Feta Salad in a shallow bowl or on a large platter to showcase its vibrant colors. Meanwhile, garnish with extra crumbled feta and a sprinkle of fresh dill for a pop of contrast. This dish shines at summer picnics, but it also makes a light yet impressive side for holiday gatherings. If you want to elevate the look, arrange cucumber slices in a circular pattern and drizzle the dressing just before serving.
What goes well with it
Pair Cucumber Feta Salad with grilled proteins like lemon herb chicken or garlic shrimp for a balanced meal. Additionally, it complements tangy dips like tzatziki or hummus, adding extra creaminess to each bite. For drinks, try a crisp white wine or sparkling water with lime to enhance the salad’s freshness. If you’re planning a full spread, serve it alongside our Mediterranean Quinoa Bowl or Grilled Halloumi Skewers for a Mediterranean-inspired feast.
What ingredients are in a classic Cucumber Feta Salad?
A classic Cucumber Feta Salad typically includes fresh cucumbers, crumbled feta cheese, red onion, olives, and fresh herbs like dill or mint. The dressing is usually a simple mix of olive oil, lemon juice, salt, and pepper. This refreshing salad highlights the crispness of cucumbers and the tangy creaminess of feta.
How long does Cucumber Feta Salad last in the fridge?
Cucumber Feta Salad stays fresh for about 2–3 days when stored in an airtight container in the fridge. The cucumbers may release some water over time, so draining excess liquid before serving helps maintain texture. For best results, add fresh herbs right before eating.
rank-math-faq-item">
Can I add avocado to Cucumber Feta Salad?
Yes, avocado pairs wonderfully with Cucumber Feta Salad, adding creaminess and healthy fats. Dice or slice the avocado and gently toss it in just before serving to prevent browning. The combination of cool cucumbers, salty feta, and rich avocado creates a delicious balance.
Is Cucumber Feta Salad healthy?
Absolutely! Cucumber Feta Salad is packed with nutrients—cucumbers provide hydration and fiber, while feta offers protein and calcium. Using olive oil and fresh herbs boosts heart-healthy fats and antioxidants. It’s a light, nutritious dish perfect for summer meals or as a side.
Best Creamed Peas – Classic Comfort Food Recipe
Introduction
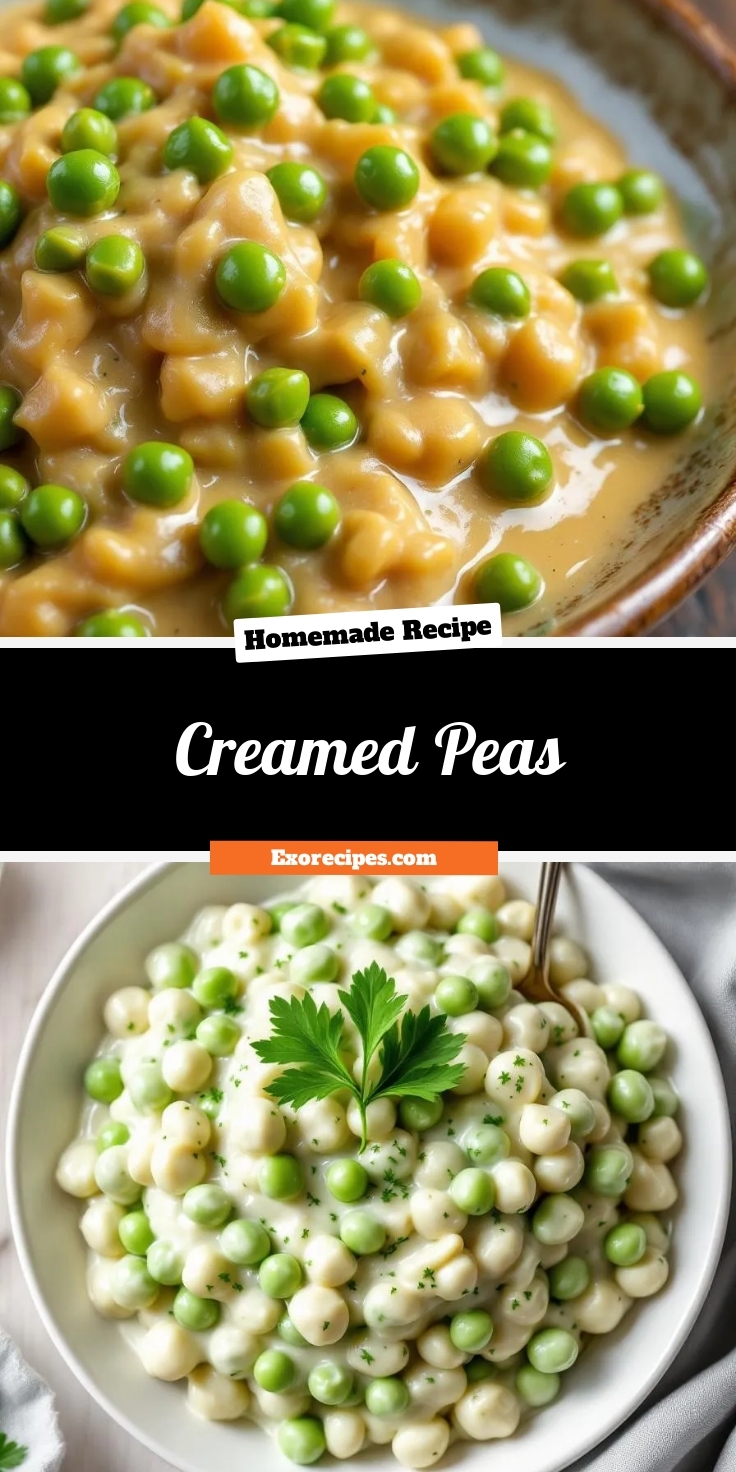
There’s something undeniably comforting about a bowl of Creamed Peas—soft, buttery, and bursting with fresh flavor. Whether you grew up with this classic side dish or are discovering it for the first time, it has a way of wrapping you in nostalgia. Moreover, it pairs perfectly with everything from roasted chicken to flaky biscuits, making it a versatile addition to any meal. If you’re craving a taste of home or simply want to elevate your weeknight dinners, this recipe delivers warmth and satisfaction in every bite.
Creamed Peas is a timeless dish that transforms humble ingredients into something truly special. At its core, it combines tender peas with a rich, velvety sauce made from butter, flour, and milk or cream. While it might sound simple, the magic lies in the balance of textures and flavors—sweet peas contrast beautifully with the savory cream base. Historically, this dish has roots in American home cooking, often appearing on holiday tables or as a comforting weeknight staple. On brekcakes.com, we celebrate recipes like this because they bridge tradition and modern simplicity. For instance, if you love classic comfort food, you’ll appreciate our fluffy buttermilk biscuits, which pair wonderfully with Creamed Peas. Similarly, if you’re exploring more vegetable-forward sides, our garlic green beans offer another delicious option. Ultimately, this dish embodies what we stand for—approachable, flavorful, and deeply satisfying cooking.
Why I Love This Recipe
Creamed Peas holds a special place in my heart because it reminds me of Sunday dinners at my grandmother’s house. She always made it with garden-fresh peas and a touch of nutmeg, which added warmth to every spoonful. Even now, whenever I prepare this dish, it brings back memories of laughter around the table and the joy of sharing food with loved ones. Beyond nostalgia, I adore how effortlessly it comes together, proving that the simplest recipes often leave the biggest impression.
Health and Nutrition
Why it’s good for your body
Creamed Peas deliver a powerhouse of nutrients in every creamy, satisfying bite. First, they pack a punch of plant-based protein and fiber, which keeps you full longer and supports digestion. Additionally, peas provide essential vitamins like vitamin K for bone health and vitamin C to boost immunity. Since Creamed Peas often include milk or a dairy alternative, they also offer calcium for strong teeth and bones.
Moreover, this dish contains antioxidants that fight inflammation and promote heart health. The natural sweetness of peas means you can enjoy Creamed Peas without added sugars, making it a smarter choice for balanced eating. Furthermore, the combination of healthy fats from cream or butter substitutes and the low glycemic index of peas helps stabilize blood sugar levels. Whether you serve it as a side or a main, Creamed Peas contribute to a nutrient-dense meal without sacrificing flavor.
Finally, Creamed Peas adapt easily to dietary preferences. For instance, you can swap traditional dairy for almond milk or coconut cream to reduce lactose. Either way, you still get the same wholesome benefits. With so many advantages, it’s no wonder Creamed Peas remain a timeless favorite for health-conscious eaters.
How it fits in a healthy lifestyle
Creamed Peas fit seamlessly into a balanced diet, whether you’re aiming for heart-healthy meals or plant-based protein sources. Their versatility makes them ideal for weeknight dinners or meal prep, especially when paired with lean proteins like grilled chicken or fish. If you’re exploring gluten-free options, Creamed Peas naturally avoid gluten while still feeling indulgent.
For those focusing on weight management, the fiber in Creamed Peas helps control cravings, so you stay satisfied without overeating. You can also lighten the dish by using low-fat milk or a splash of olive oil instead of heavy cream. Looking for more ways to incorporate veggies? Try pairing Creamed Peas with our Roasted Vegetable Medley for a colorful, nutrient-packed plate. Or, if you need quick family-friendly ideas, our 30-Minute Weeknight Dinners guide offers plenty of inspiration. However you enjoy it, Creamed Peas make healthy eating simple and delicious.
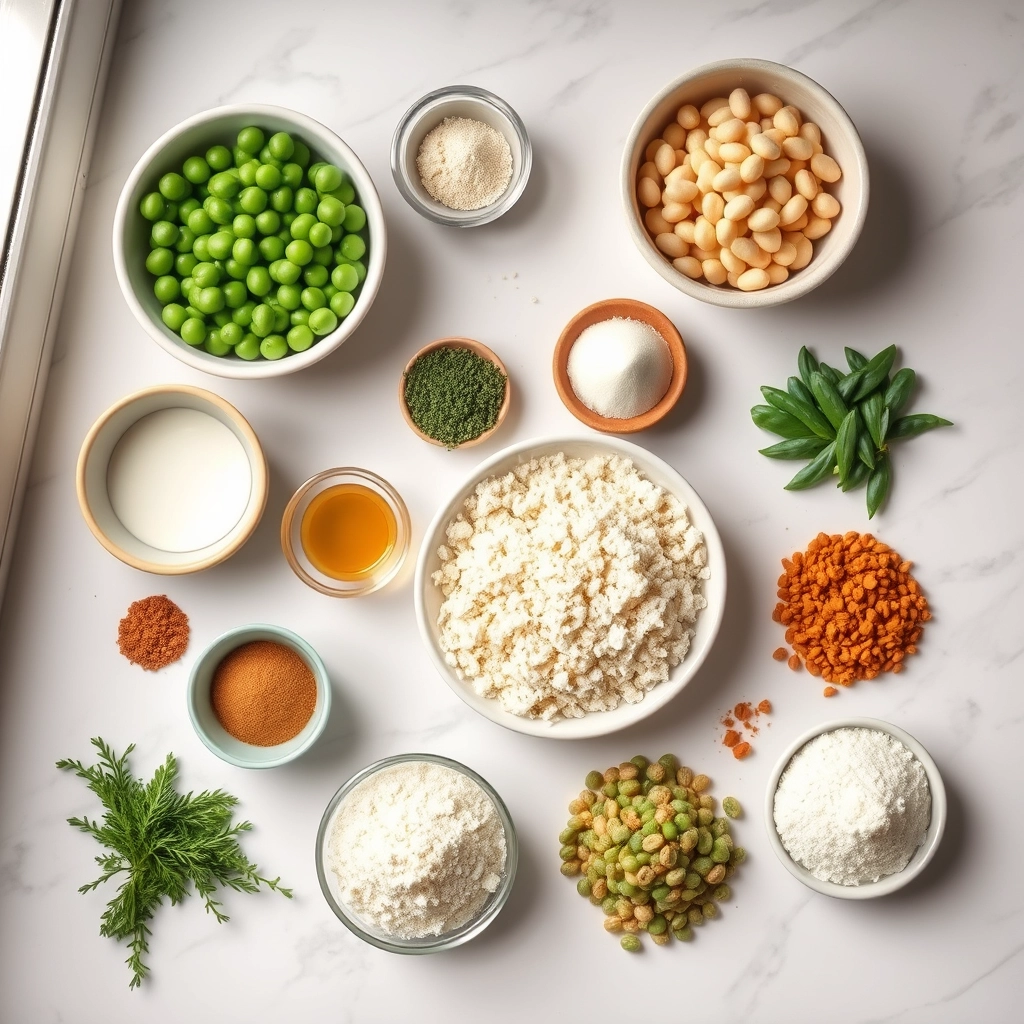
A simple and creamy side dish featuring tender peas in a rich, velvety sauce.
Ingredients
Scale
For the Crust:
2 cups frozen peas
2 tablespoons butter
2 tablespoons all-purpose flour
1 cup whole milk
1/2 teaspoon salt
1/4 teaspoon black pepper
1/4 teaspoon garlic powder
Instructions
1. Prepare the Crust:
In a medium saucepan, melt the butter over medium heat.
Whisk in the flour and cook for 1-2 minutes until lightly golden.
Gradually whisk in the milk, ensuring no lumps form.
Cook the sauce, stirring constantly, until it thickens (about 3-4 minutes).
Stir in the peas, salt, pepper, and garlic powder.
Simmer for 5-7 minutes until the peas are heated through and the sauce is creamy.
Notes
You can customize the seasonings to taste.
“`html
="how-to-prepare-this-dish">How to Prepare This Dish
Steps and time-saving tips
Start by melting butter in a saucepan over medium heat, then whisk in flour to create a smooth roux. Cook it for just a minute to remove the raw flour taste, but don’t let it brown. Gradually pour in milk while stirring constantly to avoid lumps—this ensures your creamed peas stay velvety. Once the sauce thickens, reduce the heat and fold in fresh or frozen peas, letting them simmer until tender. Season with salt, pepper, and a pinch of sugar to balance the flavors. For a time-saving hack, use pre-cooked peas or steam them in the microwave while preparing the sauce. If the mixture feels too thick, splash in a little extra milk or broth. Finish with a sprinkle of fresh herbs like parsley or chives for brightness. Serve immediately while warm, or keep it covered on low heat to prevent a skin from forming on top.
Mistakes I’ve made and learned from
I once rushed the roux and ended up with a grainy sauce—patience is key here! Letting the flour and butter cook just long enough makes all the difference. Another time, I overcooked the peas, turning them mushy. Now I add them at the last minute if they’re already tender, as I learned from my guide to perfect vegetable textures. If your sauce separates, don’t panic. A quick whisk or a splash of warm milk usually brings it back together. For more troubleshooting tips, check out my sauce consistency fixes. Trust me, creamed peas forgive small mistakes, so keep it simple and enjoy the process.
Creamed Peas carry a cozy, nostalgic charm that stretches back generations. Originally, this dish found its roots in rural American kitchens, where families relied on simple, hearty ingredients to stretch meals. Farmers often paired fresh or preserved peas with creamy sauces to create a comforting side dish, especially during colder months. Meanwhile, in England, a similar version called “mushy peas” became a staple alongside fish and chips, proving how versatile this humble dish can be.
In my own family, Cream
ed Peas always made an appearance at holiday gatherings. My grandmother would simmer them with a touch of nutmeg, a trick she learned from her German neighbors. Across the South, cooks might add a dash of hot sauce or crumbled bacon for extra flair. Even today, you’ll find regional twists—some prefer a lighter sauce, while others go all-in with butter and cream. No matter the variation, Creamed Peas remain a timeless way to turn simple ingredients into something special.
How it fits in today’s cooking
Modern cooks still love Creamed Peas for their versatility and comfort-food appeal. They’re a natural fit for holiday tables, especially when paired with classic mains like roasted turkey or ham. But you don’t need a special occasion to enjoy them. Many home chefs whip up a batch for weeknight dinners, swapping heavy cream for coconut milk or almond milk to keep things light. Others fold them into pasta dishes for an easy upgrade.
What keeps Creamed Peas relevant today? Their adaptability. Whether you’re cooking for a crowd or meal-prepping solo, this dish fits right in. Some even repurpose leftovers into creamy soups or savory pie fillings. With so many ways to customize it, Creamed Peas prove that classic flavors never go out of style.
>Taste and Texture
What makes it delicious
Creamed Peas deliver a comforting blend of sweetness and richness that makes every bite irresistible. The tender peas burst with a fresh, slightly grassy flavor, while the velvety cream sauce wraps them in a luxurious, buttery embrace. A hint of onion or garlic adds depth, and a sprinkle of black pepper brings just the right amount of warmth. The texture is pure harmony—soft yet slightly firm peas swimming in a smooth, decadent sauce. Whether served as a side or spooned over toast, Creamed Peas offer a nostalgic, satisfying dish that feels both hearty and light.
Boosting the flavor
For an extra layer of flavor, try stirring in crispy bacon bits or a handful of grated Parmesan cheese just before serving. Fresh herbs like dill or chives brighten the dish, while a dash of nutmeg or smoked paprika adds subtle complexity. If you love creamy sides, pair Creamed Peas with our Garlic Mashed Potatoes for a dreamy comfort-food duo. Craving crunch? Top them with toasted breadcrumbs or slivered almonds for contrast. For more inspiration, check out our guide to Easy Herb Sauces to elevate your next batch.
Tips for Success
Best practices for results
Always use fresh or frozen peas for the best texture in your Creamed Peas. If you opt for frozen, thaw them first to prevent excess water from diluting the sauce. Stir the cream sauce frequently over medium heat to avoid lumps, and season generously with salt and pepper for balanced flavor. For extra richness, finish with a pat of butter just before serving. Finally, serve Creamed Peas immediately to keep them warm and creamy.
Mistakes to avoid
Avoid overcooking the peas, as they can turn mushy and lose their vibrant color. Instead, add them to the sauce just before serving to maintain their texture. Many cooks also forget to taste the sauce before finishing, so adjust the seasoning early to avoid bland Creamed Peas. For more tips on perfecting creamy sauces, check out our guide on cream sauce secrets. Additionally, if your sauce separates, learn how to fix it with our troubleshooting tips for sauces gone wrong.
Serving and Pairing Suggestions
How to serve this dish
Serve Creamed Peas warm in a shallow bowl or elegant side dish plate to showcase their creamy texture. For a pop of color, sprinkle fresh chopped parsley or chives on top. Meanwhile, a drizzle of olive oil or a pinch of smoked paprika adds visual appeal. Creamed Peas shine at holiday dinners, but they also make a comforting weeknight side. If you’re hosting brunch, pair them with fluffy biscuits for a cozy touch.
h-it">What goes well with it
For a hearty meal, pair Creamed Peas with roasted chicken or our savory Herb-Crusted Pork Tenderloin. The tender meat balances the dish’s creaminess perfectly. Alternatively, serve them alongside crispy roasted potatoes for contrasting textures. If you prefer lighter fare, try our refreshing Citrus Avocado Salad to brighten the meal. Finally, a chilled glass of Sauvignon Blanc or sparkling water with lemon complements the peas’ rich flavor.
What are creamed peas made of?
Creamed peas are a simple dish made with tender peas cooked in a creamy sauce, typically consisting of butter, flour, milk, and seasonings. Some variations include onions, garlic, or herbs to enhance the flavor. This classic comfort food pairs well with mashed potatoes or roasted meats.
rank-math-faq-item">
How do you thicken creamed peas?
To thicken creamed peas, make a roux by melting butter and whisking in flour before adding milk. Simmer the mixture until it reaches your desired consistency. For a lighter option, you can also use cornstarch or heavy cream to adjust the thickness of the sauce.
Can you freeze creamed peas?
Yes, you can freeze creamed peas, but the texture may change slightly upon thawing. Store them in an airtight container for up to 3 months. Reheat gently on the stovetop, stirring occasionally to restore the creamy consistency.
What to serve with creamed peas?
Creamed peas pair wonderfully with dishes like fried chicken, meatloaf, or baked ham. They also complement starches such as biscuits, rice, or buttery noodles. For a vegetarian option, try serving creamed peas over toast or alongside roasted vegetables.
>
Best Grilled Veggie Skewers – Easy & Flavorful Recipe
Introduction
There’s something undeniably special about gathering around the grill with friends and family, especially when you’re serving vibrant, flavorful Grilled Veggie Skewers. Whether you’re a seasoned grill master or just starting out, this recipe brings everyone together with its smoky, charred goodness. Plus, it’s a fantastic way to celebrate seasonal produce while keeping things light and healthy. Trust me, once you try these skewers, they’ll become a staple at every summer cookout.
Grilled Veggie Skewers are more than just a side dish—they’re a celebration of simplicity and flavor. By threading colorful vegetables like bell peppers, zucchini, and mushrooms onto skewers, you create a dish that’s as visually appealing as it is delicious. The high heat of the grill caramelizes the natural sugars in the veggies, adding a depth of flavor that oven roasting simply can’t match. What I love most about this recipe is its versatility. You can customize it with your favorite vegetables or even add a protein like tofu or shrimp for a heartier meal. It’s also a great way to sneak in extra nutrients, making it perfect for those looking to eat healthier without sacrificing taste. If you’re new to grilling, don’t worry—this recipe is beginner-friendly and pairs wonderfully with other summer favorites like my Grilled Pineapple Salsa or Garlic Herb Potato Wedges.
Why I Love This Recipe
Grilled Veggie Skewers hold a special place in my heart because they remind me of lazy summer evenings spent with my family. My dad taught me how to grill when I was young, and these skewers were one of the first dishes we mastered together. The sizzle of the vegetables hitting the grill, the smoky aroma filling the air—it’s pure nostalgia. Even now, every time I make them, I’m transported back to those moments of laughter and shared meals. That’s the beauty of food—it’s not just about nourishment, but also the memories we create around it.
Health and Nutrition
Why it’s good for your body
Grilled Veggie Skewers pack a powerful nutritional punch while keeping flavors vibrant. First, they deliver a rainbow of vitamins and minerals thanks to the variety of vegetables. For example, bell peppers offer vitamin C, zucchini provides potassium, and mushrooms contribute selenium. Additionally, grilling enhances the natural sweetness of the veggies without adding excess fat.
Moreover, Grilled Veggie Skewers are rich in fiber, which supports digestion and keeps you feeling full longer. Fiber also helps regulate blood sugar levels, making this dish a smart choice for those managing energy crashes. Since the vegetables retain most of their nutrients during grilling, you get maximum benefits with minimal effort.
Finally, Grilled Veggie Skewers are naturally low in calories but high in antioxidants. These compounds fight inflammation and protect your cells from damage. Whether you serve them as a side or a main dish, you’re fueling your body with clean, wholesome ingredients.
How it fits in a healthy lifestyle
Grilled Veggie Skewers fit seamlessly into almost any dietary plan. If you’re following a gluten-free or plant-based lifestyle, they’re a perfect protein-packed option when paired with tofu or tempeh. For heart-healthy eaters, the absence of heavy oils and the abundance of fiber make them a standout choice.
Planning meals ahead? Grilled Veggie Skewers store well and reheat quickly, making them ideal for meal prep. They also pair beautifully with lean proteins like chicken or fish, so you can customize them for high-protein diets. If you’re exploring more ways to incorporate veggies into your routine, check out these vegetarian dinner ideas for inspiration.
Whether you’re grilling for a crowd or prepping weekday lunches, Grilled Veggie Skewers keep your eating habits balanced and delicious. They prove that healthy food doesn’t have to be complicated or boring.
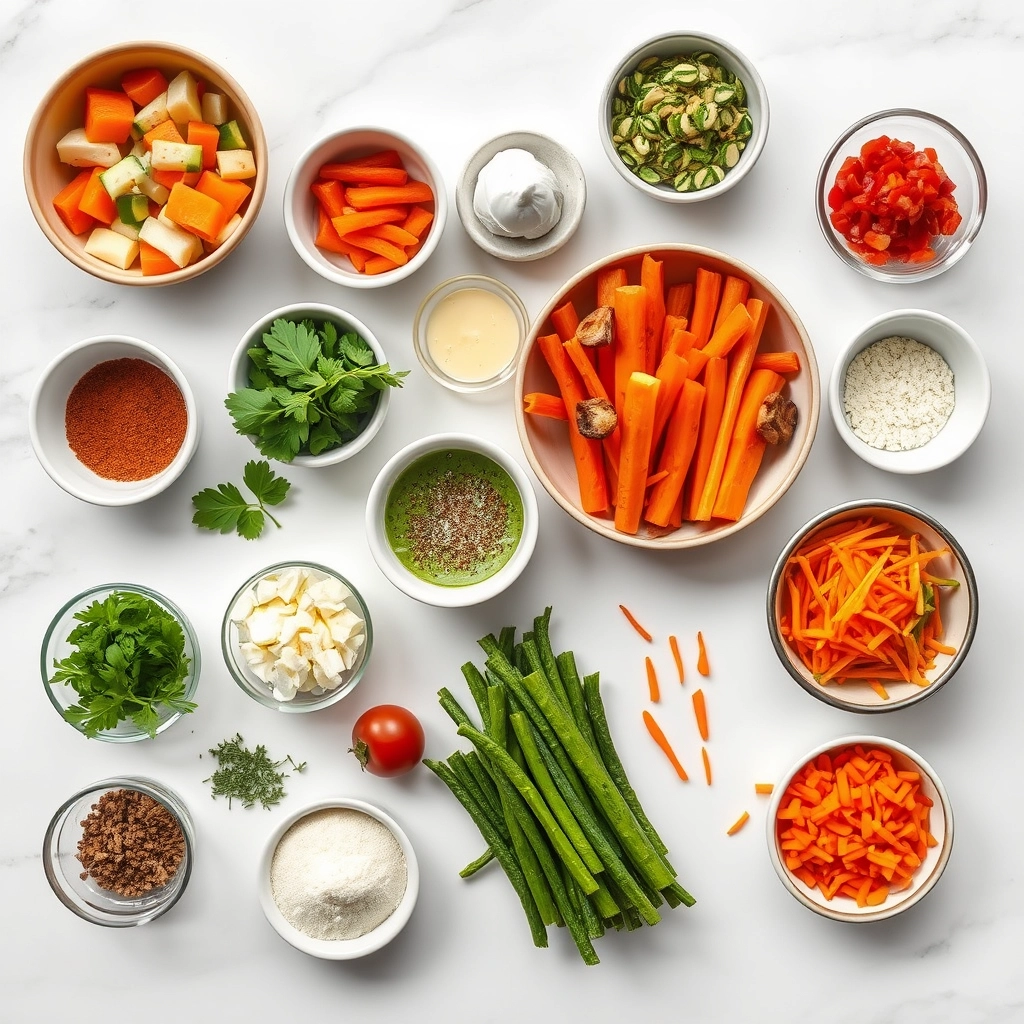
Colorful and flavorful vegetable skewers perfect for summer grilling.
Ingredients
Scale
For the Crust:
1 red bell pepper, cut into chunks
1 zucchini, sliced into rounds
1 yellow squash, sliced into rounds
1 red onion, cut into chunks
8–10 cherry tomatoes
2 tablespoons olive oil
1 teaspoon garlic powder
1 teaspoon dried oregano
Salt and pepper to taste
Instructions
1. Prepare the Crust:
Preheat grill to medium-high heat.
Thread vegetables onto skewers, alternating colors and types for visual appeal.
In a small bowl, mix olive oil, garlic powder, oregano, salt, and pepper. Brush mixture over skewered vegetables.
Grill skewers for 10-12 minutes, turning occasionally, until vegetables are tender and slightly charred.
Serve immediately.
Notes
You can customize the seasonings to taste.
How to Prepare This Dish
Steps and time-saving tips
Start by preheating your grill to medium-high heat while you prep the veggies. Chop bell peppers, zucchini, red onion, and cherry tomatoes into even, bite-sized pieces so they cook uniformly. Next, thread the vegetables onto skewers, alternating colors for a vibrant presentation. Meanwhile, whisk together olive oil, minced garlic, lemon juice, salt, and pepper in a small bowl. Drizzle this marinade generously over the Grilled Veggie Skewers, using a brush to coat every piece evenly. Let them sit for 10 minutes—this quick soak boosts flavor without lengthy marinating. When the grill is hot, place the skewers directly on the grates and cook for 3-4 minutes per side, turning gently to avoid sticking. For extra efficiency, prep a double batch and refrigerate half for later; they reheat beautifully. If you’re short on time, use pre-cut veggies or metal skewers to skip soaking wooden ones. Finally, sprinkle fresh herbs like parsley or basil over the Grilled Veggie Skewers right before serving for a bright finish.
and-learned-from">Mistakes I’ve made and learned from
Early on, I rushed the skewering step and ended up with unevenly cooked veggies—some charred, others still crunchy. Now I take care to cut everything the same size, like I do for my Perfect Roasted Vegetables. Another blunder? Forgetting to oil the grill grates, which caused sticking and messy flipping. A quick brush with oil fixes this, just like when making Grilled Chicken Tips. And if your skewers burn before the veggies soften, move them to indirect heat or lower the temp. Trust me, patience pays off with perfectly tender-crisp results every time.
Cultural Connection and Variations
Where this recipe comes from
Grilled Veggie Skewers have roots in nearly every corner of the world, from Mediterranean mezze platters to Japanese yakitori stalls. Originally, people threaded seasonal vegetables onto sticks for easy cooking over open flames, turning humble ingredients into smoky, charred delights. In Greece, they often pair them with halloumi and a drizzle of lemon, while in Morocco, they might dust them with ras el hanout for a spiced kick. Even my grandma had her own twist—she swore by marinating the veggies in balsamic and honey before grilling.
What makes Grilled Vegg
ie Skewers so special is their versatility. In Mexico, street vendors serve them with chili-lime salt, while in India, they might come slathered in tandoori marinade. Some cultures even use them as part of festive spreads, like Middle Eastern mezze or Brazilian churrasco. No matter where you go, the concept remains the same: fresh, fire-kissed veggies that bring people together. Whether you’re at a backyard BBQ or a bustling market halfway across the globe, these skewers tell a story of shared meals and simple joy.
How it fits in today’s cooking
Today, Grilled Veggie Skewers fit perfectly into modern cooking, especially as more people embrace plant-based meals. They’re a staple at summer cookouts, but they also shine as a quick weeknight dinner when paired with healthy meal prep ideas. Many cooks now experiment with global flavors, like adding miso glaze or harissa, proving this dish evolves without losing its charm.
They’re also a hit for holidays—think Fourth of July spreads or Meatless Monday feasts. Plus, with grilling season lasting longer thanks to indoor grill pans, you can enjoy them year-round. For an easy twist, try serving them alongside gluten-free dinners to keep things light and inclusive. Whether you stick to tradition or get creative, these skewers prove that good food doesn’t need to be complicated.
>Taste and Texture
What makes it delicious
Grilled Veggie Skewers deliver a smoky, charred sweetness that makes every bite irresistible. The caramelized edges of bell peppers and zucchini offer a crisp contrast to the tender, juicy mushrooms and onions. Meanwhile, the marinade infuses each piece with a tangy, garlicky depth that lingers on your tongue. Fresh herbs like rosemary or thyme add a fragrant earthiness, elevating the overall flavor. Whether you serve them hot off the grill or at room temperature, Grilled Veggie Skewers always bring a satisfying mix of textures and bold, garden-fresh taste.
Boosting the flavor
For an extra flavor kick, try brushing your Grilled Veggie Skewers with a zesty lemon-herb sauce or a drizzle of balsamic glaze right before serving. If you love heat, sprinkle them with chili flakes or smoked paprika before grilling. Another easy upgrade? Swap the marinade for a spicy peanut sauce or a creamy tahini dressing. For more inspiration, check out our guide to perfect marinades or explore creative grilling tips to take your skewers to the next level. Small tweaks can make a big difference!
Tips for Success
Best practices for results
Cut vegetables into even-sized pieces so they cook uniformly on your Grilled Veggie Skewers. Meanwhile, soak wooden skewers for at least 30 minutes to prevent burning. Brush the veggies lightly with oil before grilling to enhance flavor and prevent sticking. For the best results, preheat your grill to medium-high and turn the skewers every few minutes. Finally, let the Grilled Veggie Skewers rest for a minute before serving to lock in juices.
Mistakes to avoid
Avoid overcrowding the skewers, as this leads to uneven cooking. Instead, leave small gaps between each piece for proper heat circulation. Also, don’t skip the oil—dry veggies often char too quickly. If you need guidance on grilling temperatures, check our grilling guide for precise heat recommendations. Another common mistake is under-seasoning. For balanced flavor, try our favorite seasoning blends to elevate your Grilled Veggie Skewers effortlessly.
Serving and Pairing Suggestions
How to serve this dish
Grilled Veggie Skewers shine as a vibrant centerpiece for any gathering. For a stunning presentation, arrange them on a rustic wooden platter with fresh herb sprigs and lemon wedges. Alternatively, serve them over a bed of fluffy quinoa or couscous for a heartier meal. These skewers also make a fantastic addition to brunch spreads or holiday barbecues, especially when paired with other grilled favorites. To elevate the visual appeal, mix colorful veggies like bell peppers, zucchini, and cherry tomatoes for a rainbow effect.
h-it">What goes well with it
Pair Grilled Veggie Skewers with a tangy yogurt dip or a zesty chimichurri sauce to enhance their smoky flavor. For a refreshing drink, try a citrusy sparkling lemonade or a crisp white wine like Sauvignon Blanc. If you’re serving them as part of a larger spread, consider adding our Creamy Garlic Mashed Potatoes for a comforting side. Alternatively, our Fresh Mango Salsa adds a sweet and spicy contrast that balances the charred veggies perfectly.
What vegetables are best for Grilled Veggie Skewers?
Firm vegetables like bell peppers, zucchini, mushrooms, red onions, and cherry tomatoes work best for Grilled Veggie Skewers. These hold their shape well and caramelize beautifully on the grill. Avoid watery veggies like cucumbers, as they can become mushy when cooked.
rank-math-faq-item">
How long should you grill Veggie Skewers?
Grilled Veggie Skewers typically take 8-12 minutes on a medium-high grill, turning occasionally for even cooking. The exact time depends on your vegetable size and desired doneness. Pierce with a fork to check tenderness—they’re ready when slightly charred but still crisp-tender.
Should you marinate vegetables before making Grilled Veggie Skewers?
Yes! A simple marinade of olive oil, garlic, lemon juice, and herbs boosts flavor in Grilled Veggie Skewers. Marinate for at least 30 minutes (or up to 2 hours) before threading. The oil helps prevent sticking while the acid brightens the vegetables’ natural sweetness.
Can you make Grilled Veggie Skewers ahead of time?
You can prep the vegetables and assemble skewers 24 hours in advance—store them covered in the fridge. For best results, grill just before serving. Leftover Grilled Veggie Skewers keep for 3-4 days refrigerated and reheat well in a skillet or oven.
>
Best Japanese Cotton Candy Swiss Roll Recipe
Introduction
If you’ve ever craved a dessert that feels like biting into a cloud, you’re in the right place. Today, I’m sharing my take on the Japanese Cotton Candy Swiss Roll, a dreamy treat that melts in your mouth and brings a little joy to every bite. Whether you’re a seasoned baker or just starting out, this recipe promises to deliver lightness, sweetness, and a touch of whimsy—perfect for brightening any day. Plus, it’s a fantastic way to impress guests or treat yourself after a long week.
The Japanese Cotton Candy Swiss Roll stands out for its impossibly soft sponge and delicate, airy texture. Unlike traditional Swiss rolls, this version leans into the Japanese baking philosophy of precision and elegance, resulting in a dessert that’s as beautiful as it is delicious. The fluffy cake wraps around a silky whipped cream filling, creating a balance of flavors that’s subtle yet unforgettable. For anyone who adores desserts like my Honey Miso Caramel Cake or Matcha Tiramisu, this recipe fits right into the lineup of treats that celebrate both technique and creativity. It’s a testament to how simple ingredients—eggs, sugar, flour, and love—can transform into something extraordinary.
Why I Love This Recipe
The Japanese Cotton Candy Swiss Roll holds a special place in my heart because it reminds me of my first trip to Tokyo, where I stumbled upon a tiny bakery selling the most ethereal cakes I’d ever tasted. Recreating that magic at home became a mission, and after countless trials, I finally nailed the perfect balance of lightness and flavor. Every time I make it, I’m transported back to that moment of wonder—and now, I get to share that feeling with you. Trust me, one bite of this roll, and you’ll understand why it’s become a staple in my kitchen.
Health and Nutrition
Why it’s good for your body
Japanese Cotton Candy Swiss Roll offers a delightful way to enjoy dessert without compromising on nutrition. First, its light and airy texture means you get a satisfying treat with fewer calories than dense cakes. Plus, the whipped cream filling provides a source of calcium, which supports strong bones and teeth. Meanwhile, the delicate sponge cake base often includes eggs, adding a boost of protein to help keep you full longer.
Another benefit of Japanese Cotton Candy Swiss Roll is its lower sugar content compared to traditional desserts. Many recipes use just enough sweetness to enhance the flavor without overwhelming your taste buds. Additionally, the fluffy structure makes it easier to enjoy smaller portions, so you can indulge mindfully. Since it’s so light, you won’t feel sluggish after eating it, making it a great midday pick-me-up.
Finally, Japanese Cotton Candy Swiss Roll often incorporates natural flavors like vanilla or fruit extracts. These ingredients add subtle complexity without artificial additives. Whether you’re craving something sweet or need a gentle energy boost, this dessert delivers both taste and nourishment in every bite.
How it fits in a healthy lifestyle
Japanese Cotton Candy Swiss Roll fits perfectly into a balanced diet when enjoyed in moderation. Its lighter texture and portion-friendly design make it an ideal choice for those watching their calorie intake. If you’re following a gluten-free lifestyle, you can easily adapt the recipe with alternative flours, like almond or rice flour, for a celiac-friendly version.
For anyone focused on heart health, the dessert’s lower fat content compared to butter-heavy cakes is a smart swap. Pair it with a cup of green tea or fresh berries for added antioxidants. If you’re exploring more ways to enjoy light desserts, check out our guide to healthy dessert swaps or discover how to bake with natural sweeteners for even better results. With a little creativity, Japanese Cotton Candy Swiss Roll can be part of your everyday wellness routine.
A light and fluffy Japanese-style sponge cake rolled with whipped cream and cotton candy for a whimsical dessert.
Ingredients
Scale
For the Crust:
4 large eggs
100g granulated sugar
100g cake flour
1 tsp vanilla extract
200ml heavy cream
2 tbsp powdered sugar
1/2 cup cotton candy (flavor of choice)
Powdered sugar for dusting
Instructions
1. Prepare the Crust:
Preheat oven to 350°F (175°C). Line a 10×15-inch baking sheet with parchment paper.
In a bowl, beat eggs and granulated sugar until pale and thick. Add vanilla extract and mix well.
Sift cake flour into the egg mixture and fold gently until just combined.
Pour batter onto the prepared baking sheet and spread evenly. Bake for 10-12 minutes until golden and springy.
Let the cake cool slightly, then invert onto a clean kitchen towel dusted with powdered sugar. Roll the cake gently in the towel and let cool completely.
Whip heavy cream with powdered sugar until stiff peaks form. Unroll the cake, spread whipped cream evenly, and sprinkle cotton candy over the cream.
Roll the cake back up tightly, wrap in plastic wrap, and refrigerate for at least 1 hour before serving. Dust with powdered sugar before serving.
Notes
You can customize the seasonings to taste.
How to Prepare This Dish
Steps and time-saving tips
Start by preheating your oven to 350°F and lining a baking sheet with parchment paper. Next, whisk the egg whites until stiff peaks form, then gradually add sugar to create a glossy meringue. Gently fold in the sifted flour and cornstarch to keep the batter airy. Meanwhile, warm the milk and butter slightly to help them blend smoothly into the mixture. Spread the batter evenly on the baking sheet, then bake for 12-15 minutes until the top springs back when touched. While the cake cools, whip the heavy cream with a touch of vanilla until it holds soft peaks. Carefully roll the cake with a clean towel to prevent cracking, then unroll it to layer the whipped cream evenly. Finally, roll it back up tightly and chill for at least an hour to set. For a time-saving tip, prepare the meringue in advance and store it covered in the fridge for up to a day.
and-learned-from">Mistakes I’ve made and learned from
I once rushed the meringue and didn’t whisk it long enough, which made the Japanese Cotton Candy Swiss Roll dense instead of fluffy. Now, I always test for stiff peaks by lifting the whisk straight up. Another time, I overbaked the cake, leaving it dry and hard to roll. A kitchen timer and checking a minute early saved me from repeating that. If your cake cracks, don’t panic—just dust it with powdered sugar or cover it with extra whipped cream. For more troubleshooting, check out my guide on common baking mistakes. And if you love light desserts, try my fluffy matcha sponge for another airy treat.
Cultural Connection and Variations
Where this recipe comes from
The Japanese Cotton Candy Swiss Roll carries a whimsical charm that blends traditional Japanese baking techniques with playful modern twists. Originally inspired by Western-style sponge cakes, Japanese bakers perfected the light, airy texture by incorporating delicate folding methods and premium ingredients like cotton candy for a melt-in-your-mouth experience. Unlike heavier European rolls, this version feels almost weightless, making it a favorite at festivals and tea ceremonies alike.
Across Japan, youȁ
9;ll find regional twists—some bakers infuse matcha or cherry blossom flavors, while others layer in fresh fruit or whipped cream. In my family, we add a sprinkle of edible glitter for celebrations, turning the Japanese Cotton Candy Swiss Roll into a showstopper. Overseas, bakers adapt it too, like folding in tropical fruits in Hawaii or swapping cotton candy for flavored marshmallows in the U.S. No matter the variation, the magic lies in its cloud-like softness.
How it fits in today’s cooking
Today, the Japanese Cotton Candy Swiss Roll thrives as both a nostalgic treat and a trendy dessert. Social media loves its photogenic swirls, and home bakers appreciate its forgiving nature—unlike finicky pastries, this roll stays moist even if you overmix slightly. Many modern cooks pair it with matcha-infused desserts for a balanced bittersweet contrast or serve it alongside Japanese strawberry shortcake at birthdays.
Seasonally, it shines in spring with floral notes or winter with spiced fillings. Meal preppers even slice it into bite-sized portions for lunchboxes, proving its versatility. Whether you’re reviving family traditions or experimenting with new flavors, the Japanese Cotton Candy Swiss Roll fits seamlessly into today’s kitchens—one fluffy bite at a time.
>Taste and Texture
What makes it delicious
The Japanese Cotton Candy Swiss Roll is a dreamy, cloud-like treat that melts on your tongue with every bite. Its light, airy sponge cake hugs a fluffy filling that tastes like sweet vanilla and caramelized sugar, while the cotton candy adds a playful, nostalgic sweetness. When you slice into it, the texture feels impossibly soft, almost like biting into a sweetened pillow. Meanwhile, the delicate aroma of toasted sugar and vanilla wafts up, making it irresistible. Whether you serve it chilled or at room temperature, the Japanese Cotton Candy Swiss Roll delivers a melt-in-your-mouth experience that’s both elegant and fun.
Boosting the flavor
For an extra burst of flavor, try brushing the sponge with a light syrup infused with citrus zest or rosewater before rolling. Alternatively, fold crushed freeze-dried berries into the whipped cream filling for a tangy contrast to the cotton candy’s sweetness. If you love layered textures, sprinkle toasted almond slivers or drizzle salted caramel sauce over each slice. For a floral twist, pair it with lavender honey whipped cream to elevate the dessert’s delicate profile. With these tweaks, your Japanese Cotton Candy Swiss Roll will shine even brighter.
Tips for Success
Best practices for results
First, always sift your dry ingredients twice for the lightest Japanese Cotton Candy Swiss Roll texture. Additionally, use room-temperature eggs since they whip better and create a stable foam. Meanwhile, gently fold the batter to keep the air intact, and spread it evenly in the pan for consistent baking. Finally, roll the cake while it’s still warm to prevent cracks, and let it cool completely before adding filling. These steps ensure your Japanese Cotton Candy Swiss Roll stays fluffy and picture-perfect every time.
Mistakes to avoid
Avoid overmixing the batter, as this deflates the air and leads to a dense Swiss roll. Instead, fold just until combined for that signature cottony softness. Also, don’t skip preheating the oven—uneven heat causes uneven rising. For more troubleshooting, check our guide on common baking mistakes. Another pitfall is using cold filling, which makes rolling harder. Soften your cream slightly, or try our whipped cream tutorial for the right consistency. With these fixes, your Japanese Cotton Candy Swiss Roll will turn out smooth and delicious.
Serving and Pairing Suggestions
How to serve this dish
Slice the Japanese Cotton Candy Swiss Roll into thick, even pieces to showcase its fluffy texture and vibrant swirls. For a stunning presentation, arrange the slices on a pastel-colored plate and dust them lightly with powdered sugar. Alternatively, add fresh berries or edible flowers as garnishes for a pop of color. This dessert shines at afternoon tea parties, birthday celebrations, or even as a sweet finale to a festive dinner. If you want to make it extra special, serve it with a side of whipped cream or a drizzle of honey.
h-it">What goes well with it
Pair the Japanese Cotton Candy Swiss Roll with a cup of creamy matcha latte to balance its sweetness with earthy, aromatic notes. For a refreshing contrast, try serving it alongside a citrusy yuzu lemonade, which brightens every bite. If you prefer something richer, a scoop of vanilla bean ice cream enhances the roll’s delicate flavor while adding a cool, creamy texture.
What makes Japanese Cotton Candy Swiss Roll different from regular Swiss rolls?
Japanese Cotton Candy Swiss Roll stands out for its ultra-light, fluffy texture, resembling cotton candy, achieved by whipping egg whites to a delicate meringue. Unlike traditional Swiss rolls, it often incorporates subtle flavors like matcha or strawberry, making it a unique dessert experience.
rank-math-faq-item">
How do you prevent a Japanese Cotton Candy Swiss Roll from cracking when rolling?
To avoid cracks, roll the Japanese Cotton Candy Swiss Roll while it’s still warm with a damp towel or parchment paper to help it hold its shape. Letting it cool too long before rolling can make the sponge brittle, so timing is key for that perfect swirl.
Can I make a Japanese Cotton Candy Swiss Roll without special ingredients?
Yes! While some recipes use specialty flours or flavorings, a basic Japanese Cotton Candy Swiss Roll requires just eggs, sugar, flour, and a touch of cream of tartar for stability. The magic lies in the technique—whipping the batter to airy perfection.
What fillings pair best with a Japanese Cotton Candy Swiss Roll?
Light fillings like whipped cream, fresh fruit, or red bean paste complement the delicate texture of a Japanese Cotton Candy Swiss Roll. Avoid heavy frostings, as they can overwhelm the airy sponge—keep it simple and elegant.
>
Best Hot Honey Blackened Shrimp Caesar Salad Recipe
Introduction
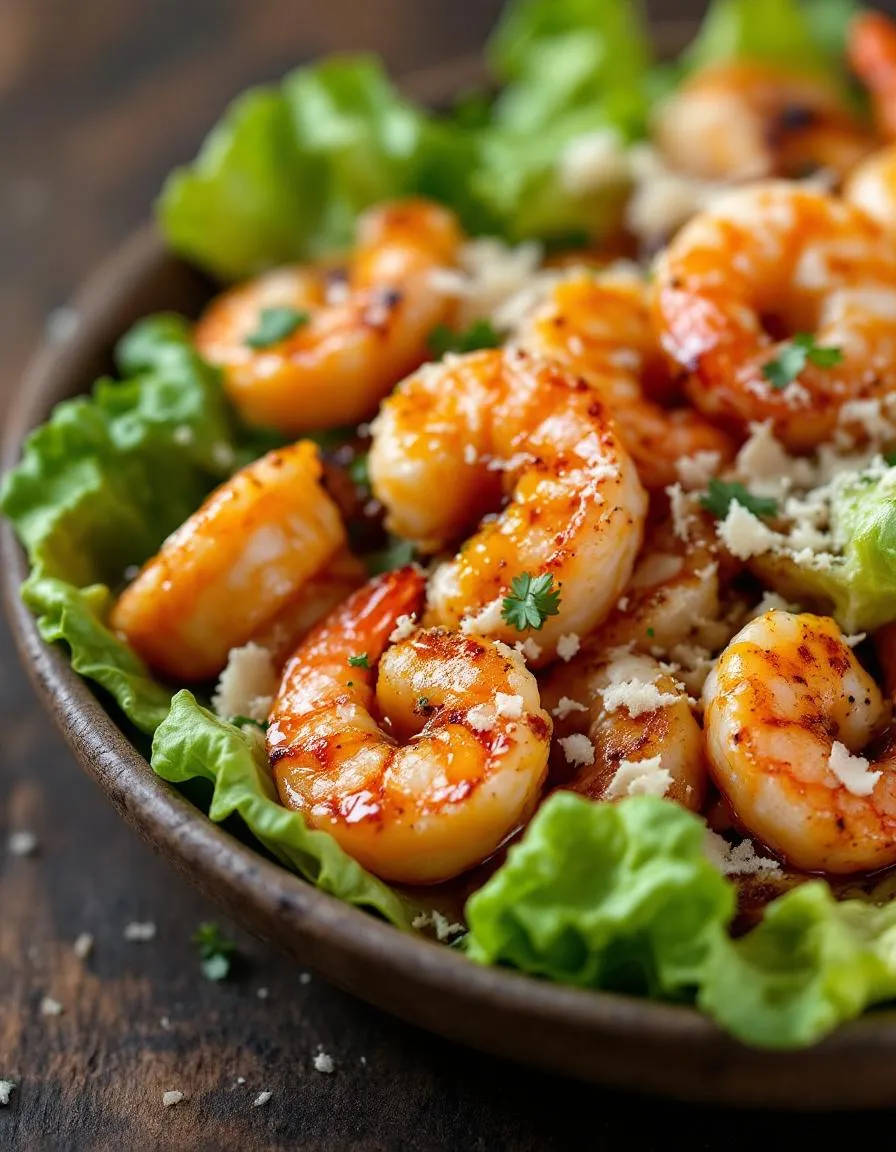
If you’re craving a salad that’s anything but boring, you’ve come to the right place. Today, I’m sharing my Hot Honey Blackened Shrimp Caesar Salad—a dish that balances smoky, spicy, and sweet flavors in every bite. Whether you’re looking for a quick weeknight dinner or a show-stopping meal for guests, this recipe delivers. Plus, it’s packed with protein and fresh ingredients, so you can feel good about indulging.
The Hot Honey Blackened Shrimp Caesar Salad reinvents a classic by adding bold, modern twists. Succulent shrimp, coated in a fiery blackened spice blend, pair perfectly with crisp romaine, creamy Caesar dressing, and a drizzle of hot honey for that irresistible sweet-heat combo. This dish matters because it proves that salads can be exciting, satisfying, and far from mundane. It fits the brekcakes.com tone by blending approachable techniques with gourmet flair—just like my homemade pasta recipes or decadent chocolate desserts. Whether you’re a seasoned cook or a beginner, you’ll find joy in making (and eating) this vibrant meal.
Why I Love This Recipe
This Hot Honey Blackened Shrimp Caesar Salad holds a special place in my heart because it reminds me of summer nights by the coast. The first time I made it, the aroma of sizzling spices filled my kitchen, and the first bite transported me to a seaside grill. It’s become a staple in my home because it’s versatile—equally perfect for a casual lunch or a fancy dinner party. Most importantly, it captures the essence of what I love about cooking: creativity, flavor, and the ability to turn simple ingredients into something unforgettable.
Health and Nutrition
Why it’s good for your body
Hot Honey Blackened Shrimp Caesar Salad packs a powerful nutritional punch while delighting your taste buds. First, the shrimp delivers lean protein, which helps build muscle and keeps you full longer. Additionally, the blackening spice blend adds antioxidants like paprika and garlic, which support immune health. Meanwhile, the hot honey drizzle offers a touch of natural sweetness without refined sugars.
Furthermore, the romaine lettuce in Hot Honey Blackened Shrimp Caesar Salad provides fiber and vitamins A and K, promoting healthy digestion and bone strength. The Caesar dressing, when made with Greek yogurt or light mayo, cuts calories while still offering creamy satisfaction. Plus, the dish balances bold flavors with wholesome ingredients, making it a smarter choice than heavy comfort foods.
Finally, the combination of protein, veggies, and healthy fats in Hot Honey Blackened Shrimp Caesar Salad stabilizes blood sugar levels. This means you avoid energy crashes and stay satisfied for hours. Whether you need a post-workout meal or a light yet flavorful lunch, this salad delivers both nutrition and excitement.
How it fits in a healthy lifestyle
Hot Honey Blackened Shrimp Caesar Salad fits seamlessly into balanced eating plans. For gluten-free diets, simply swap croutons for roasted chickpeas or nuts. If you focus on heart health, the shrimp’s omega-3s support cardiovascular wellness. High-protein seekers will love how the shrimp and optional Parmesan cheese keep macros in check.
This salad also works for meal prep, saving time without sacrificing nutrition. Pair it with a quick weeknight dinner rotation for variety. For those watching calories, the dish adapts easily—just lighten the dressing or reduce the honey. Craving more protein-packed ideas? Explore our high-protein recipes for similar balanced meals. With its flexibility and nutrient density, Hot Honey Blackened Shrimp Caesar Salad makes healthy eating effortless and delicious.
A spicy and sweet twist on the classic Caesar salad with blackened shrimp drizzled in hot honey.
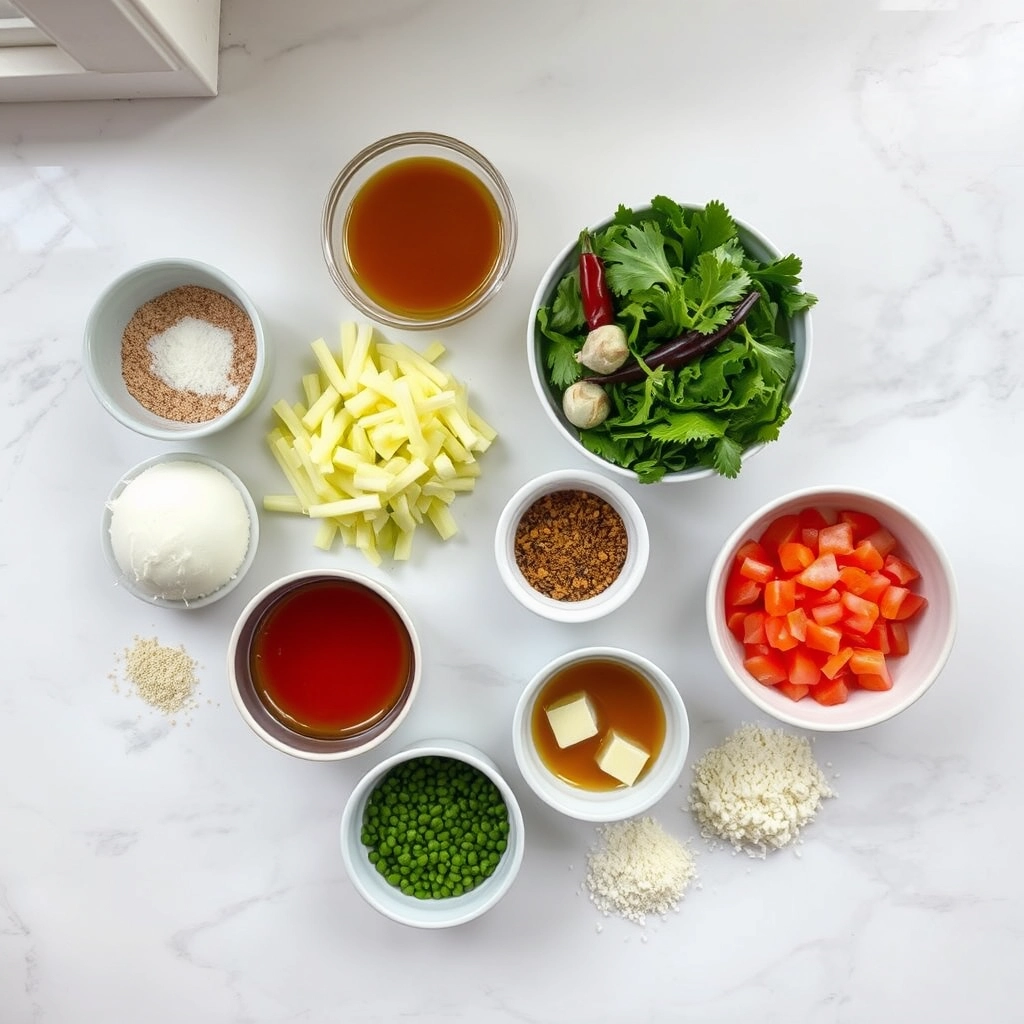
Ingredients
Scale
For the Crust:
1 lb large shrimp, peeled and deveined
2 tbsp blackening seasoning
2 tbsp olive oil
1/4 cup hot honey
1 large romaine lettuce, chopped
1/2 cup Caesar dressing
1/2 cup grated Parmesan cheese
1 cup croutons
1 lemon, cut into wedges
Instructions
1. Prepare the Crust:
In a bowl, toss the shrimp with blackening seasoning until evenly coated.
Heat olive oil in a skillet over medium-high heat. Add shrimp and cook for 2-3 minutes per side until blackened and cooked through.
Drizzle hot honey over the cooked shrimp and toss to coat.
In a large salad bowl, combine chopped romaine, Caesar dressing, and half of the Parmesan cheese. Toss well.
Top the salad with blackened shrimp, croutons, and remaining Parmesan cheese.
Serve with lemon wedges on the side for squeezing over the salad.
Notes
You can customize the seasonings to taste.
“`html
s-dish">How to Prepare This Dish
Steps and time-saving tips
Start by prepping your shrimp for the Hot Honey Blackened Shrimp Caesar Salad. Pat them dry with paper towels to ensure the seasoning sticks well. Next, toss the shrimp in a mix of blackening spices, making sure each piece gets an even coat. Heat a skillet over medium-high and cook the shrimp for just 2-3 minutes per side—they’ll turn pink and slightly charred. Meanwhile, whisk together the Caesar dressing ingredients like garlic, anchovy paste, lemon juice, and mayo until smooth. If you’re short on time, use a high-quality store-bought dressing instead. For the salad, chop fresh romaine into bite-sized pieces and layer it in a large bowl. Add croutons and a generous sprinkle of Parmesan cheese. Once the shrimp are done, drizzle them with hot honey for that sweet-spicy kick. Finally, toss everything together or plate the greens first and top with the shrimp. Serve immediately for the best texture. To save time, prep the dressing and chop the lettuce ahead of time, then assemble right before eating.
Mistakes I’ve made and learned from
I’ve definitely overcooked shrimp more times than I’d like to admit, leaving them rubbery instead of juicy. Now I set a timer for 2 minutes per side and pull them off the heat the second they curl. Another mistake? Skipping the dry step—wet shrimp won’t blacken properly, so always pat them dry first. I also learned the hard way that overdressing the greens makes the salad soggy fast. Toss lightly and add extra dressing on the side if needed. For more tips on perfecting seafood dishes, check out my guide on avoiding common seafood mistakes. And if you’re new to homemade dressings, my easy dressing hacks will save you time without sacrificing flavor.
The Hot Honey Blackened Shrimp Caesar Salad is a vibrant twist on a classic, blending Southern spice with Italian tradition. Originally, the Caesar salad hails from Tijuana, Mexico, created by Italian immigrant Caesar Cardini. Over time, chefs worldwide have reimagined it, adding local flavors like the fiery kick of blackened shrimp and the sweet heat of hot honey. In the American South, for example, cooks often swap croutons for cornbread crumbs or toss in collard greens for extra texture.
Meanwhile, in coastal regions like Louisiana, the Hot Honey Blackened Shrimp Caesar Salad might feature Cajun seasoning or a splash of citrus from nearby groves. Families there sometimes serve it as a festive starter during crawfish boils or Mardi Gras gatherings. Across the globe, in places like Japan, you’ll find lighter versions with miso dressing or tempura shrimp. Even at home, my aunt adds a pinch of smoked paprika to the hot honey glaze, making it a star at summer potlucks.
ays-cooking">How it fits in today’s cooking
Today, the Hot Honey Blackened Shrimp Caesar Salad bridges comfort food and modern flair. Busy cooks love it for quick weeknight dinners, while meal preppers layer it in jars for grab-and-go lunches. Its bold flavors also make it a hit at gatherings, especially when paired with crowd-pleasers like air fryer appetizers or refreshing summer cocktails.
Seasonally, it shines in summer with grilled shrimp or in winter with roasted veggies for warmth. Fitness enthusiasts even tweak it by swapping mayo for Greek yogurt in the dressing. Whether you’re craving a hearty meal or a light bite, this salad adapts effortlessly—proof that some classics only get better with time.
Taste and Texture
What makes it delicious
Hot Honey Blackened Shrimp Caesar Salad delivers a bold, irresistible combination of flavors and textures. The shrimp, coated in a smoky, spicy blackening seasoning, caramelizes into a slightly crispy exterior while staying juicy inside. Meanwhile, the hot honey drizzle adds a sweet, fiery kick that balances the savory depth of the dish. Crisp romaine lettuce and crunchy croutons contrast beautifully with the creamy, garlicky Caesar dressing, creating a satisfying bite every time. Fragrant Parmesan cheese ties everything together, adding a salty, umami-rich finish. With each forkful, Hot Honey Blackened Shrimp Caesar Salad surprises your taste buds with layers of heat, sweetness, and richness.
r">Boosting the flavor
For an extra flavor boost, try tossing the shrimp with a pinch of smoked paprika or cayenne before blackening. If you love texture, sprinkle toasted pine nuts or crispy prosciutto over the salad for added crunch. A squeeze of fresh lemon brightens the dish, while a drizzle of garlic aioli enhances the creamy richness. For a lighter twist, swap the traditional Caesar dressing with a zesty avocado lime dressing. These small tweaks keep Hot Honey Blackened Shrimp Caesar Salad exciting and customizable for any palate.
Tips for Success
Best practices for results
Always pat the shrimp dry before seasoning to help the blackening spice stick evenly. Meanwhile, preheat your skillet until it’s very hot—this ensures a crisp crust on your Hot Honey Blackened Shrimp Caesar Salad. For the dressing, whisk the ingredients vigorously to emulsify them fully, creating a smooth texture. Finally, toss the salad greens just before serving to keep them fresh and crisp.
>Mistakes to avoid
Overcrowding the skillet will steam the shrimp instead of blackening them, so cook in batches if needed. Additionally, avoid overdressing the salad, as too much dressing can make the greens soggy. For more on balancing flavors, check out our guide to perfect salad dressing ratios. Also, don’t skip resting the shrimp for a minute after cooking—this helps redistribute juices. Learn how to master protein rests with our resting meat guide for best results.
Serving and Pairing Suggestions
How to serve this dish
For a stunning presentation, arrange the Hot Honey Blackened Shrimp Caesar Salad on a large platter with crisp romaine leaves as the base. Alternatively, serve individual portions in wide, shallow bowls to showcase the vibrant colors. Top with extra shaved Parmesan and a drizzle of hot honey for a glossy finish. Since this dish balances bold flavors with fresh greens, it works beautifully for summer lunches, dinner parties, or even as a showstopper at holiday gatherings. To elevate the visual appeal, add a sprinkle of crushed black pepper or microgreens for a pop of contrast.
What goes well with it
Pair the Hot Honey Blackened Shrimp Caesar Salad with a chilled glass of citrus-forward Sauvignon Blanc to balance the spicy sweetness. If you prefer non-alcoholic options, try a sparkling lemonade with a hint of ginger for a refreshing twist. For sides, warm garlic knots or a light roasted vegetable medley complement the dish without overpowering it. If you love bold flavors, consider adding our Spicy Avocado Dip for extra creaminess. Alternatively, serve it alongside our Herb Focaccia to soak up every last bit of the Caesar dressing.
What makes Hot Honey Blackened Shrimp Caesar Salad different from a regular Caesar salad?
Hot Honey Blackened Shrimp Caesar Salad adds bold flavors with spicy blackened shrimp and sweet-hot honey drizzle, elevating the classic Caesar. The combination of crispy romaine, creamy dressing, and smoky shrimp creates a perfect balance of textures and tastes.
How do you blacken shrimp for Hot Honey Blackened Shrimp Caesar Salad?
Coat shrimp in a spice blend (paprika, cayenne, garlic powder, etc.), then sear in a hot skillet until charred but juicy. This technique gives Hot Honey Blackened Shrimp Caesar Salad its signature smoky flavor that pairs perfectly with the honey glaze.
rank-math-faq-item">
Can I make Hot Honey Blackened Shrimp Caesar Salad ahead of time?
Prep components separately—store dressed greens, cooked shrimp, and hot honey sauce in airtight containers. Assemble just before serving to keep the shrimp crispy and greens fresh. The flavors in Hot Honey Blackened Shrimp Caesar Salad taste best when freshly combined.
What sides pair well with Hot Honey Blackened Shrimp Caesar Salad?
Garlic bread or crusty baguettes soak up the dressing, while roasted corn or avocado slices complement the heat. For a lighter meal, serve Hot Honey Blackened Shrimp Caesar Salad with a chilled white wine or citrusy sparkling water.