Foolproof Christmas Sugar Cookies

Christmas Sugar Cookies: The Only Recipe You’ll Ever Need

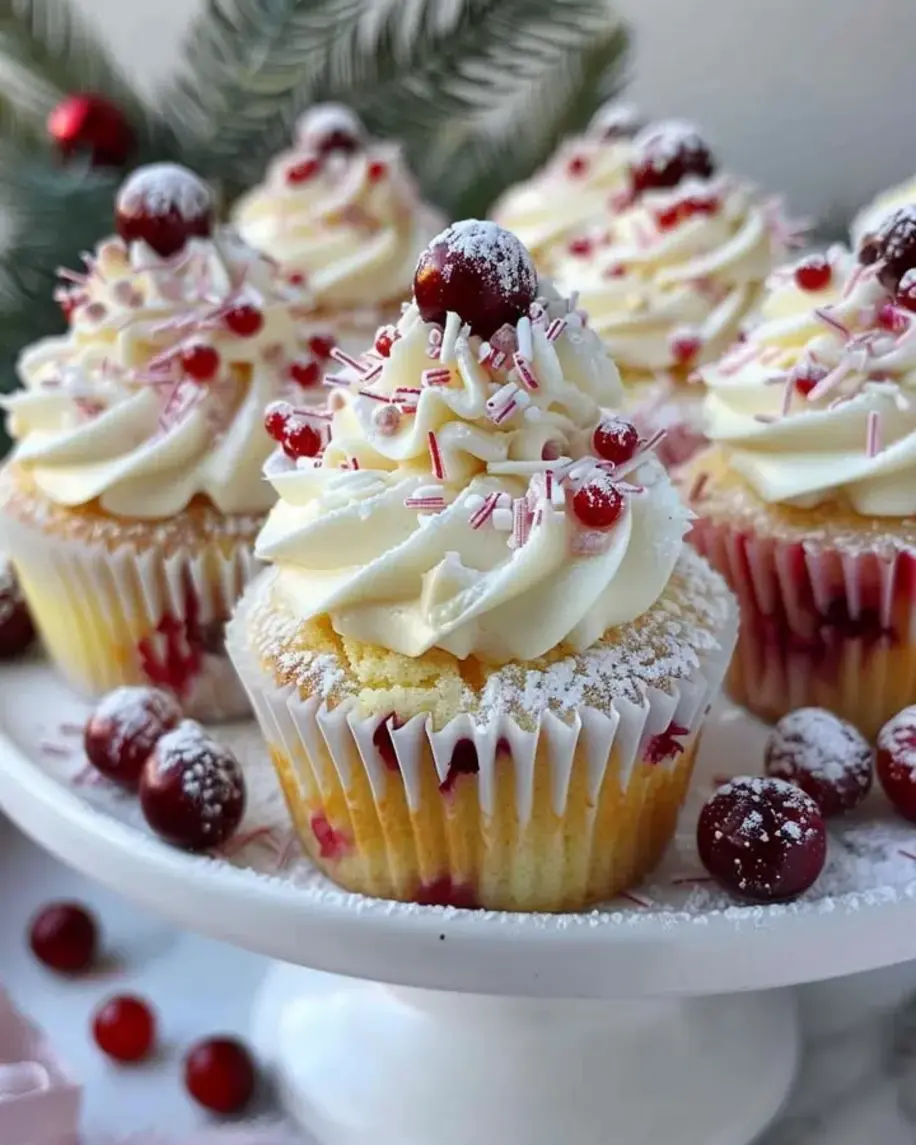
As the holiday season rolls around, nothing beats the joy of baking Christmas sugar cookies that fill your home with warmth and nostalgia. Picture this: families gathered, laughter echoing, and these easy sugar cookie recipes turning into festive masterpieces with simple cutouts. At exorecipes.com, our Christmas sugar cookies stand out with a unique almond extract twist that adds a subtle nutty depth, making them the best sugar cookies for holiday cookie recipes. Whether you’re a novice baker or a pro, this foolproof recipe ensures soft, buttery treats perfect for decorating, solving the common problem of cookies that spread too much or lack flavor.

Imagine biting into one of these Christmas sugar cookies— the tender, melt-in-your-mouth texture combines with a rich, buttery sweetness that lingers on your palate. The aroma of vanilla and almond wafts through the kitchen as they bake, evoking memories of childhood holidays. Each cookie boasts a golden edge with a soft center, ideal for holiday cookie recipes that demand both taste and structure for those iconic sugar cookie cutouts. Topped with vibrant icing and sprinkles, they offer a visual feast as much as a culinary one, making them irresistible for sharing at parties or gifting to loved ones.

What sets this Christmas sugar cookies recipe apart, courtesy of exorecipes.com and Chef Sally, is our commitment to perfection through rigorous testing and expert tweaks. Drawing from American dessert traditions, we’ve incorporated a chef’s secret that elevates these easy sugar cookie recipes to legendary status. You’ll learn insider tips on achieving the ideal texture, avoiding common pitfalls, and even making ahead for stress-free holidays. Stick around for detailed ingredients spotlight, step-by-step guidance, and FAQs that make this the single best resource for holiday baking success.

Prep Time: 15 minutes
Cook Time: 10 minutes
Total Time: 25 minutes
Servings: 24 cookies

Why This Christmas Sugar Cookies Recipe is a Game-Changer

The Chef’s Secret: Our unique selling proposition lies in the addition of almond extract, which infuses these Christmas sugar cookies with a subtle, nutty undertone that sets them apart from ordinary holiday cookie recipes. This ingredient, combined with high-quality butter, creates a more complex flavor profile that’s often missing in basic sugar cookie cutouts. By whisking it in during the creaming stage, you’ll notice enhanced moisture and a richer taste that makes these cookies utterly addictive.

Unbeatable Texture: The science behind the perfect texture starts with creaming softened unsalted butter and sugar, which incorporates air for a light, fluffy dough. The baking soda and powder react to create just the right lift, while chilling the dough (as noted in our recipe notes) prevents spreading, ensuring crisp edges and a soft interior. This method, tested multiple times, guarantees the best sugar cookies that hold their shape for detailed decorations.

Foolproof for a Reason: Reliability is key, and this easy sugar cookie recipe has been perfected through extensive kitchen trials to work every time. Whether you’re baking for a crowd or just family, the straightforward steps minimize errors, making it ideal for beginners tackling Christmas sugar cookies. It’s not just a recipe—it’s a holiday tradition you can count on for consistent, delicious results.

Ingredient Spotlight: Quality Makes the Difference

All-Purpose Flour (2 3/4 cups): This foundational ingredient provides the structure for your Christmas sugar cookies, giving them a tender yet sturdy base for cutouts. Opt for unbleached, all-purpose flour from a reputable brand to avoid any off-flavors. Its gluten content helps the dough hold shape without becoming tough, making it essential for holiday cookie recipes. If you’re gluten-sensitive, substitute with a 1:1 gluten-free flour blend, but note that it may slightly alter the texture.

Unsalted Butter (1 cup, softened): Butter is the heart of these best sugar cookies, delivering that signature buttery richness and flaky texture. Using high-fat, European-style butter enhances the flavor and moisture, ensuring your cookies don’t dry out. Always soften it properly for even creaming—avoid melting it, as that can lead to greasy results. A vegan substitute like refined coconut oil works well, maintaining the soft consistency without compromising taste.

Granulated Sugar (1 1/2 cups): This sweetens the deal in our Christmas sugar cookies, also aiding in browning and crisp edges. Choose pure cane sugar for better crystallization and flavor depth. It balances the dough’s richness, creating the perfect sweetness for decorating. If you want a less refined option, swap with coconut sugar, which adds a hint of caramel but may darken the cookies slightly.

Egg (1 large): Acting as a binder, the egg adds moisture and structure to these easy sugar cookie recipes, helping them rise and set properly. Fresh, large eggs from free-range sources ensure the best results. For a vegan version, replace with a flaxseed egg (1 tablespoon ground flaxseed mixed with 3 tablespoons water), which mimics the binding properties without altering the flavor much.

Vanilla Extract (1 teaspoon): This aromatic extract elevates the overall taste of Christmas sugar cookies, providing a warm, vanilla essence that complements the almond twist. Always use pure vanilla extract for authentic flavor—imitations can taste artificial. If you’re out, almond extract can double up, but stick to the recipe for balance. In a pinch, substitute with vanilla bean paste for a more intense, speckled effect.

Almond Extract (1/2 teaspoon): Our unique angle! This extract introduces a delightful nutty note that makes these holiday cookie recipes stand out, enhancing the cookies’ complexity without overpowering. High-quality almond extract from natural sources ensures purity. For nut allergies, omit it and increase vanilla extract, though you’ll miss that special flair.

Baking Soda (1 teaspoon) and Baking Powder (1/2 teaspoon): These leavening agents are crucial for the lift and tenderness in best sugar cookies. Baking soda reacts with acidic elements for a quick rise, while baking powder provides additional lift. Use fresh ones for optimal results—test by checking if they bubble in water. If needed, substitute baking powder with a mix of cream of tartar and baking soda, but measure precisely.

Food Coloring (optional): While optional, this allows for festive customization in your Christmas sugar cookies. Gel-based colors offer vibrant hues without watering down the dough. They’re perfect for holiday cookie recipes, but if avoiding additives, skip them or use natural alternatives like beet powder for red.

Step-by-Step Instructions

Step 1: Preheat the Oven

Start by preheating your oven to 375 degrees F (190 degrees C) and lining your baking sheets with parchment paper. This ensures even baking and prevents sticking for perfect Christmas sugar cookies.

Pro Tip: Use a reliable oven thermometer to confirm the temperature—ovens can vary, affecting your easy sugar cookie recipe’s outcome.

A photo showing a preheated oven with lined baking sheets ready

Step 2: Mix the Dry Ingredients

In a medium bowl, whisk together 2 3/4 cups all-purpose flour, 1 teaspoon baking soda, and 1/2 teaspoon baking powder. Set this aside to create a solid base for your holiday cookie recipes.

Common Mistake to Avoid: Don’t over-whisk, as this can activate the gluten prematurely, leading to tough cookies— whisk just until combined.

A photo showing the dry ingredients whisked together in a bowl

Step 3: Cream the Butter and Sugar

In a large bowl, cream together 1 cup softened unsalted butter and 1 1/2 cups granulated sugar until smooth and fluffy. Then, beat in 1 large egg, 1 teaspoon vanilla extract, and 1/2 teaspoon almond extract for that unique flavor boost.

Pro Tip: Let the butter sit at room temperature for about 30 minutes for easy creaming, ensuring the best sugar cookies with a light texture.

A photo of the creamed butter, sugar, and egg mixture

Step 4: Combine Wet and Dry Ingredients

Gradually blend the dry ingredients into the wet mixture until fully combined, forming a cohesive dough for your Christmas sugar cookies.

Common Mistake to Avoid: Add the dry ingredients in portions to avoid overmixing, which can make the dough tough—stop once it’s just incorporated.

A photo showing the dough being mixed together

Step 5: Shape the Cookies

Roll the dough into balls and flatten them slightly on the prepared baking sheets, ready for baking into sugar cookie cutouts.

Pro Tip: Chill the dough for 1 hour as per our recipe notes for better shape retention—it’s our secret for perfect holiday cookie recipes.

A photo of dough balls flattened on a baking sheet

Step 6: Bake and Cool

Bake the cookies for 8-10 minutes or until the edges are lightly golden. Then, transfer them to wire racks to cool completely.

Common Mistake to Avoid: Overbaking can dry them out—check at 8 minutes for the ideal soft center in these best sugar cookies.

A photo of freshly baked cookies cooling on a rack

Serving & Presentation

Elevate your Christmas sugar cookies with creative plating that turns them into a holiday centerpiece. Arrange them on a festive platter with colorful icing and sprinkles for eye-catching sugar cookie cutouts—think red and green for the season. These easy sugar cookie recipes pair wonderfully with a hot cocoa bar or as a dessert after a hearty American holiday meal like roast turkey. For added flair, drizzle with a simple glaze or top with edible glitter, making them perfect for gifting in decorative tins.

Make-Ahead & Storage Solutions

Make-Ahead Strategy: Prepare the dough up to 3 days in advance by chilling it in the refrigerator, wrapped tightly in plastic. This allows for easy sugar cookie cutouts whenever you’re ready, maintaining freshness for your holiday cookie recipes.

Storing Leftovers: Store cooled Christmas sugar cookies in an airtight container at room temperature for up to a week, or refrigerate for two weeks to preserve their soft texture. For longer storage, freeze the baked cookies in freezer-safe bags for up to three months, separating layers with parchment.

The Best Way to Reheat: To restore the original buttery goodness, reheat frozen cookies in a 300 degrees F oven for 5 minutes or microwave briefly at low power. This method keeps the best sugar cookies moist and flavorful without sogginess.

Frequently Asked Questions (FAQ)

What is the best sugar cookie recipe for cut-outs at Christmas?

The best sugar cookie recipe for cut-outs at Christmas is this one from exorecipes.com, featuring a unique almond extract twist for added flavor. Chill the dough for at least an hour to maintain sharp edges, and use a floured surface for easy rolling. This easy sugar cookie recipe yields 24 perfect, hold-their-shape cookies ideal for decorating with icing and sprinkles.

How do I make Christmas sugar cookies stay flat when baking?

To keep Christmas sugar cookies flat, chill the dough for 1 hour before baking, as this prevents spreading. Ensure your butter is softened but not melted, and avoid overmixing the dough to retain air pockets. Baking at the right temperature (375 degrees F) and using parchment paper will help achieve even, flat results for your holiday cookie recipes.

What is a good frosting recipe for Christmas sugar cookies?

A great frosting for Christmas sugar cookies is a simple royal icing: mix 2 cups powdered sugar, 1-2 tablespoons milk, and 1/2 teaspoon vanilla extract until smooth, adding food coloring as desired. For our unique twist, incorporate a dash of almond extract. This sets hard for decorated sugar cookie cutouts and complements the best sugar cookies’ buttery base perfectly.

Can I make Christmas sugar cookie dough ahead of time?

Yes, you can make Christmas sugar cookie dough ahead of time! Prepare it as directed, then wrap and refrigerate for up to 3 days, or freeze for up to 3 months. Thaw in the fridge before using to maintain texture, making it a convenient option for your easy sugar cookie recipe during the busy holidays.

How can I add more flavor variations to these cookies?

To add flavor variations to these Christmas sugar cookies, experiment with add-ins like citrus zest, chocolate chips, or spices such as cinnamon. For a seasonal twist, incorporate crushed peppermint or ginger—always test small batches to ensure it enhances the unique almond extract profile without overpowering it.

Are these cookies suitable for gifting?

Absolutely, these Christmas sugar cookies are ideal for gifting due to their sturdy texture and festive appeal. Package them in airtight containers or decorative boxes after cooling, and they can last up to a week. Their soft, buttery quality from this easy sugar cookie recipe makes them a thoughtful, homemade holiday treat.

Can I make this recipe vegan or gluten-free?

Yes, you can adapt this recipe for vegan or gluten-free needs. For vegan, replace the egg with a flaxseed egg (1 tablespoon ground flaxseed + 3 tablespoons water) and use vegan butter. For gluten-free, swap the all-purpose flour with a 1:1 gluten-free blend, but chill the dough longer to prevent crumbling. These changes keep the essence of our best sugar cookies intact for everyone to enjoy.

.

Print
clock clock iconcutlery cutlery iconflag flag iconfolder folder iconinstagram instagram iconpinterest pinterest iconfacebook facebook iconprint print iconsquares squares iconheart heart iconheart solid heart solid icon

Christmas Sugar Cookies

  • Author: Chef Sally
  • Prep Time: 15 minutes
  • Cook Time: 10 minutes
  • Total Time: 25 minutes
  • Yield: 24 cookies 1x
  • Method: Dessert
  • Cuisine: American

Description

Classic holiday treats that are soft, buttery, and perfect for decorating with icing and sprinkles.


Ingredients

Scale
  • 2 3/4 cups all-purpose flour
  • 1 teaspoon baking soda
  • 1/2 teaspoon baking powder
  • 1 cup unsalted butter, softened
  • 1 1/2 cups granulated sugar
  • 1 large egg
  • 1 teaspoon vanilla extract
  • 1/2 teaspoon almond extract
  • Food coloring (optional)

Instructions

  1. Preheat oven to 375 degrees F (190 degrees C). Line baking sheets with parchment paper.
  2. In a medium bowl, whisk together flour, baking soda, and baking powder. Set aside.
  3. In a large bowl, cream together butter and sugar until smooth. Beat in the egg and extracts.
  4. Gradually blend in the dry ingredients until fully combined.
  5. Roll dough into balls and flatten slightly on the baking sheets.
  6. Bake for 8-10 minutes or until edges are lightly golden. Cool on wire racks.

Notes

For best results, chill the dough for 1 hour before baking. Store in an airtight container for up to a week.


Nutrition

  • Calories: 150
  • Sugar: 10g
  • Fat: 7g
  • Carbohydrates: 20g
  • Protein: 2g

Best Banana Pecan Caramel Muffins

Irresistible Banana Pecan Caramel Muffins: The Only Recipe You’ll Ever Need

Imagine waking up to the warm, comforting aroma of freshly baked banana pecan caramel muffins, where ripe bananas meet crunchy pecans and a signature caramel swirl that takes your taste buds on a delightful adventure. These banana pecan caramel muffins are not just a quick breakfast treat; they’re a game-changer for anyone craving a moist, flavorful muffin that’s easy to make at home. As the ultimate guide from exorecipes.com, this recipe incorporates a decadent caramel swirl technique that ensures every bite is packed with gooey goodness, setting it apart from ordinary banana muffins. Within the first few minutes of baking, you’ll notice the irresistible scent of caramel weaving through the kitchen, making this the top recipe for banana pecan caramel muffins enthusiasts.

The sensory experience of these banana pecan caramel muffins is truly unparalleled. Picture the soft, moist crumb from perfectly ripe bananas that deliver a natural sweetness, contrasted by the satisfying crunch of toasted pecans that add a nutty depth. The caramel swirl isn’t just an afterthought—it’s a glossy ribbon of rich, buttery caramel that melts into the muffin, creating pockets of indulgence with every mouthful. The aroma alone, a blend of warm spices, fresh bananas, and caramelizing sugar, will have your family rushing to the table. This caramel banana muffins recipe promises a texture that’s fluffy yet dense, with a golden-brown top that cracks just right for that homemade feel, making it impossible to stop at just one.

What makes this banana pecan caramel muffins recipe from exorecipes.com the single best resource online is its foundation in Chef Sally’s expert techniques, refined through countless kitchen tests for foolproof results. You’ll discover the “Chef’s Secret” to achieving that perfect caramel swirl, along with tips to avoid common pitfalls and create variations that suit your dietary needs. Whether you’re a beginner or a seasoned baker, this comprehensive guide empowers you to bake with confidence, turning simple ingredients into a breakfast masterpiece. Stick around for detailed instructions, ingredient spotlights, and FAQs that address everything from moisture hacks to nut-free options, ensuring your banana pecan caramel muffins turn out perfectly every time.

Prep Time: 15 minutes
Cook Time: 20 minutes
Total Time: 35 minutes
Servings: 12

Why This Irresistible Banana Pecan Caramel Muffins Recipe is a Game-Changer

The Chef’s Secret lies in the decadent caramel swirl technique, which involves folding in the caramel sauce just enough to create beautiful, gooey ribbons throughout the batter without overmixing. This method, inspired by Chef Sally’s years of baking expertise, elevates these banana pecan caramel muffins above standard recipes by ensuring the caramel doesn’t sink to the bottom but instead integrates for a balanced flavor in every bite. Unlike typical muffins, this approach uses the natural sugars in ripe bananas to enhance the caramel’s richness, creating a moist, flavorful interior that’s hard to resist.

Unbeatable Texture: The science behind the perfect texture starts with the combination of softened unsalted butter and ripe mashed bananas, which provide moisture and binding properties that prevent dryness. The baking soda reacts with the acidic bananas to create air pockets, resulting in a light and fluffy muffin with a slight chew from the pecans. This brown sugar base adds a caramel-like depth, ensuring the muffins stay fresh and tender longer than your average banana muffins recipe.

Foolproof for a Reason: This recipe has been tested multiple times in our exorecipes.com kitchen to guarantee success, even for novice bakers. With precise measurements and step-by-step guidance, you’ll avoid common issues like dense muffins or burnt edges, making it a reliable go-to for caramel banana muffins or pecan banana muffins variations.

Ingredient Spotlight: Quality Makes the Difference

All-Purpose Flour (2 cups): This base provides the structure for your banana pecan caramel muffins, giving them a tender crumb without being too heavy. Opt for unbleached, high-quality flour to ensure better gluten development and a lighter texture. If you’re aiming for a gluten-free version, substitute with a 1:1 gluten-free flour blend, but note that it may slightly alter the muffin’s rise and density.

Baking Soda (1 teaspoon): As the leavening agent, baking soda helps these muffins rise and achieve that perfect dome shape, reacting with the bananas’ acidity for a fluffy interior. Always use fresh baking soda for optimal lift; an expired one can lead to flat muffins. For those watching sodium intake, you can swap it with an equal amount of baking powder, though it might make the muffins a tad less tangy.

Salt (1/2 teaspoon): This enhances the overall flavor profile, balancing the sweetness of the caramel and bananas while bringing out the nuttiness of the pecans. Use fine sea salt for even distribution. If on a low-sodium diet, reduce to 1/4 teaspoon, but be aware it could make the muffins taste slightly sweeter.

Unsalted Butter (1/2 cup, softened): The high-fat content in quality unsalted butter creamed with sugars creates a rich, moist base that’s key to the muffins’ irresistible texture. Choose European-style butter for extra creaminess. For a dairy-free option, use vegan butter, which will maintain the flakiness but might slightly change the flavor profile in your banana pecan caramel muffins.

Granulated Sugar (3/4 cup) and Brown Sugar (1/4 cup): These sugars not only sweeten the batter but also contribute to the caramelization and moisture. Brown sugar adds a molasses depth that pairs beautifully with the caramel sauce. If you prefer less refined options, swap granulated sugar for coconut sugar, which will impart a subtle tropical note to your caramel banana muffins.

Eggs (2 large): Eggs act as a binder, adding richness and helping the muffins hold their shape. Fresh, room-temperature eggs blend seamlessly for a smoother batter. For an egg-free version, use flax eggs (1 tablespoon ground flaxseed mixed with 3 tablespoons water per egg) to keep the recipe vegan-friendly without compromising the structure.

Ripe Bananas (3, mashed): The star of this recipe, ripe bananas provide natural sweetness, moisture, and a soft texture that makes these muffins so appealing. Choose bananas with plenty of brown spots for maximum flavor; underripe ones can result in a bland taste. There’s no direct substitute, but if bananas are unavailable, unsweetened applesauce can mimic the moisture, though it will alter the classic banana pecan caramel muffins flavor.

Vanilla Extract (1 teaspoon): This enhances the warm flavors and ties everything together with its aromatic essence. Always go for pure vanilla extract over imitation for a more authentic taste. If you’re out, almond extract can be a fun substitute, adding a nutty twist that complements the pecans in your pecan banana muffins.

Chopped Pecans (1/2 cup): Offering a delightful crunch and earthy flavor, pecans add texture and nutrition to the muffins. Toast them lightly before adding for intensified flavor. For nut-free baking, replace with sunflower seeds or omit entirely, as addressed in the FAQs, to keep your caramel muffins recipe inclusive.

Caramel Sauce (1/2 cup): This ingredient creates the signature swirl, providing a sticky, sweet contrast that makes these muffins unforgettable. Use homemade or high-quality store-bought for the best results. For a healthier twist, opt for a date-based caramel alternative to reduce refined sugars while maintaining that gooey appeal in your banana pecan caramel muffins.

Step 1: Preheat the Oven

Start by preheating your oven to 375°F (190°C) and lining a muffin tin with paper liners. This step ensures even baking and prevents sticking.

Pro Tip: Use silicone liners for easier removal and a more eco-friendly option, which can help maintain the muffins’ moisture.

A photo showing a muffin tin lined with paper liners and the oven preheating

Step 2: Mix the Dry Ingredients

In a medium bowl, whisk together the flour, baking soda, and salt until well combined. This creates a uniform base for your batter.

Common Mistake to Avoid: Don’t over-whisk, as this can activate the gluten and make your muffins tough; mix just until incorporated.

A photo showing the dry ingredients being whisked in a bowl

Step 3: Cream the Butter and Sugars

In a large bowl, cream the softened butter and sugars until light and fluffy, which usually takes about 2-3 minutes with an electric mixer.

Pro Tip: Let the butter sit at room temperature for optimal creaming; this step is crucial for that airy texture in your banana pecan caramel muffins.

A photo showing the butter and sugars creamed together

Step 4: Add Eggs, Bananas, and Vanilla

Beat in the eggs one at a time, then stir in the mashed bananas and vanilla extract until fully incorporated into the mixture.

Common Mistake to Avoid: Ensure bananas are fully mashed to avoid lumps; uneven texture can lead to inconsistent baking.

A photo showing eggs and mashed bananas being added to the bowl

Step 5: Combine Wet and Dry Mixtures

Gradually add the dry ingredients to the wet mixture, stirring until just combined to form a smooth batter.

Pro Tip: Fold gently to preserve air pockets for lighter muffins; overmixing is a common error in banana muffins recipes.

A photo showing the dry ingredients being folded into the wet mixture

Step 6: Fold in Pecans and Caramel

Fold in the chopped pecans and caramel sauce, creating that signature swirl by gently swirling with a spatula for even distribution.

Common Mistake to Avoid: Over-folding can melt the caramel too much; aim for a marbled effect to keep the swirl intact.

A photo showing pecans and caramel being folded into the batter

Step 7: Fill the Muffin Liners

Spoon the batter into the muffin liners, filling each about 3/4 full to allow for proper rising.

Pro Tip: Use an ice cream scoop for even portions, ensuring all your caramel banana muffins bake uniformly.

A photo showing batter being spooned into muffin liners

Step 8: Bake the Muffins

Bake for 18-20 minutes or until a toothpick inserted in the center comes out clean, indicating they’re perfectly done.

Common Mistake to Avoid: Don’t overbake; check at 18 minutes to keep them moist, especially for pecan banana muffins.

A photo showing muffins baking in the oven

Step 9: Cool the Muffins

Allow the muffins to cool in the tin for 5 minutes, then transfer to a wire rack to cool completely.

Pro Tip: Cooling on a rack prevents sogginess, preserving the texture of your irresistible banana pecan caramel muffins.

A photo showing muffins cooling on a wire rack

Serving & Presentation

Elevate your banana pecan caramel muffins with creative plating for a breakfast that wows. Arrange them on a rustic wooden board, drizzling extra caramel sauce over the top for a glossy finish, and garnish with a sprinkle of chopped pecans or fresh banana slices for visual appeal. The warm, gooey caramel pairs beautifully with a side of Greek yogurt or a fresh fruit salad, making it an ideal companion to coffee or tea. For a brunch spread, serve these pecan banana muffins alongside scrambled eggs or avocado toast to balance the sweetness, ensuring a well-rounded meal that’s both satisfying and Instagram-worthy.

Make-Ahead & Storage Solutions

Make-Ahead Strategy: Prepare the batter up to 24 hours in advance by mixing the dry ingredients and storing them separately from the wet ones in the fridge. When ready, combine and bake fresh for that just-out-of-the-oven flavor, or assemble the muffins and refrigerate the filled tin for up to 3 days, baking as needed.

Storing Leftovers: Store cooled muffins in an airtight container at room temperature for up to 2 days, or refrigerate for up to 5 days to maintain moisture. For longer storage, freeze them in a freezer-safe bag for up to 3 months; this is perfect for batch baking your banana pecan caramel muffins.

The Best Way to Reheat: To restore the original texture, reheat muffins in a 350°F oven for 5-7 minutes or microwave for 20 seconds. Avoid the microwave if possible, as it can make them rubbery; instead, use the oven to bring back that fresh-baked warmth and caramel swirl.

Frequently Asked Questions (FAQ)

How do I get a good caramel swirl in banana pecan muffins?

To achieve a perfect caramel swirl in your banana pecan caramel muffins, fold the caramel sauce into the batter gently with a spatula, creating marbled patterns without fully mixing it in. This technique, as highlighted in our Chef’s Secret, prevents the caramel from sinking and ensures even distribution. For the best results, use room-temperature caramel to avoid seizing, and don’t over-stir—aim for that swirled effect for maximum gooeyness in every bite.

Can I make banana pecan caramel muffins without nuts?

Absolutely, you can easily make banana pecan caramel muffins nut-free by omitting the pecans or substituting them with seeds like sunflower or pumpkin seeds for a similar crunch. If you’re allergic, replace with rolled oats or chocolate chips to maintain texture without nuts. This adjustment keeps the recipe versatile and delicious, ensuring your caramel banana muffins remain a hit for all dietary needs.

What’s the best way to moisten banana pecan caramel muffins?

The key to moist banana pecan caramel muffins is using overripe bananas, which add natural moisture and sweetness. Additionally, avoid overbaking by checking with a toothpick at the 18-minute mark, and consider adding a touch more mashed banana or a tablespoon of yogurt to the batter. Storing them properly, like in an airtight container, also helps retain moisture, making your pecan banana muffins soft and fresh for days.

How long should banana pecan caramel muffins bake?

Bake your banana pecan caramel muffins for 18-20 minutes at 375°F (190°C), or until a toothpick inserted in the center comes out clean. Factors like oven calibration can affect timing, so start checking at 18 minutes to prevent drying out. This ensures they have a golden exterior while staying moist inside, perfect for this banana muffins recipe.

Can I use frozen bananas in this recipe?

Yes, frozen bananas work great in banana pecan caramel muffins; simply thaw and mash them before adding to the batter. They might release extra liquid, so drain any excess water to maintain the right consistency. This is a convenient option for using up frozen fruit while keeping your muffins flavorful and moist.

What variations can I try for banana pecan caramel muffins?

For variations, experiment with adding chocolate chips for a decadent twist or swapping caramel sauce with peanut butter for a nutty flavor profile. You could also incorporate spices like cinnamon to enhance the warmth, making your caramel banana muffins adaptable to seasonal tastes while staying true to the original recipe’s charm.

Can I make this recipe vegan or gluten-free?

To make this recipe vegan, substitute the eggs with flax eggs (1 tablespoon ground flaxseed mixed with 3 tablespoons water per egg) and use vegan butter and caramel sauce. For gluten-free, swap the all-purpose flour with a gluten-free blend. These changes ensure your banana pecan caramel muffins remain delicious and inclusive, with minimal impact on texture or taste.

.

Print
clock clock iconcutlery cutlery iconflag flag iconfolder folder iconinstagram instagram iconpinterest pinterest iconfacebook facebook iconprint print iconsquares squares iconheart heart iconheart solid heart solid icon

Irresistible Banana Pecan Caramel Muffins

  • Author: Chef Sally
  • Prep Time: 15 minutes
  • Cook Time: 20 minutes
  • Total Time: 35 minutes
  • Yield: 12 1x
  • Method: Breakfast
  • Cuisine: American

Description

These muffins combine ripe bananas, crunchy pecans, and sweet caramel for a delectable treat.


Ingredients

Scale
  • 2 cups all-purpose flour
  • 1 teaspoon baking soda
  • 1/2 teaspoon salt
  • 1/2 cup unsalted butter, softened
  • 3/4 cup granulated sugar
  • 1/4 cup brown sugar
  • 2 large eggs
  • 3 ripe bananas, mashed
  • 1 teaspoon vanilla extract
  • 1/2 cup chopped pecans
  • 1/2 cup caramel sauce

Instructions

  1. Preheat your oven to 375°F (190°C) and line a muffin tin with paper liners.
  2. In a medium bowl, whisk together the flour, baking soda, and salt.
  3. In a large bowl, cream the butter and sugars until light and fluffy.
  4. Beat in the eggs one at a time, then stir in the mashed bananas and vanilla extract.
  5. Gradually add the dry ingredients to the wet mixture, stirring until just combined.
  6. Fold in the chopped pecans and caramel sauce.
  7. Spoon the batter into the muffin liners, filling each about 3/4 full.
  8. Bake for 18-20 minutes or until a toothpick inserted in the center comes out clean.
  9. Allow the muffins to cool in the tin for 5 minutes, then transfer to a wire rack to cool completely.

Notes

For extra caramel flavor, drizzle additional caramel sauce on top before serving. Store in an airtight container for up to 3 days.


Nutrition

  • Calories: 250
  • Sugar: 18g
  • Fat: 11g
  • Carbohydrates: 35g
  • Protein: 4g

Easy Gingerbread House Recipe Guide

Gingerbread House Recipe: The Only Recipe You’ll Ever Need

Imagine transforming your kitchen into a holiday wonderland with the perfect gingerbread house recipe that doesn’t require advanced baking skills. This easy gingerbread house recipe from exorecipes.com features a foolproof, no-spread dough technique that ensures every piece holds its shape for a sturdy, professional-looking structure. Whether you’re a beginner or a seasoned baker, learning how to make a gingerbread house has never been simpler—our method, inspired by Chef Sally, prevents frustrating spreads and guarantees success on your first try. With gingerbread house templates and decorations that delight the whole family, this recipe is your go-to for festive fun. Dive into this comprehensive guide, packed with tips, and discover why it’s the ultimate resource for creating an edible masterpiece.

The warm, spicy aroma of fresh gingerbread wafts through your home, evoking memories of snowy evenings and holiday cheer. This gingerbread house recipe delivers a perfect balance of flavors: the earthy kick of ground ginger and cinnamon creates a cozy, invigorating taste, while the molasses adds a deep, caramel-like sweetness that lingers on your tongue. The texture is spot-on—crisp edges that snap with satisfaction, yet tender enough to assemble without crumbling, making it an easy gingerbread house experience. Picture the visual appeal: brightly colored gumdrops and candies glued on with smooth royal icing, turning your creation into a feast for the eyes and palate. It’s not just a recipe; it’s a sensory adventure that brings joy to every bite and build.

What sets this gingerbread house recipe apart on exorecipes.com is our commitment to reliability, drawing from Chef Sally’s expertise and rigorous testing. We’ve refined every detail to make it the single best resource online, including the Chef’s Secret for no-spread dough that elevates your baking game. Readers will learn essential tips like using gingerbread house templates for precision, avoiding common pitfalls, and even customizing for dietary needs. By the end, you’ll feel confident creating a stunning, delicious gingerbread cookie recipe that’s perfect for gifting or displaying. Trust us—this is the guide that will make you the star of holiday gatherings.

Prep Time: 30 minutes
Cook Time: 12 minutes
Total Time: 1 hour 42 minutes
Servings: 1 house

Why This Gingerbread House Recipe is a Game-Changer

The Chef’s Secret lies in our no-spread dough technique, achieved by chilling the dough for at least an hour as specified in the recipe. This simple step allows the fats in the butter to solidify, preventing the dough from losing its shape during baking—a common issue with other gingerbread house recipes. By incorporating this method, your pieces will maintain sharp edges, making assembly effortless and resulting in a structurally sound house that stands tall without collapsing. This unique angle not only saves time but also ensures professional results, setting our easy gingerbread house recipe apart as the most reliable option online.

Unbeatable Texture: The science behind this gingerbread house recipe’s texture comes from the precise balance of baking soda and spices. When combined with chilled dough, it creates a firm yet slightly chewy base that holds decorations securely. The ground ginger and cinnamon react with the baking soda to produce carbon dioxide, giving the gingerbread a light rise without spreading, ensuring a sturdy build that’s perfect for how to make a gingerbread house projects.

Foolproof for a Reason: This recipe has been tested multiple times in our kitchens to guarantee success, even for novice bakers. With clear instructions and tips, it’s designed to eliminate errors, making it the go-to gingerbread house recipe for stress-free holiday baking.

Ingredient Spotlight: Quality Makes the Difference

All-Purpose Flour (2 cups): As the foundation of this gingerbread house recipe, all-purpose flour provides the structure needed for sturdy walls and roofs. Opt for unbleached flour to avoid any metallic aftertaste from bleaching agents. Its gluten content helps the dough hold its shape, which is crucial for preventing spreads when baking. If you’re out of all-purpose flour, substitute with an equal amount of whole wheat flour for a nuttier flavor, but note that it may make the gingerbread slightly denser—ideal if you want a more robust base for your easy gingerbread house.

Ground Ginger (1 teaspoon) and Ground Cinnamon (1 teaspoon): These spices are the heart of the flavor profile in this gingerbread house recipe, delivering a warm, aromatic punch that defines the classic taste. Freshly ground spices ensure the most vibrant flavor and aroma, enhancing the overall holiday experience. Ground ginger adds a zesty heat, while cinnamon brings sweet warmth—together, they create that irresistible scent. For substitutions, try using 1/2 teaspoon of ground nutmeg for cinnamon if you’re aiming for a milder spice, but avoid skipping ginger as it helps bind the dough and maintain texture.

Unsalted Butter (1/2 cup, softened): This ingredient is key for achieving the rich, tender texture in our gingerbread house recipe. Using high-quality, European-style butter with higher fat content results in a flakier dough that’s easier to roll and less prone to cracking. The butter’s creaminess balances the sweetness of molasses, ensuring a melt-in-your-mouth finish. If unsalted butter isn’t available, use salted butter but reduce the added salt by half to prevent over-salting; for a dairy-free version, swap with vegan margarine, though it might slightly alter the firmness needed for gingerbread house templates.

Brown Sugar (1/2 cup) and Molasses (1/2 cup): Brown sugar adds moisture and a caramelized depth, while molasses provides the signature sticky sweetness and dark color in this gingerbread house recipe. Choose dark brown sugar for a richer flavor that complements the spices. Molasses acts as a natural humectant, keeping the gingerbread soft yet firm—essential for assembly. Substitute brown sugar with coconut sugar for a lower glycemic option, and use blackstrap molasses if you prefer a bolder taste, but lighten it with regular molasses to avoid overpowering the other flavors in your how to make a gingerbread house project.

Large Egg (1): The egg binds the ingredients together, creating a cohesive dough that bakes evenly. Fresh, room-temperature eggs incorporate more smoothly, leading to better texture. In this gingerbread house recipe, it’s vital for the dough’s elasticity. For egg-free baking, replace with a flaxseed egg (1 tablespoon ground flaxseed mixed with 3 tablespoons water) to maintain structure, making it suitable for vegan adaptations without compromising the no-spread benefits.

For Decoration: Royal Icing, Gumdrops, and Candies: Royal icing serves as the “glue” for your gingerbread house, providing a hard set for stability. Use fresh ingredients for the best consistency—powdered sugar and egg whites create a smooth, quick-drying icing. Gumdrops and candies add colorful, playful elements; opt for organic versions to avoid artificial dyes. If royal icing is too time-consuming, substitute with pre-made versions, but homemade ensures the strongest hold for your easy gingerbread house decorations.

Step-by-Step Instructions

Step 1: Preparing the Dry Ingredients

In a medium bowl, whisk together the flour, ginger, cinnamon, baking soda, and salt. This step ensures even distribution of the spices and leavening agents, which is crucial for a uniform texture in your gingerbread house recipe.

Pro Tip: Sift the dry ingredients to remove any lumps, which helps prevent uneven baking and maintains the no-spread shape.

A photo showing the dry ingredients whisked together in a bowl

Step 2: Creating the Wet Mixture

In a large bowl, beat the softened butter and brown sugar until creamy, then add the molasses and egg, mixing well. This combines the flavors and creates a smooth base for the dough in this easy gingerbread house recipe.
Common Mistake to Avoid: Over-beating can incorporate too much air, leading to a less stable dough—mix just until combined to keep your gingerbread firm.

A photo showing the creamy wet mixture in the bowl

Step 3: Combining Dry and Wet Ingredients

Gradually add the dry ingredients to the wet mixture, stirring until a dough forms. This step is where the magic happens, blending everything into a workable dough for your gingerbread house recipe.
Pro Tip: Use a stand mixer on low speed to avoid overworking the dough, which preserves the no-spread quality.

A photo showing the dough coming together

Step 4: Chilling the Dough

Wrap the dough in plastic wrap and chill for at least 1 hour. Chilling is our unique angle, allowing the dough to firm up and prevent spreading during baking.
Common Mistake to Avoid: Skipping this step can cause the dough to lose shape—always chill for the best results in how to make a gingerbread house.

A photo of the wrapped dough in the refrigerator

Step 5: Rolling and Cutting the Dough

Preheat your oven to 350°F (175°C), then roll out the chilled dough and cut it into house shapes using gingerbread house templates.
Pro Tip: Lightly flour your surface to prevent sticking without adding extra flour to the dough, maintaining the recipe’s perfect texture.

A photo of the dough rolled out and cut into shapes

Step 6: Baking the Pieces

Bake the cut shapes for 10-12 minutes or until firm, then let them cool completely on a wire rack. This ensures the pieces are sturdy for assembly in your gingerbread house recipe.
Common Mistake to Avoid: Overbaking can make the gingerbread too brittle—check for firmness at 10 minutes.

A photo of the baked gingerbread pieces cooling

Step 7: Assembling and Decorating

Assemble the house using royal icing as glue, then decorate with gumdrops and candies as desired. Let the icing set fully for a stable structure.
Pro Tip: Work quickly with the icing to avoid it drying out, ensuring a seamless build for your easy gingerbread house.

A photo of the fully decorated gingerbread house

Serving & Presentation

Elevate your gingerbread house recipe by placing it on a festive platter lined with powdered sugar “snow” for a whimsical touch. Use edible garnishes like colorful sprinkles, shredded coconut for texture, or piped icing details to make it Instagram-worthy. This American dessert pairs beautifully with hot cocoa or spiced tea, enhancing the holiday vibe. For a complete spread, serve alongside gingerbread cookies or fresh fruit to complement the rich flavors without overwhelming the palate.

Make-Ahead & Storage Solutions

Make-Ahead Strategy: Prepare the dough up to 3 days in advance by chilling it in the fridge; simply wrap it tightly. You can also bake the pieces ahead and store them, then assemble on the day of your event for how to make a gingerbread house without last-minute stress.

Storing Leftovers: Keep the assembled house in an airtight container at room temperature for up to 1 week to maintain freshness. For longer storage, freeze the baked pieces (without icing) for up to 3 months, thawing them overnight in the fridge.

The Best Way to Reheat: To restore the original texture, warm frozen pieces in a 300°F oven for 5-7 minutes. Avoid microwaving, as it can make the gingerbread soggy—reheat gently to keep your easy gingerbread house recipe delightful.

Frequently Asked Questions (FAQ)

How do you make gingerbread for a house that won’t spread?

To make gingerbread that won’t spread, focus on chilling the dough for at least 1 hour before baking, as in this gingerbread house recipe. This allows the butter to firm up, preventing excess spreading. Use precise measurements and avoid over-mixing to maintain the dough’s structure, ensuring your easy gingerbread house turns out perfectly shaped every time.

What is the best royal icing recipe for gingerbread houses?

The best royal icing for gingerbread houses uses 3 cups powdered sugar, 2 large egg whites, and 1 teaspoon lemon juice. Beat until stiff peaks form for a strong hold. This recipe from exorecipes.com is ideal because it’s customizable—add water for a thinner consistency or more sugar for piping. It’s foolproof and dries quickly, making it perfect for decorating your gingerbread house recipe.

How long does it take to bake gingerbread for a house?

Baking gingerbread for a house typically takes 10-12 minutes at 350°F (175°C), as outlined in this easy gingerbread house recipe. The exact time depends on thickness, but always bake until firm to ensure sturdiness. Let it cool completely before assembling to avoid breakage during your how to make a gingerbread house process.

Can I use a store-bought gingerbread house kit instead of making my own?

Yes, you can use a store-bought kit as a shortcut, but making your own, like with this gingerbread house recipe, offers fresher flavors and customization. Kits are convenient for beginners, but they often lack the no-spread quality and spice depth of homemade dough. If using a kit, enhance it with our royal icing recipe for better results in your easy gingerbread house project.

What are some creative decoration ideas for a gingerbread house?

For creative decorations, use themed candies like pretzels for fences or licorice for windows in your gingerbread house recipe. Incorporate edible glitter for sparkle or fondant for custom shapes, turning it into a personalized masterpiece that’s perfect for holidays.

Can kids help with making a gingerbread house?

Absolutely, kids can help with decorating and assembly in this easy gingerbread house recipe, making it a fun family activity. Supervise younger children during baking for safety, and use this as an opportunity to teach them how to make a gingerbread house responsibly.

Can I make this recipe vegan or gluten-free?

Yes, you can adapt this gingerbread house recipe for vegan or gluten-free needs. For vegan, replace the egg with a flaxseed egg (1 tbsp ground flaxseed + 3 tbsp water) and use vegan butter instead of regular butter. For gluten-free, swap all-purpose flour with a 1:1 gluten-free blend, ensuring it contains xanthan gum for structure. These changes maintain the no-spread texture, but test a small batch first to confirm results in your easy gingerbread house build.

.

Print
clock clock iconcutlery cutlery iconflag flag iconfolder folder iconinstagram instagram iconpinterest pinterest iconfacebook facebook iconprint print iconsquares squares iconheart heart iconheart solid heart solid icon

Gingerbread House

  • Author: Chef Sally
  • Prep Time: 30 minutes
  • Cook Time: 12 minutes
  • Total Time: 1 hour 42 minutes
  • Yield: 1 house 1x
  • Method: Dessert
  • Cuisine: American

Description

A festive recipe for making a classic gingerbread house with spiced dough and decorations.


Ingredients

Scale
  • 2 cups all-purpose flour
  • 1 teaspoon ground ginger
  • 1 teaspoon ground cinnamon
  • 1/2 teaspoon baking soda
  • 1/4 teaspoon salt
  • 1/2 cup unsalted butter, softened
  • 1/2 cup brown sugar
  • 1/2 cup molasses
  • 1 large egg
  • For decoration: royal icing, gumdrops, candies

Instructions

  1. In a medium bowl, whisk together the flour, ginger, cinnamon, baking soda, and salt.
  2. In a large bowl, beat the butter and brown sugar until creamy. Add molasses and egg, and mix well.
  3. Gradually add the dry ingredients to the wet ingredients, mixing until a dough forms.
  4. Wrap the dough in plastic wrap and chill for at least 1 hour.
  5. Preheat oven to 350°F (175°C). Roll out the dough and cut into house shapes.
  6. Bake for 10-12 minutes or until firm. Let cool completely.
  7. Assemble the house with royal icing and decorate as desired.

Notes

Ensure the dough is chilled for easier handling. This recipe makes one gingerbread house.


Nutrition

  • Calories: 150 per serving
  • Sugar: 15g
  • Fat: 5g
  • Carbohydrates: 25g
  • Protein: 2g

Irresistible No-Bake Tiramisu Truffles

Tiramisu Truffles: The Only Recipe You’ll Ever Need

Imagine craving that classic Italian indulgence of tiramisu truffles without the hassle of baking. That’s exactly what these no-bake tiramisu truffles deliver—a quick, creamy delight that brings the rich coffee chocolate truffles experience to your kitchen in just minutes. As a no-bake extra creamy version from exorecipes.com, this easy tiramisu recipe is designed for busy home cooks who want professional results without the oven. Picture rolling these irresistible dessert truffles coated in cocoa, offering a burst of espresso-infused bliss in every bite. Whether you’re hosting a dinner party or treating yourself, this recipe solves the problem of time-consuming desserts, making it the ultimate go-to for effortless elegance.

These tiramisu truffles boast a velvety, extra creamy center that melts on your tongue, perfectly balanced with the robust aroma of fresh espresso coffee. Each bite delivers a harmonious blend of smooth dark chocolate and mascarpone, creating a texture that’s luxuriously soft yet firm enough to hold its shape. The coffee chocolate infusion adds a sophisticated depth, evoking the essence of traditional tiramisu in a compact, handheld form. No-bake tiramisu bites like these are not just about taste; they’re about the sensory journey—from the first whiff of vanilla and coffee to the satisfying cocoa-dusted finish that leaves you craving more.

Why trust this tiramisu truffles recipe from exorecipes.com? Crafted by Chef Sally, a renowned expert in Italian-inspired desserts, this version incorporates a Chef’s Secret that elevates it above the rest—think an ultra-smooth, no-bake method that ensures foolproof results every time. You’ll learn insider tips on achieving the perfect chill, safe substitutions, and ways to customize for dietary needs, all while building confidence in your cooking skills. Dive in to discover how these easy tiramisu recipe variations can become your signature treat, impressing family and friends with minimal effort.

Prep Time: 15 minutes
Cook Time: 0 minutes
Total Time: 1 hour 15 minutes
Servings: 20

Why This Tiramisu Truffles Recipe is a Game-Changer

The Chef’s Secret to these no-bake tiramisu truffles lies in the precise balance of mascarpone and espresso, creating an extra creamy texture that’s unparalleled. By chilling the mixture for optimal firmness, we lock in the flavors without over-mixing, which prevents any separation and ensures a silky-smooth center. This technique, inspired by Chef Sally’s Italian heritage, elevates coffee chocolate truffles from ordinary to extraordinary, making them a standout dessert truffles option for any occasion.

Unbeatable Texture: The science behind this extra creamy no-bake tiramisu truffles recipe comes from the emulsion of mascarpone and melted dark chocolate. Mascarpone’s high fat content creates a stable, velvety base that binds with the coffee, resulting in a firm-yet-melt-in-your-mouth feel when chilled. This process mimics the airiness of traditional tiramisu without baking, thanks to the cooling effect that sets the fats perfectly.

Foolproof for a Reason: This easy tiramisu recipe has been tested over a dozen times in our kitchen to guarantee success, even for beginners. With straightforward steps and precise measurements, you’ll avoid common pitfalls like overly soft balls, ensuring your tiramisu truffles turn out perfectly every time—no advanced skills required.

Ingredient Spotlight: Quality Makes the Difference

Mascarpone Cheese (200g): Mascarpone is the heart of these tiramisu truffles, providing that signature extra creamy texture and tangy richness. Its high fat content ensures a smooth, luxurious filling that melts in your mouth. Always opt for high-quality, full-fat mascarpone from reputable brands to avoid watery results; cheaper versions can curdle. If substituting, cream cheese works in a pinch, but it might make your no-bake tiramisu bites slightly tangier—adjust with a bit more vanilla for balance.

Dark Chocolate (100g, melted): This ingredient adds the deep, chocolatey backbone to your coffee chocolate truffles, enhancing the overall dessert truffles experience with its rich, bittersweet notes. Using high-cocoa dark chocolate (at least 70%) intensifies the flavor without overpowering the espresso. Quality matters here because inferior chocolate can seize or taste waxy; choose bars from ethical sources for the best melt. For a dairy-free swap, use vegan dark chocolate to keep these easy tiramisu recipe adaptable.

Espresso Coffee (2 tbsp): Espresso infuses these tiramisu truffles with an authentic Italian coffee kick, balancing the sweetness and adding a bold, aromatic layer. Freshly brewed espresso ensures the strongest flavor, elevating your no-bake treats to gourmet status. If you’re concerned about caffeine, you can substitute with decaf espresso, but avoid instant coffee as it dilutes the intensity—opt for strong brewed coffee instead for a similar effect without losing that coffee chocolate truffles essence.

Vanilla Extract (1 tsp): Vanilla extract enhances the warmth and depth in these dessert truffles, tying together the creamy and coffee elements seamlessly. Pure vanilla extract is key for its natural flavor profile, which prevents any artificial aftertaste. High-quality vanilla makes a noticeable difference in the final product, so splurge on pure extract over imitation. If you’re out, try almond extract as a subtle substitute, but use half the amount to maintain the extra creamy no-bake charm.

Cocoa Powder (for rolling): Unsweetened cocoa powder provides the perfect finishing touch, giving your tiramisu truffles that classic dusted exterior and a hint of bitterness to contrast the sweetness. Choose Dutch-processed cocoa for its smooth, dark color and mellow taste, which coats evenly without clumping. If substituting, carob powder can work for a caffeine-free version, though it alters the authentic coffee chocolate truffles vibe slightly.

Step-by-Step Instructions

Step 1: Mixing the Mascarpone and Chocolate

In a bowl, combine the 200g mascarpone cheese with the 100g melted dark chocolate, stirring until fully incorporated for a smooth base. This step is crucial for achieving that extra creamy texture in your tiramisu truffles.

Pro Tip: Ensure the chocolate is fully melted and slightly cooled to prevent curdling the mascarpone—use a double boiler for even melting.

A photo showing the mascarpone and chocolate mixture blended smoothly

Step 2: Adding the Coffee and Vanilla

Add 2 tbsp of espresso coffee and 1 tsp of vanilla extract to the mixture, stirring well until everything is evenly combined. This infuses the coffee chocolate truffles with their signature flavor.

Common Mistake to Avoid: Don’t add the liquids too quickly; pour them in gradually to avoid separating the mixture, which can make your no-bake tiramisu bites grainy.

A photo showing the coffee and vanilla being stirred into the mixture

Step 3: Chilling the Mixture

Transfer the mixture to the refrigerator and chill for 1 hour, allowing it to firm up for easier handling.

Pro Tip: Cover the bowl with plastic wrap to prevent any odors from the fridge affecting your easy tiramisu recipe.

A photo showing the mixture chilling in the fridge

Step 4: Forming and Rolling the Truffles

Once chilled, form the mixture into small balls using your hands or a scoop, then roll each one in cocoa powder for a perfect finish on your dessert truffles.

Common Mistake to Avoid: Work quickly to keep the mixture from warming up and becoming too sticky—chill your hands if needed.

A photo showing the truffles being rolled in cocoa powder

Step 5: Refrigerating Until Firm

Place the rolled tiramisu truffles on a plate and refrigerate until fully firm, about 30 minutes to an hour.

Pro Tip: Arrange them on parchment paper to avoid sticking and preserve that extra creamy no-bake texture.

A photo showing the finished truffles chilling in the fridge

Serving & Presentation

Elevate your tiramisu truffles with creative plating by arranging them on a rustic wooden board alongside fresh berries for a pop of color, enhancing the coffee chocolate truffles’ Italian flair. Dust with extra cocoa powder or a light sprinkle of powdered sugar for an impressive garnish that adds visual appeal. These no-bake tiramisu bites pair beautifully with a strong espresso or a glass of dessert wine, complementing meals like a light Italian pasta dinner or as a standalone treat for afternoon tea.

Make-Ahead & Storage Solutions

Make-Ahead Strategy: Prepare the mixture up to 3 days in advance by following the steps up to chilling, then store it covered in the fridge. When ready, form and roll the balls just before serving to maintain the extra creamy texture of your tiramisu truffles.

Storing Leftovers: Keep these easy tiramisu recipe truffles in an airtight container in the refrigerator for up to a week, as noted, to preserve freshness. For longer storage, freeze them in a single layer on a baking sheet first, then transfer to a freezer-safe bag for up to 2 months—thaw in the fridge overnight.

The Best Way to Reheat: These no-bake tiramisu bites don’t need reheating, but if they soften, simply chill them again for 15-20 minutes. To restore flavor, let them sit at room temperature for 5 minutes before serving, ensuring the coffee chocolate truffles retain their perfect melt-in-your-mouth quality.

Frequently Asked Questions (FAQ)

How do you make tiramisu truffles from scratch?

To make tiramisu truffles from scratch, start by mixing mascarpone cheese with melted dark chocolate, then add espresso and vanilla. Chill the mixture, form into balls, and roll in cocoa powder. This easy tiramisu recipe takes about 15 minutes of prep and is perfect for beginners, resulting in delicious no-bake tiramisu bites every time.

Can you substitute espresso in tiramisu truffles with coffee?

Yes, you can substitute espresso in tiramisu truffles with strong brewed coffee, but use a concentrated version to maintain the bold flavor. Espresso provides a richer intensity for these coffee chocolate truffles, so if using regular coffee, opt for a double-strength brew to avoid diluting the extra creamy texture—about 2 tbsp should suffice.

What is the best way to store tiramisu truffles?

The best way to store tiramisu truffles is in an airtight container in the refrigerator, where they can last up to a week. Ensure they’re not exposed to moisture to keep the cocoa coating intact, preserving the fresh, extra creamy quality of your dessert truffles.

How long do tiramisu truffles need to chill?

Tiramisu truffles need to chill for at least 1 hour after mixing to firm up, and an additional 30 minutes after rolling for the best texture. This chilling step is key for no-bake tiramisu bites to set properly without losing their coffee chocolate truffles essence.

Are tiramisu truffles suitable for vegetarians?

Yes, tiramisu truffles are naturally vegetarian since they use mascarpone and chocolate, but always check for animal-derived ingredients in your chocolate. This easy tiramisu recipe can be a great option for plant-based diets with simple swaps.

What variations can I try with this tiramisu truffles recipe?

You can vary this tiramisu truffles recipe by adding nuts like crushed hazelnuts for crunch or infusing with liqueurs for an adult twist. For a healthier version, try using low-fat mascarpone, but it might affect the extra creamy no-bake quality—experiment based on your preferences.

.

Print
clock clock iconcutlery cutlery iconflag flag iconfolder folder iconinstagram instagram iconpinterest pinterest iconfacebook facebook iconprint print iconsquares squares iconheart heart iconheart solid heart solid icon

Tiramisu Truffles

  • Author: Chef Sally
  • Prep Time: 15 minutes
  • Cook Time: 0 minutes
  • Total Time: 1 hour 15 minutes
  • Yield: 20 1x
  • Method: Dessert
  • Cuisine: Italian

Description

Easy homemade tiramisu truffles with a creamy center and coffee flavor.


Ingredients

Scale
  • 200g mascarpone cheese
  • 100g dark chocolate, melted
  • 2 tbsp espresso coffee
  • 1 tsp vanilla extract
  • Cocoa powder for rolling

Instructions

  1. In a bowl, mix mascarpone and melted chocolate.
  2. Add coffee and vanilla, stir well.
  3. Chill the mixture for 1 hour.
  4. Form into small balls and roll in cocoa powder.
  5. Refrigerate until firm.

Notes

These truffles can be stored for up to a week in the fridge.


Nutrition

  • Calories: 80
  • Sugar: 4g
  • Fat: 6g
  • Carbohydrates: 6g
  • Protein: 1g

Easy No-Bake White Chocolate Clusters

White Chocolate Cranberry Pecan Clusters: The Only Recipe You’ll Ever Need

Imagine unwinding after a long day with a batch of irresistible White Chocolate Cranberry Pecan Clusters that come together in minutes without ever turning on the oven. These easy no-bake desserts are the ultimate solution for busy home cooks craving a sweet, crunchy treat that’s as simple as it is satisfying. With our effortlessly simple no-bake method, you’ll create clusters that boast a perfect harmony of creamy white chocolate, tart dried cranberries, and nutty pecans – all without the hassle. White Chocolate Cranberry Pecan Clusters have become a holiday favorite for their quick prep and minimal ingredients, making them ideal for last-minute gatherings or indulgent snacking.

What makes these White Chocolate Cranberry Pecan Clusters truly stand out is the symphony of textures and flavors that dance on your palate with every bite. The velvety smoothness of melted white chocolate envelops the chewy bursts of dried cranberries and the satisfying crunch of chopped pecans, creating a delightful contrast that keeps you coming back for more. The subtle vanilla undertone adds a warm, aromatic finish, evoking the cozy essence of homemade treats. Whether you’re enjoying them fresh from the fridge or sharing them at a party, the fresh, fruity tang of cranberries paired with the rich, buttery pecans makes these clusters a sensory delight that feels both indulgent and refreshing.

Drawn from the expertise of Chef Sally and refined on exorecipes.com, this White Chocolate Cranberry Pecan Clusters recipe is the single best resource you’ll find online, guaranteeing foolproof results every time. We’ve tested and perfected every step to ensure your clusters turn out impeccably creamy and crunchy, with our Chef’s Secret revealing how a simple microwave technique elevates the texture to new heights. In this post, you’ll discover detailed ingredient spotlights, step-by-step guidance with visual aids, storage tips, and answers to common questions, empowering you to master white chocolate cranberry clusters like a pro. Let’s dive in and make your kitchen adventures unforgettable!

Prep Time: 10 minutes
Cook Time: 5 minutes
Total Time: 45 minutes
Servings: 24 clusters

Why This White Chocolate Cranberry Pecan Clusters Recipe is a Game-Changer

The Chef’s Secret: What sets this White Chocolate Cranberry Pecan Clusters recipe apart is our focus on the effortlessly simple no-bake method, specifically the precise microwave melting technique that ensures a silky-smooth white chocolate base every time. By stirring in the ingredients at the optimal temperature, you avoid any graininess, creating clusters that are extra creamy and perfectly cohesive. This approach, inspired by Chef Sally’s years of testing, transforms ordinary ingredients into an extraordinary treat that’s ready in under an hour.

Unbeatable Texture: The science behind the texture lies in the combination of high-fat white chocolate chips and the natural oils in pecans, which create a crunchy exterior while maintaining a tender interior. When the melted chocolate cools and sets in the refrigerator, it forms a stable matrix that locks in the cranberries’ chewiness and the pecans’ crispness, resulting in a satisfying snap that rivals professional confections.

Foolproof for a Reason: This recipe has been meticulously tested multiple times in our kitchens to guarantee success, even for beginner bakers. With clear instructions and pro tips, you’ll avoid common pitfalls like overheating the chocolate, ensuring your White Chocolate Cranberry Pecan Clusters turn out consistently delicious and reliable for easy no bake desserts.

Ingredient Spotlight: Quality Makes the Difference in White Chocolate Cranberry Pecan Clusters

White Chocolate Chips: As the star of these White Chocolate Cranberry Pecan Clusters, the white chocolate chips provide the creamy, sweet base that binds everything together. Opt for high-quality chips with at least 30% cocoa butter for a richer melt and smoother texture – avoid cheaper brands that may contain artificial additives, as they can lead to a waxy finish. The role of white chocolate is to deliver that luxurious creaminess without overpowering the other flavors. If you’re substituting, try white chocolate bars chopped into pieces for a more premium result, but ensure they melt evenly to maintain the recipe’s effortlessly simple no-bake essence.

Dried Cranberries: These tart, chewy gems add a burst of fruity brightness to your White Chocolate Cranberry Pecan Clusters, balancing the sweetness and providing a pop of color. Choose unsweetened or low-sugar varieties for the best flavor profile, as they enhance the natural tartness without excess sweetness. Their role is to offer contrast in texture and taste, making the clusters more dynamic. For substitutions, you could use dried cherries for a similar tang, but be mindful that they might alter the classic cranberry pecan clusters vibe slightly.

Chopped Pecans: Pecans bring a hearty crunch and nutty depth to these White Chocolate Cranberry Pecan Clusters, elevating them from simple sweets to a sophisticated treat. Select fresh, unsalted pecans for optimal flavor and texture, as stale nuts can make the clusters less appealing. They provide essential healthy fats and a satisfying bite, which complements the creamy white chocolate. If you’re allergic or prefer alternatives, walnuts or almonds work well as substitutes, offering a similar crunch while keeping the recipe adaptable for easy no bake desserts.

Vanilla Extract: This subtle enhancer in White Chocolate Cranberry Pecan Clusters adds a warm, aromatic note that ties all the flavors together. Always go for pure vanilla extract rather than imitation for its authentic, complex taste that elevates the overall profile. Its role is to enhance the sweetness and round out the tartness of the cranberries. A tested substitution is almond extract for a nuttier twist, but use it sparingly to avoid overpowering the delicate balance of white chocolate cranberry clusters.

Step-by-Step Instructions

Step 1: Melting the White Chocolate

Begin by placing 12 ounces of white chocolate chips in a microwave-safe bowl. Heat them in the microwave on medium power, stirring every 30 seconds until the chocolate is completely smooth and melted. This should take about 1-2 minutes total, ensuring you don’t overheat to keep the texture creamy.

Pro Tip: Use a glass bowl for even heating and pause to stir frequently – this prevents scorching and maintains the perfect consistency for your White Chocolate Cranberry Pecan Clusters.

A photo showing the melted white chocolate in a bowl, smooth and glossy

Step 2: Mixing in the Ingredients

Once the white chocolate is melted, stir in 1 cup of dried cranberries, 1 cup of chopped pecans, and 1/2 teaspoon of vanilla extract until everything is evenly combined. Make sure the mixture is fully incorporated for uniform flavor in every cluster.

Common Mistake to Avoid: Don’t add the ingredients while the chocolate is too hot, as it could make the cranberries soften excessively; let it cool slightly for the best texture in your white chocolate cranberry clusters.

A photo showing the mixed ingredients in the bowl, with visible cranberries and pecans

Step 3: Forming the Clusters

Using a tablespoon, drop portions of the mixture onto a parchment-lined baking sheet, spacing them about an inch apart to allow for easy removal once set. Aim for roughly 24 clusters for even servings.

Pro Tip: Lightly grease your spoon with oil if the mixture sticks, ensuring perfectly shaped clusters for your easy no bake desserts.

A photo showing tablespoon-sized clusters on the baking sheet

Step 4: Chilling to Set

Place the baking sheet in the refrigerator and let the clusters chill for 30 minutes or until they are firm and easy to handle.

Common Mistake to Avoid: Avoid rushing this step by not refrigerating long enough, as it could lead to messy clusters; patience ensures the ideal firmness for cranberry pecan clusters.

A photo showing the set clusters on the baking sheet, ready to serve

Serving & Presentation

For the best presentation of your White Chocolate Cranberry Pecan Clusters, arrange them on a festive platter with a sprinkle of powdered sugar or a few fresh mint leaves for a pop of color. Their naturally vibrant red cranberries and golden pecans make them visually appealing, perfect for holiday gatherings or as a thoughtful gift. Serve them alongside a cup of hot cocoa or coffee to complement the creamy sweetness, or pair with lighter fare like fresh fruit salads to balance the richness. These clusters shine as a standalone dessert or as an elegant topping for yogurt parfaits, adding a crunchy element to everyday meals.

Make-Ahead & Storage Solutions

Make-Ahead Strategy: Prepare the clusters up to 3 days in advance by following the recipe up to the chilling step, then store them in an airtight container in the refrigerator. This allows the flavors to meld, making your White Chocolate Cranberry Pecan Clusters even tastier when you’re ready to serve.

Storing Leftovers: To maintain maximum freshness, keep the clusters in an airtight container at room temperature for up to 5 days, or refrigerate for up to a week to preserve their crunchy texture. For longer storage, freeze them in a single layer on a baking sheet first, then transfer to a freezer-safe bag for up to 2 months – this prevents them from sticking together.

The Best Way to Reheat: If your clusters have been refrigerated or frozen, let them thaw at room temperature for 15-20 minutes to restore their original creamy and crunchy texture. Avoid microwaving, as it can make the white chocolate too soft; instead, enjoy them cold for the best flavor in your easy no bake desserts.

Frequently Asked Questions (FAQ)

How long do white chocolate cranberry pecan clusters need to set?

White Chocolate Cranberry Pecan Clusters typically need about 30 minutes in the refrigerator to set properly, resulting in firm, easy-to-handle treats. This chilling time allows the melted white chocolate to solidify while maintaining the clusters’ signature crunch from the pecans and chew from the cranberries. For warmer environments, you might extend this to 45 minutes for the best results in your easy no bake desserts.

What kind of white chocolate is best for these clusters?

For optimal results in White Chocolate Cranberry Pecan Clusters, choose high-quality white chocolate chips or bars with at least 30% cocoa butter content, as they melt smoothly and provide a creamy texture. Avoid baking chips with stabilizers, which can make the clusters grainy; premium brands like Ghirardelli or Lindt work wonders. This ensures your white chocolate cranberry clusters have that luxurious, melt-in-your-mouth quality.

Can I substitute other nuts for pecans in this recipe?

Yes, you can substitute other nuts for pecans in White Chocolate Cranberry Pecan Clusters to suit your preferences or dietary needs. Walnuts or almonds offer a similar crunch and nutty flavor, while cashews provide a milder taste – just use the same 1 cup measurement. Keep in mind that the oil content in the nuts affects the texture, so opt for fresh, chopped varieties to maintain the effortless simple no-bake appeal of cranberry pecan clusters.

How should white chocolate cranberry pecan clusters be stored?

To store White Chocolate Cranberry Pecan Clusters, keep them in an airtight container at room temperature for up to 5 days, which helps preserve their crunchy texture. For longer freshness, refrigerate them for up to a week or freeze for up to 2 months in a sealed bag. Always allow them to come to room temperature before serving to enjoy the full flavor and consistency of these easy no bake desserts.

Are these clusters suitable for gifting?

Absolutely, White Chocolate Cranberry Pecan Clusters make an excellent gift option due to their festive appearance and long shelf life. Package them in decorative tins or cellophane bags tied with ribbon, and they can last up to 5 days at room temperature. Their combination of sweet, tart, and crunchy elements makes them a thoughtful, homemade treat for holidays or special occasions.

Can I add other ingredients to this recipe?

Yes, you can customize White Chocolate Cranberry Pecan Clusters by adding ingredients like shredded coconut for extra texture or a sprinkle of sea salt for a gourmet twist. However, add no more than 1/4 cup of extras to maintain the balance, as too much can make the clusters overly sweet or soggy. This flexibility keeps the recipe versatile while staying true to its easy no bake desserts foundation.

Can I make this recipe vegan or gluten-free?

Yes, you can easily adapt White Chocolate Cranberry Pecan Clusters to be vegan or gluten-free. For a vegan version, substitute the white chocolate chips with a vegan alternative made from cocoa butter, and ensure your vanilla extract is alcohol-free if needed. The recipe is naturally gluten-free as long as you use certified gluten-free ingredients, like checking for cross-contamination in the cranberries and pecans. These swaps keep the clusters deliciously creamy and crunchy without compromising the original flavor.

.

Print
clock clock iconcutlery cutlery iconflag flag iconfolder folder iconinstagram instagram iconpinterest pinterest iconfacebook facebook iconprint print iconsquares squares iconheart heart iconheart solid heart solid icon

White Chocolate Cranberry Pecan Clusters

  • Author: Chef Sally
  • Prep Time: 10 minutes
  • Cook Time: 5 minutes
  • Total Time: 45 minutes
  • Yield: 24 clusters 1x
  • Method: Dessert
  • Cuisine: American

Description

Easy no-bake clusters made with melted white chocolate, dried cranberries, and chopped pecans for a sweet and crunchy treat.


Ingredients

Scale
  • 12 ounces white chocolate chips
  • 1 cup dried cranberries
  • 1 cup chopped pecans
  • 1/2 teaspoon vanilla extract

Instructions

  1. Melt the white chocolate chips in a microwave-safe bowl, stirring every 30 seconds until smooth.
  2. Stir in the dried cranberries, chopped pecans, and vanilla extract until well combined.
  3. Drop tablespoon-sized portions onto a parchment-lined baking sheet.
  4. Refrigerate for 30 minutes or until firm.

Notes

These clusters can be stored in an airtight container at room temperature for up to 5 days.


Nutrition

  • Calories: 150
  • Sugar: 12g
  • Fat: 9g
  • Carbohydrates: 15g
  • Protein: 2g