If you’ve ever craved a dessert that’s as visually stunning as it is delicious, you’re in the right place. Today, I’m sharing my dreamy Creamy Ube Cheesecake—a vibrant, velvety treat that blends rich cheesecake with the earthy sweetness of ube. Whether you’re a longtime fan of Filipino flavors or just love indulging in unique desserts, this recipe promises to delight your taste buds and brighten your table. Plus, it’s easier to make than you might think!
Creamy Ube Cheesecake is a showstopper that combines the creamy tang of classic cheesecake with the unmistakable flavor and color of ube, a purple yam treasured in Filipino cuisine. Unlike traditional cheesecakes, this version boasts a striking purple hue and a subtly nutty, vanilla-like taste that sets it apart. What makes it special isn’t just its appearance—it’s the way it bridges cultures and brings people together. At brekcakes.com, we celebrate desserts that tell a story, and this one is no exception. If you’re new to baking with ube, don’t worry. I’ll guide you through every step, just like I do with my Classic New York Cheesecake. And if you’re curious about other unique flavors, my Mango Lava Cake is another must-try.
Why I Love This Recipe
This Creamy Ube Cheesecake holds a special place in my heart because it reminds me of family gatherings where dessert was more than just a sweet ending—it was a conversation starter. The first time I tried ube, I fell in love with its depth of flavor, and I knew I had to incorporate it into a cheesecake. Now, every time I make it, I think of the smiles it brings to my loved ones’ faces. It’s not just a recipe; it’s a little piece of joy I get to share with you.
Health and Nutrition
Why it’s good for your body
Creamy Ube Cheesecake offers more than just irresistible flavor. First, ube, the vibrant purple yam, packs antioxidants that help combat oxidative stress. Additionally, it provides dietary fiber, which supports digestion and keeps you feeling full longer. Meanwhile, the cream cheese and dairy ingredients deliver a dose of calcium and protein, essential for strong bones and muscle repair.
Moreover, Creamy Ube Cheesecake contains natural sweetness from ube, reducing the need for excessive added sugars. The yam’s anthocyanins, responsible for its purple hue, may also promote heart health by improving circulation. Furthermore, when enjoyed in moderation, this dessert satisfies cravings without derailing your nutrition goals. Finally, the combination of wholesome ingredients makes Creamy Ube Cheesecake a smarter indulgence compared to overly processed treats.
How it fits in a healthy lifestyle
Creamy Ube Cheesecake fits seamlessly into a balanced diet when enjoyed mindfully. For gluten-free eaters, it’s a delicious option since ube and cheesecake bases often skip wheat flour. If you’re watching your sugar intake, pair a small slice with low-sugar desserts to keep things light. The protein and healthy fats from dairy also help stabilize energy levels, making it a satisfying occasional treat.
For those focused on heart health, the antioxidants in ube support cardiovascular wellness. You can even tweak the recipe with healthier baking swaps, like Greek yogurt for extra protein. By balancing indulgence with nutrient-rich ingredients, Creamy Ube Cheesecake proves that desserts can be both delightful and nourishing.
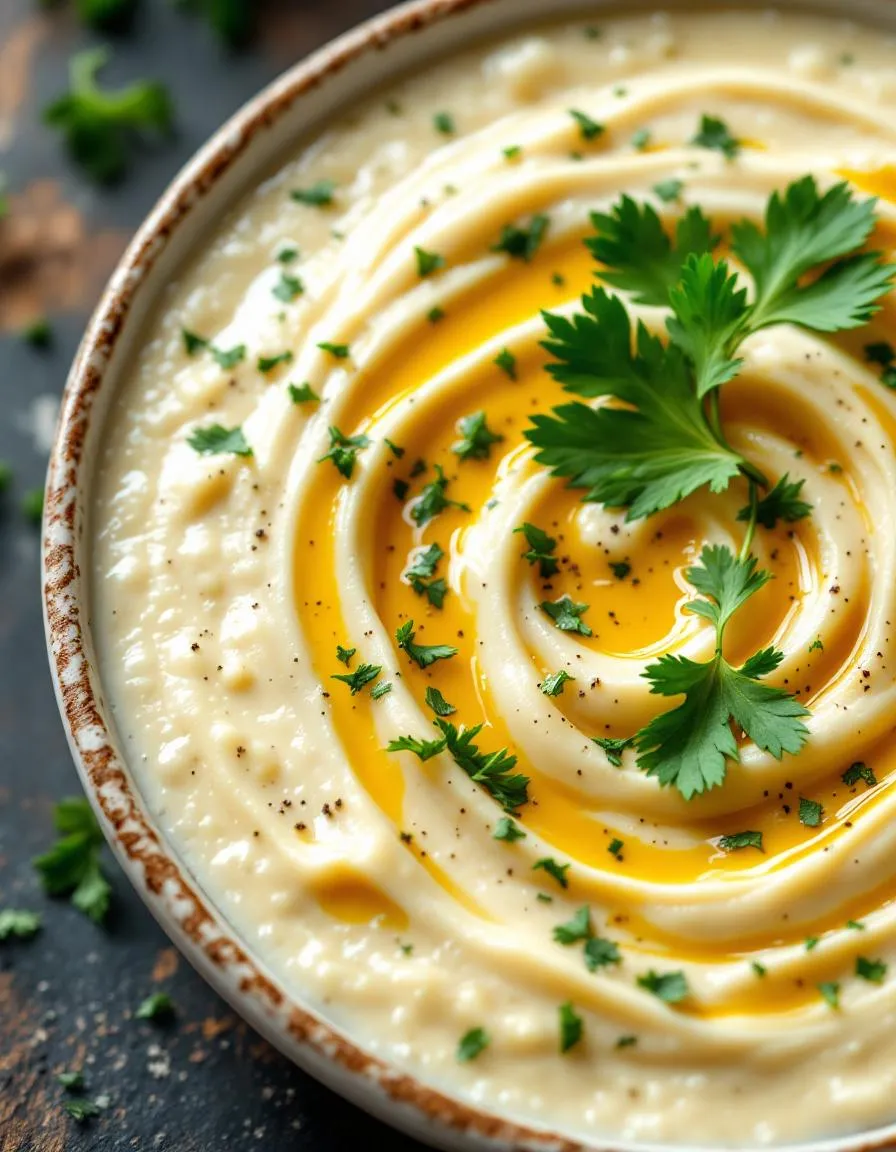
A rich and vibrant purple cheesecake infused with the sweet, nutty flavor of ube (purple yam).
Ingredients
Scale
For the Crust:
2 cups graham cracker crumbs
1/2 cup unsalted butter, melted
3 (8 oz) packages cream cheese, softened
1 cup granulated sugar
1 cup ube halaya (purple yam jam)
3 large eggs
1 tsp vanilla extract
1/2 cup heavy cream
Instructions
1. Prepare the Crust:
Preheat oven to 325°F (165°C).
Mix graham cracker crumbs and melted butter, then press into the bottom of a 9-inch springform pan.
In a large bowl, beat cream cheese and sugar until smooth. Add ube halaya and mix well.
Beat in eggs one at a time, then stir in vanilla and heavy cream until fully incorporated.
Pour filling over the crust and smooth the top. Bake for 50-60 minutes or until the center is set.
Let cool to room temperature, then refrigerate for at least 4 hours before serving.
Notes
You can customize the seasonings to taste.
s-dish">How to Prepare This Dish
Steps and time-saving tips
Start by preheating your oven to 325°F and greasing a 9-inch springform pan. Crush graham crackers into fine crumbs, then mix them with melted butter and a pinch of salt. Press this mixture firmly into the pan’s base and chill it for 10 minutes while you prepare the filling. For the creamy ube cheesecake layer, beat softened cream cheese until smooth, then gradually add sugar and ube extract. Whisk in eggs one at a time, blending well after each addition. Fold in heavy cream gently to keep the batter airy. Pour the filling over the crust and smooth the top with a spatula. Bake for 50-55 minutes until the edges set but the center still jiggles slightly. Turn off the oven, crack the door, and let the cheesecake cool inside for an hour to prevent cracks. Finally, chill it for at least 4 hours—or overnight for best results. To save time, use store-bought graham cracker crumbs or a food processor for quick crushing. If you’re short on chilling time, pop the cheesecake in the freezer for 2 hours instead.
Mistakes I’ve made and learned from
My first attempt at creamy ube cheesecake ended with a sunken center because I overmixed the batter. I learned too late that overbeating incorporates excess air, which collapses during baking. Now, I stop mixing as soon as the ingredients combine. Another blunder? Skipping the water bath, which led to uneven baking. Now I always wrap the pan in foil and place it in a shallow tray of hot water, like I do for my classic New York cheesecake. Also, rushing the chilling step made slicing messy. Patience pays off—just like with my no-bake mango cheesecake, letting it set overnight ensures clean cuts and perfect layers.
n-and-variations">Cultural Connection and Variations
Where this recipe comes from
Creamy Ube Cheesecake blends two beloved culinary worlds: the rich, tangy tradition of American cheesecake and the vibrant, earthy flavors of Filipino ube. Ube, a purple yam, has deep roots in Filipino culture, often starring in desserts like halo-halo or ube halaya. Meanwhile, cheesecake traveled across continents, evolving with local twists. Combine them, and you get a dessert that honors both heritage and innovation.
In the Philippines, families often grate fresh ube for desserts, but modern bakers now use ube extract or powder for convenience. Some versions of Creamy Ube Cheesecake layer ube jam between cheesecake batter, while others swirl it in for a marbled effect. Across the U.S., Filipino-American communities might top it with latik (coconut curds) or toasted coconut for extra texture. Whether served at fiestas or family reunions, this dessert bridges generations and geographies with every creamy bite.
How it fits in today’s cooking
Today, Creamy Ube Cheesecake shines as a standout dessert for holidays, potlucks, or even weeknight treats. Its striking purple hue makes it a showstopper at celebrations, while its familiar cheesecake base keeps it approachable. Many home cooks now experiment with gluten-free crusts or dairy-free alternatives, proving how adaptable this recipe can be. For instance, swapping graham crackers for oat-based crusts adds a nutty twist.
Social media also fuels
its popularity, with bakers sharing vibrant photos and creative riffs. Some add ube flavor to no-bake cheesecakes for easy summer desserts, while others layer it into parfaits. Whether you stick to tradition or put your spin on it, Creamy Ube Cheesecake fits seamlessly into modern kitchens—and hearts.
Taste and Texture
What makes it delicious
One bite of Creamy Ube Cheesecake delivers a dreamy mix of sweet, earthy, and tangy flavors. The vibrant purple yam infuses every layer with a subtly nutty, vanilla-like taste, while the rich cream cheese balances it with a smooth, velvety tang. As you savor it, the buttery graham cracker crust adds a satisfying crunch, contrasting the lush, melt-in-your-mouth filling. Meanwhile, the aroma of toasted coconut or a hint of ube extract lingers, making each forkful irresistible. Whether chilled or slightly softened, Creamy Ube Cheesecake feels indulgent yet light—a dessert that’s as visually stunning as it is delicious.
Boosting the flavor
Elevate your Creamy Ube Cheesecake by drizzling it with homemade ube sauce for an extra layer of earthy sweetness. For a tropical twist, sprinkle toasted coconut flakes or serve with a side of mango puree to complement the ube’s natural flavors. A pinch of cinnamon or a splash of vanilla extract in the batter can also deepen the warmth. If you love texture, try adding crushed pistachios or a dollop of whipped cream on top. Small tweaks make this dessert even more unforgettable.
Always use room-temperature cream cheese to prevent lumps in your Creamy Ube Cheesecake batter. Meanwhile, thoroughly mix the ube extract into the filling for even color and flavor. Additionally, bake the cheesecake in a water bath to ensure gentle, crack-free cooking. Finally, chill it for at least 6 hours before serving to let the texture set perfectly.
Mistakes to avoid
Avoid overmixing the batter, as this can incorporate too much air and cause cracks. Instead, blend just until smooth. Similarly, don’t skip the water bath—it’s key for even baking. For more troubleshooting tips, check out our guide on perfect cheesecake baking. Also, measure the ube extract carefully; too much can overpower the dessert. Learn how to balance flavors with our ube dessert tips.
g-suggestions">Serving and Pairing Suggestions
How to serve this dish
For a stunning presentation, slice your Creamy Ube Cheesecake into elegant wedges and plate them on neutral-toned dishes to let the vibrant purple shine. Meanwhile, a sprinkle of toasted coconut flakes or edible flowers adds a pop of color and texture. Since this dessert balances rich and sweet flavors, it works beautifully for special occasions like birthdays or holidays. Alternatively, serve mini versions at brunch for a delightful twist. Either way, the Creamy Ube Cheesecake will steal the spotlight with its eye-catching hue and velvety texture.
What goes well with it
Pair your Creamy Ube Cheesecake with a warm cup of whipped dalgona coffee to contrast its sweetness with bold, frothy flavors. If you prefer something cooler, a scoop of coconut ice cream enhances the tropical notes in the cheesecake. For a refreshing option, try a glass of iced lavender tea—its floral aroma complements the ube’s earthy sweetness perfectly.
math-faq-block">
What is Creamy Ube Cheesecake made of?
Creamy Ube Cheesecake combines a graham cracker crust with a rich filling made of cream cheese, purple yam (ube), sugar, eggs, and heavy cream. The vibrant purple color comes from ube extract or puree, giving it a unique sweet and nutty flavor. This dessert blends classic cheesecake texture with Filipino-inspired ingredients.
How do you store Creamy Ube Cheesecake?
Store Creamy Ube Cheesecake in an airtight container in the refrigerator for up to 5 days. For longer storage, wrap individual slices tightly in plastic wrap and freeze for up to 2 months. Always let chilled cheesecake sit at room temperature for 15 minutes before serving for the creamiest texture.
Can I make Creamy Ube Cheesecake without ube extract?
Yes, you can substitute ube halaya (sweetened purple yam jam) for the extract in Creamy Ube Cheesecake. Use about 1 cup of halaya blended into the filling for both color and flavor. The texture may be slightly denser, but the distinctive ube taste will still shine through.
rank-math-faq-item">
Why did my Creamy Ube Cheesecake crack?
Cracks in Creamy Ube Cheesecake usually occur from overmixing, rapid temperature changes, or overbaking. Prevent this by mixing ingredients just until combined, cooling the cheesecake gradually in the oven, and using a water bath. A cracked cheesecake still tastes delicious—just cover it with ube whipped cream!
Best Rotisserie Chicken Soup – Easy Homemade Recipe
Introduction
Nothing brings comfort quite like a steaming bowl of Rotisserie Chicken Soup. Whether you’re battling a chilly evening or simply craving something wholesome, this recipe wraps you in warmth from the first spoonful. Moreover, it’s a lifesaver on busy days—transforming leftover rotisserie chicken into a nourishing, flavor-packed meal. If you’ve ever needed a hug in a bowl, this is it.
Rotisserie Chicken Soup is the ultimate comfort food, blending tender shredded chicken, hearty vegetables, and a rich, savory broth. Unlike store-bought versions, this homemade recipe lets you control the ingredients, ensuring every bite is fresh and satisfying. It’s also incredibly versatile—swap veggies, adjust spices, or even add noodles to make it your own. For those who love easy yet impressive meals, this soup fits perfectly into the brekcakes.com ethos of approachable, delicious cooking. Plus, it pairs wonderfully with a slice of homemade cornbread or a crisp green salad for a complete meal.
Why I Love This Recipe
Rotisserie Chicken Soup holds a special place in my heart because it’s the dish my mom always made when I needed a little extra care. Even now, the aroma of simmering broth and herbs instantly takes me back to those cozy childhood moments. Beyond nostalgia, I adore how effortlessly it comes together, proving that great food doesn’t need to be complicated. Every time I make it, I’m reminded that the simplest recipes often leave the biggest impression.
Health and Nutrition
Why it’s good for your body
Rotisserie Chicken Soup packs a powerful nutritional punch while keeping flavors rich and satisfying. First, the tender rotisserie chicken delivers lean protein, which helps repair muscles and keeps you full longer. Additionally, the slow-cooked broth soaks up collagen from the bones, supporting joint health and digestion. Since the soup simmers with vegetables like carrots and celery, you also get a boost of fiber and vitamins A and C.
Moreover, Rotisserie Chicken Soup hydrates you while providing essential electrolytes, making it a great choice when you need a comforting yet nourishing meal. The broth base keeps calories in check, so you can enjoy a hearty bowl without overindulging. Furthermore, the garlic and onions often used in the recipe add immune-boosting properties, helping your body fight off seasonal bugs.
Finally, Rotisserie Chicken Soup is versatile enough to fit into many dietary preferences. Whether you need a post-workout recovery meal or a light dinner option, this soup delivers balanced nutrition without skimping on taste. With every spoonful, you’re treating your body to warmth, comfort, and wholesome ingredients.
How it fits in a healthy lifestyle
Rotisserie Chicken Soup effortlessly fits into a balanced diet, whether you’re focusing on high-protein meals, gluten-free eating, or simply want a wholesome weeknight dinner. The lean protein from the chicken supports muscle maintenance, while the broth keeps the dish light yet satisfying. If you’re meal prepping, this soup stores beautifully, so you always have a nutritious option ready.
For those following heart-healthy habits, Rotisserie Chicken Soup offers a low-sodium alternative when you use homemade broth and fresh herbs. Pair it with a crisp salad or whole-grain bread for a complete meal. If you’re exploring more ways to incorporate protein-rich dishes, check out our guide to high-protein meals for extra inspiration. And if you love easy, nutrient-packed recipes, our gluten-free dinners roundup includes more ideas to keep your meals both delicious and nourishing.
Whether you need a quick lunch or a cozy dinner, Rotisserie Chicken Soup helps you stay on track without sacrificing flavor. It’s a simple way to enjoy comfort food that truly loves you back.
Start by shredding the rotisserie chicken into bite-sized pieces, discarding the skin and bones. Meanwhile, heat a large pot over medium heat and drizzle in olive oil. Toss in diced onions, carrots, and celery, stirring frequently until they soften. Add minced garlic and sauté for another minute until fragrant. Pour in chicken broth and bring the mixture to a gentle boil. Next, drop in the shredded rotisserie chicken soup along with bay leaves, thyme, and a pinch of salt and pepper. Reduce the heat and let it simmer for 20 minutes to meld the flavors. For a time-saving shortcut, use pre-chopped veggies or leftover roasted vegetables. If you prefer a thicker broth, whisk in a slurry of cornstarch and water during the last five minutes. Finally, stir in cooked noodles or rice just before serving to keep them from getting mushy. Garnish with fresh parsley for a bright finish.
Mistakes I’ve made and learned from
Early on, I made the mistake of overcooking the vegetables, leaving them limp and flavorless. Now, I sauté them just until tender-crisp so they retain texture in the rotisserie chicken soup. Another blunder? Adding noodles directly to the pot—they turned into a starchy mess by the next day. The fix? Store them separately and combine portions as needed, a trick I picked up from my meal prep hacks article. I also learned the hard way that skimping on seasoning dulls the broth. A pro tip from my soup seasoning guide: taste and adjust spices in stages, especially if using store-bought broth. These small tweaks transformed my soup from mediocre to memorable.
Rotisserie Chicken Soup carries a rich history, blending convenience with deep-rooted comfort food traditions. Many cultures have their own take on chicken soup, but this version stands out because it starts with a store-bought rotisserie chicken, making it a modern twist on classic homemade broths. In Mexico, for instance, they might add lime, avocado, and tortilla strips, turning it into a hearty sopa de pollo. Meanwhile, in Jewish cuisine, matzo balls or noodles often float in the golden broth, especially during holidays.
My family’s version of Rotisserie Chicken Soup always includes extra garlic and fresh herbs, a trick my grandmother picked up from her French neighbors. She believed the roasted chicken added a deeper flavor than raw poultry, and honestly, she wasn’t wrong. Across the American South, cooks might stir in okra or cornbread crumbles, proving how adaptable this dish truly is. No matter where you go, Rotisserie Chicken Soup becomes a canvas for local flavors while keeping its soul-warming essence.
ays-cooking">How it fits in today’s cooking
Today, Rotisserie Chicken Soup remains a go-to for busy cooks and meal preppers. It’s a lifesaver on chilly weeknights, yet fancy enough for holiday gatherings when paired with crusty bread or a crisp salad. Modern twists, like adding quinoa or spiralized veggies, keep it fresh for health-conscious eaters. Plus, it’s a great way to use leftovers—toss in yesterday’s roasted veggies or that half-used box of pasta.
Many home chefs also love pairing this soup with easy sides, like our garlic herb dinner rolls, for a complete meal. And if you’re craving something sweet after, our classic vanilla pudding makes the perfect finish. Whether you stick to tradition or experiment with global flavors, Rotisserie Chicken Soup fits seamlessly into today’s kitchens, proving comfort food never goes out of style.
Taste and Texture
What makes it delicious
Rotisserie Chicken Soup wraps you in warmth with its rich, savory broth and tender shreds of juicy chicken. The deep umami flavors come alive thanks to slow-simmered bones and aromatic veggies like carrots, celery, and onions. Each spoonful delivers a comforting balance—creamy from a touch of butter, bright from fresh herbs, and slightly sweet from caramelized onions. Meanwhile, the broth coats your tongue with a silky texture, while the veggies add just the right amount of crunch. Fragrant thyme and garlic linger in every bite, making Rotisserie Chicken Soup a bowl of pure comfort.
r">Boosting the flavor
For an extra flavor kick, try stirring in a splash of lemon juice or a sprinkle of Parmesan cheese right before serving. If you love heat, a dash of smoked paprika or a drizzle of homemade chili oil adds depth. Crusty bread or buttery garlic herb rolls turn this soup into a hearty meal. Don’t shy away from fresh toppings like chopped parsley or crispy bacon bits—they add texture and brightness. With these tweaks, Rotisserie Chicken Soup becomes even more irresistible.
Tips for Success
Best practices for results
Always start with high-quality rotisserie chicken for the best flavor in your Rotisserie Chicken Soup. Additionally, simmer the broth gently to prevent overcooking the vegetables while still extracting rich taste. For extra depth, toast the spices before adding them to the pot. Finally, let the soup rest for 10 minutes before serving to allow the flavors to meld perfectly.
>Mistakes to avoid
Avoid boiling the soup too vigorously, as this can make the chicken dry and the broth cloudy. Instead, keep the heat low for a clear, tender result. Also, don’t skip skimming the fat from the broth—this step ensures a cleaner, more balanced Rotisserie Chicken Soup. For more on perfecting broths, check out our guide on homemade stock secrets. Another common mistake is overcrowding the pot with vegetables, which leads to uneven cooking. For tips on prepping ingredients efficiently, visit our knife skills 101 tutorial.
Serving and Pairing Suggestions
How to serve this dish
Rotisserie Chicken Soup shines when you serve it in a rustic bread bowl for a cozy, hearty meal. Alternatively, ladle it into elegant ceramic bowls and top with fresh herbs like parsley or dill for a touch of color. For gatherings, set up a garnish bar with shredded cheese, croutons, and a squeeze of lemon so guests can customize their bowls. This soup works beautifully for weeknight dinners, but it also makes a comforting addition to holiday menus or casual brunches with friends.
What goes well with it
Pair Rotisserie Chicken Soup with a crisp green salad for a light yet satisfying meal. The fresh veggies balance the rich broth perfectly. If you crave something heartier, try warm garlic knots or crusty sourdough—ideal for dipping. For drinks, a chilled glass of white wine or sparkling water with lemon elevates the experience. Looking for more inspiration? Our Garlic Parmesan Dinner Rolls add a savory twist, while the Creamy Caesar Salad brings a creamy crunch to the table.
How do you make rotisserie chicken soup from scratch?
To make rotisserie chicken soup, start by sautéing onions, carrots, and celery in olive oil. Add shredded rotisserie chicken, chicken broth, and seasonings like thyme and bay leaves, then simmer for 20-30 minutes. Rotisserie chicken soup is a quick, flavorful meal that tastes homemade with minimal effort.
Can you freeze rotisserie chicken soup?
Yes, rotisserie chicken soup freezes well for up to 3 months. Let it cool completely before transferring to airtight containers or freezer bags. Reheat gently on the stove, adding a splash of broth if needed to restore the soup’s consistency.
rank-math-faq-item">
What vegetables go well in rotisserie chicken soup?
Classic vegetables for rotisserie chicken soup include carrots, celery, onions, and garlic. You can also add spinach, kale, or zucchini for extra nutrition. Rotisserie chicken soup is versatile, so feel free to use whatever veggies you have on hand.
How long does rotisserie chicken soup last in the fridge?
Rotisserie chicken soup stays fresh in the refrigerator for 3-4 days when stored in an airtight container. For best quality, reheat only the portion you plan to eat. The flavors often deepen, making this soup even tastier the next day.
There’s something incredibly comforting about a bowl of soup that balances bright, zesty flavors with creamy richness. That’s exactly what you’ll find in this Lemony Artichoke Soup—a dish that feels like a warm hug on a chilly day. Whether you’re craving a light yet satisfying meal or need a cozy pick-me-up, this recipe delivers. Plus, it’s packed with fresh, vibrant ingredients that make every spoonful a delight.
Lemony Artichoke Soup is a celebration of simplicity and flavor. Artichokes, with their earthy sweetness, pair perfectly with the bright acidity of lemon, creating a harmony that’s both refreshing and deeply satisfying. This soup isn’t just delicious—it’s also versatile. Serve it as an elegant starter for a dinner party or enjoy it as a hearty lunch alongside crusty bread. If you love dishes that bring a touch of sophistication without fuss, you’ll adore this recipe. And if you’re looking for more cozy soup ideas, check out my Creamy Tomato Basil Soup or explore other vegetarian comfort food favorites.
Why I Love This Recipe
Lemony Artichoke Soup holds a special place in my heart because it reminds me of springtime gatherings with my family. My grandmother used to make a similar version, and the tangy, creamy flavors always brought everyone to the table with smiles. Now, whenever I whip up a batch, it feels like carrying on a little tradition—one that’s as nourishing for the soul as it is for the body. It’s the kind of recipe that never fails to impress, yet remains wonderfully easy to make. That’s the magic of cooking, isn’t it? Simple ingredients, big memories.
Health and Nutrition
Why it’s good for your body
Lemony Artichoke Soup packs a powerful nutritional punch while delighting your taste buds. First, artichokes deliver a hefty dose of fiber, which supports digestion and keeps you feeling full longer. Additionally, they contain antioxidants like quercetin and rutin, which help combat inflammation. Meanwhile, the lemon juice not only brightens the flavor but also provides vitamin C to boost your immune system.
Moreover, this soup is naturally low in calories yet rich in flavor, making it a smart choice for weight management. The olive oil in the recipe adds heart-healthy monounsaturated fats, which promote good cholesterol levels. Furthermore, the garlic and herbs contribute antimicrobial properties, giving your body an extra layer of defense.
Finally, Lemony Artichoke Soup is a hydrating option, especially when you use a light vegetable broth base. The combination of ingredients works synergistically to nourish your gut, heart, and immune system. Whether you enjoy it as a starter or a light meal, this soup delivers both comfort and wellness in every spoonful.
How it fits in a healthy lifestyle
Lemony Artichoke Soup effortlessly fits into a balanced diet, whether you’re focusing on heart health, gluten-free eating, or simply incorporating more veggies. Its plant-based ingredients align perfectly with Mediterranean diet principles, which emphasize whole foods and healthy fats. For those managing gluten sensitivities, this soup is a safe and flavorful option, especially when paired with gluten-free bread.
If you’re meal prepping, this soup stores well and reheats beautifully, making it a convenient choice for busy weekdays. Pair it with a protein-packed salad like our Quinoa Chickpea Salad for a complete, satisfying meal. For more ideas on integrating soups into a nutritious routine, check out our guide to Balanced Meal Prep. With its versatility and nutrient density, Lemony Artichoke Soup helps you stay on track without sacrificing flavor.
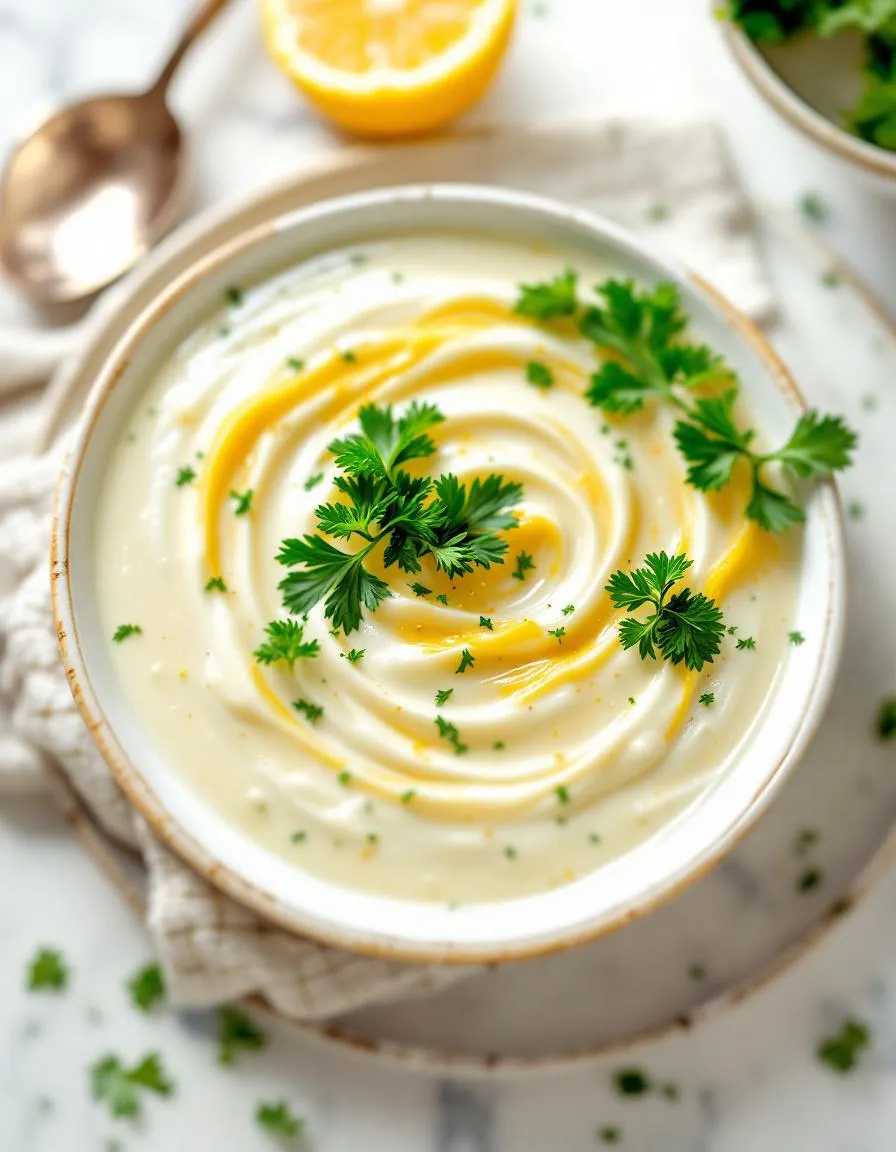
A creamy and tangy soup featuring artichokes and fresh lemon for a bright, comforting dish.
Ingredients
Scale
For the Crust:
2 tbsp olive oil
1 onion, diced
3 garlic cloves, minced
1 lb artichoke hearts, frozen or canned
4 cups vegetable broth
1 lemon, juiced and zested
1/2 cup heavy cream
1 tsp salt
1/2 tsp black pepper
2 tbsp fresh parsley, chopped
Instructions
1. Prepare the Crust:
Heat olive oil in a large pot over medium heat. Add diced onion and sauté until translucent, about 5 minutes.
Add minced garlic and cook for another minute until fragrant.
Stir in artichoke hearts and vegetable broth. Bring to a boil, then reduce heat and simmer for 15 minutes.
Using an immersion blender, puree the soup until smooth. Alternatively, transfer to a blender in batches.
Stir in lemon juice, lemon zest, heavy cream, salt, and black pepper. Simmer for another 5 minutes.
Garnish with fresh parsley before serving.
Notes
You can customize the seasonings to taste.
s-dish">How to Prepare This Dish
Steps and time-saving tips
Start by heating olive oil in a large pot over medium heat. Toss in diced onions and sauté until they turn translucent, which takes about 3 minutes. Next, add minced garlic and stir for another 30 seconds until fragrant. Pour in vegetable broth and bring it to a gentle simmer. Meanwhile, drain and rinse canned artichoke hearts before chopping them into bite-sized pieces. Add them to the pot along with a pinch of salt and black pepper. Let the Lemony Artichoke Soup simmer for 15 minutes to meld the flavors. For a creamy texture, blend half the soup with an immersion blender or transfer it carefully to a countertop blender. Stir in fresh lemon juice and zest right before serving to brighten the dish. If you’re short on time, use pre-minced garlic and pre-chopped onions from the grocery store. To save cleanup, blend the soup directly in the pot instead of transferring batches.
Mistakes I’ve made and learned from
Early on, I overcooked the artichokes, turning them mushy and bitter. Now I simmer them just until tender—about 15 minutes max. Another blunder? Skipping the lemon zest, which made the Lemony Artichoke Soup taste flat. A reader once suggested adding it at the end, and wow, what a difference! For more tips on balancing citrus flavors, check out my guide on brightening dishes with citrus. I also learned the hard way that blending hot soup without caution leads to messy splatters. Always vent the blender lid and cover it with a towel. If you’re new to blending soups, my soup safety tips will save you from burns and spills.
n-and-variations">Cultural Connection and Variations
Where this recipe comes from
Lemony Artichoke Soup carries the bright flavors of the Mediterranean, where artichokes thrive under the warm sun. In Italy, cooks often prepare it with fresh artichokes in spring, celebrating the season’s bounty. Meanwhile, Greek versions might add a splash of ouzo or extra herbs for depth. My grandmother, however, swore by a dash of cayenne to give it a subtle kick.
Across the Middle East, you’ll find similar soups with tahini or yogurt stirred in for creaminess. Some families even serve it chilled in summer, making it a versatile dish. Lemony Artichoke Soup also holds a special place in coastal regions, where cooks pair it with fresh seafood or crusty bread. No matter the variation, the tangy lemon and earthy artichoke always shine.
How it fits in today’s cooking
Today, Lemony Artichoke Soup fits perfectly into modern kitchens as a light yet satisfying meal. Busy cooks love it because it comes together quickly, especially with pantry staples like canned artichokes. For a cozy twist, some add roasted garlic or swap the lemon for preserved lemon, like in this quick pantry meal.
It’s also a star
during holidays, often appearing at Easter or Passover tables as a fresh starter. Health-conscious eaters appreciate its nutrient-packed profile, while food bloggers reinvent it with vegan creams or gluten-free croutons. If you’re looking for more ways to enjoy artichokes, check out this seasonal produce guide. Whether served hot or cold, Lemony Artichoke Soup remains a timeless favorite.
Taste and Texture
What makes it delicious
Lemony Artichoke Soup delivers a bright, tangy flavor with a velvety smooth texture that comforts every spoonful. Fresh lemon zest cuts through the richness, while tender artichoke hearts add a subtle earthiness. Each bite feels creamy yet light, thanks to a blend of broth and a touch of olive oil. Meanwhile, garlic and herbs infuse the soup with a fragrant aroma that makes your kitchen smell irresistible. Whether you savor it warm or chilled, Lemony Artichoke Soup balances zesty and savory notes for a refreshing twist on classic comfort food.
Boosting the flavor
Elevate your Lemony Artichoke Soup with a sprinkle of grated Parmesan or a dollop of Greek yogurt for extra richness. For a crunchy contrast, top it with toasted garlic croutons or crispy chickpeas. If you love heat, stir in a pinch of red pepper flakes or a drizzle of chili oil. Pair it with a side of herb focaccia to soak up every last drop. Experiment with fresh thyme or a splash of white wine to deepen the flavors—your taste buds will thank you.
Always use fresh artichokes for the brightest flavor in your Lemony Artichoke Soup. If fresh isn’t available, opt for high-quality frozen artichoke hearts instead. Meanwhile, zest your lemons before juicing them to maximize the citrusy punch. For a smoother texture, blend the soup in batches rather than overfilling your blender. Finally, taste and adjust the seasoning just before serving, as the lemon can mellow slightly while cooking.
Mistakes to avoid
Overcooking the artichokes can make them mushy, so check them frequently for tenderness. Additionally, skipping the step of rinsing canned artichokes may leave your Lemony Artichoke Soup with a metallic taste. For more tips on balancing flavors, check out our guide to seasoning soups perfectly. Another common mistake is adding dairy too early, which can cause curdling. Instead, stir in cream or yogurt off the heat. Learn how to prevent curdling in our avoid curdled soups tutorial.
g-suggestions">Serving and Pairing Suggestions
How to serve this dish
Lemony Artichoke Soup shines when served in warm, shallow bowls to highlight its creamy texture. For a vibrant touch, drizzle a swirl of olive oil on top and sprinkle fresh parsley or microgreens. Alternatively, add a dollop of crème fraîche and a pinch of lemon zest for extra brightness. This soup makes an elegant starter for dinner parties, yet it also works beautifully for a light lunch with crusty bread on the side. During spring gatherings, serve it in small cups as a refreshing appetizer.
What goes well with it
Pair Lemony Artichoke Soup with a crisp white wine like Sauvignon Blanc to enhance its citrusy notes. If you prefer non-alcoholic options, try a sparkling lemonade for a playful twist. For sides, warm garlic knots or a simple arugula salad balance the soup’s richness perfectly. If you’re hosting a larger meal, consider serving it alongside our Herb Focaccia for a satisfying combo. For dessert, a light Lemon Ricotta Cake keeps the citrus theme alive without overpowering the palate.
math-faq-block">
What makes Lemony Artichoke Soup different from regular artichoke soup?
Lemony Artichoke Soup stands out with its bright, tangy flavor from fresh lemon juice and zest, which balances the earthy taste of artichokes. Unlike traditional versions, this soup has a lighter, fresher profile perfect for spring or summer meals.
Can I use canned artichokes for Lemony Artichoke Soup?
Yes, canned or jarred artichoke hearts work well for Lemony Artichoke Soup, saving prep time while still delivering great flavor. Just rinse them thoroughly to remove excess brine, which can make the soup too salty.
What protein pairs best with Lemony Artichoke Soup?
Grilled chicken, shrimp, or white fish complement Lemony Artichoke Soup beautifully, as their mild flavors won’t overpower the citrusy notes. For a vegetarian option, add cannellini beans or crispy chickpeas for extra texture.
rank-math-faq-item">
How do I store leftover Lemony Artichoke Soup?
Store Lemony Artichoke Soup in an airtight container in the fridge for up to 3 days. The lemon helps preserve freshness, but the vibrant flavor tastes best when reheated gently—avoid boiling to prevent separation.
Best Thumbprint Cookies – Easy Homemade Recipe
Introduction
There’s something undeniably comforting about Thumbprint Cookies. Maybe it’s the way their buttery crumb melts in your mouth or how the sweet jam filling feels like a tiny surprise in every bite. Whether you’re baking them for a holiday gathering or just because, these cookies have a way of bringing people together. Plus, they’re incredibly fun to make—especially if you involve little hands to help press those perfect thumbprint indents!
Thumbprint Cookies are a classic treat that combines simplicity with irresistible flavor. Originating from Sweden, where they’re known as “Hallongrottor” (raspberry caves), these cookies have won hearts worldwide. What makes them special is their versatility. You can fill them with jam, chocolate, or even caramel, making them adaptable to any season or occasion. Here at brekcakes.com, we celebrate recipes that balance tradition with creativity, and Thumbprint Cookies fit perfectly. They’re nostalgic yet open to experimentation, much like our approach to baking. If you’re looking for more crowd-pleasing desserts, check out our easy dessert recipes or explore our guide to baking essentials to stock your kitchen for success.
Why I Love This Recipe
Thumbprint Cookies hold a special place in my heart because they remind me of baking with my grandmother. She taught me that the best recipes are the ones that spark joy, and these cookies do just that. Every time I press my thumb into the dough, I think of her laughter and the way she’d sneak an extra spoonful of jam into the centers. Now, I love sharing that same warmth with my own family—and with you. Because really, isn’t that what baking is all about?
Health and Nutrition
Why it’s good for your body
Thumbprint Cookies offer more than just a sweet treat. First, they often include nutrient-rich ingredients like nuts, oats, or whole wheat flour, which provide fiber and healthy fats. Additionally, the jam filling adds a dose of antioxidants, especially if you use fruit-based varieties like raspberry or blueberry. These cookies also give you a quick energy boost, making them a smart choice for an afternoon pick-me-up.
Moreover, Thumbprint Cookies can be customized for extra health benefits. For example, almond flour boosts protein content, while chia seeds add omega-3s. Even better, dark chocolate drizzles or nut butter centers enhance flavor without excessive sugar. Because they’re portion-controlled, you can enjoy them mindfully without overindulging.
Finally, Thumbprint Cookies support gut health when made with ingredients like oats or honey. Oats contain prebiotic fiber, which feeds good gut bacteria. Meanwhile, honey offers natural antibacterial properties. Whether you bake them gluten-free or vegan, these cookies adapt to your dietary needs while still tasting delicious.
How it fits in a healthy lifestyle
Thumbprint Cookies fit perfectly into a balanced diet when enjoyed in moderation. Pair them with a protein-rich snack like Greek yogurt or nuts to stabilize blood sugar. They also work well as a post-workout treat when you need quick carbs to replenish energy.
For those with dietary preferences, Thumbprint Cookies easily adapt. Use gluten-free flour for a celiac-friendly version or swap butter for coconut oil in a dairy-free recipe. If you’re focusing on heart health, try our healthy dessert swaps to reduce saturated fat. Want more protein? Add a spoonful of nut butter to the dough or filling.
Craving something sweet but nutritious? Check out our balanced snack ideas for inspiration. Thumbprint Cookies prove that indulgence and wellness can go hand in hand.
Classic buttery cookies with a sweet jam center, perfect for holiday baking.
Ingredients
Scale
For the Crust:
1 cup unsalted butter, softened
1/2 cup granulated sugar
2 large egg yolks
1 teaspoon vanilla extract
2 cups all-purpose flour
1/4 teaspoon salt
1/2 cup jam (raspberry, strawberry, or apricot)
Instructions
1. Prepare the Crust:
Preheat oven to 350°F (175°C) and line baking sheets with parchment paper.
In a large bowl, cream together butter and sugar until light and fluffy. Beat in egg yolks and vanilla extract.
Gradually mix in flour and salt until dough forms. Roll dough into 1-inch balls and place on baking sheets.
Use your thumb or the back of a spoon to make an indentation in the center of each cookie. Fill with jam.
Bake for 12-15 minutes or until edges are lightly golden. Let cool on baking sheets for 5 minutes before transferring to wire racks.
Notes
You can customize the seasonings to taste.
“`html
="how-to-prepare-this-dish">How to Prepare This Dish
Steps and time-saving tips
Start by preheating your oven to 350°F and lining a baking sheet with parchment paper. In a large bowl, cream together softened butter and sugar until light and fluffy. Then, whisk in vanilla extract and a pinch of salt for depth of flavor. Gradually mix in flour until the dough comes together without overworking it. Roll the dough into small balls, about 1-inch in size, and place them on the baking sheet. Use your thumb or the back of a teaspoon to gently press a well into the center of each cookie. Fill each indentation with a dollop of jam or melted chocolate—just enough to create a vibrant, flavorful center. Bake for 10-12 minutes until the edges turn golden but the centers remain soft. Let the Thumbprint Cookies cool slightly before transferring them to a wire rack. For a time-saving hack, chill the dough for 15 minutes before shaping to prevent spreading. If you’re short on time, skip the rolling step and simply drop spoonfuls of dough onto the sheet, then press the wells.
Mistakes I’ve made and learned from
Early on, I learned the hard way that overbaking Thumbprint Cookies turns them crumbly instead of tender. Now, I set a timer for 10 minutes and check for lightly golden edges—they’ll firm up as they cool. Another blunder? Using cold butter straight from the fridge, which made the dough lumpy and hard to handle. Softening it first ensures a smooth texture, just like in my perfect cookie dough consistency guide. Once, I also overfilled the jam wells, causing messy spills during baking. A teaspoon per cookie is plenty, as I discovered while testing tips from my jam-filled cookie secrets post. Trust me, a little patience and these small adjustments make all the difference.
Thumbprint Cookies carry a cozy, nostalgic charm that spans generations and borders. Originating in Sweden as “Hallongrottor” (raspberry caves), these buttery treats gained global fame when immigrants brought them to America. Families often baked them during holidays, pressing their thumbs into the dough to create little wells for jam. Meanwhile, in Poland, they call them “Kolaczki,” sometimes using nuts or fruit preserves. Even today, bakers debate whether Thumbprint Cookies taste best with raspberry, apricot, or even chocolate fillings.
In my grandma’s
kitchen, Thumbprint Cookies meant Christmas. She’d let us kids press the indentations and sneak extra jam. Some cultures skip the jam entirely, opting for caramel or citrus zest. For example, Italian cooks might add lemon curd, while Germans prefer a dollop of Nutella. No matter the variation, the magic lies in that simple thumbprint—a tiny edible canvas for creativity.
How it fits in today’s cooking
Thumbprint Cookies still shine in modern kitchens, especially during cookie swaps or festive gatherings. Busy bakers love them because they’re easy to customize—swap almond flour for gluten-free needs or use chia jam for a vegan twist. They also pair perfectly with afternoon tea or as a sweet finish to brunch menus.
Social media fuels new trends, like drizzling melted chocolate or adding matcha powder to the dough. Some even turn Thumbprint Cookies into edible gifts, tying them with ribbon for a homemade touch. For more inspiration, check out these holiday baking hacks. Whether you stick to tradition or experiment, these cookies remind us that joy often comes in small, jam-filled packages.
>Taste and Texture
What makes it delicious
Thumbprint Cookies deliver a buttery, melt-in-your-mouth experience with a delicate crumb that contrasts perfectly with their sweet, jam-filled centers. Each bite starts with a crisp edge, giving way to a tender, almost shortbread-like texture. The jam—whether tart raspberry, rich apricot, or tangy lemon—bursts with fruity brightness, balancing the cookie’s subtle vanilla warmth. Meanwhile, the toasted nuts or coconut lining the edges add a satisfying crunch and nutty aroma. These cookies smell heavenly while baking, filling your kitchen with the comforting scents of browned butter and caramelized sugar. Thumbprint Cookies are a nostalgic treat, offering both richness and freshness in every bite.
Boosting the flavor
For an extra flavor boost, try swapping traditional jam for a spiced fruit compote or citrus curd, which adds a luxurious creaminess. A sprinkle of flaky sea salt on top enhances the buttery dough, while a drizzle of homemade caramel sauce turns these cookies into an indulgent dessert. If you love texture, roll the dough in crushed pistachios or toasted almonds for a deeper nutty flavor. For a festive twist, pair Thumbprint Cookies with a dusting of cinnamon or a touch of cardamom in the dough. Want more inspiration? Explore our guide to creative cookie decorating to make them as beautiful as they are delicious.
Tips for Success
Best practices for results
Always chill the dough for at least 30 minutes before shaping your Thumbprint Cookies, as this prevents spreading and helps them hold their shape. For even baking, use parchment paper and space the cookies about two inches apart on the tray. Additionally, measure your flour correctly by spooning it into the cup and leveling it off—this ensures the perfect texture. Finally, press your thumb gently but firmly into each cookie to create a well that won’t close up during baking.
Mistakes to avoid
Avoid overmixing the dough, as this can make your Thumbprint Cookies tough instead of tender. Instead, mix just until the ingredients combine. Another common mistake is overfilling the thumbprint wells, which can cause the jam to bubble over. For the best results, use a teaspoon to add just enough filling. If you’re unsure about dough consistency, check out our guide on cookie dough textures for clarity. Also, never skip the cooling step—letting the cookies set on the tray for 5 minutes ensures they stay intact. For more troubleshooting tips, explore our common baking mistakes article.
Serving and Pairing Suggestions
How to serve this dish
Thumbprint Cookies shine when you arrange them on a rustic wooden board or a vintage cake stand for a charming presentation. For holidays, dust them lightly with powdered sugar or drizzle melted chocolate over the tops to add festive flair. Meanwhile, if you’re hosting a brunch, nestle them beside fresh berries or a dollop of whipped cream for a delightful touch. Since these cookies are versatile, you can also pack them in decorative boxes or jars as edible gifts that friends and family will adore.
h-it">What goes well with it
Pair Thumbprint Cookies with a steaming cup of chai tea or hot cocoa for a cozy treat—the spices or rich chocolate will highlight the jam-filled centers. Alternatively, serve them alongside a scoop of vanilla ice cream for a simple yet indulgent dessert. If you love balancing flavors, try our Lemon Lavender Shortbread for a citrusy contrast or our Spiced Chai Latte to echo the warm notes in the cookies.
What is the best jam for thumbprint cookies?
Raspberry, strawberry, and apricot jam are classic choices for thumbprint cookies, but you can use any flavor you prefer. Thicker jams work best to prevent spreading during baking. For a festive touch, try seasonal flavors like cranberry or spiced apple in your thumbprint cookies.
rank-math-faq-item">
How do you keep thumbprint cookies from spreading?
Chill the dough for at least 30 minutes before baking to prevent thumbprint cookies from spreading too much. Using a sturdy dough with the right butter-to-flour ratio and baking on a cool sheet pan also helps maintain their shape. Properly spaced thumbprint cookies will hold their indentation better during baking.
Can you freeze thumbprint cookies?
Yes, thumbprint cookies freeze beautifully for up to 3 months. You can freeze either the unbaked dough balls (without jam) or fully baked cookies. For best results, add the jam after thawing if freezing unbaked thumbprint cookies.
Why are my thumbprint cookies dry?
Overbaking is the most common cause of dry thumbprint cookies. They continue to cook slightly after removal from the oven, so pull them out when just lightly golden. Using too much flour or not enough butter in your recipe can also make thumbprint cookies dry and crumbly.
>
Classic Beef Barley Soup – Hearty and Comforting
Introduction
There’s something deeply comforting about a steaming bowl of Beef Barley Soup on a chilly evening. Whether you’re craving nostalgia or simply need a hearty meal to warm your soul, this recipe delivers. With tender beef, chewy barley, and a rich broth, it’s the kind of dish that feels like a hug from the inside. Plus, it’s incredibly forgiving—perfect for busy weeknights or lazy Sundays when you want something wholesome without the fuss.
Beef Barley Soup is a timeless classic that bridges the gap between simplicity and satisfaction. Originating from humble roots, this dish has graced family tables for generations, offering nourishment and comfort in every spoonful. The combination of slow-cooked beef, earthy barley, and aromatic vegetables creates a symphony of flavors that only improves with time. What makes it special is its versatility—you can tweak the ingredients based on what’s in your pantry or fridge, making it a practical choice for any home cook. If you’re looking for more cozy recipes, check out my Comfort Food Favorites or explore Soup Season Guide for other warming ideas. This soup isn’t just food; it’s a reminder that some of life’s greatest joys come from the simplest traditions.
Why I Love This Recipe
Beef Barley Soup holds a special place in my heart because it reminds me of my grandmother’s kitchen. She used to make it every winter, filling the house with its savory aroma. Even now, one bite takes me back to those snowy afternoons spent laughing around the table. Beyond the memories, I adore how this recipe brings people together—it’s the kind of meal that invites conversation and connection. Every time I make it, I feel like I’m carrying forward a little piece of her legacy, and that’s something truly priceless.
Health and Nutrition
Why it’s good for your body
Beef Barley Soup packs a powerful nutritional punch while warming you up from the inside out. First, the lean beef delivers high-quality protein, which helps build and repair muscles. Additionally, it provides iron and zinc, two nutrients that support energy levels and immune function. Meanwhile, the barley adds a hearty dose of fiber, keeping digestion smooth and promoting long-lasting fullness.
Beyond protein and fiber, Beef Barley Soup offers a balanced mix of vitamins and minerals. For example, carrots and celery contribute vitamin A for eye health and antioxidants to fight inflammation. Similarly, onions and garlic bring natural compounds that may boost heart health. Since the soup simmers slowly, it retains most of these nutrients, making every spoonful as wholesome as it is delicious.
Another benefit of Beef Barley Soup is its hydrating quality. The broth base helps replenish fluids, especially during colder months when hydration often slips. Moreover, the combination of ingredients creates a low-glycemic meal, meaning it won’t spike blood sugar levels. Whether you need a post-workout recovery dish or a comforting immune booster, this soup checks all the boxes.
How it fits in a healthy lifestyle
Beef Barley Soup fits seamlessly into a balanced diet, whether you’re focusing on high-protein meals or heart-healthy eating. The lean beef and fiber-rich barley make it a satisfying option for those managing weight or building muscle. If you’re gluten-free, simply swap barley for quinoa or brown rice to keep the dish just as nourishing.
For meal preppers, this soup is a lifesaver. It stores well in the fridge or freezer, so you can enjoy a nutrient-packed lunch without extra effort. Pair it with a crisp side salad for extra greens, or try our healthy dinner ideas for more balanced meal inspiration. If you’re watching sodium intake, use low-sodium broth and load up on herbs for flavor instead.
Busy families will love how Beef Barley Soup simplifies weeknight dinners while delivering wholesome ingredients. It’s also a great way to sneak extra veggies into picky eaters’ diets. For more tips on family-friendly nutrition, explore our guide to kids’ nutrition. No matter your dietary goals, this soup adapts to support your health journey.
A hearty and comforting soup made with tender beef, wholesome barley, and fresh vegetables.
Ingredients
Scale
For the Crust:
1 lb beef stew meat, cubed
1 cup pearl barley
4 cups beef broth
2 cups water
1 onion, chopped
2 carrots, diced
2 celery stalks, diced
2 cloves garlic, minced
1 tbsp olive oil
1 tsp dried thyme
1 bay leaf
Salt and pepper to taste
Instructions
1. Prepare the Crust:
Heat olive oil in a large pot over medium heat. Add beef cubes and brown on all sides, about 5 minutes.
Add onion, carrots, celery, and garlic. Sauté until vegetables soften, about 5 minutes.
Stir in beef broth, water, barley, thyme, bay leaf, salt, and pepper. Bring to a boil.
Reduce heat to low, cover, and simmer for 30 minutes or until barley is tender and beef is cooked through.
Remove bay leaf before serving. Adjust seasoning if needed.
Notes
You can customize the seasonings to taste.
How to Prepare This Dish
Steps and time-saving tips
Start by heating a large pot over medium heat and drizzling in a tablespoon of olive oil. Toss in diced onions, carrots, and celery, then stir them until they soften, about 5 minutes. Next, add minced garlic and cook for another minute until fragrant. Crumble in ground beef and brown it thoroughly, breaking it apart with a wooden spoon as it cooks. Once the beef is no longer pink, sprinkle in a pinch of salt and pepper for flavor. Stir in tomato paste and let it caramelize slightly for depth. Pour in beef broth and water, then bring the mixture to a gentle boil. Meanwhile, rinse pearl barley under cold water to remove excess starch before adding it to the pot. Reduce the heat to a simmer and let the Beef Barley Soup cook uncovered for about 45 minutes, stirring occasionally. If you’re short on time, pre-cook the barley separately and add it later to cut the simmering time in half. Finally, toss in chopped fresh herbs like thyme or parsley just before serving for a bright finish. Ladle the soup into bowls and enjoy its hearty warmth.
and-learned-from">Mistakes I’ve made and learned from
Early on, I made the mistake of adding uncooked barley directly to the pot without rinsing it first, which turned my Beef Barley Soup gluey. Now, I always rinse the barley thoroughly to prevent excess starch from thickening the broth too much. Another blunder was overcrowding the pot with vegetables, leaving little room for the beef to brown properly. I’ve since learned to sauté them in batches for even cooking. If you’re new to soups, check out my guide on common soup mistakes to avoid similar pitfalls. Also, don’t skip deglazing the pot after browning the beef—those crispy bits add incredible flavor. For more tips on building layers of taste, my umami-rich recipes post dives deeper into balancing savory notes. Trust me, a little patience with each step makes all the difference.
Cultural Connection and Variations
Where this recipe comes from
Beef Barley Soup carries a rich history, often tied to hearty, cold-weather traditions. Originating in Eastern Europe, this dish became a staple for farmers and laborers who needed a filling meal to power through long winters. Families would simmer tough cuts of beef with barley, a grain that thrived in harsh climates, creating a nourishing bowl that warmed both body and soul. Over time, immigrants brought their versions to America, where it evolved into the comfort food we love today.
Different regions put t
heir own spin on Beef Barley Soup. In Poland, cooks might add mushrooms for an earthy depth, while Scottish versions often include root vegetables like turnips. My grandmother’s recipe, passed down through generations, features a splash of red wine for extra richness. Whether you prefer it thick like a stew or brothy with tender chunks of meat, Beef Barley Soup adapts to local tastes while keeping its soul-satisfying essence.
How it fits in today’s cooking
Today, Beef Barley Soup remains a go-to for busy home cooks and meal preppers. Its versatility makes it perfect for cozy weeknight dinners or freezer-friendly batch cooking. Modern twists, like using instant pots or swapping in quinoa for barley, keep it fresh without losing tradition. Many families still serve it during holidays, pairing it with crusty bread or a crisp salad for balance.
For those exploring global flavors, Beef Barley Soup bridges the gap between classic and contemporary. Try pairing it with a slice of banana bread for a sweet contrast, or serve it alongside garlic knots to soak up every last drop. Whether you stick to tradition or experiment, this soup proves that some dishes never go out of style.
>Taste and Texture
What makes it delicious
Beef Barley Soup wraps you in warmth with its rich, savory broth and tender chunks of beef that melt in your mouth. The barley adds a delightful chewiness, while carrots and celery bring a subtle sweetness and crisp bite. Fragrant garlic and thyme deepen the flavor, making every spoonful aromatic and comforting. Whether you savor it on a chilly evening or as a hearty lunch, Beef Barley Soup delivers a satisfying balance of textures and robust taste.
Boosting the flavor
For an extra layer of richness, stir in a splash of red wine or a spoonful of tomato paste while simmering the broth. Toppings like fresh parsley or a dollop of sour cream add brightness and creaminess. If you love bold spices, try a pinch of smoked paprika or a bay leaf for depth. Pair it with crusty bread or a light salad for a complete meal. For more inspiration, explore our guide to perfect soup pairings or discover how to elevate homemade broth with simple tricks.
Tips for Success
Best practices for results
Always brown the beef first to deepen the flavor of your Beef Barley Soup. Additionally, use low-sodium broth so you can control the seasoning perfectly. Stir the barley occasionally while it simmers to prevent sticking, and for the best texture, cook it just until tender. Finally, let the soup rest for 10 minutes before serving to allow the flavors to meld.
Mistakes to avoid
Avoid overcooking the barley, as it can turn mushy and ruin the texture of your Beef Barley Soup. Instead, check it 5 minutes before the recommended time. Another common mistake is skipping the deglazing step after browning the beef. Forgetting to scrape the flavorful bits from the pan means missing out on rich depth. For more on balancing flavors, check out our guide to soup seasoning secrets. Also, resist adding too much liquid at once. If your soup ends up too thin, learn how to thicken soups properly without compromising taste.
Serving and Pairing Suggestions
How to serve this dish
For a cozy family dinner, ladle steaming Beef Barley Soup into deep bowls and top with fresh parsley or thyme for a pop of color. Alternatively, serve it in rustic bread bowls for a fun, edible presentation that soaks up every flavorful drop. If you’re hosting a casual gathering, set up a garnish bar with grated Parmesan, crusty bread, and a drizzle of olive oil so guests can customize their bowls. Whether it’s a chilly weeknight or a holiday potluck, this hearty soup always feels comforting and inviting.
h-it">What goes well with it
Pair Beef Barley Soup with a crisp green salad like our Spring Mix Salad to balance its rich flavors. The bright, tangy dressing cuts through the soup’s heartiness perfectly. For a heartier meal, add warm Garlic Herb Focaccia, which you can tear apart and dip into the broth. Finally, a glass of dry red wine or sparkling water with lemon elevates the meal without overpowering the savory notes of the soup.
How long does it take to cook beef barley soup?
Beef barley soup typically takes about 1.5 to 2 hours to cook, including simmering time for the beef to become tender. The barley adds another 30-40 minutes to fully soften. Slow cooking enhances the flavors, making Beef Barley Soup a hearty meal.
rank-math-faq-item">
Can I make beef barley soup in a slow cooker?
Yes, Beef Barley Soup works great in a slow cooker! Combine all ingredients and cook on low for 6-8 hours or high for 3-4 hours. The slow cooker method ensures tender beef and perfectly cooked barley with minimal effort.
What cut of beef is best for beef barley soup?
Chuck roast or stew meat is ideal for Beef Barley Soup because it becomes tender when slow-cooked. These cuts have enough marbling to add rich flavor. Avoid lean cuts, as they can turn tough in the soup.
Can I substitute pearl barley in beef barley soup?
Yes, you can use quick-cooking barley or even hulled barley, but adjust cooking times accordingly. Pearl barley is traditional in Beef Barley Soup, but substitutions work if you prefer a different texture or cooking speed.