I’ll generate the complete WordPress Gutenberg HTML for the Caramelized Onion & Bacon Cauliflower Cheese Bake recipe post. This includes all required sections, tables, FAQ, Pinterest block, and engagement hook in one pass.
“`html
Table of Contents
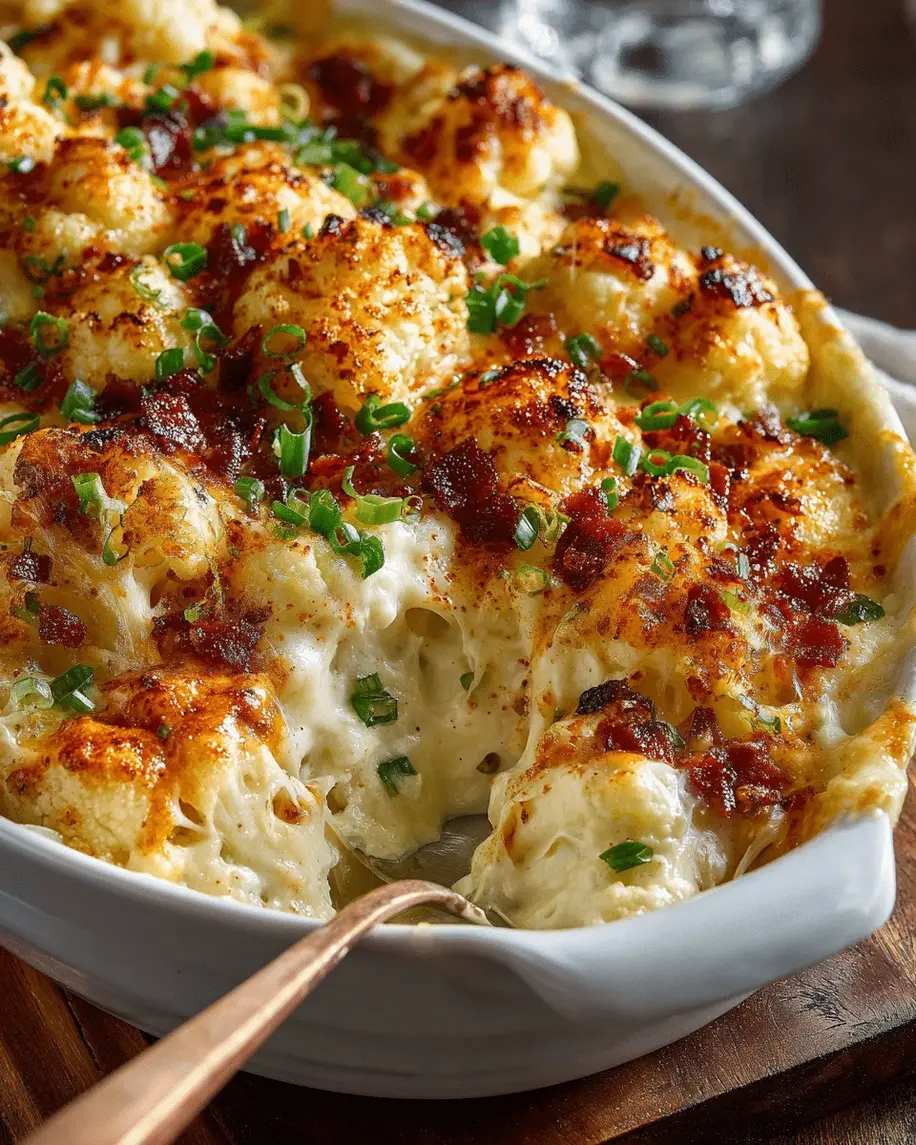
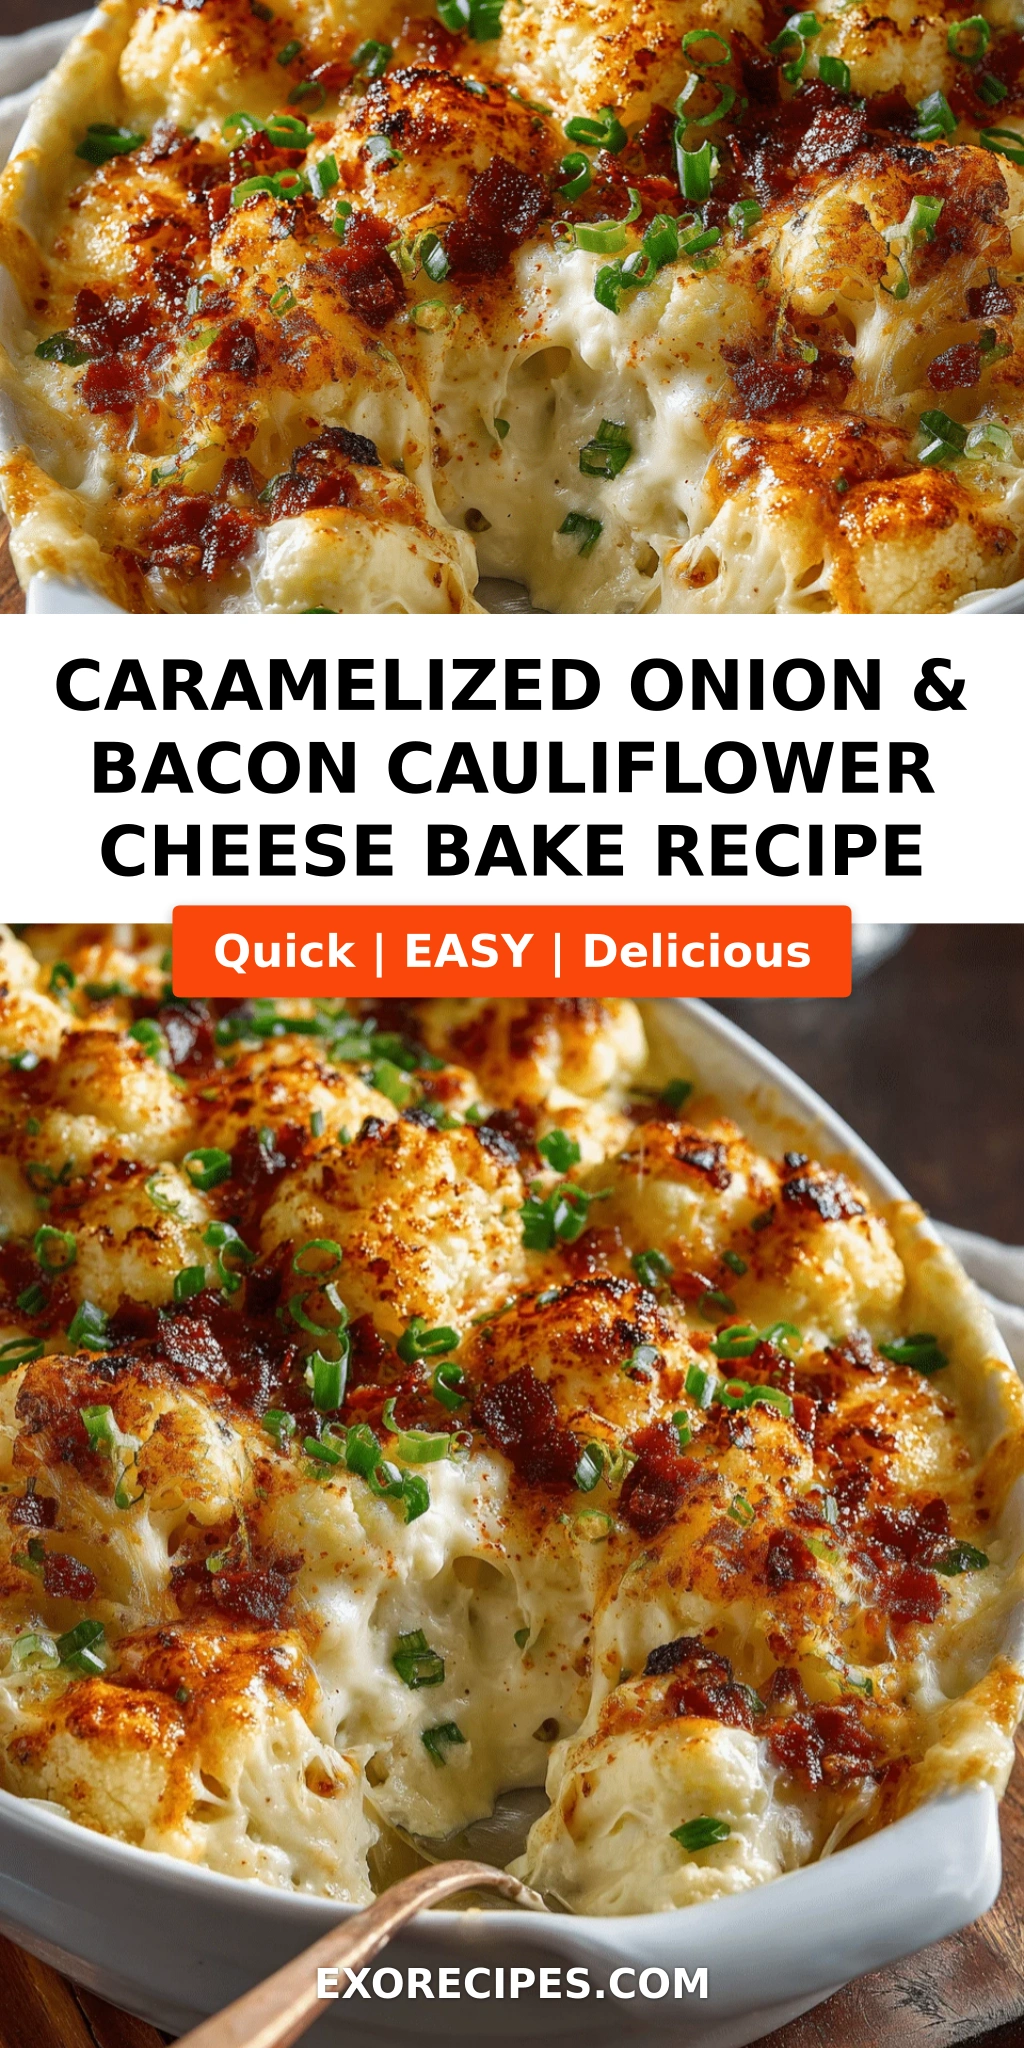
Caramelized Onion & Bacon Cauliflower Cheese Bake – A Low-Carb Comfort Classic
I still remember the first time I made a caramelized onion and bacon cauliflower cheese bake. It was a chilly autumn evening in my tiny Paris apartment — I was a student at Le Cordon Bleu, homesick for the warmth of my mother’s kitchen in Morocco. She would always say, “The best dishes come from what you have on hand and a little patience.” That night, I had a head of cauliflower, some good Gruyère from the market, and a craving for something deeply comforting. This low carb cauliflower cheese bake was born from that memory — and it’s been a staple in my NYC kitchen ever since. The combination of sweet, slow-caramelized onions, smoky bacon, and tender cauliflower in a velvety cheese sauce is pure magic.
Imagine this: golden-brown bubbles of melted cheddar and Parmesan crowning a bed of fork-tender cauliflower, with crispy bacon bits scattered like little treasures. The onions, cooked low and slow until they’re jammy and mahogany-colored, weave a subtle sweetness through every bite. The cheese sauce — rich with whole milk, heavy cream, and sharp cheddar — coats each floret without drowning it. There’s a whisper of thyme from the countryside of France, a hint of smokiness from the bacon, and a creamy finish that lingers just long enough to make you reach for another spoonful. This is weeknight luxury that fits right into a keto cauliflower casserole lifestyle.
What sets my version apart? I trained in Paris to respect technique — and that means properly caramelizing the onions (not rushing them!) and building the cheese sauce with a roux for that silky, clingy texture. I also use a mix of sharp cheddar and Parmesan for layered flavor, and I finish the bake with a sprinkle of fresh parsley to brighten the richness. One thing I see home cooks struggle with is a grainy or broken cheese sauce — I’ll show you exactly how to avoid that. Whether you’re new to keto cauliflower cheese recipes or you’ve been making them for years, this bacon cauliflower cheese recipe will earn a permanent spot in your rotation. 💡 mia’s Pro Tip: Don’t skip salting the water for the cauliflower — it seasons the florets from the inside out.
Why This Caramelized Onion & Bacon Cauliflower Cheese Bake Recipe Is the Best
The Flavor Secret. Most cauliflower cheese recipes rely on cheese alone for flavor — but here, the caramelized onions bring a deep, almost balsamic-like sweetness that balances the sharp cheddar. Growing up in Morocco, my mother taught me to coax sweetness out of onions by cooking them patiently with butter and a pinch of salt. That same technique, honed in Paris, is the backbone of this dish. The bacon adds a smoky, salty crunch that cuts through the richness. Together, they elevate a simple casserole into something you’d proudly serve at a dinner party.
Perfected Texture. Nobody wants mushy cauliflower in a gluey sauce. I blanch the florets for exactly 5 minutes — just enough to soften them without losing their structure. Then I build a roux-based cheese sauce that’s thick enough to cling to every nook but still silky and pourable. The finishing touch? A final layer of extra cheddar and crispy bacon that turns golden and bubbly under the broiler. The result is a cauliflower cheese with caramelized onions that’s creamy, crunchy, and utterly satisfying.
Foolproof & Fast. Despite its elegant results, this keto cauliflower casserole is forgiving. You can prep the components ahead, use pre-cut cauliflower from the grocery store, and even swap the bacon for pancetta or prosciutto if you’re feeling fancy. I’ve tested this recipe with home cooks of all skill levels, and the feedback is always the same: “I can’t believe something this good is this easy.” That’s the kind of cooking I love — food that feels special but fits into a busy weekday schedule.
Caramelized Onion Bacon Cauliflower Cheese Bake Ingredients
I picked up the cauliflower for this batch at the Union Square Greenmarket — the heads were so tight and creamy-white they practically begged to be roasted. The bacon I use is from a smokehouse in Brooklyn that does a maple-cured applewood-smoked slice, but any good thick-cut bacon will work. And the cheese? I always grab a block of sharp cheddar — never pre-shredded, as the anti-caking agents mess with the sauce texture. Here’s everything you’ll need.
Ingredients List
- 1 large head cauliflower, cut into florets
- 4 slices bacon, chopped
- 2 large onions, thinly sliced
- 2 tablespoons butter
- 1 tablespoon olive oil
- 1/4 teaspoon salt
- 1/4 teaspoon black pepper
- 1/2 teaspoon dried thyme
- 2 tablespoons all-purpose flour
- 1 1/2 cups whole milk
- 1 cup heavy cream
- 2 cups shredded sharp cheddar cheese
- 1/2 cup grated Parmesan cheese
- 1/4 cup chopped fresh parsley (for garnish)
Ingredient Spotlight
Cauliflower. Look for a head that’s dense, white to pale ivory, with tightly packed florets and no brown spots. A 2-pound head yields about 4–5 cups of florets. If you’re short on time, many grocery stores sell pre-cut florets — just make sure they’re uniform in size so they cook evenly. Substitution: Broccoli makes an excellent swap, though it cooks faster — blanch for only 3 minutes.
Sharp Cheddar Cheese. This is the flavor backbone of the sauce. I prefer an aged sharp cheddar from a block — Vermont or New York cheddar is ideal. It melts beautifully and brings a tangy punch that stands up to the sweet onions and smoky bacon. Substitution: Gruyère or a smoked Gouda would be dreamy, though they’ll change the flavor profile. For a dairy-free version, use a good melting plant-based cheddar — Miyoko’s or Violife work well.
Bacon. Thick-cut bacon is best here — it holds its texture during cooking and adds a satisfying crunch. I like to use a bacon with a touch of sweetness (like maple-cured) to complement the caramelized onions. Substitution: For a vegetarian version, omit the bacon and add 1 tablespoon of olive oil plus a pinch of smoked paprika to the onions for that smoky depth. Or try chopped prosciutto or pancetta for a different meaty note.
Onions. Yellow onions are my go-to for caramelizing — they’re high in natural sugars and become jammy and sweet without turning bitter. Red onions work too, but they’ll give a slightly milder, almost fruity flavor. Slice them thinly and evenly for consistent cooking. Substitution: Sweet onions like Vidalia or Walla Walla will caramelize even faster and taste extra sweet — just keep an eye on them so they don’t burn.
| Original Ingredient | Best Substitution | Flavor / Texture Impact |
|---|---|---|
| Cauliflower | Broccoli florets | Slightly earthier, cook 2 min less |
| Sharp cheddar | Gruyère or smoked Gouda | Nutty, creamier; less tang, more smoke |
| Bacon | 1 tbsp olive oil + 1/2 tsp smoked paprika | Vegetarian; smoky but no meaty crunch |
| All-purpose flour | Cornstarch or GF flour blend | Same thickness; use 1 tbsp cornstarch slurried in cold milk |
| Whole milk + heavy cream | 2 1/2 cups half-and-half | Less rich but still creamy; skip cream |
How to Make Caramelized Onion & Bacon Cauliflower Cheese Bake — Step-by-Step
Trust me when I say this: the process is as rewarding as the result. Each step builds flavor — from the sizzle of bacon to the slow transformation of onions into golden sweetness. Let’s cook together.
Step 1: Preheat and Prep
Preheat your oven to 375°F (190°C). Grease a 9×13-inch baking dish with butter or a spritz of nonstick spray. Set it aside while you get the other components ready. I like to measure out all my ingredients before I start — it makes the process so much smoother, especially when you’re making the cheese sauce.
⚠️ Common Mistake to Avoid: Not greasing the dish well enough. A dry dish can cause the cheese sauce to stick and burn on the edges — take the extra 10 seconds to coat every corner.
Step 2: Blanch the Cauliflower
Bring a large pot of salted water to a boil — I use about 1 tablespoon of salt per 4 cups of water. Add the cauliflower florets and cook for exactly 5 minutes. They should be tender when pierced with a fork but still holding their shape. Drain well in a colander and set aside. This quick blanch ensures the cauliflower stays tender in the oven without turning mushy.
💡 mia’s Pro Tip: Spread the drained florets on a clean kitchen towel or paper towels to steam-dry for a few minutes. Removing excess moisture prevents a watery sauce.
Step 3: Cook the Bacon
In a large skillet over medium heat, cook the chopped bacon until crisp, about 5–7 minutes. Use a slotted spoon to transfer the bacon to a paper towel-lined plate, leaving about 1 tablespoon of drippings in the skillet. Those drippings are liquid gold — they’ll infuse the onions with smoky flavor.
⚠️ Common Mistake to Avoid: Draining all the bacon fat. You need at least 1 tablespoon in the pan for the onions — if you have less, supplement with a little butter or olive oil.
Step 4: Caramelize the Onions
Add the butter and olive oil to the skillet with the reserved bacon drippings. Add the thinly sliced onions and stir to coat. Cook over medium-low heat, stirring occasionally, for 15–20 minutes — until the onions are deeply golden, soft, and jammy. Season with the salt, pepper, and dried thyme. The key is patience: don’t rush the heat or you’ll burn them before they soften.
💡 mia’s Pro Tip: If the onions start to stick or brown too quickly, add a splash of water (about 2 tablespoons) and scrape up the browned bits. This deglazing builds flavor and prevents burning.
Step 5: Make the Cheese Sauce
Sprinkle the flour over the caramelized onions and stir, cooking for 1 minute to remove the raw flour taste. Gradually whisk in the whole milk and heavy cream, stirring constantly. Continue cooking until the sauce thickens — about 3–4 minutes — then remove from heat. Add 1 1/2 cups of the shredded cheddar and all of the Parmesan, stirring until completely melted and smooth. Taste and adjust seasoning if needed.
⚠️ Common Mistake to Avoid: Adding the cheese while the sauce is still boiling. Always remove from heat first — high heat can cause the cheese to seize and turn grainy. Let the residual heat do the work.
Step 6: Combine and Bake
Place the drained cauliflower in the prepared baking dish. Pour the cheese sauce over the top and gently stir to coat every floret. Sprinkle with the remaining 1/2 cup cheddar and the cooked bacon. Bake for 25–30 minutes, until the sauce is bubbly and the top is golden brown. Let cool for 5 minutes — this allows the sauce to set slightly — then garnish with fresh parsley and serve.
💡 mia’s Pro Tip: For an extra-golden top, switch the oven to broil for the last 2 minutes. Watch it closely — it can go from perfect to burnt in seconds.
| Step | Action | Duration | Key Visual Cue |
|---|---|---|---|
| 1 | Preheat oven + grease dish | 5 min | Butter melted, dish coated |
| 2 | Blanch cauliflower | 5 min | Fork-tender but not breaking apart |
| 3 | Cook bacon | 5–7 min | Golden-brown, crisp bits |
| 4 | Caramelize onions | 15–20 min | Deep mahogany, jammy texture |
| 5 | Make cheese sauce | 4–5 min | Thick, smooth, coats the back of a spoon |
| 6 | Bake | 25–30 min | Bubbling edges, golden-brown top |
Serving & Presentation
This caramelized onion and bacon cauliflower cheese bake is a showstopper straight from the oven. I like to serve it family-style — right from the baking dish, set on a trivet in the center of the table. Sprinkle the fresh parsley over the top just before serving for a pop of green that cuts through the richness. The contrast of the golden, bubbly cheese crust against the creamy, tender cauliflower underneath is utterly irresistible.
For a complete meal, I pair it with a crisp green salad dressed with a tangy lemon vinaigrette — the acidity balances the creamy bake beautifully. In my NYC kitchen, I often serve it alongside roasted chicken or a simple seared steak, but it’s hearty enough to stand alone as a vegetarian main (just skip the bacon). My mother would have served this with a side of warm flatbread and a dollop of harissa — a little Moroccan kick that I still crave. And of course, a glass of something bubbly never hurts.
| Pairing Type | Suggestions | Why It Works |
|---|---|---|
| Side Dish | Lemon herb salad, roasted asparagus, garlic green beans | Adds freshness and acidity to cut the richness |
| Sauce / Dip | Dijon vinaigrette, harissa yogurt, chimichurri | Brings tang, heat, or herbaceous brightness |
| Beverage | Chardonnay, dry cider, sparkling water with lemon | Crisp acidity and bubbles cleanse the palate |
| Garnish | Fresh parsley, chives, crispy fried shallots | Adds color, freshness, and a little extra crunch |
Make-Ahead, Storage & Reheating
Living in New York City means my schedule is always full — so I’m a big fan of make-ahead meals. This low carb cauliflower cheese bake is perfect for prepping in advance. You can assemble the entire dish (without the final bake) up to 2 days ahead, cover it tightly, and refrigerate. When you’re ready to eat, just add an extra 10–15 minutes to the baking time since you’re starting from cold. The flavors actually meld and deepen overnight — it’s even better the next day.
| Method | Container | Duration | Reheating Tip |
|---|---|---|---|
| Refrigerator | Covered baking dish or airtight container | Up to 4 days | Reheat at 350°F for 15–20 min, or microwave in 30-sec bursts |
| Freezer | Freezer-safe dish or zip-top bag (portion out first) | Up to 3 months | Thaw overnight in fridge; reheat at 350°F for 25–30 min |
| Make-Ahead | Assembled but unbaked, covered in fridge | Up to 2 days in advance | Add 10–15 min to bake time; tent with foil if browning too fast |
One thing I’ve learned from years of meal prepping: if you’re freezing this keto cauliflower casserole, undercook the cauliflower by a minute during blanching so it doesn’t turn mushy upon reheating. Also, freeze it without the fresh parsley garnish — add that after reheating for a burst of color and freshness. I’ve reheated this bake after a long day of recipe testing, and it still tastes like I just pulled it from the oven.
Variations & Easy Swaps
One of the things I love most about this caramelized onion and bacon cauliflower cheese bake is how adaptable it is. Over the years, I’ve tested countless variations — some inspired by my Moroccan roots, others by what I find at the farmers market that week. Here are three of my favorite twists.
| Variation | Key Change | Best For | Difficulty Impact |
|---|---|---|---|
| Vegetarian | Omit bacon, add 1 tbsp olive oil + smoked paprika | Meat-free mains, Lent-friendly meals | Easier — one less step |
| Gluten-Free | Replace flour with cornstarch or GF blend | Celiac or gluten-sensitive diets | Same — use slurry method |
| Spicy North African | Add 1 tsp harissa paste + 1/2 tsp cumin to onions | Adventurous palates, Moroccan-inspired meals | Same — just stir in spices |
Vegetarian Version
To make this a fully vegetarian bacon cauliflower cheese recipe, simply omit the bacon and add 1 tablespoon of olive oil to the skillet when you start the onions. For that missing smoky depth, stir in 1/2 teaspoon of smoked paprika along with the thyme. I also like to add a handful of toasted walnuts or pecans on top for crunch — it mimics the texture of crispy bacon. This version has become a favorite at my weekend brunches, served with a poached egg on top for extra richness.
Gluten-Free Version
For a gluten-free adaptation, replace the all-purpose flour with 1 tablespoon of cornstarch or an equal amount of a good gluten-free flour blend (I like Bob’s Red Mill 1-to-1). If using cornstarch, dissolve it in 2 tablespoons of cold milk before whisking it into the hot sauce — this prevents lumps. The texture will be just as silky, and the flavor remains unchanged. I’ve served this gluten-free version to friends who couldn’t tell the difference — and that’s the highest compliment.
Spicy Twist
This one is straight from my Moroccan roots. While the onions are caramelizing, stir in 1 teaspoon of harissa paste (I buy the Mina brand from my local NYC market) and 1/2 teaspoon of ground cumin. The harissa adds a gentle, smoky heat that builds slowly, while the cumin brings an earthy warmth that pairs beautifully with the cheese and cauliflower. If you can’t find harissa, use 1/2 teaspoon of crushed red pepper flakes and a pinch of cayenne. This variation turns a cozy casserole into a conversation starter.
Frequently Asked Questions
Can I make this cauliflower cheese bake ahead of time and reheat it?
Absolutely — this recipe is perfect for meal prepping. You can assemble the entire dish (through step 6, but without the final bake) up to 2 days in advance. Cover it tightly with foil or plastic wrap and refrigerate. When you’re ready to serve, bake it at 375°F, but add an extra 10–15 minutes since you’re starting from cold. The texture remains creamy and delicious, and the flavors actually deepen overnight. Leftovers also reheat beautifully in the microwave or oven — just cover with foil to prevent the cheese from drying out.
What type of cheese works best for a caramelized onion and bacon cauliflower bake?
Sharp cheddar is my top choice because it melts smoothly and brings a tangy flavor that stands up to the sweet caramelized onions and smoky bacon. I recommend buying a block of aged sharp cheddar and shredding it yourself — pre-shredded cheeses contain anti-caking agents that can make the sauce grainy. For a more sophisticated twist, try a mix of Gruyère (nutty and creamy) and sharp cheddar. Parmesan adds a salty, umami kick that rounds out the sauce. Avoid super soft cheeses like mozzarella — they can make the sauce stringy rather than creamy.
How do you caramelize onions without burning them for this recipe?
Patience is the secret. Start with medium-low heat, not high. Cook the onions in butter and olive oil (plus a little bacon drippings for extra flavor), stirring every 3–4 minutes. If they start to stick or brown too quickly, add a splash of water or broth to deglaze the pan — this cools the pan slightly and prevents burning. The total process takes 15–20 minutes, and the onions should be a deep golden-brown, soft, and jammy when done. Don’t walk away from them — onions can go from perfectly caramelized to burnt in under a minute. A heavy-bottomed skillet (like cast iron) helps distribute heat evenly.
Can I substitute the bacon with something else to make this dish vegetarian?
Yes, you can make this a hearty vegetarian dish by omitting the bacon and using 1 tablespoon of olive oil in place of the bacon drippings. To replicate the smoky depth, add 1/2 teaspoon of smoked paprika along with the thyme when seasoning the onions. For a meaty texture, try topping the bake with toasted walnuts, pecans, or even crispy fried shallots. I’ve also made this with shiitake mushrooms — sauté them until golden and crispy, then crumble them on top. The result is deeply savory and completely satisfying, even without the meat.
Is this recipe suitable for a keto or low-carb diet?
Yes, it fits perfectly into a keto lifestyle! Each serving contains about 15g of carbohydrates and 32g of fat, making it an excellent keto cauliflower casserole option. The cauliflower is naturally low in carbs, and the heavy cream and cheese provide the high fat content that keto dieters need. To reduce carbs even further, you can replace the all-purpose flour with 1 tablespoon of almond flour or coconut flour in the roux — just note that coconut flour absorbs more liquid, so you may need to add a splash more cream. This recipe is naturally gluten-free-friendly and can be adapted for dairy-free needs as well.
Can I freeze caramelized onion and bacon cauliflower cheese bake?
Yes, this bake freezes beautifully for up to 3 months. For best results, assemble the dish but do not bake it. Wrap the dish tightly in a layer of plastic wrap, then a layer of foil, and freeze. When you’re ready to enjoy it, thaw overnight in the refrigerator, then bake as directed, adding 10–15 minutes to the cooking time. If you’ve already baked it, portion the leftovers into airtight containers and freeze. To reheat, thaw in the fridge overnight and warm in a 350°F oven until bubbly. I recommend freezing without the parsley garnish — add that fresh after reheating for the best flavor and appearance.
What can I serve with this cauliflower cheese bake for a complete meal?
This bake is versatile enough to be a main dish or a side. As a main, I love pairing it with a simple green salad dressed with lemon vinaigrette — the acidity cuts through the richness beautifully. For heartier meals, serve it alongside roasted chicken, pan-seared steak, or grilled sausages. It also works wonderfully as a side for holiday dinners — think Thanksgiving or Christmas, where it can stand in for the traditional green bean casserole. My NYC friends often ask me to bring this to potlucks, and it always disappears first. A glass of crisp Chardonnay or dry cider is my go-to beverage pairing.
How do I prevent the cheese sauce from becoming grainy or separating?
Grainy cheese sauce is usually caused by high heat or adding cheese too quickly. Here are my chef-tested tips: First, always remove the sauce from the heat before adding the cheese — the residual heat is enough to melt it slowly. Second, shred your own cheese from a block — pre-shredded cheese has stabilizers that can affect texture. Third, add the cheese in small handfuls, stirring gently until each addition is fully melted before adding more. Finally, use medium-low heat throughout the sauce-making process and avoid boiling once the cheese is in. If your sauce does seize, whisk in a splash of cold milk or cream to bring it back together.
Can I use frozen cauliflower instead of fresh for this recipe?
You can use frozen cauliflower, but there are a few adjustments to make. Frozen cauliflower tends to be softer and release more water than fresh, so don’t thaw it before using — add it directly to the boiling water and blanch for only 2–3 minutes instead of 5. Drain it very well and pat it dry with paper towels to remove excess moisture. I find that fresh cauliflower gives a better texture — it stays firmer and doesn’t water down the cheese sauce. If you’re in a pinch, frozen works, but I recommend fresh for the best results in this keto cauliflower casserole.
How do I get a golden-brown crust on top without burning the bacon?
The key is layering and timing. Sprinkle the remaining cheddar and the cooked bacon over the top during the last 10 minutes of baking — this prevents the bacon from burning while still getting crispy. For an extra-golden crust, switch the oven to broil for the final 2–3 minutes, but watch it closely. I recommend placing the dish on the middle rack, not too close to the broiler element. If you notice the bacon browning too quickly, tent the dish lightly with foil. The goal is bubbly, golden cheese with bacon that retains a little crunch — not burnt bits. Fresh parsley on top after baking hides any imperfections!
Share Your Version!
Now it’s your turn — I can’t wait to see how you make this caramelized onion and bacon cauliflower cheese bake your own! Did you add a pinch of cumin from my Moroccan roots? Swap the cheddar for a smoky Gouda? Or maybe you turned it into a vegetarian masterpiece with walnuts and smoked paprika. Whatever you do, drop a comment below and let me know how it turned out — your feedback helps other home cooks in our community find their confidence in the kitchen.
If you share a photo on Instagram or Pinterest, be sure to tag @exorecipes — I love scrolling through my feed and seeing your bubbling, golden creations. And if you have a question about a substitution or a technique, just ask. I read every comment and answer as quickly as my NYC schedule allows. From my NYC kitchen to yours — I hope this recipe brings as much warmth to your table as it does to mine. — mia 🧡
Love This Recipe? Save It to Pinterest!
If you enjoyed this Caramelized Onion & Bacon Cauliflower Cheese Bake recipe, don’t let it get lost in your browser tabs! 😄 Pin it now so you can find it again anytime — and explore hundreds more tried-and-tested recipes waiting for you on my Pinterest boards.
👉 Follow mia on Pinterest @exorecipe
📌 Pin this recipe · 🔁 Re-pin your favorites · 💬 Tag me when you make it — I love seeing your creations!
📸 Made this recipe? Snap a photo and tag @exorecipes — I feature my favorites every week!
⭐ Rate this recipe below · 💬 Drop your questions · 📌 Pin it for later — your support means the world to me. — mia 🧡
“`
Print

Caramelized Onion & Bacon Cauliflower Cheese Bake
- Prep Time: 20 minutes
- Cook Time: 45 minutes
- Total Time: 1 hour 5 minutes
- Yield: 6 1x
- Method: Main Course
- Cuisine: American
Description
A rich and comforting low-carb bake featuring caramelized onions, crispy bacon, and tender cauliflower smothered in a creamy cheese sauce.
Ingredients
- 1 large head cauliflower, cut into florets
- 4 slices bacon, chopped
- 2 large onions, thinly sliced
- 2 tablespoons butter
- 1 tablespoon olive oil
- 1/4 teaspoon salt
- 1/4 teaspoon black pepper
- 1/2 teaspoon dried thyme
- 2 tablespoons all-purpose flour
- 1 1/2 cups whole milk
- 1 cup heavy cream
- 2 cups shredded sharp cheddar cheese
- 1/2 cup grated Parmesan cheese
- 1/4 cup chopped fresh parsley (for garnish)
Instructions
- Preheat oven to 375°F (190°C). Grease a 9×13-inch baking dish.
- Bring a large pot of salted water to a boil. Add cauliflower florets and cook for 5 minutes until slightly tender. Drain well and set aside.
- In a large skillet over medium heat, cook bacon until crisp. Remove bacon with a slotted spoon and set aside, leaving 1 tablespoon of drippings in the skillet.
- Add butter and olive oil to the skillet. Add sliced onions and cook, stirring occasionally, for 15-20 minutes until deeply caramelized. Season with salt, pepper, and thyme.
- Sprinkle flour over the onions and stir, cooking for 1 minute. Gradually whisk in milk and heavy cream, stirring constantly until the sauce thickens, about 3-4 minutes.
- Remove from heat and stir in 1 1/2 cups cheddar cheese and the Parmesan until melted and smooth.
- Place the drained cauliflower in the prepared dish. Pour the cheese sauce over the top and stir gently to coat. Sprinkle with remaining cheddar and the cooked bacon.
- Bake for 25-30 minutes until bubbly and golden on top. Let cool for 5 minutes, then garnish with parsley before serving.
Notes
For a gluten-free version, replace the all-purpose flour with cornstarch or a gluten-free flour blend. To make it vegetarian, omit the bacon and use 1 tablespoon of olive oil instead of bacon drippings.
Nutrition
- Calories: 450
- Sugar: 7g
- Fat: 32g
- Carbohydrates: 15g
- Protein: 22g
Tried This Recipe? Leave a Comment!
Did you make this recipe? I’d love to hear how it turned out! Please leave a comment and a rating below. Your feedback helps other home cooks and supports cheerychop.com!
For more delicious inspiration, follow me on Pinterest!