Do you ever crave that deep, savory comfort of a classic party dip but dream of turning it into a satisfying main course? We completely understand that feeling. Fortunately, this recipe transforms that nostalgic flavor into a stunning, family-friendly dinner. Get ready to fall in love with the incredible ease and explosive taste of these French Onion Dip Chicken Thighs. They promise to become your new weeknight hero, delivering maximum flavor with minimal effort.
So, what exactly are French Onion Dip Chicken Thighs? Essentially, this dish takes juicy, bone-in chicken thighs and coats them in the unmistakably savory and creamy flavor of French onion dip before baking them to golden perfection. The magic happens because the dip mixture—typically a blend of sour cream and dehydrated onion soup mix—creates a rich, caramelized crust that locks in the chicken’s natural juices. This recipe matters immensely for anyone seeking to break out of a dinner rut without spending hours in the kitchen. It utilizes a brilliant shortcut that delivers gourmet-level taste from simple, accessible ingredients. Furthermore, this approachable recipe fits our blog’s core mission perfectly: to provide reliably delicious meals that empower home cooks. If you enjoy simple yet transformative dishes, you might also love our approach to easy baked chicken thighs. The method requires just a few minutes of hands-on prep, making it ideal for busy schedules. Ultimately, the result is a succulent, flavorful chicken dinner that feels both indulgent and incredibly straightforward, proving that the best meals often come from the most clever ideas.
Why I Love This Recipe
This recipe holds a special place in my heart because it truly saved a chaotic weeknight. I first threw it together with ingredients I already had in my pantry and fridge, desperately needing a win. The moment my family took their first bites, the room went quiet except for the sounds of happy eating. That immediate and unanimous approval cemented it as a permanent favorite in our rotation. It consistently delivers joy around our dinner table, and that is a feeling I always want to share with others looking for a reliable, crowd-pleasing meal.
Health and Nutrition
Why it’s good for your body
French Onion Dip Chicken Thighs deliver a powerful nutritional punch. For instance, chicken thighs provide an excellent source of high-quality protein, which is essential for building muscle and keeping you full. Moreover, this protein content actively supports your metabolism and aids in cell repair throughout your body.
Additionally, the onions in the dish offer significant health advantages. They are rich in antioxidants and prebiotic fibers, which consequently support a healthy gut microbiome and may reduce inflammation. Furthermore, when you prepare this meal, you control the ingredients, allowing you to create a delicious yet wholesome version of a classic flavor.
Ultimately, this dish combines taste and wellness seamlessly. The recipe utilizes simple, whole-food ingredients that work together to nourish your body. Therefore, enjoying French Onion Dip Chicken Thighs means you are treating yourself to a meal that truly benefits your overall health.
How it fits in a healthy lifestyle
This recipe perfectly supports a balanced and proactive approach to eating. French Onion Dip Chicken Thighs fit wonderfully into a high-protein diet, helping to promote satiety and manage hunger levels throughout a busy day. You can easily pair it with a side of roasted vegetables or a fresh salad for a complete, macro-balanced plate.
If you follow a gluten-free lifestyle, this dish is a fantastic option because it naturally lacks gluten-containing ingredients. For more ideas on crafting a delicious gluten-free kitchen, explore our guide on gluten-free baking. Furthermore, the meal is incredibly adaptable for meal prep, making healthy choices convenient during the week. For those focused on building muscle or maintaining energy, its macros are ideal. Discover other protein-packed options in our roundup of high-protein meals to keep your menu exciting and diverse.
Juicy chicken thighs coated in a savory French onion dip seasoning mix, baked to perfection with a crispy golden crust.
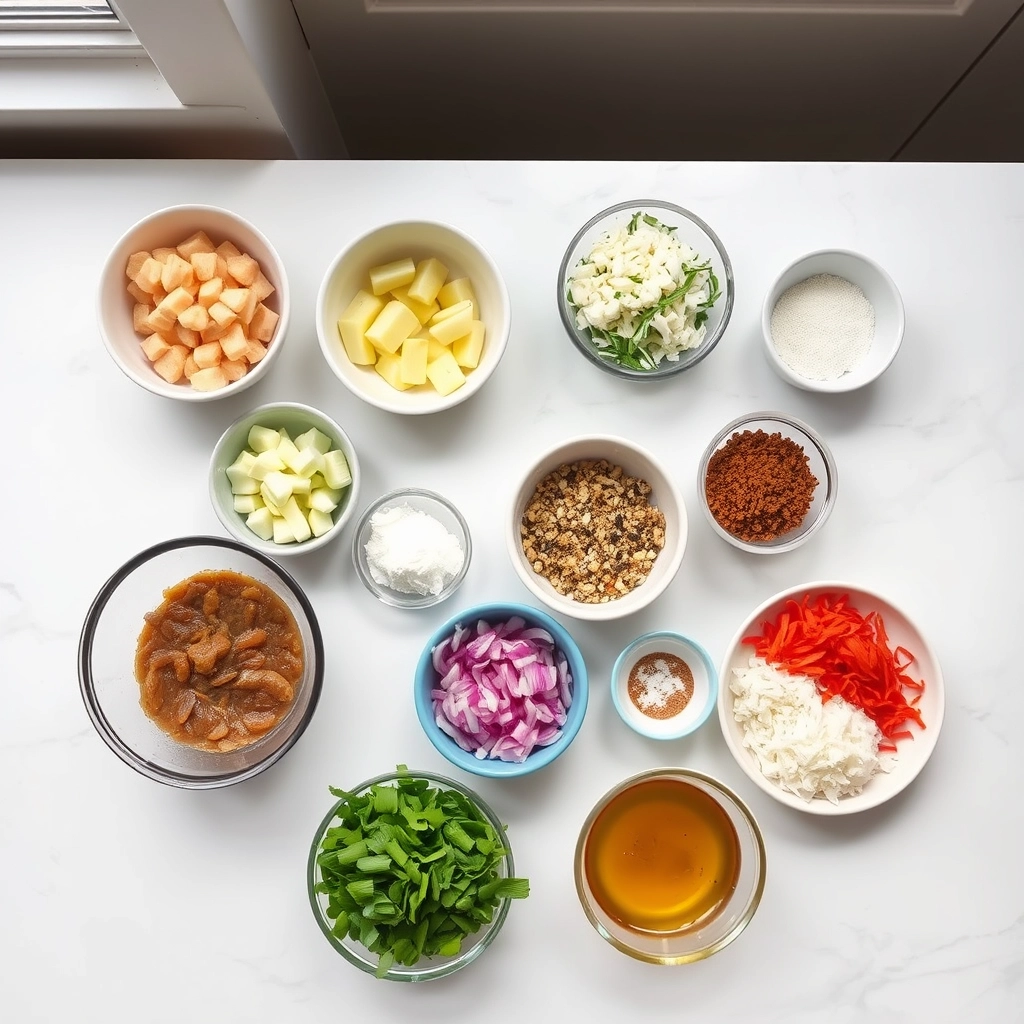
Ingredients
Scale
For the Crust:
8 bone-in, skin-on chicken thighs
1 packet (1 oz) French onion soup mix
1 cup sour cream
1/2 cup mayonnaise
1 tsp garlic powder
1/2 tsp black pepper
1 tbsp olive oil
Fresh parsley for garnish (optional)
Instructions
1. Prepare the Crust:
Preheat oven to 375°F (190°C). Line a baking sheet with parchment paper or foil.
In a bowl, mix together sour cream, mayonnaise, French onion soup mix, garlic powder, and black pepper until well combined.
Pat chicken thighs dry with paper towels. Coat each thigh evenly with the French onion dip mixture, ensuring both sides are covered.
Place chicken thighs skin-side up on the prepared baking sheet. Drizzle lightly with olive oil.
Bake for 35-40 minutes, or until chicken is cooked through and the top is golden and crispy. Garnish with fresh parsley if desired and serve warm.
Notes
You can customize the seasonings to taste.
How to Prepare This Dish
Steps and time-saving tips
First, gather your ingredients and preheat your oven to 375°F. Next, pat your chicken thighs completely dry with paper towels; this step is crucial for achieving a beautifully golden sear. Meanwhile, generously season both sides of the chicken with salt and pepper. Now, heat a couple of tablespoons of oil in a large, oven-safe skillet over medium-high heat. Carefully place the chicken thighs in the hot skillet skin-side down; then, resist the urge to move them for a solid 6-7 minutes to get that perfect, crispy crust. After that, flip the chicken and sear the other side for just 2-3 minutes. Subsequently, remove the skillet from the heat and let it cool for a minute. In a separate bowl, whisk together the French onion dip and a splash of milk or broth to loosen it for easier spreading. Spoon this creamy mixture over each chicken thigh, making sure to cover them entirely. Finally, transfer the whole skillet to your preheated oven and bake for 20-25 minutes. For a time-saving tip, use a store-bought French onion dip; however, you can also quickly mix a packet of onion soup mix with sour cream. Moreover, you can prepare the dip mixture a day ahead and keep it refrigerated until you’re ready to cook. Your French Onion Dip Chicken Thighs are done when the internal temperature reaches 165°F and the top is bubbly and lightly browned. Let the chicken rest for five minutes before serving to allow the juices to redistribute.
Mistakes I’ve made and learned from
I’ve definitely learned a few lessons the hard way with this recipe. Initially, I used to overcrowd the skillet because I was impatient and wanted to cook all the chicken at once. This mistake created steam instead of a sear, resulting in soggy skin that nobody wants. Now, I cook in batches to ensure each French Onion Dip Chicken Thigh gets its own space to properly crisp up. Another common error I made was not letting the chicken come to room temperature first. I’d pull it straight from the fridge and into the pan, which caused the meat to cook unevenly. The outside would be overdone before the inside was fully safe to eat. I also learned the importance of checking my oven’s actual temperature with a separate thermometer, as my old oven ran hot and would burn the creamy topping. This experience taught me to always trust a good meat thermometer for perfect results every time. For more tips on getting that ideal cook on poultry, check out my guide on how to tell when chicken is done. And if you’re looking for a fantastic homemade dip to use instead of store-bought, my ultimate French onion dip recipe is a game-changer for flavor.
This dish tells a beautiful story of fusion. It marries the classic American party dip with rustic, French-inspired chicken braising techniques. My grandmother always made a version with canned soup, but we have since elevated it. The method of slowly caramelizing onions builds a deep, sweet foundation that defines so much French provincial cooking. Meanwhile, the creamy, tangy dip element feels purely nostalgic, like something straight from a 1950s Midwest potluck.
Different regions put their own spin on it, of course. In the South, cooks might add a dash of hot sauce or use smoked paprika for a bit of heat. Conversely, some families in the Midwest stir a handful of shredded cheddar into the dip mixture for extra cheesiness. The beauty of French Onion Dip Chicken Thighs lies in its adaptability. You can truly make it your own.
Ultimately, this recipe
represents how home cooking evolves. It takes a familiar flavor we all love and transforms it into a satisfying, hands-off dinner. The process creates a wonderfully cozy and aromatic kitchen, which for me, is the real heart of any home.
How it fits in today’s cooking
This recipe absolutely thrives in modern kitchens because it delivers immense flavor with minimal effort. Busy weeknights demand exactly this kind of set-it-and-forget-it meal. Furthermore, its rich, comforting profile makes it a fantastic centerpiece for casual gatherings. It fits seamlessly into a rotation of easy dinners that everyone enjoys.
Today’s cooks often adapt it for different diets. For instance, many use a Greek yogurt based dip for a lighter version. Others might serve it alongside a bright, crunchy salad to cut through the richness. You can find inspiration for the perfect side in our collection of easy salad recipes.
Moreover, this dish emb
odies the current trend of nostalgic remixes. It takes a beloved snack and turns it into a legitimate dinner. The result feels both familiar and excitingly new. For a different but equally comforting chicken dinner, you might also love our take on a slow cooker honey garlic chicken. Ultimately, French Onion Dip Chicken Thighs proves that the best comfort food never goes out of style.
Taste and Texture
What makes it delicious
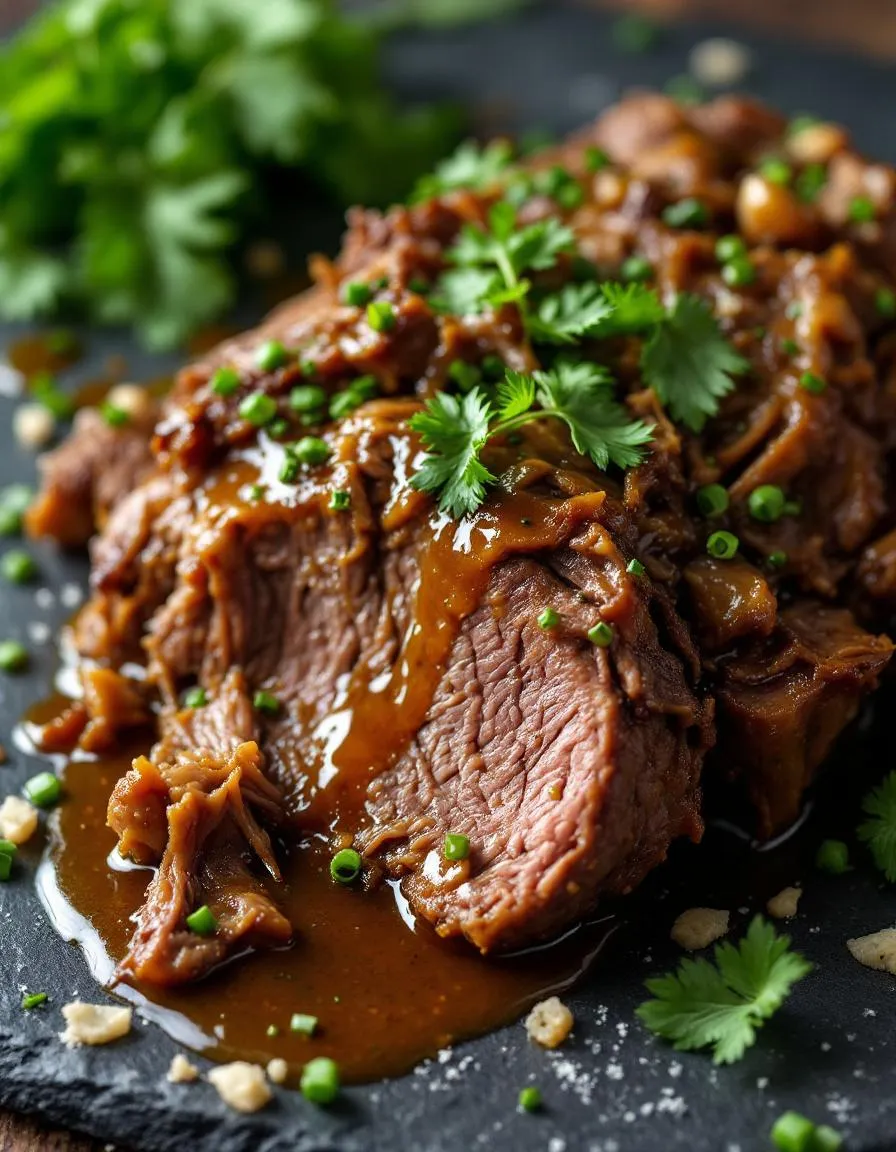
This dish delivers a powerful savory punch from the very first bite. The chicken thighs become incredibly juicy and tender, while the French onion dip forms a rich, golden-brown crust that is packed with umami flavor. Each mouthful offers a delightful contrast between the succulent, fall-off-the-bone meat and the slightly crisp, herb-flecked topping. Moreover, the sweet, caramelized onions and the sharp, salty notes from the parmesan cheese create a deeply satisfying and complex taste. Ultimately, the aroma that fills your kitchen is utterly irresistible, smelling of savory herbs and roasted onion. The overall experience of these French Onion Dip Chicken Thighs is both comforting and gourmet.
Boosting the flavor
For an extra flavor boost, consider mixing a tablespoon of Worcestershire sauce into your French onion dip before slathering it on the chicken. This simple addition will deepen the savory, umami profile of the entire dish. Alternatively, you can top the cooked chicken with a sprinkle of crispy fried onions or fresh, chopped chives for a fantastic textural contrast. If you enjoy a bit of heat, a pinch of smoked paprika or cayenne pepper blended into the dip works wonderfully. Furthermore, serving these flavorful thighs alongside a cool, creamy side can really make the meal pop. For instance, a simple cucumber salad provides a refreshing counterpoint. Similarly, a scoop of garlic mashed potatoes is the ultimate comforting companion for soaking up all the delicious pan juices.
First, always pat your chicken thighs completely dry with paper towels; this step ensures the seasoning and dip stick properly for a flavorful crust. Furthermore, generously season the chicken underneath the skin and on all sides to build a deep, savory flavor profile. For the crispiest skin, arrange the chicken thighs in a single layer in your baking dish, making sure they do not touch. Finally, always let your French Onion Dip Chicken Thighs rest for a few minutes before serving to allow the juices to redistribute.
Mistakes to avoid
A common mistake is overcrowding the pan, which steams the chicken instead of roasting it; consequently, you will miss out on the crispy texture. Instead, use a large enough baking dish to give each piece some space. Additionally, avoid under-seasoning the meat itself, as the dip primarily coats the outside. For more guidance on getting the perfect cook every time, check out our guide on how to tell when chicken is done. Moreover, do not skip searing the chicken skin first if you have time, as this adds an incredible layer of flavor and crunch. If you are unsure about cookware, our review of the best bakeware for chicken can help you choose the right pan for the job.
g-suggestions">Serving and Pairing Suggestions
How to serve this dish
Impress your guests by presenting these French Onion Dip Chicken Thighs on a large rustic platter. For a truly stunning presentation, drizzle any remaining pan juices over the top. Next, sprinkle a handful of freshly chopped chives or parsley for a vibrant pop of color. This dish truly shines at casual gatherings, making it a perfect centerpiece for game day or a weekend family dinner. Ultimately, its comforting aroma and golden-brown appearance will have everyone eager to dig in.
What goes well with it
For a classic comfort food experience, pair these savory chicken thighs with a side of creamy mashed potatoes. The potatoes beautifully soak up the rich, onion-infused sauce. Alternatively, a crisp and simple arugula salad provides a refreshing, peppery contrast that cuts through the dish’s richness. Furthermore, a chilled glass of pale ale or a crisp Chardonnay wonderfully complements the deep umami flavors. If you need the perfect side, our recipe for Garlic Herb Mashed Potatoes is an ideal match. For a lighter option, try our Easy Arugula Salad with a lemon vinaigrette to complete your meal.
math-faq-block">
What is French Onion Dip Chicken Thighs made of?
This simple dish primarily uses bone-in, skin-on chicken thighs and a container of store-bought French onion dip. Many recipes also include additional flavor enhancers like dry onion soup mix, garlic powder, and crispy fried onions for a crunchy topping. The combination creates a creamy, savory sauce that perfectly coats the chicken as it bakes.
Can I use boneless chicken thighs for French Onion Dip Chicken?
Yes, you can absolutely use boneless, skinless chicken thighs for this recipe. Just be aware that they will cook faster than bone-in thighs, so you should reduce the baking time by about 10-15 minutes to prevent them from drying out. The result will still be incredibly tender and flavorful French Onion Dip Chicken Thighs.
How long do you bake chicken thighs with French onion dip?
For bone-in, skin-on chicken thighs, bake them at 375°F (190°C) for approximately 45-55 minutes. The chicken is done when the internal temperature reaches 165°F (74°C) and the skin is golden brown and crispy. The baking time ensures the French Onion Dip Chicken Thighs are cooked through and the sauce is beautifully bubbly.
ank-math-faq-item">
What to serve with French Onion Dip Chicken Thighs?
The rich and savory flavor of this chicken pairs wonderfully with simple sides that can soak up the delicious sauce. Great options include mashed potatoes, egg noodles, white rice, or a crusty piece of bread. For a lighter meal, try serving it with a crisp green salad or steamed green beans.
Easy Slow Cooker Garlic Herb Pot Roast Recipe
Introduction
There is something incredibly comforting about walking into a home filled with the rich, savory aroma of a meal that has been simmering all day. Furthermore, it promises a dinner that requires no last-minute fuss, just pure, hearty satisfaction. This magical experience is exactly what you get with our ultimate Slow Cooker Garlic Herb Pot Roast. Ultimately, it transforms simple, affordable ingredients into a tender, flavor-packed masterpiece with minimal effort on your part.
This Slow Cooker Garlic Herb Pot Roast is the epitome of comfort food, designed for busy home cooks who refuse to sacrifice flavor for convenience. Essentially, we take a humble chuck roast and slowly braise it in a savory broth infused with fresh garlic, rosemary, and thyme until it becomes impossibly tender. The result is a complete, satisfying meal with melt-in-your-mouth beef and vegetables that the entire family will adore. This recipe matters because it delivers restaurant-quality taste with a set-it-and-forget-it approach, making a luxurious dinner achievable on even the most hectic weeknights. Moreover, it perfectly fits our blog’s mission to provide reliable, crowd-pleasing recipes that build confidence in the kitchen. For instance, if you are new to using your appliance, this dish is a fantastic starting point, much like our popular guide on how to cook beef chuck roast. Additionally, the hands-off cooking method frees you up to tackle other things, whether that is helping with homework or simply relaxing. Ultimately, this Slow Cooker Garlic Herb Pot Roast proves that you do not need complicated techniques to create a deeply flavorful and memorable meal. In fact, the slow cooker does all the heavy lifting, gently breaking down the connective tissues in the meat. Consequently, every single bite is moist, succulent, and infused with the robust garlic and herb flavors. This method is a game-changer for meal prepping as well, as the leftovers taste even better the next day. For another fantastic way to enjoy your slow cooker, explore our slow cooker honey garlic chicken thighs.
Why I Love This Recipe
This Slow Cooker Garlic Herb Pot Roast holds a special place in my heart because it was the first meal I truly mastered for my family. I love how the simple act of layering ingredients in the morning leads to a triumphant dinner that feels like a warm hug after a long day. The consistent perfection of the tender meat and the way the garlic and herbs perfume the entire house creates a sense of accomplishment and warmth that I never tire of. It is my go-to recipe for creating lasting memories around the dinner table without any stress.
Health and Nutrition
Why it’s good for your body
Slow Cooker Garlic Herb Pot Roast delivers a powerful combination of essential nutrients your body needs to thrive. Firstly, this meal provides a fantastic source of high-quality protein from the beef, which is crucial for building and repairing muscle tissue. Moreover, the slow cooking process gently breaks down the meat’s collagen, making these proteins easier for your body to absorb.
Additionally, the vegetables in this dish contribute their own impressive health profile. For instance, carrots offer a significant dose of beta-carotene, which supports healthy vision and immune function. The herbs and garlic not only create incredible flavor but also deliver antioxidants that combat oxidative stress in your body.
Furthermore, preparing a Slow Cooker Garlic Herb Pot Roast allows you to control the ingredients, ensuring a meal low in processed additives and sodium. Ultimately, this cooking method helps retain more vitamins and minerals compared to other high-heat techniques. Therefore, you can feel great about serving a meal that is as nourishing as it is delicious.
How it fits in a healthy lifestyle
This pot roast fits seamlessly into a balanced and mindful eating plan. It naturally aligns with gluten-free and dairy-free lifestyles, making it a fantastic option for those with specific dietary needs. The high protein content helps promote satiety, keeping you feeling full and satisfied longer, which can support weight management goals.
For a complete, well-rounded plate, simply pair your Slow Cooker Garlic Herb Pot Roast with a simple side salad or some steamed greens. This approach to building your meal is a cornerstone of practical healthy eating habits you can maintain. It’s the perfect make-ahead meal for busy weekdays, helping you avoid less nutritious last-minute takeout options.
Planning nutritious dinners like this one for the whole week is easier than you think. If you love the convenience of this recipe, you can explore more ideas in our guide on easy meal prep ideas to keep your healthy lifestyle on track without spending hours in the kitchen.
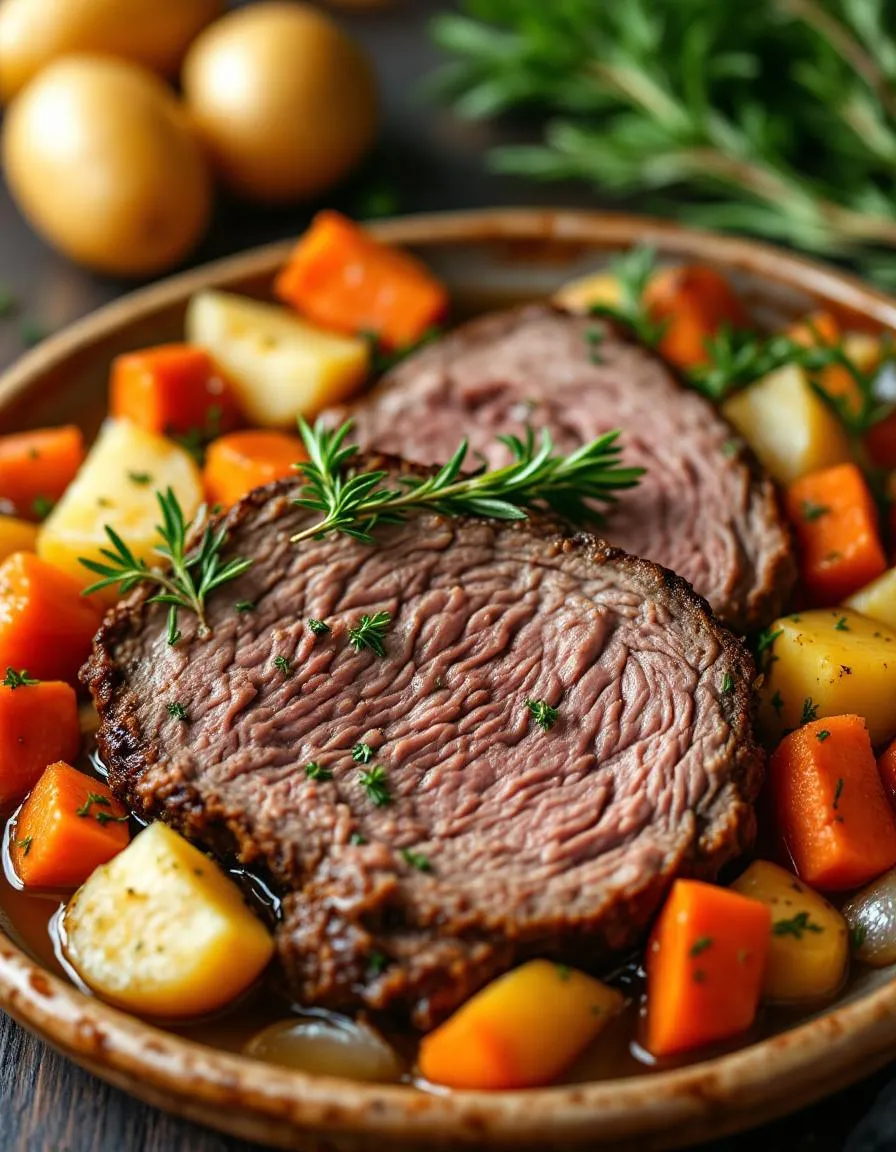
A tender and flavorful pot roast slow-cooked with garlic, herbs, and vegetables for a comforting meal.
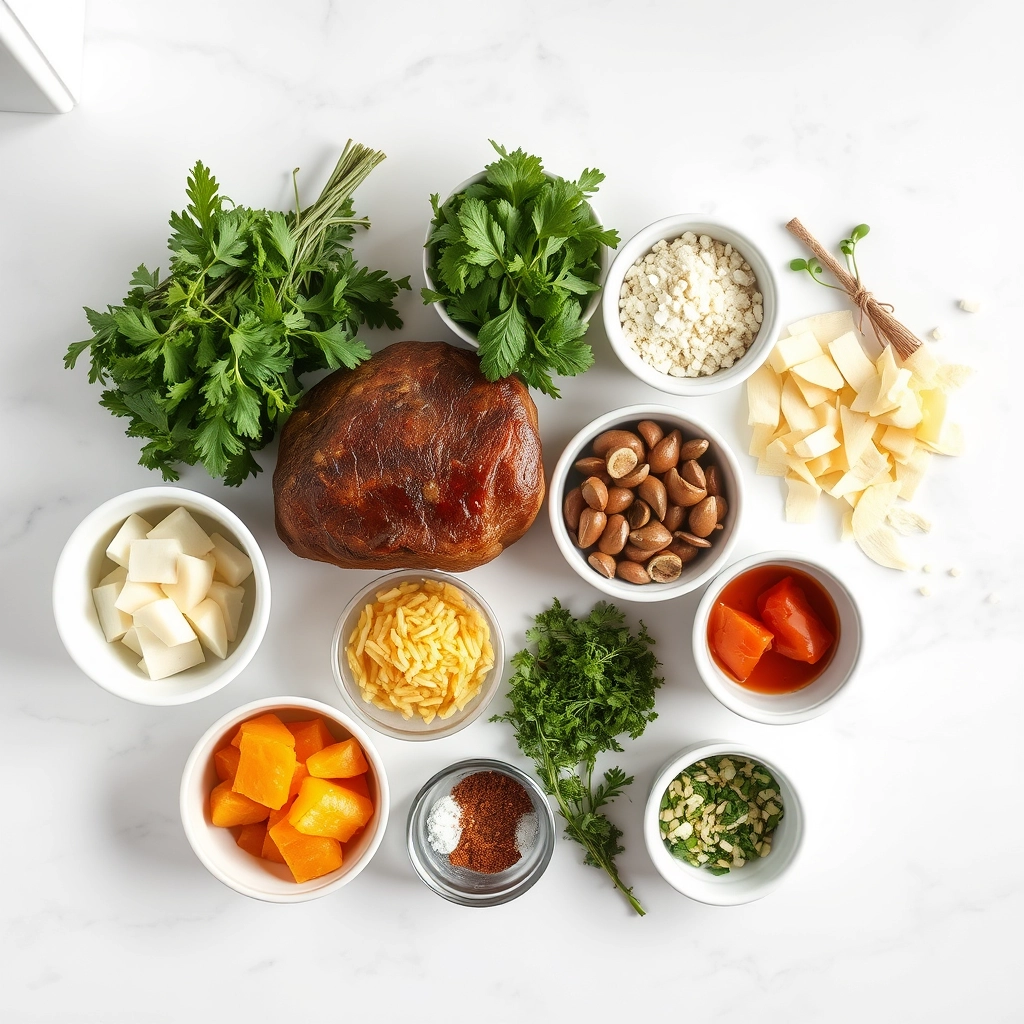
Ingredients
Scale
For the Crust:
3–4 lb chuck roast
1 tbsp olive oil
1 tsp salt
1/2 tsp black pepper
1 tsp dried thyme
1 tsp dried rosemary
6 cloves garlic, minced
1 large onion, sliced
4 carrots, chopped
4 potatoes, cubed
2 cups beef broth
2 tbsp Worcestershire sauce
Instructions
1. Prepare the Crust:
Season the chuck roast with salt, pepper, thyme, and rosemary.
Heat olive oil in a skillet and sear the roast on all sides until browned.
Place onions, carrots, and potatoes in the slow cooker.
Add the seared roast on top of the vegetables.
Sprinkle minced garlic over the roast and pour in beef broth and Worcestershire sauce.
Cover and cook on low for 8 hours or high for 5-6 hours, until meat is tender.
Let rest for 10 minutes before slicing and serving with vegetables and broth.
Notes
You can customize the seasonings to taste.
How to Prepare This Dish
Steps and time-saving tips
First, pat your chuck roast completely dry with paper towels. This crucial step guarantees a beautiful sear. Meanwhile, generously season all sides of the meat with salt and pepper. Next, heat a tablespoon of oil in a large skillet over medium-high heat. Carefully sear the roast for a few minutes per side until a deep brown crust forms. This process locks in incredible flavor. Then, transfer the meat to your slow cooker. Quickly toss your chopped carrots, potatoes, and onions around the roast. In a small bowl, whisk together the beef broth, minced garlic, tomato paste, and all those fragrant herbs like rosemary and thyme. Pour this savory liquid evenly over everything. Finally, place the lid on the slow cooker and set it to low for 8-9 hours. For a time-saving tip, chop all your vegetables the night before and store them in an airtight container in the fridge. Additionally, you can mix your herb and broth mixture ahead of time. Your house will smell absolutely amazing as this Slow Cooker Garlic Herb Pot Roast cooks to fall-apart perfection.
and-learned-from">Mistakes I’ve made and learned from
I used to skip searing the roast, thinking it was an unnecessary extra dish to wash. However, I learned the hard way that this step is non-negotiable for building a rich, deep flavor foundation. Searing creates a Maillard reaction that your slow cooker simply cannot replicate on its own. Another mistake was overcrowding the vegetables. I’d pack them in too tightly, which resulted in some pieces steaming instead of roasting in the savory juices. Now, I use a larger crock or slightly fewer veggies to ensure everything cooks evenly. For more on getting the most from your appliance, my guide on slow cooker maintenance and care has been a lifesaver. And if you’re ever unsure about doneness, especially with different cuts of meat, my article on checking beef temperatures takes all the guesswork out of the process.
Cultural Connection and Variations
Where this recipe comes from
My grandmother’s Slow Cooker Garlic Herb Pot Roast always meant the whole family was gathering. She would prepare it for Sunday dinners after church, filling her small house with the most incredible aroma. However, this style of pot roast actually has deep roots in French cooking, specifically the method known as “à la mode,” which means braising a tougher cut of beef until it becomes incredibly tender. Over time, immigrants brought this technique to America, where it became a cornerstone of heartland comfort food.
Different regions put t
heir own spin on this classic. For instance, in the American South, cooks often add a cup of strong coffee to the braising liquid for depth. Meanwhile, in parts of Europe, they might use red wine and a bouquet garni instead of the dried herbs we commonly use. My family’s version, a true Slow Cooker Garlic Herb Pot Roast, leans heavily on garlic and rosemary, which always reminds me of my grandfather’s herb garden.
Ultimately, every family seems to have their own cherished variation, passing down subtle tweaks through the generations. This dish truly connects us to our past while warming our present-day tables.
How it fits in today’s cooking
This classic dish absolutely thrives in our modern kitchens. It seamlessly fits into our busy schedules because the slow cooker does most of the work. Many home cooks now use it for effortless weeknight dinners that feel special, not just for big holiday feasts. Furthermore, its versatility is a huge bonus. You can easily adapt it to be gluten-free or even dairy-free without losing any of its comforting essence.
Its role as a centerpie
ce for seasonal gatherings also remains strong. A pot roast embodies warmth and abundance, making it perfect for a cozy autumn or winter meal. In fact, it pairs wonderfully with other traditional sides. For a complete comfort food experience, consider serving it alongside some easy homemade biscuits to soak up the delicious juices.
And let’s not forget about the leftovers. Today’s cooks brilliantly repurpose the tender beef into entirely new meals, like sandwiches or a hearty beef stew. If you find yourself with extra potatoes, you can always transform them into a fantastic breakfast potato hash the next morning. This adaptability ensures the Slow Cooker Garlic Herb Pot Roast remains a beloved and practical choice for contemporary life.
Taste and Texture
What makes it delicious
This Slow Cooker Garlic Herb Pot Roast delivers a deeply savory and comforting experience. First, the aroma of garlic and rosemary will fill your kitchen, creating an incredibly fragrant and inviting atmosphere. Each bite of the meat melts in your mouth with a succulent, fork-tender texture that effortlessly pulls apart. Meanwhile, the carrots and potatoes soak up the rich, herby juices, becoming wonderfully soft and flavorful. Ultimately, the slow cooking process creates a symphony of hearty, robust flavors that is both satisfying and nostalgic.
r">Boosting the flavor
You can easily elevate your Slow Cooker Garlic Herb Pot Roast with a few creative twists. For instance, try adding a splash of red wine or a tablespoon of tomato paste to the broth for a richer, more complex depth of flavor. Additionally, serving it over a bed of creamy mashed potatoes makes for an unforgettable meal. Furthermore, a simple gremolata or herb sprinkle right before serving introduces a bright, fresh contrast. For more inspiration on building the perfect side dish, explore our favorite easy weeknight dinners. Finally, a drizzle of our quick simple pan sauces can add a delightful finishing touch to each plate.
Tips for Success
Best practices for results
First, always sear your roast on all sides to create a flavorful crust that locks in juices. Furthermore, place your chopped vegetables at the bottom of the slow cooker to act as a natural rack. Next, generously season the meat with salt and pepper before adding your herbs. Finally, avoid lifting the lid during cooking so you don’t release valuable heat and steam. Following these steps guarantees your Slow Cooker Garlic Herb Pot Roast turns out perfectly tender and full of flavor every single time.
>Mistakes to avoid
A common mistake is using a roast that is too lean, which can result in a dry final dish. Instead, choose a well-marbled cut like chuck roast for the best results. Additionally, do not skip the searing step; otherwise, you will miss out on a ton of deep, rich flavor. Moreover, be careful not to overfill your slow cooker with liquid, as the roast will release its own juices. For more guidance on selecting the right cut, check out our guide on how to choose beef cuts. Also, if your gravy turns out too thin, you can easily thicken it using a method from our tips to thicken slow cooker gravy.
Serving and Pairing Suggestions
How to serve this dish
Present your Slow Cooker Garlic Herb Pot Roast family-style for a truly inviting table. First, carefully transfer the entire roast to a large, elegant platter. Then, generously spoon the rich cooking juices and tender vegetables all around it. For a final touch of freshness, sprinkle some chopped parsley or rosemary over the top. This beautiful presentation makes the meal perfect for Sunday dinners or holiday gatherings. Ultimately, the incredible aroma will draw everyone to the table.
What goes well with it
For a classic pairing, serve this hearty pot roast alongside a creamy mashed potato recipe. The smooth, buttery potatoes beautifully soak up the savory garlic herb jus. Alternatively, a bright, crisp side salad provides a refreshing contrast to the rich meat. Furthermore, a robust red wine like a Cabernet Sauvignon complements the deep flavors perfectly. Finally, a slice of our easy homemade focaccia is ideal for mopping up every last bit of the delicious sauce.
What is the best cut of meat for a Slow Cooker Garlic Herb Pot Roast?
Chuck roast is the best and most popular cut for this dish. It has a good amount of marbling and connective tissue, which breaks down during the long, slow cooking process, resulting in a tender and flavorful Slow Cooker Garlic Herb Pot Roast. Other good options include rump roast or bottom round.
Do you have to brown a pot roast before slow cooking?
While not strictly mandatory, browning the roast first is highly recommended. Searing the meat creates a flavorful crust through the Maillard reaction, which adds significant depth and richness to the overall dish. This extra step greatly enhances the final flavor of your Slow Cooker Garlic Herb Pot Roast.
ank-math-faq-item">
Can I put raw potatoes in the slow cooker with the roast?
Yes, you can absolutely add raw potatoes directly into the slow cooker. Cut them into large, uniform chunks (about 1.5 to 2 inches) so they hold their shape and cook evenly alongside the meat. They will absorb the delicious garlic herb flavors and become perfectly tender.
How long does it take to cook a pot roast on low in a slow cooker?
For a standard 3-4 pound roast, cook on the LOW setting for 8-10 hours. This long, gentle cooking time is essential for breaking down tough fibers and creating a fall-apart tender pot roast. The roast is done when it easily shreds with a fork.
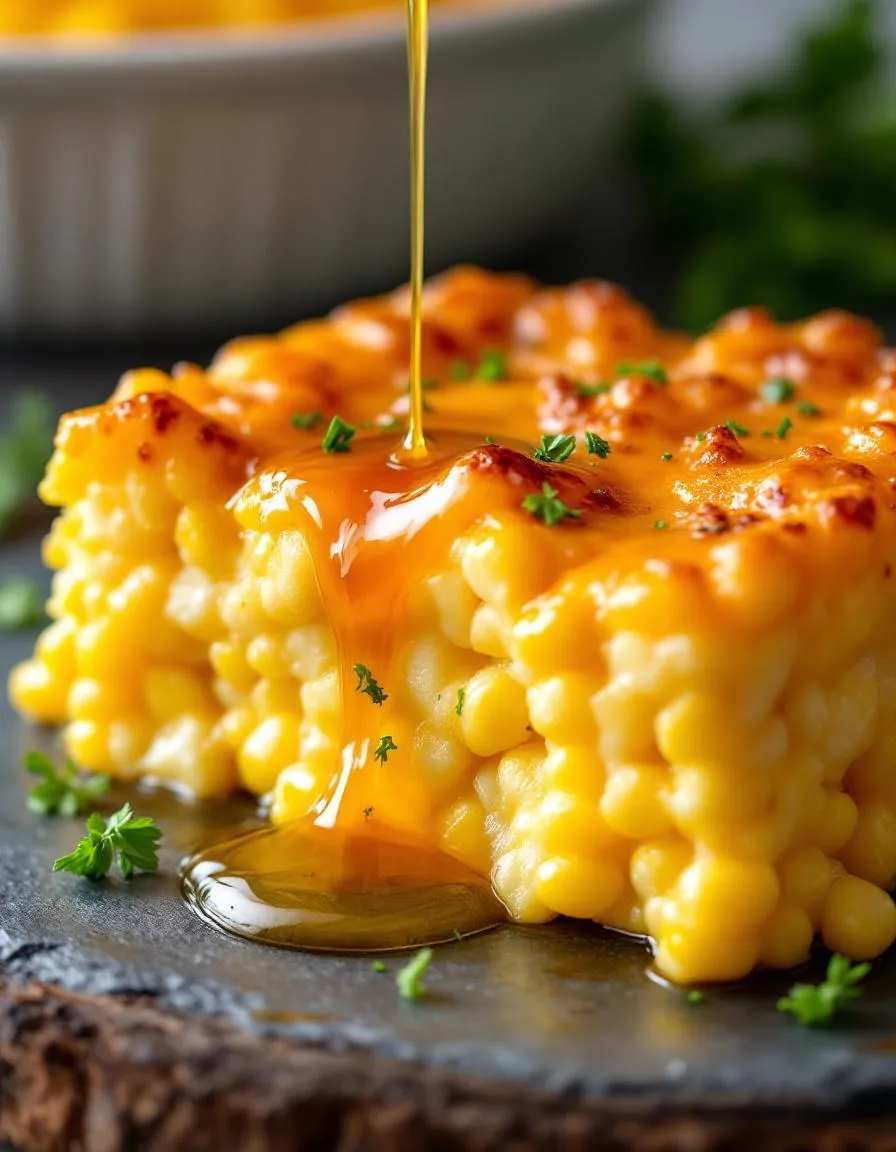
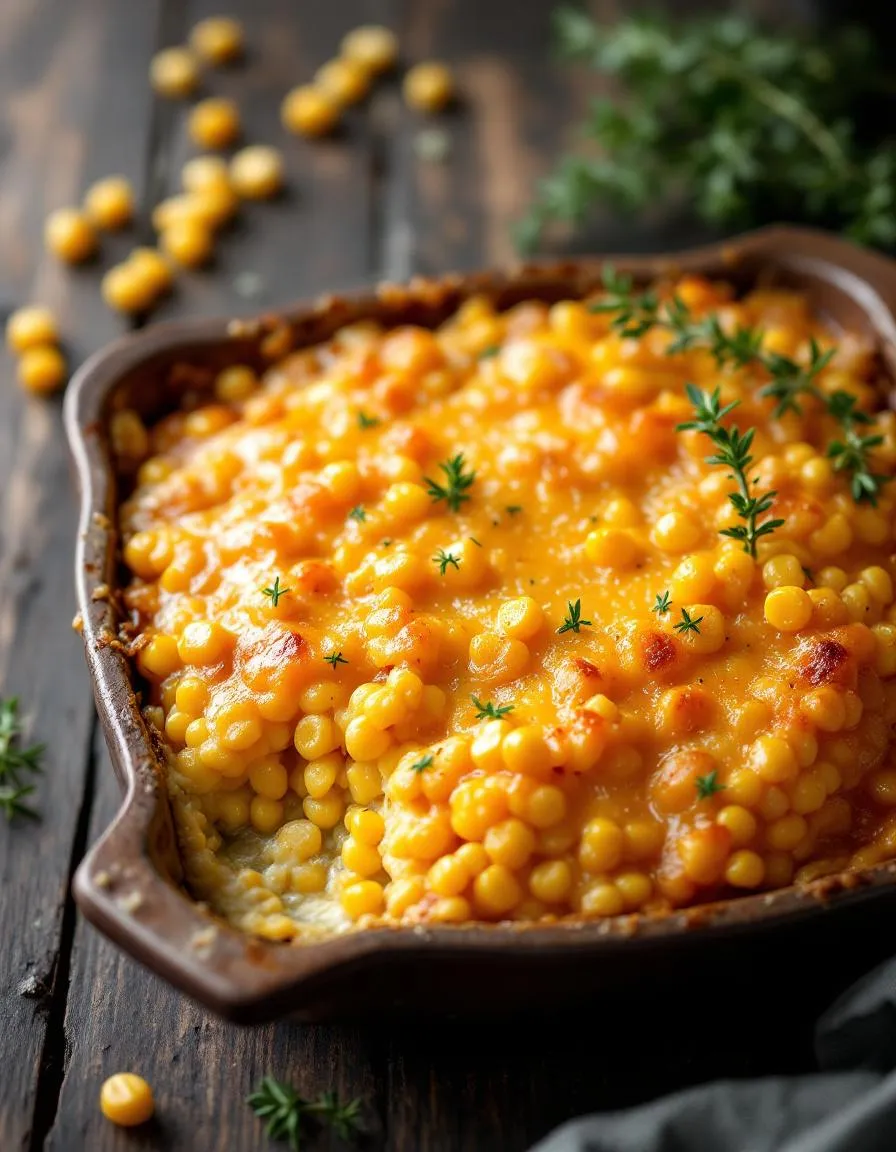
Best Honey-Glazed Corn Casserole Recipe
Introduction
Is there anything more comforting than the aroma of a home-cooked side dish wafting from your oven? This feeling of warmth and nostalgia is exactly what you get with our incredible Honey-Glazed Corn Casserole. Moreover, this dish promises to become the star of your dinner table, offering a perfect blend of sweet and savory that everyone will adore. Ultimately, it transforms simple ingredients into a truly memorable experience.
This Honey-Glazed Corn Casserole is a delightful twist on a classic comfort food. It combines creamy corn, a rich custard base, and a sweet, crackly honey glaze that caramelizes beautifully in the oven. The dish matters because it strikes a perfect balance; it feels indulgent and special enough for a holiday feast, yet it remains incredibly simple to prepare for a weeknight meal. Furthermore, it fits our blog’s tone perfectly, as we always strive to share recipes that are both approachable and exceptionally delicious. This Honey-Glazed Corn Casserole embodies our philosophy that great food doesn’t have to be complicated. If you are looking for more classic sides that deliver on flavor, you must explore our ultimate guide to perfect mashed potatoes. For another sweet and savory vegetable dish that will surprise you, our maple roasted carrots are a must-try. This recipe uses pantry staples to create a side that is far greater than the sum of its parts, ensuring your Honey-Glazed Corn Casserole will earn a permanent spot in your recipe rotation.
Why I Love This Recipe
I have a deep personal connection to this Honey-Glazed Corn Casserole because it reminds me of my grandmother’s kitchen. She always believed that a touch of honey could make any dish feel like a celebration. Consequently, every time I pull this golden, bubbling casserole from the oven, I am transported back to those cherished family gatherings. I love how the recipe consistently delivers joy and comfort, creating new memories while honoring old ones.
Health and Nutrition
Why it’s good for your body
This Honey-Glazed Corn Casserole delivers a powerful nutritional punch. For instance, sweet corn provides essential fiber, which actively supports your digestive health and helps you feel full longer. Moreover, the natural honey glaze offers a more wholesome sweetness than refined sugars, giving you a quick energy boost without a major crash.
Additionally, this comforting dish supplies valuable vitamins and minerals. Corn contains B-vitamins, which naturally help your body convert food into energy. Furthermore, depending on your recipe additions like eggs or dairy, this Honey-Glazed Corn Casserole can also contribute to your daily protein and calcium intake for stronger muscles and bones.
Ultimately, the combination of complex carbs and fiber creates a satisfying meal that stabilizes your blood sugar. Therefore, you can enjoy this delicious Honey-Glazed Corn Casserole knowing it fuels your body effectively.
How it fits in a healthy lifestyle
This casserole fits beautifully into a balanced eating plan. You can easily serve it as a hearty side dish that complements a lean protein source, like grilled chicken or fish, for a complete and satisfying meal. It also makes for a fantastic meatless main course option that doesn’t skimp on flavor or substance.
For those with specific dietary needs, this dish is naturally gluten-free when you use certified gluten-free ingredients. The fiber content also supports a heart-healthy diet. If you are looking for more ways to incorporate wholesome sides into your routine, explore our guide on easy meal prep ideas for busy weeknights. Remember, enjoying comforting foods is a key part of a sustainable healthy lifestyle. For another nutrient-packed side dish that pairs perfectly with any meal, try our herb-roasted vegetables.
A sweet and savory corn casserole with a sticky honey glaze, perfect for family dinners or holiday gatherings.
Ingredients
Scale
For the Crust:
2 cups corn kernels (fresh or frozen)
1 cup cream-style corn
1/2 cup sour cream
1/4 cup melted butter
1/4 cup honey
1 large egg, beaten
1 cup shredded cheddar cheese
1/2 cup cornmeal
1/4 cup all-purpose flour
1 tsp baking powder
1/2 tsp salt
1/4 tsp black pepper
Instructions
1. Prepare the Crust:
Preheat oven to 375°F (190°C) and grease a 2-quart baking dish.
In a large bowl, mix corn kernels, cream-style corn, sour cream, melted butter, honey, and beaten egg until well combined.
Stir in shredded cheddar cheese, cornmeal, flour, baking powder, salt, and pepper until evenly incorporated.
Pour mixture into the prepared baking dish and smooth the top.
Bake for 25-30 minutes, or until the top is golden and the edges are bubbly.
Let cool for 5 minutes before serving.
Notes
You can customize the seasonings to taste.
s-dish">How to Prepare This Dish
Steps and time-saving tips
First, preheat your oven to 375°F and generously grease your favorite casserole dish. Meanwhile, grab a large mixing bowl and whisk together the sour cream, melted butter, and eggs until the mixture is completely smooth and creamy. Next, gently fold in the whole kernel corn, creamed corn, and your cornbread mix. Importantly, do not overmix the batter; a few lumps are perfectly fine and will keep your final Honey-Glazed Corn Casserole wonderfully tender. Pour this hearty mixture directly into your prepared dish and use a spatula to spread it into a beautifully even layer. Slide the dish into your preheated oven and bake for approximately 45 to 50 minutes. While the casserole bakes, quickly whisk together the honey, a bit more melted butter, and a pinch of salt for your simple glaze. Carefully remove the partially baked casserole from the oven and immediately drizzle that glossy honey glaze all over the golden top. Finally, pop it back in for just 5 to 7 more minutes until the entire top is bubbling and caramelized. For a fantastic time-saving tip, you can mix the wet ingredients the night before and simply stir in the dry components right before baking.
Mistakes I’ve made and learned from
I have absolutely learned a few lessons the hard way with this Honey-Glazed Corn Casserole. My biggest mistake was impatience—I used to pull it out of the oven too early, resulting in a soupy, undercooked center that no amount of extra baking could fully fix. Now I religiously wait until the edges are deeply golden and pull away from the dish. Another common error I made was overmixing the batter, which led to a dense, tough texture instead of the light, spoonable side dish we all love. I also learned that the type of dish matters immensely; a glass or ceramic dish bakes more evenly than a metal pan, which can cause the edges to burn before the center sets. For more on selecting the right tools, my guide on essential baking tools covers this in detail. And if you’re ever doubting your oven’s accuracy, which was another one of my issues, I highly recommend checking your temperature with an oven thermometer to ensure perfect results every single time.
n-and-vartiations">Cultural Connection and Variations
Where this recipe comes from
This Honey-Glazed Corn Casserole recipe feels like a warm hug from my grandmother’s kitchen. She always prepared it for our large family gatherings, claiming the dish blended her Midwestern roots with a touch of Southern charm. Interestingly, communities across the globe put their own spin on similar corn-based bakes. For instance, Mexican esquites often feature creamy corn with chili and lime, while in parts of Europe, they might incorporate savory herbs and local cheeses. My family’s version, however, always celebrated the sweet and savory balance that the honey glaze provides. Consequently, every Thanksgiving table boasted this golden, bubbling dish right next to the turkey. Ultimately, this Honey-Glazed Corn Casserole became our edible heirloom, connecting generations through simple, heartfelt ingredients.
How it fits in today’s cooking
Today, this casserole absolutely holds its place as a beloved comfort food classic. Modern cooks frequently adapt it to fit various dietary needs, for example, by using plant-based creams or adding a spicy kick with jalapeños. Furthermore, its versatility makes it a star performer for both weeknight dinners and elaborate holiday spreads. You can easily pair it with other make-ahead sides for a stress-free feast, much like planning a menu that includes perfect mashed potatoes. Similarly, its comforting nature makes it an ideal companion to a cozy main course, such as a classic pot roast, on a chilly evening. Therefore, this dish seamlessly bridges the gap between tradition and contemporary convenience, ensuring its spot on our tables for years to come.
Taste and Texture
What makes it delicious
This Honey-Glazed Corn Casserole delivers a magnificent sweet and savory experience. Initially, you notice the fragrant honey glaze caramelizing into a slightly crisp top layer. Then, your spoon breaks through to a luxuriously creamy and moist interior bursting with sweet corn kernels. Ultimately, each bite offers a perfect harmony of rich, custardy comfort and pops of juicy sweetness. The overall effect is both comforting and sophisticated, making this Honey-Glazed Corn Casserole a true crowd-pleaser.
r">Boosting the flavor
For an even more dynamic dish, consider a few simple tweaks. Firstly, fold in a cup of shredded sharp cheddar cheese to introduce a delightful tangy contrast. Alternatively, top your finished casserole with crispy fried onions or chopped fresh chives for a fantastic crunch. If you adore a smoky flavor, a pinch of smoked paprika or a dash of hot sauce beautifully deepens the profile. For a complete meal, this casserole pairs wonderfully with our Herb-Roasted Chicken. Finally, don’t forget a side of our Garlic Herb Dinner Rolls to soak up every last bit of that delicious honey glaze.
Tips for Success
Best practices for results
First, always use full-fat dairy for the creamiest texture in your Honey-Glazed Corn Casserole. Additionally, thoroughly drain the canned corn to prevent a watery final dish. For the best flavor, however, use fresh corn when it is in season. Finally, let the casserole rest for ten minutes before serving so it sets perfectly.
>Mistakes to avoid
A common mistake is overmixing the batter, which unfortunately results in a dense casserole. Instead, gently fold the ingredients until they are just combined. Moreover, do not skip preheating your oven, as a consistent temperature is crucial for even cooking. For more guidance, read our article on common baking mistakes to avoid. Furthermore, ensure your baking dish is the correct size; otherwise, the custard might not set properly. Consequently, always refer to our baking pan conversion guide if you need to use a different dish.
Serving and Pairing Suggestions
How to serve this dish
For a truly stunning presentation, serve your Honey-Glazed Corn Casserole straight from the oven in its baking dish. Consequently, the golden, bubbling top will impress everyone at the table. Moreover, garnish each portion with a sprinkle of fresh chopped chives or parsley for a vibrant pop of color. This dish truly shines during holiday feasts or as the star of a comforting Sunday brunch. Ultimately, its sweet and savory profile makes it a guaranteed crowd-pleaser.
What goes well with it
This Honey-Glazed Corn Casserole pairs beautifully with a variety of mains and sides. For instance, its sweet notes perfectly complement the smoky, savory flavors of our Smoked Pork Chops. Alternatively, serve it alongside a crisp, refreshing salad to balance its richness. Furthermore, a chilled glass of slightly sweet Riesling or a hoppy IPA wonderfully cuts through the dish’s creamy texture. Finally, for a complete Southern-inspired meal, consider adding our classic Buttermilk Biscuits to soak up every last delicious bite.
What is the best way to make a honey glaze for corn casserole?
The best honey glaze for corn casserole is simple and enhances the natural sweetness. Whisk together equal parts honey and melted butter, then add a pinch of salt and a dash of smoked paprika for depth. Drizzle this glaze over the casserole before baking to create a beautifully caramelized, sweet crust on your Honey-Glazed Corn Casserole.
Can I make honey-glazed corn casserole ahead of time?
Yes, you can assemble the casserole a day in advance. Prepare the dish without the final glaze, cover it tightly, and refrigerate. When ready to bake, let it sit at room temperature for 20-30 minutes, add the honey glaze, and then bake as directed. The texture of the make-ahead Honey-Glazed Corn Casserole remains perfectly creamy.
ank-math-faq-item">
What can I add to corn casserole for more flavor?
To boost flavor, consider adding shredded sharp cheddar cheese, diced green chiles, or crispy crumbled bacon into the batter. Fresh herbs like thyme or chives also work wonderfully. These additions complement the sweet and savory profile of the honey glaze without overpowering the classic comfort food taste.
How do I prevent my corn casserole from being too runny?
To avoid a runny consistency, ensure you thoroughly drain any canned corn or creamed corn you use. Letting the batter rest for 5-10 minutes before baking allows the ingredients to fully hydrate and thicken. Also, make sure to bake it until the center is fully set and a toothpick inserted comes out clean.
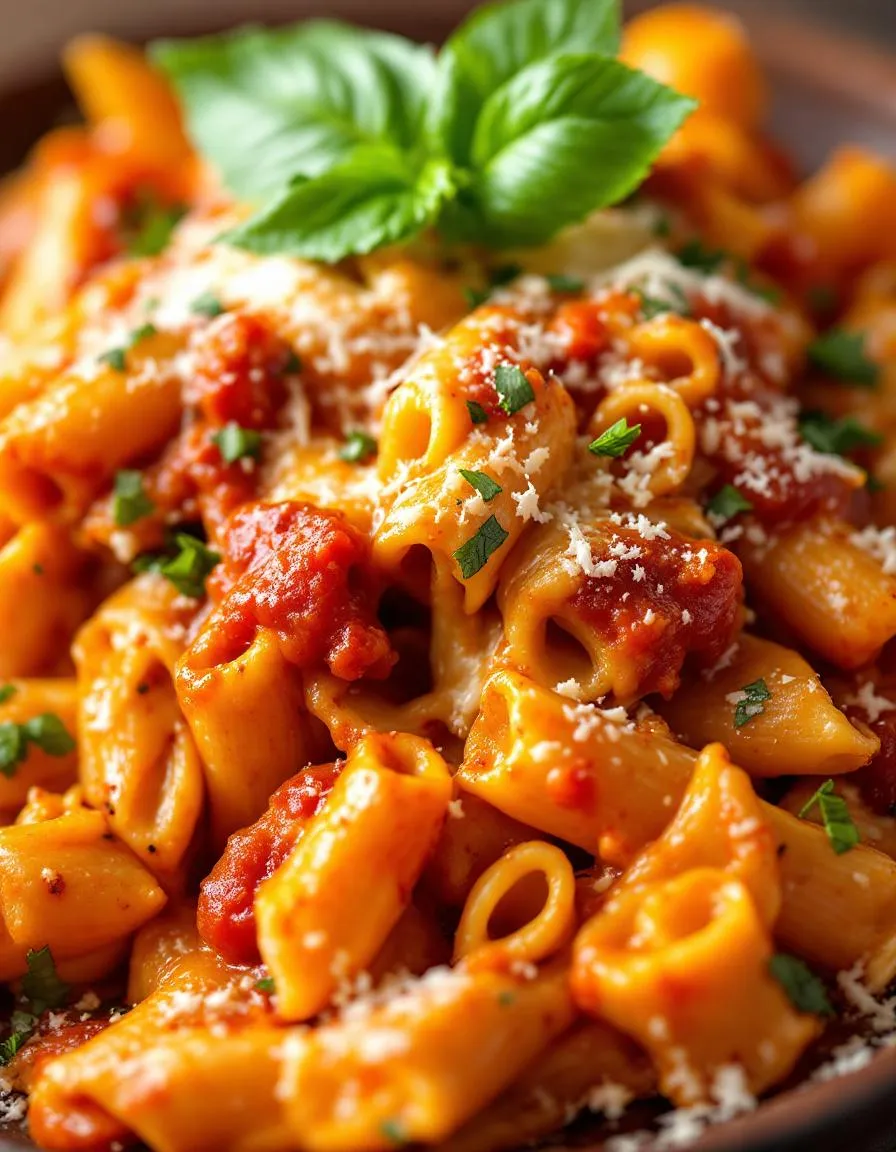
Easy Cheesy Pasta Bake with Pumpkin-Tomato Sauce
Introduction
Is there anything more comforting than a bubbling, golden casserole fresh from the oven? Especially when it promises the ultimate cozy dinner with minimal fuss. This Cheesy Pasta Bake with Pumpkin-Tomato Sauce (Vegetarian) delivers exactly that. It wraps you in a warm hug of flavor and turns an ordinary weeknight into something special. Furthermore, it solves the eternal question of what to cook that will please everyone at the table without keeping you tied to the stove for hours.
This Cheesy Pasta Bake with Pumpkin-Tomato Sauce (Vegetarian) is a hearty, satisfying meal that masterfully combines tender pasta with a uniquely rich and velvety sauce. Essentially, we create a robust tomato base and then enrich it with creamy, sweet pumpkin puree, which adds a incredible depth of flavor and a beautiful color. Subsequently, we toss the sauce with your favorite short pasta, layer it with a generous amount of mozzarella and parmesan, and bake it until the top is perfectly crisp and the interior is luxuriously gooey. This dish matters because it proves that vegetarian cooking can be just as indulgent and soul-satisfying as any other. Moreover, it cleverly uses pantry staples and seasonal produce to create a meal that feels both gourmet and accessible. It perfectly fits our blog’s tone of creating approachable, delicious, and reliable recipes that become instant family favorites. For instance, if you enjoy our Creamy Tomato Soup, you will adore the similar flavor profile in a heartier, baked form. Ultimately, this recipe is a celebration of simple ingredients transformed into pure comfort food magic, much like our beloved Vegetarian Shepherd’s Pie.
Why I Love This Recipe
This Cheesy Pasta Bake with Pumpkin-Tomato Sauce (Vegetarian) holds a special place in my heart because it became an instant hit with my family on the first try. I love how the pumpkin makes the sauce so luxuriously smooth and adds a subtle sweetness that balances the tomatoes beautifully. Honestly, the way the cheese forms that perfect, stretchy crust on top never fails to bring a smile to everyone’s face around the dinner table. It is my go-to recipe for potlucks and busy nights alike because it always feels like a treat, yet it comes together with such ease.
Health and Nutrition
Why it’s good for your body
This Cheesy Pasta Bake with Pumpkin-Tomato Sauce (Vegetarian) delivers a powerful nutritional punch. For instance, the pumpkin base provides a massive dose of vitamin A, which actively supports your immune system and vision. Moreover, tomatoes contribute lycopene, an antioxidant that becomes even more bioavailable when cooked into a sauce.
Additionally, the cheese and milk offer a fantastic source of calcium and protein for strong bones and muscles. Consequently, this dish provides a well-rounded meal that satisfies your hunger effectively. Furthermore, the complex carbohydrates from the pasta supply your body with sustained energy, preventing those dreaded mid-afternoon slumps.
Ultimately, you can feel great about serving this Cheesy Pasta Bake with Pumpkin-Tomato Sauce (Vegetarian) to your family. Finally, it cleverly combines indulgence with wholesome ingredients, making healthy eating an absolute delight.
How it fits in a healthy lifestyle
This comforting bake fits beautifully into a balanced diet. You can easily make it with whole wheat or legume-based pasta for an extra fiber and protein boost, keeping you fuller for longer. It’s a fantastic vegetarian option that doesn’t skimp on flavor or satisfaction, proving that plant-forward meals can be the star of the show.
For those managing specific dietary needs, this recipe is wonderfully adaptable. You can easily explore gluten-free pasta options to make it celiac-friendly. If you are looking for more ways to incorporate nutritious vegetables into your weekly rotation, our guide on meal prepping vegetables offers fantastic tips to save time. Think of this dish as a perfect canvas for your healthy lifestyle goals.
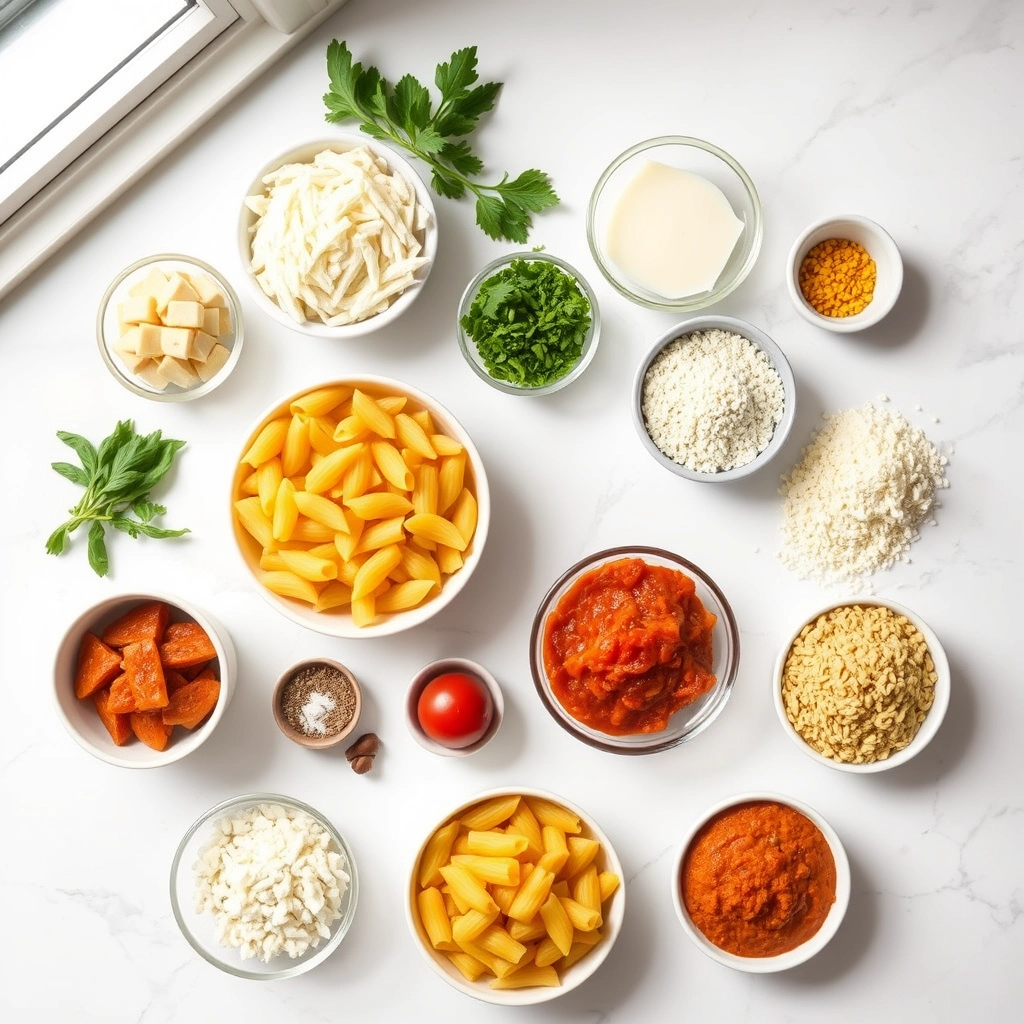
A comforting vegetarian pasta bake featuring a rich pumpkin-tomato sauce and a bubbly, golden cheese topping.
Ingredients
Scale
For the Crust:
12 oz penne pasta
1 tbsp olive oil
1 small onion, diced
2 cloves garlic, minced
1 (15 oz) can pumpkin puree
1 (15 oz) can crushed tomatoes
1 cup vegetable broth
1 tsp dried oregano
1/2 tsp smoked paprika
Salt and black pepper to taste
2 cups shredded mozzarella cheese
1/2 cup grated Parmesan cheese
Fresh basil for garnish (optional)
Instructions
1. Prepare the Crust:
Preheat oven to 375°F (190°C). Cook pasta according to package directions until al dente; drain and set aside.
Heat olive oil in a large skillet over medium heat. Add onion and cook until soft, about 5 minutes. Add garlic and cook for 1 minute more.
Stir in pumpkin puree, crushed tomatoes, vegetable broth, oregano, smoked paprika, salt, and pepper. Simmer for 10 minutes, stirring occasionally.
Combine the cooked pasta with the pumpkin-tomato sauce. Transfer to a greased 9×13 inch baking dish.
Top evenly with mozzarella and Parmesan cheeses. Bake for 20-25 minutes, until cheese is melted and bubbly.
Let stand for 5 minutes before serving. Garnish with fresh basil if desired.
Notes
You can customize the seasonings to taste.
How to Prepare This Dish
Steps and time-saving tips
First, preheat your oven to 375°F and generously grease a 9×13 inch baking dish. Cook your pasta according to package directions, but aim for al dente since it will continue cooking in the oven. Meanwhile, heat olive oil in a large skillet over medium heat. Sauté the onion and garlic until they become fragrant and translucent, which usually takes about five minutes. Stir in the canned pumpkin, crushed tomatoes, and your chosen herbs like oregano and a pinch of red pepper flakes. Let this vibrant Pumpkin-Tomato Sauce simmer for a good ten minutes; this allows the flavors to meld together beautifully. In a separate bowl, whisk together the ricotta, one cup of mozzarella, and an egg until the mixture is smooth and well-combined. Finally, combine the drained pasta, pumpkin-tomato sauce, and cheese mixture in your prepared baking dish, folding everything gently to ensure each piece of pasta gets coated. Top it all with the remaining mozzarella and a generous sprinkle of parmesan. Bake for 25-30 minutes, or until the cheese is gloriously bubbly and golden brown. For a perfect finish, let it rest for five minutes before serving. This step is crucial as it allows the Cheesy Pasta Bake to set, making it much easier to slice into neat portions.
Mistakes I’ve made and learned from
I used to pull my Cheesy Pasta Bake with Pumpkin-Tomato Sauce (Vegetarian) straight from the oven and dive right in, only to end up with a soupy, messy plate. I learned the hard way that letting it rest for those five crucial minutes is non-negotiable for the perfect slice. Another common blunder was overcooking the pasta initially, which resulted in a mushy final bake. Now, I always undercook it by a minute or two. Getting the sauce consistency right was another hurdle; sometimes it was too thick, other times too watery. Through trial and error, I found that simmering it uncovered for the full ten minutes gives it the ideal body for coating the pasta. For more tips on nailing vegetarian sauces, my guide on creating rich vegetarian sauces breaks it down. And if you’re worried about timing, my easy meal prep ideas can help you get components ready ahead of time, making this dish a weeknight lifesaver.
My grandmother first introduced me to this dish on a crisp October afternoon. She called it her “autumn symphony,” a way to celebrate the harvest. Consequently, our family’s Cheesy Pasta Bake with Pumpkin-Tomato Sauce (Vegetarian) became a seasonal tradition that signaled the start of cozy evenings. Meanwhile, in Italy’s northern regions, cooks often pair pumpkin or squash with pasta, showcasing the beautiful marriage of sweet and savory. Alternatively, you might find a similar Greek dish called “pastitsio” that layers pasta with a rich, spiced tomato sauce and béchamel, though it rarely features pumpkin.
Furthermore, many cultures embrace the concept of a baked pasta casserole for its ability to bring people together. For instance, American midwestern potlucks often feature a version with a classic tomato base, while some British cooks might add a layer of spinach for a heartier vegetable pie. Ultimately, our vegetarian version weaves these threads together, creating a comforting and familiar yet uniquely flavorful experience. This particular Cheesy Pasta Bake with Pumpkin-Tomato Sauce (Vegetarian) honors that global spirit of sharing a warm, satisfying meal from a single dish.
ays-cooking">How it fits in today’s cooking
This recipe fits perfectly into our modern desire for flexible, comforting meals. Moreover, it serves as a fantastic make-ahead meal prep option for busy weeknights, as the flavors only improve after a day in the fridge. Families also love its versatility; you can easily sneak in extra veggies like zucchini or mushrooms for a nutrient boost without any complaint.
Seasonally, it has become a staple on many vegetarian Thanksgiving tables, offering a hearty centerpiece that everyone can enjoy. Additionally, its comforting nature makes it ideal for potlucks or whenever you need to deliver a meal to a friend. For a complete cozy night in, consider pairing it with a simple easy green salad to add a fresh, crisp contrast to the rich, cheesy bake. Ultimately, this dish continues to earn its place in our kitchens by adapting to our routines while always delivering warmth and satisfaction.
Taste and Texture
What makes it delicious
This Cheesy Pasta Bake with Pumpkin-Tomato Sauce (Vegetarian) delivers a wonderfully cozy and complex flavor profile. Initially, you experience the rich, savory sweetness from the roasted pumpkin and tomatoes, which creates a velvety, luxurious sauce. Furthermore, the generous layers of melted, bubbling cheese provide a salty, gooey richness that perfectly contrasts the sauce’s natural sweetness. Each forkful offers a satisfying combination of tender pasta and a crisp, golden-brown cheese crust. Ultimately, the aromatic herbs like sage or rosemary weave a fragrant, earthy note through every delicious bite, making this dish a true comfort food masterpiece.
r">Boosting the flavor
For an extra flavor kick, consider stirring a spoonful of pesto into the sauce before baking; it introduces a bright, herby complexity. Alternatively, a sprinkle of red pepper flakes just before serving will add a welcome touch of heat. If you want to enhance the texture, top your bake with buttery breadcrumbs or toasted pine nuts for a delightful crunch. For more cheesy inspiration, explore our guide on selecting the best cheese for your recipes. Additionally, a simple garlic bread recipe makes the perfect side to complete this comforting meal.
Tips for Success
Best practices for results
First, always cook your pasta just until al dente because it will continue to soften in the oven. Furthermore, make sure you generously season your pumpkin-tomato sauce; taste it before assembling the bake. For the best texture, use a combination of melty cheeses like mozzarella and a sharper cheese for more flavor. Finally, let your Cheesy Pasta Bake with Pumpkin-Tomato Sauce (Vegetarian) rest for about 10 minutes after baking so it sets up perfectly for serving.
>Mistakes to avoid
Avoid using a baking dish that is too small; otherwise, the ingredients will be overcrowded and won’t heat evenly. Instead, use a properly sized dish to ensure everything bakes through. Additionally, do not skip the step of rinsing your cooked pasta, as the starch can make your final dish gummy. For more guidance on selecting the right tools, check out our essential kitchen equipment reviews. Also, remember to properly balance the flavors in your sauce; if your tomato sauce is too acidic, it can overpower the pumpkin. Luckily, our guide on fixing common sauce mistakes can help you get it just right.
Serving and Pairing Suggestions
How to serve this dish
Immediately serve this Cheesy Pasta Bake with Pumpkin-Tomato Sauce (Vegetarian) straight from the oven while it is still gloriously bubbly. For a beautiful presentation, garnish each portion with a few fresh basil leaves or a sprinkle of chopped parsley. Consequently, the green herbs create a stunning contrast against the rich, orange-hued sauce. This cozy bake truly shines as the centerpiece of a casual family dinner or a festive holiday potluck. Moreover, you can easily make it ahead for a stress-free meal that still feels incredibly special.
What goes well with it
A simple, crisp side salad perfectly balances the richness of this hearty pasta bake. For instance, our classic Easy Arugula Salad with a lemon vinaigrette cuts through the creaminess with its peppery zest. Additionally, a crusty piece of garlic bread is essential for scooping up every last bit of the delicious sauce. Finally, to complete your autumn feast, pair this comforting dish with a glass of chilled hard cider; its bright, apple-forward notes wonderfully complement the savory pumpkin and tomato flavors. You could also offer our popular Honey Balsamic Roasted Brussels Sprouts for a sweet and savory side that adds a delightful crunch.
Can I use fresh pumpkin instead of canned for this pasta bake?
Absolutely! You can substitute one 15-ounce can of pumpkin puree with approximately 1 ¾ cups of homemade puree. Simply roast a sugar pumpkin (like a Sugar Pie pumpkin), remove the skin, and blend the flesh until smooth. Using fresh pumpkin will give your Cheesy Pasta Bake with Pumpkin-Tomato Sauce (Vegetarian) a wonderfully fresh, sweet flavor.
What kind of cheese works best in a vegetarian pasta bake?
A combination of mozzarella and Parmesan is classic for its meltiness and savory flavor. For a richer, more complex taste, consider adding a handful of sharp cheddar or fontina. The key is to use cheeses that melt well to create that signature gooey texture in your Cheesy Pasta Bake with Pumpkin-Tomato Sauce (Vegetarian).
ank-math-faq-item">
How can I make this pumpkin pasta bake gluten-free?
To make this dish gluten-free, simply swap the regular pasta for your favorite gluten-free variety, such as those made from brown rice, quinoa, or lentil flour. Be sure to also check that your vegetable broth and any other packaged ingredients are certified gluten-free. The pumpkin-tomato sauce is naturally gluten-free, making it an easy adaptation.
Can I prepare this vegetarian pasta bake ahead of time?
Yes, this is a great make-ahead meal! You can assemble the entire dish, cover it tightly, and refrigerate it for up to 24 hours before baking. When ready, you may need to add a few extra minutes to the baking time since it will be going into the oven cold. Letting the flavors meld overnight often makes this vegetarian pasta bake even more delicious.
Do you ever crave a snack that feels incredibly luxurious yet is surprisingly simple to make? You know, that perfect treat for a cozy movie night or a last-minute gathering with friends. Furthermore, you want something that truly wows everyone without keeping you in the kitchen for hours. This is exactly why I am sharing my ultimate recipe for gourmet Truffle Popcorn. It transforms a humble classic into a spectacularly savory and elegant experience that will completely elevate your snacking game.
Truffle popcorn is a gourmet snack that combines the earthy, aromatic flavor of truffle with the light, crispy crunch of popcorn. This dish matters because it bridges the gap between everyday eating and a special occasion treat. You can easily create a sophisticated flavor profile with just a few key ingredients, making it perfect for impressing guests or simply treating yourself. Moreover, it fits our blog’s tone perfectly, as we champion approachable gourmet cooking that delivers maximum flavor without complexity. This recipe aligns with our philosophy that great food should be both delicious and achievable, much like our guide on easy appetizers for a crowd. The process is straightforward, but the result feels decadent and restaurant-quality. Essentially, you are taking a common pantry staple and elevating it into something extraordinary with the magic of truffle oil and a few seasonings. This approach to cooking—making the exceptional feel accessible—is a cornerstone of what we do here. For instance, if you enjoy this, you might also appreciate our take on another upgraded classic, found in our Garlic Parmesan Wings recipe. Ultimately, truffle popcorn proves that you do not need a special reason to enjoy something wonderfully delicious.
Why I Love This Recipe
This particular Truffle Popcorn recipe holds a special place in my heart because it reminds me of my first trip to a gourmet food market. I sampled a version that was outrageously expensive, and I immediately knew I could recreate that magic at home for a fraction of the cost. After much experimentation, I perfected this blend of oils and salts. Now, I make it for every single game night and movie marathon. It never fails to receive compliments and makes an ordinary evening feel like a celebrated event. This simple act of creating something so luxurious from scratch brings me immense joy and a sense of accomplishment every single time.
Health and Nutrition
Why it’s good for your body
This gourmet Truffle Popcorn offers more than just incredible flavor. Furthermore, it provides a satisfying snack that supports your well-being. Popcorn itself is a whole grain, meaning it delivers a good dose of fiber. Consequently, this fiber aids in digestion and helps you feel full longer. Moreover, when you prepare it with high-quality oils and real truffle, you get a dose of healthy fats.
Additionally, these fats are essential for absorbing nutrients and supporting heart health. Unlike many processed snacks, a well-made Truffle Popcorn avoids artificial flavors and excessive sodium. Instead, it relies on the natural, earthy essence of truffle. Therefore, you can enjoy a savory treat without unnecessary additives. Ultimately, this delicious Truffle Popcorn turns a simple craving into a nutritious moment.
How it fits in a healthy lifestyle
Enjoying Truffle Popcorn fits perfectly into a balanced eating plan. Think of it as a smart swap for heavier, less nutritious snacks. It’s naturally gluten-free and can be made vegan-friendly, accommodating various dietary needs. For a heart-healthy approach, simply use an olive oil base and a light hand with the salt.
Portion control is key, of course, but its rich flavor makes a little feel like a lot. Pair it with a protein source for a completely satisfying snack that keeps you energized. If you’re looking for more wholesome snack ideas, explore our guide on healthy snacks on the go. Remember, a healthy lifestyle includes foods you truly love. For more inspiration on balancing your meals, check out our tips for creating a balanced plate.
Elevate your snack game with this luxurious truffle-infused popcorn. Perfect for movie nights or as a gourmet appetizer.
Ingredients
Scale
For the Crust:
1/2 cup popcorn kernels
3 tablespoons truffle oil
2 tablespoons melted butter
1/4 cup grated Parmesan cheese
1 teaspoon truffle salt
1/4 teaspoon black pepper
Instructions
1. Prepare the Crust:
Pop the popcorn kernels using your preferred method (air popper, stovetop, or microwave).
In a small bowl, whisk together truffle oil, melted butter, truffle salt, and black pepper.
Drizzle the truffle mixture over the warm popcorn and toss gently to coat evenly.
Sprinkle grated Parmesan cheese over the popcorn and toss again to distribute.
Serve immediately while warm and enjoy.
Notes
You can customize the seasonings to taste.
How to Prepare This Dish
Steps and time-saving tips
First, pop your kernels using your preferred method. For a truly hands-off approach, use a microwave popcorn popper bowl. Meanwhile, gently melt your truffle butter or regular butter with truffle oil in a small saucepan over low heat. This gentle heat preserves the delicate truffle aroma. Next, drizzle the warm truffle butter over your freshly popped popcorn in a very large bowl. Use a bowl that is much larger than you think you need. This gives you ample room to toss everything evenly without spilling. Sprinkle your grated Parmesan cheese and a pinch of salt over the popcorn. Now, toss everything together with a confident, folding motion. You want to coat every single piece without crushing the kernels. Finally, give it a quick taste test and adjust the seasoning if needed. Serve your Truffle Popcorn immediately for the ultimate warm, crispy, and luxurious snack experience.
Mistakes I’ve made and learned from
I have absolutely learned this recipe the hard way. My biggest mistake was using far too much truffle oil at once, which created an overpowering and almost chemical flavor that ruined the entire batch. I now know that truffle oil is incredibly potent, so you must start with just a few drops and taste as you go. Another common error involves cheese. I once used pre-shredded Parmesan, which simply did not stick to the popcorn and created a clumpy mess. Freshly grating a hard cheese like Parmesan or even Pecorino makes all the difference, as it melts slightly upon contact with the warm popcorn. For more on selecting the right ingredients, my guide on selecting ingredients dives deeper into this. Also, getting your seasoning right is crucial; my early attempts were either bland or far too salty. Thankfully, my post on seasoning perfection covers how to balance flavors like a pro.
My first taste of Truffle Popcorn happened at a cozy wine bar in Northern California. They served it in a little metal bowl, and its incredible aroma completely stole the show. This simple snack, however, has much deeper roots. Popcorn itself is a truly ancient food, with evidence suggesting people in Mexico enjoyed it thousands of years ago. The truffle twist is a more modern luxury, borrowing from the lavish culinary traditions of Italy and France where chefs shave fresh truffles over pasta and risotto.
Around the world, people put their own spin on flavored popcorn. In Japan, you might find it seasoned with soy sauce and nori, while in India, bold spices like garam masala take center stage. My own family makes a version with white truffle oil and a generous shower of parmesan cheese for holiday movie nights. Ultimately, this dish beautifully marries humble American fun with European sophistication. A great batch of Truffle Popcorn tells a story of global fusion right in your kitchen.
ays-cooking">How it fits in today’s cooking
Today, Truffle Popcorn fits perfectly into our desire for elevated yet easy entertaining. It has become a modern classic for everything from casual get-togethers to fancy cocktail parties. Furthermore, home cooks love how it delivers a gourmet experience without any fuss. You can easily adapt the recipe to be vegan by using nutritional yeast instead of cheese or make it extra spicy with a pinch of cayenne pepper.
This snack also shines as a special treat during the holidays. For instance, it makes a fantastic homemade gift when packaged in a beautiful jar. Moreover, its irresistible flavor pairs wonderfully with a crisp white wine, making it the ultimate starter for a dinner party. If you are looking for other impressive yet simple dishes, our easy appetizers for a crowd offer plenty of inspiration. For a sweet ending to your gathering, consider serving it alongside something decadent like our chocolate hazelnut tart. Ultimately, Truffle Popcorn proves that the simplest foods often make the biggest impact.
Taste and Texture
What makes it delicious
This Truffle Popcorn delivers an incredibly savory and luxurious experience. Each fluffy kernel shatters with a satisfying crispness, immediately giving way to a rich, earthy truffle aroma. Furthermore, the truffle oil coats your palate with its distinct, umami-forward flavor, which is perfectly balanced by a subtle, creamy note from finely grated Parmesan cheese. Ultimately, the light, airy texture of the popcorn makes this decadent Truffle Popcorn feel both indulgent and delightfully easy to eat.
r">Boosting the flavor
For an even more robust flavor profile, consider a few simple upgrades. First, swap the Parmesan for a sharper cheese like Pecorino Romano to amplify the salty, savory punch. Alternatively, a light drizzle of our garlic herb compound butter adds a fragrant, creamy dimension that complements the truffle beautifully. For a touch of heat, a pinch of smoked paprika or cayenne pepper introduces a warm, smoky kick. Finally, serve your creation alongside a cool, creamy dip; our easy herb yogurt dip provides a refreshing contrast that makes each bite exciting.
Tips for Success
Best practices for results
Always use freshly popped popcorn for the best texture, as it provides the ideal surface for our truffle oil to cling to. Furthermore, drizzle the truffle oil and melted butter while the popcorn is still warm so every piece gets thoroughly and evenly coated. For a truly gourmet experience, use a high-quality, real truffle oil to make your Truffle Popcorn. Finally, toss the mixture gently with a large spoon to distribute the flavors without crushing the kernels.
>Mistakes to avoid
A common mistake is overheating your truffle oil, which can damage its delicate flavor; consequently, always add it off the heat. Additionally, avoid oversalting the popcorn before you add the truffle oil, as the salt will not stick properly and can create uneven pockets of seasoning. For more on balancing savory flavors, read our guide on using salt in your recipes. Moreover, do not store leftover Truffle Popcorn while it is still warm, as this will cause it to lose its signature crunch; instead, let it cool completely first. For best practices on storage, check out our tips for storing baked goods and snacks to keep everything fresh.
Serving and Pairing Suggestions
How to serve this dish
Immediately elevate your Truffle Popcorn by serving it warm in a large, elegant wooden bowl. Consequently, this simple act enhances its incredible aroma. For a special touch, garnish with a light sprinkle of freshly grated parmesan and a few chopped chives. Furthermore, you can present individual portions in classic striped paper bags for a fun and chic movie night at home. This gourmet Truffle Popcorn truly shines as a luxurious starter for a dinner party or as a unique snack during holiday gatherings.
What goes well with it
Firstly, a crisp, chilled glass of champagne or a dry prosecco makes a perfect partner. The bright, bubbly acidity beautifully cuts through the rich, earthy notes of the Truffle Popcorn. For a non-alcoholic option, try a sparkling lemonade with a twist of black pepper. Additionally, this popcorn pairs wonderfully with other savory bites. For instance, serve it alongside a creamy spinach and artichoke dip for a textural contrast. Similarly, it creates a fantastic flavor combination with our elegant Goat Cheese and Fig Crostini. Finally, complete your spread with a light, refreshing salad like our Arugula Salad with Lemon Vinaigrette to balance the indulgence.
Truffle popcorn is typically made from freshly popped popcorn that is tossed with high-quality truffle oil, grated Parmesan cheese, and fine salt. Some recipes also include a touch of melted butter or black truffle salt to enhance the earthy, umami flavor. The key to great Truffle Popcorn lies in using authentic truffle oil for that distinct, aromatic taste.
Is truffle oil good on popcorn?
Yes, truffle oil is excellent on popcorn as it provides a luxurious, gourmet flavor that transforms a simple snack. Its potent, earthy aroma and taste pair wonderfully with the neutral base of popcorn. For the best Truffle Popcorn, use a small amount of high-quality truffle oil to avoid overpowering the other ingredients.
ank-math-faq-item">
How do you keep truffle popcorn from getting soggy?
To prevent soggy truffle popcorn, always add the truffle oil and seasonings to freshly popped, hot popcorn and toss it immediately so the heat helps the oil coat evenly without soaking in. Serve the popcorn right away and avoid storing it in an airtight container while it’s still warm, as the steam will cause sogginess. This method ensures your homemade Truffle Popcorn stays perfectly crisp.
Where can I buy truffle popcorn?
You can find pre-made truffle popcorn at many gourmet food stores, specialty snack shops, and online retailers like Amazon. Major grocery chains often carry it in their snack or specialty food aisles, with brands like LesserEvil and The Popcorn Factory being popular options. For the freshest experience, however, making your own Truffle Popcorn at home is simple and highly rewarding.