“`html
Table of Contents
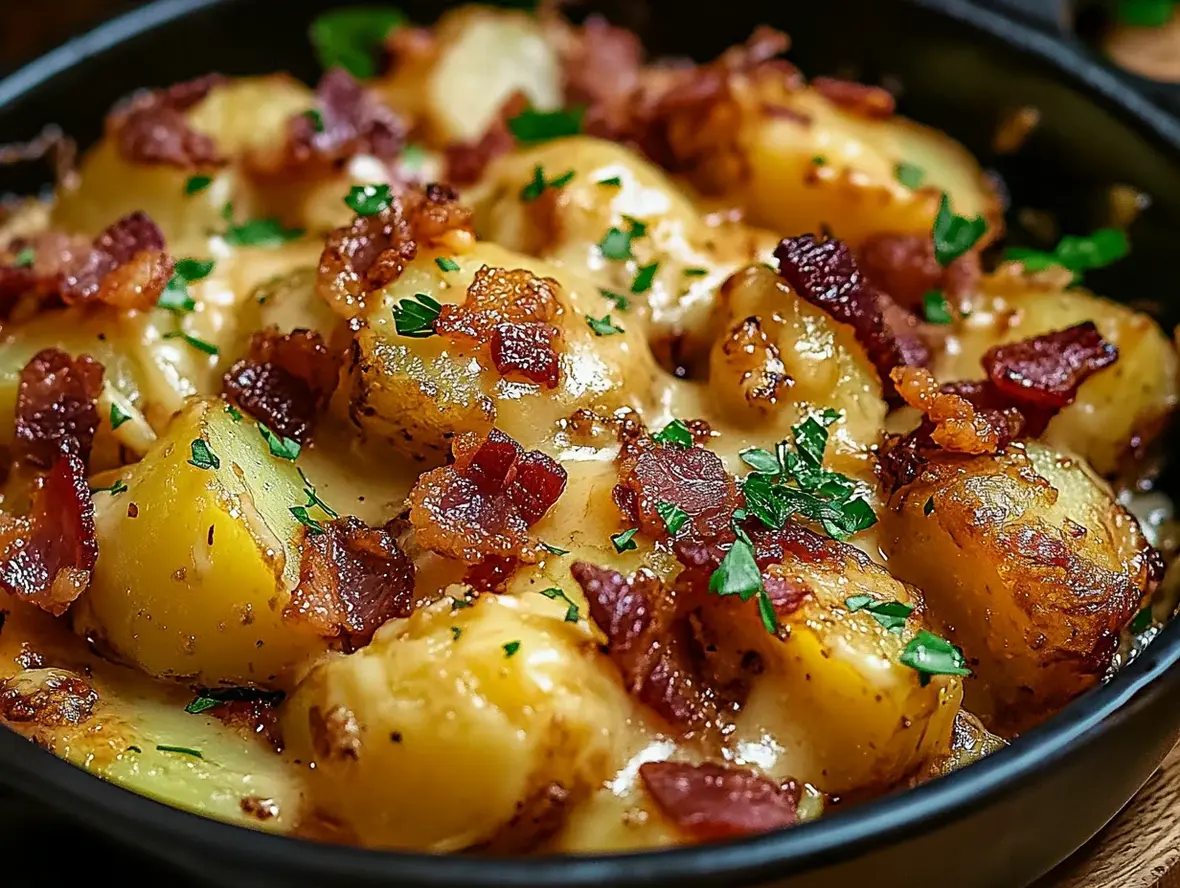
Mississippi Mud Potatoes – The Ultimate Comfort Food Recipe
Are you craving a dish that’s incredibly rich, undeniably creamy, and packed with savory goodness? If you’re nodding along, then you’ve come to the right place! This Mississippi Mud Potatoes recipe is the epitome of comfort food, designed to warm you from the inside out. Forget everything you thought you knew about potato casseroles; this is a game-changer.
What Makes Mississippi Mud Potatoes So Irresistible?
The magic of comfort food lies in its ability to evoke warmth, nostalgia, and pure culinary bliss. When we talk about dishes that truly embody this, the concept of “Mississippi Mud” comes to mind – rich, decadent, and utterly satisfying. Could this “Mississippi Mud Potatoes” casserole be the ultimate answer to your comfort food cravings? This isn’t just any potato bake; it’s a symphony of smoky turkey bacon, sharp, melty cheddar cheese, and a gloriously creamy sauce infused with just the right amount of garlic. It’s the kind of dish that disappears from the table faster than you can say “second helping,” making it a guaranteed hit for holiday gatherings, potlucks, or simply a cozy family dinner.
The Foundation of Flavor: Ingredients
The beauty of this recipe lies in its simple yet impactful ingredients. Each component plays a crucial role in creating that signature “muddy” richness and delightful texture. We’ve focused on quality and flavor, ensuring every bite is a delight.
For the Potatoes & Bacon:
- 2 lbs Yukon Gold potatoes, peeled and thinly sliced (about 1/8-inch thick) – Their buttery texture and waxy consistency hold up beautifully without becoming mushy.
- 8 oz smoky turkey bacon, diced – Provides that irresistible smoky depth without excessive grease.
- 1 cup shredded sharp cheddar cheese – For a tangy, salty kick that melts into gooey perfection.
- 1/2 cup grated Parmesan cheese – Adds a nutty, umami layer.
- 1/4 cup finely chopped fresh chives, for garnish (optional) – A touch of fresh green to brighten things up.
For the Creamy Sauce:
- 4 tablespoons unsalted butter – The base for our luscious sauce.
- 4 cloves garlic, minced – The aromatic soul of the dish.
- 1/4 cup all-purpose flour – To thicken our sauce into a velvety consistency.
- 2 cups whole milk, warmed – Provides creamy richness.
- 1 cup heavy cream – For unparalleled decadence and smoothness.
- 1 teaspoon salt, or to taste – Enhances all the flavors.
- 1/2 teaspoon black pepper, freshly ground – Adds a gentle warmth.
- 1/4 teaspoon smoked paprika – Deepens the smoky notes.
Substitutions & Notes:
- Potatoes: Russet potatoes can be used, but ensure they are sliced evenly and perhaps a little thicker to prevent overcooking.
- Turkey Bacon: Regular bacon or even pancetta can be substituted for a slightly different flavor profile. For a vegetarian option, consider crispy fried onions or smoked tofu.
- Cheese: Gruyere, Monterey Jack, or a blend of your favorite melting cheeses can be used instead of cheddar.
- Milk: You can use 2% milk, but the sauce might be slightly less rich.
- Garlic: Garlic powder can be used in a pinch (about 1/2 tsp), but fresh garlic offers a superior aroma and flavor.
The Sweet Spot: Timing Your Culinary Masterpiece
25 minutes
50-60 minutes
1 hour 15 minutes – 1 hour 25 minutes
~1 hour 30 minutes
This recipe is perfectly on par with typical comfort food casserole timelines, offering a manageable prep and cook time for a weeknight splurge or a weekend feast.

Crafting the Comfort: Step-by-Step Instructions
Let’s dive into creating this absolute comfort food dream. Follow these simple steps for a dish that’s truly divine!
Step 1: Preheat and Prep Your Potatoes
First things first, preheat your oven to 375°F (190°C). This ensures your casserole bakes evenly right from the start. Take your peeled Yukon Gold potatoes and slice them thinly, aiming for about 1/8-inch thickness. Using a mandoline slicer can be a lifesaver here to ensure uniform slices, which is key for even cooking. Place the sliced potatoes in a large bowl and set aside. Don’t rinse them – the starch will help thicken everything!
Step 2: Render that Smoky Goodness (Turkey Bacon)
In a large skillet over medium heat, cook the diced turkey bacon until it’s crispy and has rendered most of its fat. This usually takes about 8-10 minutes. Using a slotted spoon, transfer the crispy bacon to a plate lined with paper towels, reserving about 1-2 tablespoons of the rendered bacon fat in the skillet for later (discard the rest or save it for another use). This flavorful fat will add an extra layer of deliciousness to our sauce!
Step 3: Layering the Foundation
Grease a 9×13 inch baking dish with butter or cooking spray. Arrange half of the thinly sliced potatoes in an even layer at the bottom of the dish. Sprinkle half of the cooked turkey bacon evenly over the potatoes, followed by a third of the shredded sharp cheddar cheese and a third of the Parmesan cheese. Repeat with the remaining potatoes, turkey bacon, and cheeses. We’re building layers of flavor and texture!
Step 4: Crafting the Velvety Sauce
In the same skillet used for the bacon (or a separate saucepan), melt the 4 tablespoons of butter over medium heat. Add the minced garlic and sauté for about 1 minute until fragrant – be careful not to burn it! Whisk in the all-purpose flour and cook for another minute, stirring constantly, to create a roux. Gradually whisk in the warmed milk, a little at a time, until smooth. Then, whisk in the heavy cream. Bring the mixture to a gentle simmer, stirring often, until it thickens enough to coat the back of a spoon. This should take about 5-7 minutes. Stir in the salt, pepper, and smoked paprika. Taste and adjust seasonings as needed. The sauce should be rich and pourable.
Step 5: Pour, Bake, and Devour!
Carefully pour the creamy sauce evenly over the layered potatoes and bacon in the baking dish. Make sure to get into all the nooks and crannies. Cover the baking dish tightly with aluminum foil. Bake in the preheated oven for 40 minutes. After 40 minutes, remove the foil and bake for another 10-15 minutes, or until the potatoes are tender when pierced with a fork and the top is golden brown and bubbly. If you like a crispier top, you can briefly broil it for 1-2 minutes, watching it very carefully to prevent burning. Let the casserole rest for about 10 minutes before serving; this allows the sauce to set slightly, making it easier to serve and ensuring it’s not scalding hot.
A Peek at the Goodness: Nutritional Highlights
While this is a decadent comfort food, understanding its nutritional breakdown can be helpful for moderation. (Note: This is an estimation and can vary based on exact ingredients and portion sizes.)
- Calories: Approximately 450-550 per serving
- Protein: Around 18-25g
- Fat: Roughly 30-40g (includes saturated fat)
- Carbohydrates: Approximately 25-35g
- Fiber: Around 3-5g
Making it Lighter Without Losing Flavor
Craving that rich flavor but want to lighten things up? Here are some swaps that keep the comfort and cut back on the extras:
- Lighter Milk: Substitute whole milk with 2% or even skim milk. For a richer flavor without extra fat, consider using half-and-half.
- Leaner Protein: Use turkey bacon or even fully cooked chicken breast for a lean protein boost.
- Reduced Cheese: Use a sharp, full-flavored cheese and a little less of it. Alternatively, a blend of low-fat cheese with some regular cheese can offer flavor and reduced fat.
- Thicker-Upper: Instead of a flour-based roux, you can use a cornstarch slurry (cornstarch mixed with cold water) to thicken the sauce for fewer calories.
- Add Veggies: Bulk up the casserole with layers of spinach, mushrooms, or caramelized onions.
Perfect Pairings: Serving Suggestions
Mississippi Mud Potatoes are a star on their own, but they truly shine when paired thoughtfully. Here are some ideas:
- Green Salad: A crisp, fresh green salad with a bright vinaigrette offers a refreshing contrast to the rich casserole.
- Roasted Vegetables: Asparagus, broccoli, or Brussels sprouts roasted with a touch of olive oil and sea salt complement the dish beautifully.
- Grilled Meats: This casserole makes a fantastic side dish for grilled chicken, steak, or pork chops.
- Hearty Soups: Pair a smaller serving with a hearty lentil soup or a creamy tomato soup for a complete and comforting meal.
Common Mistakes to Avoid
Don’t let a few slip-ups dim your potato casserole’s shine! Keep these in mind:
- Uneven Slicing: Inconsistent potato slices lead to some pieces being undercooked and others becoming mushy. Use a mandoline or slice with care.
- Sauce Too Thin: Not cooking the roux long enough or not simmering the sauce sufficiently can result in a watery consistency.
- Over-Browning Garlic: Burnt garlic tastes bitter. Sauté it gently until fragrant, not brown.
- Not Resting: Skipping the 10-minute rest after baking can lead to a runny casserole that’s hard to serve neatly.
- Skipping the Foil: Baking uncovered for the entire duration can dry out the potatoes before they’re tender.
Storing and Reheating Your Comfort Creation
Leftovers are a treasure! Store cooled Mississippi Mud Potatoes in an airtight container in the refrigerator for up to 3-4 days. Reheat gently in the oven at 350°F (175°C) until warmed through, or use the microwave for a quicker option, covering it to retain moisture.
The Verdict: Pure Comfort Gold
Mississippi Mud Potatoes are more than just a dish; they’re an experience. They capture that nostalgic, soul-warming feeling that only truly great comfort food can provide. With its rich, creamy texture, savory smoky notes, and cheesy indulgence, this casserole is poised to become a new family favorite. Ready to dive into a bowl of pure happiness? Give this recipe a try and prepare for rave reviews!
Frequently Asked Questions
***Can I make this ahead of time?***
Absolutely! You can assemble the casserole up to a day in advance. Cover it tightly and refrigerate. You may need to add an extra 10-15 minutes to the baking time when cooking from cold.
***What kind of potatoes are best?***
Yukon Golds are ideal due to their creamy texture and ability to hold their shape. Waxy potatoes in general are preferred over starchy ones like Russets, which can become too soft.
***Can I use a different type of bacon?***
Yes, regular pork bacon will work wonderfully. If you are looking for a vegetarian option, you could omit the bacon entirely and perhaps add some sautéed mushrooms or crispy fried onions for texture and flavor.
***Why is it called “Mississippi Mud”?***
The name evokes the rich, dense, and layered nature of the dish, similar to the concept of “Mississippi Mud Pie” or cake, which are known for their deep, decadent flavors and textures. It’s a playful nod to its comforting, hearty qualities.
***How do I prevent the top from burning?***
Covering the casserole with foil for the initial baking period is crucial. Once uncovered, keep an eye on it, and if the top is browning too quickly for your liking, you can loosely tent it with foil.

Delicious Mississippi Mud Potatoes
Description
This rich, creamy, and cheesy potato casserole is packed with smoky turkey bacon, sharp cheddar, and the perfect amount of garlic. It’s a comfort food classic that’s sure to be a hit at any gathering or family meal.
Ingredients
- 6 cupspotatoes, peeled and diced1 cupcheddar cheese, shredded3/4 cupmayonnaise1 cupturkey bacon, cooked and crumbled3 tspgarlic, minced1/2 cuponion, chopped
- 1 cupcheddar cheese, shredded3/4 cupmayonnaise1 cupturkey bacon, cooked and crumbled3 tspgarlic, minced1/2 cuponion, chopped
- 3/4 cupmayonnaise1 cupturkey bacon, cooked and crumbled3 tspgarlic, minced1/2 cuponion, chopped
- 1 cupturkey bacon, cooked and crumbled3 tspgarlic, minced1/2 cuponion, chopped
- 3 tspgarlic, minced1/2 cuponion, chopped
- 1/2 cuponion, chopped
Instructions
- 1️⃣Preheat the Oven:
- Preheat your oven to 325°F (163°C).Lightly grease a 9×13-inch baking pan to prevent sticking.2️⃣Combine Ingredients:In the prepared baking pan, mix together the diced potatoes, shredded cheddar cheese, crumbled turkey bacon, minced garlic, and chopped onion.Toss the ingredients until evenly distributed.3️⃣Add the Mayonnaise:Add the mayonnaise to the potato mixture.Stir thoroughly to ensure the potatoes are evenly coated in the creamy mixture.4️⃣Bake:Place the pan in the preheated oven and bake for about 1 1/2 hours.Stir the mixture halfway through cooking for even baking.Bake until the potatoes are tender, and the top is golden brown and slightly crispy.5️⃣Serve:Remove from the oven and let it rest for a few minutes.Serve hot and enjoy the irresistible combination of creamy, cheesy, and turkey bacon-filled goodness!
- Lightly grease a 9×13-inch baking pan to prevent sticking.2️⃣Combine Ingredients:In the prepared baking pan, mix together the diced potatoes, shredded cheddar cheese, crumbled turkey bacon, minced garlic, and chopped onion.Toss the ingredients until evenly distributed.3️⃣Add the Mayonnaise:Add the mayonnaise to the potato mixture.Stir thoroughly to ensure the potatoes are evenly coated in the creamy mixture.4️⃣Bake:Place the pan in the preheated oven and bake for about 1 1/2 hours.Stir the mixture halfway through cooking for even baking.Bake until the potatoes are tender, and the top is golden brown and slightly crispy.5️⃣Serve:Remove from the oven and let it rest for a few minutes.Serve hot and enjoy the irresistible combination of creamy, cheesy, and turkey bacon-filled goodness!
- 2️⃣Combine Ingredients:
- In the prepared baking pan, mix together the diced potatoes, shredded cheddar cheese, crumbled turkey bacon, minced garlic, and chopped onion.Toss the ingredients until evenly distributed.3️⃣Add the Mayonnaise:Add the mayonnaise to the potato mixture.Stir thoroughly to ensure the potatoes are evenly coated in the creamy mixture.4️⃣Bake:Place the pan in the preheated oven and bake for about 1 1/2 hours.Stir the mixture halfway through cooking for even baking.Bake until the potatoes are tender, and the top is golden brown and slightly crispy.5️⃣Serve:Remove from the oven and let it rest for a few minutes.Serve hot and enjoy the irresistible combination of creamy, cheesy, and turkey bacon-filled goodness!
- Toss the ingredients until evenly distributed.3️⃣Add the Mayonnaise:Add the mayonnaise to the potato mixture.Stir thoroughly to ensure the potatoes are evenly coated in the creamy mixture.4️⃣Bake:Place the pan in the preheated oven and bake for about 1 1/2 hours.Stir the mixture halfway through cooking for even baking.Bake until the potatoes are tender, and the top is golden brown and slightly crispy.5️⃣Serve:Remove from the oven and let it rest for a few minutes.Serve hot and enjoy the irresistible combination of creamy, cheesy, and turkey bacon-filled goodness!
- 3️⃣Add the Mayonnaise:
- Add the mayonnaise to the potato mixture.Stir thoroughly to ensure the potatoes are evenly coated in the creamy mixture.4️⃣Bake:Place the pan in the preheated oven and bake for about 1 1/2 hours.Stir the mixture halfway through cooking for even baking.Bake until the potatoes are tender, and the top is golden brown and slightly crispy.5️⃣Serve:Remove from the oven and let it rest for a few minutes.Serve hot and enjoy the irresistible combination of creamy, cheesy, and turkey bacon-filled goodness!
- Stir thoroughly to ensure the potatoes are evenly coated in the creamy mixture.4️⃣Bake:Place the pan in the preheated oven and bake for about 1 1/2 hours.Stir the mixture halfway through cooking for even baking.Bake until the potatoes are tender, and the top is golden brown and slightly crispy.5️⃣Serve:Remove from the oven and let it rest for a few minutes.Serve hot and enjoy the irresistible combination of creamy, cheesy, and turkey bacon-filled goodness!
- 4️⃣Bake:
- Place the pan in the preheated oven and bake for about 1 1/2 hours.Stir the mixture halfway through cooking for even baking.Bake until the potatoes are tender, and the top is golden brown and slightly crispy.5️⃣Serve:Remove from the oven and let it rest for a few minutes.Serve hot and enjoy the irresistible combination of creamy, cheesy, and turkey bacon-filled goodness!
- Stir the mixture halfway through cooking for even baking.Bake until the potatoes are tender, and the top is golden brown and slightly crispy.5️⃣Serve:Remove from the oven and let it rest for a few minutes.Serve hot and enjoy the irresistible combination of creamy, cheesy, and turkey bacon-filled goodness!
- Bake until the potatoes are tender, and the top is golden brown and slightly crispy.
- 5️⃣Serve:Remove from the oven and let it rest for a few minutes.Serve hot and enjoy the irresistible combination of creamy, cheesy, and turkey bacon-filled goodness!
- Remove from the oven and let it rest for a few minutes.Serve hot and enjoy the irresistible combination of creamy, cheesy, and turkey bacon-filled goodness!
- Serve hot and enjoy the irresistible combination of creamy, cheesy, and turkey bacon-filled goodness!
Notes
Make Ahead:Prep the dish a day ahead and store it in the refrigerator. Let it come to room temperature before baking.Customizations:Add chopped green onions or fresh parsley for a burst of color and freshness.Swap cheddar for pepper jack or Colby cheese for a different flavor profile.Storage:Refrigerate leftovers in an airtight container for up to 3 days. Reheat in the oven or microwave before serving.
Customizations:Add chopped green onions or fresh parsley for a burst of color and freshness.Swap cheddar for pepper jack or Colby cheese for a different flavor profile.Storage:Refrigerate leftovers in an airtight container for up to 3 days. Reheat in the oven or microwave before serving.
Add chopped green onions or fresh parsley for a burst of color and freshness.Swap cheddar for pepper jack or Colby cheese for a different flavor profile.
Swap cheddar for pepper jack or Colby cheese for a different flavor profile.
Storage:Refrigerate leftovers in an airtight container for up to 3 days. Reheat in the oven or microwave before serving.
“`