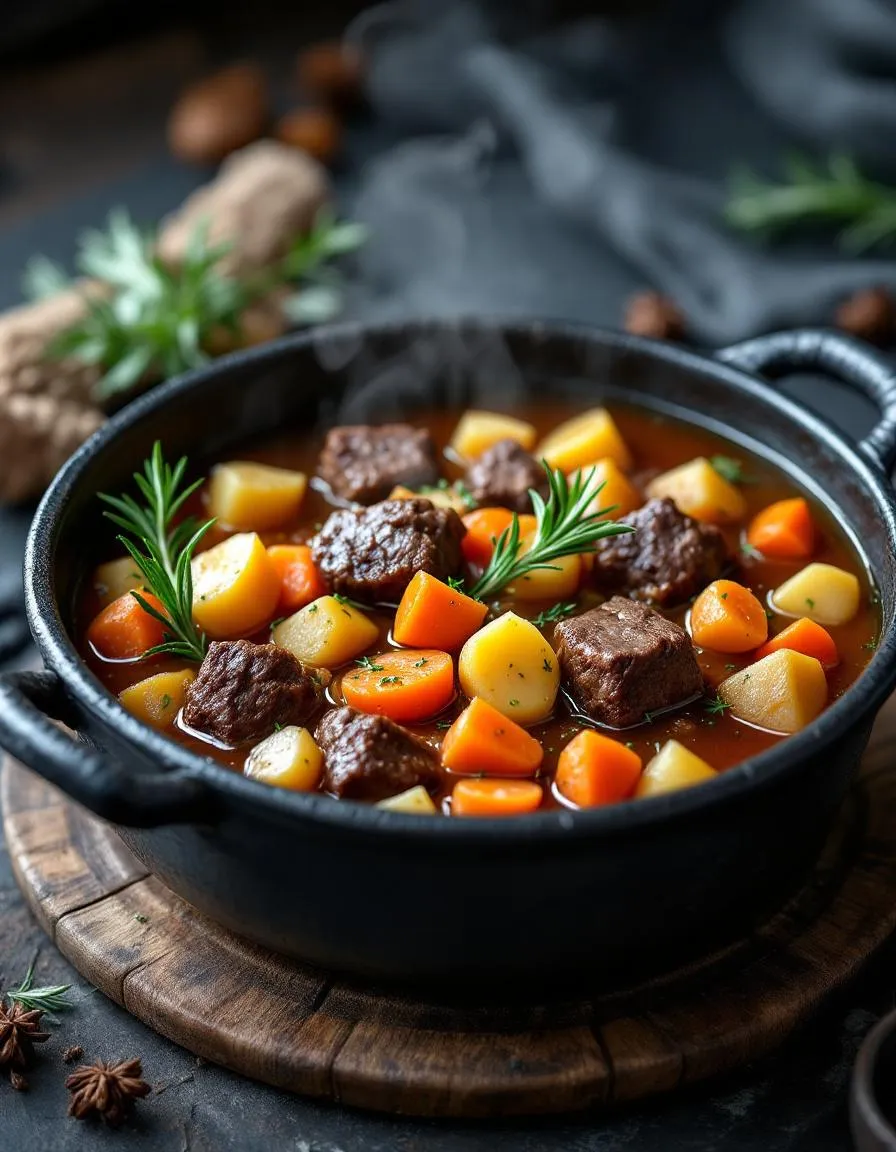
Is there anything more comforting than a rich, bubbling stew on a crisp autumn evening? As the leaves turn and the air gets that magical chill, we all crave a meal that warms us from the inside out. This recipe for Witch’s Cauldron Beef Stew does exactly that and so much more. It transforms simple, hearty ingredients into a spellbinding pot of pure comfort, promising to become the centerpiece of your fall and winter gatherings.
So, what exactly is Witch’s Cauldron Beef Stew? Essentially, it is a deeply flavorful, slow-simmered beef stew that earns its enchanting name from its dark, rich broth and the magical way its flavors meld together. Unlike a standard stew, this version often incorporates a dark beer or a splash of red wine, which gives the gravy a profound depth and a color as dark as a midnight sky. The key to its incredible taste lies in the slow cooking process, which allows the beef to become impossibly tender and the vegetables to soak up every bit of the savory broth. This dish matters because it is more than just food; it is an experience. It fills your home with an irresistible aroma that beckons everyone to the table, making an ordinary weeknight feel like a special occasion. It perfectly fits our blog’s tone of creating approachable yet unforgettable meals that bring people together. For instance, if you love the cozy feeling this stew provides, you might also enjoy our classic Hearty Beef Stew. Furthermore, the process of making it is wonderfully simple, making it an ideal project for a lazy weekend. You can easily pair it with a simple side, perhaps some Garlic Herb Dinner Rolls for dipping, to create a complete and utterly satisfying feast.
Why I Love This Recipe
I have a profound personal connection to this Witch’s Cauldron Beef Stew. It instantly transports me back to my childhood, standing on a chair next to my grandmother as she taught me how to properly brown the meat. She always called it her “magic potion” for bringing the family together. Now, I make it for my own family whenever we need a little warmth and connection. I love how the simple act of preparing it fills the entire house with a sense of anticipation and comfort. Ultimately, every spoonful feels like a delicious, loving hug.
Health and Nutrition
Why it’s good for your body
This Witch’s Cauldron Beef Stew delivers a powerful nutritional punch in every single bowl. First, the lean beef provides a fantastic source of high-quality protein, which is essential for building muscle and keeping you full. Furthermore, the slow cooking process tenderizes the meat while also helping to release collagen, a key nutrient that supports joint health.
Additionally, the colorful array of vegetables packs a serious vitamin boost. Carrots contribute beta-carotene for eye health, while potatoes offer energizing complex carbohydrates. Moreover, the onions and garlic contain allicin, a compound known for its immune-boosting properties. Consequently, enjoying a bowl of this stew can truly feel like a warm, healing hug for your body.
Ultimately, this Witch’s Cauldron Beef Stew is a complete and balanced meal. Finally, the rich broth not only hydrates you but also helps your body absorb all the fat-soluble vitamins from the other ingredients. Therefore, you can feel great about serving this wholesome dish to your family.
How it fits in a healthy lifestyle
This stew fits beautifully into a balanced eating plan. It’s naturally high in protein, making it an excellent choice for supporting muscle repair after a workout or simply keeping hunger at bay throughout a busy afternoon. The combination of protein, fiber-rich vegetables, and healthy fats creates a satiating meal that helps prevent mindless snacking.
If you follow a gluten-free diet, you will love that this Witch’s Cauldron Beef Stew is completely compliant when you use a gluten-free thickener like cornstarch. For those focused on heart health, you can easily trim any excess fat from the beef and skim the broth before serving. For more ideas on crafting meals that support your wellness goals, explore our guide on easy meal prep ideas.
This recipe is also perfect for batch cooking, allowing you to prepare healthy, homemade meals in advance for those hectic weeknights. It freezes wonderfully, so you always have a nutritious option ready to go, making it easier than ever to stick to your healthy lifestyle.
A hearty and mystical beef stew with deep, savory flavors, perfect for a chilly evening. Its rich broth and tender meat make it a spellbinding meal.
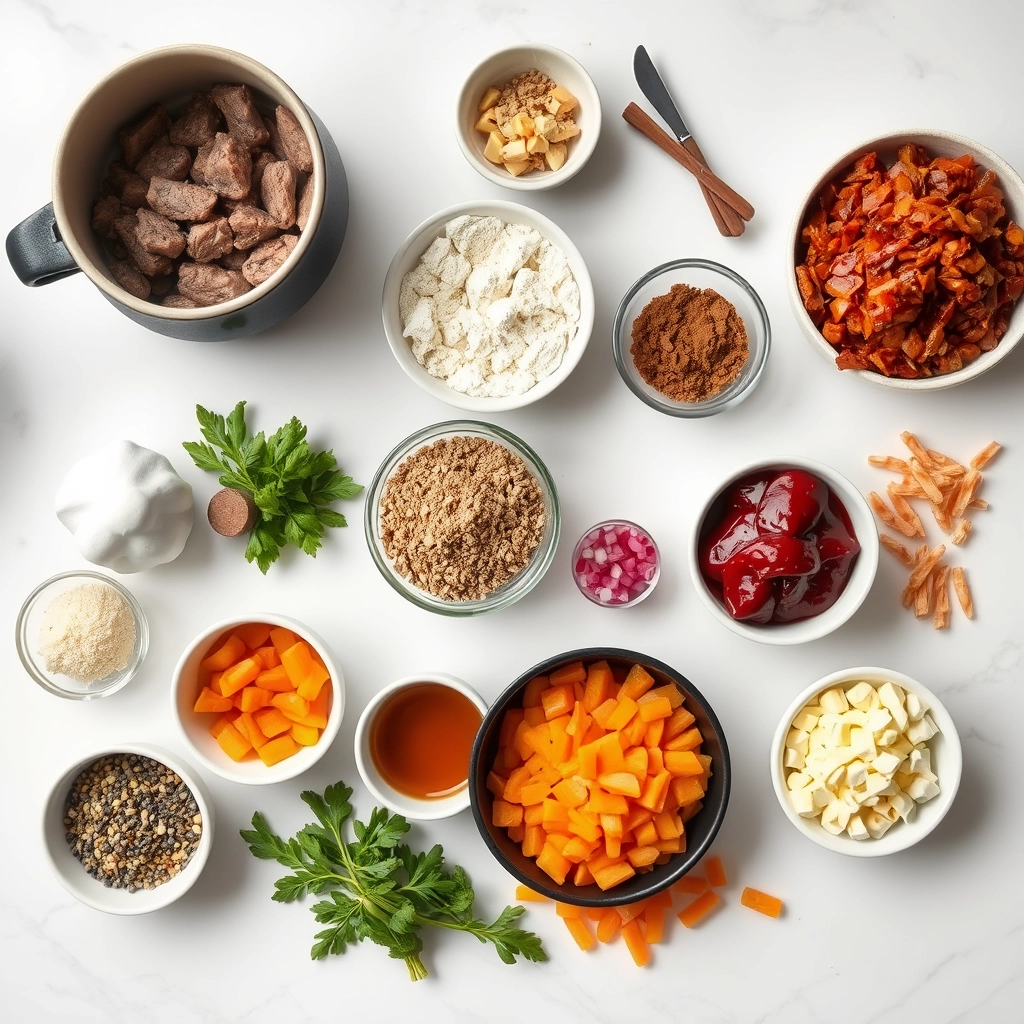
Ingredients
Scale
For the Crust:
2 lbs beef chuck, cubed
2 tbsp olive oil
1 large onion, chopped
3 cloves garlic, minced
4 cups beef broth
1 cup red wine
3 carrots, sliced
2 potatoes, cubed
1 tsp thyme
1 tsp rosemary
Salt and pepper to taste
Instructions
1. Prepare the Crust:
Heat olive oil in a large pot over medium heat. Brown the beef cubes on all sides, then remove and set aside.
Sauté onion and garlic in the same pot until fragrant. Add beef back to the pot along with broth and red wine. Bring to a simmer.
Add carrots, potatoes, thyme, rosemary, salt, and pepper. Cover and simmer for 1.5 to 2 hours, until beef is tender and vegetables are cooked through.
Notes
You can customize the seasonings to taste.
s-dish">How to Prepare This Dish
Steps and time-saving tips
First, pat your beef stew meat completely dry with paper towels. This crucial step guarantees a beautiful sear instead of a steam. Next, heat a generous amount of oil in your Dutch oven or heavy-bottomed pot over medium-high heat. Then, sear the beef in batches, making sure not to crowd the pan. After that, remove the beef and sauté your chopped onions until they become translucent. Subsequently, add the garlic and tomato paste, stirring for about a minute until it becomes fragrant. Now, pour in your red wine to deglaze the pot, scraping up all those delicious browned bits from the bottom. Return the beef to the pot and add your beef broth, along with all the hearty vegetables like carrots and potatoes. Finally, bring everything to a simmer, cover it, and let it cook low and slow for a few hours until the meat becomes incredibly tender. For a fantastic time-saving tip, you can chop all your vegetables the night before. Alternatively, use a slow cooker on low for eight hours for a truly hands-off approach to your Witch’s Cauldron Beef Stew.
Mistakes I’ve made and learned from
I have definitely learned a few lessons the hard way with this Witch’s Cauldron Beef Stew. My biggest mistake was rushing the sear on the beef; I would add it all at once because I was impatient. Consequently, the meat steamed and boiled instead of developing that deep, flavorful crust. Now I sear in small batches without fail. Another common error I made was adding salt too early in the cooking process. I once accidentally over-salted the broth before it had reduced, which resulted in an almost inedible stew. I now wait until the very end to do my final seasoning. This approach to seasoning beef has saved countless dinners. Also, if your stew looks a bit thin, don’t worry. You can easily thicken it at the end with a simple roux or slurry for the perfect, cozy consistency.
n-and-variations">Cultural Connection and Variations
Where this recipe comes from
This Witch’s Cauldron Beef Stew bubbles up from a rich, cross-cultural pot. Essentially, it takes the hearty principles of a French beef bourguignon and simmers them with the playful, communal spirit of Halloween. My own family always prepared a big pot for our annual Halloween party. Consequently, the savory aroma would greet costumed guests as they came in from the cold.
Different regions, however, put their own spin on this concept. For instance, in Ireland, you might find a similar stew with Guinness providing a deep, malty backbone. Meanwhile, a Hungarian version might lean heavily on paprika for a smoky warmth. Some American families add black beans and corn for a Southwest twist, turning the cauldron’s contents into something entirely new. Ultimately, the magic of this dish lies in its adaptability.
Every family seems to have their own secret spell. Therefore, our classic Witch’s Cauldron Beef Stew recipe honors that tradition of personalization.
ays-cooking">How it fits in today’s cooking
This stew absolutely remains a cherished tradition for autumn. Modern cooks, however, brilliantly adapt it for contemporary kitchens. Many now use a slow cooker, letting the stew bubble away all day without any supervision. Consequently, you can easily make this dish part of your weekly meal prep routine for cozy dinners.
Its relevance extends beyond just Halloween. Frankly, it provides the ultimate comfort on any chilly evening. Furthermore, its one-pot nature makes cleanup a dream, which everyone appreciates today. Families often serve it with a side of crusty bread for dipping, making it a complete and satisfying meal. For a perfect finish, consider pairing it with a decadent chocolate dessert. Ultimately, this timeless stew continues to warm hearts and kitchens everywhere.
Taste and Texture
What makes it delicious
This Witch’s Cauldron Beef Stew delivers a deeply savory and complex flavor profile. Tender chunks of beef simply melt in your mouth after braising for hours in a rich, herb-infused broth. Meanwhile, the vegetables soften into a comforting, hearty texture that perfectly complements the meat. Aromatic garlic and sweet onions create a fragrant base that fills your kitchen with an irresistible smell. Ultimately, each spoonful of this Witch’s Cauldron Beef Stew offers a warm, satisfying, and complete meal in a bowl.
r">Boosting the flavor
You can easily elevate your stew with a few creative tweaks. For instance, stir in a tablespoon of tomato paste to caramelize with the onions and add a subtle sweetness. Furthermore, a splash of red wine right before simmering introduces a wonderful depth of flavor. Consider topping each bowl with a dollop of tangy sour cream or a sprinkle of fresh herbs for a bright finish. For a side that soaks up every last drop of the delicious broth, try our classic Easy Homemade Bread. Additionally, a simple Fresh Herb Salad on the side provides a crisp, refreshing contrast to the stew’s richness.
Tips for Success
Best practices for results
Always sear your beef in small batches to create a beautiful, flavorful crust. Furthermore, use a good quality, full-bodied red wine for the braising liquid because it truly deepens the entire flavor profile of your Witch’s Cauldron Beef Stew. Additionally, allow the stew to simmer gently and patiently for the full recommended time to guarantee the meat becomes incredibly tender.
>Mistakes to avoid
Avoid rushing the searing process since crowding the pan will steam the meat instead of browning it. Consequently, you will miss out on those rich, caramelized notes that define a great stew. Moreover, do not skip the step of deglazing the pot with your wine or broth to capture every bit of flavor. Also, be careful not to boil the stew vigorously after adding the dairy, as this can cause it to curdle. For perfect results every time, always use a reliable instant-read thermometer to check that your beef has reached the ideal tenderness. Finally, remember that stews often taste even better the next day, so consider making your Witch’s Cauldron Beef Stew ahead of time using these make-ahead meal tips.
Serving and Pairing Suggestions
How to serve this dish
Present your Witch’s Cauldron Beef Stew with a touch of magic for a memorable meal. Firstly, ladle the hearty stew into deep, rustic bowls to keep it wonderfully warm. For a festive Halloween spread, serve it directly from a Dutch oven surrounded by flickering tea lights. Garnish each portion with a fresh sprinkle of chopped parsley and a dollop of tangy sour cream. Consequently, the creamy swirl will mimic a mystical potion swirling in the cauldron. This approach makes the Witch’s Cauldron Beef Stew a perfect centerpiece for any autumn gathering.
What goes well with it
Pair your Witch’s Cauldron Beef Stew with crusty bread for a truly comforting experience. Specifically, our classic Easy Homemade Focaccia soaks up the rich broth beautifully. Alternatively, a simple side salad offers a fresh, crisp contrast. For instance, our vibrant Autumn Apple Salad provides a sweet and tangy crunch that cuts through the stew’s deep flavors. Finally, a robust red wine like a Cabernet Sauvignon complements the savory beef and herbs perfectly.
What cut of beef is best for Witch’s Cauldron Beef Stew?
Chuck roast is the best cut for this Witch’s Cauldron Beef Stew because it’s well-marbled with fat and connective tissue. This breaks down during the long, slow cooking process, resulting in incredibly tender and flavorful meat that falls apart in your mouth.
Can I make Witch’s Cauldron Beef Stew in a slow cooker?
Absolutely! After browning the beef and sautéing the aromatics on the stovetop, transfer everything to your slow cooker. Cook on low for 7-8 hours or on high for 4-5 hours, until the beef is fork-tender. This method makes the Witch’s Cauldron Beef Stew incredibly convenient.
ank-math-faq-item">
What makes it a “Witch’s Cauldron” stew?
The name “Witch’s Cauldron” evokes the idea of a magical, bubbling pot filled with a deep, dark, and complex brew. This stew earns the name through its rich, deeply caramelized flavors, a hint of earthy herbs, and its hearty, almost mystical appearance that’s perfect for a cozy autumn or Halloween meal.
How can I thicken my beef stew if it’s too watery?
For a thicker Witch’s Cauldron Beef Stew, create a slurry by mixing one or two tablespoons of cornstarch with an equal amount of cold water. Whisk this into the simmering stew and cook for a few more minutes until it reaches your desired consistency. Alternatively, you can mash some of the softened potatoes against the side of the pot.
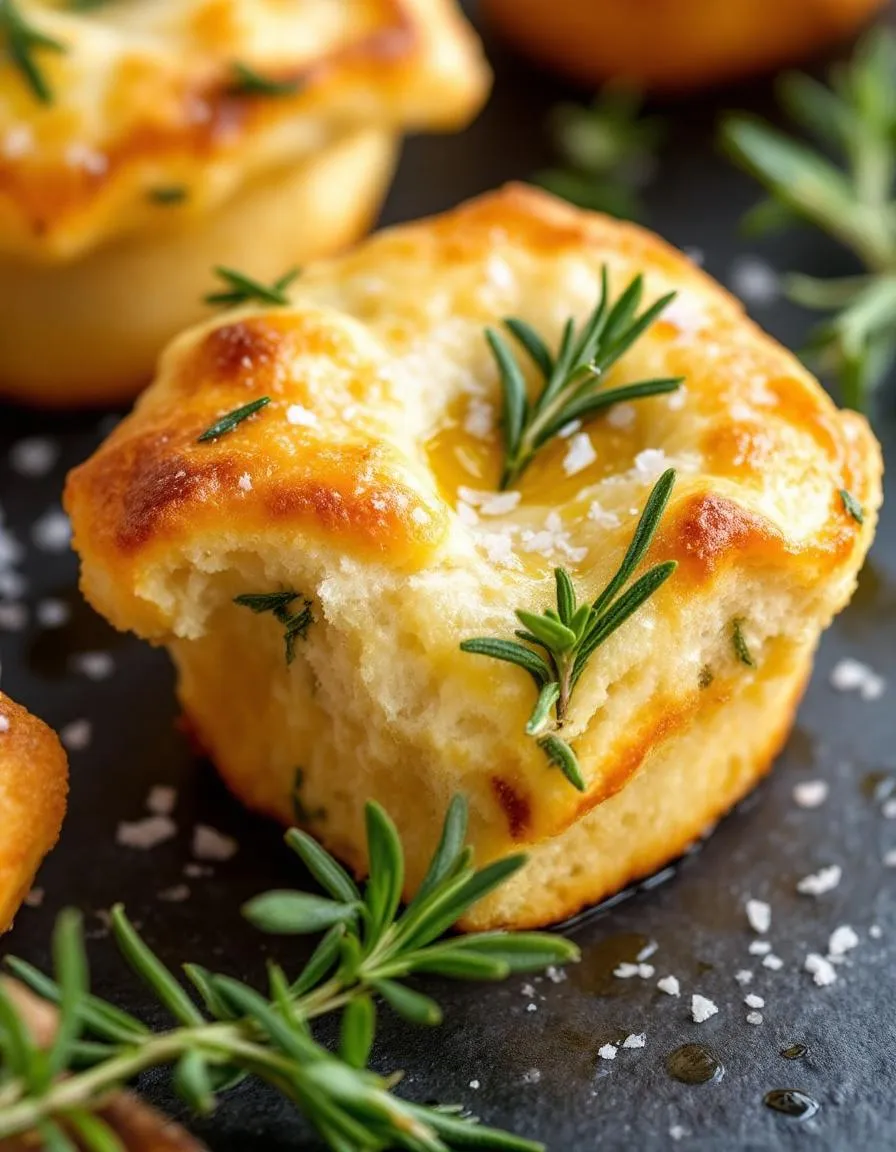
Easy Golden Crust Garlic Rosemary Focaccia Muffins
Introduction
Is there anything more comforting than the smell of fresh bread baking in your oven? That warm, yeasty aroma promises something deliciously satisfying. Now, imagine that feeling, but in a perfectly personal, handheld form. This recipe for Golden Crust Garlic Rosemary Focaccia Muffins captures that soul-warming magic in a single, irresistible bite. They are the ultimate cozy upgrade to your soup night or the star of your next brunch spread.
So, what exactly are Golden Crust Garlic Rosemary Focaccia Muffins? Essentially, they are the delightful flavors of classic Italian focaccia bread baked in a muffin tin. This ingenious method creates individual servings with an incredible texture. Each muffin boasts a crisp, golden crust that gives way to a soft, airy, and olive oil-rich interior, all infused with the robust flavors of roasted garlic and fragrant rosemary. This format matters because it solves common baking dilemmas. For instance, you no longer need to worry about slicing a loaf evenly or serving a large crowd. Moreover, the muffin tin guarantees a higher crust-to-crumb ratio, ensuring every single bite delivers that satisfying crunch. This recipe fits our blog’s mission perfectly because it transforms a seemingly complex artisan bread into an approachable, fun, and absolutely foolproof project for bakers of any skill level. If you are new to working with yeast, our guide on understanding yeast will build your confidence. Ultimately, these muffins are a versatile side dish that will instantly elevate any meal, from a simple weeknight dinner to a festive holiday gathering. They pair wonderfully with a hearty pasta or a fresh salad, but honestly, they are so good you might just eat them straight from the pan.
Why I Love This Recipe
I have a deep personal connection to these muffins because they remind me of family gatherings at my grandmother’s house. She always had a loaf of something warm and homemade on her table, and the scents of garlic and rosemary instantly transport me back to her kitchen. I love this recipe because it takes that cherished memory and makes it incredibly easy to recreate on a busy Tuesday. The process is therapeutic, and the reward is immense. Sharing a basket of these fresh from the oven, perhaps with a side of creamy tomato bisque, creates new moments of connection around the table, which is truly what cooking is all about for me.
Health and Nutrition
Why it’s good for your body
Golden Crust Garlic Rosemary Focaccia Muffins offer more than just incredible flavor. For instance, they pack a surprising nutritional punch. Olive oil, a key ingredient, provides heart-healthy monounsaturated fats. Consequently, these fats can support good cholesterol levels.
Furthermore, fresh rosemary does more than add an aromatic touch. This herb boasts powerful antioxidants and anti-inflammatory compounds. Similarly, garlic contributes allicin, which may support immune function and heart health. Therefore, every bite of a Golden Crust Garlic Rosemary Focaccia Muffin delivers beneficial plant compounds.
Moreover, this recipe utilizes simple, whole-food ingredients. You can feel good about serving these muffins to your family. Ultimately, enjoying a Golden Crust Garlic Rosemary Focaccia Muffin means you are treating your body to wholesome goodness. It is a savory baked good that truly nourishes you from the inside out.
How it fits in a healthy lifestyle
These focaccia muffins fit beautifully into a balanced eating plan. You can easily enjoy one as a satisfying side with a fresh salad for a complete lunch. Their portion-controlled muffin size also helps with mindful eating, naturally preventing overindulgence.
While they are not gluten-free, you can absolutely work them into a varied diet. Consider pairing them with a protein-rich soup for a comforting and well-rounded meal. The key is moderation and pairing them with other nutrient-dense foods you love.
Soft, fluffy focaccia muffins with a golden crust, infused with garlic and fresh rosemary. Perfect as a side or snack.
Ingredients
Scale
For the Crust:
2 cups all-purpose flour
1 packet (2 1/4 tsp) active dry yeast
1 cup warm water
2 tbsp olive oil
1 tsp salt
2 cloves garlic, minced
1 tbsp fresh rosemary, chopped
Coarse sea salt for topping
Instructions
1. Prepare the Crust:
Dissolve yeast in warm water and let sit for 5 minutes until frothy.
Mix flour, salt, minced garlic, and rosemary in a bowl. Add yeast mixture and olive oil, stir until a sticky dough forms.
Cover and let rise in a warm place for 1 hour, until doubled in size.
Preheat oven to 400°F (200°C). Grease a muffin tin.
Scoop dough into muffin cups, sprinkle with coarse salt and extra rosemary. Bake for 20-25 minutes until golden.
Notes
You can customize the seasonings to taste.
How to Prepare This Dish
Steps and time-saving tips
First, whisk together your warm water, sugar, and yeast in a large bowl. Let this mixture sit for about five minutes until it becomes foamy. Meanwhile, combine your flour and salt in a separate bowl. Next, pour the yeast mixture and olive oil into the dry ingredients. Use a sturdy wooden spoon to mix everything until a shaggy dough forms. Then, turn the dough out onto a lightly floured surface. Knead it by hand for just five minutes until it feels smooth and elastic. Place the dough back into a greased bowl, cover it with a damp cloth, and let it rise in a warm spot for one hour. This is the perfect time to infuse your olive oil with minced garlic and fresh rosemary. Once the dough has doubled, punch it down to release the air. Divide the dough into twelve equal portions and press each one into a greased muffin tin. Finally, dimple the tops with your fingers, drizzle generously with your garlic-rosemary oil, and sprinkle with flaky sea salt. Bake until each Golden Crust Garlic Rosemary Focaccia Muffin achieves a deep, golden brown color.
Mistakes I’ve made and learned from
I have definitely learned a few lessons the hard way with these muffins. My biggest mistake was using yeast that was too old, which resulted in dense, flat pucks instead of airy, fluffy muffins. Now, I always test my yeast in the warm water first to ensure it’s active and bubbly. Another common error I made was over-kneading the dough, which made the final texture a bit tough. Remember, you only need to knead until the dough is smooth and springs back lightly when poked. For more on getting this right, my guide on kneading dough breaks it down simply. Also, do not skip the step of infusing the oil; it makes a massive difference in flavor depth. If you’re new to working with yeast, my post on yeast baking tips will help you avoid these pitfalls and achieve perfect results every single time.
My journey with Golden Crust Garlic Rosemary Focaccia Muffins began in a tiny, sun-drenched bakery in Liguria, Italy. The air hummed with the earthy scent of rosemary and the sharp, inviting aroma of fresh garlic. Traditionally, bakers stretch focaccia into large, dimpled sheets to share. However, my nonna always believed food should bring people together with their own perfect piece. She started baking her dough in muffin tins, creating personal, shareable bites with an incredible golden crust. This small twist honored the classic flavors while making the bread more communal and fun.
Around the world, bakers adapt this concept beautifully. In some regions, they might swap rosemary for oregano or thyme, depending on what grows locally. Other variations include a generous sprinkle of grated parmesan cheese right before baking or a drizzle of chili oil for a subtle kick. Some families even press a single olive or a sun-dried tomato into the center of each muffin, creating a delicious, savory surprise. Ultimately, the soul of this dish remains its humble, rustic ingredients and that unforgettable, crispy exterior.
Every time I bake a bat
ch of Golden Crust Garlic Rosemary Focaccia Muffins, I feel that deep connection to my family’s kitchen. The method may be simple, but the result carries generations of love and adaptation.
How it fits in today’s cooking
These muffins fit perfectly into our modern, fast-paced lives. They move effortlessly from a weeknight dinner side to the star of a holiday spread. Furthermore, their individual portions make them ideal for packed lunches, picnics, or party appetizers. Many home cooks now use them as a sophisticated alternative to dinner rolls, especially when serving soup or a large salad.
Today’s bakers also love to adapt the recipe for convenience. For instance, you can prepare the dough the night before and let it do a slow rise in the fridge. This method develops even more flavor. You can then bake them fresh in the morning. They pair wonderfully with a cozy meal like our Creamy Tomato Bisque. Moreover, their make-ahead nature and crowd-pleasing flavor make them a fantastic addition to any brunch menu, sitting right alongside a sweet option like our Blueberry Lemon Scones. Ultimately, this versatile recipe continues to create new memories in kitchens everywhere.
>Taste and Texture
What makes it delicious
These Golden Crust Garlic Rosemary Focaccia Muffins deliver a truly multi-sensory experience. Initially, your nose catches the warm, fragrant aroma of roasted garlic and earthy rosemary. As you bite in, you meet a satisfyingly crisp, golden crust that gives way to a soft, airy, and chewy interior. The olive oil infuses every bite with a rich, fruity depth, while the flaky sea salt on top provides a delightful savory crunch. Ultimately, the combination of textures and robust, herbal flavors makes these muffins utterly irresistible.
Boosting the flavor
For an even more flavorful experience, consider a few simple tweaks. First, try folding a half cup of shredded parmesan or asiago cheese into the batter for a sharp, salty kick. Alternatively, a drizzle of our truffle aioli right before serving adds a luxurious, creamy element. If you love a little heat, a sprinkle of chili flakes or a side of spicy chili oil for dipping will wonderfully complement the herbal notes. Finally, feel free to experiment with other fresh herbs like thyme or oregano for a different aromatic profile.
Tips for Success
Best practices for results
Always use warm water to activate your yeast for the best rise. Furthermore, generously grease your muffin tin to guarantee your Golden Crust Garlic Rosemary Focaccia Muffins release easily. For maximum flavor, however, you should gently press the rosemary and garlic into the dough tops before baking. Finally, allow the muffins to cool in the pan for just five minutes before transferring them.
Mistakes to avoid
Avoid over-mixing your batter, as this will develop too much gluten and create a tough texture. Instead, mix the ingredients until they are just combined for a light and airy crumb. Additionally, do not skip the proofing time for the dough. Consequently, your muffins might not achieve their full height and fluffiness. For more on this crucial step, see our guide on achieving perfect dough consistency. Moreover, ensure your oven is fully preheated before baking. Otherwise, you might not get that signature golden crust. If you are troubleshooting other baking issues, our article on oven temperature troubleshooting offers excellent solutions.
Serving and Pairing Suggestions
How to serve this dish
Impress your guests by presenting these Golden Crust Garlic Rosemary Focaccia Muffins in a rustic bread basket lined with a simple linen napkin. For a special touch, you can also tie a fresh sprig of rosemary around each muffin with kitchen twine. Furthermore, serve them warm from the oven to maximize the aroma of garlic and herbs. These muffins truly shine at a holiday feast or a weekend brunch. Consequently, their individual portions make them incredibly easy for guests to enjoy.
h-it">What goes well with it
First, dunk these savory muffins into a rich, velvety tomato bisque for the ultimate comfort food experience. The acidity of the tomatoes beautifully cuts through the rich, herby flavor of the Golden Crust Garlic Rosemary Focaccia Muffins. Alternatively, pair them with a robust main course like our Herb Crusted Pork Tenderloin; the flavors complement each other perfectly. For a lighter option, serve them alongside a fresh Classic Caesar Salad. Finally, a crisp, chilled glass of Sauvignon Blanc makes a fantastic drink pairing that highlights the herbal notes.
What is the secret to getting a golden crust on focaccia muffins?
The key to that signature golden crust is a combination of high oven temperature and a good quality olive oil. Brushing the tops of your Golden Crust Garlic Rosemary Focaccia Muffins generously with olive oil before baking ensures they crisp up beautifully and develop that rich, golden color.
ank-math-faq-item">
Can I make these focaccia muffins ahead of time?
Absolutely! These muffins are perfect for making ahead. You can store baked and cooled Golden Crust Garlic Rosemary Focaccia Muffins in an airtight container at room temperature for up to 2 days. Simply reheat them in the oven for a few minutes to restore their crisp exterior before serving.
Can I use dried rosemary instead of fresh for this recipe?
Yes, you can substitute dried rosemary, but use only one-third the amount of fresh called for, as dried herbs are more potent. For the best flavor, we highly recommend using fresh rosemary to complement the garlic in these Golden Crust Garlic Rosemary Focaccia Muffins.
What should I serve with garlic rosemary focaccia muffins?
These savory muffins are incredibly versatile. They are fantastic served alongside soups, stews, or pasta dishes. They also make a wonderful appetizer on their own, especially when served with a small dish of high-quality olive oil and balsamic vinegar for dipping.
div>
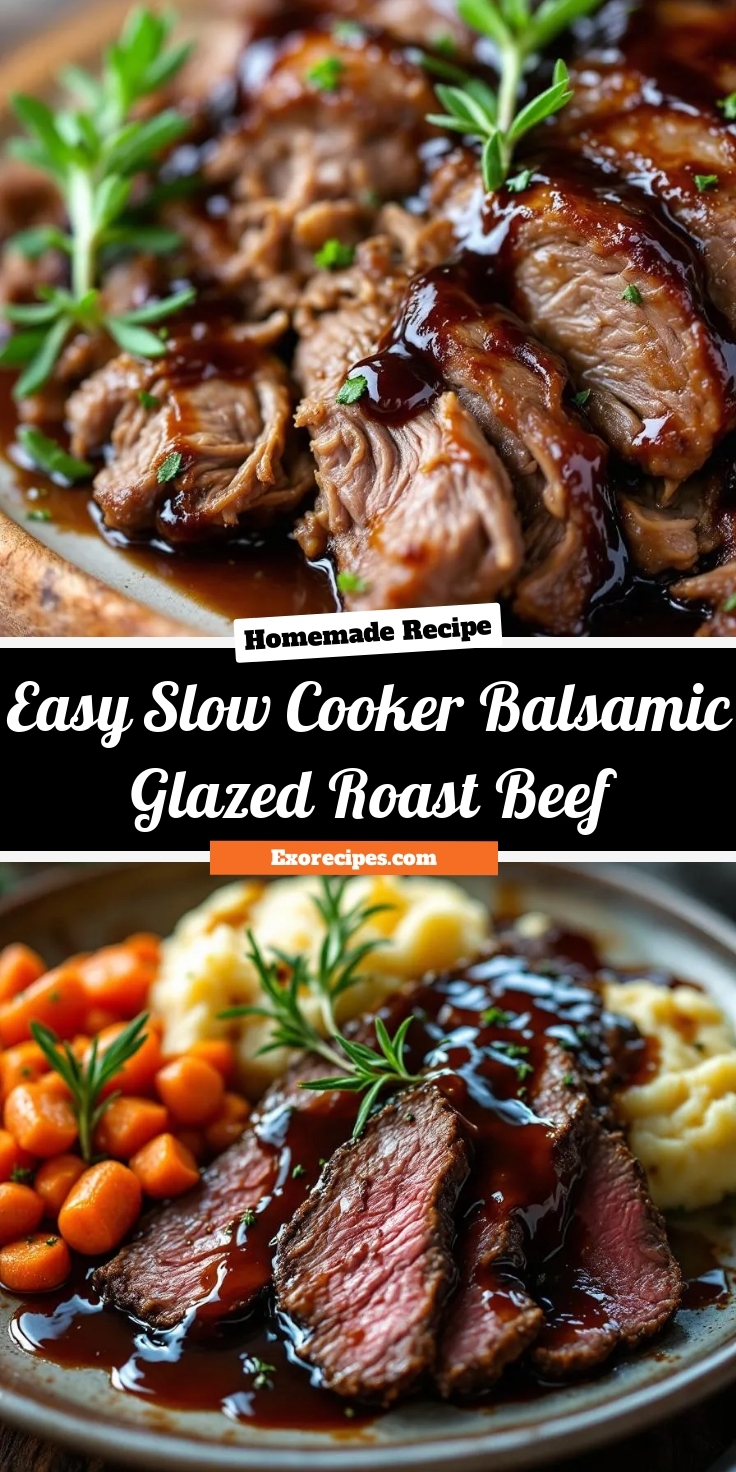
Easy Slow Cooker Balsamic Glazed Roast Beef
Introduction
Do you ever crave a meal that feels both incredibly special and completely effortless? Imagine walking into your home after a long day to the irresistible aroma of a tender, savory roast that has been simmering to perfection. This dream becomes your reality with our incredible Slow Cooker Balsamic Glazed Roast Beef. It transforms a humble cut of meat into a spectacular, company-worthy feast with almost no hands-on work, giving you back your precious time and energy.
Slow Cooker Balsamic Glazed Roast Beef is a masterclass in flavor and convenience. Essentially, we take a beef roast and cook it low and slow in a simple yet powerful sauce. This sauce, a perfect balance of tangy balsamic vinegar, savory soy sauce, and a touch of sweetness, reduces into a rich, glossy glaze that coats every slice. The magic truly happens in the slow cooker, where the tough connective tissues in the meat break down, resulting in a roast that is unbelievably tender and practically melts in your mouth. This cooking method matters because it delivers a gourmet-quality result without any gourmet-level stress. Furthermore, it perfectly fits our blog’s mission to provide recipes for real, busy people who refuse to sacrifice flavor. Whether you need a stress-free Sunday dinner or a simple centerpiece for a holiday gathering, this dish delivers. For another fantastic way to use your appliance, explore our popular Slow Cooker Pork Loin with Apples and Onions. Additionally, the hands-off nature of this recipe means you can focus on other things, like whipping up a quick side. A simple Easy Garden Salad provides the perfect fresh, crunchy contrast to the rich, savory beef. Ultimately, this recipe proves that the slow cooker is your greatest ally in the kitchen for creating deeply satisfying meals.
Why I Love This Recipe
This Slow Cooker Balsamic Glazed Roast Beef holds a special place in my heart because it was my go-to recipe during a particularly hectic semester in college. I needed meals that could cook themselves while I was in class and could feed a group of hungry friends who often stopped by. This roast never failed me. It became synonymous with warm gatherings and easy hospitality, creating a sense of community around my table without any fuss. The rich, tangy-sweet smell filling my apartment still brings back those memories of laughter and shared meals, proving that the best dishes nourish both the body and the soul.
Health and Nutrition
Why it’s good for your body
This Slow Cooker Balsamic Glazed Roast Beef delivers a powerful nutritional punch. For starters, it provides a fantastic source of high-quality protein, which is essential for building and repairing muscle tissue. Furthermore, this protein helps you feel full and satisfied for longer, making it easier to manage your appetite throughout the day.
Additionally, the balsamic vinegar glaze offers its own set of benefits. In fact, it contains antioxidants that help protect your cells from damage. Moreover, the slow cooking process gently breaks down the meat’s fibers, resulting in a tender meal that is also easier to digest. Consequently, you get a delicious dinner that truly supports your well-being.
Ultimately, this dish is a fantastic way to enjoy a hearty meal without compromising on nutrition. Therefore, you can feel great about serving this Slow Cooker Balsamic Glazed Roast Beef to your family. Finally, remember that a balanced diet includes wholesome meals like this one that nourish your body from the inside out.
How it fits in a healthy lifestyle
This Slow Cooker Balsamic Glazed Roast Beef fits seamlessly into various healthy eating plans. It naturally aligns with a high-protein diet, giving your body the fuel it needs for energy and muscle support. The recipe is also inherently gluten-free, making it a safe and delicious centerpiece for anyone with sensitivities.
For those focused on heart health, you can easily pair the roast with a side of roasted vegetables instead of heavier starches. This creates a balanced plate that is rich in nutrients and flavor. Planning meals like this in advance is a cornerstone of maintaining a healthy routine, and our guide on easy meal prep ideas can help you get started.
Enjoying this roast beef also supports practical, everyday healthy habits. The slow cooker does most of the work for you, which means you are less likely to rely on less nutritious convenience foods on busy nights. It is a perfect example of how simple, whole-food ingredients can come together for a satisfying meal. For more inspiration on crafting a well-rounded diet, explore our tips for building a perfectly balanced plate every time.
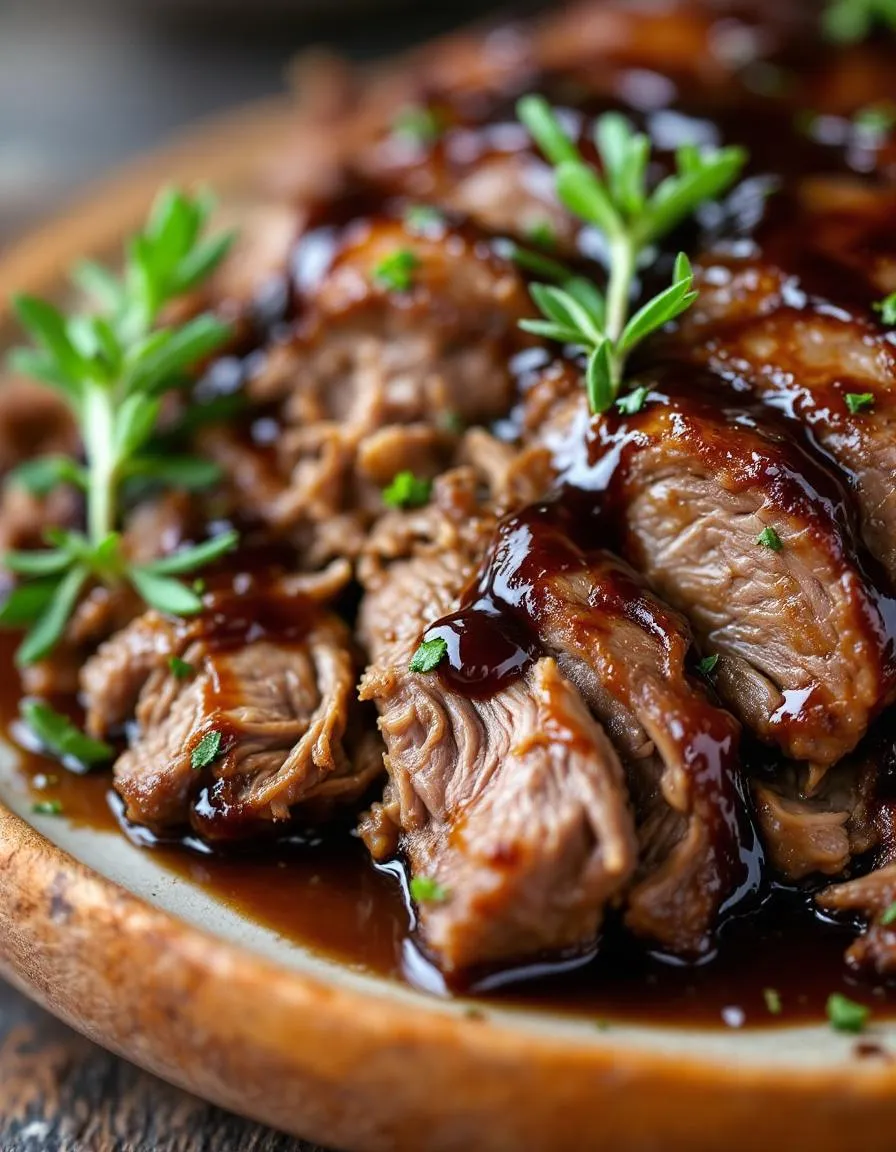
Tender roast beef with a sweet and tangy balsamic glaze, cooked to perfection in your slow cooker.
Ingredients
Scale
For the Crust:
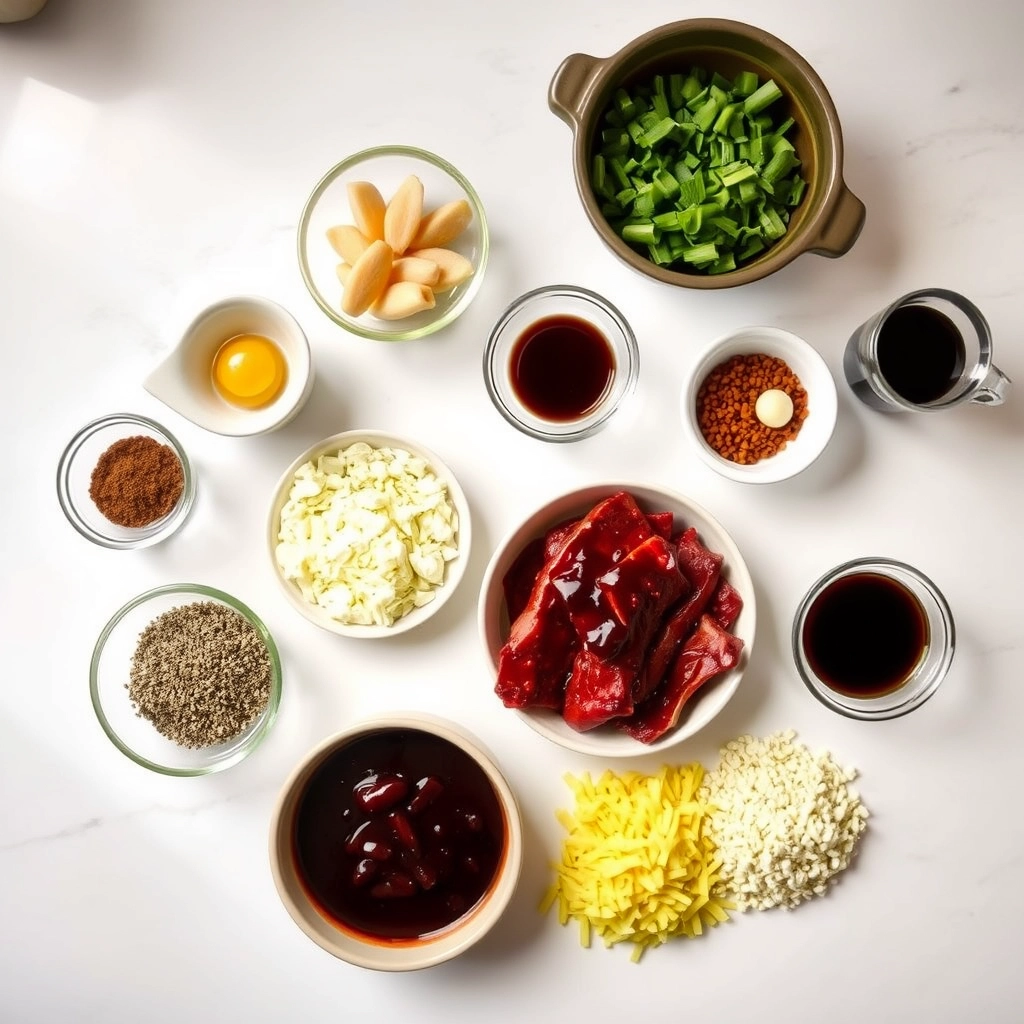
3 lb beef chuck roast
1 cup beef broth
1/2 cup balsamic vinegar
1/4 cup honey
2 tbsp soy sauce
4 cloves garlic, minced
1 tsp dried thyme
1 tsp dried rosemary
1/2 tsp black pepper
1 tbsp cornstarch
2 tbsp water
Instructions
1. Prepare the Crust:
Place beef roast in slow cooker. In a bowl, whisk together beef broth, balsamic vinegar, honey, soy sauce, garlic, thyme, rosemary, and pepper. Pour over roast.
Cover and cook on low for 8 hours or high for 4-5 hours, until beef is tender.
Remove beef from slow cooker and let rest. Whisk cornstarch and water in a small bowl, then stir into the slow cooker liquid. Cook on high for 15-20 minutes until sauce thickens.
Slice beef and serve with balsamic glaze drizzled on top.
Notes
You can customize the seasonings to taste.
How to Prepare This Dish
Steps and time-saving tips
First, grab your slow cooker and pat your roast beef completely dry with paper towels. This crucial step helps the savory crust form later. Next, generously season all sides of the beef with salt and pepper. Meanwhile, whisk together your balsamic glaze, beef broth, soy sauce, honey, and minced garlic in a separate bowl. For a fantastic time-saving tip, you can mix this sauce the night before and store it in the fridge. Then, simply sear the seasoned roast in a hot skillet with a little oil until it develops a beautiful brown color on all sides; this only takes a few minutes but locks in incredible flavor. After that, carefully place the seared roast into your slow cooker and pour the balsamic glaze mixture over the top. Finally, put the lid on, set it to low for 8 hours, and walk away. The slow cooker does all the work, filling your home with an amazing aroma. Once cooked, remove the beef to rest before slicing. For an extra glossy finish, you can reduce the leftover juices in the slow cooker on the stovetop into a thick sauce to drizzle over your finished Slow Cooker Balsamic Glazed Roast Beef.
Mistakes I’ve made and learned from
I learned the importance of searing the hard way. I once skipped this step to save five minutes, and my Slow Cooker Balsamic Glazed Roast Beef turned out bland and steamy instead of rich and flavorful. Searing is non-negotiable for building depth. Another mistake I made was using a cut that was too lean, which resulted in a slightly drier texture. I now swear by well-marbled chuck roast or a nice bottom round for the most tender, pull-apart results. Getting the internal temperature right is also key, and using a reliable meat thermometer took all the guesswork out of it for me. Finally, don’t make my early error of adding too much liquid. The roast creates its own juices, and a cup of broth is plenty. For more on choosing the right equipment for the job, my guide on selecting a slow cooker covers everything you need to know.
My family’s love affair with this dish started decades ago. My grandmother, however, would never recognize our modern version. She would spend a whole Sunday afternoon tending to a massive pot roast in the oven. Conversely, we let our slow cooker do all the gentle, patient work for us. Her secret ingredient was always a splash of something acidic to cut the richness, a trick I’ve carried forward with the balsamic glaze.
Around the world, cultures embrace this beautiful combination of sweet and savory with beef. For instance, an Italian nonna might slowly braise a pot roast in a Chianti and tomato base. Meanwhile, a French cook would create a rich boeuf bourguignon with red wine and pearl onions. Our Slow Cooker Balsamic Glazed Roast Beef proudly sits in this global tradition of slow-braised comfort. Ultimately, it represents a beautiful fusion of old-world technique and new-world convenience.
Regionally, you will fi
nd fascinating twists. In the American South, cooks might add a tablespoon of molasses for a deeper sweetness. Some Midwestern families stir in a packet of onion soup mix for an extra savory punch. Personally, I love adding a sprig of fresh rosemary from my garden. This Slow Cooker Balsamic Glazed Roast Beef recipe, therefore, becomes a delicious canvas for your own story.
How it fits in today’s cooking
This recipe absolutely thrives in our busy modern lives. It delivers the deep, satisfying flavor of a special occasion meal without requiring you to babysit the oven. Furthermore, it fits perfectly into meal prep routines, providing delicious leftovers for days. You can easily turn the tender beef into sandwiches, salads, or even a hearty filling for tacos.
It remains a star for holiday gatherings and Sunday dinners. However, its true magic lies in its everyday versatility. For a complete comfort food experience, serve it alongside some creamy mashed potatoes. Alternatively, try pairing it with a lighter side, like one of our favorite easy roasted vegetables. The tangy glaze beautifully complements the natural sweetness of carrots and Brussels sprouts.
Ultimately, this dish p
roves that tradition can effortlessly adapt. It brings people together around the dinner table with minimal effort. After a long day, nothing beats walking into a home filled with the aroma of this cooking masterpiece. For another fantastic make-ahead meal that simplifies your week, explore our popular overnight breakfast casserole. Consequently, you can enjoy incredible food and still have time to make memories.
Taste and Texture
What makes it delicious
This Slow Cooker Balsamic Glazed Roast Beef delivers a truly mouthwatering experience. Initially, you notice the rich, savory aroma of garlic and herbs that fills your kitchen. Then, your fork glides through the incredibly tender, melt-in-your-mouth meat. The balsamic glaze provides a perfect balance; it introduces a tangy sweetness that caramelizes into a slightly sticky, flavorful crust. Ultimately, each bite of this Slow Cooker Balsamic Glazed Roast Beef offers a satisfying contrast between the succulent, juicy interior and the robust, glossy exterior.
Boosting the flavor
For an even deeper flavor profile, consider a few simple tweaks. First, stir a tablespoon of tomato paste into the cooking liquid to add a rich, umami backbone. Alternatively, finish the dish with a sprinkle of fresh chopped rosemary right before serving for a fragrant, herbal kick. If you love a bit of heat, a pinch of red pepper flakes will work wonderfully. Furthermore, serving it alongside a creamy side can elevate the entire meal; our perfect creamy garlic mashed potatoes are an ideal match for the tangy glaze. Finally, a fresh, crisp salad provides a refreshing contrast; try our simple easy Italian side salad to complete your feast.
Always sear your roast on all sides before placing it in the slow cooker because this crucial step builds incredible flavor. Furthermore, use a sharp knife to thinly slice the meat against the grain for the most tender results. For the best Slow Cooker Balsamic Glazed Roast Beef, let the cooked roast rest for at least fifteen minutes before slicing. Additionally, always whisk your glaze ingredients thoroughly to create a smooth, lump-free sauce.
Mistakes to avoid
Avoid overfilling your slow cooker with vegetables, as this can prevent even cooking and steam the meat instead of roasting it. Instead, create a single layer at the bottom for the best results. Moreover, do not skip the searing step; otherwise, you will miss out on the deep, caramelized notes that define this dish. For more guidance, our article on choosing the best slow cooker can help you select the right size appliance. Finally, never pour a cold cornstarch slurry into a hot glaze, or you will get lumps; instead, always temper it with a bit of hot liquid first, a technique we detail in our guide to how to thicken sauces.
g-suggestions">Serving and Pairing Suggestions
How to serve this dish
Present your Slow Cooker Balsamic Glazed Roast Beef on a large wooden board or elegant platter for a truly stunning centerpiece. First, generously slice the roast against the grain. Then, fan the beautiful slices out to showcase the tender, juicy interior. For a final touch, drizzle any remaining glaze from the pot right over the top and garnish with a sprinkle of fresh thyme or rosemary sprigs. This approach works perfectly for a holiday dinner, yet it also feels special enough for a Sunday family gathering.
Alternatively, create a build-your-own sandwich bar for a fun and interactive meal. Simply place the shredded or thinly sliced Slow Cooker Balsamic Glazed Roast Beef in a bowl alongside soft rolls, horseradish sauce, and arugula. Consequently, your guests will love assembling their own perfect bite.
What goes well with it
For a classic pairing, serve this savory roast with creamy mashed potatoes. The rich, buttery potatoes beautifully balance the tangy-sweet glaze of the Slow Cooker Balsamic Glazed Roast Beef. Meanwhile, a side of garlicky sautéed green beans or roasted carrots adds a vibrant, fresh contrast to each hearty bite.
Additionally, a full-bo
died red wine like a Cabernet Sauvignon makes an excellent drink pairing. Its bold tannins cut through the richness of the meat perfectly. If you need a stellar side, our incredibly popular Creamy Garlic Mashed Potatoes recipe is an absolute must-try. Finally, complete your feast with a light, refreshing salad; our simple Classic Caesar Salad provides a crisp, crunchy counterpoint that everyone will enjoy.
What cut of beef is best for Slow Cooker Balsamic Glazed Roast Beef?
Chuck roast is the ideal cut for this recipe because its marbled fat content breaks down beautifully during the long, slow cooking process, resulting in a tender and flavorful dish. Other good options include rump roast or bottom round, but avoid very lean cuts like sirloin tip as they can become tough. The rich flavor of these cuts pairs perfectly with the tangy balsamic glaze.
ank-math-faq-item">
Can I make this balsamic roast beef without a slow cooker?
Yes, you can adapt this recipe for your oven. Cook it covered in a Dutch oven at 300°F (150°C) for approximately 3-4 hours, or until the beef is fork-tender. You will still achieve a delicious balsamic glazed roast beef, though the slow cooker is preferred for its set-and-forget convenience and ability to keep the meat incredibly moist.
How do I thicken the balsamic glaze for the roast beef?
The easiest method is to create a cornstarch slurry. Simply mix one tablespoon of cornstarch with two tablespoons of cold water, then whisk this into the hot cooking juices after removing the beef. Let it simmer for a few minutes until the sauce thickens into a rich glaze perfect for drizzling over your Slow Cooker Balsamic Glazed Roast Beef.
What should I serve with Slow Cooker Balsamic Glazed Roast Beef?
This hearty dish pairs wonderfully with creamy mashed potatoes, which are excellent for soaking up the delicious glaze. For a lighter option, try serving it over cauliflower mash or alongside roasted vegetables like carrots, green beans, or Brussels sprouts. The savory and tangy flavors of the balsamic glazed roast beef complement a wide variety of classic sides.
div>
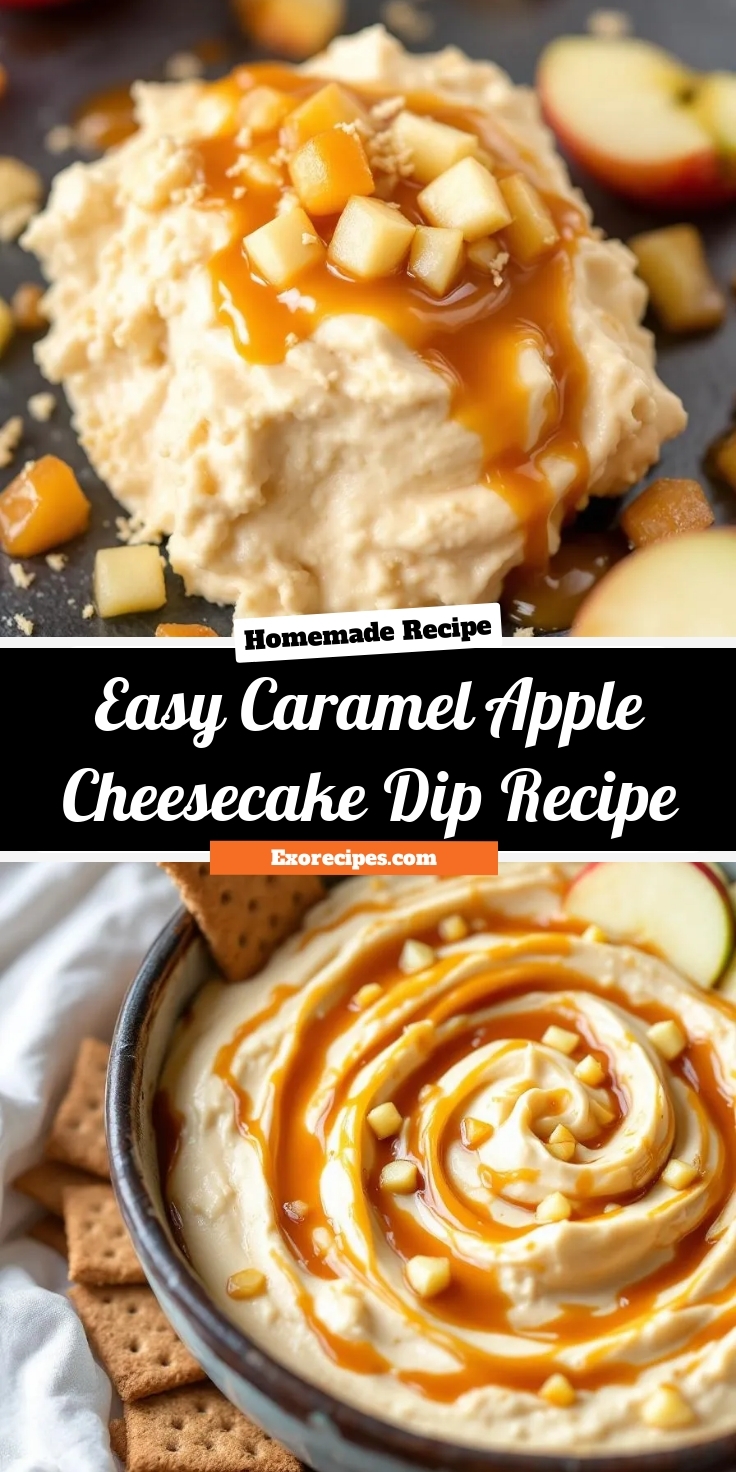
Easy Caramel Apple Cheesecake Dip Recipe
Introduction
Imagine the coziest fall gathering where a single bowl becomes the center of everyone’s attention. That is the magic you can create with this incredibly simple dessert. This Easy caramel apple cheesecake dip captures the essence of autumn in every creamy, dreamy bite, offering all the flavor of a decadent cheesecake without any of the fuss. It is the perfect solution for when you crave something spectacular but need a recipe that truly understands a busy schedule.
So what exactly is this crowd-pleasing phenomenon? Essentially, this Easy caramel apple cheesecake dip is a no-bake cheesecake transformed into a dippable, shareable experience. We combine lush, creamy ingredients to form a rich base that mimics the filling of a classic New York cheesecake. Then, we swirl in generous amounts of sweet caramel and fold in tender, spiced apple pieces. The final result is a dip that pairs perfectly with crisp apple slices, salty pretzels, or graham crackers for that perfect sweet-and-salty crunch. This recipe matters because it delivers maximum flavor and joy with minimal effort, making you the hero of any potluck, game day party, or casual family night. Furthermore, it perfectly fits our blog’s philosophy of creating approachable, no-fuss recipes that deliver restaurant-quality results. If you enjoy simple yet impressive treats, you will absolutely adore our collection of easy no bake desserts. This dip is the ultimate make-ahead dish; in fact, its flavor improves after chilling, allowing you to prepare it stress-free long before your guests arrive. Ultimately, it solves the problem of needing a stunning dessert that requires zero baking and minimal cleanup, letting you spend less time in the kitchen and more time enjoying the moment.
Why I Love This Recipe
This Easy caramel apple cheesecake dip holds a special place in my heart because it became an instant tradition at our annual fall bonfire. I needed a dessert that could be passed around easily, enjoyed by both kids and adults, and made ahead of time without any stress. This dip was the undeniable answer. I love seeing the smiles it brings and how quickly the bowl always empties. It reminds me that the best recipes are not just about taste, but about creating effortless moments of connection and joy, much like our favorite quick party appetizers that keep the focus on fun.
Health and Nutrition
Why it’s good for your body
This easy caramel apple cheesecake dip brings more to the table than just incredible flavor. First, it features the star of the show: apples. Consequently, you get a serving of fruit packed with fiber and vitamin C. Moreover, this fiber helps support healthy digestion and keeps you feeling satisfied. Additionally, the Greek yogurt and cream cheese base provides a good source of protein and calcium for strong bones.
Furthermore, you can feel good about the ingredients you use. For instance, by preparing this easy caramel apple cheesecake dip at home, you control the sugar content. Ultimately, this makes it a smarter choice than many store-bought dessert dips. Finally, the combination of protein, fat, and fiber helps prevent a rapid spike in blood sugar. Therefore, this delicious treat offers a more balanced indulgence you can truly enjoy.
How it fits in a healthy lifestyle
This easy caramel apple cheesecake dip fits beautifully into a balanced lifestyle when you enjoy it mindfully. Consider it a perfect treat for sharing at gatherings, which naturally helps with portion control. Pair it with fresh apple slices for an extra fiber boost that makes the snack even more satisfying. It also works wonderfully as a pre-portioned dessert that satisfies a sweet craving without derailing your day.
For those following specific eating plans, this dip is naturally gluten-free. You can also easily adapt the recipe to be lower in sugar by choosing a light caramel option. Remember, a healthy diet has room for joyful eating, and this dip delivers on that promise. For more ideas on balancing your meals, explore our guide on easy meal prep ideas. If you are looking for other nutritious snacks, our healthy snack recipes offer plenty of inspiration.
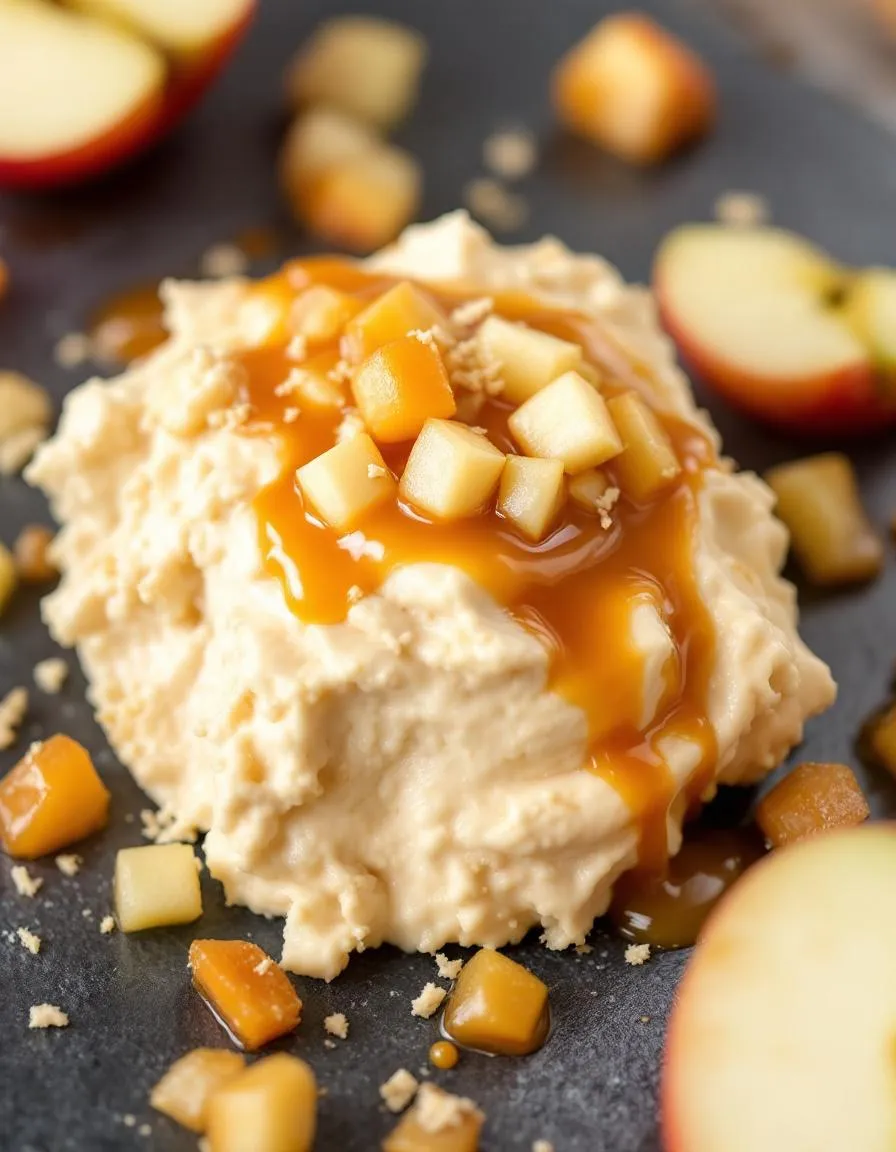
A creamy, no-bake cheesecake dip swirled with caramel and topped with apple pieces—perfect for dipping with graham crackers or apple slices.
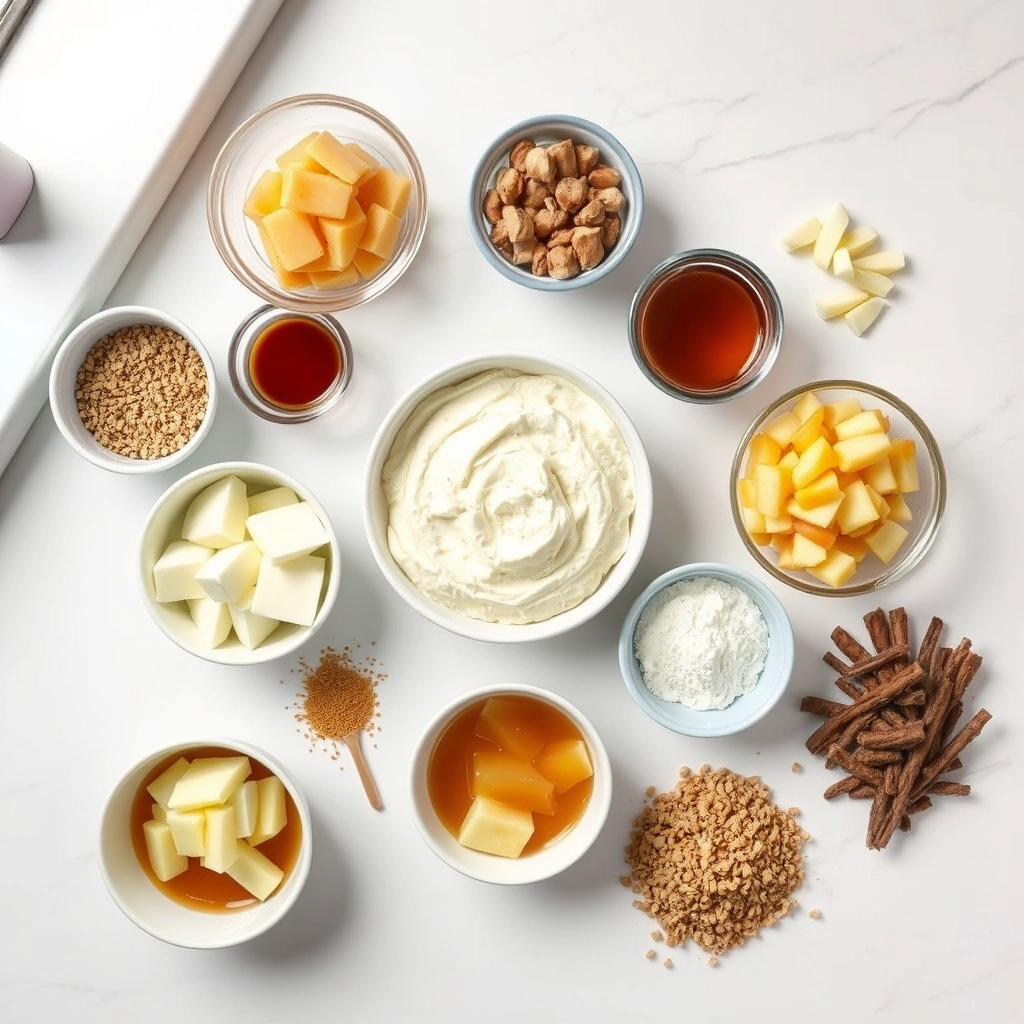
Ingredients
Scale
For the Crust:
8 oz cream cheese, softened
1/2 cup powdered sugar
1 tsp vanilla extract
1/2 cup caramel sauce, plus extra for drizzling
1 large apple, diced
1 tbsp lemon juice
Graham crackers or apple slices for serving
Instructions
1. Prepare the Crust:
In a medium bowl, beat cream cheese, powdered sugar, and vanilla until smooth and creamy.
Fold in 1/4 cup caramel sauce gently to create swirls—do not overmix.
Toss diced apple with lemon juice to prevent browning, then stir into the dip.
Transfer to a serving bowl, drizzle with remaining caramel, and chill for 30 minutes before serving with graham crackers or apple slices.
Notes
You can customize the seasonings to taste.
How to Prepare This Dish
Steps and time-saving tips
First, grab a large mixing bowl and your hand mixer. Beat the softened cream cheese and brown sugar together until the mixture becomes completely smooth and fluffy. This crucial step ensures your Easy caramel apple cheesecake dip has that signature creamy texture without any gritty sugar. Next, gently fold in the vanilla extract and a pinch of salt to balance the sweetness. Meanwhile, if you are using homemade caramel, have it ready to go. Otherwise, a good-quality store-bought jar works perfectly for a quick fix. Now, spread this creamy base evenly into your serving dish. Afterwards, generously drizzle that glorious caramel sauce over the entire layer. For the final touch, sprinkle the chopped pecans and those tiny, delicious toffee bits on top. Finally, cover the dish and chill your Easy caramel apple cheesecake dip in the refrigerator for at least one hour. This resting time allows the flavors to meld together beautifully. Serve it chilled with crisp apple slices, graham crackers, or even pretzels for a delightful sweet and salty contrast.
Mistakes I’ve made and learned from
I once made the classic mistake of using cream cheese straight from the fridge for my Easy caramel apple cheesecake dip. The result was a lumpy, unappetizing mess that no amount of mixing could fix. Now, I always let my cream cheese sit on the counter for a good hour before I start. Trust me, this simple step makes the entire process so much smoother. Another lesson learned the hard way involved my caramel sauce. I once drizzled it on while it was still piping hot, which immediately melted my creamy layer into a soupy puddle. Letting the caramel cool to room temperature first completely solved this kitchen disaster. For more tips on getting your ingredients to the perfect consistency, my guide on softening butter quickly has some great tricks that also apply to cream cheese. And if you’re feeling ambitious with your caramel, avoid the common pitfalls I experienced by checking out my homemade caramel sauce tutorial first.
We can trace the roots of this dessert dip straight back to American county fairs and autumn festivals. Picture crisp fall afternoons, the scent of cinnamon in the air, and the iconic treat everyone craves a caramel apple. Someone, a genius no doubt, looked at that classic combination and thought let us turn this into a shareable, no fuss dip. Consequently, they merged the creamy, tangy goodness of cheesecake with the sweet, buttery notes of caramel and the fresh crunch of apples. This fusion created a dish that immediately feels both nostalgic and excitingly new.
Families often put their own spin on it, too. For instance, some households might stir in toffee bits for extra crunch, while others might add a pinch of sea salt to cut the sweetness. In different regions, people might use local apple varieties like tart Granny Smiths in the north or sweeter Fujis in the west. Ultimately, this easy caramel apple cheesecake dip embodies that spirit of communal eating and personalization. It is a dessert that invites you to gather around and make it your own.
ays-cooking">How it fits in today’s cooking
This dip absolutely thrives in modern cooking because it champions simplicity and social connection. It fits perfectly into today’s fast paced lifestyle, offering a impressive dessert without any of the fuss of baking a whole cheesecake. Furthermore, it has become a staple at seasonal gatherings, from Halloween parties to Thanksgiving feasts and everything in between. Its no bake nature means anyone can whip it up quickly, making it a hero for last minute hosts.
Modern cooks continuously adapt the recipe to suit different dietary needs. Some might use a vegan cream cheese alternative to create a plant based version that everyone can enjoy. Others might serve it with a variety of dippers beyond apples, like pretzels or graham crackers, for a fun textural contrast. This versatility ensures its place as a go to recipe. It pairs wonderfully with other make ahead dishes, allowing you to create a full spread of effortless no bake desserts for any occasion. Therefore, this easy caramel apple cheesecake dip remains a beloved and relevant treat for all.
Taste and Texture
What makes it delicious
This Easy caramel apple cheesecake dip delivers a spectacular creamy texture that feels incredibly lush and smooth on your tongue. Each bite bursts with the sweet, buttery flavor of rich caramel, perfectly balanced by the subtle tang of cream cheese. Furthermore, the warm, fragrant notes of cinnamon and vanilla weave through the dip, creating a comforting aroma that reminds you of a fresh-baked dessert. Finally, when you scoop it with a crisp apple slice, you get a fantastic contrast between the cool, velvety dip and the juicy, snappy fruit. Ultimately, this combination makes the Easy caramel apple cheesecake dip an irresistible treat.
r">Boosting the flavor
For an even more decadent experience, consider folding in chopped pecans or toffee bits to introduce a delightful crunch. Alternatively, a drizzle of extra caramel sauce or a sprinkle of sea salt on top will amplify the sweet and salty profile beautifully. If you want to explore another fantastic dip variation, our pumpkin cheesecake dip offers a wonderfully spiced autumn twist. Moreover, serving this alongside a batch of homemade cinnamon sugar tortilla chips can turn your snack into a truly memorable dessert platter.
Tips for Success
Best practices for results
First, always use full-fat cream cheese for the richest and creamiest texture in your Easy caramel apple cheesecake dip. Furthermore, ensure your cream cheese sits at room temperature for at least 30 minutes; consequently, it will blend smoothly without any lumps. Additionally, gently fold the whipped topping in by hand at the final step to maintain a light and fluffy consistency. For the best flavor experience, always chill your finished Easy caramel apple cheesecake dip for one hour before serving.
>Mistakes to avoid
Avoid overmixing the dip once you add the whipped topping, as this can deflate it and make the consistency dense. Instead, use a spatula to gently fold everything together until it is just combined. Moreover, do not skip the chilling step; otherwise, the flavors will not have time to meld properly. For more guidance on getting the perfect creamy base, read our tips on how to soften cream cheese correctly. Also, remember to pat your chopped apples dry with a paper towel before adding them; this simple step prevents a watery dip. If you are preparing this for a party, you can learn how to make dips ahead of time without sacrificing quality.
Serving and Pairing Suggestions
How to serve this dish
First, present your Easy caramel apple cheesecake dip in a beautiful, wide-rimmed bowl. This simple step creates an inviting centerpiece for your dessert table. For a stunning visual effect, drizzle extra caramel sauce over the top and sprinkle it with finely chopped pecans. Consequently, this garnish adds a delightful crunch and makes the dip look absolutely irresistible.
Serve this creamy delight at your next holiday gathering or a casual game night. Alternatively, it makes a fantastic sweet treat for a brunch spread. Remember to surround the bowl with an array of dippers so everyone can dig in. Ultimately, this Easy caramel apple cheesecake dip promises to be the star of any occasion.
h-it">What goes well with it
Pair your Easy caramel apple cheesecake dip with crisp, tart apple slices for a classic combination. The fresh fruit cuts through the dip’s richness perfectly. Furthermore, salty pretzel rods or sweet graham crackers also offer a wonderful textural contrast that everyone loves.
For a truly decadent experience, serve it alongside a slice of our Snickerdoodle Cupcakes. Meanwhile, a hot cup of coffee or a glass of cold milk beautifully balances the sweetness. Finally, consider offering our Pumpkin Spice Latte Cupcakes for a full fall-themed dessert spread that will utterly delight your guests.
math-faq-block">
What do you serve with caramel apple cheesecake dip?
The best dippers for this easy caramel apple cheesecake dip are sliced apples (tossed in a little lemon juice to prevent browning), graham crackers, pretzels, or vanilla wafers. You can also use it as a delicious spread on toast or a topping for pancakes to make a special breakfast treat.
Can you make caramel apple dip ahead of time?
Absolutely! You can prepare this easy caramel apple cheesecake dip up to 2-3 days in advance. Store it covered tightly in the refrigerator, then give it a good stir before serving. Making it ahead allows the flavors to meld together beautifully.
How long does cheesecake dip last in the fridge?
When stored in an airtight container, this easy caramel apple cheesecake dip will stay fresh in the refrigerator for 3 to 4 days. Always check for any signs of spoilage before serving leftovers, especially if you’ve been dipping directly into the bowl.
ank-math-faq-item">
Can I use homemade caramel sauce for this dip?
Yes, homemade caramel sauce works wonderfully and can elevate the flavor. However, using a good quality store-bought caramel sauce is a major time-saver and is the key to keeping this recipe quick and simple. Either option will result in a delicious dip.
Easy Maple Pumpkin Cookies – Savory Splash
Introduction
Is there anything more comforting than the smell of warm spices and maple wafting through your kitchen? Honestly, it feels like a cozy autumn hug. Furthermore, we all crave those simple, soul-warming treats that make a season special. Consequently, I am absolutely thrilled to share my recipe for Maple Pumpkin Cookies – Savory Splash. This delightful twist on a classic cookie perfectly captures the essence of fall in every single bite.
So, what exactly are Maple Pumpkin Cookies – Savory Splash? Essentially, they are a soft, cake-like cookie bursting with real pumpkin flavor and sweet maple, but they feature a unique, savory splash that elevates them beyond the ordinary. This unexpected element, a hint of rosemary or a touch of black pepper, creates a sophisticated flavor profile that surprises and delights the palate. This recipe matters because it breaks the mold. Instead of just another overly sweet dessert, it offers a more complex and memorable experience. Moreover, it fits our blog’s tone perfectly. We champion approachable recipes that encourage culinary creativity, just like our guide to creating the perfect homemade spice blend. This recipe uses simple, whole ingredients to create something extraordinary, much like turning a few basic components into a stunning easy homemade focaccia. Ultimately, these Maple Pumpkin Cookies – Savory Splash are not just a treat; they are a conversation starter for your next gathering.
Why I Love This Recipe
I have a deep personal connection to these Maple Pumpkin Cookies – Savory Splash. My grandmother always made classic pumpkin cookies, but one year I decided to experiment with her recipe by adding a little fresh rosemary from my garden. The result was magical and immediately became a new family tradition. Now, baking these cookies signals the true start of fall in my home. The process fills my kitchen with the most incredible aroma, and sharing them with friends always brings so much joy. They represent a beautiful blend of cherished tradition and my own culinary adventure, which is why this recipe holds such a special place in my heart.
Health and Nutrition
Why it’s good for your body
Maple Pumpkin Cookies – Savory Splash pack a powerful nutritional punch. First, pumpkin puree provides a fantastic source of vitamin A, which actively supports your vision and immune system. Furthermore, this key ingredient delivers a healthy dose of fiber, promoting excellent digestive health and helping you feel satisfied. Consequently, you can enjoy a treat that truly nourishes your body from the inside out.
Additionally, we use real maple syrup as a natural sweetener. Unlike refined sugars, maple syrup offers beneficial antioxidants and minerals like manganese and zinc. Therefore, these cookies provide a more wholesome energy release without the typical sugar crash. Moreover, the warming spices like cinnamon and ginger not only add depth of flavor but also bring their own anti-inflammatory properties to every bite.
Ultimately, choosing Maple Pumpkin Cookies – Savory Splash means you are making a smart choice for your well-being. Each ingredient works together to create a snack that is as good for you as it is delicious. Finally, you can feel great about serving these cookies to your family, knowing you are supporting their health with every savory-sweet mouthful.
How it fits in a healthy lifestyle
Maple Pumpkin Cookies – Savory Splash seamlessly fit into a balanced eating plan. They make for a perfect afternoon snack that satisfies a sweet craving without derailing your goals. You can also enjoy one as a delightful dessert after a nutritious meal. For those following specific dietary paths, these cookies are a wonderful plant-based option that everyone can enjoy.
Pairing a cookie with a source of protein, like a handful of almonds or a glass of milk, can make it an even more satisfying and balanced treat. If you are looking for more inspiration on building a wholesome menu, explore our guide on creating a balanced meal plan. Remember, healthy living is all about balance and enjoying the foods you love. For another great recipe that complements an active lifestyle, try our wholesome energy bites for a quick protein boost.
A unique fusion of spicy Sichuan mapo flavors and sweet pumpkin in a soft, savory cookie with a hint of maple sweetness.
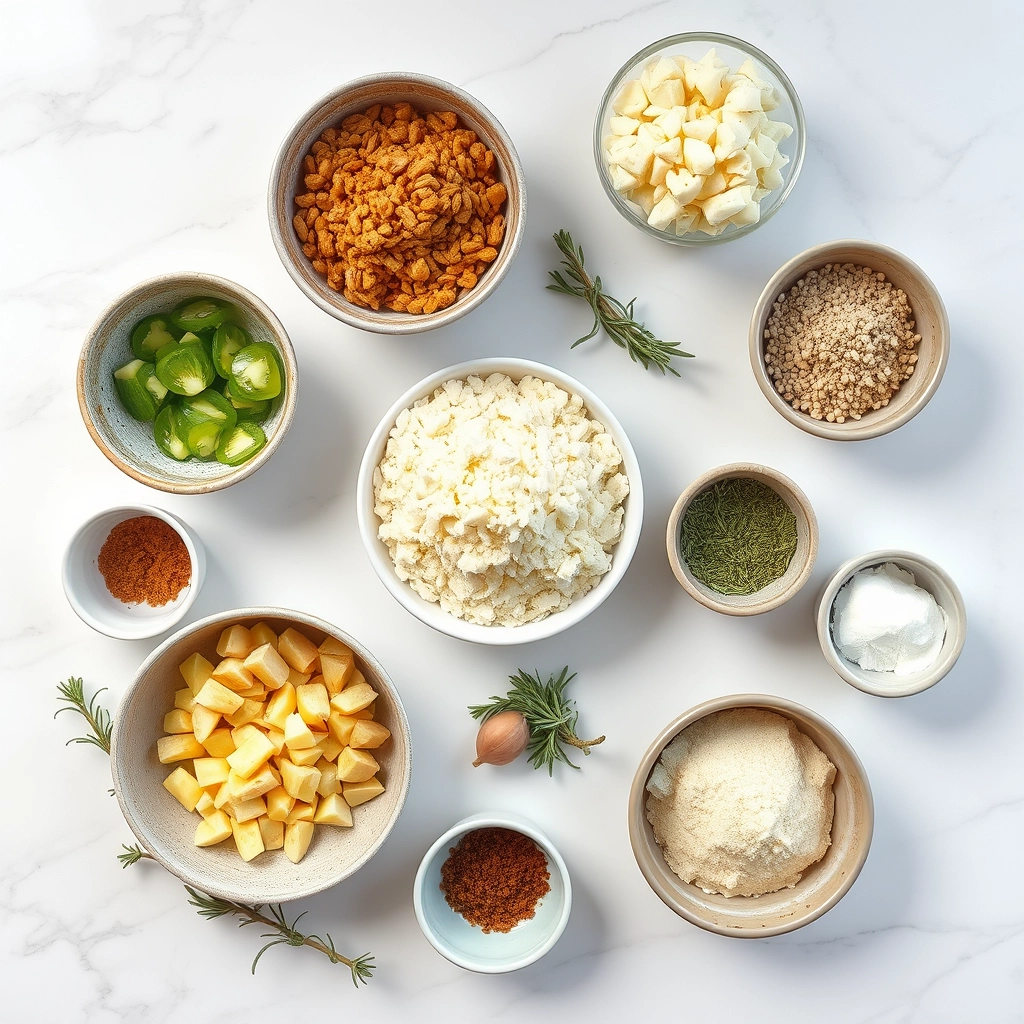
Ingredients
Scale
For the Crust:
1 cup pumpkin puree
2 tbsp maple syrup
1/4 cup doubanjiang (fermented chili bean paste)
1 tsp Sichuan peppercorns, ground
2 cups all-purpose flour
1/2 tsp baking soda
1/4 cup vegetable oil
1/4 cup finely chopped scallions
2 cloves garlic, minced
1 tsp ginger, grated
1/2 cup firm tofu, crumbled
1/4 cup water
Instructions
1. Prepare the Crust:
Preheat oven to 350°F (175°C) and line a baking sheet with parchment paper.
In a bowl, mix pumpkin puree, maple syrup, vegetable oil, doubanjiang, ground Sichuan peppercorns, garlic, and ginger until well combined.
Gradually add flour and baking soda to the wet ingredients, stirring until a soft dough forms. Fold in crumbled tofu and scallions.
Drop tablespoon-sized portions of dough onto the prepared baking sheet, spacing them about 2 inches apart.
Bake for 12-15 minutes or until edges are lightly golden. Let cool on the sheet for 5 minutes before transferring to a wire rack.
Notes
You can customize the seasonings to taste.
How to Prepare This Dish
Steps and time-saving tips
First, preheat your oven and line your baking sheets with parchment paper. Meanwhile, whisk your dry ingredients together in one bowl. In a larger separate bowl, cream the softened butter with both sugars until the mixture becomes light and fluffy. Next, beat in the pumpkin puree, maple syrup, egg, and vanilla. Gradually fold your dry ingredients into this wet mixture until you form a soft, slightly sticky cookie dough. For a major time-saving tip, use a medium cookie scoop to drop perfect dough portions onto your sheets; this ensures even baking and saves you from messy hands. Then, just bake your Maple Pumpkin Cookies – Savory Splash until the edges look set. Finally, let them cool completely on the pan before you drizzle on the simple maple glaze. Ultimately, this straightforward process yields the most wonderfully spiced and cakey cookies.
and-learned-from">Mistakes I’ve made and learned from
I have definitely learned a few lessons the hard way with these Maple Pumpkin Cookies – Savory Splash. My biggest mistake was using cold, hard butter straight from the fridge, which resulted in a lumpy batter that refused to cream properly. Now I always make sure my butter is truly softened at room temperature for a perfectly smooth base. Another common error I made was over-measuring the flour, which led to a dry and crumbly dough instead of the soft, cake-like texture we want. I finally solved this by using a kitchen scale for accuracy, and the difference was incredible. For more on getting your ingredients just right, my guide on ingredient substitutions can be a real lifesaver. Remember, patience is key; letting these cookies cool completely before glazing prevents a runny mess, a tip I picked up from my deep dive into baking science.
Cultural Connection and Variations
Where this recipe comes from
This recipe for Maple Pumpkin Cookies – Savory Splash pulls from a deep, cozy well of North American tradition. For generations, families have celebrated the autumn harvest by baking with pumpkin and warming spices. My own grandmother, however, always added a special twist. She insisted that a generous splash of real maple syrup, not just sugar, created a richer, more complex flavor. Consequently, her kitchen in Vermont smelled like a perfect fall day whenever these cookies were in the oven. Meanwhile, other cultures approach similar bakes quite differently. In Italy, for instance, cooks might fold pumpkin into a sweet ravioli filling with amaretti cookies. Alternatively, Australian bakers often pair pumpkin with sultanas and cinnamon for a classic scone. Ultimately, our version celebrates a very specific, rustic New England charm. The Maple Pumpkin Cookies – Savory Splash truly captures that spirit of hearth and home.
ays-cooking">How it fits in today’s cooking
This treat absolutely thrives in modern kitchens, especially as we seek meaningful, from-scratch cooking. Today, it fits perfectly into holiday cookie swaps and seasonal gatherings that celebrate the cooler months. Furthermore, contemporary home cooks love adapting the base recipe to suit their dietary needs. Some easily swap in gluten-free flour, while others might use a flax egg for a vegan version. You can even turn this recipe into a fun weekend project with the kids, much like our popular Rainbow Crepe Cake. Moreover, the warm spices and wholesome pumpkin make these cookies feel like a somewhat virtuous indulgence. They pair wonderfully with a cup of coffee for an afternoon pick-me-up or as a sweet ending to a hearty dinner. Ultimately, this recipe offers a delicious way to connect with tradition, much like the comforting flavors in our Butternut Squash Soup.
Taste and Texture
What makes it delicious
These Maple Pumpkin Cookies – Savory Splash deliver a wonderfully soft and cake-like texture that simply melts in your mouth. Each bite releases a warm, fragrant blend of cozy pumpkin and sweet maple, creating a truly autumnal experience. Furthermore, the rich, earthy spices complement the sweet glaze perfectly, making every cookie feel like a special treat. Ultimately, the delightful chewiness combined with the smooth, sweet icing makes these Maple Pumpkin Cookies – Savory Splash utterly irresistible.
Boosting the flavor
For an extra flavor kick, consider folding a handful of toasted pecans or walnuts into the batter for a delightful crunch. Alternatively, a sprinkle of flaky sea salt on top of the glaze just before it sets creates an amazing sweet-and-salty contrast. If you love warm spices, a pinch of extra cardamom or a dash of black pepper can really deepen the flavor profile. For another fantastic fall baking idea that uses similar warm spices, explore our popular Pumpkin Cinnamon Rolls. Moreover, serving these cookies slightly warm with a scoop of vanilla bean ice cream turns them into a decadent dessert. Discover more pairing inspiration with our guide to the perfect homemade vanilla ice cream.
Always chill your cookie dough for at least one hour before baking. This crucial step prevents the Maple Pumpkin Cookies – Savory Splash from spreading too thin in the oven. Furthermore, use a cookie scoop to ensure each portion is uniform. For the best texture, line your baking sheets with parchment paper. Finally, let the cookies cool completely on the pan so they set properly.
Mistakes to avoid
Avoid measuring your flour incorrectly, as too much creates a dry, crumbly cookie. Instead, fluff your flour with a spoon before gently spooning it into your measuring cup. Consequently, you will achieve the perfect soft texture for your Maple Pumpkin Cookies – Savory Splash. Moreover, do not overmix your dough once you add the dry ingredients. Overmixing develops gluten and leads to tough cookies, so just mix until you see no more flour streaks. For more guidance, our article on common baking mistakes offers excellent advice. Additionally, ensure your spices are fresh for the most vibrant flavor, a topic we cover in our guide to storing spices properly.
g-suggestions">Serving and Pairing Suggestions
How to serve this dish
Present your freshly baked Maple Pumpkin Cookies – Savory Splash on a rustic wooden board for a charming, homespun feel. Alternatively, arrange them on a elegant cake stand to instantly elevate your dessert table. For a special touch, lightly dust them with powdered sugar just before serving. These cookies truly shine during autumn gatherings and holiday feasts. Consequently, they make a wonderful edible gift when packaged in a beautiful tin or cellophane bag tied with twine. Always serve Maple Pumpkin Cookies – Savory Splash warm to maximize their cozy, aromatic spices.
What goes well with it
A hot cup of spiced chai tea makes a perfect partner for these cookies. The warm spices in the chai beautifully echo the cinnamon and nutmeg in your Maple Pumpkin Cookies – Savory Splash. For a truly decadent experience, try dunking them in a glass of cold milk. The creamy milk provides a lovely contrast to the cookie’s rich, spiced flavor. Furthermore, consider offering a scoop of vanilla bean ice cream on the side for a simple yet impressive dessert. This combination creates a fantastic textural play between the warm, soft cookie and the cool, creamy ice cream. You can find more inspiration for your next baking project with our popular Easy Homemade Bread Recipes. Finally, balance the sweetness by serving these cookies after a savory meal like our hearty Creamy Chicken Pot Pie.
math-faq-block">
Can I make Maple Pumpkin Cookies – Savory Splash without maple syrup?
While maple syrup is a key flavor component, you can substitute it with an equal amount of honey or agave nectar. However, this will alter the distinct autumnal taste, so the final result won’t be an authentic Maple Pumpkin Cookies – Savory Splash experience.
How do I store Maple Pumpkin Cookies to keep them soft?
To maintain their signature soft and cake-like texture, store your Maple Pumpkin Cookies – Savory Splash in an airtight container at room temperature. Placing a piece of bread in the container can help keep them moist for several days.
What kind of pumpkin should I use for these cookies?
For the best results, always use canned 100% pure pumpkin puree, not pumpkin pie filling. The puree provides the perfect moisture and flavor concentration needed for the Maple Pumpkin Cookies – Savory Splash recipe without making the batter too wet.
ank-math-faq-item">
Are Maple Pumpkin Cookies – Savory Splash freezer-friendly?
Absolutely! These cookies freeze beautifully. Ensure they are completely cooled, then place them in a single layer in a freezer-safe bag or container. They can be frozen for up to 3 months; simply thaw at room temperature when you’re ready to enjoy one.