“`html
Table of Contents
- Flavorful Fusion: Sheet Pan Chicken Shawarma Havarti Sandwich
- Ingredients for Sheet Pan Chicken Shawarma Havarti Sandwich
- Timing Is Everything
- Crafting Your Sheet Pan Chicken Shawarma Havarti Sandwich
- Nutritional Snapshot
- Healthier Twists on Your Shawarma Sandwich
- Serving Suggestions
- Common Pitfalls to Avoid
- Storing Your Shawarma Masterpiece
- Final Bite
- Frequently Asked Questions
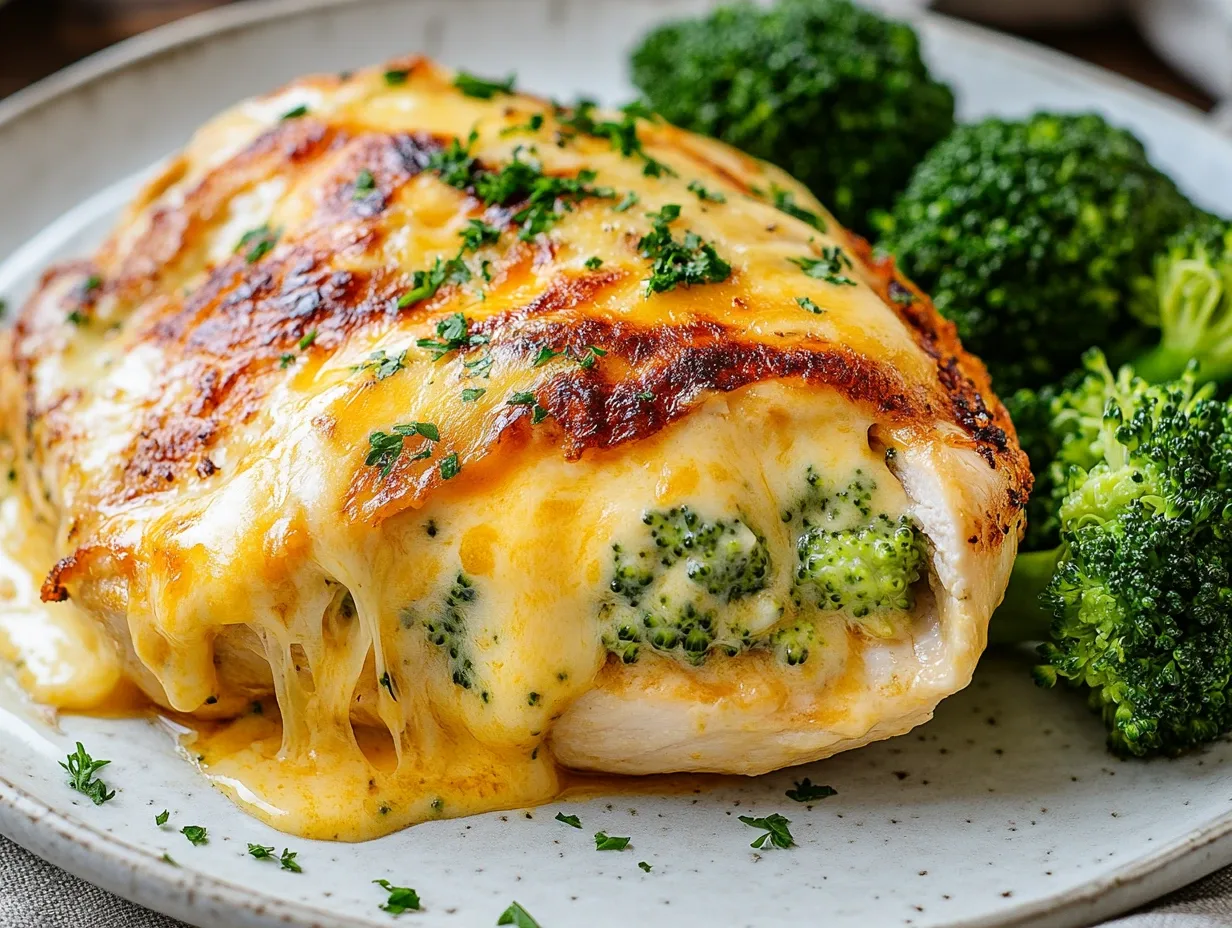
Sheet Pan Chicken Shawarma Havarti Sandwich – Easy & Flavorful! 🧀🥙
Flavorful Fusion: Sheet Pan Chicken Shawarma Havarti Sandwich
Are you craving a weeknight meal that explodes with bold, exciting flavors but doesn’t keep you chained to the stove? If you’re nodding your head, then you’ve landed in the right place! This Sheet Pan Chicken Shawarma Havarti Sandwich recipe is your ticket to a culinary adventure combining the aromatic spices of Middle Eastern shawarma with the comforting, melt-in-your-mouth creaminess of Havarti cheese, all nestled within warm, fluffy naan. We’re talking about a symphony of textures and tastes – juicy, spiced chicken, gooey cheese, and a hint of freshness – that comes together with incredibly minimal effort. Imagine a dish that offers the satisfying chew of tender chicken, the rich indulgence of melted Havarti, and the delightful tang of shawarma spices, all wrapped up in a convenient, handheld package. This isn’t just a sandwich; it’s an experience that will transform your ordinary mealtime into something extraordinary, proving that complex flavors can indeed come from the simplest of preparations. Get ready to impress yourself and anyone lucky enough to snag a bite!

Ingredients for Sheet Pan Chicken Shawarma Havarti Sandwich
The magic of this sandwich lies in the balance of bold spices and creamy cheese. Here’s what you’ll need:
For the Chicken Shawarma
- 1.5 lbs boneless, skinless chicken thighs (preferred for juiciness, but breasts work too!), cut into bite-sized pieces
- 2 tablespoons olive oil
- 1 tablespoon lemon juice (freshly squeezed for that bright zing!)
- 2 teaspoons ground cumin (earthy and warm, the backbone of shawarma)
- 2 teaspoons ground coriander (citrusy and floral notes)
- 1 teaspoon paprika (for a touch of smoky sweetness)
- 1 teaspoon turmeric (adds a beautiful golden hue and subtle peppery flavor)
- 1/2 teaspoon ground cinnamon (a whisper of warmth and sweetness)
- 1/4 teaspoon cayenne pepper (optional, for a gentle kick)
- 1/2 teaspoon garlic powder (or 2 cloves fresh garlic, minced, for a pungent punch)
- 1/2 teaspoon onion powder (enhances savory depth)
- Salt and freshly ground black pepper to taste
For the Sandwich
- 4 pieces of naan bread (fluffy and slightly chewy, the perfect vessel)
- 4-6 slices of Havarti cheese (wonderfully creamy and mild, melts like a dream) – approximately 4 oz
- 1/2 cup plain Greek yogurt or tahini sauce (for drizzling, adds tang and creaminess)
- 1/4 cup chopped fresh parsley (for bright, herbaceous freshness)
- 1/4 cup thinly sliced red onion (for a sharp, pungent bite)
- 1 cup sprouts (alfalfa or broccoli sprouts add a lovely crunch and fresh taste)
Optional Additions
- Sliced tomatoes
- Pickled cucumbers or jalapeños
- A drizzle of sriracha for extra heat
Timing Is Everything
Compared to the traditional method of marinating and cooking shawarma meat separately, this sheet pan approach shaves off significant time and cleanup. Most shawarma recipes involve longer marination periods and multiple cooking steps. Our method streamlines this into a quick and efficient process, making it perfect for a busy weeknight when you crave something special without the fuss.
Crafting Your Sheet Pan Chicken Shawarma Havarti Sandwich
Step 1: Preheat and Prep
Preheat your oven to 400°F (200°C). Line a large baking sheet with parchment paper for easy cleanup. This is your foundation for a deliciously simple meal!
Step 2: Marinate the Chicken
In a medium bowl, combine the chicken pieces with olive oil, lemon juice, cumin, coriander, paprika, turmeric, cinnamon, cayenne (if using), garlic powder, onion powder, salt, and pepper. Toss everything together until the chicken is thoroughly coated in the vibrant spice mixture. Let it sit for at least 10 minutes while you prepare other components, or up to 30 minutes for deeper flavor.
Step 3: Roast the Chicken
Spread the marinated chicken in a single layer on the prepared baking sheet. Pop it into the preheated oven and roast for 15-20 minutes, or until the chicken is cooked through and slightly caramelized at the edges. The aroma will start to fill your kitchen, signaling deliciousness is on its way!
Step 4: Warm the Naan
While the chicken is roasting, gently warm the naan bread. You can do this in a dry skillet over medium heat for about 1-2 minutes per side, or pop it into the oven for the last 5 minutes of the chicken’s cooking time. It should be warm, soft, and pliable, ready to embrace its flavorful fillings.
Step 5: Assemble the Sandwiches
Once the chicken is cooked, carefully remove the baking sheet from the oven. Lay the warmed naan flat. Top each piece of naan with a generous portion of the shawarma chicken. Layer the Havarti cheese slices over the chicken. If you’re adding any quick-cooking toppings like sliced tomatoes, add them now.
Step 6: Broil to Perfection
Place the baking sheet with the assembled sandwiches back into the oven, this time under the broiler. Broil on high for 1-2 minutes, watching very closely, until the cheese is melted and bubbly and the naan is lightly golden. Be cautious; broilers are powerful and can burn things quickly!
Nutritional Snapshot
While exact nutritional values can vary based on specific ingredients and portion sizes, a typical serving of this Sheet Pan Chicken Shawarma Havarti Sandwich provides:
- Calories: Approximately 450-600 kcal per sandwich
- Protein: High, due to chicken
- Fat: Moderate, from chicken, olive oil, and cheese
- Carbohydrates: Moderate, from naan bread
- Fiber: Lower, but can be increased with fresh vegetable additions
Healthier Twists on Your Shawarma Sandwich
Want to lighten things up without sacrificing flavor? Try these swaps:
- Leaner Protein: Use chicken breast instead of thighs, or opt for turkey breast.
- Whole Wheat Naan: Choose whole wheat naan for added fiber.
- Lighter Cheese: Use a reduced-fat Havarti or a sharp white cheddar, which has a stronger flavor, so you can use less.
- More Veggies: Load up on lettuce, tomatoes, cucumbers, and onions. Consider adding grilled bell peppers or spinach for extra nutrients.
- Sauce Swap: Opt for a lightened-up tahini sauce made with less oil, or a simple Greek yogurt mixed with herbs and lemon juice instead of heavier sauces.
Serving Suggestions
These sandwiches are hearty enough to be a meal on their own. However, for a more complete dining experience, consider serving them with:
- A crisp green salad with a light vinaigrette.
- A side of hummus and pita chips.
- A refreshing cucumber and tomato salad.
- Batches of crispy oven-baked sweet potato fries.
Don’t forget to drizzle with your favorite sauce (Greek yogurt or tahini) and sprinkle with fresh parsley and red onion just before serving for maximum freshness and visual appeal.
Common Pitfalls to Avoid
To ensure your shawarma sandwich is a triumph:
- Overcrowding the Pan: Ensure chicken pieces are in a single layer for even cooking and caramelization.
- Burning Under the Broiler: Keep a close eye on the sandwiches when broiling. It only takes a minute or two!
- Soggy Naan: Warm the naan just before assembly, and don’t let it sit too long with wet toppings.
- Under-Spicing: Don’t be shy with the shawarma spices; they are key to the flavor profile.
Storing Your Shawarma Masterpiece
These sandwiches are best enjoyed fresh. However, if you have leftovers:
- Cooked Chicken: Store the roasted chicken in an airtight container in the refrigerator for up to 3-4 days. Reheat it gently in a skillet or the microwave.
- Assembled Sandwiches: It’s not recommended to store fully assembled sandwiches, as the naan can become soggy and the cheese won’t be ideal. It’s best to assemble them just before eating.
Final Bite
There you have it – a Sheet Pan Chicken Shawarma Havarti Sandwich that proves you don’t need hours in the kitchen to create a meal bursting with vibrant Middle Eastern flavors and cheesy goodness. It’s quick, it’s easy, and it’s incredibly satisfying. This recipe is perfect for busy weeknights, casual lunches, or even informal entertaining. Give it a try and let the bold, aromatic spices and creamy Havarti transform your sandwich game!
Loved this recipe? Share your creations with us on social media using #SheetPanShawarma and tag us @YourSocialHandle! We can’t wait to see your delicious sandwiches!
Frequently Asked Questions
***Can I make the shawarma spice mix ahead of time?***
Absolutely! You can mix all the dry shawarma spices together in a jar and store it in your pantry. This makes assembling the marinade even quicker on busy days.
***What if I don’t have Havarti cheese?***
Mild, melty cheeses like Monterey Jack, Provolone, or even a mild cheddar would work well as a substitute. Mozzarella can also be used for its excellent melting properties.
***Is it possible to make this vegetarian?***
Yes! You can swap the chicken for firm tofu cubes marinated and roasted in the same spices, or use chickpeas. Ensure they are well-drained and patted dry.
***How do I get crispier edges on the chicken?***
For crispier edges, ensure you don’t overcrowd the baking sheet, and consider turning the broiler on for an extra minute or two after the cheese melts, keeping a very close watch.
***Can I make this recipe gluten-free?***
Yes! Simply use gluten-free naan or wraps instead of traditional naan. Ensure all your spice blends and any other ingredients are also gluten-free.
Print
Sheet Pan Chicken Shawarma Havarti Sandwich Recipe
Description
Welcome to a delicious journey where bold Middle Eastern flavors meet cheesy, savory perfection! ThisSheet Pan Chicken Shawarma Havarti Sandwichis a delightful fusion of flavors, featuring juicy chicken, creamy Havarti cheese, and fresh sprouts wrapped in warm naan. If you’re a fan of shawarma and mouthwatering sandwiches, this recipe is sure to become a new favorite. With a quick prep time and even quicker cleanup, it’s a must-try for anyone who loves bold flavors in a simple, easy-to-make dish.
Ingredients
- 1/3 cupfull-fat plain Greek yogurt
- 1/4 cupextra virgin olive oil
- 1 1/2pounds chicken breasts or thighs, sliced
- 6cloves garlic, chopped
- 2shallots, chopped
- 1 tablespoonsmoked paprika
- 2 teaspoonsdried oregano
- 1/2 teaspoonturmeric
- Chili flakes (to taste)
- Salt (to taste)
- 4pieces naan
- 1/2 cupCaesar dressing, mayo, or garlic tahini
- 6slices Havarti cheese
- 6slices gouda cheese
- 1/2 cupsun-dried tomatoes, sliced
- 1/2 cupdill pickles/pepperoncini, sliced (or both)
- 1/2 cuppickled red onions (optional)
- 2 cupsfresh sprouts/microgreens
- Use dairy-free cheese for lactose intolerant diners.
- Substitute turkey for chicken to keep the recipe leaner.
- For gluten-free options, swap naan for gluten-free wraps or pita.
Instructions
- In a large bowl, combine Greek yogurt, olive oil, chopped garlic, shallots, smoked paprika, oregano, turmeric, chili flakes, and salt. Toss the sliced chicken in the marinade, making sure each piece is well-coated. Allow the chicken to marinate for 15 minutes.
- Preheat your oven to 425°F (220°C). Arrange the marinated chicken slices on a baking sheet in a single layer. Bake for 20 minutes, or until fully cooked. For added flavor, broil the chicken for an additional 1-2 minutes to achieve a charred, smoky effect on the edges.
- Lay each naan flat on a clean baking sheet. Spread Caesar dressing or garlic tahini on one side of each naan. Next, layer sun-dried tomatoes, sliced pickles, and pepperoncini. Add slices of Havarti and gouda cheese over the veggies. Top with the freshly baked shawarma chicken.
- Cover the sandwiches with foil and bake them for 15 minutes or until the cheese has melted. Once melted, remove the foil and top the sandwiches with fresh sprouts and pickled onions.
- Fold the naan over the sandwich filling and gently press down. Rub the top of each naan with olive oil and sprinkle sesame seeds over the surface. Return to the oven for an additional 5 minutes to lightly toast. Slice and serve warm with extra dressing.
Notes
Marinate the chickenfor at least 15 minutes to fully absorb the flavors. If you have time, allow the chicken to sit longer—up to 24 hours in the fridge.
When broiling the chicken, watch closely as it can burn quickly. A light char on the edges adds depth but avoid overcooking.
If you prefer crispier naan, you can toast it in a pan before assembling the sandwich.
“`