French Onion Rice Recipe – The Easiest, Most Flavorful Side Dish! 🧅

“`html

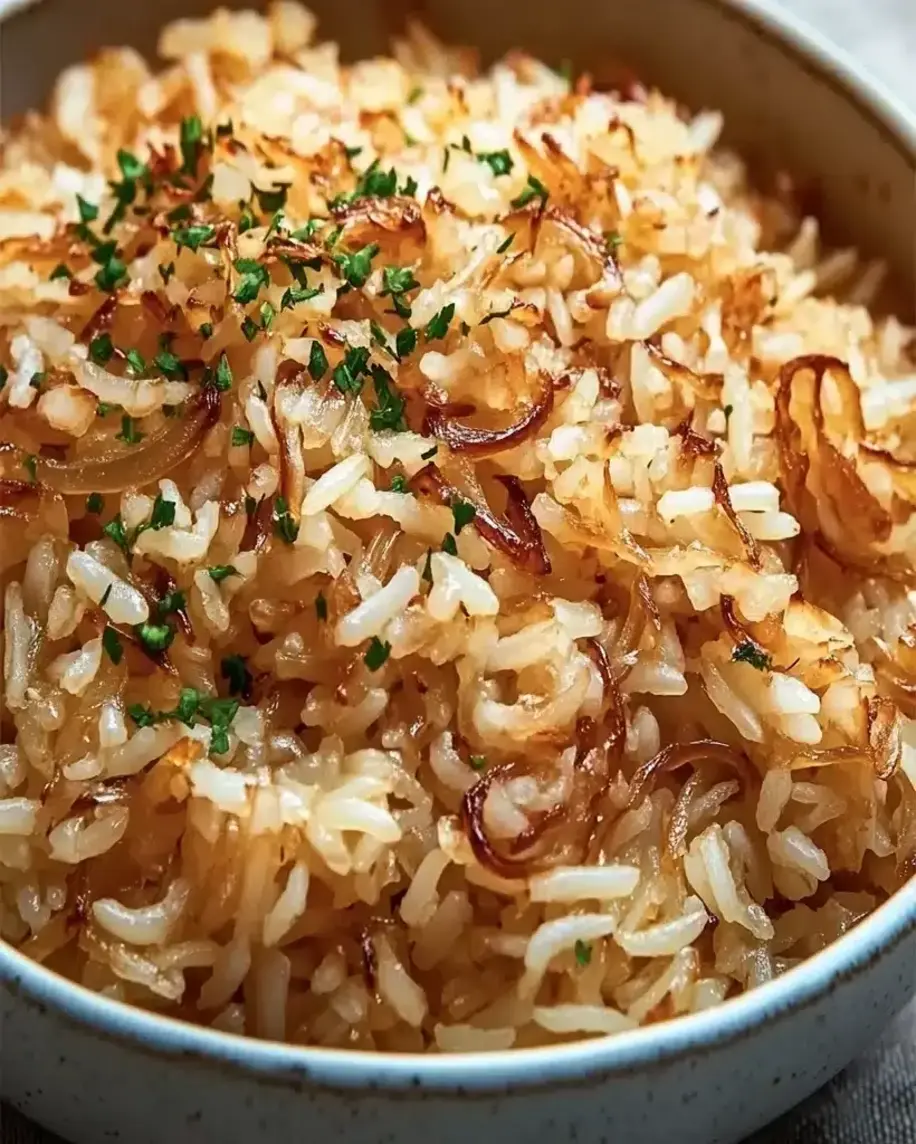
Introduction: French Onion Rice Magic

Are you looking for a side dish that’s both incredibly flavorful and surprisingly easy to make? In a world where side dishes often play second fiddle, we’re here to elevate your rice game by over 300%! With its deep, savory notes reminiscent of classic French onion soup but in a conveniently spoonable format, French Onion Rice is poised to become your new culinary best friend. This recipe masterfully blends the umami-rich essence of caramelized onions with fluffy rice, creating a side dish that’s both comforting and sophisticated. Perfect for busy weeknights or as a star accompaniment to your holiday feast, this French Onion Rice recipe is designed for maximum flavor with minimal fuss. Get ready to transform a humble grain into an extraordinary delight that will have everyone asking for seconds!

Ingredients: A Symphony of Flavors

The magic of French Onion Rice lies in its simplicity and the quality of its core ingredients. We aim for a deep, complex flavor that comes from patience and good produce. Here’s what you’ll need:

  • 2 tablespoons unsalted butter: The foundation for sautéing, adding a rich, creamy base. (Substitution: Olive oil or ghee for a dairy-free option.)
  • 3 large yellow onions, thinly sliced: The star of the show! Choose yellow onions for their balanced sweetness and pungency when caramelized. The longer they cook, the sweeter and more profound their flavor becomes. (Substitution: Sweet onions like Vidalia can be used for an even sweeter profile, or red onions for a slightly more peppery note.)
  • 1 teaspoon granulated sugar (optional): To aid in caramelization, especially if your onions aren’t super sweet.
  • 1 teaspoon salt, plus more to taste: Essential for drawing out moisture from the onions and enhancing all flavors.
  • ½ teaspoon black pepper, freshly ground: Adds a subtle warmth and bite.
  • 2 cloves garlic, minced: For that classic aromatic depth.
  • 1 ½ cups uncooked long-grain white rice: Provides a fluffy, neutral canvas for the rich onion flavor. (Substitution: Brown rice can be used, but will require longer cooking time and more liquid.)
  • 3 cups low-sodium beef broth: The liquid base that infuses the rice with savory, umami goodness. This is crucial for the “French Onion” flavor. (Substitution: Vegetable broth for vegetarian/vegan, or chicken broth if beef isn’t preferred.)
  • ¼ cup dry white wine (optional, but recommended): Deglazes the pan and adds a layer of acidity and complexity that brightens the dish. (Substitution: Use an extra ¼ cup of broth or a splash of red wine vinegar.)
  • 1 tablespoon Worcestershire sauce: Adds a powerful punch of savory, tangy, and slightly sweet notes.
  • Fresh parsley, chopped, for garnish: A sprinkle of fresh herbs cuts through the richness and adds a pop of color.

Timing: Your French Onion Rice Adventure

Prep time: 15 minutes
Cook time: 50-60 minutes
Total time: 1 hour 5 minutes – 1 hour 15 minutes

This recipe takes a little longer than your average quick side dish due to the essential caramelization of the onions. However, most of this time is hands-off simmering, making it very manageable. Compared to a standard rice pilaf (around 20-25 minutes), the extra time here is dedicated to building incredible depth of flavor that is absolutely worth it!

Delicious French Onion Rice being served

Instructions: Step-by-Step to Perfection

Follow these steps to create a side dish that will become a staple in your recipe rotation.

Step 1: Caramelize Those Onions

In a large, heavy-bottomed pot or Dutch oven, melt the butter over medium-low heat. Add the thinly sliced onions, sugar (if using), salt, and pepper. Stir to coat the onions. This is where the magic begins. You’ll want to cook the onions low and slow, stirring occasionally, for about 30-45 minutes, or until they are deeply golden brown, soft, and sweet. Don’t rush this process; the slow caramelization is key to the French onion flavor. If they start to stick or burn, add a tablespoon of water and reduce the heat slightly.

Step 2: Build the Flavor Base

Once the onions are beautifully caramelized, add the minced garlic to the pot and cook for another minute until fragrant. Pour in the dry white wine (if using) and scrape up any browned bits from the bottom of the pot – this is pure flavor! Let the wine simmer and reduce slightly for about 2 minutes.

Step 3: Simmer to Perfection

Stir in the uncooked rice, ensuring it’s coated with the onion mixture. Add the beef broth and Worcestershire sauce. Bring the mixture to a boil, then immediately reduce the heat to low, cover the pot tightly, and let it simmer for about 18-20 minutes, or until the rice is tender and most of the liquid has been absorbed. Avoid lifting the lid during this time to keep the steam in.

Step 4: The Finishing Touch

Once the rice is cooked, turn off the heat and let it stand, covered, for another 5-10 minutes. This allows the rice to steam and become perfectly fluffy. Fluff the rice gently with a fork, stir in the chopped fresh parsley, and taste for seasoning, adding more salt and pepper if needed. Serve hot and enjoy the incredible aroma and flavor!

Nutritional Information

This is an estimate per serving (assuming 6 servings), and can vary based on specific ingredients used.

  • Calories: Approximately 350-400 kcal
  • Protein: 8-10g
  • Fat: 10-15g (varies with butter/oil)
  • Carbohydrates: 55-60g
  • Fiber: 2-3g
  • Sodium: Varies based on broth and added salt

Healthier Alternatives for a Lighter Bite

Looking to lighten this dish up without sacrificing flavor? Here are a few swaps:

  • Use olive oil instead of butter: Reduces saturated fat.
  • Opt for low-sodium broth: Helps control sodium intake.
  • Incorporate more vegetables: Sauté finely diced celery or carrots along with the onions for added nutrients and fiber.
  • Choose brown rice or quinoa: These whole grains offer more fiber and a slightly lower glycemic index, though they require adjusted cooking times and liquid ratios.
  • Reduce the overall quantity of butter/oil: Use just enough to sauté the onions until tender and then let them release their natural moisture.

Serving Suggestions: Elevate Your Meal

This French Onion Rice is incredibly versatile. Here are some ideas:

  • With Steak or Roast Beef: It’s the natural pairing, echoing the flavors of classic French onion soup.
  • Alongside Roasted Chicken or Pork: The rich, savory notes complement most roasted meats beautifully.
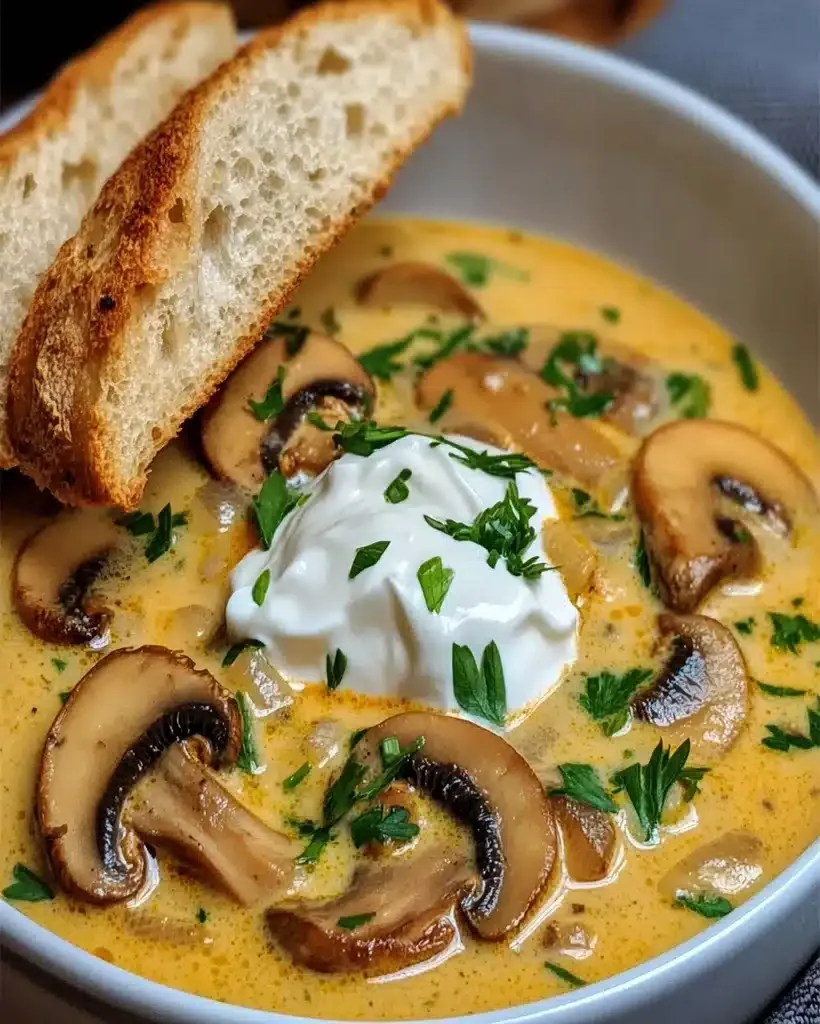
  • As a Vegetarian Main: Serve with a side salad and perhaps some pan-seared mushrooms for a hearty vegetarian meal.
  • With Fish: A lighter white fish, like cod or tilapia, can also benefit from the savory depth of this rice.
  • Topped with Gruyère Cheese: For an extra indulgence, sprinkle some grated Gruyère cheese over the rice during the last few minutes of simmering or broil briefly.

Common Mistakes to Avoid

To ensure your French Onion Rice turns out perfectly every time, keep these common pitfalls in mind:

  • Rushing the onions: The caramelization process is non-negotiable for deep flavor.
  • Using bland broth: The quality of your broth significantly impacts the final taste.
  • Over-stirring while simmering: This can lead to mushy rice. Let it steam undisturbed.
  • Not letting the rice rest: The resting period is crucial for perfect texture.

Storing Your Flavorful Creation

Leftover French Onion Rice can be stored in an airtight container in the refrigerator for up to 3-4 days. Reheat gently on the stovetop with a splash of broth or water to prevent drying, or in the microwave until heated through.

Conclusion: Your New Favorite Side

There you have it – a French Onion Rice recipe that’s as simple as it is spectacularly flavorful. This dish proves that you don’t need complicated techniques or exotic ingredients to create something truly memorable. The deep, comforting taste of caramelized onions infused into fluffy rice is a culinary hug your taste buds will thank you for. Whether you’re a seasoned cook or just starting, this recipe is a guaranteed winner. Give it a try and let us know how it turns out in the comments below! We’re eager to hear your experiences and see how you serve this delightful dish!

Frequently Asked Questions about French Onion Rice

Q: Can I use a different type of rice?
A: While long-grain white rice is recommended for its texture and cooking time, you can use brown rice. It will require more liquid and a longer simmering time (around 40-45 minutes). Quinoa is also an option but will change the flavor and texture profile considerably.

Q: How do I make this vegetarian or vegan?
A: For a vegetarian version, swap the beef broth for a good quality vegetable broth. For a vegan version, use olive oil instead of butter and vegetable broth. Ensure your Worcestershire sauce is also vegan, as some contain anchovies.

Q: My onions aren’t caramelizing, what am I doing wrong?
A: Caramelization takes time and patience. Ensure your heat is on medium-low and that you’re not overcrowding the pan. Stirring occasionally is fine, but don’t agitate them constantly. If they start to burn, reduce heat further and add a splash of water.

Q: Can I add cheese on top?
A: Absolutely! For an authentic French onion soup vibe, sprinkle grated Gruyère or Swiss cheese over the rice during the last 5 minutes of cooking or under a broiler for a few minutes until melted and bubbly.

Q: How much liquid should I use if I halve the recipe?
A: If you halve the recipe, you’ll likely need to adjust the liquid. For 1/2 the rice, start with about 1.5 cups of broth and adjust as needed during cooking. It’s always best to measure according to the rice package instructions when reducing quantities.

Print
clock clock iconcutlery cutlery iconflag flag iconfolder folder iconinstagram instagram iconpinterest pinterest iconfacebook facebook iconprint print iconsquares squares iconheart heart iconheart solid heart solid icon

French Onion Rice Recipe – Savory & Easy Side Dish Idea

  • Author: Chef Mia

Description

Welcome to the world of mouthwatering side dishes! Today, we’re bringing you a recipe that will quickly become a family favorite:French Onion Rice. If you’re a fan of the comforting flavors of French onion soup, this dish will delight you with its rich, savory goodness. Whether you’re looking for the perfect side dish for a special dinner or something easy to make that’s packed with flavor,French Onion Riceis just what you need. Let’s dive into this hearty, flavorful creation that transforms a simple rice dish into something extraordinary!


Ingredients

  • Optional Substitutions:

Instructions

  1. Warm theolive oilandbutterin a large skillet over medium heat. Add thesliced onionsandsugar, stirring frequently.
  2. Cook until the onions are very soft and caramelized. This should take about 25-30 minutes, giving the onions a sweet, rich flavor.
  3. While the onions cook, grease a 9×13-inch baking dish. Add therice,beef consommé,French onion soup,water,thyme, and season withsalt and pepper.
  4. Stir everything together to ensure the rice is well-coated with the liquids and seasonings.
  5. Once the onions are caramelized to perfection, spread them evenly over the top of the rice mixture in the baking dish.
  6. Cover the baking dish tightly with foil and bake in a preheated oven at425°Ffor30 minutes.
  7. After 30 minutes, remove the foil and stir the rice. Return the dish to the oven and bake uncovered for an additional30 minutes, or until the rice is tender and has absorbed the liquid.
  8. Let the dish stand for5 minutesafter baking. Fluff the rice with a fork before serving and garnish with fresh thyme or parsley, if desired.

Notes

Tip 1:For extra depth of flavor, try adding a splash ofdry white wineto the onions as they caramelize.
Tip 2:If you like a crispy top layer, broil the dish for the last5 minutesof baking to achieve a golden-brown finish.
Tip 3:This recipe is very versatile. Add a handful ofgrated Gruyère cheeseover the rice before the final bake for a cheesy twist.

“`

Hungarian Mushroom Soup Recipe – Creamy & Cozy Comfort in a Bowl! 🥣

“`html

Hungarian Mushroom Soup Recipe – Creamy & Cozy Comfort in a Bowl! 🥣

Welcome to Hungarian Mushroom Soup

Are you looking for a deeply satisfying, soulful soup that feels like a warm hug on a chilly day? You’ve landed in the right place! Hungarian Mushroom Soup is more than just a dish; it’s an experience. This classic Eastern European delight is renowned for its incredibly rich, velvety texture and its harmonious blend of earthy mushrooms, fragrant dill, a hint of bright lemon, and the unmistakable warmth of sweet paprika. It’s a recipe that promises comfort and delivers it in every single spoonful. Whether you’re a seasoned cook exploring new flavors or a beginner seeking a reliable, crowd-pleasing recipe, this Hungarian Mushroom Soup is set to become a staple in your culinary repertoire. Get ready to immerse yourself in the comforting simplicity and exquisite taste that this beloved soup has to offer!

Gather Your Ingredients

The magic of this Hungarian Mushroom Soup lies in its simplicity and the quality of its core ingredients. We’re focusing on fresh, vibrant components to create that signature flavor profile. Think earthy mushrooms, aromatic onions and garlic, and that indispensable touch of Hungarian sweet paprika.

Key Ingredients:

  • Mushrooms: 1.5 lbs (about 680g) mixed mushrooms (cremini, white button, shiitake recommended for depth of flavor).
    Substitutions: If you can’t find a good variety, 1.5 lbs of cremini or button mushrooms will work beautifully. For an even deeper, more ‘umami’ flavor, consider adding a tablespoon of dried porcini mushrooms, rehydrated and finely chopped.
  • Butter: 4 tablespoons (unsalted)
    Substitutions: Ghee or a good quality olive oil can be used, though butter adds a crucial richness.
  • Onion: 1 large, finely chopped (about 1.5 cups)
    Substitutions: Shallots can offer a slightly milder, sweeter flavor.
  • Garlic: 3-4 cloves, minced
    Substitutions: Garlic powder can be used in a pinch (about 1 teaspoon), but fresh garlic provides a more pungent and aromatic base.
  • All-Purpose Flour: 3 tablespoons
    Substitutions: Gluten-free all-purpose flour blend or a cornstarch slurry (mixed with water) can be used for thickening.
  • Vegetable or Chicken Broth: 6 cups
    Substitutions: Use low-sodium broth to better control the saltiness. Mushroom broth would enhance the mushroom flavor even further.
  • Hungarian Sweet Paprika: 2 tablespoons (generous!)
    Substitutions: If you can’t find Hungarian sweet paprika, use high-quality sweet paprika. Avoid smoked paprika as it will change the flavor profile significantly. A touch of hot paprika can be added if you enjoy a little heat.
  • Heavy Cream: 1 cup
    Substitutions: Half-and-half for a lighter creaminess, or full-fat coconut milk (unsweetened) for a dairy-free option, though it will impart a subtle coconut flavor.
  • Fresh Dill: 1/4 cup, chopped, plus more for garnish
    Substitutions: Parsley can be used if dill is unavailable, but dill offers that characteristic Eastern European touch.
  • Lemon Juice: 1-2 tablespoons, fresh
    Substitutions: A splash of white wine vinegar can work in a pinch, but lemon provides a brighter, more pleasing acidity.
  • Salt and Black Pepper: To taste

The Perfect Timing

This delightful soup comes together quite efficiently, making it perfect for a weeknight meal or a cozy weekend. The average time spent on similar creamy soups often hovers around 45-60 minutes. Our Hungarian Mushroom Soup fits right into that sweet spot, ensuring you’re not spending too much time in the kitchen.

Prep time: 15 minutes
Cook time: 30 minutes
Total time: 45 minutes

Delicious Hungarian Mushroom Soup in a bowl, garnished with dill and a swirl of cream.

Crafting Your Hungarian Mushroom Soup

Let’s get cooking! Follow these simple steps to create a silky, flavorful Hungarian Mushroom Soup that will impress everyone.

Step 1: Prepare the Mushrooms

Begin by cleaning your mushrooms. A gentle brush or damp paper towel is best for removing any dirt. Slice or chop about 1.5 pounds (680g) of your chosen mushrooms. It’s okay to have a mix of thicknesses for varied texture.

Step 2: Sauté the Aromatics

In a large pot or Dutch oven, melt 4 tablespoons of butter over medium heat. Add 1 large finely chopped onion and cook until it becomes soft and translucent, about 5-7 minutes. Stir in 3-4 minced cloves of garlic and cook for another minute until fragrant, being careful not to burn it.

Step 3: Build the Flavor Base

Sprinkle 3 tablespoons of all-purpose flour over the sautéed onions and garlic. Stir continuously for about 1-2 minutes to cook out the raw flour taste and create a roux. Gradually whisk in 6 cups of vegetable or chicken broth, ensuring no lumps form. Now, stir in the star ingredient: 2 tablespoons of Hungarian sweet paprika. Add the prepared mushrooms and a pinch of salt and black pepper. Bring the mixture to a simmer.

Step 4: Simmer and Thicken

Reduce the heat to low, cover the pot, and let the soup simmer gently for about 15-20 minutes. This allows the flavors to meld beautifully and the mushrooms to soften. The soup should thicken slightly on its own.

Step 5: Finish and Serve

Once the soup has simmered, stir in 1 cup of heavy cream, 1/4 cup of chopped fresh dill, and 1-2 tablespoons of fresh lemon juice. Heat gently for another 5 minutes, but do not boil after adding the cream, as it could curdle. Taste and adjust seasoning with salt and black pepper as needed. Ladle the hot soup into bowls, garnish with extra fresh dill, and perhaps a small swirl of cream if desired.

Nutritional Highlights

A typical serving of Hungarian Mushroom Soup is a comforting and relatively healthy option, packed with nutrients from the mushrooms and a good source of vitamins and minerals. Specific values can vary based on exact ingredients and portion sizes, but here’s a general overview per serving (approximate):

  • Calories: 250-350 kcal
  • Protein: 5-8g
  • Fat: 15-25g (depending on cream and butter)
  • Carbohydrates: 10-15g
  • Fiber: 2-4g
  • Vitamins: Good source of B vitamins, Vitamin D (from mushrooms), Vitamin K
  • Minerals: Potassium, Selenium, Phosphorus

Healthier Alternatives

Looking to lighten up this rich soup without sacrificing flavor? Here are a few simple swaps:

  • Lighter Cream: Use half-and-half or even a blend of milk and a touch of cornstarch for a lighter texture. For a dairy-free option, full-fat unsweetened coconut milk is an excellent substitute, though it adds a subtle coconut note.
  • Reduced Fat: Opt for low-fat cream cheese or a lighter sour cream if you want creaminess without the full fat of heavy cream.
  • Broth Base: Using 4 cups of broth and 2 cups of water can reduce overall sodium and calories.
  • Thickening: Instead of flour, you can use a cornstarch slurry (2 tablespoons cornstarch mixed with 4 tablespoons cold water) for a gluten-free and slightly lower-calorie thickener.

Serving Suggestions

This Hungarian Mushroom Soup is wonderfully versatile. It’s hearty enough to be a main course, especially when served with:

  • Crusty bread for dipping
  • A simple side salad with a light vinaigrette
  • A dollop of sour cream or Greek yogurt
  • A sprinkle of fresh chives or parsley
  • As a starter for a more elaborate meal, like roasted chicken or beef goulash.

Common Mistakes to Avoid

To ensure your soup turns out perfectly, steer clear of these common pitfalls:

  • Overcooking the Paprika: Paprika can become bitter if cooked too long or at too high a heat. Add it with the roux and stir briefly, or stir it in after the broth for minimum exposure to heat.
  • Boiling After Adding Cream: This can cause the cream to separate and curdle, ruining the smooth texture. Heat gently until just warmed through.
  • Using Smoked Paprika: While delicious, smoked paprika has a very different flavor profile that will overpower the delicate balance of this soup. Stick to sweet paprika.
  • Under-seasoning: Mushrooms absorb a lot of flavor, so don’t be afraid to season generously with salt and pepper at the end.

Storing Your Soup

This soup keeps wonderfully in the refrigerator. Allow it to cool completely before transferring it to an airtight container. It should last for 3-4 days. To reheat, gently warm it on the stovetop over low heat, stirring occasionally. If the soup appears too thick, you can add a splash more broth or water to reach your desired consistency. Freezing is also an option, though the texture of the cream might change slightly upon thawing. It’s best to freeze it without the cream and stir it in after reheating.

A Bowl of Comfort

Hungarian Mushroom Soup is a testament to how simple, quality ingredients and a bit of patient simmering can create something truly extraordinary. Its velvety texture, rich earthy notes, and comforting aroma make it an unforgettable dish. We hope this recipe brings warmth and deliciousness to your table. Try it out and let your taste buds travel to the heart of Eastern Europe!

Frequently Asked Questions

What is the role of sweet paprika in this soup?

Sweet paprika is the quintessential spice in Hungarian cuisine and provides the soup with its signature color and mild, sweet flavor. It’s crucial for achieving the authentic taste.

Can I make this soup vegetarian or vegan?

Yes! Use vegetable broth, and for the creaminess and richness, opt for full-fat unsweetened coconut milk or a cashew cream. Ensure your butter is replaced with olive oil or a vegan butter alternative. The result will be delicious!

Why are my mushrooms watery?

Mushrooms contain a lot of water. To minimize wateriness, avoid overcrowding the pan when sautéing them. Cook in batches if necessary, and don’t stir them too frequently initially, allowing them to brown rather than steam.

How can I make the soup thicker without flour?

You can use a cornstarch slurry (2 tablespoons cornstarch mixed with 4 tablespoons cold water) by whisking it into the simmering soup and cooking for a minute or two until thickened. Alternatively, you can blend a portion of the soup itself (using an immersion blender or carefully in a regular blender) to release starches and thicken it naturally.

Print
clock clock iconcutlery cutlery iconflag flag iconfolder folder iconinstagram instagram iconpinterest pinterest iconfacebook facebook iconprint print iconsquares squares iconheart heart iconheart solid heart solid icon

Hungarian Mushroom Soup Recipe: Comforting & Flavorful Dish

  • Author: Chef Mia

Description

Welcome to the world ofHungarian Mushroom Soup, a comforting, hearty dish that promises to warm your soul with its rich flavors and smooth texture. Whether you’re an enthusiast of Eastern European cuisine or simply seeking a cozy, delicious meal, thisHungarian Mushroom Soup recipeis a must-try. Imagine the earthiness of mushrooms mingling with the vibrant notes of dill, lemon, and sweet paprika—each spoonful is a burst of comforting flavors.


Ingredients

  • Optional substitutions:

Instructions

  1. Step 1:Start by melting the butter in a large pot over medium heat.
  2. Step 2:Add the diced onions and sauté until translucent.
  3. Step 3:Stir in the sliced mushrooms (except for the reserved garnish), cooking them until they release moisture and begin to brown. This will take about 5-7 minutes.
  4. Step 4:Sprinkle the dried dill, paprika, and soy sauce over the mushroom mixture, stirring well to combine all the ingredients.
  5. Step 5:Pour in the broth and bring the soup to a gentle simmer. Let it cook for about 10 minutes, allowing the flavors to meld.
  6. Step 6:In a small bowl, whisk together the cornstarch with a bit of cold water to form a slurry. Slowly stir this into the soup, ensuring the mixture thickens without clumping.
  7. Step 7:Gradually pour in the whole milk, letting the soup simmer for another 5 minutes until it’s creamy.
  8. Step 8:Lower the heat and stir in the sour cream and lemon juice, blending everything smoothly. Be careful not to let it boil, or the sour cream may curdle.
  9. Step 9:Season with salt and pepper to taste.
  10. Step 10:In a separate pan, sauté the reserved ¾ cup of mushrooms until golden, and set them aside for garnishing.

Notes

Use fresh mushroomsfor the best flavor. Fresh button mushrooms provide the earthiness that defines the dish.
Don’t rush the sautéing process: Let the onions and mushrooms cook slowly to extract the most flavor.
If you’re in a rush, you can use pre-sliced mushrooms, but for abetter texture, slice them fresh.
Add the cornstarch slowlyto avoid lumps, ensuring a smooth, creamy texture.

“`

Cheesy Baked Potatoes with Broccoli Cheese Sauce 🥦 – So Creamy & Delicious!

“`html

Cheesy Baked Potatoes with Broccoli Cheese Sauce 🥦 – So Creamy & Delicious!

Welcome to Our Delicious Kitchen Corner!

Are you constantly searching for that perfect, comforting dish that’s both incredibly satisfying and relatively simple to whip up? One that can serve as a hearty lunch, a delightful dinner, or an irresistible side? You’re not alone! Millions of home cooks are on the hunt for recipes that hit all the right notes. Today, we’re diving headfirst into the world of Cheesy Baked Potatoes with Broccoli Cheese Sauce. This dish is a beautiful symphony of textures and flavors: the satisfying crisp of a perfectly baked potato cradling a lusciously creamy, utterly decadent broccoli cheese sauce. It’s a guaranteed winner for cheese aficionados and a fantastic way to sneak those much-loved greens onto plates, even for the pickiest eaters. Get ready to bookmark this one – it’s destined to become a staple in your culinary repertoire. Let’s get cooking!

The Star Ingredients

The magic of this dish lies in its simplicity and the quality of its components. Here’s what you’ll need:

  • Large Russet Potatoes (4-6): The foundation of our dish. Choose firm, blemish-free potatoes that are uniform in size for even baking. Their starchy interior crisps up beautifully on the outside.
  • Fresh Broccoli Florets (2 cups, packed): The vibrant green star of our sauce. Ensure they are fresh, crisp, and bright green. You can also use frozen broccoli florets, thawed and drained, in a pinch.
  • Unsalted Butter (4 tablespoons): The rich base for our roux. High-quality butter will lend a superior flavor.
  • All-Purpose Flour (4 tablespoons): The thickening agent for our creamy sauce. Provides a smooth, velvety texture.
  • Milk (2 cups): Whole milk is recommended for the creamiest texture. You can substitute with 2% milk, but avoid skim milk for optimal richness.
  • Shredded Cheddar Cheese (2 cups, sharp or medium): The heart and soul of the cheese sauce. Freshly shredded cheese melts better and tastes superior to pre-shredded varieties which often contain anti-caking agents. A sharp cheddar provides a bolder flavor, while a medium cheddar offers a smoother, milder taste.
  • Salt (1 teaspoon, or to taste): Essential for bringing out all the flavors.
  • Black Pepper (1/2 teaspoon, or to taste): Freshly ground black pepper adds a subtle warmth and spice.
  • Optional: Pinch of Nutmeg: Enhances the creamy, cheesy flavor beautifully.
  • Optional: Pinch of Garlic Powder/Onion Powder: For an extra layer of savory depth.

Perfecting the Timing

Prep time: 15 minutes
Cook time: 60-75 minutes
Total time: 75-90 minutes

Compared to many complex casseroles, this Cheesy Baked Potato with Broccoli Cheese Sauce recipe is quite efficient. While the potatoes bake, you can prepare the sauce, making it a manageable weeknight meal. The total time of 75-90 minutes is generally in line with or slightly longer than average similar baked potato dishes, primarily due to the initial baking of the potatoes to achieve that perfect crispy skin.

Cheesy Baked Potatoes with Broccoli Cheese Sauce 🥦 – So Creamy & Delicious!

Let’s Get Cooking: Step-by-Step

Step 1: Prep & Bake the Potatoes

First things first, let’s get those potatoes ready for their golden-brown transformation. Preheat your oven to 400°F (200°C). Scrub the potatoes thoroughly under cool running water to remove any dirt. Pat them completely dry with a paper towel. This is crucial for crispy skin; moisture is the enemy of crispiness! Pierce each potato several times with a fork. This allows steam to escape during baking, preventing them from bursting. Rub each potato all over with a little olive oil or melted butter and sprinkle generously with salt. Place the prepared potatoes directly on the oven rack or on a baking sheet. Bake for 60-75 minutes, or until the skins are crisp and the insides are tender when pierced easily with a knife or fork. The time will vary depending on the size of your potatoes.

Step 2: Craft the Broccoli Cheese Sauce

While the potatoes are baking, let’s whip up that glorious broccoli cheese sauce. You have two options for the broccoli: steam it until tender-crisp (about 5-7 minutes) then finely chop it, or if you prefer a smoother sauce with smaller broccoli pieces, you can lightly boil it until tender, then carefully pulse it a few times in a food processor. Set aside. In a medium saucepan, melt the butter over medium heat. Whisk in the flour and cook for about 1-2 minutes, whisking constantly, until it forms a smooth paste (this is your roux). Don’t let it brown too much. Gradually whisk in the milk, a little at a time, ensuring there are no lumps. Continue to cook and whisk until the sauce thickens to a creamy consistency, about 5-7 minutes. Season with salt, pepper, and a pinch of nutmeg or garlic/onion powder if using. Remove the saucepan from the heat. Stir in the shredded cheddar cheese, a handful at a time, stirring until each addition is melted and incorporated before adding the next. Once all the cheese is melted and the sauce is smooth and luscious, gently stir in your prepared broccoli florets. Taste and adjust seasoning if needed. The sauce should be rich, creamy, and wonderfully cheesy!

Step 3: Combine and Bake to Perfection

Once the potatoes are perfectly baked and tender, carefully remove them from the oven. Let them cool slightly so you can handle them. Slice each potato in half lengthwise, or cut a deep pocket into the top of each potato. You can gently fluff the insides with a fork to create more space. Spoon generous amounts of the warm broccoli cheese sauce over the cut potatoes, allowing it to spill into the crevices. If you like extra cheese, sprinkle a little more shredded cheddar on top of the sauce. Return the loaded potatoes to the oven (still at 400°F/200°C) for another 5-10 minutes, or until the cheese is melted and bubbly, and the sauce is heated through. For an extra crispy topping, you can even broil them for the last 1-2 minutes, watching carefully to prevent burning!

Nutritional Spotlight

While exact nutritional values can vary based on ingredient brands and portion sizes, a typical serving of Cheesy Baked Potatoes with Broccoli Cheese Sauce is a good source of carbohydrates, protein, and calcium. It’s also a way to incorporate vegetables into your meal.

  • Calories: Approx. 400-600 per serving (highly variable)
  • Protein: Good source from cheese and milk
  • Carbohydrates: Primarily from the potatoes
  • Fat: From butter, milk, and cheese
  • Fiber: Present in the potatoes and broccoli (skin on potatoes is best for fiber)

Healthier Twists

Looking for ways to lighten up this creamy delight without sacrificing flavor? Try these swaps:

  • Lighter Milk: Use 2% milk instead of whole milk.
  • Reduced-Fat Cheese: Opt for reduced-fat cheddar, though the texture might be slightly less creamy.
  • Whole Wheat Flour: Use whole wheat flour in the roux for added fiber.
  • Greek Yogurt: For an extra creamy tang and protein boost, stir in a dollop of plain Greek yogurt into the finished sauce (off the heat).
  • Cauliflower Mash: For an even lower-carb, veggie-packed sauce, steam and blend cauliflower into the cheese sauce base.

Serving Suggestions

These loaded baked potatoes are hearty enough to be a main course! They pair wonderfully with:

  • A crisp green salad with a light vinaigrette.
  • Grilled chicken or fish for a complete meal.
  • As a side dish to steak or roasted meats.
  • A dollop of sour cream or Greek yogurt and a sprinkle of chives or parsley for freshness.

Common Pitfalls to Avoid

To ensure your Cheesy Baked Potatoes with Broccoli Cheese Sauce turn out perfectly every time:

  • Undercooking Potatoes: Make sure potatoes are fully tender before loading.
  • Lumpy Sauce: Whisk the flour and milk gradually to prevent lumps.
  • Overheating Cheese Sauce: Cook the roux and thicken the milk over medium heat. Once cheese is added, keep it warm but avoid boiling, which can make the sauce oily or grainy.
  • Not Drying Potatoes: For crispy skins, ensure potatoes are dry before oiling and salting.

Storing Your Delicious Creation

Leftovers can be stored in an airtight container in the refrigerator for up to 2-3 days. Reheat gently in the oven or microwave until heated through. Note that the baked potato skin may lose some crispness upon reheating.

A Crowd-Pleasing Classic

Cheesy Baked Potatoes with Broccoli Cheese Sauce is more than just a meal; it’s an experience. It’s the ultimate comfort food that brings warmth and smiles to any table. Easy enough for a weeknight, yet special enough for company, this recipe is a keeper. Give it a try, and let us know how much you love it in the comments below!

Frequently Asked Questions

***Does the broccoli need to be cooked before adding to the sauce?***

Yes, it’s best to either steam or lightly boil the broccoli until tender-crisp before incorporating it into the cheese sauce. This ensures it’s cooked through and its flavor is well-integrated without becoming mushy.

***Can I use different types of potatoes?***

Russet potatoes are ideal for their starchy texture that crisps up well. While other potatoes like Yukon Gold can work, they might result in a softer skin and a different texture.

***My cheese sauce is too thick, what should I do?***

You can thin out a thick cheese sauce by whisking in a little more milk, a tablespoon at a time, until you reach your desired consistency. Ensure the sauce is warm when you do this.

***Can I make this recipe ahead of time?***

You can prepare the broccoli cheese sauce a day in advance and store it in the refrigerator. Reheat it gently before spooning over freshly baked potatoes. The potatoes themselves are best baked fresh for optimal crispiness.

Print
clock clock iconcutlery cutlery iconflag flag iconfolder folder iconinstagram instagram iconpinterest pinterest iconfacebook facebook iconprint print iconsquares squares iconheart heart iconheart solid heart solid icon

Cheesy Baked Potatoes with Broccoli Cheese Sauce | Easy Recipe

  • Author: Chef Mia

Description

Welcome to our delicious kitchen corner! Today, we’re diving into the world ofCheesy Baked Potatoes with Broccoli Cheese Sauce. This comforting dish combines crispy baked potatoes with a creamy, cheesy broccoli sauce that’s perfect for lunch, dinner, or even a side dish. Whether you’re a cheese lover or simply looking to add more veggies to your plate, this recipe will become a favorite! Let’s get cooking!


Ingredients

  • Optional Substitutions:

Instructions

  1. Preheat your oven to 425℉.
  2. Wash and scrub the potatoes, then pierce them with a fork in several spots.
  3. Brush the potatoes with olive oil and sprinkle with salt.
  4. Place them on a baking sheet and bake for 50-60 minutes until fork-tender.
  5. While the potatoes are baking, melt the butter in a saucepan over medium heat.
  6. Add the flour, whisking constantly until the mixture turns golden.
  7. Slowly pour in the milk, whisking continuously to avoid lumps.
  8. Add cayenne pepper, garlic powder, and salt, cooking until the sauce thickens.
  9. Gradually add the grated cheddar, stirring until the cheese melts into a smooth sauce.
  10. Fold in the finely chopped broccoli and cook for another 2-3 minutes. Remove from heat.
  11. Once the potatoes are done, let them cool for a few minutes.
  12. Slice them lengthwise and fluff the insides with a fork.
  13. Pour the warm broccoli cheese sauce over the potatoes.
  14. Garnish with black pepper, chives, or scallions. Serve immediately and enjoy!

Notes

Tip #1: Always use freshly grated cheese for the best melting results. Pre-packaged shredded cheese contains additives that prevent smooth melting.
Tip #2: If you want a spicier sauce, increase the cayenne pepper or add a dash of hot sauce.
Tip #3: You can prepare the cheese sauce in advance and store it in the fridge for up to two days. Simply reheat before serving.

“`

Delicious Turkey Bacon Cheese Baked Spaghetti Recipe You Must Try

“`html

Delicious Turkey Bacon Cheese Baked Spaghetti Recipe You Must Try

Craving Ultimate Comfort Food? This Creamy Turkey Bacon Baked Spaghetti is Your Answer!

Are you searching for that perfect, soul-warming dish that’s both incredibly delicious and surprisingly easy to make? In a world flooded with quick dinners, finding a recipe that hits all the right notes – creamy, cheesy, savory, and utterly satisfying – can feel like a quest. Well, your quest ends here! This creamy, cheesy baked spaghetti is loaded with savory turkey bacon, chive cream cheese, and melty mozzarella for the ultimate comfort food dish that your whole family will adore. Forget bland pasta bakes; this recipe elevates baked spaghetti to a whole new level of deliciousness, making it perfect for a cozy family dinner or a crowd-pleasing potluck.

Ingredients for Turkey Bacon Cheese Baked Spaghetti

This recipe relies on a harmonious blend of textures and flavors to create a truly memorable dish. The star ingredients come together to create a symphony of comfort:

  • 1 pound spaghetti: The classic backbone of any spaghetti dish. Look for good quality pasta that holds its shape well during baking. Whole wheat spaghetti is a great healthier alternative.
  • 1 pound ground turkey bacon: Adds a smoky, salty crispness without the grease of pork bacon. Choose a good quality ground turkey bacon for the best flavor. If you can’t find ground, you can finely chop regular turkey bacon.
  • 1 small yellow onion, finely chopped: Provides a subtle sweetness and aromatic depth. Shallots can be used for a milder flavor.
  • 2 cloves garlic, minced: Essential for that savory aroma and taste. Fresh garlic is always best for its pungent kick.
  • 1 (8-ounce) package cream cheese, softened: This is the secret to our creamy sauce! Chive & Onion cream cheese adds an extra layer of flavor, but plain works too. Ensure it’s at room temperature for smooth blending.
  • 1 cup milk (whole or 2%): Helps to create a smooth, luscious sauce consistency. Use dairy-free milk if needed.
  • 1/2 cup grated Parmesan cheese: Adds a sharp, nutty, salty element that enhances the overall richness. Freshly grated is always superior to pre-shredded.
  • 2 cups shredded mozzarella cheese, divided: For that irresistible, gooey, melty cheese pull. A blend of mild and sharp mozzarella can offer more complex flavor.
  • 1/4 cup chopped fresh chives: Adds a fresh, mild oniony bite that cuts through the richness. Alternatively, use green onions or parsley.
  • 1/2 teaspoon salt, or to taste.
  • 1/4 teaspoon black pepper, or to taste.
  • Optional: Red pepper flakes for a hint of heat.

Recipe Timing

Prep Time:
20 minutes
Cook Time:
30 minutes
Total Time:
50 minutes

Compared to the average baked spaghetti that often requires longer baking times or multiple stages, this recipe is remarkably efficient. The 20-minute prep time is ample for browning the turkey bacon and chopping aromatics, while the 30-minute cook time ensures a perfectly melty, bubbly dish without a lengthy wait. This makes it ideal for busy weeknights.

Delicious Turkey Bacon Cheese Baked Spaghetti Recipe

Step-by-Step Instructions

Step 1: Cook the Turkey Bacon

Start by browning your turkey bacon in a large skillet over medium heat. Break it up with a spoon as it cooks. Once it’s nicely browned and somewhat crispy, drain off any excess fat, leaving just a tablespoon or two in the skillet. Remove the cooked turkey bacon from the skillet and set it aside on a paper towel-lined plate to drain further. This step ensures that your bacon bits are perfectly crisp and not greasy.

Step 2: Sauté Aromatics

In the same skillet (with the reserved fat), add the finely chopped yellow onion. Sauté it over medium heat until it becomes translucent and tender, about 5-7 minutes. Then, add the minced garlic and cook for another minute until fragrant, being careful not to burn it. The aroma building in your kitchen right now is just the beginning!

Step 3: Make the Cream Sauce

Reduce the heat to low. Add the softened cream cheese to the skillet with the onions and garlic. Stir until it starts to melt and combine with the aromatics. Gradually whisk in the milk until you have a smooth, creamy sauce. Then, stir in the grated Parmesan cheese, half of the shredded mozzarella cheese, salt, pepper, and optional red pepper flakes. Continue stirring until the cheese is melted and the sauce is thick and luscious. Taste and adjust seasoning if needed.

Step 4: Combine and Bake

While you’re making the sauce, cook your spaghetti according to package directions until al dente. Drain the spaghetti well. Add the drained spaghetti to the skillet with the cream sauce. Toss gently to coat all the pasta evenly. Stir in most of the cooked turkey bacon and chopped chives (save a little for garnish). Pour the spaghetti mixture into a greased 9×13 inch baking dish. Top with the remaining shredded mozzarella cheese and sprinkle with the reserved turkey bacon and chives. Bake in a preheated oven at 375°F (190°C) for 20-25 minutes, or until the cheese is melted, bubbly, and golden brown around the edges.

Nutritional Information

While exact nutritional values can vary based on ingredients and portion sizes, a typical serving of this delicious baked spaghetti offers:

  • Calories: Approximately 450-550 per serving (this can vary significantly with cheese and pasta quantities).
  • Protein: Around 25-35g (from turkey bacon, cheese, and pasta).
  • Fat: Approximately 20-30g (mostly from cheese and cream cheese).
  • Carbohydrates: Around 40-50g (from spaghetti).

Please note: These are estimates and can be adjusted with ingredient substitutions.

Healthier Alternatives

Looking to lighten up this comfort classic without sacrificing flavor? Here are some simple swaps:

  • Whole Wheat Spaghetti: Boost fiber content and added nutrients.
  • Low-Fat Cream Cheese & Milk: Reduce saturated fat.
  • Lean Ground Turkey: If you can’t find turkey bacon, or want even less fat, use lean ground turkey and add a pinch of smoked paprika and extra salt for that smoky flavor.
  • More Veggies: Stir in steamed broccoli florets or sautéed spinach for added nutrients and fiber.
  • Reduced-Fat Cheese: Use reduced-fat mozzarella for a similar melt with less fat.

Serving Suggestions

This Turkey Bacon Cheese Baked Spaghetti is a meal in itself, but it pairs wonderfully with a crisp side salad dressed with a light vinaigrette to balance the richness. A side of crusty garlic bread for soaking up any extra sauce is always a popular choice for a more indulgent meal. For a complete family dinner, consider serving it with steamed green beans or roasted asparagus.

Common Mistakes to Avoid

* Overcooking the Spaghetti: Remember, it will continue to cook in the oven. Aim for al dente.
* **Not Softening the Cream Cheese:** Lumpy cream cheese makes for a less smooth sauce.
* Using Stale Cheese: Freshly grated Parmesan and good quality mozzarella make a significant difference in flavor.
* Skipping the Browning Step: Properly browning the turkey bacon and sautéing the aromatics builds essential flavor depth.

Storing and Reheating Tips

Leftovers can be stored in an airtight container in the refrigerator for up to 3-4 days. Reheat in the oven or microwave until heated through. For best results when reheating in the oven, cover with foil to prevent the top from drying out, then uncover for the last few minutes to re-melt the cheese.

A Comfort Food Masterpiece

This Delicious Turkey Bacon Cheese Baked Spaghetti is more than just a recipe; it’s an experience. It’s the warm hug on a chilly evening, the comforting aroma that fills your home, and the satisfied smiles around your dinner table. The combination of savory turkey bacon, creamy chive cream cheese, and gooey mozzarella over perfectly cooked spaghetti is simply irresistible. Don’t wait another minute to try this guaranteed crowd-pleaser!

Frequently Asked Questions

***Can I use pork bacon instead of turkey bacon?***

Absolutely! Pork bacon will add a different, richer flavor. If using regular pork bacon, be sure to drain off most of the grease before adding the onions.

***Can I make this ahead of time?***

Yes, you can assemble the entire dish (up to the point of baking) and cover it tightly with plastic wrap or foil. Store it in the refrigerator for up to 24 hours. You may need to add an extra 5-10 minutes to the baking time if baking directly from the fridge.

***What kind of pasta is best?***

While spaghetti is traditional, you can also use other pasta shapes like penne, rotini, or rigatoni. Just ensure they are cooked al dente before combining with the sauce.

***How can I make it spicier?***

Add more red pepper flakes to the sauce, or stir in a pinch of cayenne pepper. You could also add a few dashes of your favorite hot sauce to the sauce mixture.

Print
clock clock iconcutlery cutlery iconflag flag iconfolder folder iconinstagram instagram iconpinterest pinterest iconfacebook facebook iconprint print iconsquares squares iconheart heart iconheart solid heart solid icon

Turkey Bacon Cream Cheese Baked Spaghetti

  • Author: Chef Mia

Description

Thiscreamy, cheesy baked spaghettiis loaded withsavory turkey bacon, chive cream cheese, and melty mozzarellafor the ultimate comfort food dish. Perfect for a cozy family dinner!


Ingredients

  • ✅For the Spaghetti:4 cupsmilk10.5 ozcondensedcream of baconsoup7.5 ozPhiladelphia Whipped Chive cream cheese1 teaspoonsalt1 teaspoonblack pepper1 tablespoongarlic powder1 tablespoononion powder1lb spaghetti2 cupsshredded mozzarella cheese½ cupreal turkey bacon bits✅For the Topping:2 cupsshredded mozzarella cheese1 tablespoonchopped chives½ cupreal turkey bacon bits
  • ✅For the Topping:2 cupsshredded mozzarella cheese1 tablespoonchopped chives½ cupreal turkey bacon bits

Instructions

  1. 1️⃣Preheat oven: Set your oven to400°F (200°C). Grease a9×13-inch baking dishand set aside.2️⃣Make the sauce: In a large pot over medium heat, combinemilk, cream of bacon soup, whipped chive cream cheese, salt, pepper, garlic powder, and onion powder. Stir well and bring to a gentle boil.3️⃣Cook the pasta: Once the liquid is boiling, break the spaghetti noodles in half and add them to the pot. Reduce heat tomedium-lowand cook for8 minutes, stirring occasionally.4️⃣Add cheese & turkey bacon: Stir in2 cups of shredded mozzarellaand½ cup of turkey bacon bits, mixing until fully incorporated.5️⃣Transfer to baking dish: Pour the spaghetti mixture into theprepared baking dish, spreading it evenly.6️⃣Add toppings: Sprinkle the top with2 more cups of shredded mozzarella, chopped chives, and turkey bacon bits.7️⃣Bake: Place the dish in the oven and bake for14-15 minutes, or until the cheese isfully meltedand slightly golden around the edges.8️⃣Let it rest: Remove from the oven and let the baked spaghetti sit fora few minutesbefore serving.
  2. 2️⃣Make the sauce: In a large pot over medium heat, combinemilk, cream of bacon soup, whipped chive cream cheese, salt, pepper, garlic powder, and onion powder. Stir well and bring to a gentle boil.
  3. 3️⃣Cook the pasta: Once the liquid is boiling, break the spaghetti noodles in half and add them to the pot. Reduce heat tomedium-lowand cook for8 minutes, stirring occasionally.4️⃣Add cheese & turkey bacon: Stir in2 cups of shredded mozzarellaand½ cup of turkey bacon bits, mixing until fully incorporated.5️⃣Transfer to baking dish: Pour the spaghetti mixture into theprepared baking dish, spreading it evenly.6️⃣Add toppings: Sprinkle the top with2 more cups of shredded mozzarella, chopped chives, and turkey bacon bits.7️⃣Bake: Place the dish in the oven and bake for14-15 minutes, or until the cheese isfully meltedand slightly golden around the edges.8️⃣Let it rest: Remove from the oven and let the baked spaghetti sit fora few minutesbefore serving.
  4. 4️⃣Add cheese & turkey bacon: Stir in2 cups of shredded mozzarellaand½ cup of turkey bacon bits, mixing until fully incorporated.5️⃣Transfer to baking dish: Pour the spaghetti mixture into theprepared baking dish, spreading it evenly.6️⃣Add toppings: Sprinkle the top with2 more cups of shredded mozzarella, chopped chives, and turkey bacon bits.7️⃣Bake: Place the dish in the oven and bake for14-15 minutes, or until the cheese isfully meltedand slightly golden around the edges.8️⃣Let it rest: Remove from the oven and let the baked spaghetti sit fora few minutesbefore serving.
  5. 5️⃣Transfer to baking dish: Pour the spaghetti mixture into theprepared baking dish, spreading it evenly.
  6. 6️⃣Add toppings: Sprinkle the top with2 more cups of shredded mozzarella, chopped chives, and turkey bacon bits.7️⃣Bake: Place the dish in the oven and bake for14-15 minutes, or until the cheese isfully meltedand slightly golden around the edges.8️⃣Let it rest: Remove from the oven and let the baked spaghetti sit fora few minutesbefore serving.
  7. 7️⃣Bake: Place the dish in the oven and bake for14-15 minutes, or until the cheese isfully meltedand slightly golden around the edges.8️⃣Let it rest: Remove from the oven and let the baked spaghetti sit fora few minutesbefore serving.
  8. 8️⃣Let it rest: Remove from the oven and let the baked spaghetti sit fora few minutesbefore serving.

Notes

🥗 Serve with afresh saladorgarlic breadfor a complete meal.🌶 Add a littlered pepper flakesfor a spicy kick.🧀 Mix in someparmesan cheesefor extra cheesiness.ThisTurkey Bacon Cream Cheese Baked Spaghettiis creamy, cheesy, and packed with smoky turkey bacon flavor.Enjoy!
ThisTurkey Bacon Cream Cheese Baked Spaghettiis creamy, cheesy, and packed with smoky turkey bacon flavor.Enjoy!

“`

Sbarro Mama’s Meatball Recipe – Easy Spaghetti & Sauce You’ll Love!

“`html

Sbarro Mama’s Meatball Recipe – Easy Spaghetti & Sauce You’ll Love!

Welcome to this classic Sbarro Mama’s Meatball Recipe with Spaghetti & Sauce! There’s nothing quite as comforting as a plate of delicious meatballs resting on a bed of spaghetti, drenched in rich marinara sauce. If you’re a fan of hearty Italian meals, you’re in the right place. This recipe brings the flavors of Sbarro’s right into your kitchen, with a simple step-by-step guide that will leave your family asking for seconds!

We’ve all had those days where only a deeply satisfying, home-cooked Italian meal will do. This Sbarro-inspired recipe captures that homestyle magic, making it accessible even for beginner cooks. Forget the freezer aisle; this is the real deal, a true taste of tradition that’s surprisingly easy to recreate.

Ingredients That Sing: The Heart of Mama’s Meatballs

The secret to incredible meatballs lies in the quality and combination of ingredients. We’ve focused on creating a balance of flavors and textures that are both traditional and irresistibly delicious.

For the Perfect Meatball Mix

  • 1 lb Ground Beef (80/20): The rich fat content from 80/20 beef ensures tender, juicy meatballs that don’t dry out. (Substitution: You can use 90/10 for a leaner option, but consider adding a tablespoon of olive oil for moisture.)
  • 1/2 lb Ground Pork: Adds a wonderful depth of flavor and tenderness, a classic Italian meatball secret. (Substitution: Use an additional 1/2 lb of ground beef or ground veal.)
  • 1/2 cup Italian-style Breadcrumbs: These seasoned crumbs add structure and absorb the juices beautifully. (Substitution: Use plain breadcrumbs and add 1/2 teaspoon each of dried oregano and basil.)
  • 1/4 cup Grated Parmesan Cheese: For that essential salty, nutty umami punch. (Substitution: Pecorino Romano for a sharper flavor, or nutritional yeast for a dairy-free option.)
  • 1/4 cup Milk: Helps to tenderize the meat and bind the ingredients. (Substitution: Water or a dairy-free milk alternative.)
  • 1 large Egg, lightly beaten: The crucial binder that holds your beautiful meatballs together.
  • 2 cloves Garlic, minced: Fresh garlic is key for that authentic aroma and taste. (Substitution: 1 teaspoon garlic powder if fresh isn’t available.)
  • 1 teaspoon Dried Oregano: An aromatic herb that is indispensable in Italian cooking.
  • 1/2 teaspoon Salt: Enhances all the other flavors.
  • 1/4 teaspoon Black Pepper: For a subtle kick.

For the Rich Marinara Sauce

  • 2 tablespoons Olive Oil: The foundation of our flavorful sauce.
  • 1 medium Onion, finely chopped: Adds a savory sweetness as it simmers.
  • 3 cloves Garlic, minced: Doubles down on the garlicky goodness.
  • 1 (28 ounce) can Crushed Tomatoes: The heart of our marinara, providing a vibrant, tangy base. (Substitution: Diced tomatoes for a chunkier sauce, or tomato passata for a smoother texture.)
  • 1 (15 ounce) can Tomato Sauce: Contributes to a velvety, rich sauce consistency.
  • 1 teaspoon Dried Basil: A fresh, slightly sweet herb that perfectly complements tomatoes.
  • 1/2 teaspoon Dried Oregano: Echoing the flavors in the meatballs.
  • 1/4 teaspoon Red Pepper Flakes (optional): For a hint of warmth.
  • 1 teaspoon Sugar (optional): Balances the acidity of the tomatoes.
  • Salt and Freshly Ground Black Pepper to taste.

For Assembling and Serving

  • 1 lb Spaghetti: The classic canvas for our meatballs and sauce. (Substitution: Linguine, fettuccine, or your favorite pasta shape.)
  • Fresh Parsley, chopped: For a bright, fresh garnish.
  • Grated Parmesan Cheese, for serving.
A plate of Sbarro-style meatballs with spaghetti and marinara sauce.

A Symphony of Flavors: Timing is Everything

Prep Time:
25 Minutes
Cook Time:
1 Hour 15 Minutes
Total Time:
1 Hour 40 Minutes
Yields:
6-8 Servings

Compared to the average spaghetti and meatball recipe which often clocks in around 1 hour total time, this Sbarro Mama’s recipe requires a bit more patience, especially for the sauce to meld with the meatballs. However, the extended simmering time is precisely what infuses every bite with deep, complex flavors, making it well worth the extra minutes.

Step-by-Step: Crafting Your Sbarro Mama’s Masterpiece

Step 1: Crafting the Flavorful Meatball Mixture

In a large bowl, combine the ground beef, ground pork, Italian breadcrumbs, grated Parmesan cheese, milk, beaten egg, minced garlic, dried oregano, salt, and pepper. Use your hands to gently mix everything together until just combined. Be careful not to overmix, as this can result in tough meatballs. The mixture should feel cohesive but still slightly loose.

Step 2: Rolling Perfection – Shaping the Meatballs

Lightly wet your hands to prevent sticking. Take about 2 tablespoons of the meat mixture and gently roll it between your palms to form uniform balls, roughly 1.5 inches in diameter. Place the formed meatballs on a baking sheet or platter. You should get about 18-24 meatballs, depending on size. If the mixture is too sticky, chill it in the refrigerator for 15-20 minutes.

Step 3: The Golden Touch – Browning the Meatballs

Heat the 2 tablespoons of olive oil in a large, heavy-bottomed pot or Dutch oven over medium-high heat. Carefully add the meatballs in batches, ensuring not to overcrowd the pot. Brown them on all sides until they have a nice golden-brown crust. This step is crucial for developing flavor and texture. Remove the browned meatballs with a slotted spoon and set them aside on a plate.

Step 4: Building the Aromatic Sauce Base

In the same pot (with a bit of the rendered fat from the meatballs, if desired, or add a little more olive oil if it’s dry), reduce the heat to medium. Add the finely chopped onion and sauté until softened and translucent, about 5-7 minutes. Add the minced garlic and cook for another minute until fragrant, being careful not to burn it.

Step 5: The Slow Dance – Simmering the Sauce with Meatballs

Pour in the crushed tomatoes and tomato sauce. Stir in the dried basil, dried oregano, red pepper flakes (if using), and sugar (if using). Season with salt and pepper to taste. Bring the sauce to a gentle simmer. Carefully return the browned meatballs to the pot, nestling them into the sauce. Cover the pot, reduce the heat to low, and let it simmer for at least 1 hour, or up to 1.5 hours. Stir occasionally to prevent sticking. The longer it simmers, the more the flavors will meld and deepen.

Step 6: Al Dente Dreams – Cooking the Spaghetti

About 15-20 minutes before you’re ready to serve, bring a large pot of generously salted water to a rolling boil. Add the spaghetti and cook according to package directions until al dente (tender but still with a slight bite). Drain the pasta, reserving about a cup of the pasta water.

Step 7: The Grand Finale – Plating Perfection

You have two options here: you can either gently toss the drained spaghetti with a ladleful of the sauce in the pot, or serve the spaghetti as is and spoon the sauce and meatballs over the top. For a richer flavor, toss the pasta with a little of the reserved pasta water to help the sauce coat each strand. Serve hot, garnished with fresh chopped parsley and extra grated Parmesan cheese.

Nutritional Spotlight: Guiding Your Culinary Journey

While exact nutritional values can vary significantly based on ingredient brands and specific quantities used, a typical serving (approximately 3-4 meatballs with sauce and pasta) of this Sbarro Mama’s Meatball Recipe contains:

  • Calories: 500-700 kcal
  • Protein: 25-35g
  • Fat: 20-35g (including saturated fat)
  • Carbohydrates: 45-60g
  • Sodium: Varies, can be high if relying on processed ingredients.

(Note: These are estimations. For precise tracking, use a nutritional calculator with your specific ingredients.)

Healthier Twists on a Classic Comfort

Maintaining the soul of this dish while making it more heart-healthy is entirely possible:

  • Leaner Meats: Swap some or all of the beef and pork for lean ground turkey, chicken, or even plant-based crumbles. For turkey/chicken, ensure you add a touch more olive oil to the meatball mix to maintain moisture.
  • Whole Wheat Pasta: Opt for whole wheat spaghetti for increased fiber content.
  • Reduced Sodium: Use low-sodium canned tomatoes and tomato sauce, and adjust salt to your taste.
  • Veggie Boost: Finely grate zucchini or mushrooms and add them to the meatball mix for added nutrients and moisture. Or, increase the onion and garlic in the sauce, and consider adding finely diced carrots or bell peppers.
  • Less Breadcrumbs: Use whole wheat breadcrumbs, or reduce the amount and compensate with finely ground oats for binding.

Serving Suggestions: Elevating Your Italian Feast

This dish is a star on its own, but here are a few ideas to make your meal even more special:

  • Garlic Bread: A crusty loaf of garlic bread is the perfect companion for soaking up that delicious sauce.
  • Side Salad: A simple, crisp green salad with a vinaigrette offers a refreshing contrast to the rich main course.
  • Roasted Vegetables: Broccoli, asparagus, or zucchini roasted with olive oil and herbs complement the Italian flavors beautifully.
  • Wine Pairing: A medium-bodied Italian red like Chianti or Sangiovese would be an excellent choice.

Avoiding Pitfalls: Common Mistakes to Skip

Even the most seasoned cooks can make errors. Here are a few common missteps to avoid:

  • Overmixing the Meat: This is the most frequent culprit behind tough, dense meatballs. Mix only until ingredients are just incorporated.
  • Not Browning the Meatballs: Skipping the browning step means missing out on a significant amount of flavor development and a desirable textured exterior.
  • Overcrowding the Pot: When browning meatballs or simmering sauce, give ingredients space to cook properly. Overcrowding leads to steaming rather than browning, and uneven cooking.
  • Sauce Too Thin/Thick: The simmering time is key. If your sauce is too thin after an hour, let it simmer uncovered for the last 15-20 minutes to reduce. If it’s too thick, add a splash of water or reserved pasta water.
  • Under-seasoning: Always taste and adjust seasoning (salt and pepper) at the end of cooking, especially after simmering.

Savoring the Leftovers: Smart Storing Tips

Leftovers are a gift! Properly stored, this dish can be enjoyed for days:

  • Refrigeration: Allow the spaghetti and meatballs to cool completely. Store them in an airtight container in the refrigerator for up to 3-4 days. It’s best to store the pasta and meatballs/sauce separately if possible to prevent the pasta from becoming too mushy.
  • Freezing: This dish freezes exceptionally well! Store cooled leftovers in freezer-safe containers or heavy-duty freezer bags for up to 2-3 months. It’s ideal to freeze the meatballs and sauce separately from the pasta for the best texture upon reheating.
  • Reheating: To reheat, thaw frozen items in the refrigerator overnight. Gently reheat on the stovetop over low heat, adding a splash of water or broth if needed. You can also reheat individual portions in the microwave. If reheating pasta, consider cooking fresh pasta to add to the warmed sauce and meatballs for optimal texture.

A Taste of Tradition, Made by You

This Sbarro Mama’s Meatball Recipe with Spaghetti & Sauce isn’t just a meal; it’s an experience. It’s about bringing people together, creating delicious memories, and savoring the kind of honest, comforting food that feels like a warm hug. You’ve got the power to recreate this classic Italian favorite right in your own kitchen, impressing your loved ones with your culinary prowess.

So, roll up your sleeves, gather your ingredients, and get ready to create a dish that will become a cherished part of your family’s mealtime traditions. Don’t forget to share your creations and any tips you discover in the comments below – we can’t wait to hear how your Sbarro Mama’s meatballs turn out!

Frequently Asked Questions

***Can I make the meatballs ahead of time?***

Absolutely! You can prepare the meatball mixture and form the meatballs up to 24 hours in advance. Store them covered in the refrigerator. You can also brown them ahead of time and store them separately. When ready to cook, add them to the simmering sauce.

***Can I freeze raw meatballs?***

Yes, you can freeze raw meatballs. Form them and place them on a baking sheet in a single layer to freeze until solid. Then, transfer them to a freezer-safe bag or container. Cook them directly from frozen (they may take a little longer) or thaw them in the refrigerator first.

***What kind of tomatoes are best for the sauce?***

For a classic marinara, crushed tomatoes provide a good balance of texture and smoothness. If you prefer a chunkier sauce, use diced tomatoes. San Marzano tomatoes are often considered the gold standard for their sweet, less acidic flavor.

***Can I make this vegetarian?***

Yes, you can adapt this recipe. For vegetarian meatballs, use a base of breadcrumbs, cheese, egg (or flax egg), and finely chopped vegetables like mushrooms, zucchini, or eggplant. You can also use plant-based ground meat alternatives. The sauce is naturally vegetarian, but ensure your cheese is vegetarian if needed.

***How do I prevent my meatballs from breaking apart in the sauce?***

Ensure you don’t overmix the meat, use enough binder (egg, breadcrumbs), and brown them properly before adding them to the sauce. Gentle simmering rather than vigorous boiling also helps maintain their shape.

Print

clock clock iconcutlery cutlery iconflag flag iconfolder folder iconinstagram instagram iconpinterest pinterest iconfacebook facebook iconprint print iconsquares squares iconheart heart iconheart solid heart solid icon

Sbarro Mama’s Meatball Recipe – Easy Spaghetti & Sauce

  • Author: Chef Mia

Description

Welcome to this classicSbarro Mama’s Meatball Recipe with Spaghetti & Sauce! There’s nothing quite as comforting as a plate of delicious meatballs resting on a bed of spaghetti, drenched in rich marinara sauce. If you’re a fan of hearty Italian meals, you’re in the right place. This recipe brings the flavors of Sbarro’s right into your kitchen, with a simple step-by-step guide that will leave your family asking for seconds!


Ingredients

  • Optional substitutions for dietary needs:

Instructions

  1. In a large mixing bowl, combinelean ground beef,Panko bread crumbs,egg,ricotta cheese,Romano cheese,kosher salt,black pepper,minced garlic,garlic powder,dried parsley, anddried basil. Use your hands to gently mix everything together until all ingredients are well combined. Avoid over-mixing as this can lead to tough meatballs.
  2. Using a portion scoop or a tablespoon, scoop about1 oz. of the meat mixtureand roll it into balls with your hands. Place the meatballs evenly on a baking sheet lined with parchment paper. You should get about 25 meatballs from this mixture.
  3. Preheat your oven to350°F. Bake the meatballs for18-22 minutesor until they are fully cooked through and reach an internal temperature of165°F. While the meatballs are baking, you can prepare your spaghetti.
  4. Cook yourspaghettiaccording to the package instructions until al dente. Once done, drain and set aside.
  5. Warm up your favoritejarred marinara sauceon the stove. Once the meatballs are done, serve them over a bed of spaghetti and pour marinara sauce generously on top. Garnish with freshly grated Romano cheese and parsley for an extra burst of flavor.

Notes

Use Fresh Ingredients:For the best flavor, use fresh garlic and herbs. It makes a huge difference in the final dish.
Don’t Overmix:Gently mix the meatball ingredients to prevent the meatballs from becoming tough.
Freezing Tip:You can freeze any leftover cooked meatballs for up to three months. Simply reheat in the oven or microwave when you’re ready to enjoy them again!


“`