Table of Contents
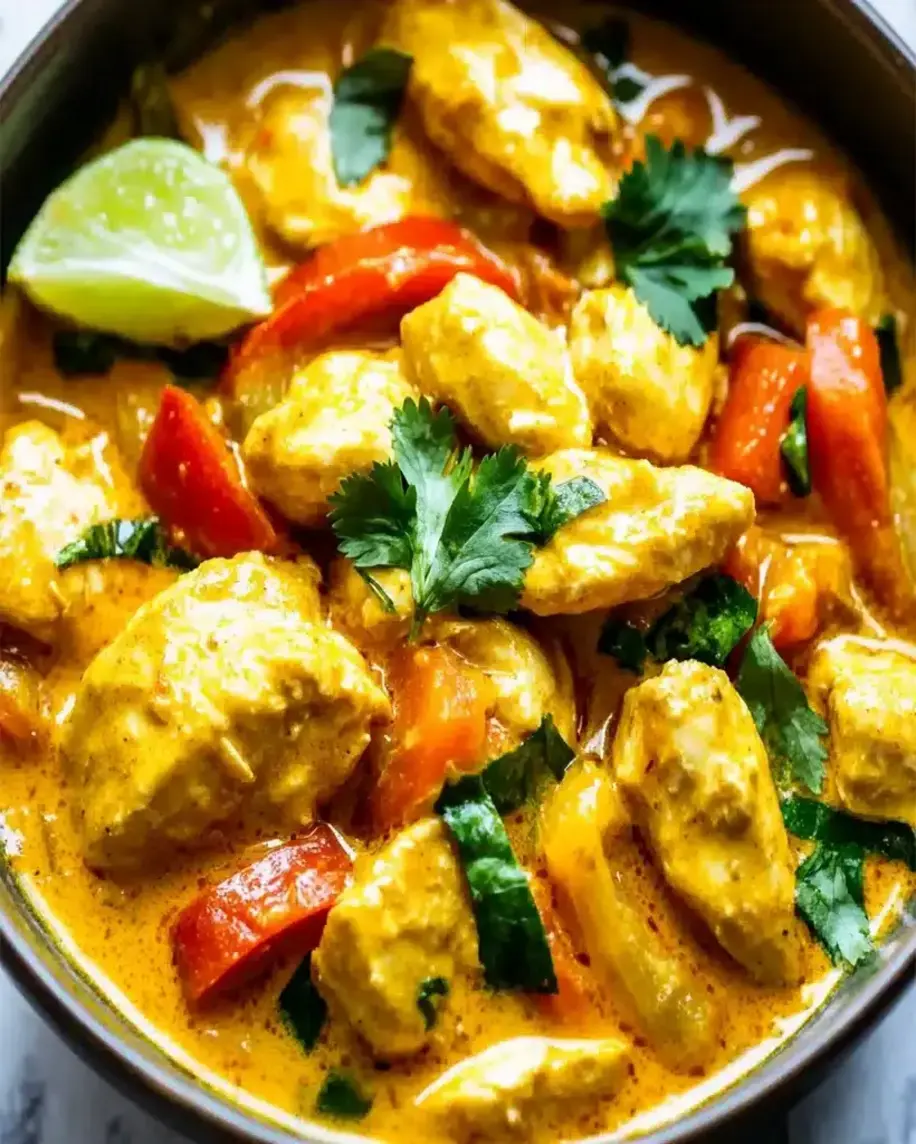
Thai Yellow Curry Recipe – Easy, Creamy & Ready in 30 Min!
Hello, Curry Lovers! Craving a Flavorful Thai Meal in Under an Hour?
Hello, curry lovers! Today, we’re diving into a flavorful and incredibly easy recipe: Thai Yellow Curry! Whether you’re a long-time fan of Thai cuisine or a newcomer looking for something delicious and simple to whip up, this 30-minute Thai Yellow Curry will leave your taste buds dancing with joy. In just half an hour, you’ll have a warm and comforting meal on the table, with no need for any pre-made curry paste. Get ready to experience a delightful fusion of spices and creamy coconut milk in a dish that’s both satisfying and effortless to prepare! Forget spending hours over a hot stove; this recipe proves that authentic, vibrant flavors can be achieved with minimal effort and time. Perfect for busy weeknights or when you simply want a quick yet impressive meal, this Thai Yellow Curry is about to become your new go-to.
Gather Your Aromatic Ingredients
The secret to a truly delicious homemade Thai yellow curry lies in the quality and freshness of your ingredients. This recipe focuses on building layers of flavor with aromatics and a balanced spice blend, mimicking the complex taste of traditional paste without the fuss.
- For the Curry Base:
- 1 tbsp Coconut oil or other neutral oil (for sautéing the aromatics)
- 1 medium Yellow onion, finely chopped (provides sweetness and a savory base)
- 3-4 cloves Garlic, minced (essential for pungent depth)
- 1 tbsp FreshGinger, grated or minced (adds a bright, zesty kick)
- 1 tsp Turmeric powder (for that signature yellow hue and earthy warmth)
- 1 tsp Cumin powder (adds warmth and a slightly nutty flavor)
- 1/2 tsp Coriander powder (for a citrusy, earthy note)
- 1/4 tsp Cayenne pepper or red pepper flakes (optional, for a gentle heat) – adjust to your spice preference!
- For the Creamy Curry Sauce:
- 1 can (13.5 oz) Full-fat Coconut milk, unsweetened (the heart of the creamy texture and rich flavor) – shake well before opening!
- 1/2 cup Vegetable broth or chicken broth (to adjust consistency and add savory notes)
- 1-2 tbsp Soy sauce or Tamari (for umami depth and saltiness) – use Tamari for gluten-free!
- 1 tbsp Brown sugar or maple syrup (to balance the savory and spicy notes, enhancing the overall flavor profile)
- 1 tbsp Lime juice, fresh (for a burst of tangy brightness that lifts all the flavors) – essential for authentic Thai taste!
- Vegetables & Protein:
- 2 cups Mixed vegetables, chopped (e.g., broccoli florets, bell pepper strips (any color), snap peas, carrots slices) – choose what you love!
- 1 lb Protein of choice (cubed chicken breast, shrimp, firm tofu cubes, or chickpeas) – choose your favorite!
- For Garnish:
- Fresh cilantro, chopped (for fresh, herbaceous notes)
- Lime wedges (for an extra squeeze of citrus at the table)
- Cooked jasmine rice, for serving
Efficient Timing for Deliciousness
This Thai Yellow Curry recipe is designed for speed without compromising on flavor. In an average of 30 minutes, you’ll achieve a dish that typically takes much longer with traditional methods.
Step-by-Step Instructions: Crafting Your Curry
Follow these simple steps to create a restaurant-quality Thai Yellow Curry right in your own kitchen.
Step 1: Prepare Your Veggies (and Protein)
First things first, let’s get organized! Wash and chop all your vegetables into bite-sized pieces. This includes your onion, garlic, ginger, and any other chosen vegetables like broccoli, bell peppers, or snap peas. If you’re using chicken, cut it into uniform cubes. For tofu, ensure it’s pressed and cubed. If using shrimp, peel and devein them, if necessary. Having everything prepped and ready to go is key to a smooth cooking process.
Step 2: Sauté Aromatics for Flavor Foundation
Heat the coconut oil in a large skillet or wok over medium heat. Add the chopped yellow onion and sauté until it becomes translucent and begins to soften, about 3-4 minutes. Then, add the minced garlic and grated ginger. Stir continuously for about 1 minute until fragrant. Be careful not to burn the garlic, as this can impart a bitter taste.
Step 3: Bloom Your Spices for Maximum Aroma
To unlock the full potential of your spices, we’ll ‘bloom’ them. Add the turmeric, cumin, coriander, and cayenne pepper (if using) to the skillet with the onions, garlic, and ginger. Stir well and cook for another 1-2 minutes, until the spices are fragrant. This step is crucial as it toasts the spices, enhancing their flavor and aroma significantly.
Step 4: Add Liquids and Simmer the Sauce
Pour in the full-fat coconut milk and vegetable broth. Stir everything together, scraping the bottom of the pan to loosen any browned bits from the aromatics and spices. Bring the mixture to a gentle simmer. Add the soy sauce (or tamari) and brown sugar (or maple syrup). Stir until the sugar dissolves. Let the sauce simmer gently for about 5-7 minutes, allowing the flavors to meld and the sauce to thicken slightly.
Step 5: Add Protein and Vegetables, Then Finish
Now, add your chosen protein (chicken, shrimp, tofu, or chickpeas) and the mixed vegetables to the simmering sauce. Stir to coat everything evenly. If using chicken or shrimp, cook until they are just cooked through (chicken opaque, shrimp pink and curled). For tofu or chickpeas, simply heat them through. This usually takes about 5-8 minutes depending on your protein and vegetables. Just before serving, stir in the fresh lime juice. Taste and adjust seasoning if needed – more soy sauce for saltiness, more sugar for sweetness, or a splash more lime for acidity.
Nutritional Highlights
While this recipe offers incredible flavor, it’s also relatively balanced. Individual nutritional values will vary based on the exact ingredients and portion sizes used.
- Calories: Approximately 450-600 per serving (varies based on protein and amount of coconut milk/oil)
- Protein: High, especially if using chicken, shrimp, or tofu.
- Fat: Moderate to high, primarily from coconut milk. Rich in healthy fats.
- Carbohydrates: Moderate, depending on vegetables and added sugars.
- Fiber: Good source, from vegetables.
Note: These are estimated values and can change significantly based on specific ingredient choices and brands. For precise tracking, use a nutritional calculator with your exact ingredients.
Healthier Alternatives & Swaps
Looking to lighten up this delicious curry? Here are a few swaps that maintain flavor while reducing fat or calories:
- Lighter Coconut Milk: Use light coconut milk instead of full-fat. This will reduce the fat and calorie content, though the curry will be less rich.
- Reduced Oil: Sauté the aromatics with a tablespoon or two of water or broth instead of oil to significantly cut down on fat.
- More Veggies, Less Carbs: Load up on non-starchy vegetables like broccoli, cauliflower, spinach, and bell peppers. Reduce portion sizes of rice if serving with it.
- Leaner Protein: Opt for chicken breast, shrimp, or plant-based proteins like edamame or lentils over fattier meats.
- Natural Sweeteners: Stick with maple syrup or a small amount of honey for sweetness, avoiding refined sugars.
Serving Suggestions to Complete Your Meal
This Thai Yellow Curry is wonderfully versatile! Here’s how to serve it for a complete and satisfying meal:
- Jasmine Rice: The classic pairing for Thai curries. Fluffy, fragrant jasmine rice soaks up the delicious sauce perfectly.
- Brown Rice or Quinoa: For a whole-grain boost, serve with cooked brown rice or quinoa.
- Cauliflower Rice: A great low-carb option.
- Garnish Extravaganza: Don’t skip the fresh cilantro and lime wedges! A sprinkle of toasted sesame seeds or sliced red chilies also adds a nice touch.
- Add Extra Greens: Stir in a handful of fresh spinach or baby bok choy during the last minute of cooking for added nutrients and vibrant color.
Common Mistakes to Avoid
Even with a simple recipe, a few common pitfalls can affect the outcome. Here’s how to ensure your Thai Yellow Curry turns out perfectly:
- Burning Aromatics: Garlic and ginger can burn quickly. Keep the heat on medium and stir constantly when sautéing.
- Not Blooming Spices: Skipping the step of toasting the spices can result in a muted flavor. Bloom them for at least a minute until fragrant.
- Using Low-Quality Coconut Milk: Opt for full-fat, unsweetened coconut milk for the best creamy texture and rich flavor. Shake the can well before use.
- Overcooking Protein/Veggies: Add delicate proteins like shrimp towards the end of cooking. Don’t overcook vegetables, as they should retain a slight crispness.
- Forgetting the Lime Juice: The fresh lime juice at the end is essential for balancing the flavors and adding that signature Thai brightness.
Storing and Reheating Your Curry
Leftover Thai Yellow Curry is often even better the next day as the flavors continue to meld!
- Storage: Allow the curry to cool completely. Transfer it to an airtight container and store it in the refrigerator for up to 3-4 days.
- Reheating: Reheat gently on the stovetop over low heat, stirring occasionally. You can add a splash of water or broth if the curry has thickened too much. Alternatively, you can reheat it in the microwave.
Enjoy Your Speedy & Savory Thai Yellow Curry!
And there you have it – a delicious, creamy, and incredibly easy Thai Yellow Curry ready in just 30 minutes! This recipe proves that you don’t need to be a master chef or spend hours in the kitchen to enjoy authentic, vibrant flavors. Feel free to customize it with your favorite vegetables and protein, and don’t be afraid to adjust the spice level to your liking. We hope you love this quick weeknight wonder as much as we do!
Did you try this recipe? Let us know in the comments below how it turned out! Share your photos and tag us on social media. We love to see your culinary creations!
Frequently Asked Questions
***Can I make this curry paste from scratch instead of using dry spices?***
Absolutely! If you have Thai yellow curry paste on hand, you can substitute about 2-3 tablespoons of it for the dry spices (turmeric, cumin, coriander, cayenne). Sauté it with the aromatics for a minute before adding the liquids. The flavor will be slightly different but still delicious!
***How spicy is this Thai Yellow Curry?***
This recipe is mildly spicy by default, primarily from the optional cayenne pepper. The main flavor comes from the warming spices. If you prefer it spicier, increase the cayenne pepper or add fresh sliced Thai chilies with the aromatics. If you prefer it milder, omit the cayenne pepper entirely.
***What other vegetables work well in this curry?***
Almost any vegetable works! Great additions include zucchini, eggplant (cubed and sautéed first), green beans, baby corn, bamboo shoots, bok choy, kale, or spinach (added at the very end).
***Can I make this recipe vegan?***
Yes! This recipe is easily made vegan. Ensure you use vegetable broth, and for your protein, opt for firm tofu, chickpeas, edamame, or your favorite plant-based protein. Use maple syrup as your sweetener.
***How long does the curry last in the refrigerator?***
Leftover Thai Yellow Curry will last in an airtight container in the refrigerator for up to 3-4 days. The flavors often intensify over time!

Thai Yellow Curry Recipe – Easy, Delicious in 30 Minutes
Description
Hello, curry lovers! Today, we’re diving into a flavorful and incredibly easy recipe:Thai Yellow Curry! Whether you’re a long-time fan of Thai cuisine or a newcomer looking for something delicious and simple to whip up, this30-minute Thai Yellow Currywill leave your taste buds dancing with joy. In just half an hour, you’ll have a warm and comforting meal on the table, with no need for any pre-made curry paste. Get ready to experience a delightful fusion of spices and creamy coconut milk in a dish that’s both satisfying and effortless to prepare!
Ingredients
- Feel free to adjust the spice levels to your liking, and consider usingpalm sugarorsoy sauceto cater to specific dietary needs.
Instructions
- Begin by heating the vegetable oil in a large skillet over medium heat. Add the chopped onion and sauté for 3-4 minutes until it becomes soft and translucent. Next, toss in the minced garlic and ginger, and continue to sauté for another 2 minutes until the aroma fills your kitchen.
- Season your cubed chicken with salt and pepper, then add it to the skillet along with the curry paste. Stir well, making sure the chicken is evenly coated with the curry paste. Let it cook for 2-3 minutes, just until the chicken starts to brown.
- Pour in the coconut milk, fish sauce, and brown sugar. Stir everything together and bring the mixture to a gentle simmer. Allow it to cook uncovered for about 10 minutes or until the chicken is fully cooked through.
- Add the spinach and stir until it wilts. Squeeze in the fresh lime juice, giving the dish a bright, tangy finish. Taste and adjust the seasoning with additional salt, pepper, or fish sauce if necessary.
- Serve your Thai Yellow Curry hot, garnished with freshly chopped cilantro, sliced red chili peppers, and a few lime wedges on the side. It’s perfect over fluffy white rice or alongside warm naan bread.
- Pro tip: For an even creamier texture, try adding an extra half-can of coconut milk!
Notes
Adjust the spice level: If you prefer a milder curry, reduce the amount of curry paste or add more coconut milk. For extra heat, include more sliced chili peppers in the garnish.
Use fresh ingredients: Fresh garlic, ginger, and lime juice will enhance the flavors of your curry.
Substitute proteins: Swap out chicken for tofu or shrimp for a vegetarian or pescatarian version that’s just as tasty.